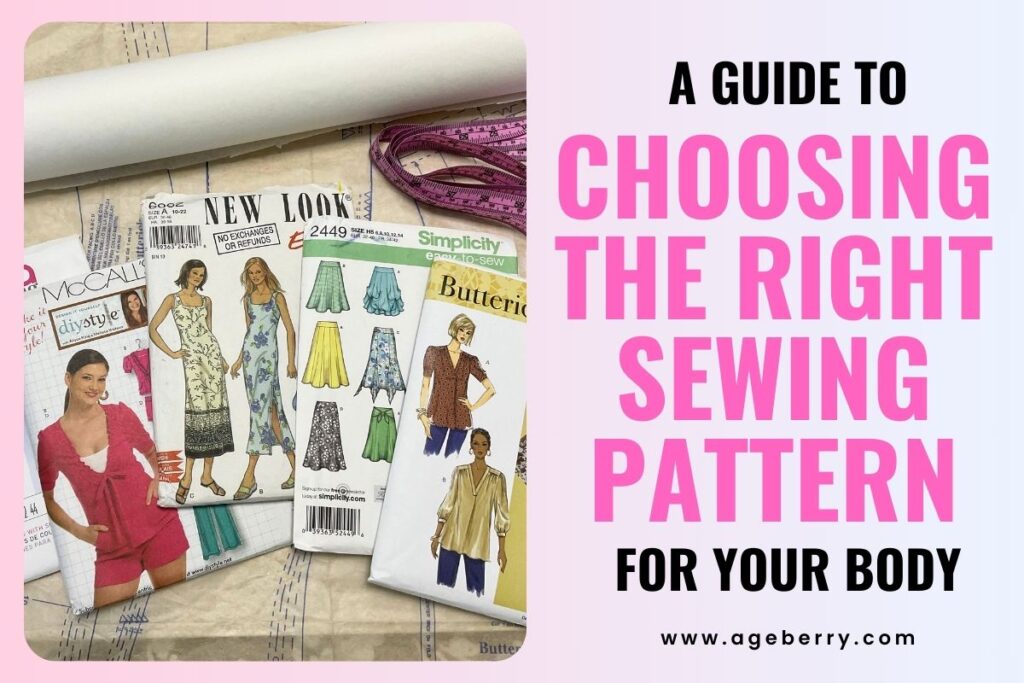
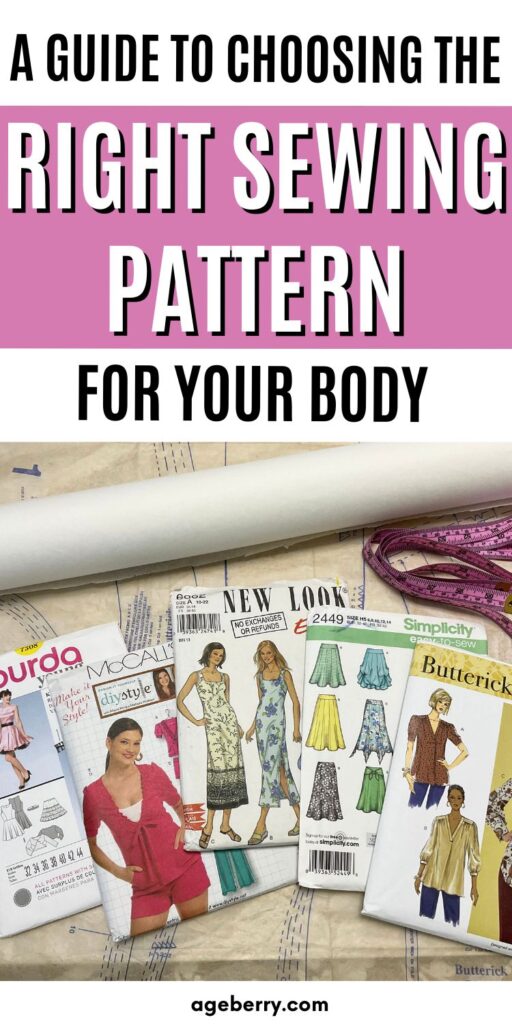
A Guide to Choosing the Right Sewing Pattern for Your Body
At the heart of any sewing project is the sewing pattern, a blueprint that guides you from fabric to finished garment. Sewing pattern serves not just as a template for cutting your fabric, but also as a roadmap for construction, ensuring that each piece fits together perfectly.
Choosing the right pattern is just as important as selecting the fabric or thread. It can mean the difference between a garment that flatters and one that falters, a project that inspires continued learning or one that frustrates. A well-chosen pattern can accommodate your skill level, body shape, and style preferences, setting you up for a successful sewing experience. With the right pattern in hand, you’re ready to translate your vision into a wearable reality.
A sewing pattern dictates the type and quantity of fabric you’ll need, provides a preview of the finished piece, and guides you through the assembly process to complete a project.
Consider a few key factors to ensure you select the best pattern for your needs:
- Your body shape and measurements. Accurate measurements ensure the perfect fit.
- Your sewing experience. Many patterns indicate difficulty levels, which can guide you to a project that matches your abilities.
- Design and fabric choices.
Understanding Sewing Patterns
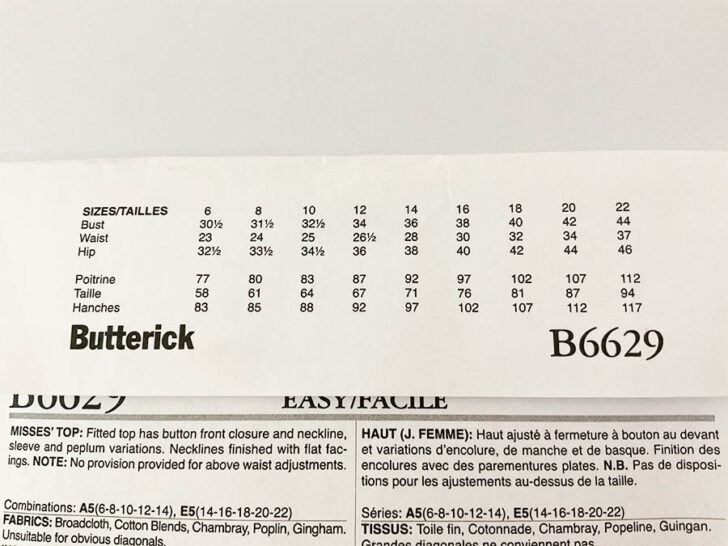
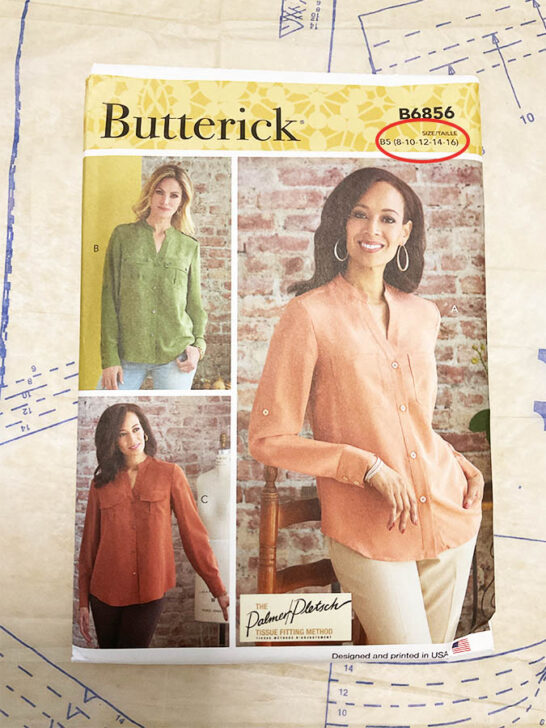
You’ll want to familiarize yourself with the sewing pattern envelope. This contains essential information to help you understand what the pattern offers. You’ll find the pattern description on the envelope, which gives you an idea of the garment’s fit, style, and any unique features it may have. There is also the size chart available on the back of most envelopes or within PDF sewing patterns to determine your size.
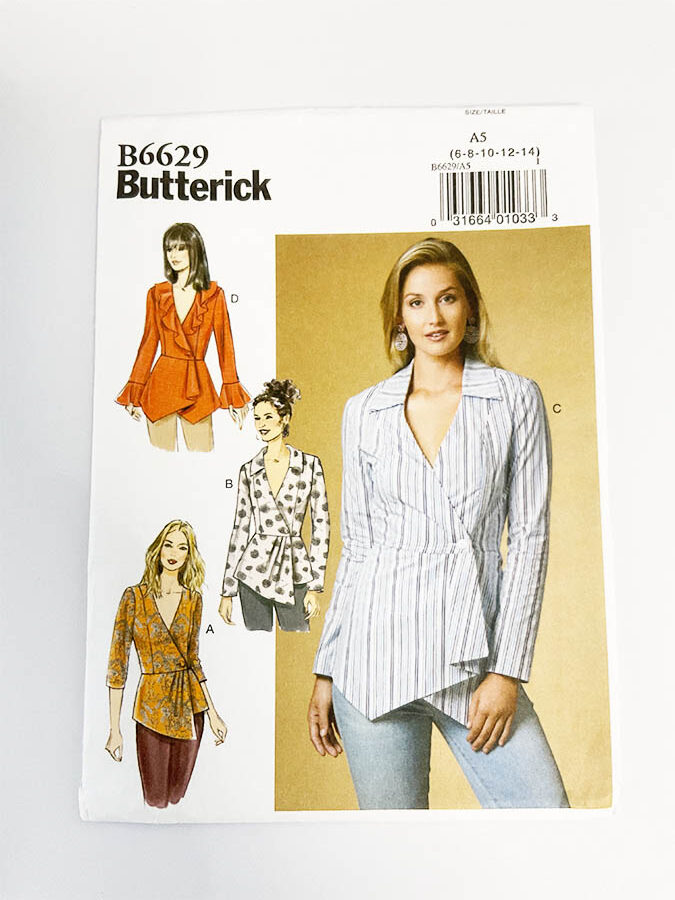
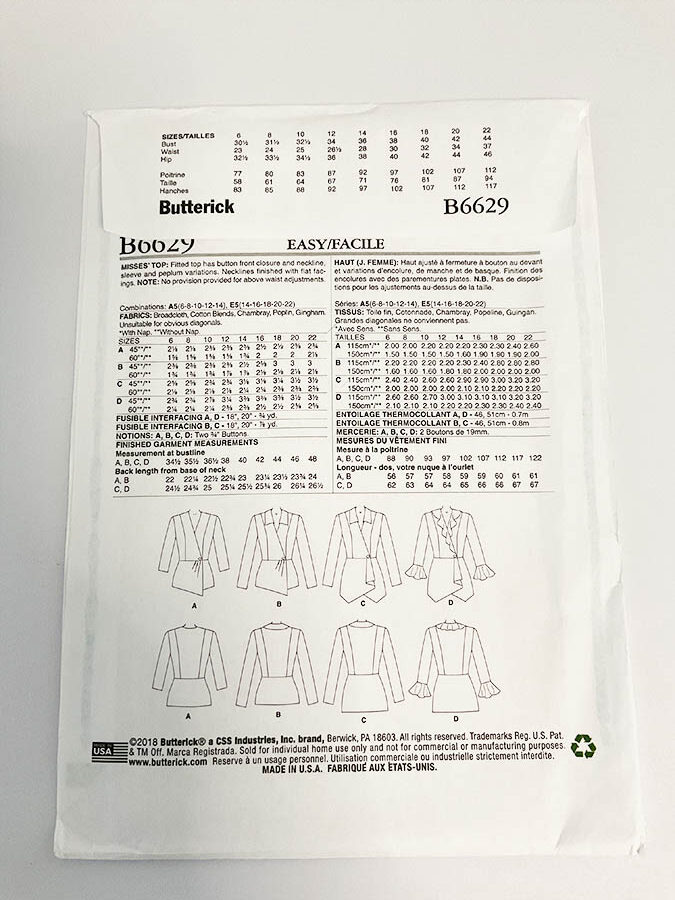
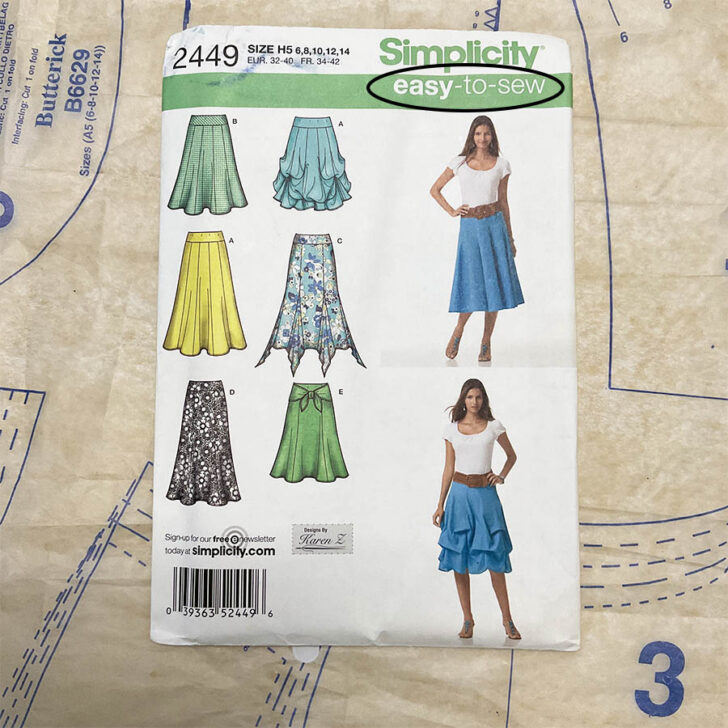
Pay attention to the pattern pieces included. Patterns labeled as “easy” or “beginner” tend to have fewer pieces, making it simpler to finish your project. As you advance your sewing skills, you can explore patterns with more complex components and many design details.
Sewing patterns have their language, using symbols to convey instructions. These symbols cover essential aspects like seam allowances, straight grain lines, notches, etc, all of which guide you in cutting, aligning, and sewing your pieces properly.
Importance of Body Measurements for Choosing Pattern
Unlike ready-to-wear sizes, sewing patterns require you to select a size based on your actual body measurements. It’s important to use a measurement guide and to understand the difference between body measurements and the garment’s finished measurements, which can significantly affect comfort and the overall look of the piece.
When selecting a pattern, use your actual body measurements rather than your commercial clothing size, as these can differ significantly from sewing pattern sizes. Sewing patterns follow a standard set of industry measurements, which is fortunate since it means your pattern size will be consistent across most different brands. The number on the pattern is just that—a number. It won’t appear on your finished garment, so there’s no need to be concerned if it’s different from your usual clothing size.
Measuring Your Body
To measure your body, you’ll need a flexible tape measure. Focus on the following key measurements: bust, waist, hip, and back length from base of neck to waist.
- Bust: Measure the fullest part of your chest, keeping the tape measure parallel to the floor.
- Waist: Locate your natural waistline, usually the narrowest part of your torso, and measure around it.
- Hip: Measure the fullest part of your hips, while standing with your feet together.
- Back Waist Length: Measure from the nape of your neck to your natural waistline.
It’s best to take these measurements wearing minimal clothing (like undergarments) and to have someone assist you to ensure accuracy. Your measurements should be taken comfortably—neither too tight nor too loose.
If you would like additional insights and tips to help you take your body measurements with precision, check out my complete guide to body measurements to refine your measuring technique and lay the foundation for beautifully fitted garments – How To Take Body Measurements For Sewing
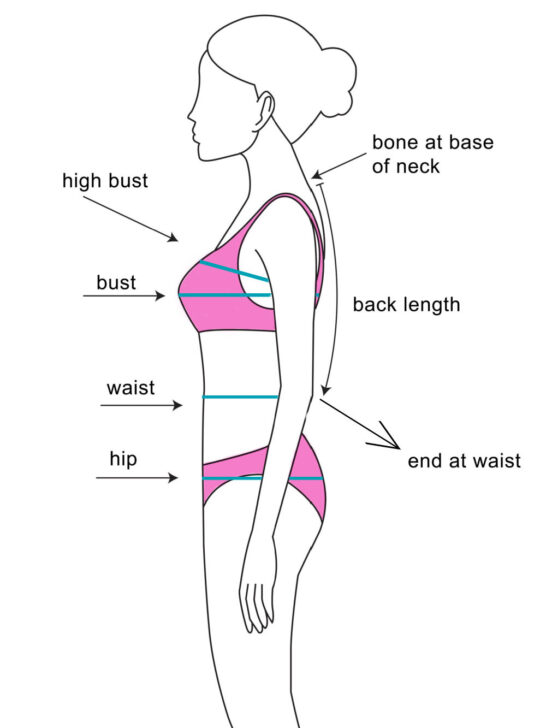
Sometimes you will need to take a high bust measurement. The high bust measurement is taken above the full bust, under the arms, and around your back. The tape should pass across the upper back, under the armpits, and across the chest just above the fullest part of your breasts.
This measurement is necessary for individuals who have a significant difference between their full bust and high bust sizes, as it provides a more accurate representation of the body’s frame size. By using the high bust measurement to select your pattern size, you can achieve a better fit around the shoulders, neck, and upper chest. If you have more than 2 1/2″ (6.3cm) difference between bust and high bust, select your pattern size by high bust measurement.
This can be especially helpful for women with larger busts, as patterns are often designed for B-cup and C-cup standards.
Choosing a pattern size based on the high bust measurement ensures that the neck, shoulders, and upper chest areas of the garment will fit properly.
If you select a pattern based on your full bust measurement, you might end up with a garment that fits well in the bust but is too large in other areas, such as the shoulders and neck. Using the high bust measurement helps avoid this issue, as it aligns the pattern more closely with the size of your actual body frame.
Once you have selected a pattern based on your high bust measurement, you may need to perform a Full Bust Adjustment (FBA) to provide additional room in the bust area without altering the fit in the rest of the garment.
Some patterns include separate pattern pieces for cup sizes A through J.
Knowing your height
Knowing your height is very important when choosing a sewing pattern because it directly impacts the fit and proportion of the finished garment. Most sewing patterns are designed with a standard height in mind—typically around 5’5″ to 5’6″ for women’s and misses’ patterns. If your height significantly deviates from this standard, the pattern’s proportions may not align with your body’s proportions, leading to a garment that doesn’t fit correctly.
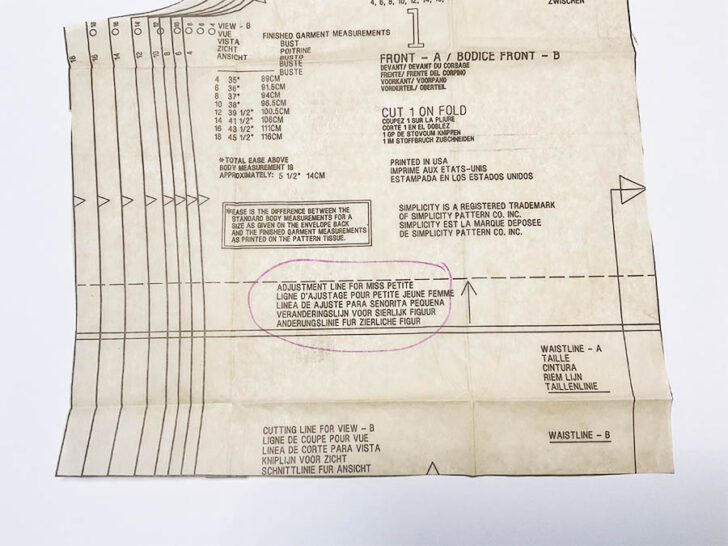
For petite individuals, the vertical proportions such as the rise in pants, the length of skirts and dresses, and the positioning of waistlines and hips may need to be shortened. Conversely, if you are taller than the standard height, these features may need to be lengthened.
Understanding your height can guide you to make necessary adjustments or to look for patterns specifically designed for your height range. Some pattern companies provide patterns for different height ranges or include lengthen/shorten lines on their patterns to make these adjustments easier. For example, some patterns from Simplicity are drafted for a standard height but include these lines for adjustment.
Petite sizes are generally designed for women who are 5’3″ and under. It’s not just about shorter lengths, but also considers the placement of darts, pockets, and other design elements.
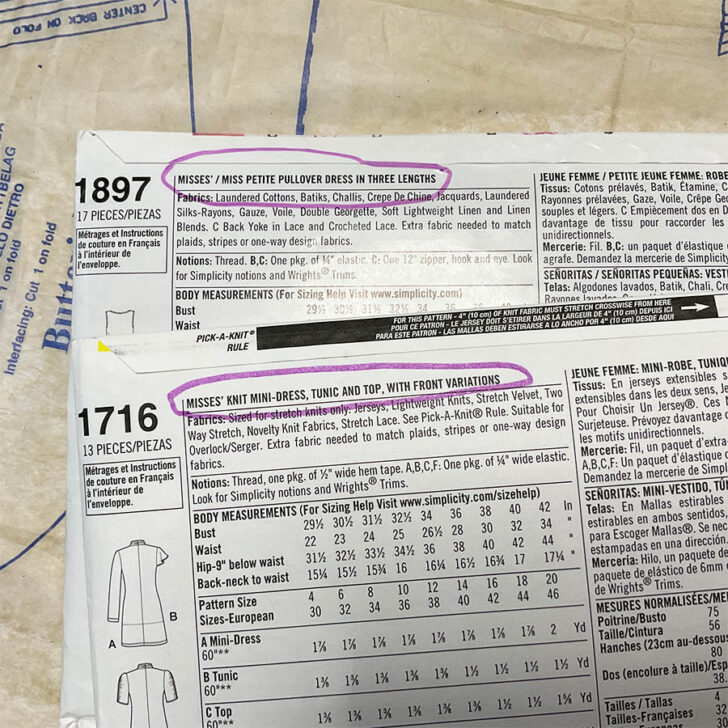
Some brands have specific petite lines, while others include petite adjustments within their regular patterns.
Petite women often need to pay attention to the length of the garment and the placement of the waistline.
If a pattern doesn’t come in petite sizes, you may need to start with the standard size that matches your measurements best and then make alterations.
Translating Measurements to Pattern Size
Once you have your measurements, compare them with the well-intended size charts provided by the pattern company. It’s common to fall between sizes in different areas, such as for example having a size 12 bust but size 14 waist.
To select the appropriate pattern size, consider the following factors:
- For skirts & pants, choose the size based on your hip measurement.
- For upper body garments, select the size using your bust measurement or high bust measurement.
- Pay attention to the waist measurement, especially if it falls into a different size category. Adjust the pattern accordingly.
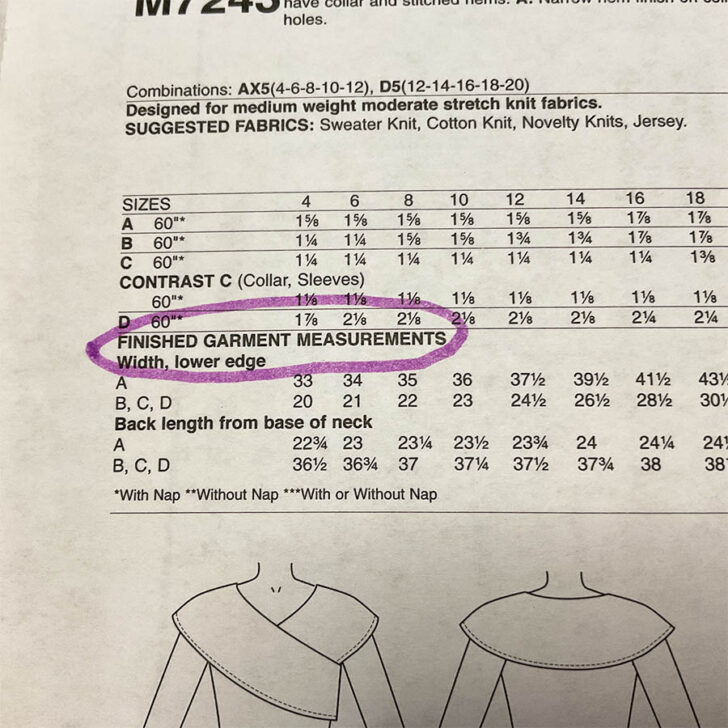
You will also need to pay attention to the finished garment measurements, which indicate the actual size of the completed garment. These are especially useful for understanding the intended ease and fit of the pattern. These measurements can help you adjust the pattern size if your measurements fall between sizes or if you prefer a looser or tighter fit.
Most patterns are multi-sized, allowing for easy alterations between sizes—handy if your measurements don’t neatly align with a single size.
If you find your measurements span multiple sizes, opt for the smaller size for a closer fit or the larger size for more ease, depending on your preference and the style of the garment.
So, keep in mind this information:
Women’s patterns are for the larger, more mature figure averaging about 5’5″ to 5’6″ without shoes. Women’s patterns are made for a C-cup with 1″ (2.5cm) difference between bust and high bust measurement.
Women’s Petite patterns are for the shorter mature figure, about 5’2″ without shoes.
Misses’ patterns are for evenly proportioned and developed figures averaging about 5’5″ to 5’6″ without shoes. Misses’ patterns are made for a B-cup with 2″ (5cm) difference between bust and high bust measurement.
Misses’ Petite patterns are for the shorter figure, about 5’2″ without shoes.
Children’s patterns are designed for a youngster who is walking and not wearing diapers.
Infant patterns are for babies who are not yet walking.
Ok, these are general guidelines that pattern companies ( Simplicity, McCall’s, Butterick, New Look, Vogue) give for choosing the correct pattern size based on body measurements.
According to these standard instructions, with my 38-inch bust, I’d be a size 16 for tops and, with my 32-inch waist, a size 18 for bottoms.
However, experience has taught me that these numbers don’t always translate to a perfect fit. In fact, they often leave me with garments that are waaaay too big. After countless patterns and many muslins – those test garments stitched from cheaper materials – I’ve uncovered that my true fit tends to hover around a size 12 for tops and between a 14 or 16 for bottoms.
This sizing puzzle can be baffling – am I an anomaly, or are the size chats off? I’ve learned to trust the finished garment measurements more than the size charts, as they seem to be a more reliable indicator of how a piece will actually fit my frame.
So, I advise you to always create a muslin first. It’s the surest way to tailor a pattern to your unique shape before committing to your final fabric. It’s the clearest path to understanding your size and achieving that coveted tailor-made fit.
Introduction to Ease in Sewing
Envelope descriptions can specify the fit—whether it’s close-fitting, semi-fitted, or loose. This fit is influenced by the built-in ease of the garment. When choosing a sewing pattern, you might come across the term “ease.” Understanding ease is necessary for achieving the perfect fit for your sewing projects. There are two fundamental types of ease: wearing ease and design ease.
Wearing Ease
Wearing ease refers to the extra fabric added to a garment’s measurements to provide comfort and room to move. It essentially separates the garment from your body, accommodating different movements such as sitting, walking, etc. The amount of wearing ease required depends on the garment style and fabric. For example, a fitted dress will typically have less wearing ease than a loose, flowing blouse. The amount of wearing ease differs for each type of garment and can influence the overall look and fit.
For close-fitting garments, the wearing ease is typically minimal to allow the garment to closely contour the body without being too tight. The wearing ease for close-fitting garments is generally up to 2 1/2 inches. This minimal ease allows for some movement without compromising the close fit of the garment.
For semi-fitted garments, the amount of ease added provide a slightly looser fit that offers more movement. The exact amount of ease can vary based on the type of garment and the desired fit, but it typically ranges from about 3 to 4 inches.
The wearing ease for loose-fitting garments generally ranges from about 4 to 8 inches or even more. This additional ease allows for a full range of motion and a relaxed silhouette, which can be ideal for casual wear and certain types of designs that aim for a flowy, draped look.
To determine the total ease in your sewing pattern, subtract your body measurements from the finished garment measurements.
Design Ease
In addition to wearing ease, there’s also design ease. Unlike wearing ease, which focuses on functional purposes, design ease has more to do with the style and appearance of the garment. It can provide volume, drape, or other structural elements to create a specific look. Design ease varies considerably depending on the pattern and the desired style.
When working with design ease, consider the type of fabric you’re using, as this will affect the way the extra fabric behaves. For example, a heavy fabric can create a more structured look, while a lightweight fabric can create a flowy, romantic effect.
Selecting the Right Pattern for Your Skill Level
When choosing a sewing pattern, consider your skill level. Beginners should look for patterns labeled as “Easy” or “Beginner-Friendly.” These patterns generally require simple techniques and are forgiving of minor mistakes.
Here are key points to consider:
- Beginner. Look for patterns that encourage learning basic skills, such as straight seams, simple darts, and elastic waistbands. Patterns that include fewer pieces, clear instructions and minimal fitting are ideal.
- Recommended features: Elastic waistbands, simple skirts, basic totes, etc.
- Recommended features: Elastic waistbands, simple skirts, basic totes, etc.
- Intermediate. At this stage, you can explore patterns with more details, such as zippers, buttons, and different types of seams. Intermediate patterns offer a bit more challenge without being overwhelming.
- Recommended features: Zippers, buttonholes, sleeve insertion, cuffs, collar construction, etc.
- Recommended features: Zippers, buttonholes, sleeve insertion, cuffs, collar construction, etc.
- Advanced. Advanced sewists can tackle complex patterns, which include intricate sewing techniques, detailed fitting adjustments, and premium finishes.
- Recommended features: Lined garments, tailored pieces, advanced draping, ruching, etc.
- Recommended features: Lined garments, tailored pieces, advanced draping, ruching, etc.
Before purchasing a pattern, review the instructions and required techniques to ensure they align with your current abilities. Your experience will be much more rewarding when you select a pattern suitable for your skill level.
✅ Related article: Best sewing machine for intermediate or advanced sewists: tips from the experts
Design Choices
Pattern catalogs and envelopes are treasure troves of information. Examine the pictures or drawings to get a sense of the garment’s style. Look for specific design elements like necklines, shoulder construction, and overall silhouette. Line-art on the back of the envelope can clarify details such as zipper placement or seam lines and can also indicate the complexity of the pattern.
Begin with the visual representations—photos or drawings. These visuals present a clear picture of the finished piece, indicating whether it’s form-fitting or more relaxed in style.
Assess the neckline’s position to ensure it matches your preference, and observe the shoulder construction—whether it features a drop shoulder style or sleeves that are joined at the natural armhole point. These nuanced elements set apart seemingly similar garment shapes.
Understanding Suggested Fabrics
Sewing patterns typically include a list of suggested fabrics, which are highly recommended for the best results. It’s essential to consider the fabric’s properties, such as drape, stability, and texture, when choosing the right fabric for your pattern.
Before settling on a pattern, scrutinize the recommended fabrics listed on the envelope. Pattern makers test their designs with various textiles to guide consumers toward the most compatible fabric choices. If you’re keen on a specific material like natural silk, but the pattern is intended for stretch knits, you’ll have to consider a different design.
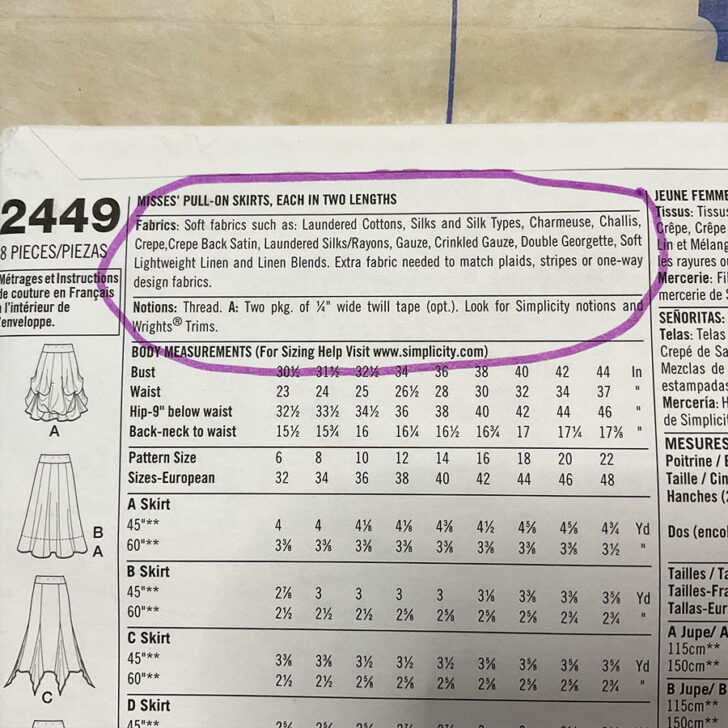
Essential Notions
In addition to selecting the right fabric, you’ll also need an array of essential notions for your sewing project. These include:
- Buttons: Get the proper size, shape, and style of buttons that match your fabric and garment design.
- Elastic: Choose the right type, width, and length of elastic for your project, such as waistbands or cuffs.
- Thread: It’s important to select a matching thread that complements the color and material of your fabric.
Having the right notions at your disposal will significantly improve your sewing experience and the final outcome of your project.
———————————-
If you found this tutorial helpful, don’t forget to save this pin (see below) to your sewing board for future reference on selecting the right sewing pattern. For more guidance, tips, and creative inspiration, make sure to follow me on Pinterest!
latest posts
- What Do You Call a Person Who Sews? I Asked My Readers and Got 1,408 Opinions
- DIY Round Purse: PDF Sewing Pattern and Detailed Instructions
- Mini Wonder Clips By Clover: Useful Sewing Tool Or Just Another Notion?
- Non-Slip Grips For Quilting Rulers: A Small Notion With A Useful Job
- Fabric Eraser for Sewing: What It Removes and When to Use It
- What Is The Best Thread For Sewing Machine Projects? Let’s Find Out!
- Butterfly Quilt Block Tutorial – Foundation Paper Piecing
- How To Sew Quilt Squares So The Corners Match
- Sewing With Fork Pins: How They Help With Pattern Matching, Slippery Fabric, And Seams