
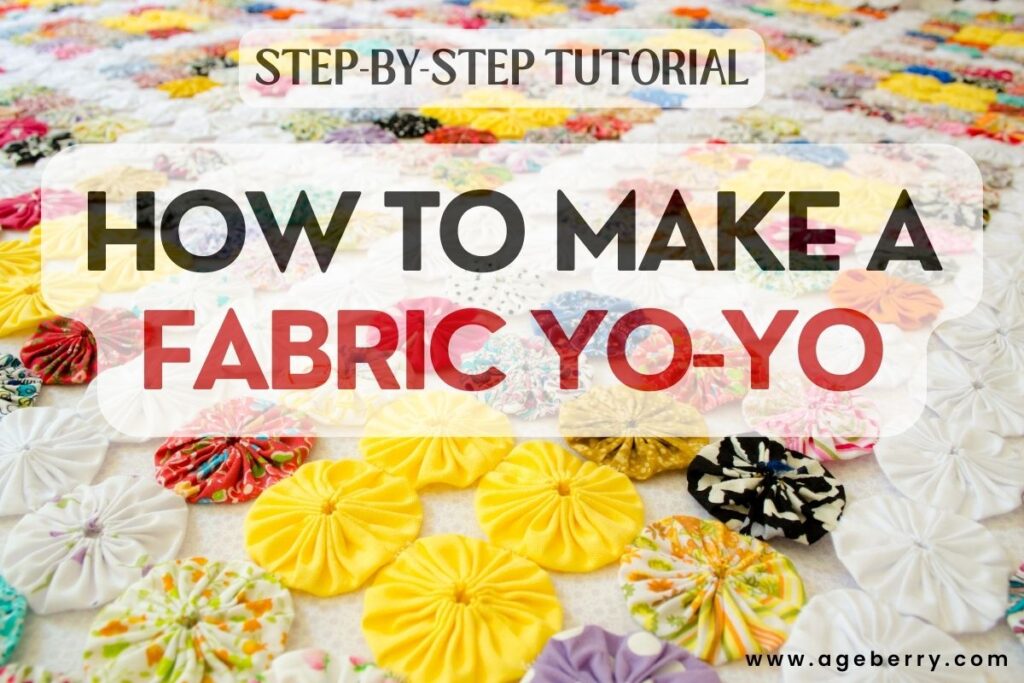
How to Make Fabric Yo-Yos: A Step-by-Step Guide
Fabric yo-yos are a delightful addition to any quilter or crafter’s skill set. They give an extra dimension to handmade projects. These small, rosette-like fabric circles have a vintage charm and are surprisingly simple to create.
The versatility of fabric yo-yos is part of their appeal. Crafters can incorporate them into a diverse range of projects, including quilts, accessories, and home decor. They can be embellished with buttons or beads, tailored in a variety of sizes, and combined to create intricate patterns or shapes.
What Are Fabric Yo-Yos
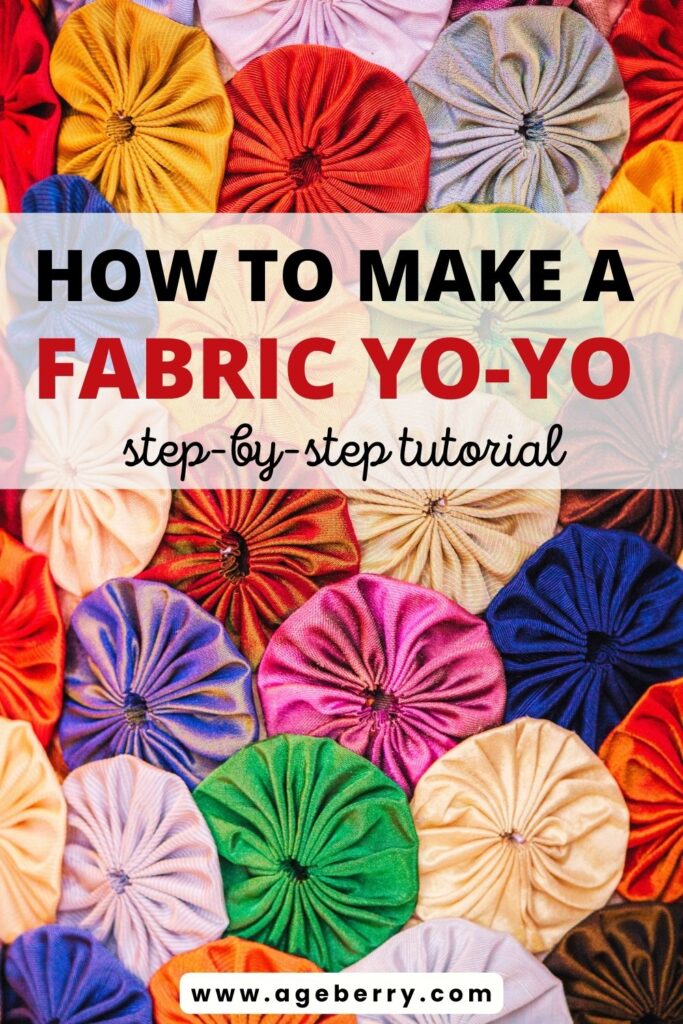
Fabric yo-yos are small, usually round pieces of hand-sewn fabric, traditionally used as decorative elements in various crafts. A fabric yo-yo consists of a circle of fabric that has been gathered around the edge, creating a puckered design resembling a miniature textile pouf or a rosette.
They are also known under the name “Suffolk Puffs” (thank you Dawn for the addition).
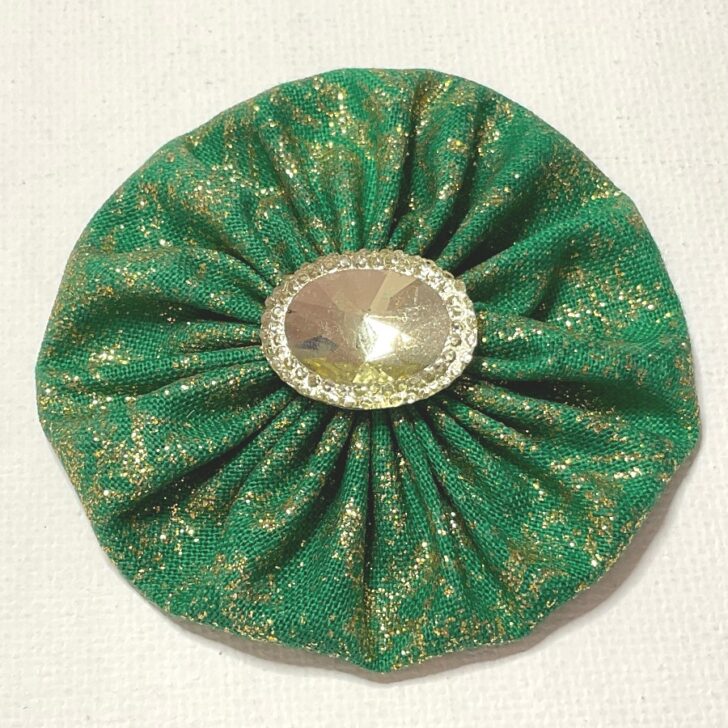
One side of the yo-yo is smooth and the other side is gathered. If a button, bead, or other embellishment is added to the center of the gathered side, it can become the decorative front of the yo-yo, creating a finished look that is often used in various sewing and craft projects.
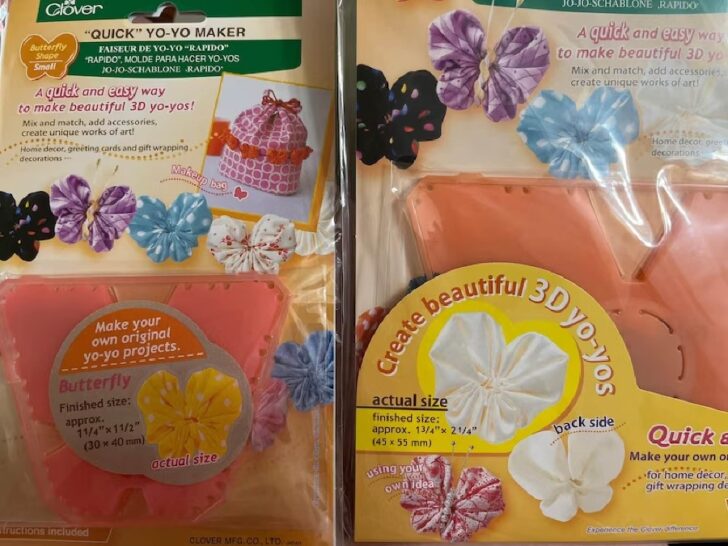
However, fabric yo-yos are not always circles. While the traditional shape is circular, now we have creative variations. For instance, it’s possible to make oval shaped yo-yos or even heart, butterfly and flower shaped yo-yos, by using a special yoyo maker from Clover. The same gathering technique is applied to the edges of these shapes to create a yo-yo with a different outline.
I recently discovered the Clover Yo-Yo Maker Tool on Etsy, which adds a fun and creative twist to yoyo designs and allows for even more variety in our handmade creations.
What You’ll Need to Make Round Fabric Yo-Yos
In order to create fabric yo-yos, you will need just a few items. They are easy to find and may already be at hand for those who engage in sewing or quilting.
Basic Supplies
- Fabric – light- to medium-weight fabrics are ideal for yo-yos, especially quilting cotton with its ease of handling and the vast array of available designs . The size of the fabric pieces will vary depending on the desired yo-yo size.
- Needles – choose a sharp hand sewing needle. Try different sizes to find which is most comfortable for you.
- Thread – choose a slightly heavier thread, 40 or 30-weight, so it doesn’t break when you gather the fabric.
- Scissors – use sharp fabric shears for precise cutting.
- Patterns (or you can call them templates) in different sizes.
- Fabric marker – a marker is helpful for tracing the template onto the fabric.
Additional Items
- Embellishments – assorted buttons, flowers, or beads for embellishing the center of the yo-yos.
- Fabric glue or glue gun – use it for attaching yo-yos to each other or to other surfaces.
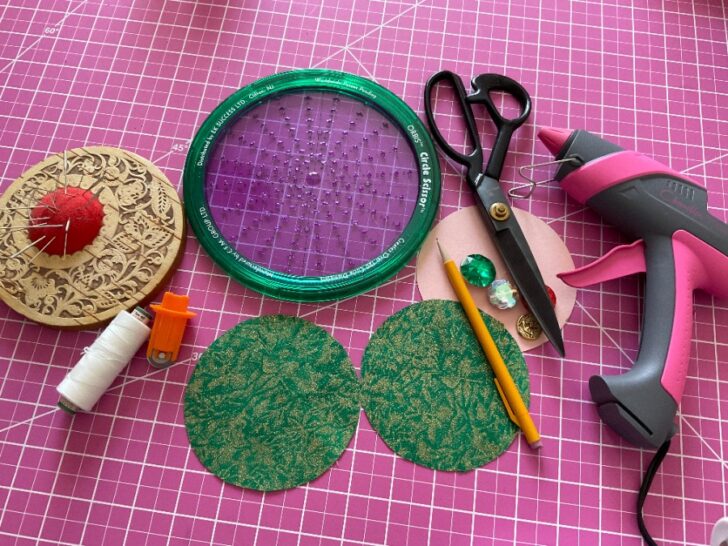
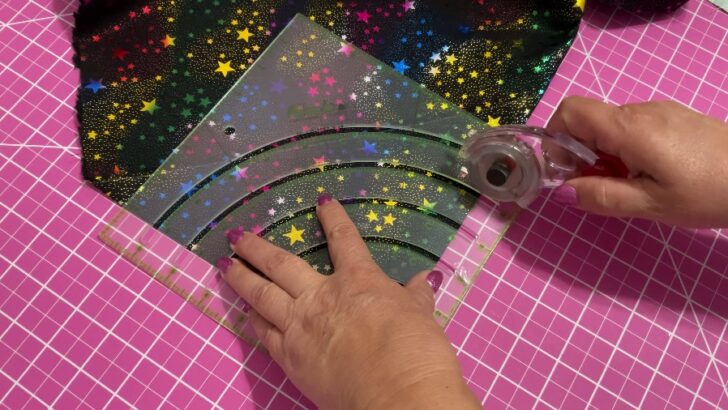
- A special circle ruler to draw circles
Step-by-Step Creation of Fabric Yo-yos
Step 1. Creating a Pattern for a Fabric Yo-yo
Creating a pattern for a fabric yo-yo is quite straightforward. The pattern is essentially a circle that is approximately twice the diameter of the desired finished yo-yo size. This is because once the fabric is gathered, the circumference reduces, pulling the edges inward and creating a smaller, double-layered, puffed shape.
So, decide the diameter of the finished yo-yo you want. For example, if you want a finished yo-yo that is 2 inches in diameter, you will need to start with a circle that is about 4 inches in diameter. You can also add a little extra, for example, an extra half-inch for seam allowances and make the diameter of the circle 4.5 inches. This extra fabric allows for the depth created by the gathering so that the finished yo-yo will be the size you intended.
To draw the pattern, you’ll need something round to trace (among household items with the desired circumference), which in this case would be about 4.5 inches across. This could be a mug, a small bowl, a reel of tape, or any other circular object that fits the measurements.
You can also use plates, mugs, jar lids, or cups, depending on the size of yo-yo you want to create.
There are also specific tools and round rulers designed for drawing circles and adjustable circle cutting machines which can be particularly useful in this case.
For example, I like to use a special circle ruler for an efficient way to cut my fabric circles in a range of sizes – 12, 10, 8, 6, and 4 inches in diameter. Starting with a fabric square, I need to fold it twice to form a smaller square with four layers of fabric. Then I align the circle ruler’s center point with the fabric’s center, where it features a quarter-circle cutout. This design let me slice through the layers with a rotary cutter, producing perfect circles.
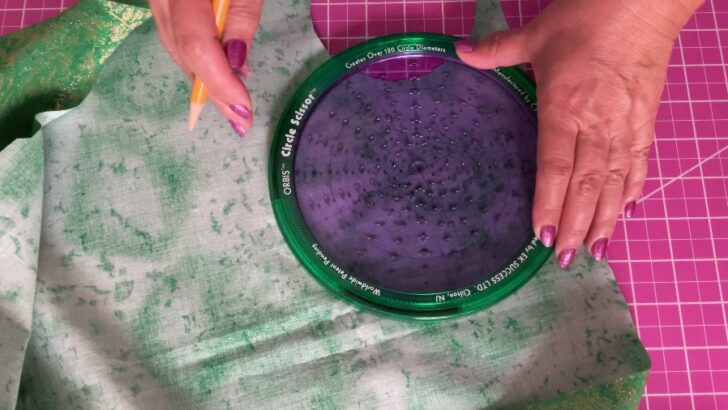
For smaller circles, up to 6 inches in diameter, I like to use another type of circle ruler, which is similar to the Helix Circle Maker that’s currently available on Amazon. This tool is incredibly handy for drawing precise circles without the hassle of a traditional compass.
Here’s how to use it.
Place the circle ruler on paper. I use cardstock paper to make a template.
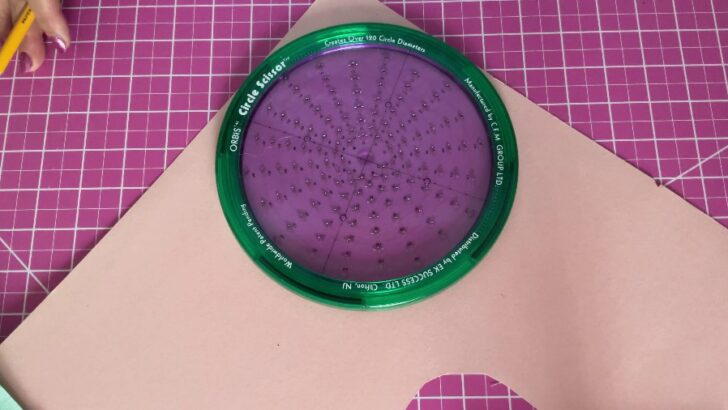
The ruler has various holes marked with different diameters. Select the hole that corresponds to the size of the circle you want to draw.
Place the tip of your pen or pencil into the chosen hole. Make sure it’s sitting upright and snugly in the hole to maintain accuracy.
With one hand, hold the ruler firmly in place. With the other hand, rotate the pen or pencil 360 degrees around the ruler’s center point. The pivot point is usually clearly marked, and the ruler stays stationary while the pen moves, drawing a perfect circle.
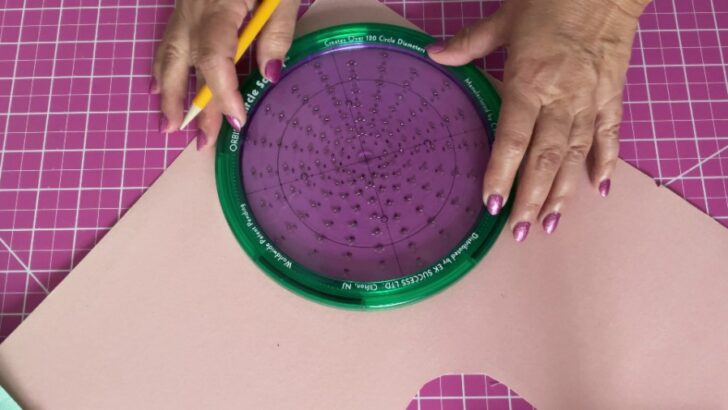
You can draw circles right on the fabric. And if you need multiple circles of the same size, simply reposition the ruler on a new section of fabric and repeat the process.
If you are making a specific project (a quilt with yoyos for example) and follow a tutorial you probably can find a printable PDF pattern for the circle to cut.
If you want to make many yo-yos you can make a template from stiff cardstock.
There is also a fabric yo-yo maker made by Clover. You can find them on Amazon in many different sizes.
They are ideal if you want to make numerous yo-yos, that are completely identical in size. The tool provide a uniform edge without the need for pre-cutting circles. Simply place your fabric between the yo-yo maker’s halves, cut around it, and start sewing.

Step 2. Preparing and Cutting the Fabric
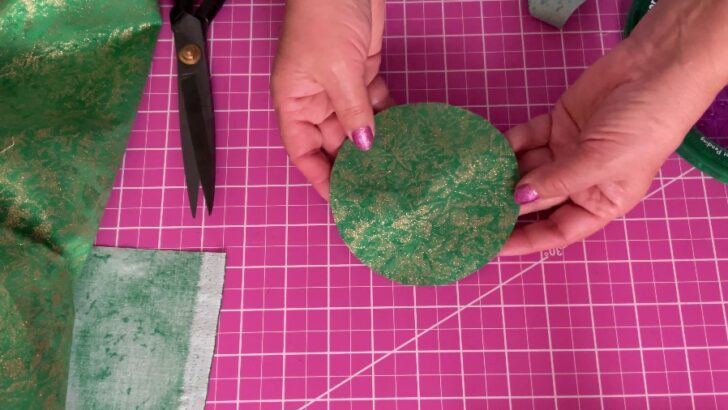
Selecting the appropriate fabric is important for the final appearance and feel of yo-yos. Lightweight cotton or quilting fabric is probably the best choice as it’s easy to handle and sew. Choose fabric that’s wrinkle-resistant and not too stretchy, to maintain the shape of the yo-yos. Fabrics with smaller prints or solids often the best for visually appealing yo-yos.
To create fabric yo-yos, you must cut out circles of fabric.
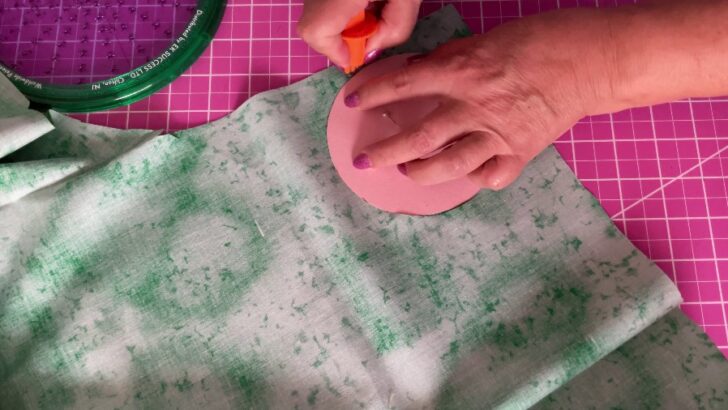
Place a round object you chose or a template you made on the fabric and trace around it with a fabric marker. Keep the fabric smooth and flat to avoid any irregularities in the circle.
Cut out the fabric circle along the traced line.
You can cut multiple circles at once, and for this, pin the template to the layers of fabric, trace, then cut along the traced lines.
Avoid jagged edges when cutting, as this could make the gathering process more difficult.
✅ Related article: Cutting Tools For Sewing: The Ultimate Guide
Step 3. Sewing Along the Fabric Edge
So, you prepared fabric circles in sizes you want.
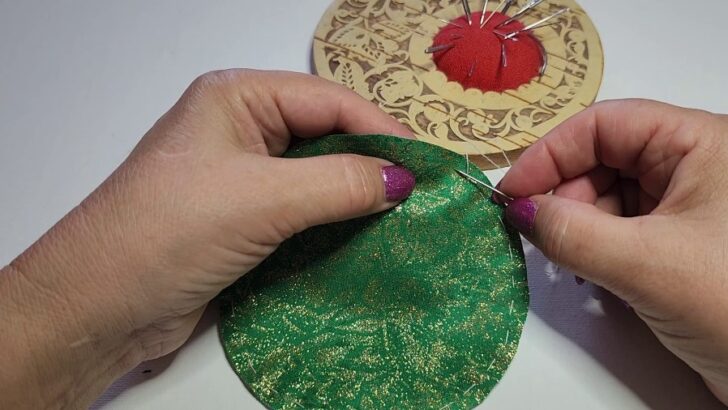
Sew a running stitch by hand around the circumference, approximately ¼ or ⅛ inch from the edge.
Use a thread that matches or complements your fabric, and consider using a double strand for added durability.
Maintain consistent stitch lengths for even gathering later in the process.
✅ Related article: Sewing Basics # 2: Learn How to Sew by Hand
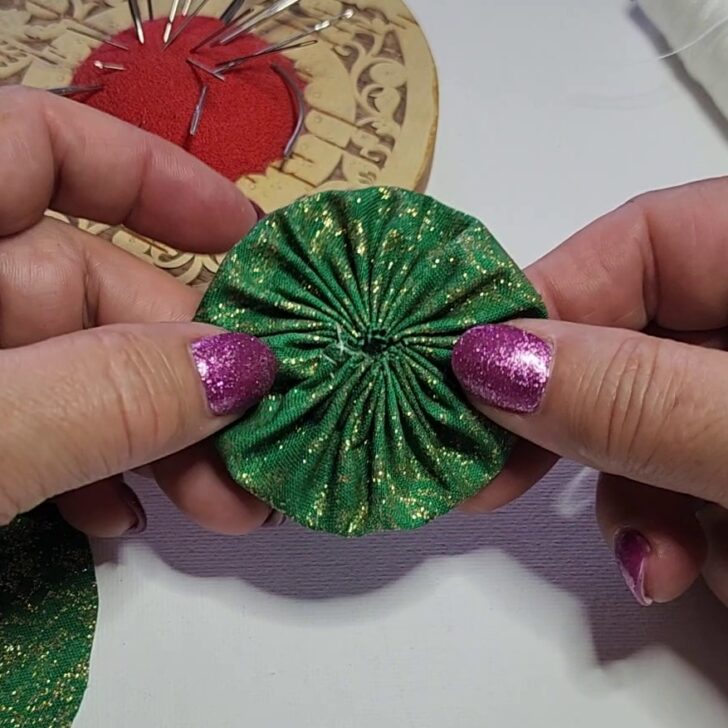
Step 4. Gathering the Fabric
After sewing the running stitch, gently pull the thread to gather the fabric towards the center. Do this step gradually to adjust the gathers and avoid puckering or bunching. Once you achieve the desired level of tightness, secure the thread and flatten the yo-yo to reveal its completed form.
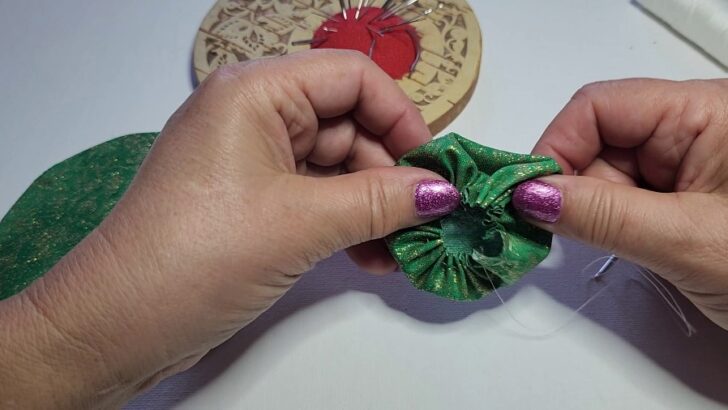
Step 5. Securing the Yo-Yo
Once the fabric is pulled into a gathered circle, the next step is to secure the opening. This can be done by making several small stitches across the gathered edge. Secure the thread, so the stitches do not unravel. Try to make these stitches almost invisible so they blend seamlessly with the folds of the yo-yo.
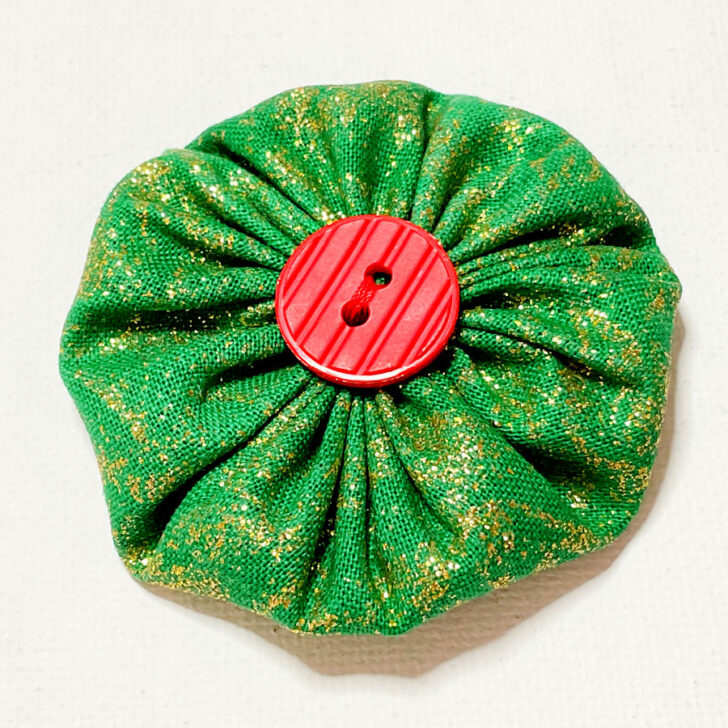
Step 6. Adding the Embellishments (optional)
You can add a button or bead to the center of the yo-yo for decorative purposes. Select a button that complements the fabric. Center it over the yo-yo’s gathered opening and sew it in place, ensuring the thread is tightly fastened.
You can also use fabric glue or a glue gun to attach the embellishments.
Buttons and beads not only add a visual appeal but can also help maintain the yo-yo’s shape.
✅ Related article: How to sew on a button
Variations of Fabric Yo-Yos
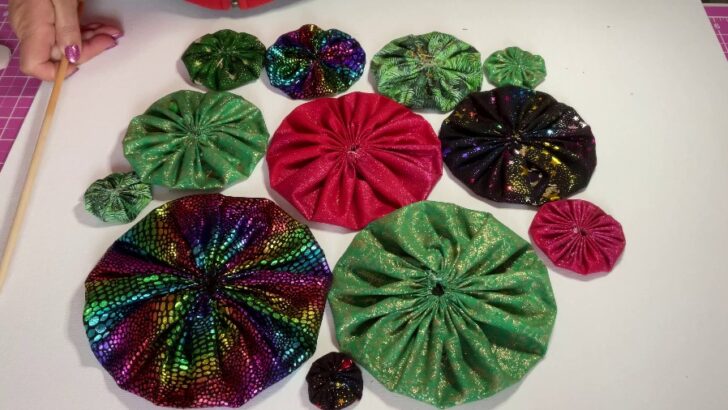
Fabric yo-yos can take on many forms to suit various crafting projects. From numerous shapes and sizes to an eclectic mix of colors and prints, these embellishments allow for personalization and creative expression.
Different Sizes and Shapes
Fabric yo-yos traditionally are round, but they can be crafted in a diversity of sizes and forms to accommodate different looks.
While a standard yo-yo might be a few inches in diameter, you could also create tiny yo-yos for subtle accents or very large ones for a more standout effect.
Aside from circles, fabric yo-yos can be made in oval, square, heart, or even butterfly shapes, and used as unique decorative elements for quilts, clothing, and accessories.
Combining Colors and Patterns
Selecting nice fabrics with varying colors and patterns is key in fabric yo-yo projects.You can make a visually striking composition by mixing solid colors with prints or by coordinating colors that clash or complement each other. Mismatching patterns like polka dots, stripes, and florals, when used thoughtfully, can add visual interest to any craft project that incorporates fabric yo-yos.
Projects with Fabric Yo-Yos
Once created, fabric yo-yos offer a charming vintage look and can be incorporated into numerous crafting projects to add texture and dimension.
Decorative Items
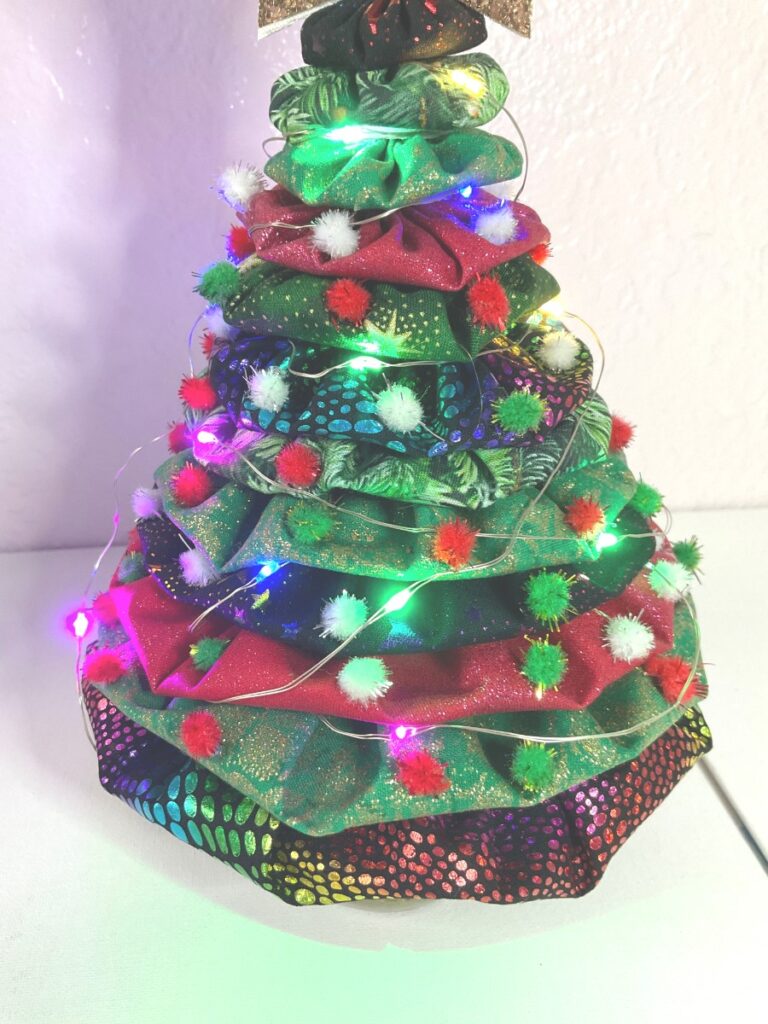
Fabric yo-yos can be stitched together to create colorful garlands or used individually as ornaments for holiday decor. They can embellish pillow covers and can also serve as embellishments on lampshades to refresh home interiors. Their versatility allows crafters to adapt them to any color scheme or aesthetic preference.
I made a charming yo-yo Christmas tree that has become the centerpiece of my holiday decorations. It’s made up of layered fabric yo-yos.
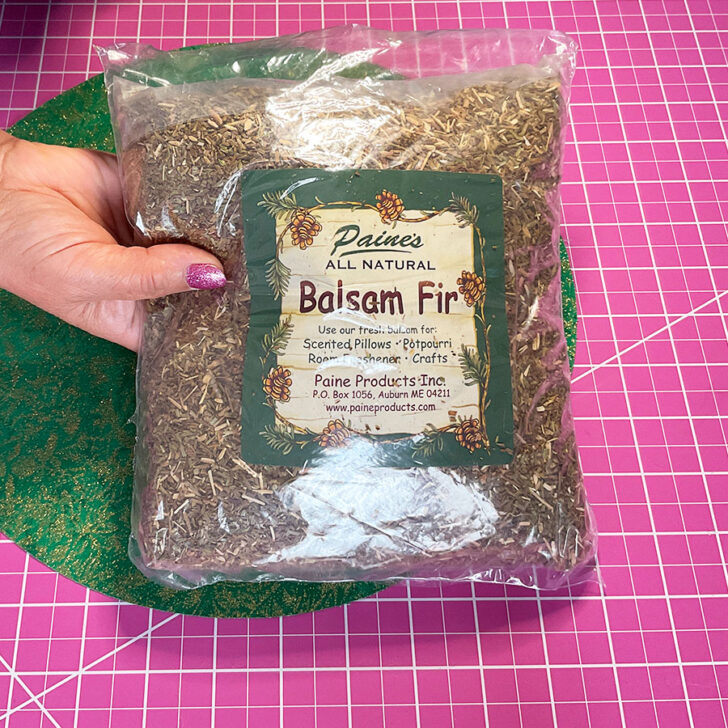
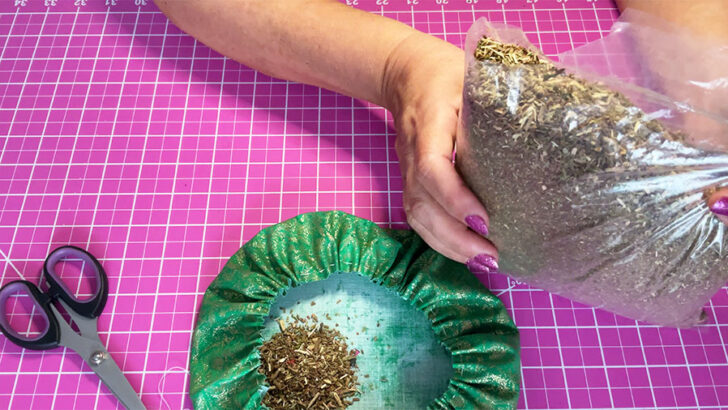
I also made sachets from the yo-yos, infusing them with the woodsy essence of balsam fir, perfect for tucking into drawers or just placing them somewhere around to spread holiday cheer throughout my home. These sachets have the authentic fragrance of a real Christmas tree and they are so easy and fun to make!
✅ Related article: DIY sachets: how to make lavender sachets for closets and drawers
Fashion Accessories
They can also be fashioned into unique brooches or clustered to adorn handbags. For a bohemian flair, fabric yo-yos are perfect for headbands or can be used to enhance the visual appeal of a plain scarf.
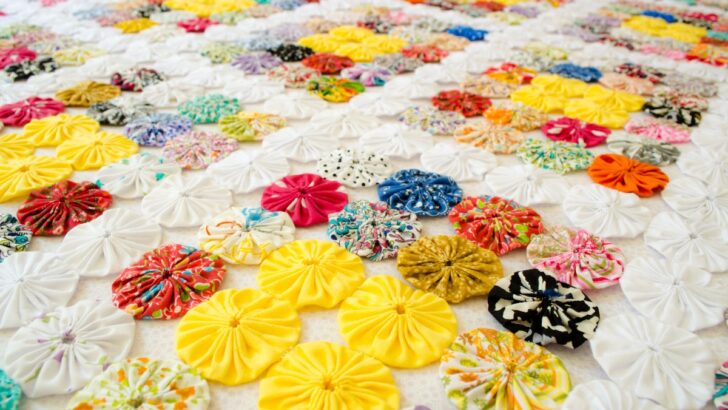
Quilting With Yo-Yos
Quilters can incorporate fabric yo-yos into their work by using them as dimensional appliqués on quilts or blankets. A common project is the creation of a yo-yo quilt, where yo-yos are stitched together, covering an entire surface. They can also be attached to quilt borders to add a textured edge to a quilt.
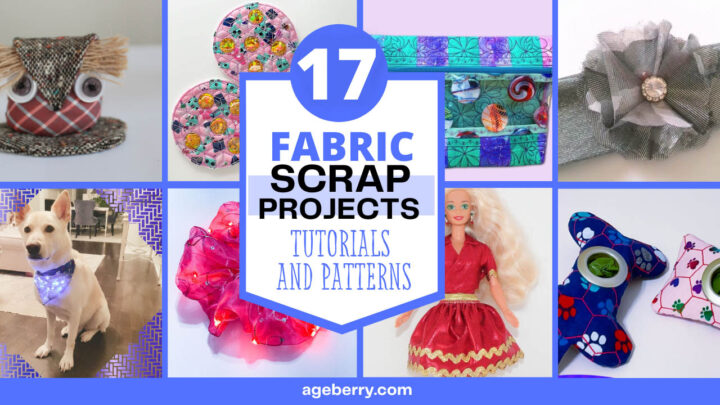
Once you’ve mastered making fabric yoyos, put those skills to good use with my guide 17 Fun And Unique Fabric Scrap Projects. These projects are also simple and a great way to use up leftover materials. Take a look for additional creative inspiration!
If this guide was useful, consider pinning the image below to your sewing Pinterest board for future reference. It’ll help you easily revisit the instructions on making fabric yoyos whenever you need them. Also, follow me on Pinterest to stay updated with more sewing tips, tutorials, and creative ideas!
latest posts
- Corset Pressing Board for Sewing: What It Does and How I Use It
- 7 Essential Tools and Settings for Sewing Denim on a Regular Sewing Machine
- That Purple Thang: 10 Smart Ways to Use This Weird Little Tool
- 20+ Reasons Your Sewing Machine Thread Keeps Breaking (+ Solutions)
- Dresden Plate Quilt Block: 4th of July Fireworks
- How To Sew Curves the Easy Way Using a Curve Master Presser Foot
- 30 Sewing Hacks That Turn Ordinary Items into Useful Sewing Tools
- Seam Allowances in Sewing Patterns: What They Are and How to Use Them
- What Do You Call a Person Who Sews? I Asked My Readers and Got 1,408 Opinions

Hi. Over here in England, we call these “Suffolk puffs.” Suffolk is the name of a county. I assume a lot of these are made there, hence the name. Thank you for all your hard work and the jokes 😁
Thank you for the addition!