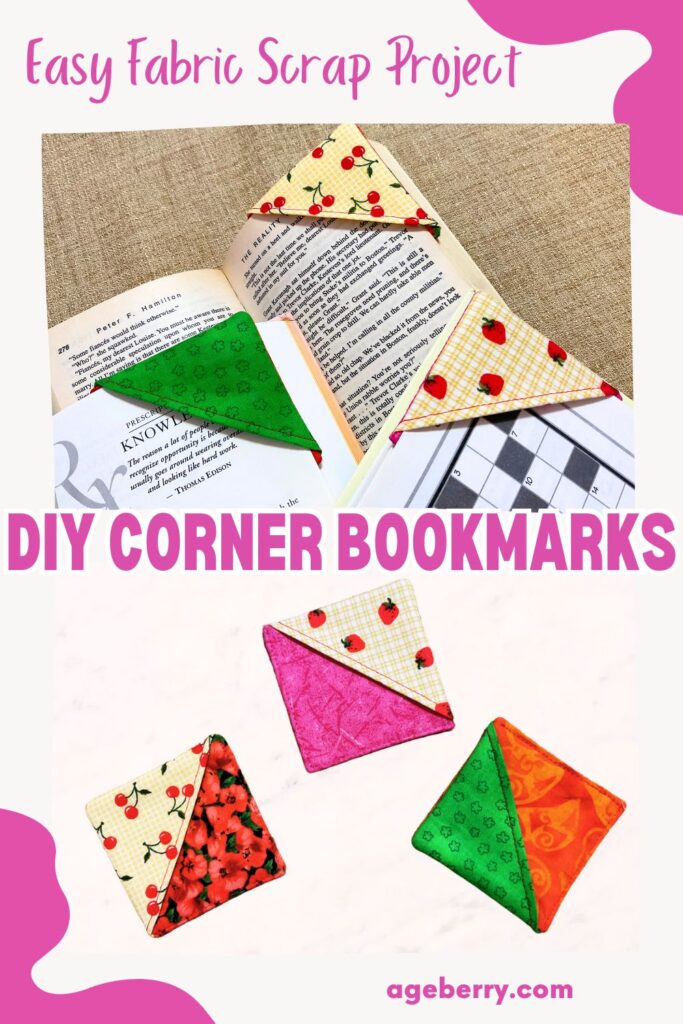
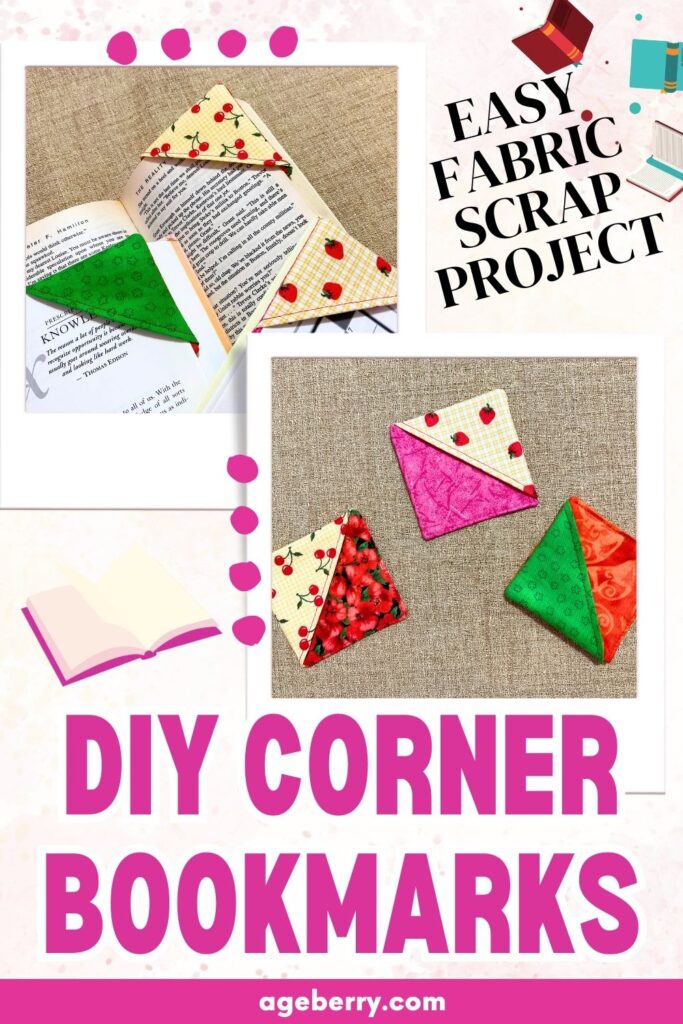
Easy Scrap Fabric Projects: Fabric Corner Bookmarks Tutorial
Attention, bookworms and fabric fanatics! Are you drowning in a sea of adorable leftover fabric scraps from your sewing projects? I’ve got the perfect tiny scrap fabric projects that’ll turn those precious bits into charming corner bookmarks from fabric. This easy sewing project for beginners is so addictive, you’ll soon have more bookmarks than actual books to put them in (ha-ha).
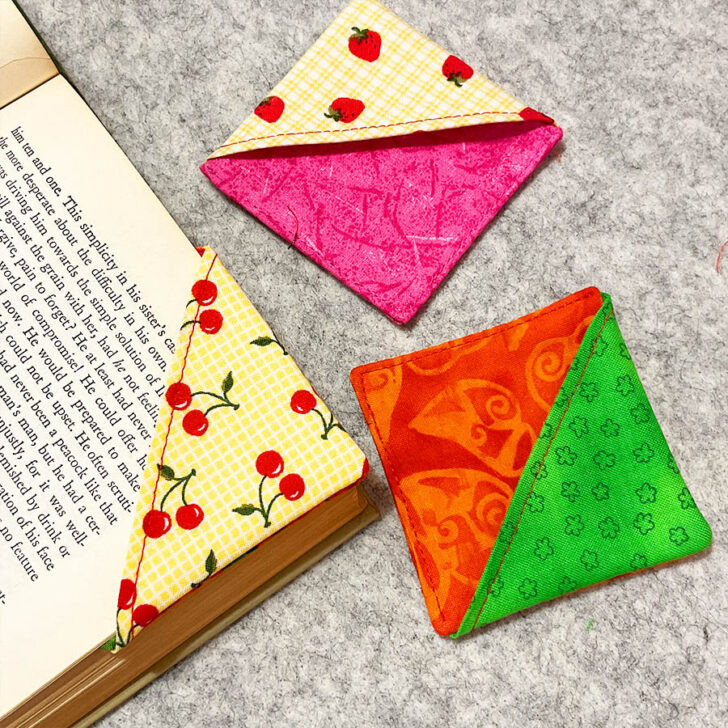
I am making three bookmarks at once because well, one is never enough.
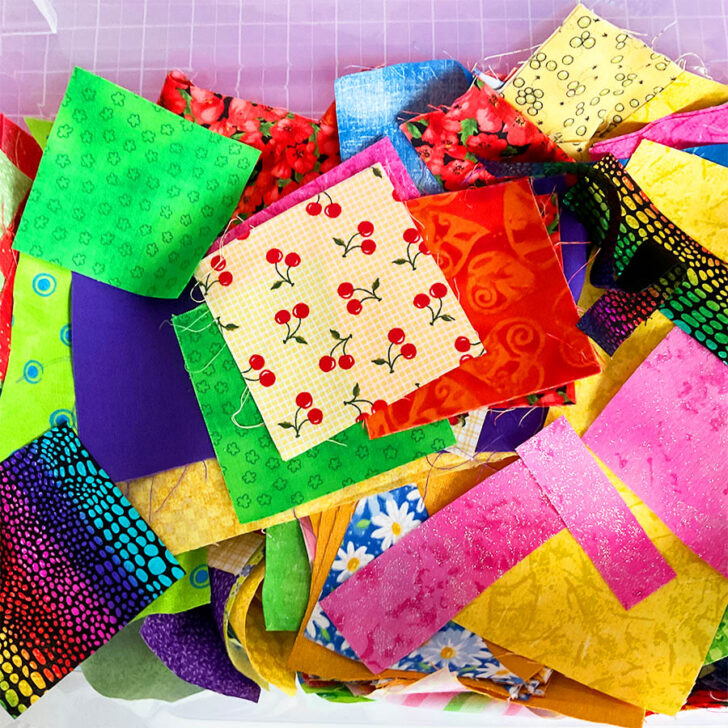
Step 1. Fabric Hunting for Your Homemade Bookmarks
Dive into your fabric stash like it’s a ball pit at a kid’s birthday party. Emerge victorious with squares of fabric. Remember, life’s too short for boring fabric choices!
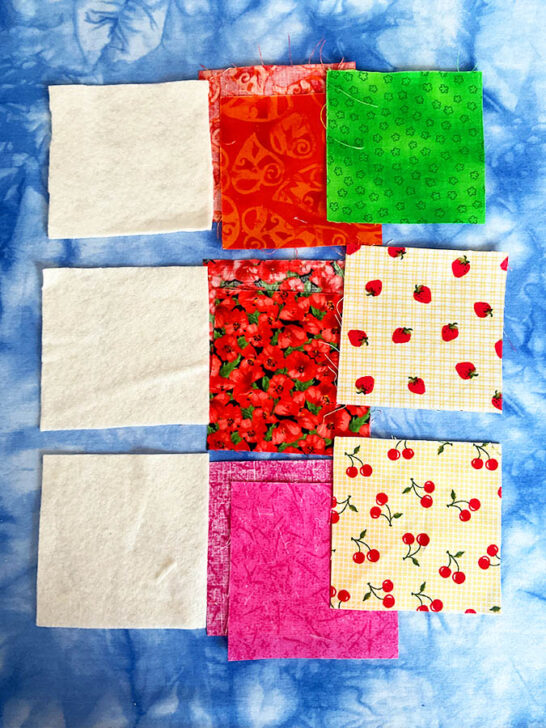
For sewing bookmarks, you’ll need:
- Two 3.5″ x 3.5″ squares from your base fabric
- One 3.5″ x 3.5″ square for your corner triangle
- Two 3.5″ x 3.5″ squares of thin batting (I used fusible batting leftovers from my quilting adventures
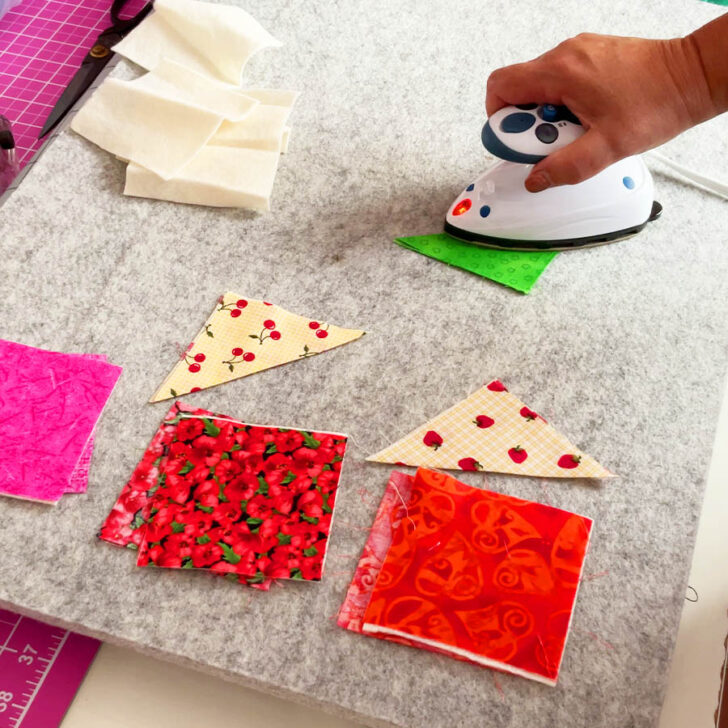
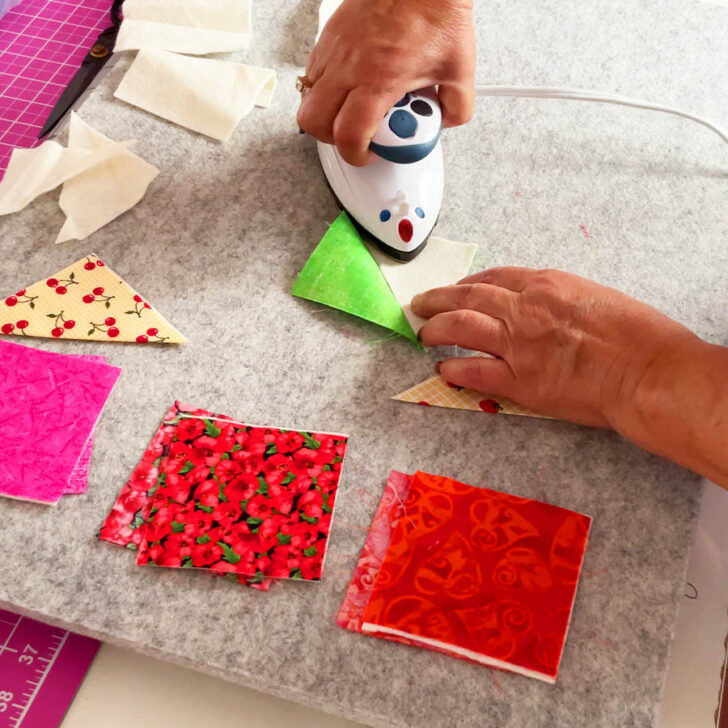
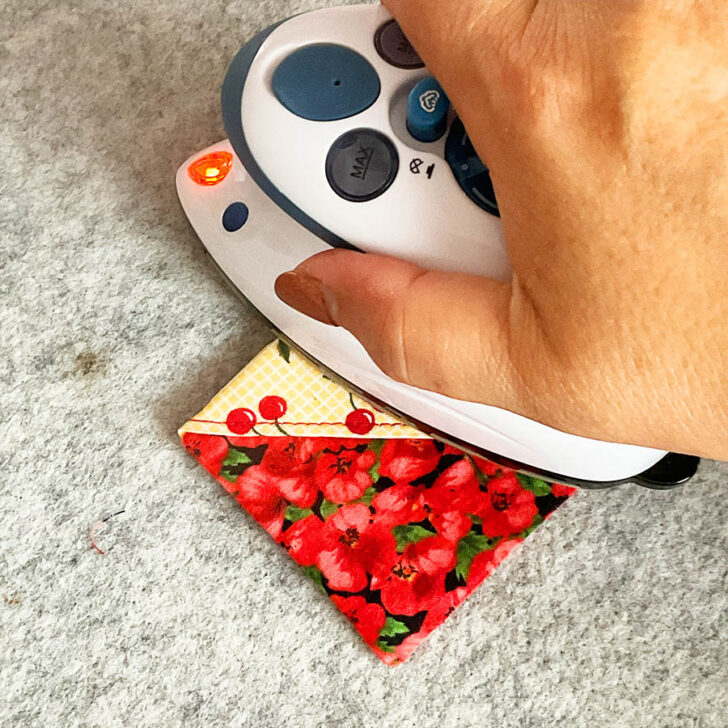
Step 2. The Pressing Party
Time to heat up that iron! I love using my Dritz mini-iron on a wool pressing mat for these tiny scrap projects, but any iron will do the trick. Give all your pieces a good press until they’re smoother than a fresh page in a new book.
Note: Some of the links on this page are affiliate links. This means I will receive a commission if you order a product through one of my links. I only recommend products I believe in and use myself.
Fuse batting to one square for the base of each bookmark.

✅ Related tutorial: Mini Irons For Sewing And Quilting
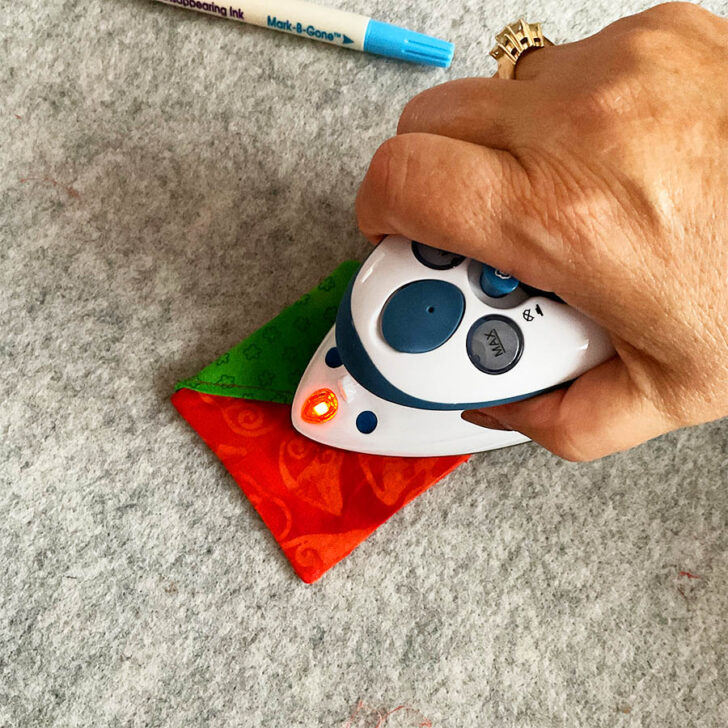
Step 3. Triangle Transformation
Fold your corner square with wrong sides together. Press it into a triangle shape.
✅ Related tutorial: Wool Pressing Mat: How to Use, Pros and Cons, Best Brands, Sizes
Now, cut one square of batting diagonally to make two triangles.

Fuse one inside your fabric triangle.
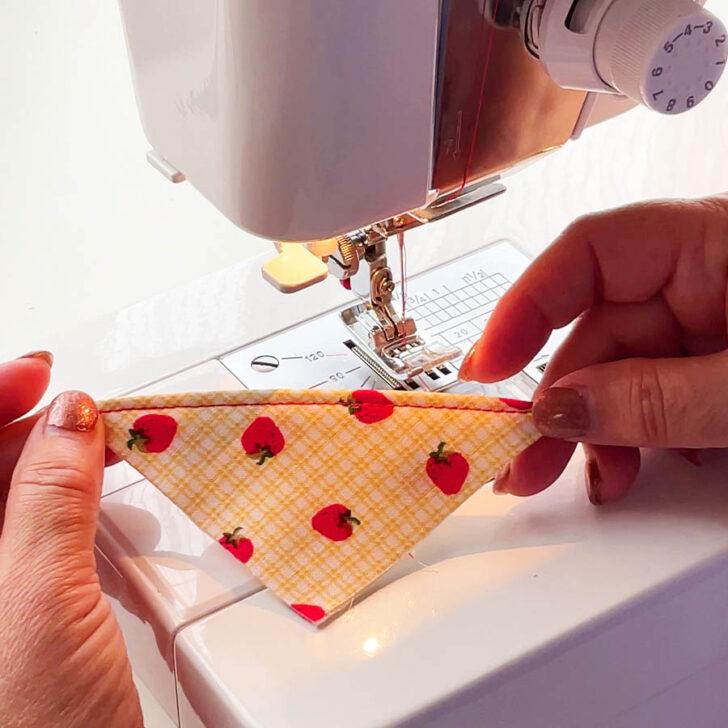
Stitch along the longest side.
Before you start stitching, let’s chat about thread. Choosing the right thread is like finding the perfect dance partner for your fabric – it can make or break your project.
Pick a thread color that complements your fabric. The rule of thumb is to go slightly darker than your fabric color. If you’re stuck, hold a few thread options against your fabric and squint – the one that blends in best is your winner.
Now, about quality – this is not the time to use that mystery thread you found at the bottom of your sewing box. Use good quality thread that won’t break or fray easily.
✅ Related tutorial: What Is The Best Thread For Sewing Machine Projects? Let’s Find Out!
Thread needs to be strong enough to hold seams together through regular use and washing. Your bookmarks are going on adventures between pages, after all.
If you’re having trouble finding an exact match, don’t stress. Pick the best match you can find and move on. Your beautiful fabric and neat stitching will be the stars of the show.
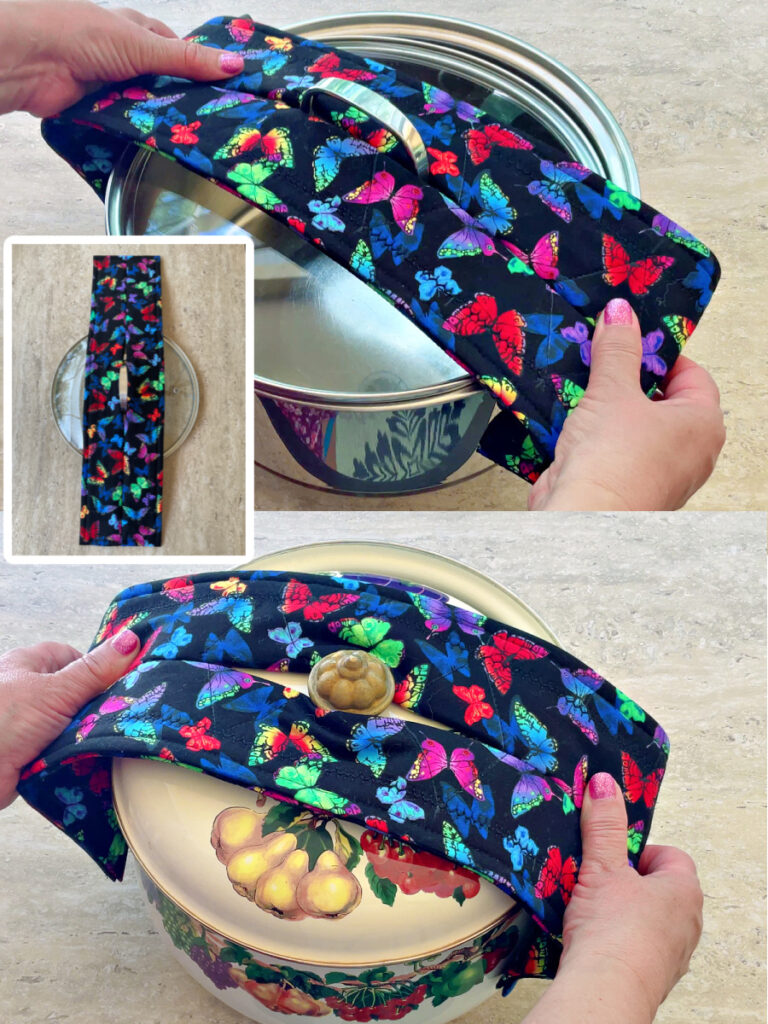
By the way, if you like quick, practical sewing projects, I recently made a potholder that works very differently from the usual ones. It wraps around the handle and stays in place, so you can lift pots or drain hot water safely. It’s quick to sew and makes a really nice handmade gift. I made a detailed PDF tutorial with all the steps – take a look here.
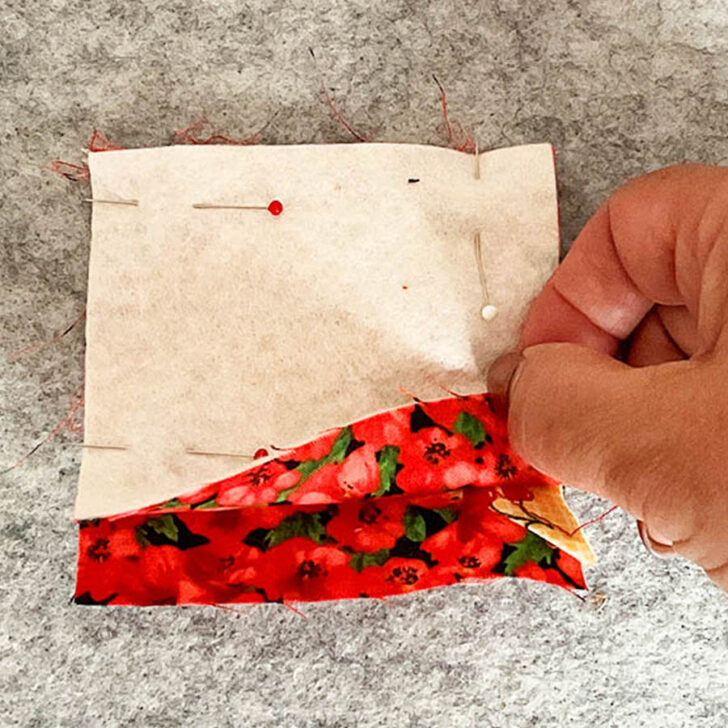
Step 4. The Sandwich Assembly
Layer your fabric like you’re making the world’s tiniest, flattest sandwich.
- Base square without batting (right side up)
- Corner triangle
- Square with batting (right side down)
Pin these layers together. They’re about to become best friends. Secure your fabric sandwich with pins.
✅ Related tutorial: Types of sewing pins and their uses: all you need to know about straight pins for sewing
Step 5. Sew, Sew, Sew Your Bookmark
Using a 1/4″ seam allowance, sew around the edges, leaving a small opening at the bottom for turning. Make sure to sew around all corners – we want sharp corners, not round ones.
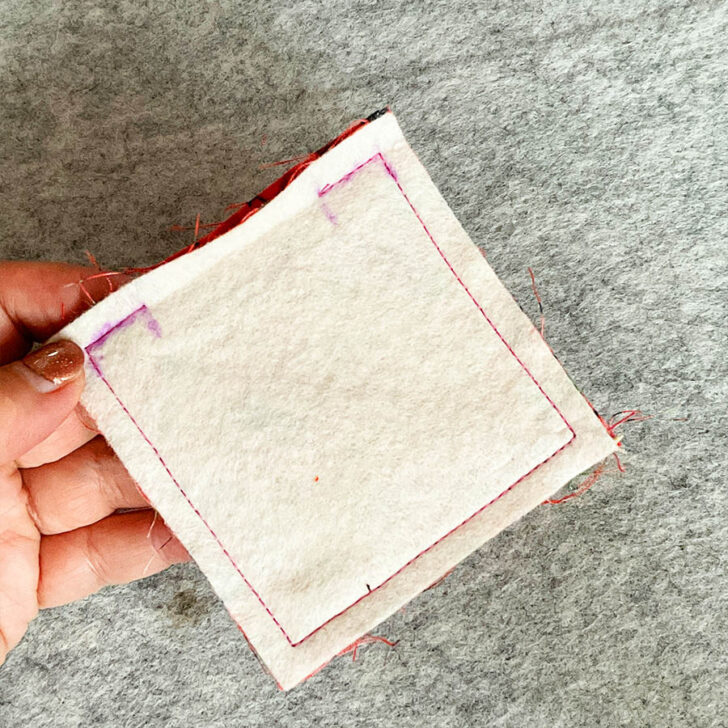
✅ Related tutorial: Basic sewing techniques: How to sew corners and curved seams
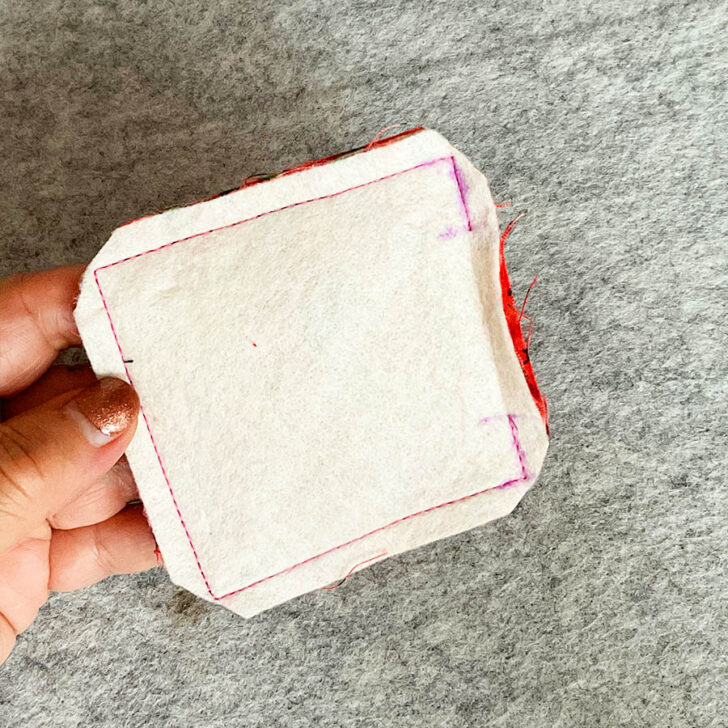
Step 6. Corner Clipping Ceremony
Clip those corners.
Step 7. The Big Reveal
Turn your bookmark right side out. Use a point turner to make those corners sharp. No one wants a bookmark with soggy corners!
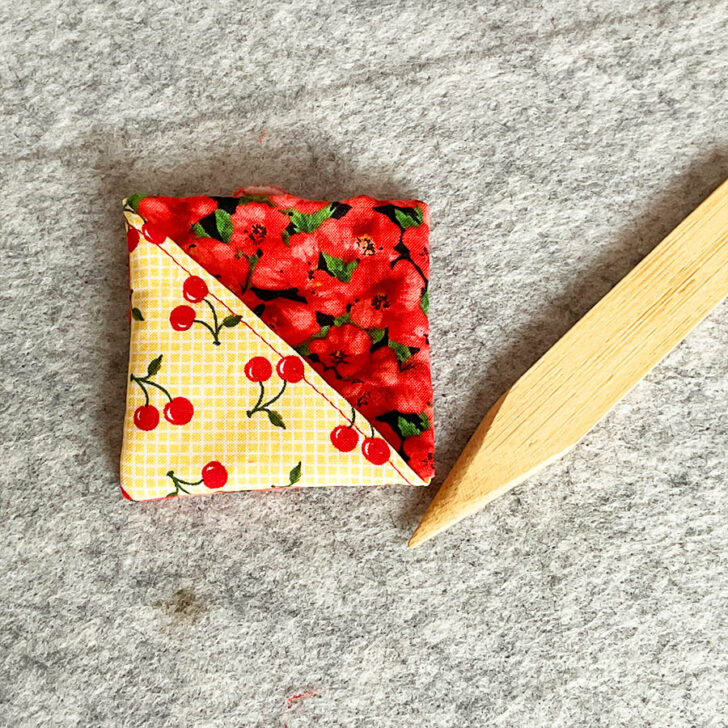


Dritz 3150 Bamboo Point Turner & Presser
Step 8. Press for Success
Give your bookmark one last press, tucking in the opening.
Step 9. The Final Flourish
Topstitch around the two sides without the corner fabric.
✅ Related tutorial: How To Topstitch | 17 Topstitching Tips Every Beginner Should Know
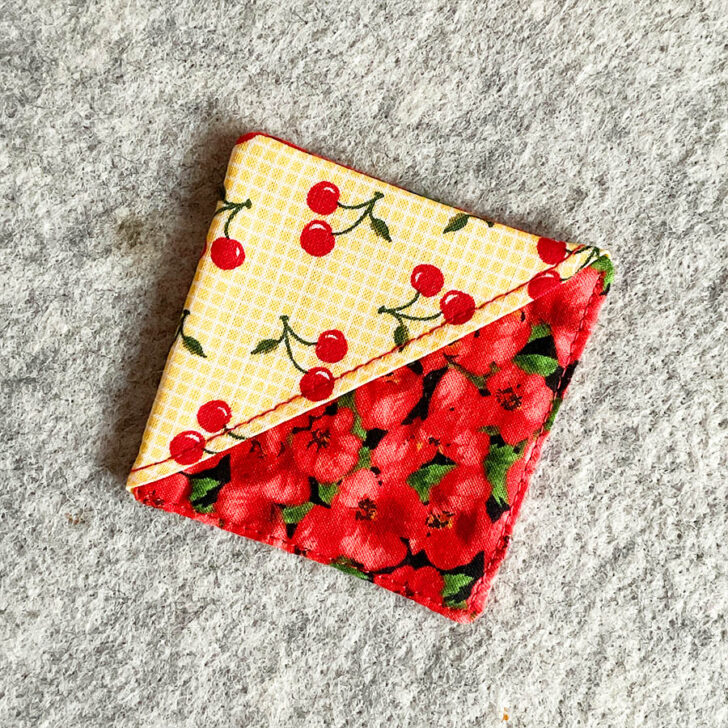
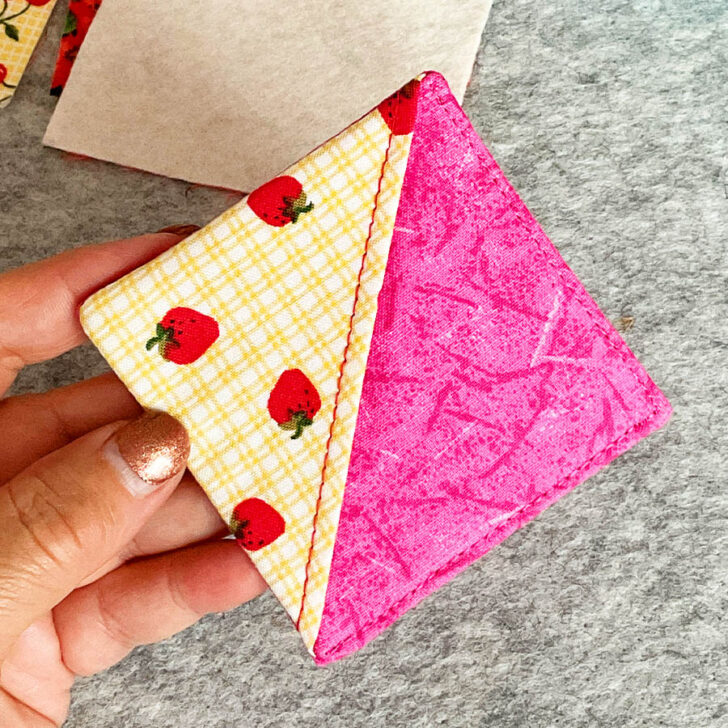
Voila! You now have a cute little fabric bookmark!
These easy fabric scrap projects are perfect for using up those fabric leftovers. Plus, they make great gifts for your book-loving friends. Just don’t blame me if you become addicted to making them – you’ve been warned!
So go forth and conquer those book corners with your newly acquired bookmark-making superpowers. Your fabric scraps will feel purposeful, and you’ll have the satisfaction of knowing you’ve created something both cute and functional.
latest posts
- What Do You Call a Person Who Sews? I Asked My Readers and Got 1,408 Opinions
- DIY Round Purse: PDF Sewing Pattern and Detailed Instructions
- Mini Wonder Clips By Clover: Useful Sewing Tool Or Just Another Notion?
- Non-Slip Grips For Quilting Rulers: A Small Notion With A Useful Job
- Fabric Eraser for Sewing: What It Removes and When to Use It
- What Is The Best Thread For Sewing Machine Projects? Let’s Find Out!
- Butterfly Quilt Block Tutorial – Foundation Paper Piecing
- How To Sew Quilt Squares So The Corners Match
- Sewing With Fork Pins: How They Help With Pattern Matching, Slippery Fabric, And Seams