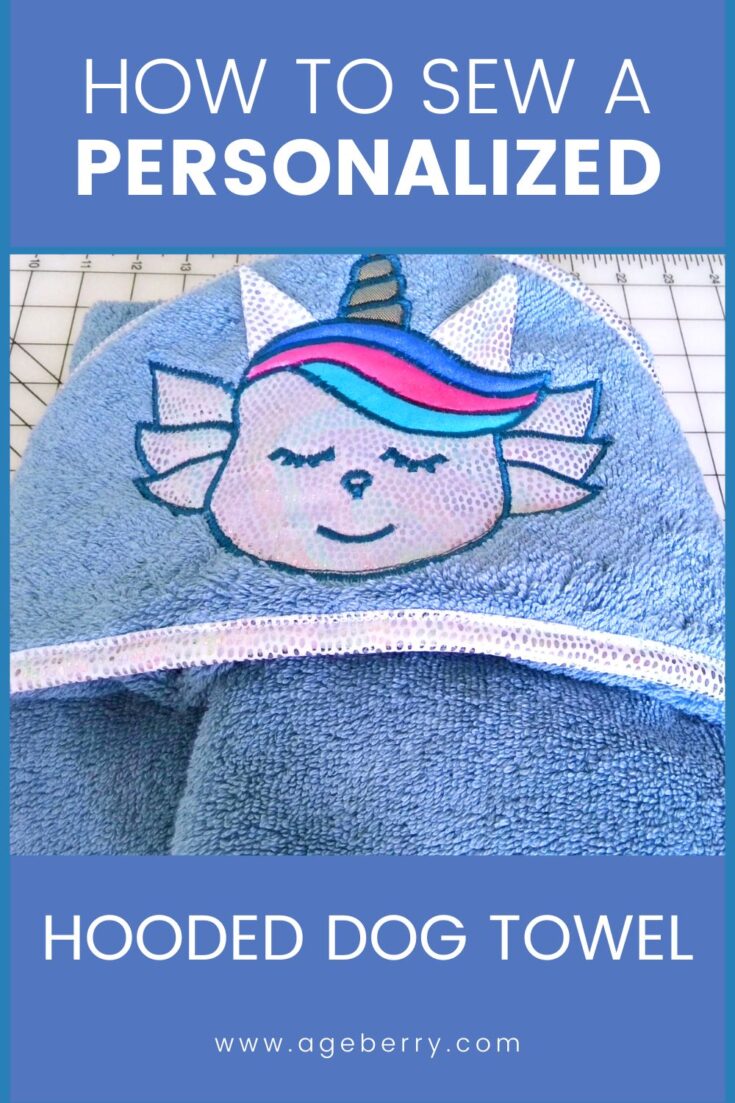
How to sew a personalized dog drying coat/towel
In this sewing tutorial I want to show you how to make personalized dog drying coats {hooded towels for dogs}.
There are so many tutorials on hooded bath towels for babies but I didn’t find any tutorial on hooded dog towel coat. So, I hope this post will be very useful for you if you are a dog owner. Or you can make it as a Christmas gift for your favorite dog owner, right? And I bet this will be the easiest gift you’ll ever make.
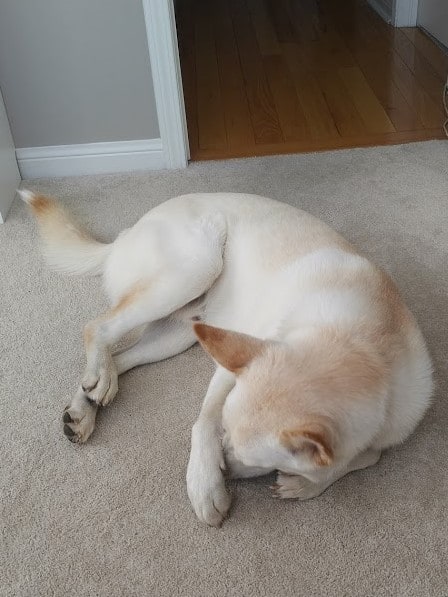
Last summer I was visiting my daughter and she has a dog (Umka). I love that dog a lot. So, we went for a walk with the dog to a provincial park and he was so happy to swim in some small river that goes across the park.
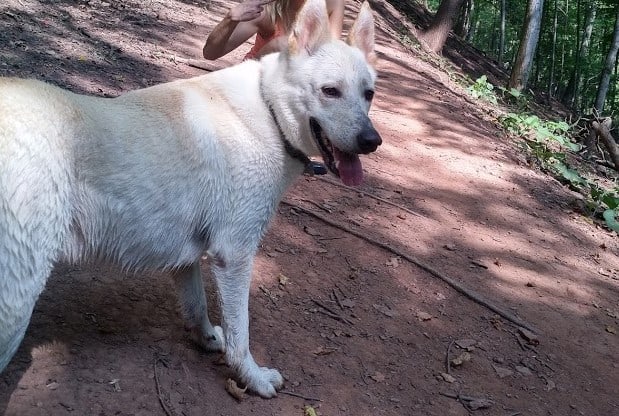
But when he was out of the water his fur had a horrible smell of a dead fish. And we had to seriously wash him (with a dog shampoo and stuff) – and he hated it but I think he hated even more being dried off – he couldn’t sit still anymore and he certainly preferred just to VIGOROUSLY shake the water off.
I will allow you one guess: guess where did all that water go? Suffice to say, I had to dry myself after!
After the bath his fur stayed wet for hours even if we tried to dry him with a bath towel. And he was shaking off like crazy so all the floor, furniture and ME included were wet. I also had to take shower after this.
And after that not so pleasant experience I decided to sew a hooded towel for the dog. It’s a really easy project and even a beginner sewist can make the towel in no time.
If you’re looking for a stylish and practical dog drying robe but don’t want to sew one yourself, check out how Harbour Hounds can make life with dogs more enjoyable and see their selection of dog drying robes. Not only are they stylish and practical, but they’re also designed to make drying off your dog a breeze. Whether your dog has just been for a swim or out in the rain, their dog drying robes will help them to dry off quickly and easily.
Note: Some of the links on this page are affiliate links. This means I will receive a commission if you order a product through one of my links. I only recommend products I believe in and use myself.
6 reasons why personalized dog drying towels are so handy
- Your pet won’t shake it off because it has a strong velcro closure – I will show you how to sew Velcro
- The towel will really help to prevent water dripping all over the house
- It’s easy to put it on the dog and the dog will not get annoyed by it because it’s lightweight and doesn’t prevent the dog from moving
- The dog will stay warm while drying
- The towel will absorb the water fast making drying your pet easy
- The towel is great for grooming and travelling and will keep your dog warm, cozy and comfortable
And this hooded towel looks adorable. The hood isn’t really that useful for drying the fur but it’s probably more a gimmick for the owner than the dog.
What you’ll need
Thin fabric for binding
Regular sewing tools (scissors, threads, needles, pins, etc.)
Sewing machine (of course)
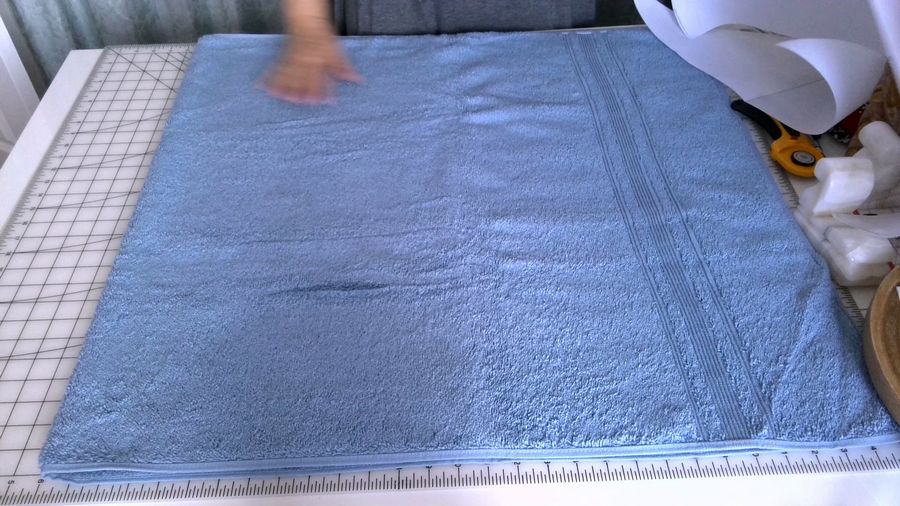
What size of the towel to use? Well, it depends on your dog’s size. But I think the larger the towel, the better. For my 60 pound dog, I used a bath towel 30” x 58”. .
I think it’s important to choose 100% cotton – it absorbs water better, it’s pleasant to the touch. The fabric can be of different densities – I used thick double-sided terry towel.
If you prefer to watch the tutorial GO TO MY YOUTUBE CHANNEL TO SEE THE VIDEO

Step 1
How to make a pattern for dog drying coats
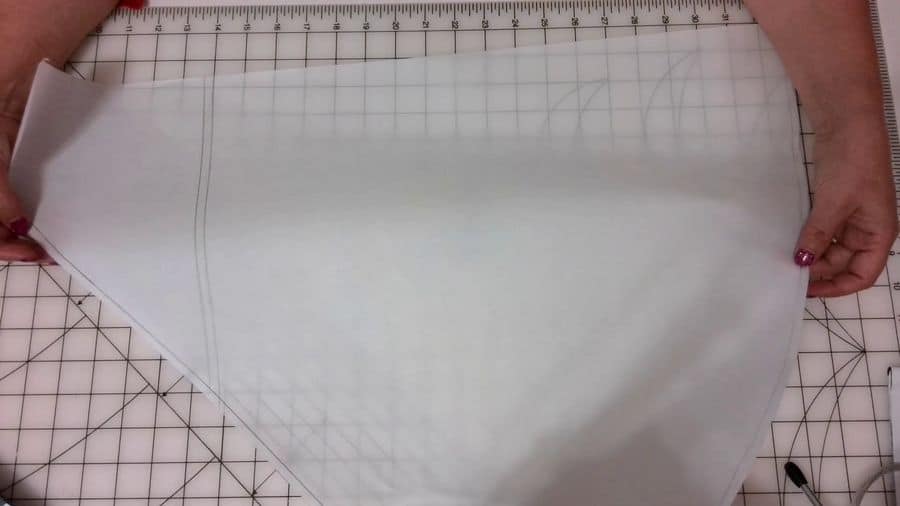
First I made a pattern on vellum paper. I just draw it freehand – it looked like this in the image below.
For convenience, I first drew pieces with the required dimensions on paper and only then transferred the pattern to the fabric.
I use for tracing vellum paper which I usually buy in rolls of 50 yards or larger from Amazon, eBay or wherever I find a good price. A roll is enough for a couple of years so I buy good quality paper, 24″ or 36″ wide, whichever has a good price. Both widths have advantages and disadvantages, so my recommendation is but based on price.
You can make the same pattern. Here is the description:
AB = CD = 20 “
AD = BC = 28”
AG = 9”
GE = 5”
BF = 16 OR 17 “
AH = 8”
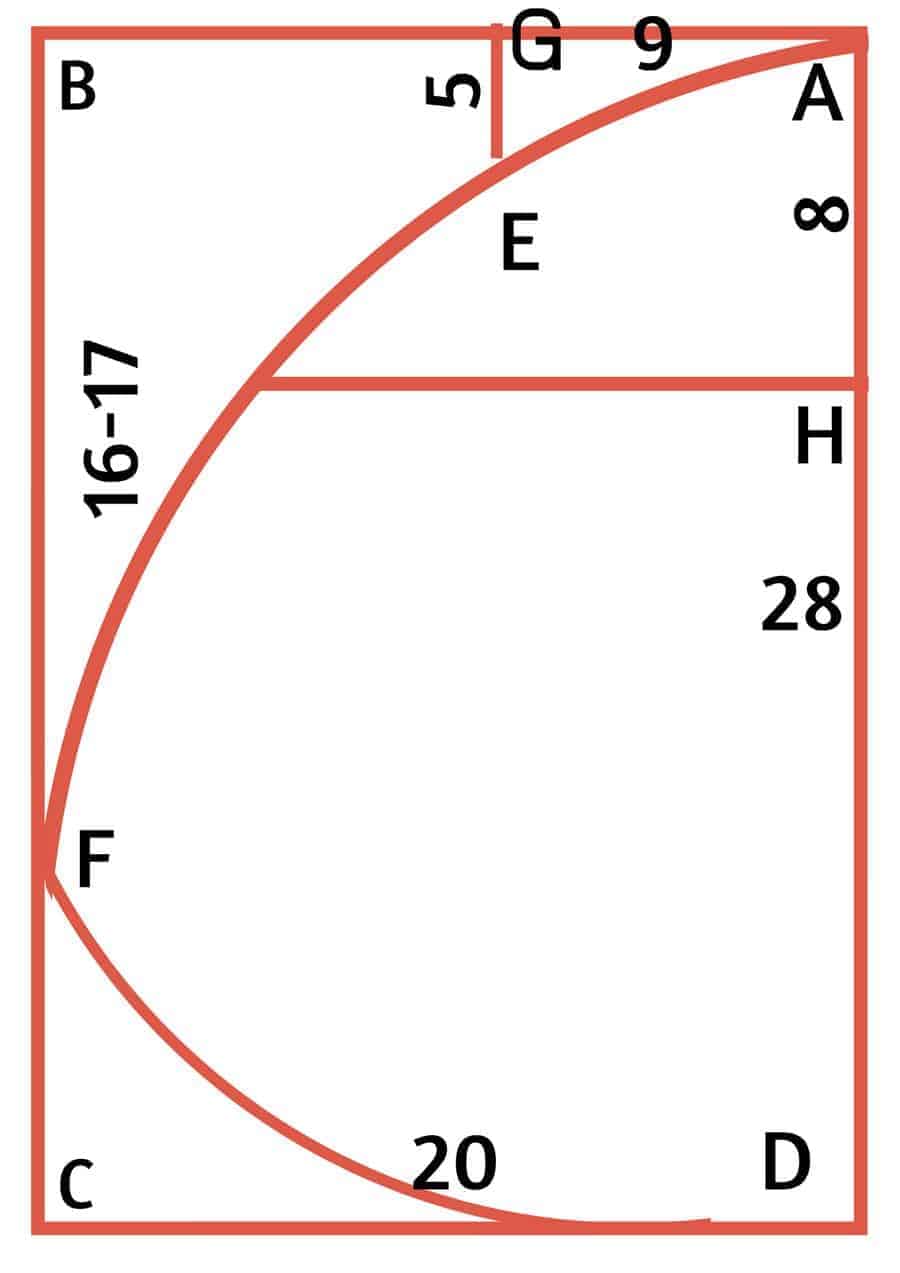
Just connect points AF and FD with curved lines. Round the lines slightly around point F so there is no sharp corner in the point F.
The line AD is the center on fold.
Make a separate pattern for the hood.
Step 2
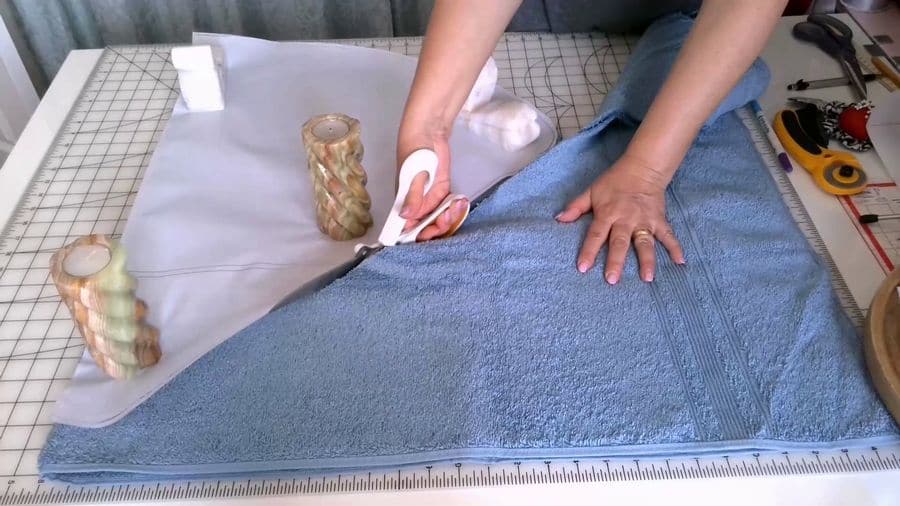
Cut the towel for the dog drying coat
Cut the towel using this pattern – 1 main piece on fold, and 1 piece for the hood. I used only one towel for cutting the 2 pieces.
Have in mind that when you cut terry cloth fabric you will have lots of little fuzzy bits. You can’t avoid that. All those little fuzzy cuts from the pile will fly around and go everywhere. Clean the table right away. Or keep the vacuum cleaner handy. Usually I go outside and give it a good shake so all the small bits go away.
Step 3
Prepare fabric for binding the dog towel coat {the hooded dog towel}
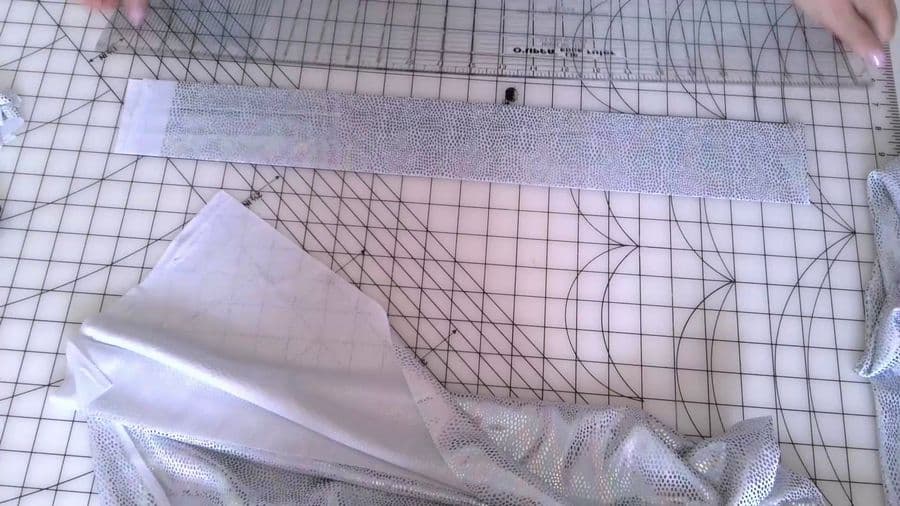
If you will use stretchy fabric you can cut it perpendicular to the selvages but if you choose not stretchy woven fabric (like quilting cotton, for example) you will have to cut bias strips because the towel has a curved shape (not straight edges)
I decided to go with stretchy fabric and cut 3 strips 3 inches wide (the length is from selvage to selvage). It has to be enough to bind the whole towel and the hood.
Step 4
Sew the binding strips together for the dog drying coat
Sew the strips together so that the binding is one continuous piece.
For this cut the selvages first and position 2 strips right sides together perpendicular to each other on a flat surface and align raw edges. You see that the edges of the strips make a right angle. Draw a line with a marker across the pieces to connect the points where they intersect, at an angle of exactly 45 degrees, pin them together and sew along that line. The diagonal seam makes the binding tape less bulky and less noticeable than a straight seam.
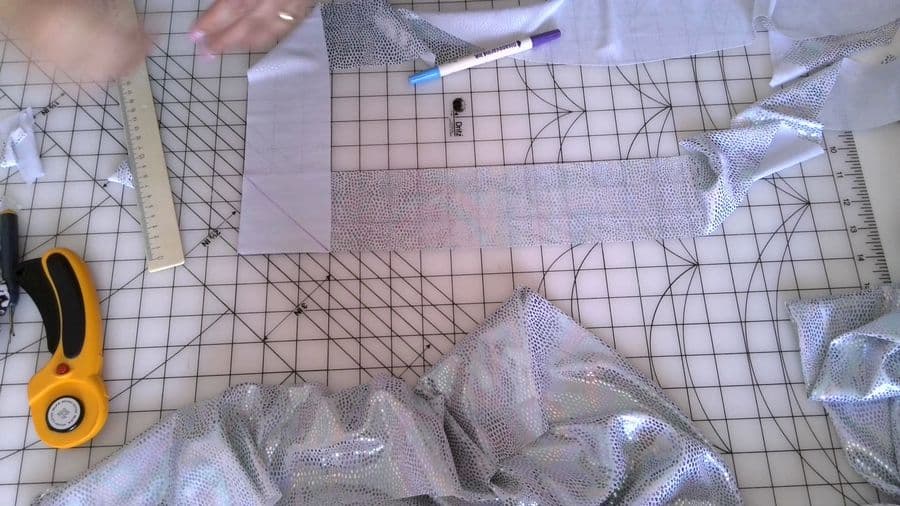
Connect all the strips. Make sure that there is enough length with a margin: measure the approximate perimeter of the towel + about 25 inches to bind the hood.
Fold this continuous piece in half lengthwise wrong sides together and press.
Step 5
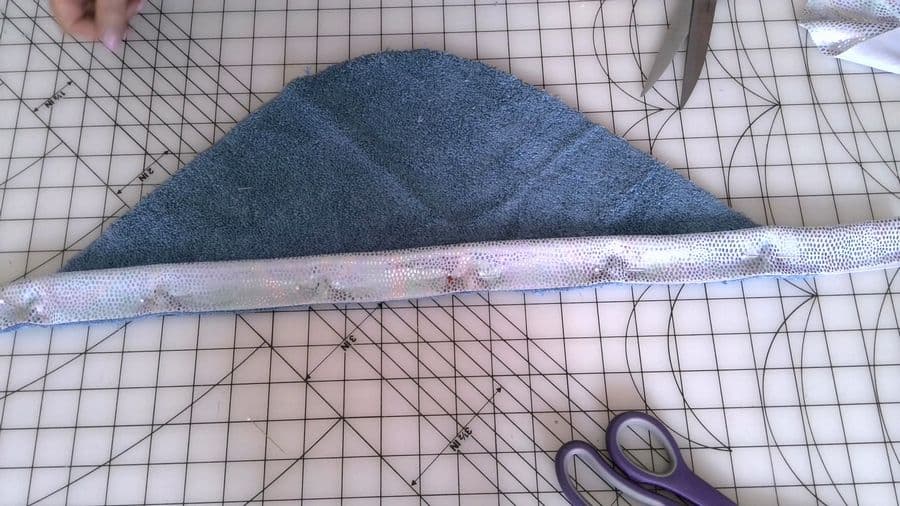
Bind the hood of the dog towel coat {on the straight side}
Prepare your sewing machine to sew thick terry cloth – use thicker needle (size 90/14 universal), strong thread (that doesn’t break easily), make the stitch length around 3 mm.
Cut from the long binding the length that matches the length of the hood.
You should have a long ribbon left for covering the entire perimeter of the towel.
Pin the folded binding to the hood, stitch it with seam allowance ⅜ inch (1 cm). Wrap the binding around the edge and pin it so that the binding edge is going a little bit over stitches.
Step 6
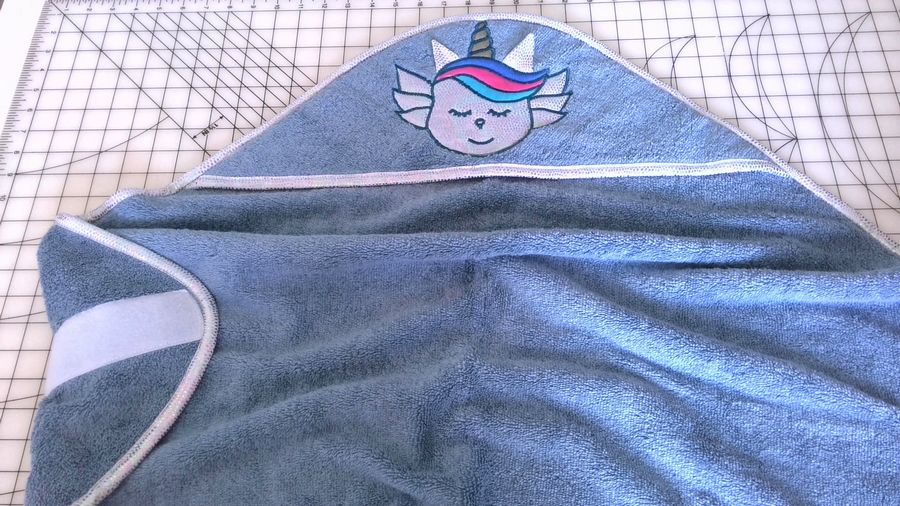
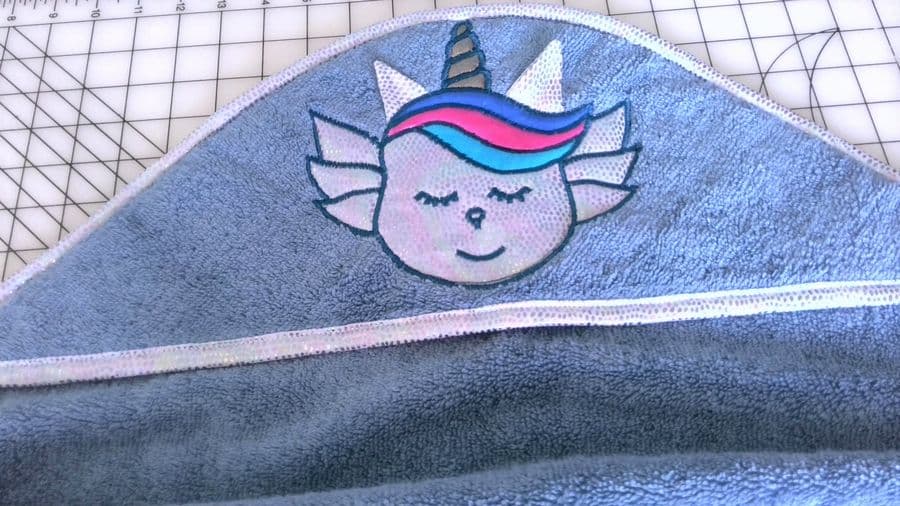
Put an applique or an embroidery design on the hood piece (optional).
You can download the printable drawing for the Unicorn applique in PDF (it’s free).
Step 7
Bind the dog drying towel with the prepared binding strip
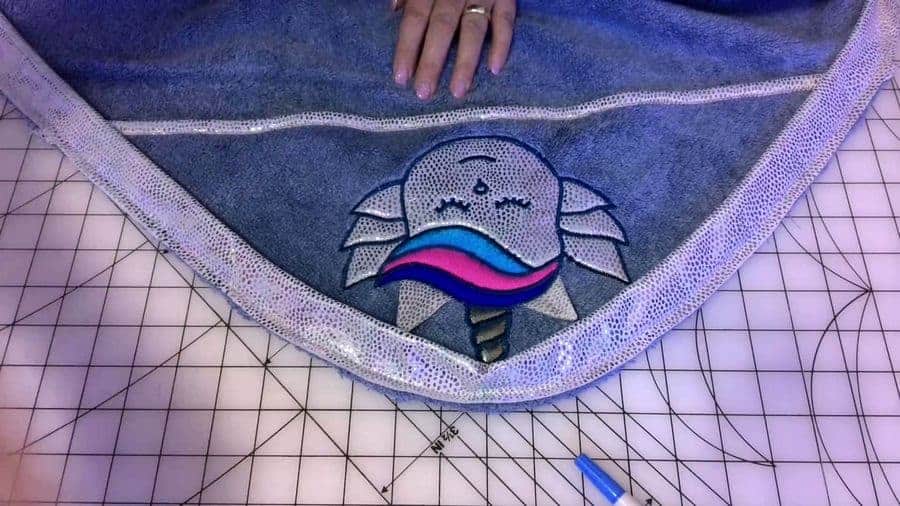
Place the hood on the towel and make sure that all edges are aligned and pin the hood to the fabric to prevent it from moving.
Bind the towel with the binding strip.
It not only finishes the raw edges of the towel, it also decorates your towel with a beautiful finish.
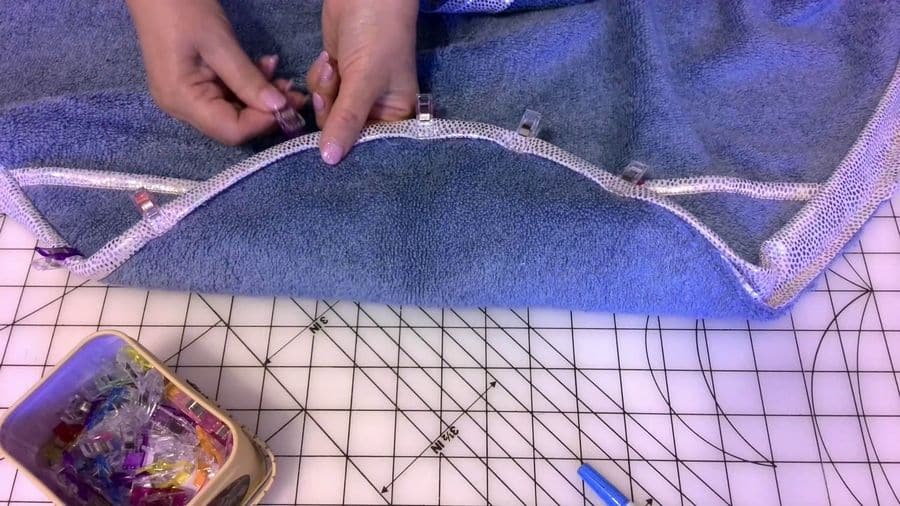
Line up the long raw edges of the binding strip with the raw edge of the towel and pin in place.
I like to use Wonder clips to hold the binding in place. You can buy the whole box of them quite cheap. But they are better than pins for thick fabric and here we have in some places 2 pieces of terry cloth together.
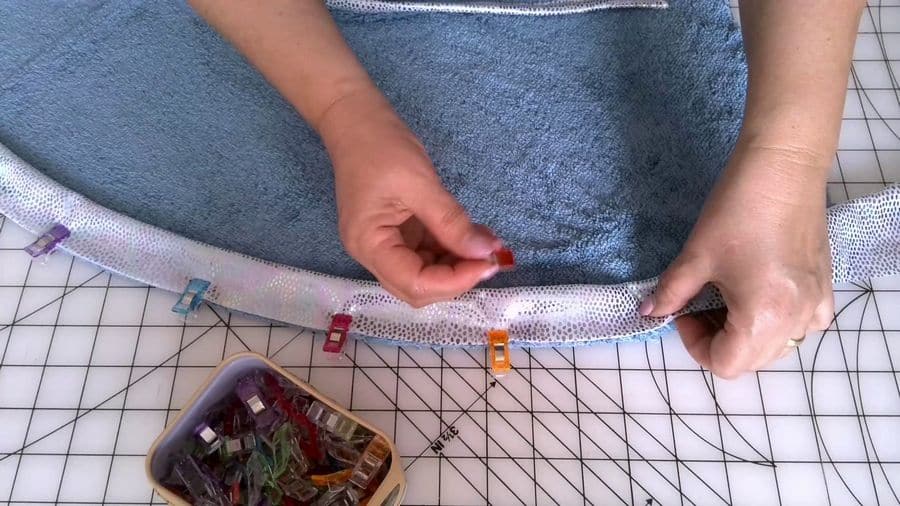
Sew the binding with ⅜ inch (1 cm) seam allowances and fold it over the raw edges.
Begin clipping the binding to the reverse. Work your way around the towel until everything is folded and clipped in place. Make sure the folded edge of the binding strip covers the stitched seam on the reverse of your towel by about 1 mm.
Machine stitch binding in place to finish the towel. In the needle I put thread that matches my binding fabric and in the bobbin I put thread that matches the towel fabric so the stitches blend right in. Stitch the folded edge of binding on one side of the towel, and on the other side you will have almost an invisible line of stitching.
Step 8
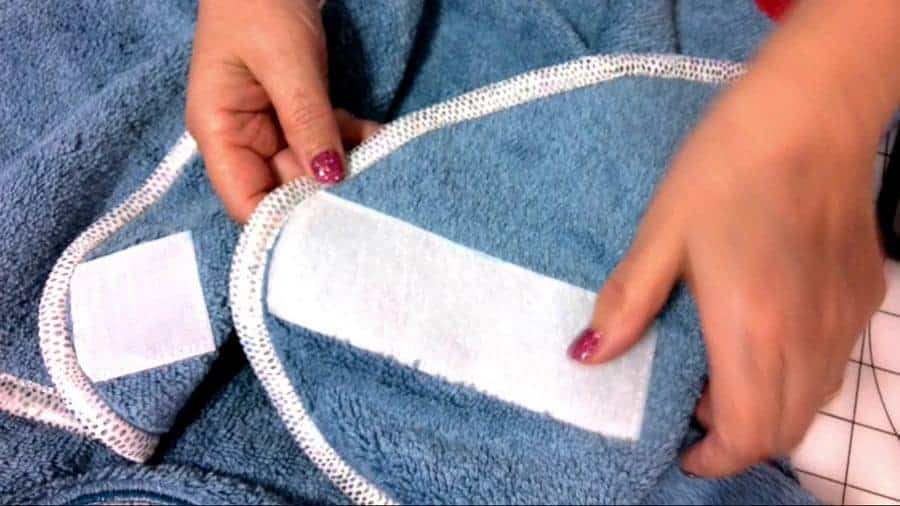
Sew Velcro for securing the hooded towel coat on the dog
For this towel I used wide Velcro strips – 2 inches wide. I made one strip 6 inches long and I cut the other one shorter – about 2 inches long.
Before stitching the Velcro to the towel attach them with fabric glue stick – it will help to sew them easily.
Glue stick and Velcro (or Velcro-like) tape at Amazon:


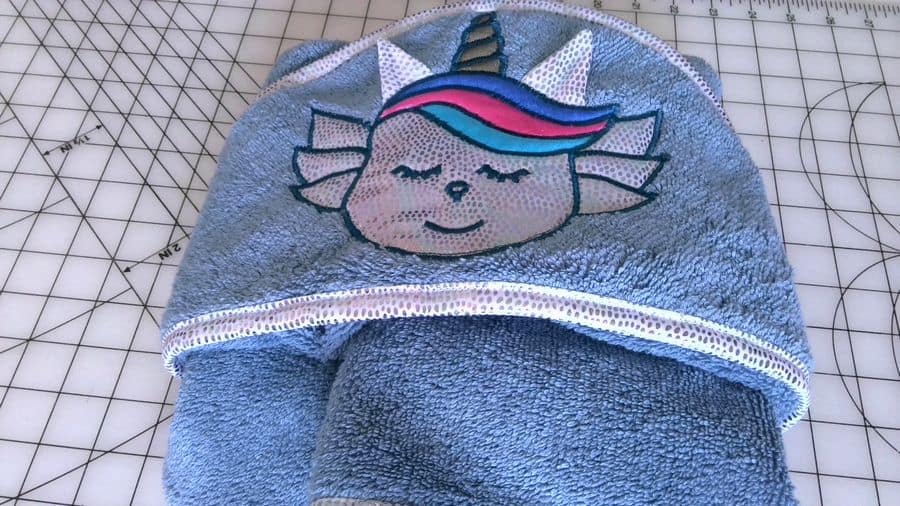
Here is the result.
Did you find this tutorial helpful? If so, save this pin (see below) on your sewing board so you can come to this tutorial later when you are ready to make the dog drying coat and follow me on Pinterest for more tips, tutorials, and inspiration!
latest posts
- What Do You Call a Person Who Sews? I Asked My Readers and Got 1,408 Opinions
- DIY Round Purse: PDF Sewing Pattern and Detailed Instructions
- Mini Wonder Clips By Clover: Useful Sewing Tool Or Just Another Notion?
- Non-Slip Grips For Quilting Rulers: A Small Notion With A Useful Job
- Fabric Eraser for Sewing: What It Removes and When to Use It
- What Is The Best Thread For Sewing Machine Projects? Let’s Find Out!
- Butterfly Quilt Block Tutorial – Foundation Paper Piecing
- How To Sew Quilt Squares So The Corners Match
- Sewing With Fork Pins: How They Help With Pattern Matching, Slippery Fabric, And Seams