An Easy Hanging Kitchen Towel with Plastic Snaps
Snaps are often associated with special tools and extra setup. But these plastic snaps work differently. They install by hand, and that changes how and where they can be used. This tutorial shows a tool-free snap system and explains how to identify the parts and install them step by step.

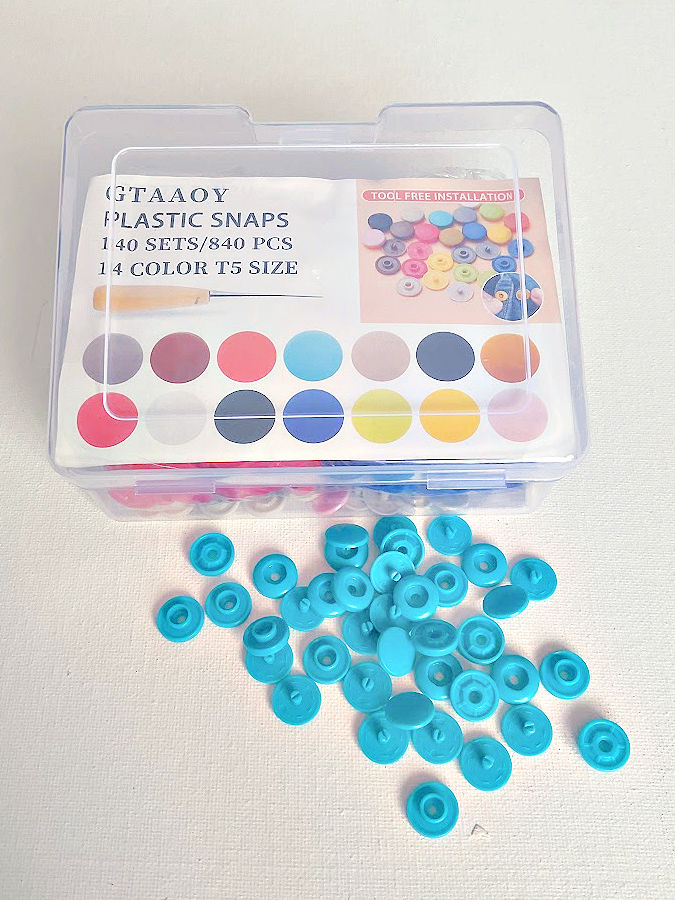
I bought this box of GTAAOY plastic snaps mostly out of curiosity. These snaps are similar to KAM snaps in size and appearance, but the way they install makes a real difference.
Instead of using pliers or a snap press, you put them together with your fingers. That small change removes friction from the whole process and makes them useful for quick projects, simple fixes, and situations where setting up tools feels unnecessary.
I decided to show how they work, how to recognize the snap pieces, and how I used them in a no-sew project that solved a surprisingly persistent household problem.
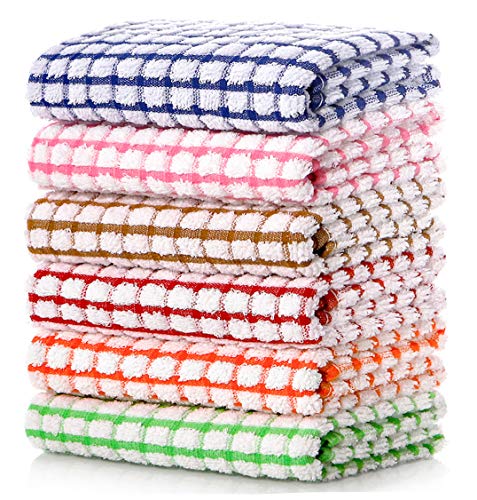
What comes in the GTAAOY snap box
Note: Some of the links on this page are affiliate links. This means I will receive a commission if you order a product through one of my links. I only recommend products I believe in and use myself.
I bought the multi-colored set in the image above; it comes in a box. The set is generous and thoughtfully packed.
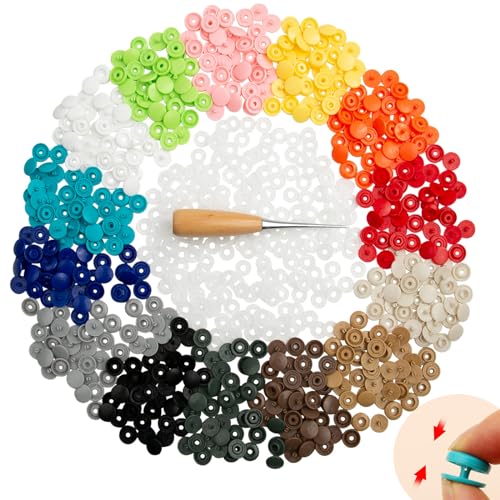
Inside the box, you’ll find plastic snaps in 14 different colors. Each color includes three different types of snap pieces, which are essential for proper installation. Everything is sorted, so it’s easy to grab exactly what you need without digging.
The box also includes a sewing awl designed to make holes in fabric before inserting the snap.

The three snap pieces you need to recognize
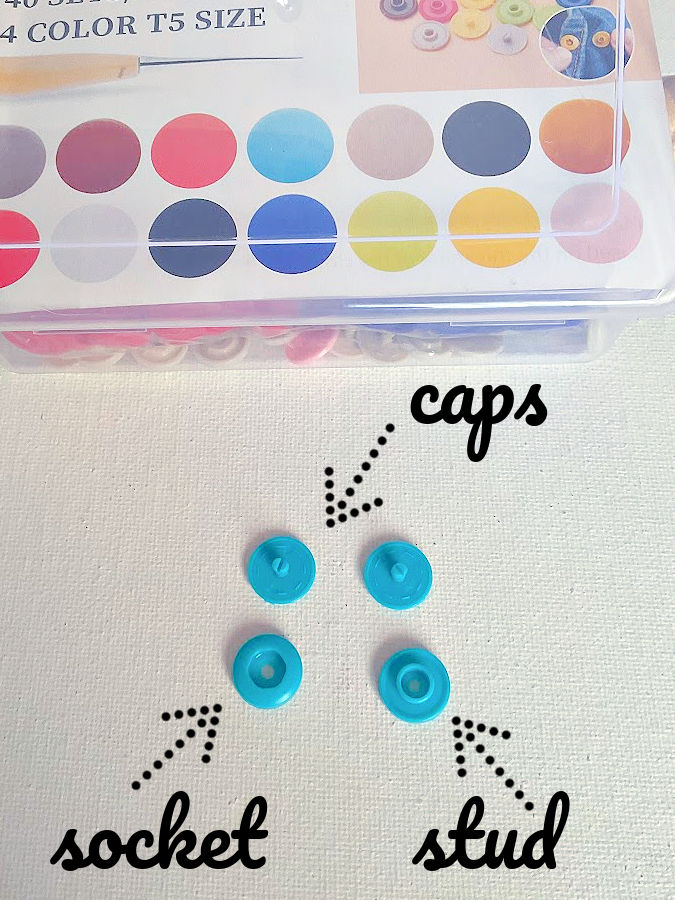
Every snap set uses four tiny parts, and understanding them upfront prevents mistakes later.
- Snap covers (caps with tiny prongs)
This is the visible piece on the outside of your project. It gives the snap a finished look and holds everything together. You will use two for each snap, one for the stud and one for the socket. - Stud
This piece has a raised center. It clicks into the socket when the snap is closed. - Socket
This piece has a recessed center.
The stud and socket only work when paired correctly, so it helps to take a moment and look closely before installing anything.


How to install GTAAOY plastic snaps step by step
The installation process is straightforward, but the order matters. The box includes brief instructions, and I’ll walk through the steps here with photos.

Step 1: Choose your color
With 14 colors available, matching your fabric or adding contrast feels easy.
Step 2: Decide how the snap should close
Before making holes or inserting snaps, close the fabric the way you want it to sit when finished. This tells you which side needs the stud and which side needs the socket.
This step takes a moment, but it prevents installing snaps backward.
Step 3: Make a hole
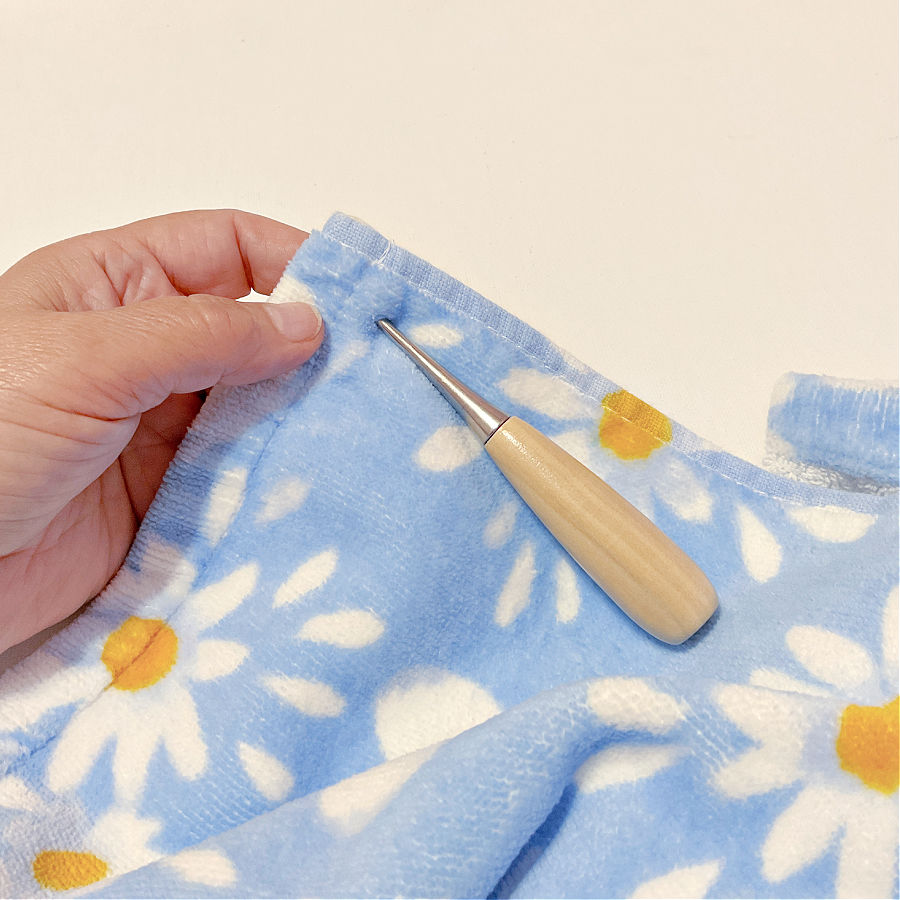
Use the included awl to create a small hole through the fabric where the snap will sit. The hole should be just large enough for the snap prong to pass through.

Step 4: Insert the snap cover
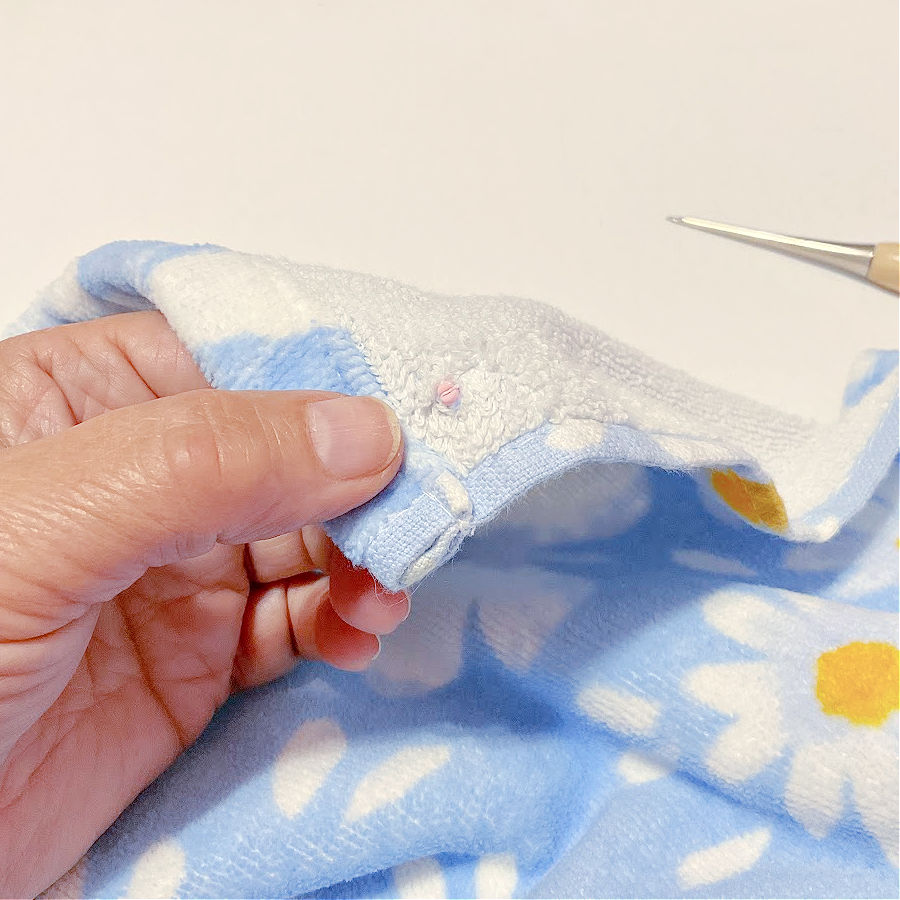
Push the cap through the hole from the right side of the fabric. This will be the cap for the stud part.
Step 5: Add the stud
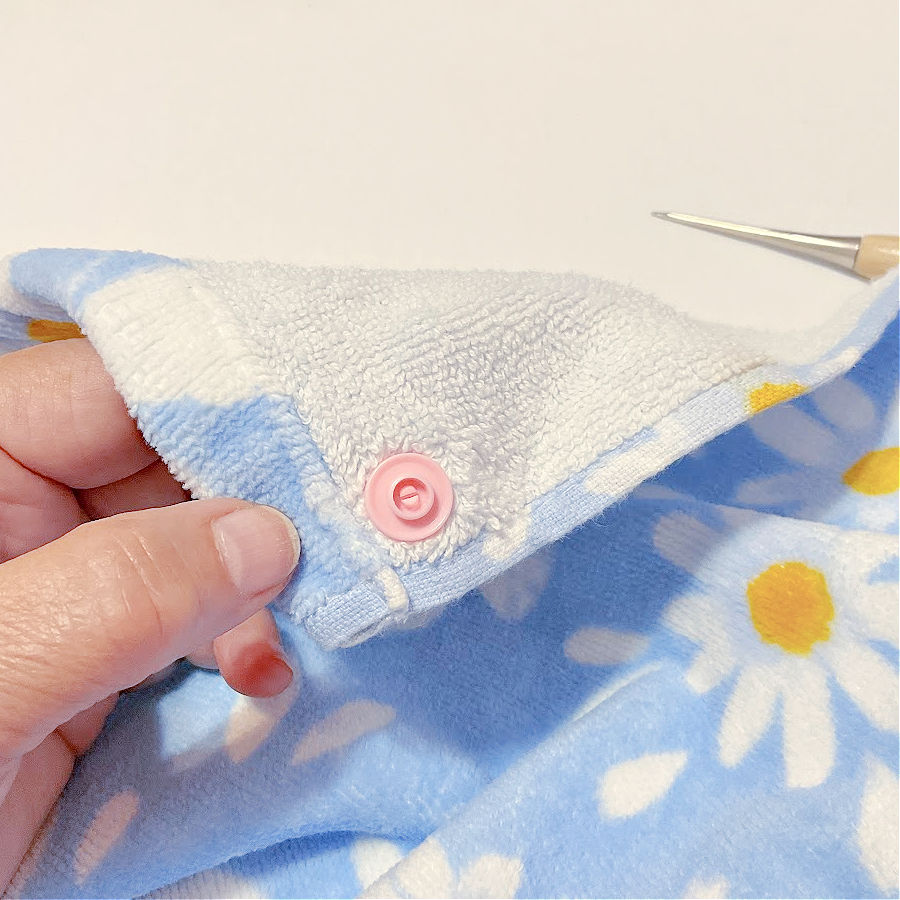
On the wrong side of the fabric, place the stud onto the snap prong.
Step 6: Press the snap together
Press the pieces together firmly with your fingers. When the snap locks into place, you’ll feel resistance release and hear a small click. That sound tells you the snap is fully engaged.
At this stage, you have only one side of the closure in place. A snap always works as a pair, so the second half must be installed on the opposite fabric edge.
Step 7: Install the socket and it’s cap
Bring the fabric pieces together the way they should sit when closed. This helps you mark the exact position for the second snap.
Then repeat steps 5 and 6 for the socket and it’s cap.
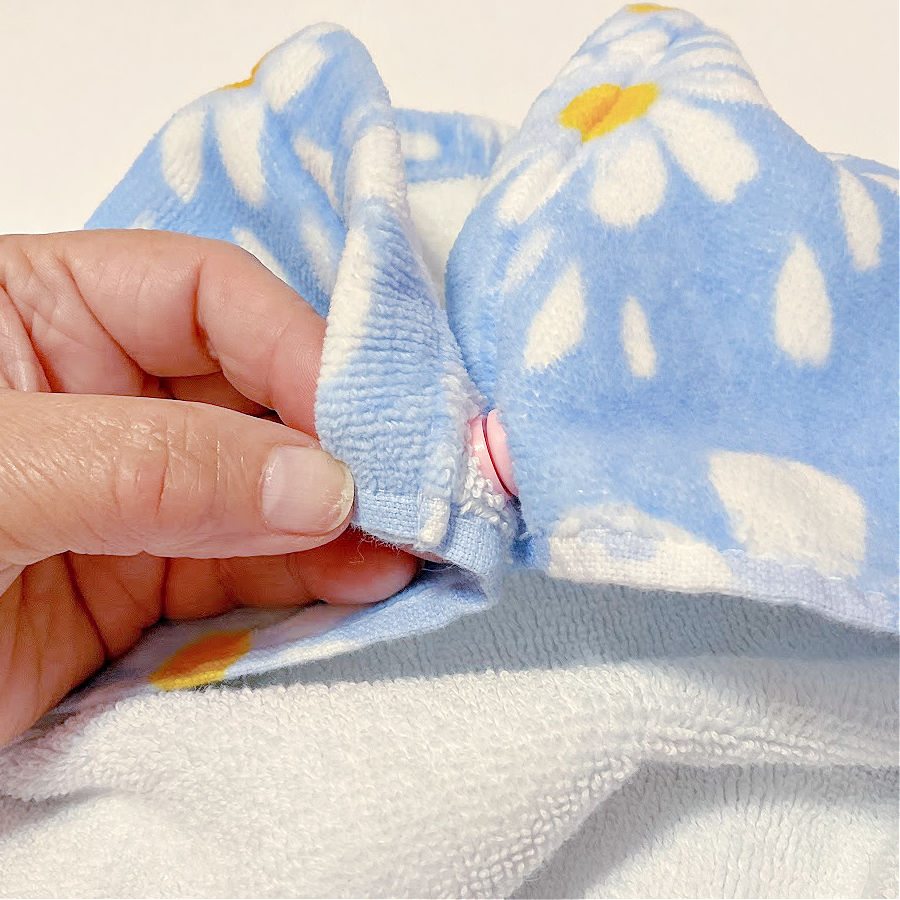
Use the awl to make a hole in the corresponding spot on the opposite side. Insert the cap but this time from the wrong side of the towel. Then add the socket piece, this will be on the right side now. Press the snap together with your fingers until it locks.
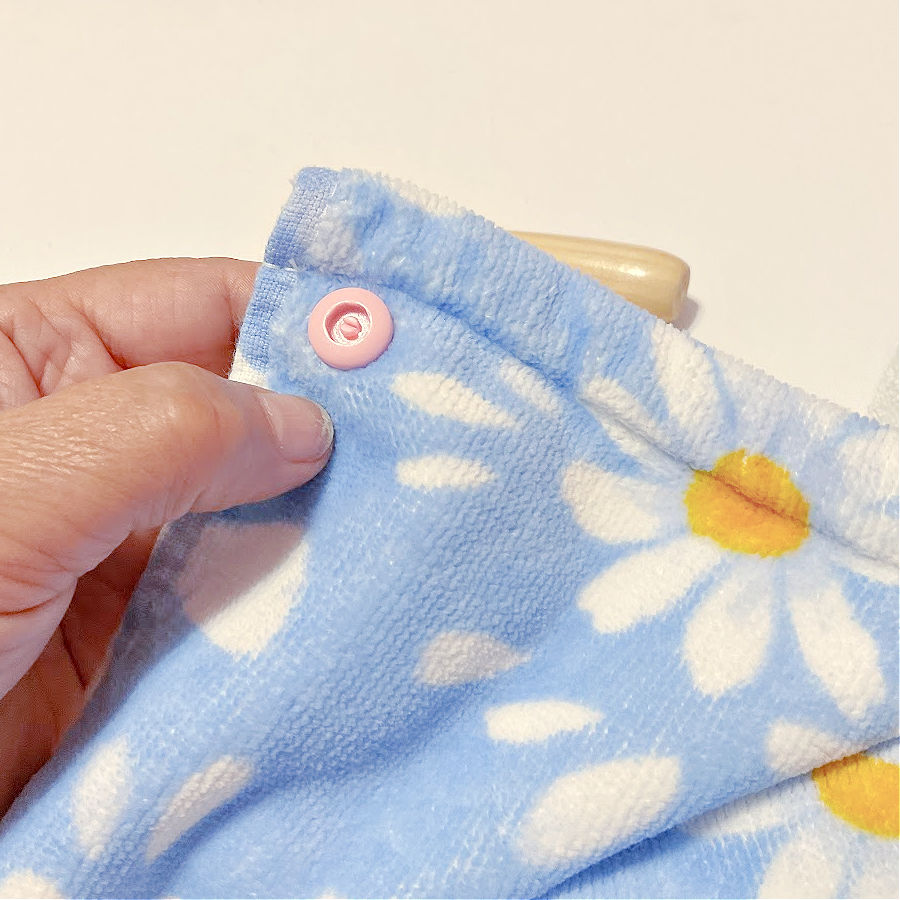
Once both snap halves are installed, the pieces will close securely and open easily when needed.
A no-sew kitchen towel project that solved a real problem
This is where these snaps earned their praise.
I stayed in my daughter’s house for a while. She has three cats. One of them developed a nightly habit of stealing the kitchen towel from the oven handle and carrying it upstairs. Every single night. Always to the floor.
Different towels did not help. Folding did not help. Placement did not help.
So I stopped fighting the cat and changed the setup.
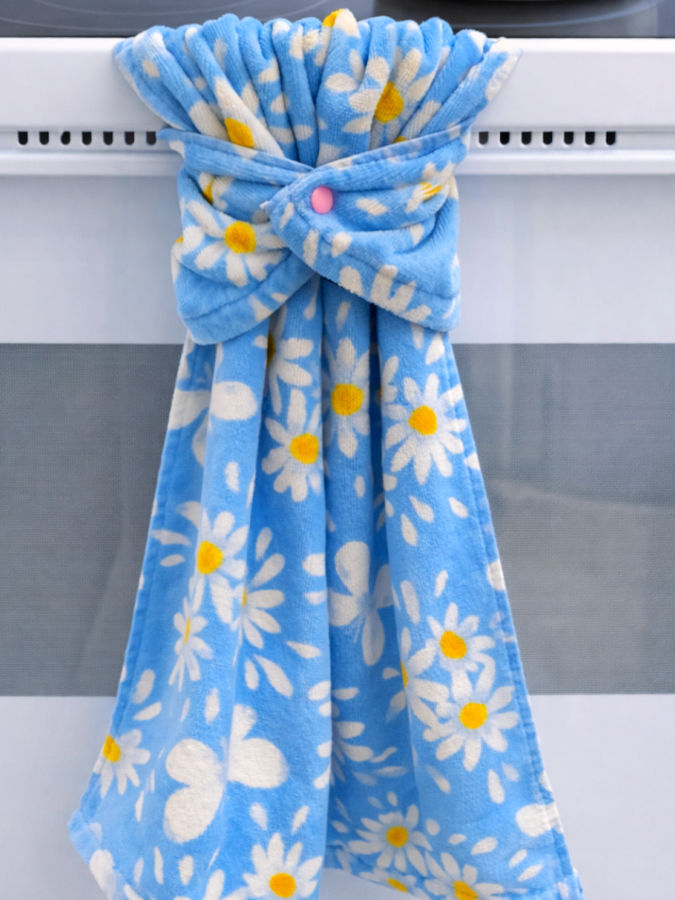
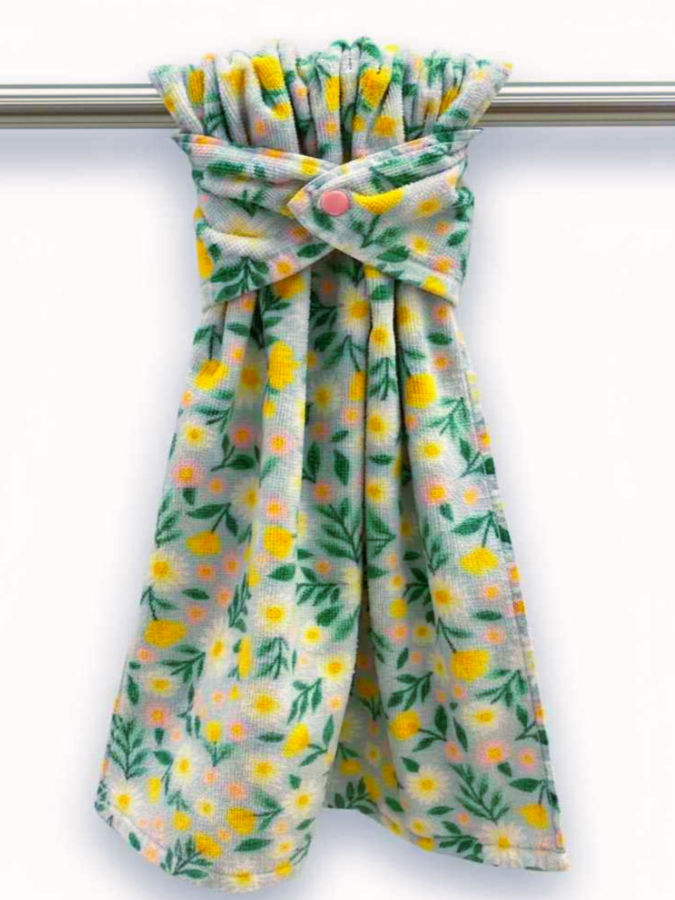
I added plastic snaps to the towel so it could wrap around the stove rod and close securely. I didn’t alter the towel itself in any permanent way. I simply added snaps to the ends.
The towel stayed exactly where it belonged. The cat lost interest. Peace returned to the kitchen.
Many people sew special towel toppers for the kitchen. Those projects usually involve cutting the towel, adding a fabric band, sewing on buttons or Velcro, etc.
This snap version works in a very similar way, but the process is much simpler. Instead of sewing a separate topper, the towel wraps around the stove rod and closes on itself with snaps. The towel stays whole, and nothing extra is added.
If you want to give these snaps a try, you may be interested in my other articles about installing KAM snaps (which need a tool for installation).
- How to Install and Use KAM Snaps: A Step-by-Step Tutorial
- Easy Fabric Tray DIY with Snaps – Free Pattern and Step-by-Step Guide
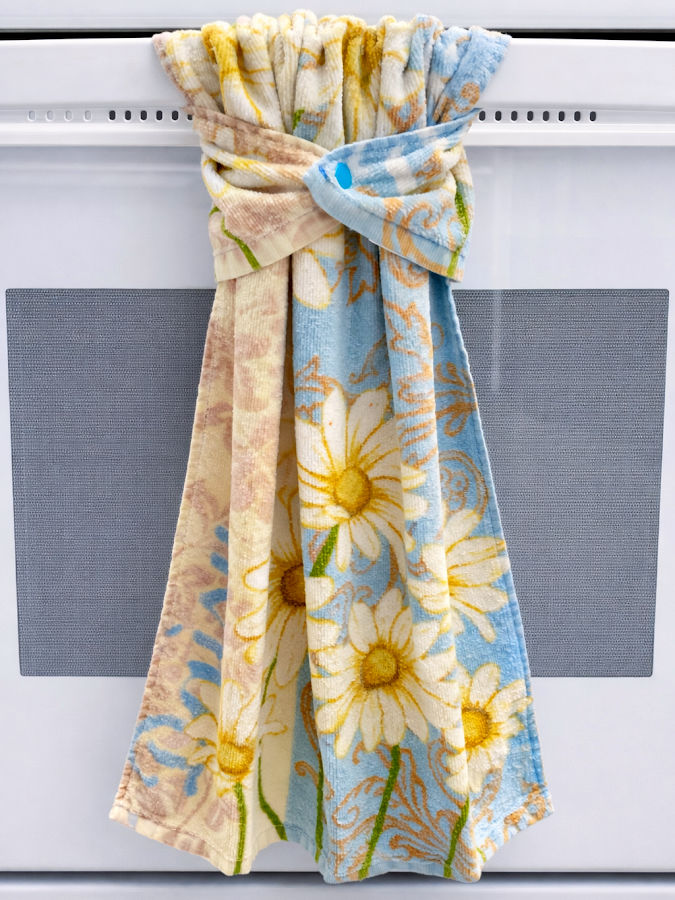
The snaps do the same job as a topper. They hold the towel in place, keep it from sliding off, and allow it to hang neatly. When you want to remove the towel, you just unsnap it. There’s no cutting, no measuring, and no construction beyond placing the snaps.
What I like about this approach is that the towel stays flexible. You can use it as a regular towel, wash it easily, or move it to a different spot.
Why plastic snaps work so well for projects like this
These snaps hold securely but still open easily when needed. They don’t distort lightweight fabrics, and they don’t require reinforcement stitching for simple uses.
They can be used for many projects:
- kitchen and bathroom towels
- baby and doll clothes
- pet accessories
- lightweight home décor
- quick closures on fabric items
Final thoughts
What I like most about these GTAAOY plastic snaps is how approachable they feel. The lack of tools removes hesitation. The installation is quick. The result feels finished.
They encourage problem-solving instead of workarounds. Instead of tying knots, using clips, or accepting inconvenience, you can add a snap and be done.
Total time to install the snap? Frankly, the most difficult and time-consuming part of the project was deciding which corners shall I use!
Want to see it in action?
I filmed a quick reel showing how I used these snaps to keep a kitchen towel from sliding off the stove. You can see exactly how it works from start to finish. You’ll find it on my Facebook page. While you’re there, feel free to follow the page for more sewing tips and real-life projects.

This is a simple idea you might want to keep. Save the pin below so you can return to the tutorial later, and follow me on Pinterest for more sewing tutorials and practical projects.

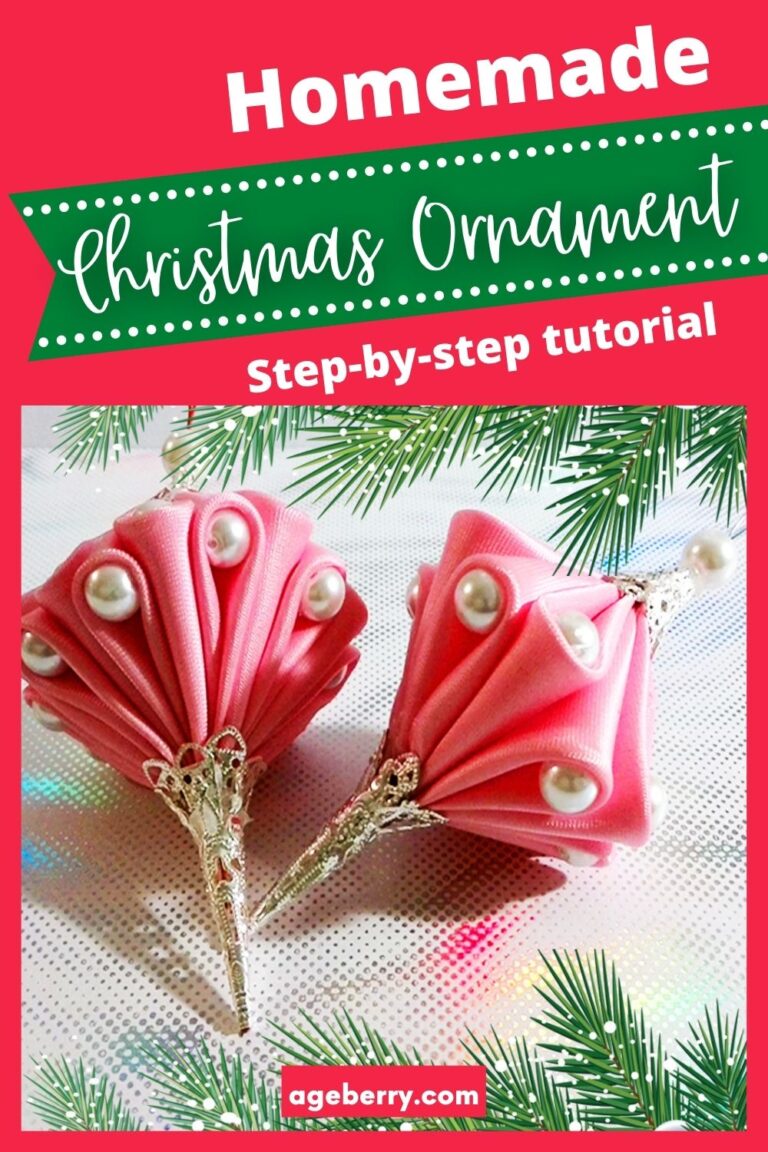
latest posts
- Butterfly Quilt Block Tutorial – Foundation Paper Piecing
- How To Sew Quilt Squares So The Corners Match
- Sewing With Fork Pins: How They Help With Pattern Matching, Slippery Fabric, And Seams
- How Much Fabric Do I Need? 21 Helpful Tips For Calculating Fabric Yardage
- Easy Simple Sewing Project: Fabric Jar Opener
- DIY Oven Mitts: Step-by-Step Sewing Tutorial
- Easy DIY Potholder: New Design
- Tailor’s Clapper: What It Does, Why It Works, And How To Use It Right
- Heat Resistant Batting for Sewing: What It Is, How It Works, and What Makes a Difference