
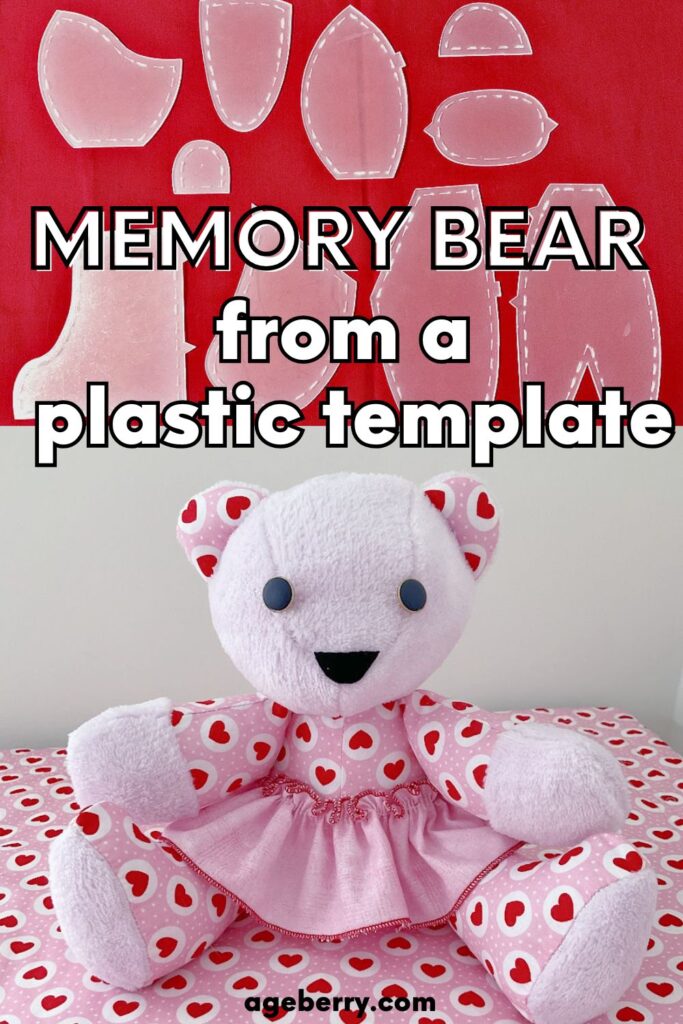
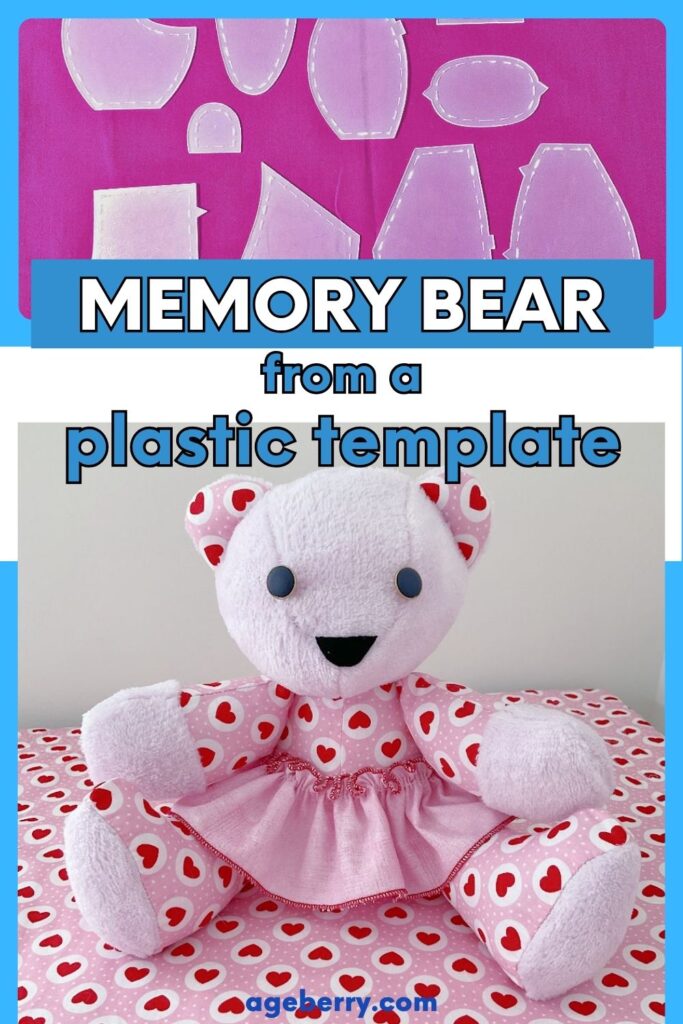
My Adventure with a Memory Bear Template: The Good, the Bad, and the Adorable
Over the past year, I have noticed a growing trend in the sewing world – ready-made plastic templates and patterns. You can find them on Amazon, Temu, and in some craft shops. They come in all shapes and sizes, ready to help you whip up everything from bowl cozies and keychains to cat bandanas, doll clothes, and even blouses. There are quilting shapes, drawstring bag patterns, and much more.
If you’ve ever worked with a paper pattern and accidentally crumpled it, traced it so many times it started curling, or found that it mysteriously shrank (coffee spill, anyone?), you’ll understand why I’m so happy about these new plastic versions.
Why plastic sewing templates are worth a try:
- Durable and reusable – They don’t tear, wrinkle, or get floppy like paper patterns. You can use them again and again for years.
- Easy to trace – Just lay them on your fabric, mark around them, and cut. They don’t shift as easily as paper, especially if you use pattern weights.
- Consistent accuracy – They keep their shape, so your cuts stay identical every time.
- Seam allowances included – Many have this built in. No extra measuring.
- Clear design – Some are transparent, which helps you see your fabric placement for perfect pattern matching.
- Great for repetitive projects – Ideal when making multiples of the same design.
Note: Some of the links on this page are affiliate links. This means I will receive a commission if you order a product through one of my links. I only recommend products I believe in and use myself.
You can find plastic templates for almost anything:
Quilting shapes like hexagons, triangles, Dresden plates, etc.


Bowl cozies and potholders, Keychains and small pouches


Women’s blouses, or perhaps Purses and bags ,


And of course… bears


For this project, I decided to try a memory bear template. I wanted to see how these work in real life, from first cut to final stitch.
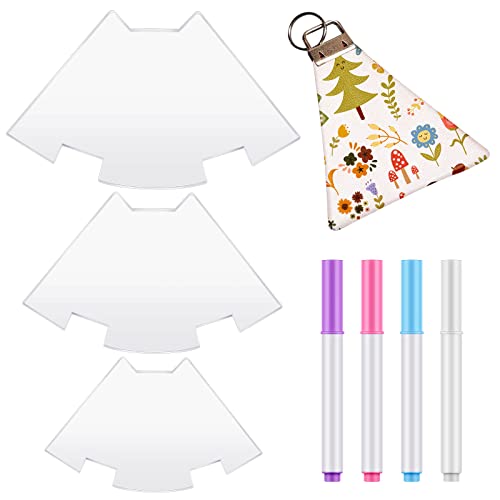
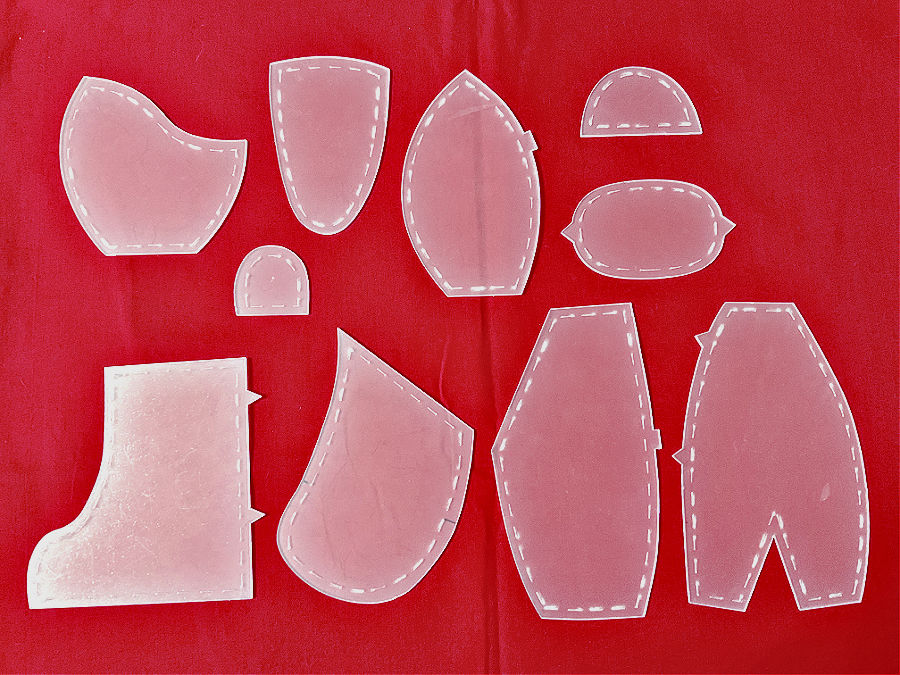
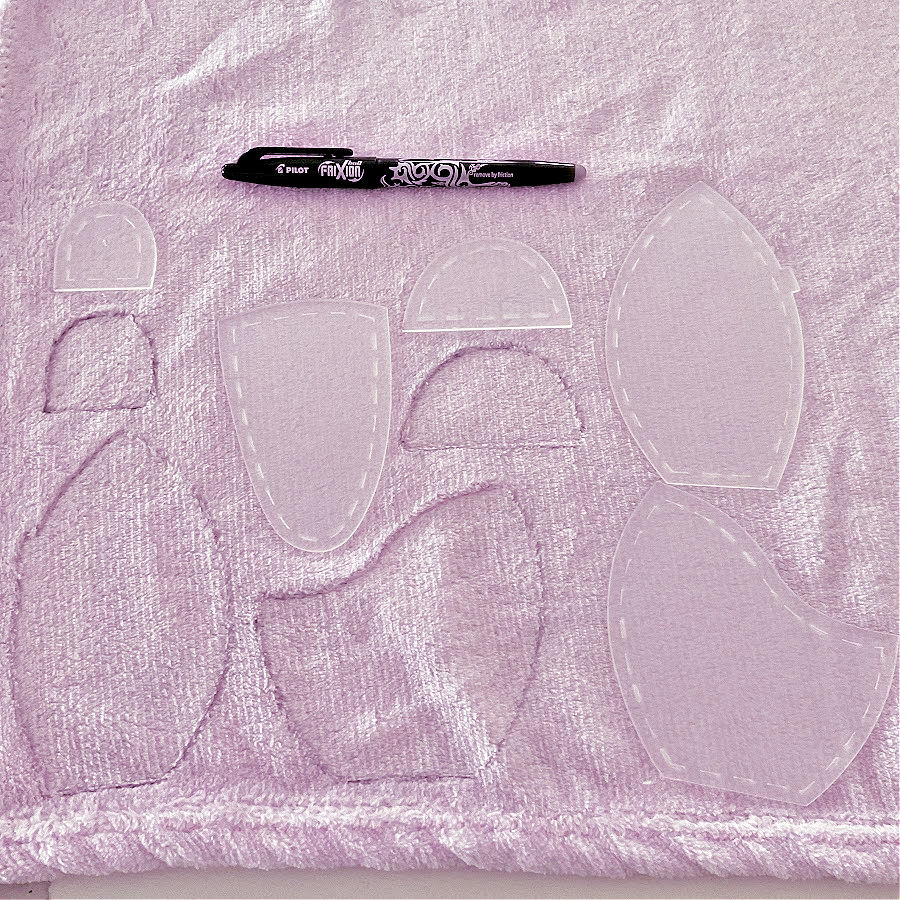
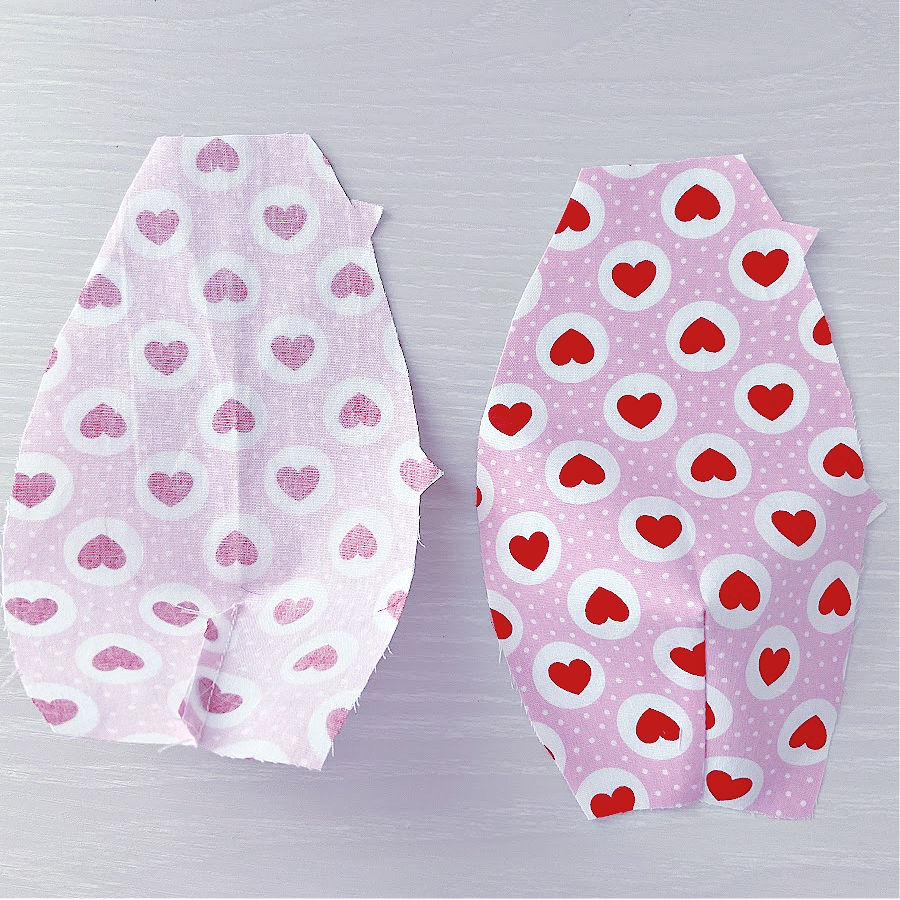
The exact template I used is the one in the left image above; I suspect Amazon uses a stock image because the two set of shapes are clearly different while the bear shown in the images is the same. The shapes from the template I used are below:
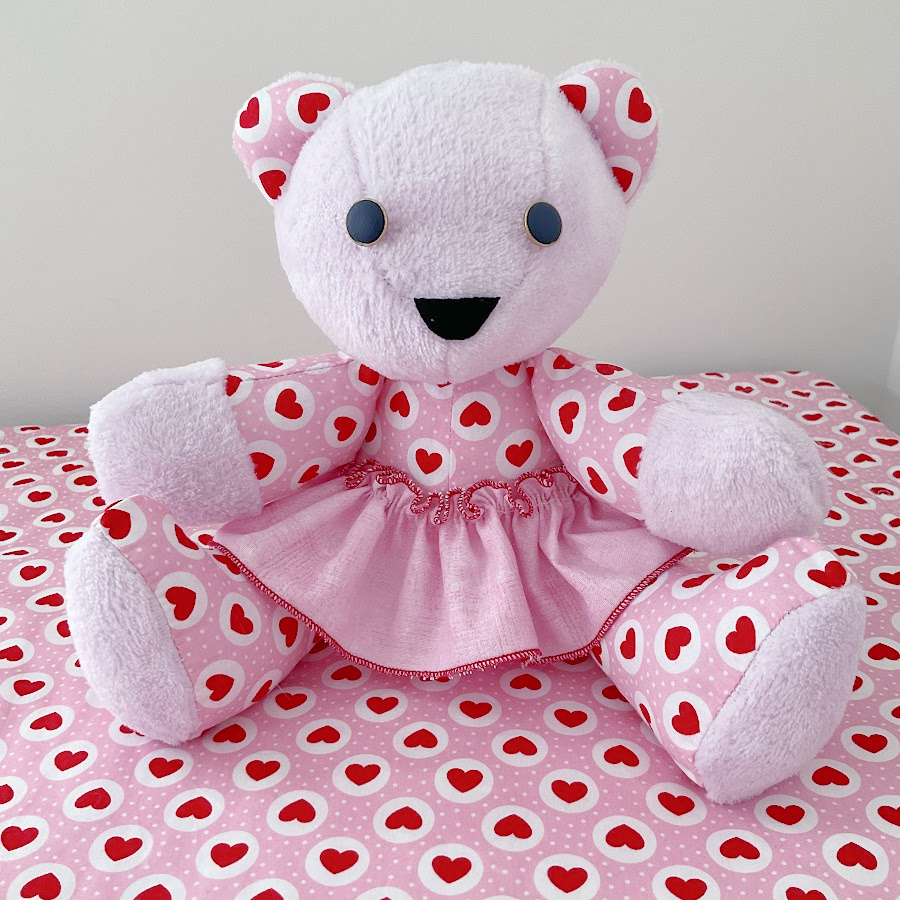
Despite some drawbacks, my bear turned out very cute. And since the pattern itself had no clear instructions, I’ll walk you through exactly how I made mine.
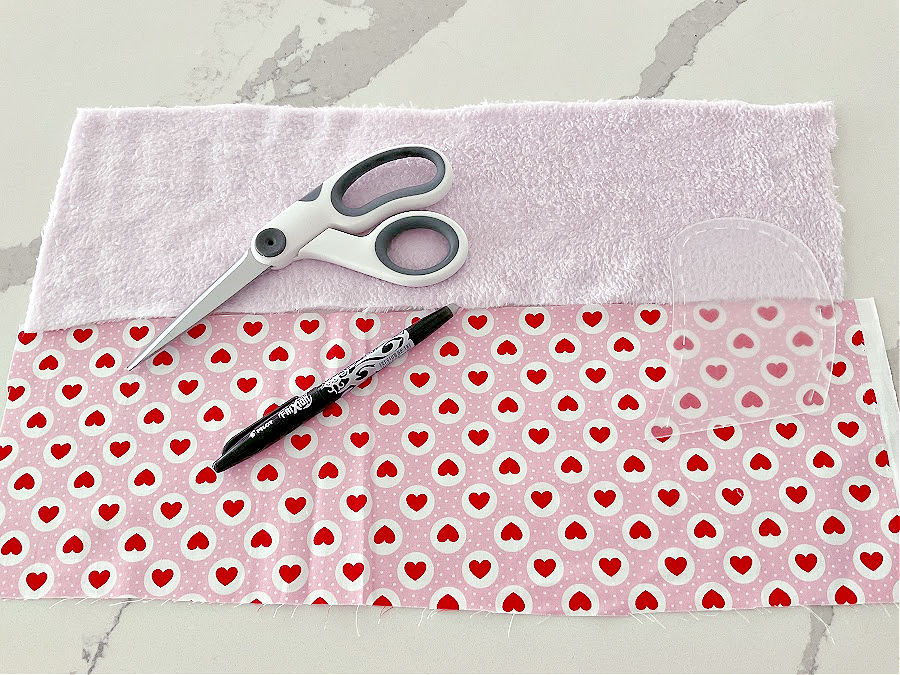
Step 1: Prepare Your Fabric and Tools
Fabric used
For toys like this bear, you don’t need much fabric. I chose two different fabrics to give mine personality and texture:
- Minky plush fabric in a soft pink. I actually repurposed this from a baby blanket from the dollar store. It’s wonderfully soft and perfect for stuffed animals.
- Quilting cotton in a coordinating print.
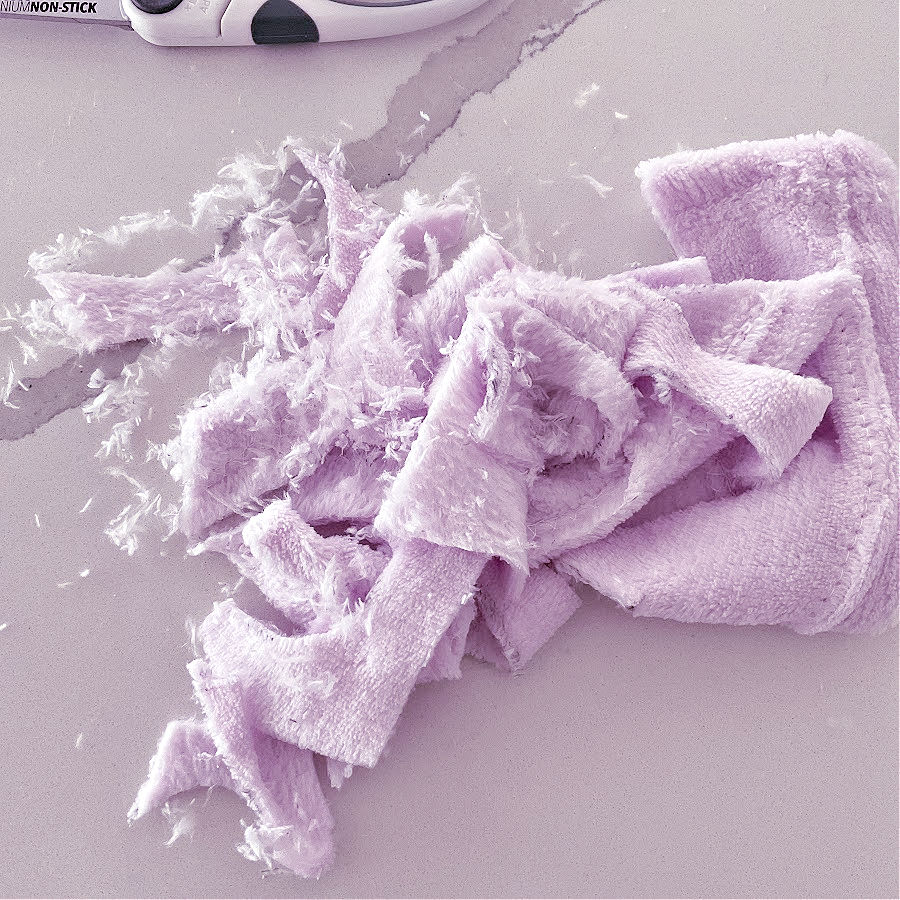
A quick note about minky: This fabric is silky-soft and has a short, dense pile that makes toys extra cuddly. It does shed when cut, so don’t be surprised if you find fluffy bits clinging to everything in sight. A mini vacuum cleaner comes in handy here!
✅ Related tutorial: Choosing a Mini Vacuum for Sewing Machine
Tips for Cutting Minky Plush Fabric:
- Cut over a large tray or on a surface you can easily clean, because minky bits like to travel.
- Shake each cut piece outside or over a trash can before bringing it to your sewing machine.
- Keep a small vacuum and a lint roller nearby. They will be your best friends!
Other supplies I used:
- Frixion pen for drawing pattern lines.
- Standard sewing tools (machine, scissors, pins, etc.).
- Needle and thread for some hand-sewn seams.
- Stuffing
- Two buttons for the eyes.


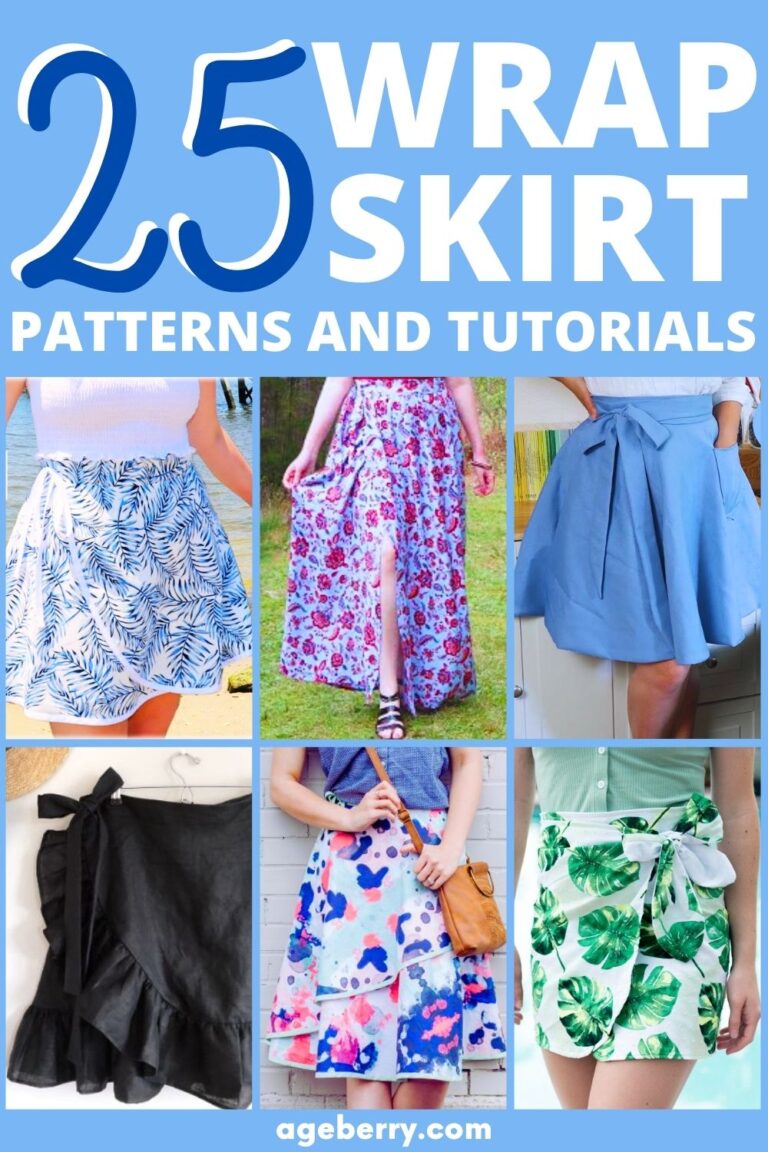
Optional: I also made a skirt for my bear. That part wasn’t included in the template, but I couldn’t resist dressing her up. I like skirts!
✅ Related tutorial: DIY Skirt Inspiration: 10 Sewing Tutorials for Every Skill Level
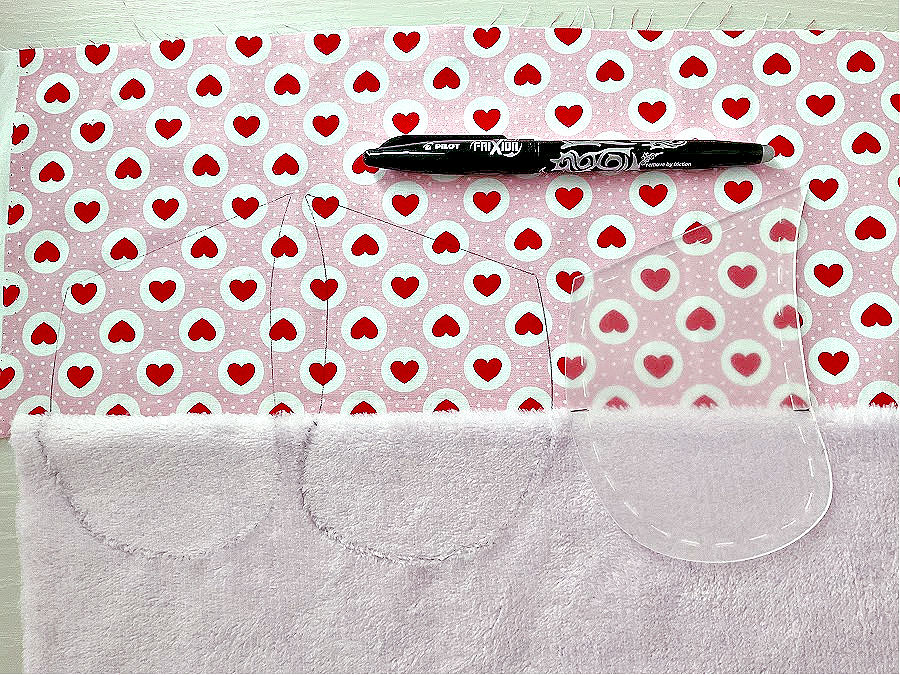
Step 2: Cutting the Fabric with the Templates
These plastic templates make the cutting process straightforward, but you do need to pay attention to how the pieces are mirrored and how many of each you’ll need. I used my Frixion pen to trace around each template directly onto the fabric. The pen marks will disappear with heat later, so it’s perfect for this step.
The templates are designed so that you only get one shape for symmetrical pieces. For example:
- Legs – The template for legs has two plastic shapes. You will need 4 pieces total of one: 2 for the front of the legs, 2 for the back of the legs, plus 2 pieces for the other (sole) for the bottom of the feet.
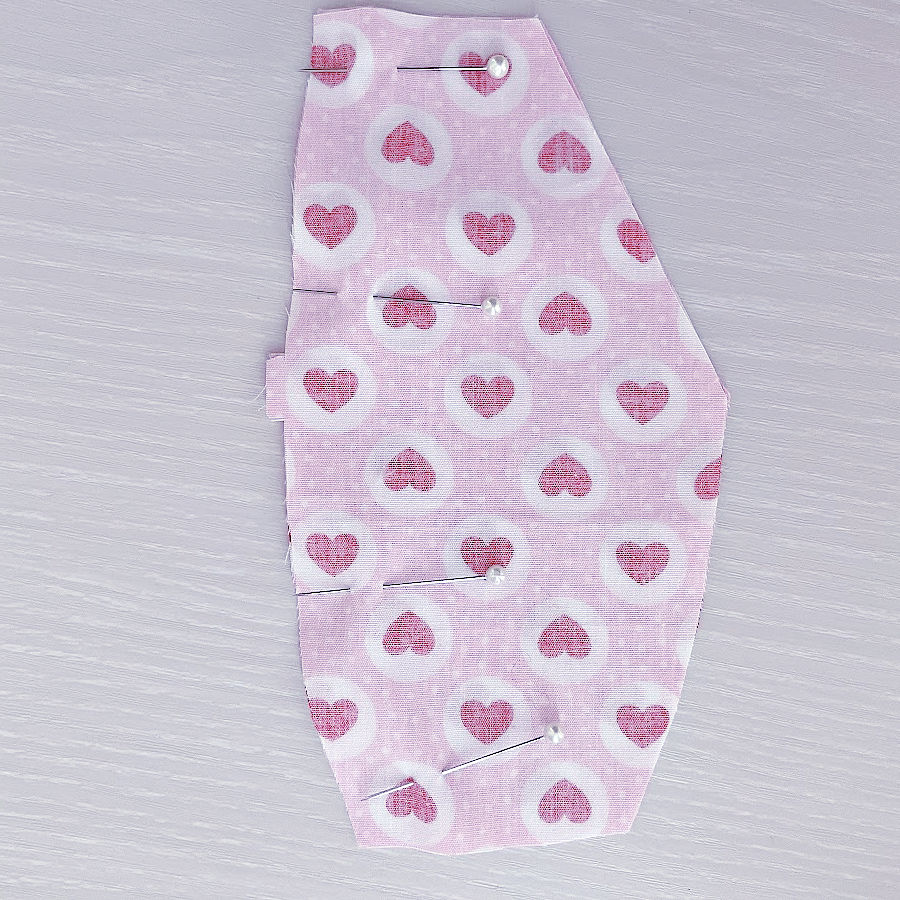
- Body Front – The template is for one side. You’ll need 2 pieces for the front, which will be sewn together down the center seam.
- Body Back – Same as the front, but note that these pieces have darts. The darts help shape the bear’s back. You’ll need 2 pieces.
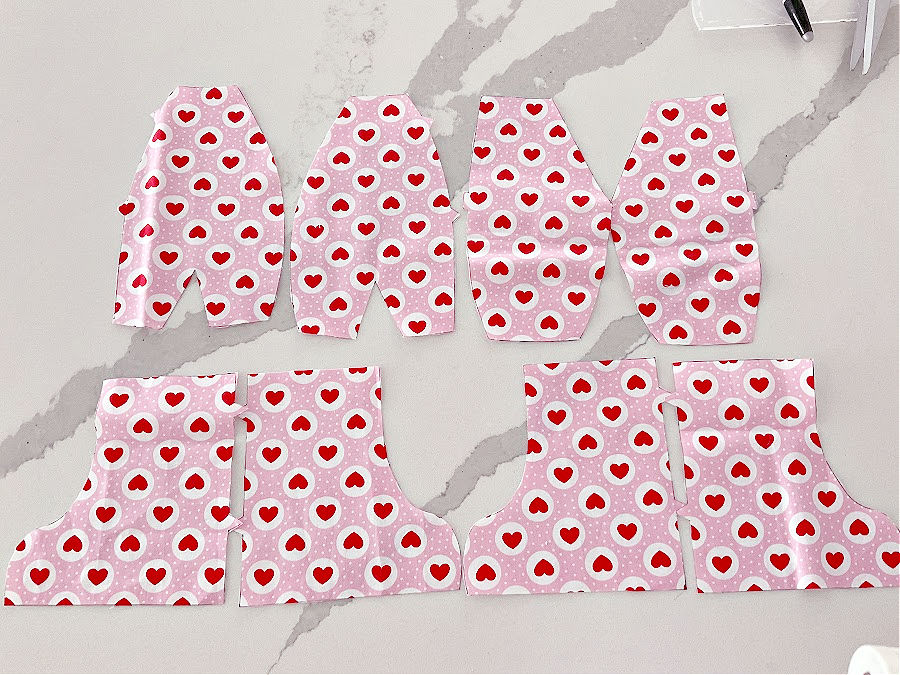
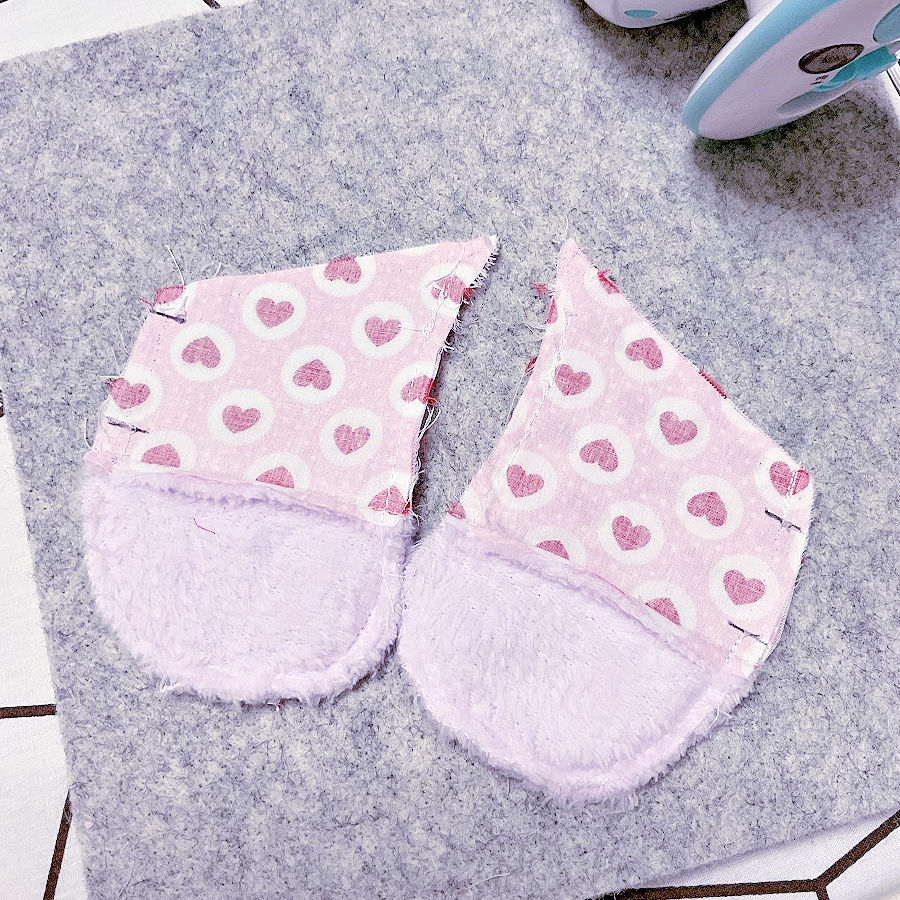
- Head – The head is the most complex part. There are 9 pieces total, but only 4 different template shapes: side head, center head, back head, and ear. I cut almost all head pieces from minky, but for the ears I used half minky (back part) and half quilting cotton (front part) for extra charm.
- Arms – The template is for one arm piece. You’ll need 4 pieces total. I decided to make the arms half minky, half quilting cotton for contrast. Instead of cutting each arm piece separately, I took a shortcut: I cut two rectangles of minky (16 x 4 inches) and two rectangles of quilting cotton (16 x 5 inches), sewed each minky/cotton pair together along the long edge, pressed them, and then used the arm template to cut 4 pieces. This gave me perfectly matched two-fabric arms.
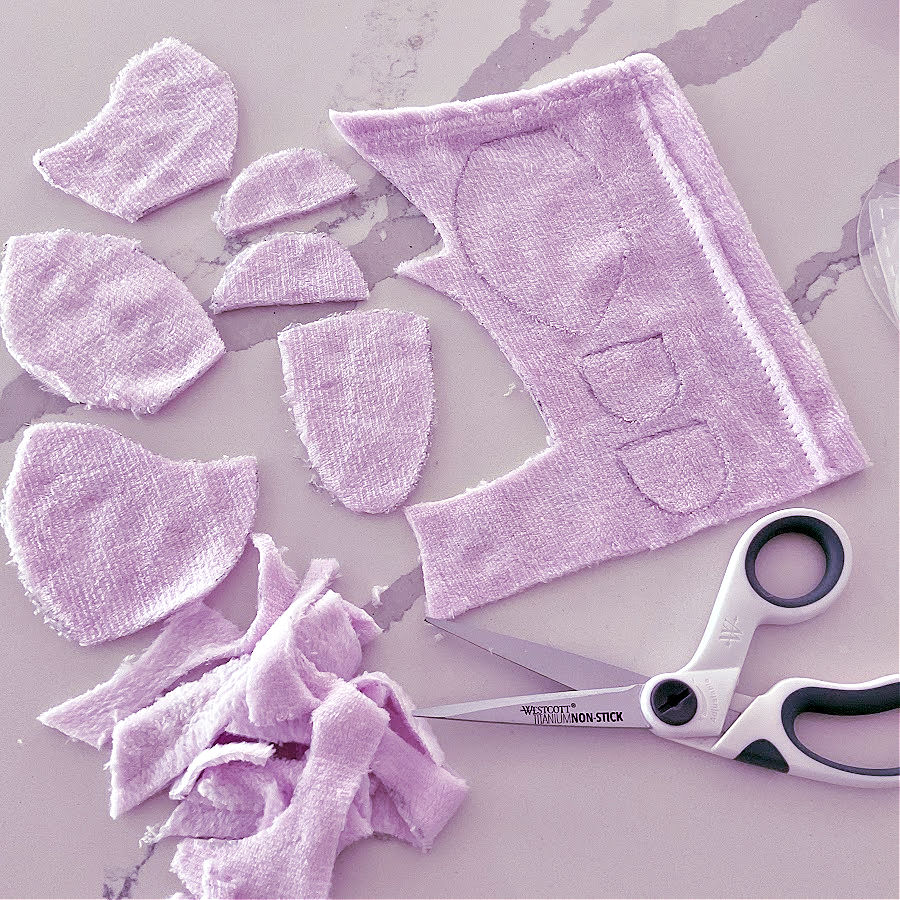
My fabric choices:
- Minky plush – Almost all head pieces, the soles of the feet, and part of the ears and arms.
- Quilting cotton – Most body pieces, legs, and part of the ears and arms.
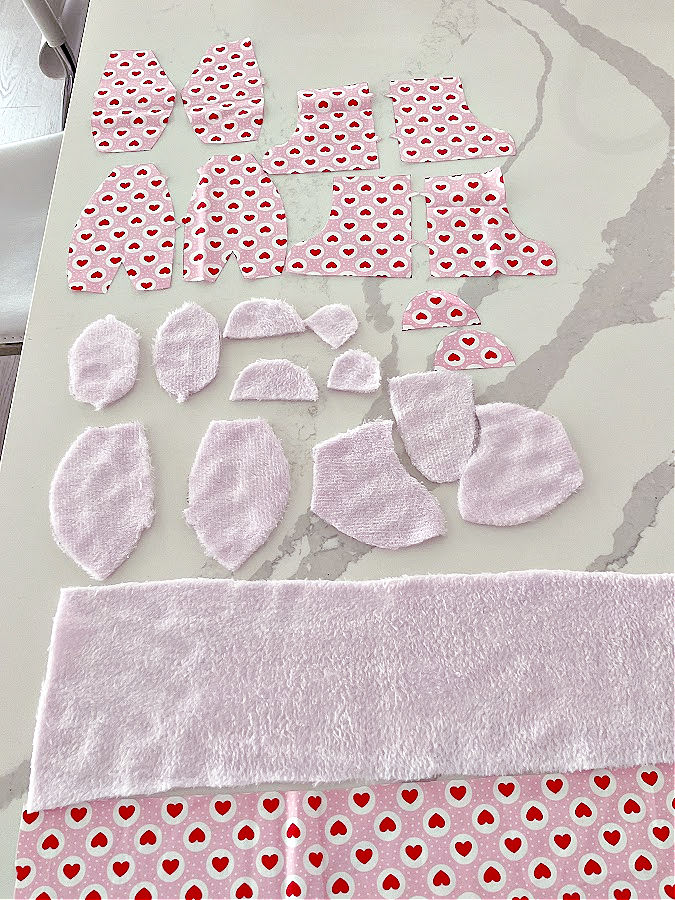
In the image above the arm pieces are not yet cut (will be cut from the two strips at the bottom), all other pieces are ready.
Tip: When working with minky, cut slowly and shake each piece outside or over a bin to control the fluff. It will save your sewing area from looking like it snowed indoors.
Step 3: Start Sewing the Head
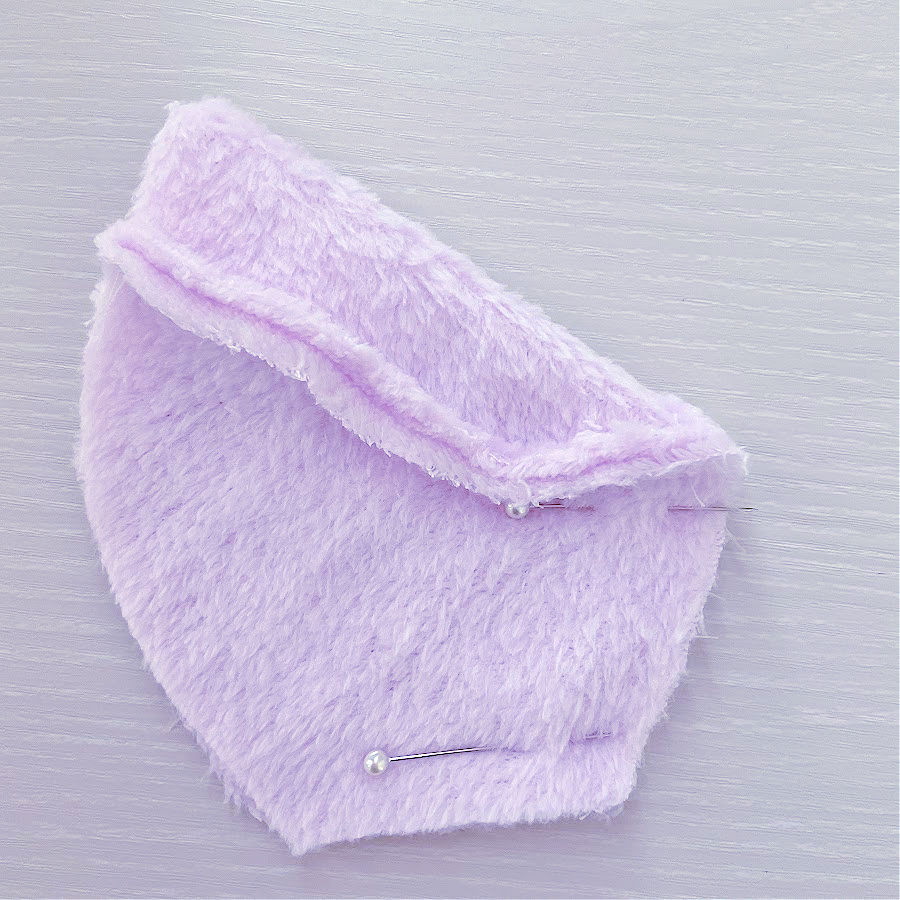
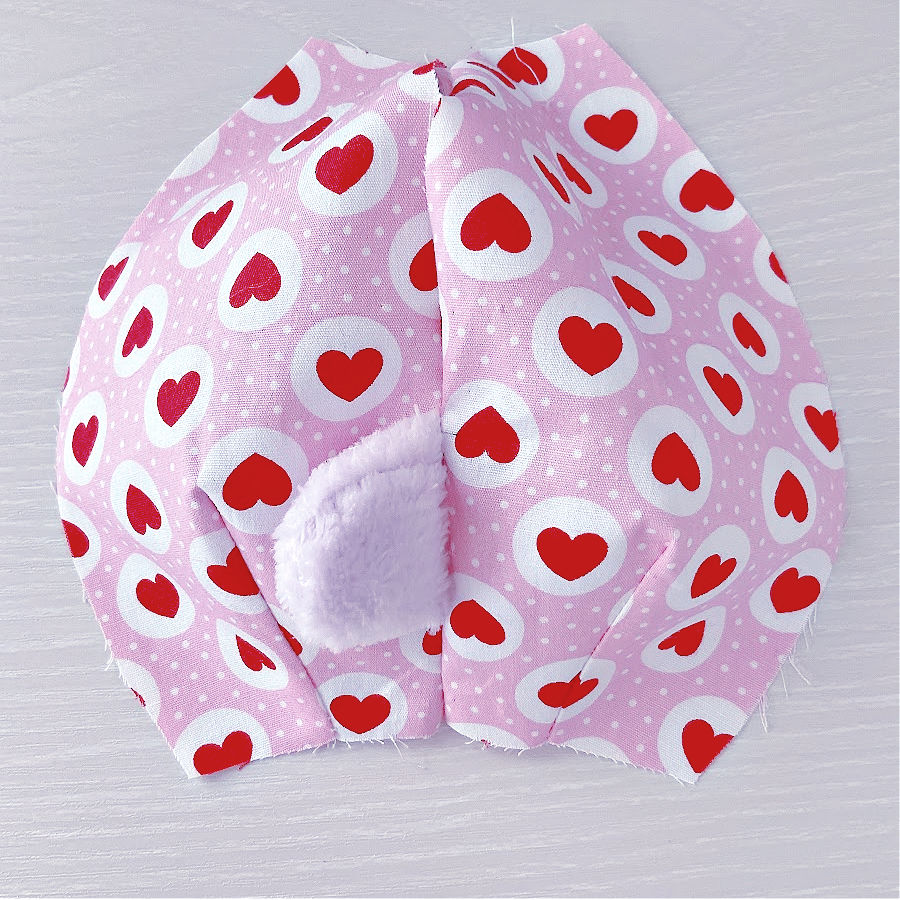
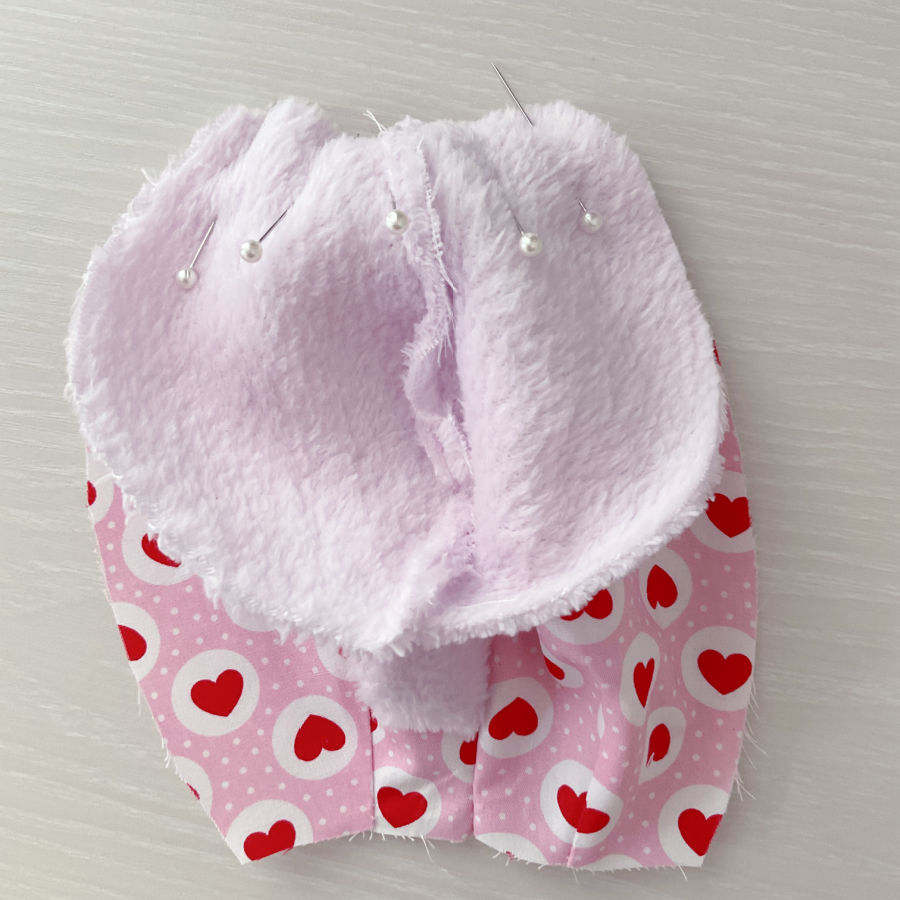
The head is where your bear’s personality starts to appear, so I like to take my time here. I began with the two side head pieces, placing them right sides together and stitching along the seam from the tip of the nose area down to the neck.
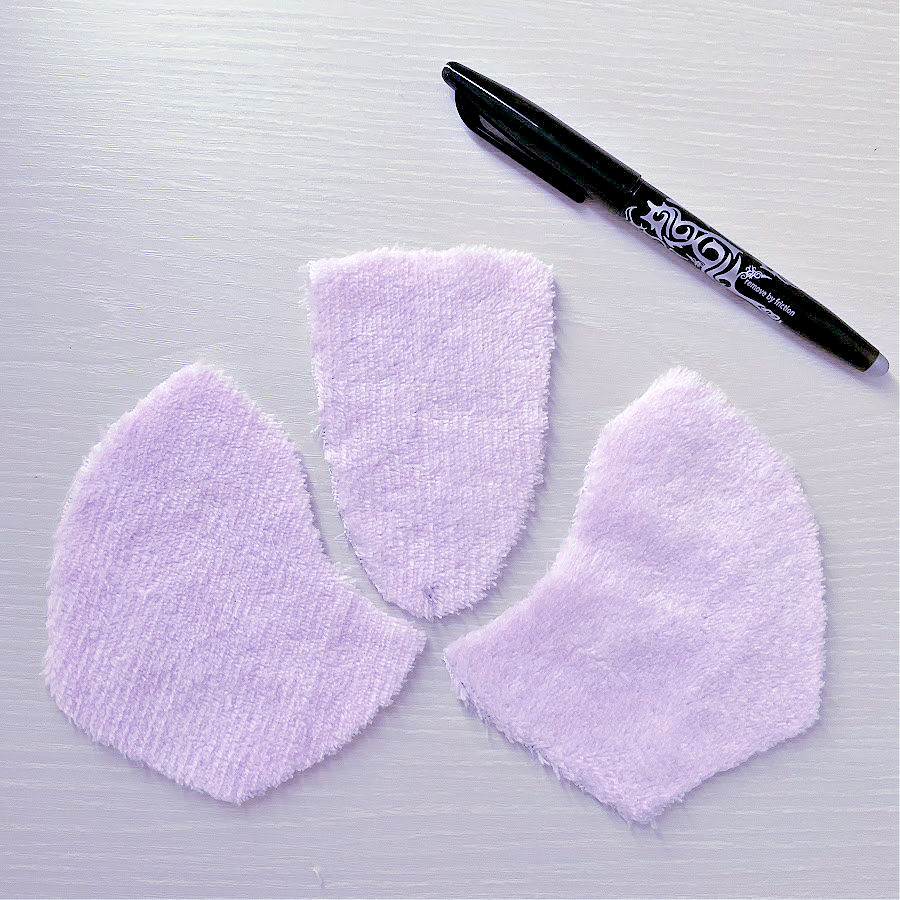
Next, I added the center head gusset (also called the center head piece). This runs from the nose area, over the top of the head. I pinned it in place very frequently — about every ½ inch — because curves can shift while sewing, especially with minky. A lot of pins keep everything where it should be.
Go slowly stitching the gusset, especially around the nose curve.
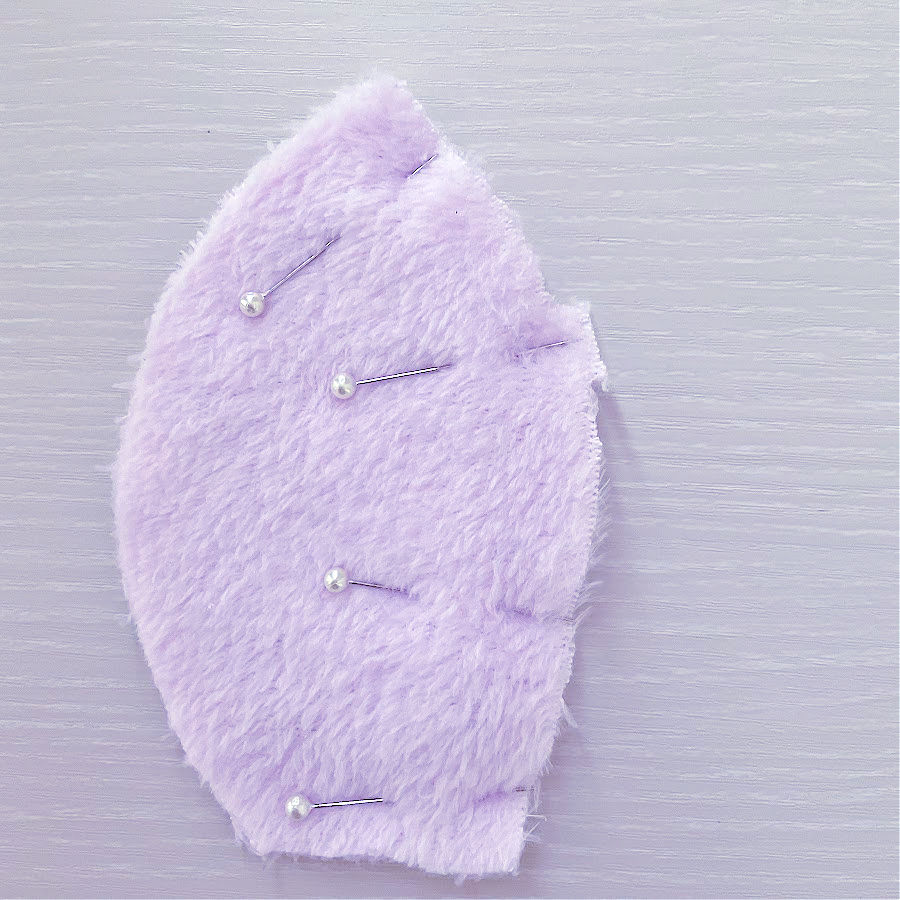
Once the front of the head was together, I moved on to the two back head pieces. I sewed these together along their center seam, but I did not attach the front and back of the head yet. That part comes later.
Tip: If you’re using minky, your seams can slip because the pile makes the layers want to move. A walking foot and a slightly longer stitch length (around 3 mm) can help keep your seams even.
✅ Related tutorial: How to use a walking foot
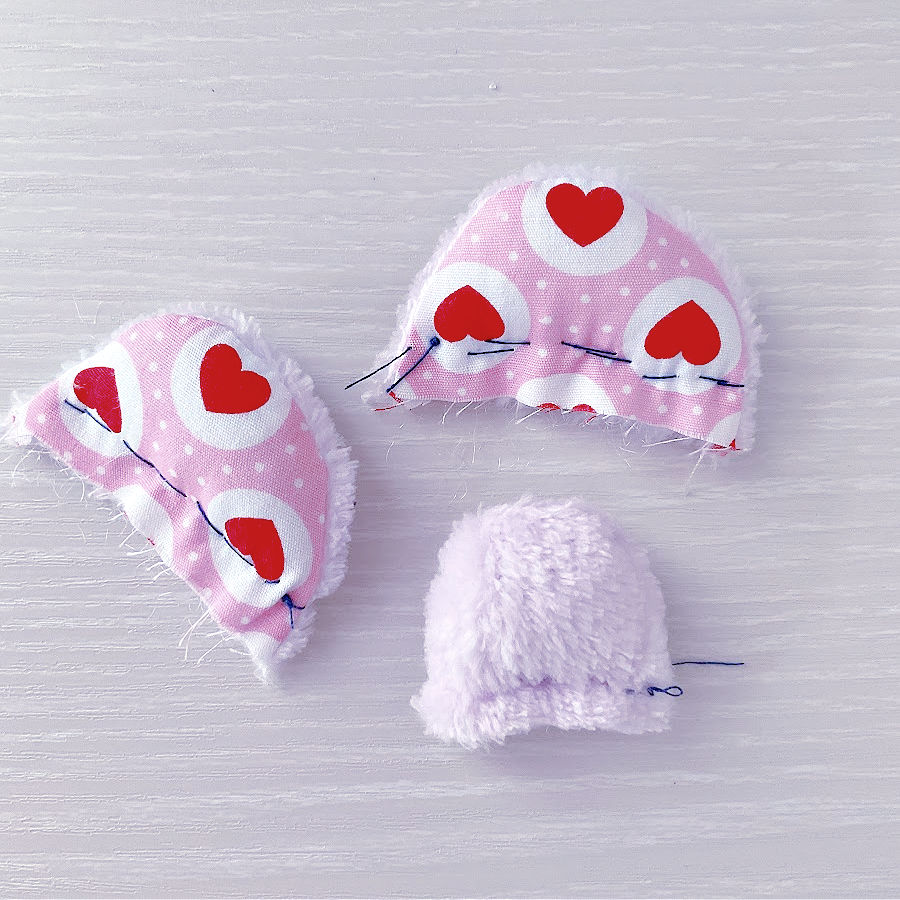
Step 4: Sew the Ears and Tail
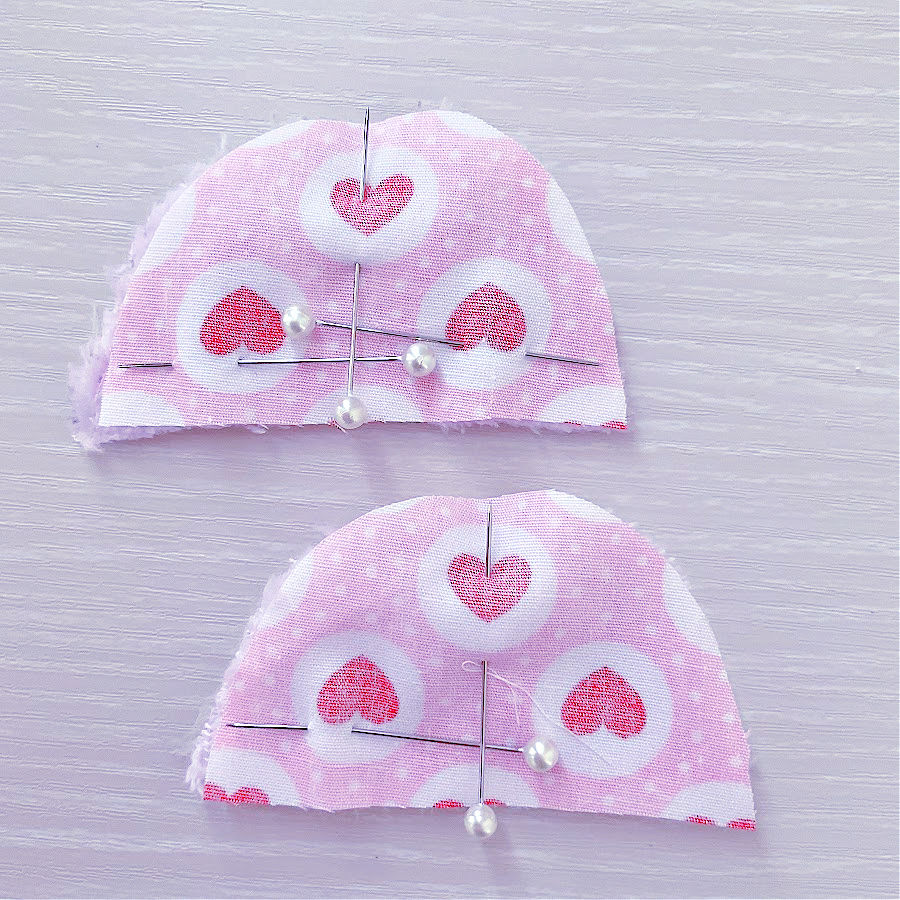
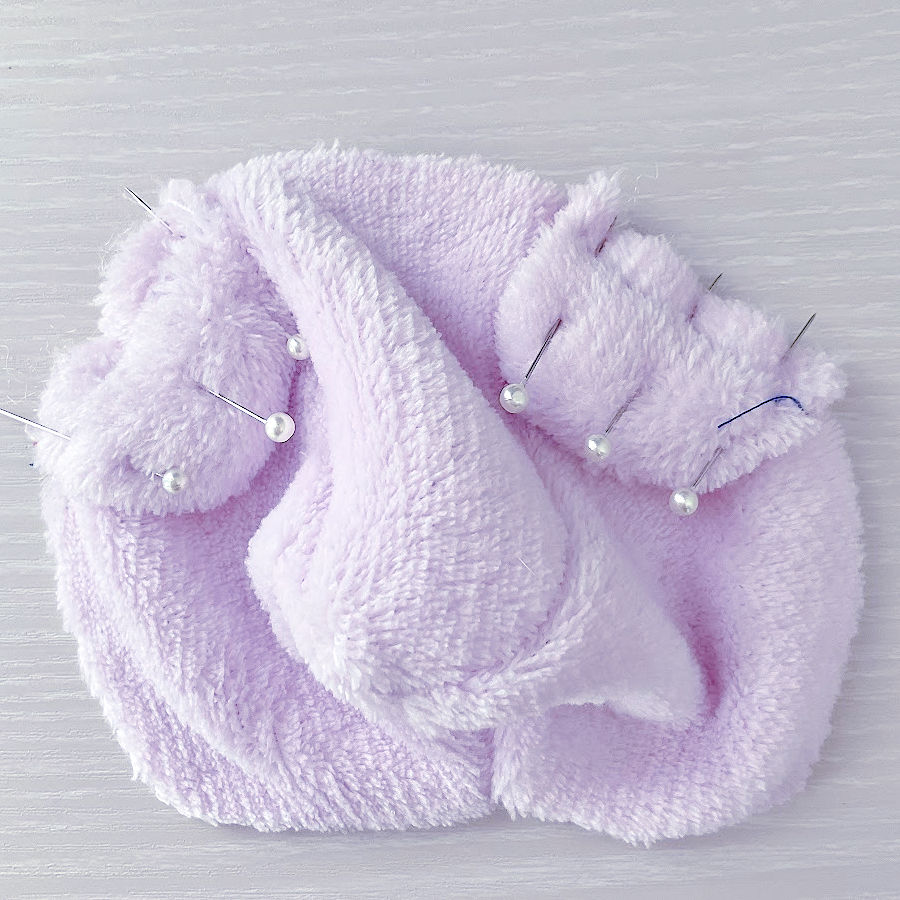
For my bear, I made each ear from one piece of minky and one piece of quilting cotton. This gives them a sweet, two-tone look. Place each minky and cotton piece right sides together and stitch around the curved edges, leaving the straight edge open.
Tip: If your material has a model (print) make sure the pieces are symmetrical! You do not want a bear with two different looking ears.

Once sewn, trim the seam allowances with pinking shears, cutting close to the stitches. This helps the curves turn smoothly without bulk. Turn the ears right side out and gently shape them.
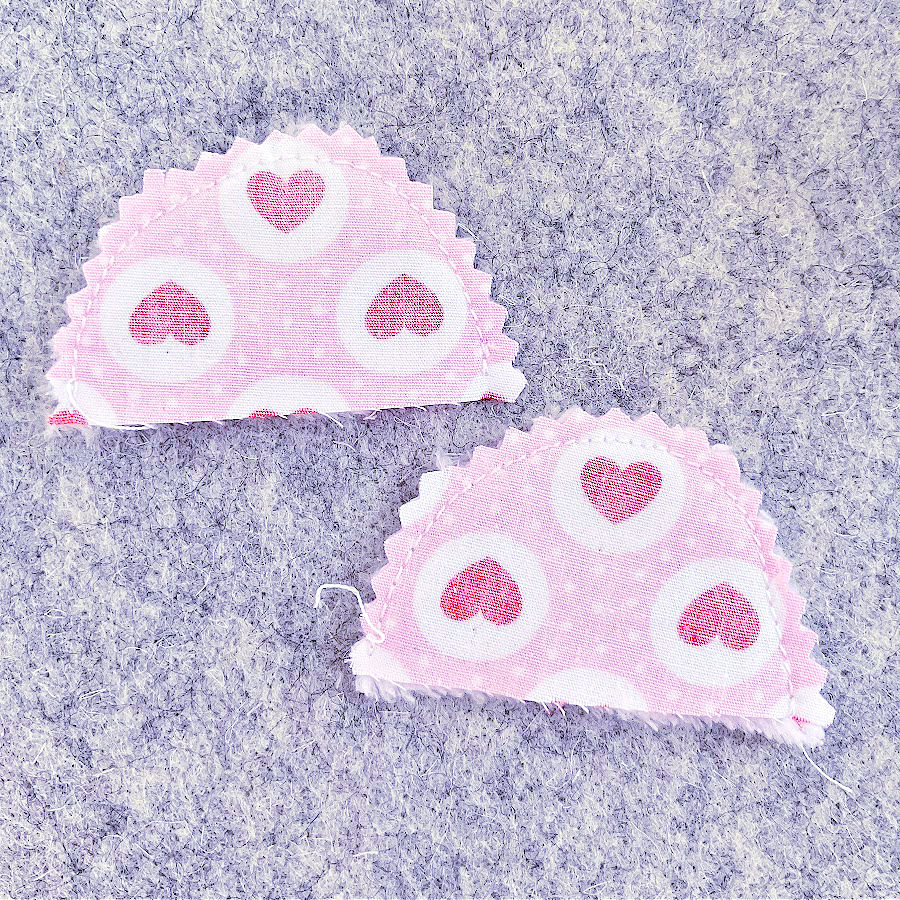
The tail is sewn in a similar way — stitch around the curved edge, leave the flat edge open, and then turn it right side out.
Fill the ears and tail lightly with stuffing (polyester fiberfill works perfectly). You just want enough to give them shape without making them stiff.
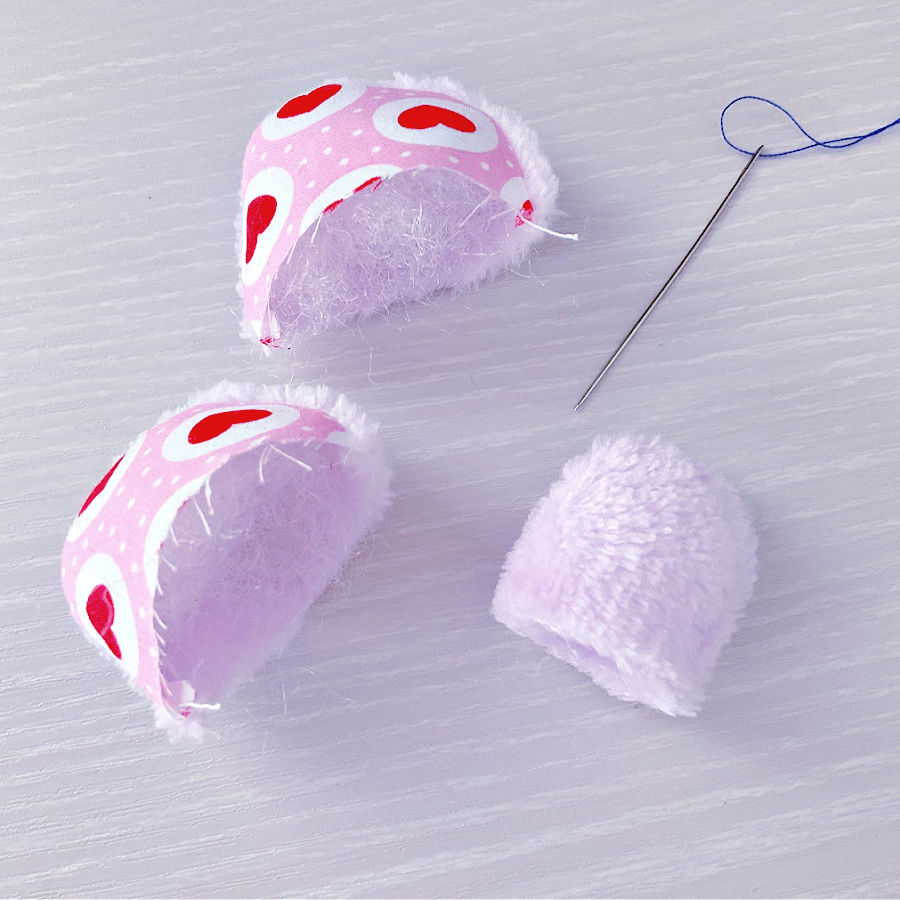
Before attaching them to the bear, hand sew along the raw edges of the open ends with a seam allowance a little larger than ¼ inch. This makes them easier to position and stitch onto the bear’s body or head later.
Tip: When stuffing small pieces like ears and tails, a blunt chopstick or the eraser end of a pencil works well to push the filling into place without poking through the fabric.
Step 5: Stitching the Body, Legs, and Arms
With the head pieces set aside for now, it’s time to assemble the rest of the bear. This step is mostly sewing straight and curved seams — but the real secret is pressing. Pressing at each stage makes a big difference in how neat and professional your finished bear will look.
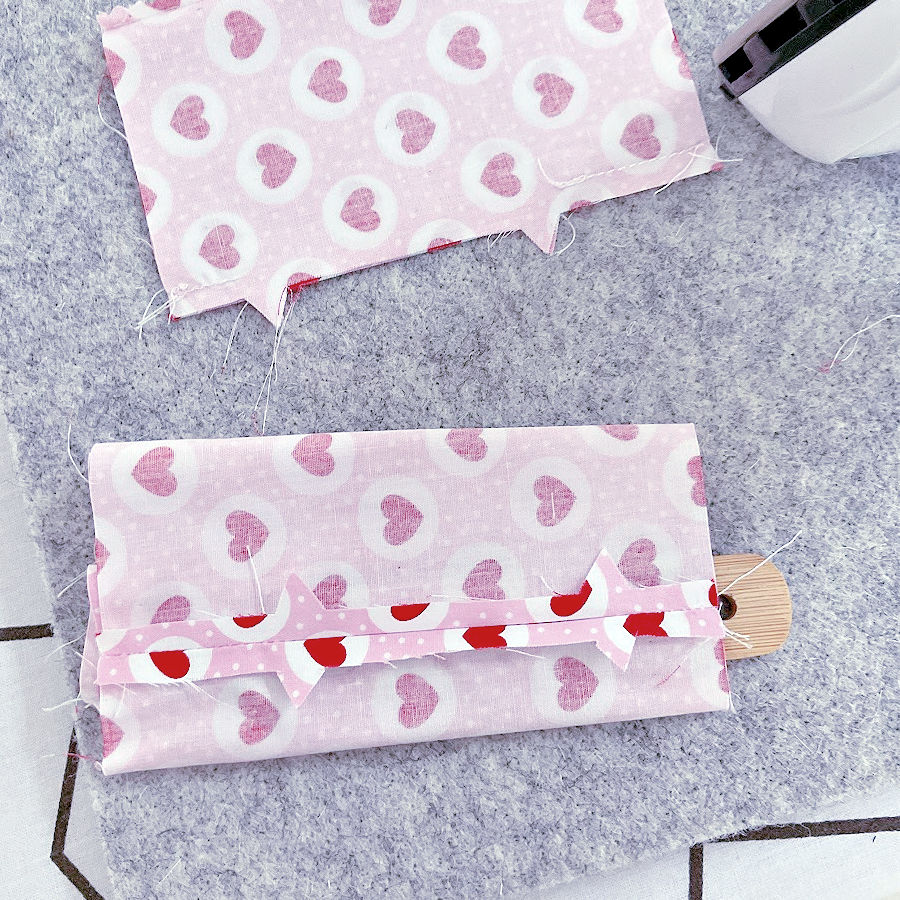
1. Body Front
- Stitch the two front body pieces together along the center seam.
- After sewing, press the seam, and then press the seam open.
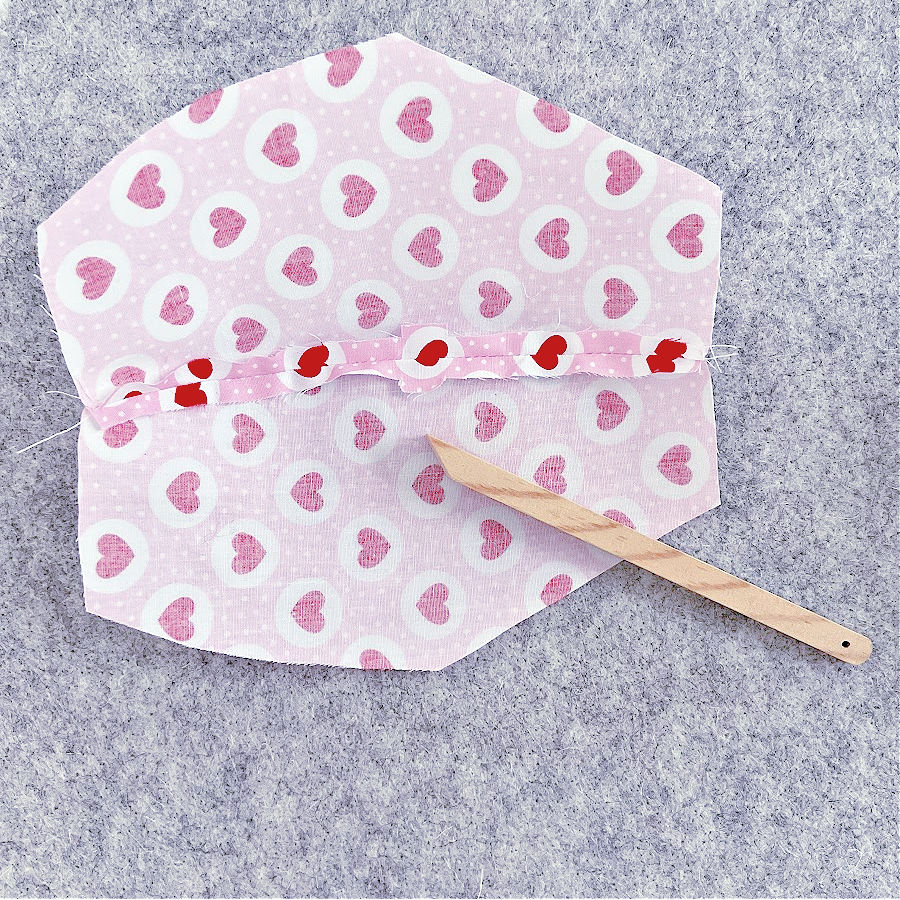
- For toys, I love using a mini wool pressing mat and a mini iron. The heat sets the seams nicely without overheating small pieces.
- I use a wooden finger presser to gently open the seam before bringing in the iron — it keeps the fabric from shifting and gives a crisp result.
✅ Related tutorials
Wool Pressing Mat: How to Use, Pros and Cons, Best Brands, Sizes
Mini Irons For Sewing And Quilting
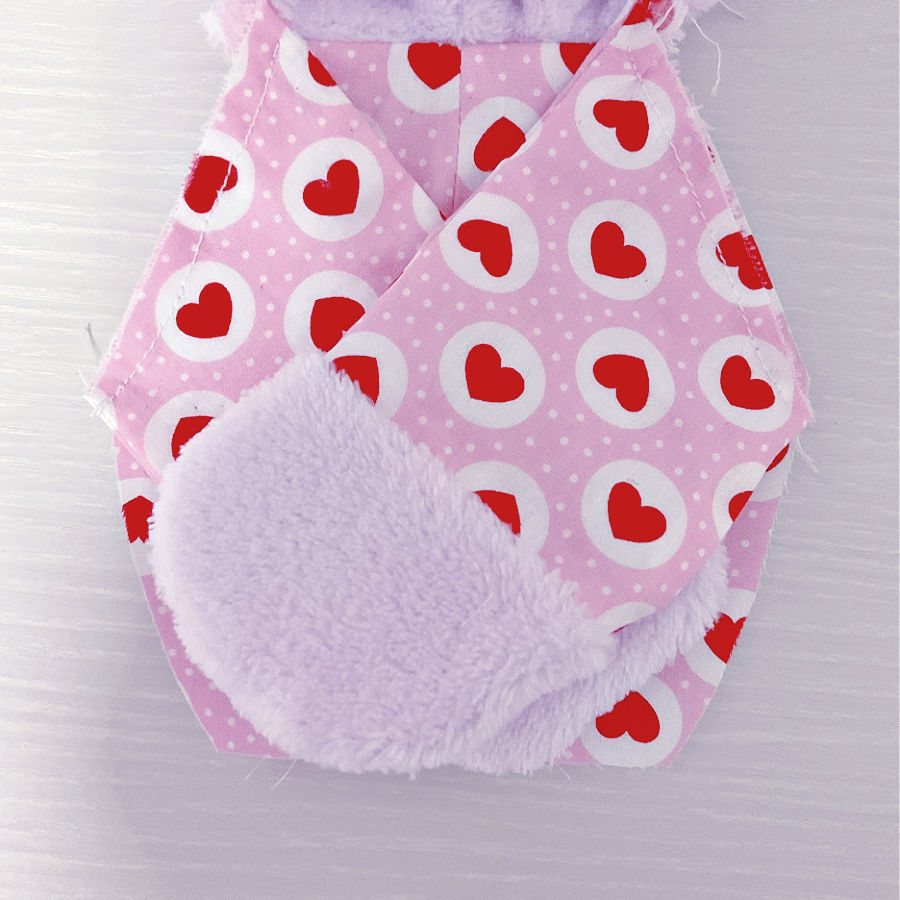
2. Body Back
- Stitch the darts, press them to the sides.
- Position the tail close to the bottom edge of one back piece, with the raw edges aligned. Baste it in place.
- Stitch the two back body pieces together, but leave an opening along the center seam. This will be your turning gap for bringing the bear right side out later.
- Press these seams open as well.
3. Legs
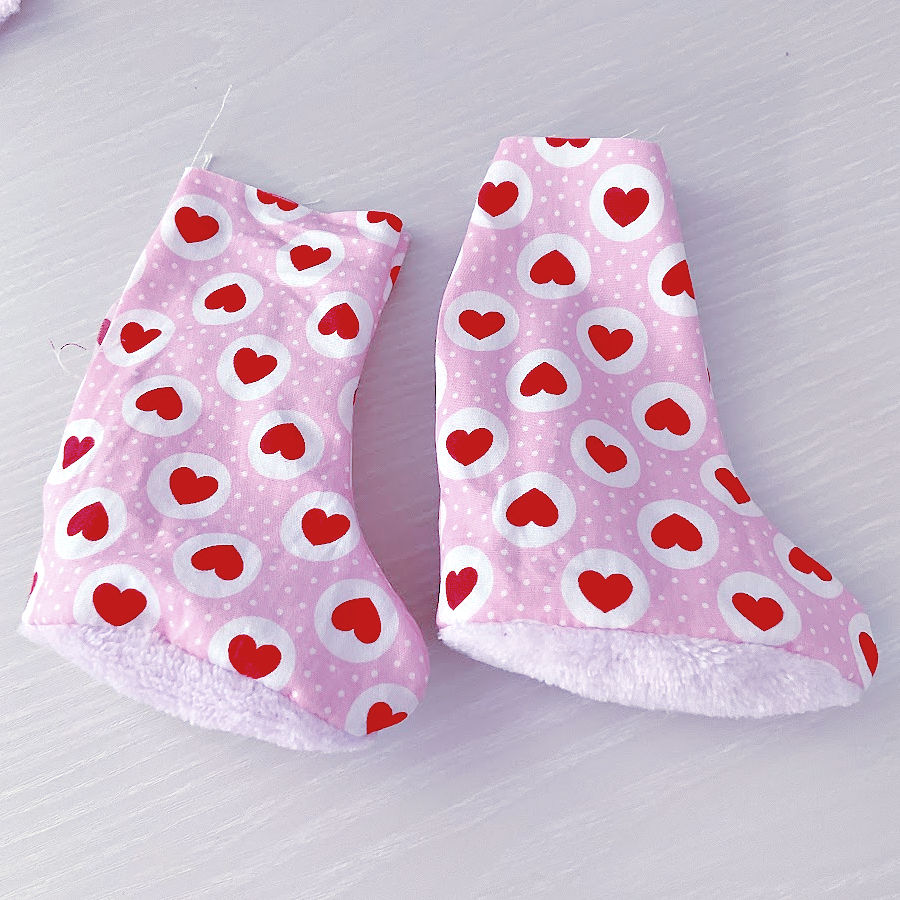
- Sew the curved seams of the leg pieces together.
- Cut the seam allowances close to stitches (with pinking shears). Press the seams open — it’s a bit trickier on curves, but it’s important. Pressed seams help the legs keep a smooth shape once stuffed.

- Sew the straight seams leaving an opening for stuffing. Press the seams open too.
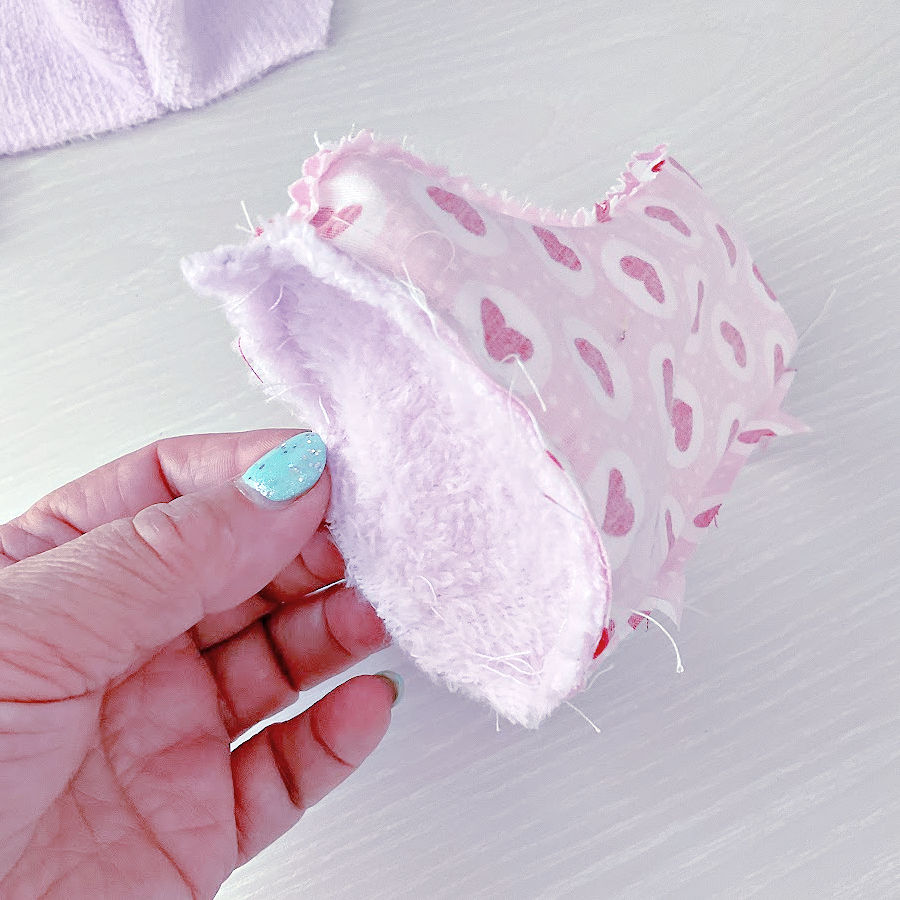
- Don’t forget the soles – For each leg, stitch the sole piece to the bottom opening of the leg. Pin it well, easing the curves so it fits smoothly. Sewing slowly here really helps — minky can be a bit slippery on curves.
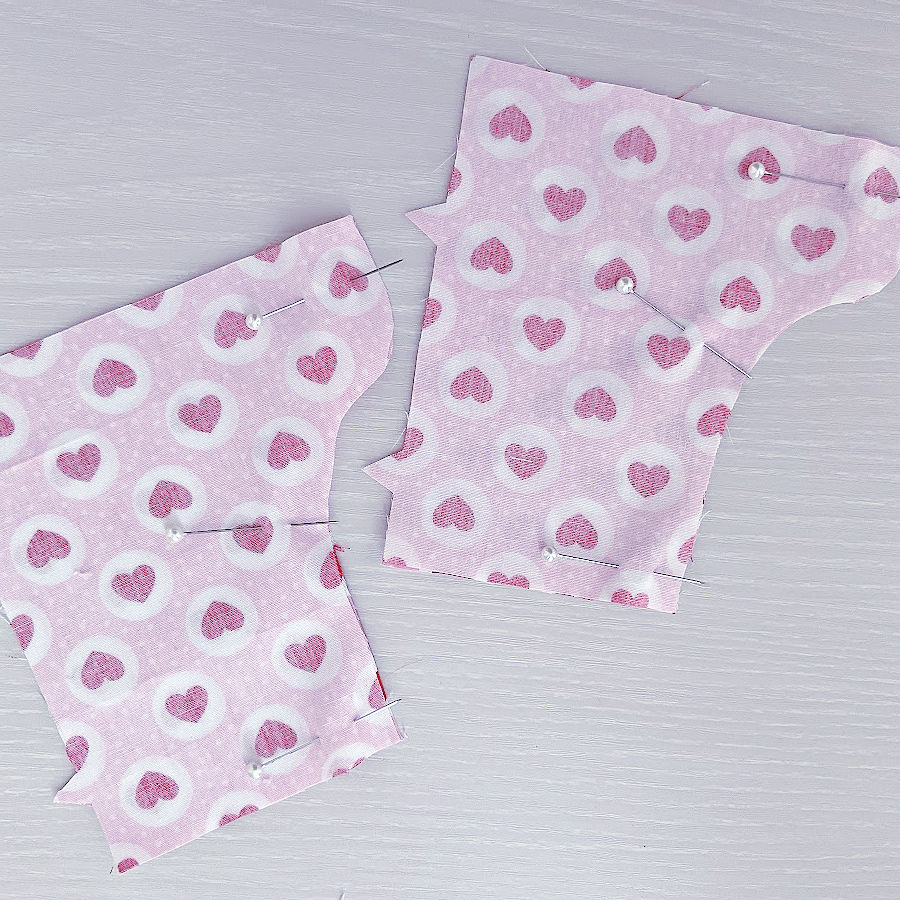
4. Arms
Stitch around each arm. I decided to leave a separate opening for stuffing in each arm because these arms are quite wide, rather than trying to stuff them through the body later. This will make shaping the bear easier.
Tip: Pressing small, curved seams can be fiddly. A tailor’s ham or even a rolled-up towel under the seam works well to keep the curve smooth while you press.
Step 6: Join the Head and Body
Now it’s time to bring the bear’s head and body together — but first, we need to secure those ears in place.
1. Attach the Ears
- Position each ear on the front head piece where you want them to sit. I like them slightly toward the center for a cute, alert look.
- Make sure the raw edges of the ears are aligned with the raw edge of the head piece. This ensures they will be caught securely in the seam.
- Baste them in place using a longer stitch length. This will hold them firmly when sewing the head to the body.
2. Connect the Front Head to the Front Body
- With right sides together, stitch the front head piece to the front body piece along the neckline seam.
- Press the seam allowances toward the head.
3. Connect the Back Head to the Back Body
- Do the same with the back head piece and back body piece.
- Remember that the back body still has the opening you left earlier for turning the bear right side out later — don’t close it yet.
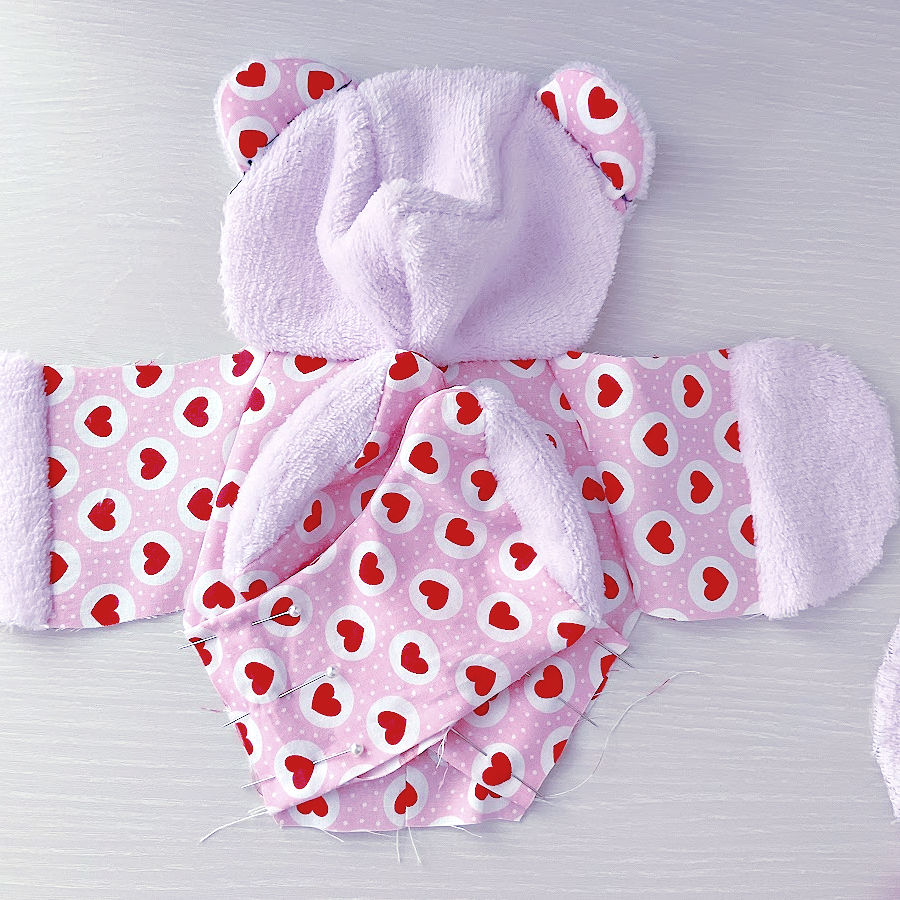
At this point, you now have a front half of your bear and a back half of your bear. The next step will be to join these halves together and shape your bear.
Step 7: Attach the Arms and Legs, Then Join the Bear
This is the step where your bear finally starts looking like a bear. We’ll attach the limbs, then sew the two main halves together — head included.
1. Position and Baste the Arms
- Place each arm on the front body piece, matching the raw edges to the side seam lines.
- The template pieces are designed to align perfectly here, so they should fit without fuss.
Pin well, then baste the arms in place just like you did for the ears.
2. Position and Baste the Legs
- Align each leg with the matching curve on the lower body.
- Pin, then baste them to hold in place.
- The legs should be pointing inward toward the center of the bear at this stage — this keeps them out of the way for the next step.
3. Prepare for Assembly
- With the limbs basted to the front body, fold them so they lie inside the body area.
- This way, when you place the back body piece on top, all arms and legs will be safely enclosed inside, ready to be sewn into the seams.
4. Stitch the Bear Together
- Place the back body (with the back head attached) on top of the front body, right sides together.
- Pin around the entire edge, matching seams and curves.
- Stitch all the way around the bear — starting at one side of the back opening, up around the head, down the other side, and around the body.
- In this step, you’re securing the arms and legs to the body and sewing the head front and back together in one go.
- Make sure you don’t accidentally stitch over the arms and legs — they should stay free and not get caught in the seam.
Somehow I don’t have an image of this step — I was so focused (and honestly, a little too excited) to finish the bear that my camera didn’t even get a chance. Let’s just say I went into “must-finish-now” mode and forgot all about photos. I hope you can picture what I mean here, even if I can’t show you.
Step 8: Stuffing and Finishing the Bear
Now comes the part where your bear comes to life — literally. Time to stuff!
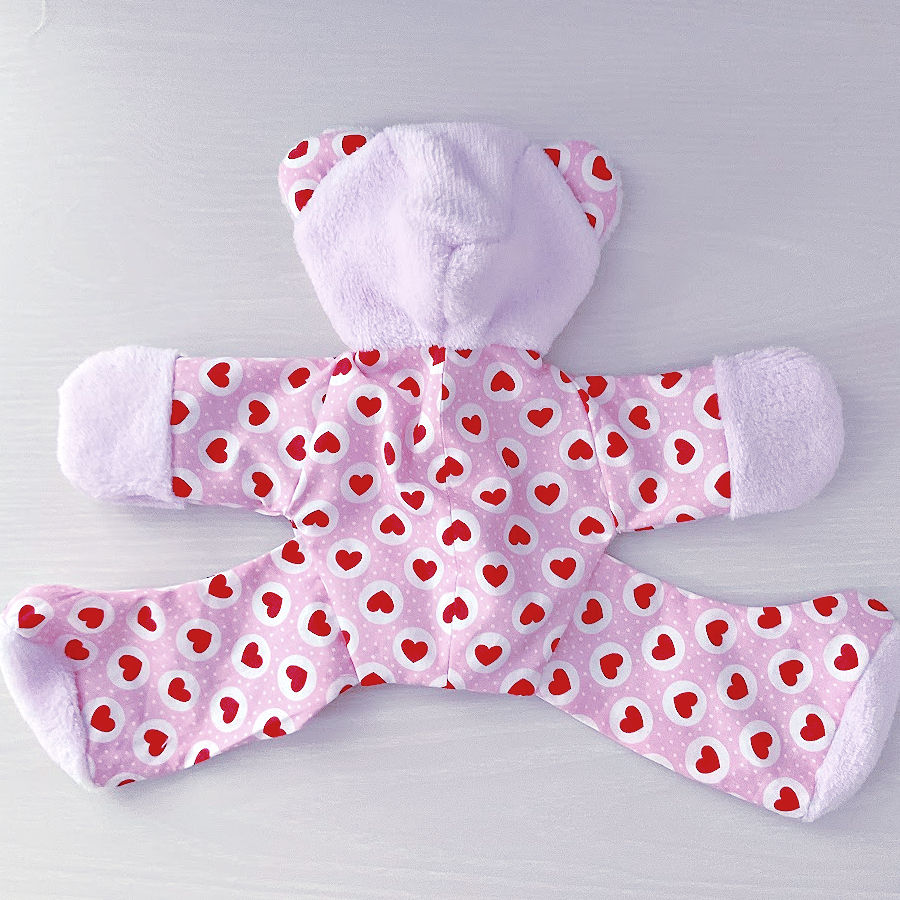
1. Turn the Bear Right Side Out
- Gently pull everything through the opening you left in the back.
- At first, it might look like you made a floppy inside-out octopus with no face. Don’t panic. Once the stuffing goes in, it will start looking more like a bear and less like a sewing experiment gone wrong.
2. Stuff the Head First
- Start with the head so you can shape the muzzle, cheeks, and top nicely before the rest of the body fills up.
- Use small amounts of stuffing (polyester fiberfill is perfect) at a time. This gives you better control and avoids weird lumps.
- A blunt chopstick or stuffing tool works well for pushing filling into the corners without poking through the fabric.
3. Stuff the Body
- Work your way down to the tummy.
- Don’t be shy — bears are happiest when they’re plump. But avoid overstuffing to the point where the seams start to come apart.
4. Stuff the Limbs
- Remember those openings we left in the arms and legs? Now’s the time to use them. Stuff each limb firmly but evenly so they keep their shape without feeling rock-hard. A chopstick or stuffing tool will help push the filling right into the tips of the arms and legs.
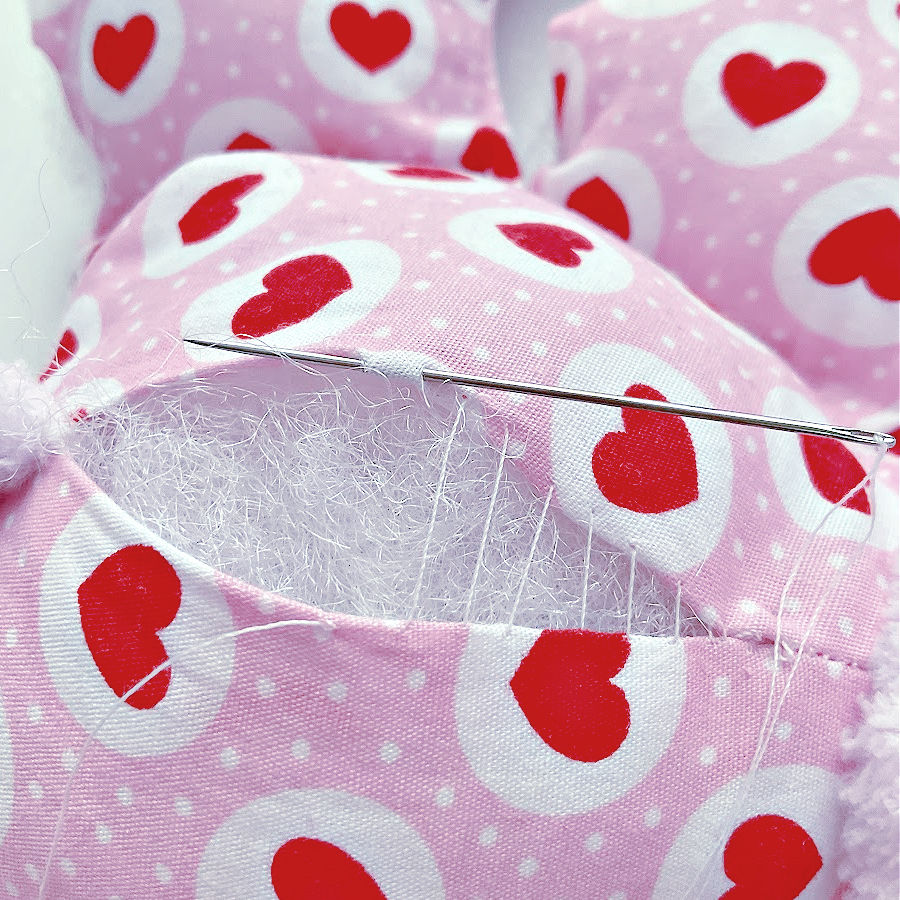
5. Close the Openings
- Once everything is stuffed to your liking, fold the seam allowances inward and close each opening with a ladder stitch (also called an invisible stitch). Do the same for the opening in the back of the body. Take your time — neat closing stitches make your bear look polished.
✅ Related tutorial: Invisible Stitch Tutorial: How To Fix A Tear (+ Sewing “Blind” Hems)
6. Add the Face
- Sew on two buttons for eyes or use safety eyes if your bear will be gifted to a child. I skipped the mouth this time, and honestly, I like the simple, sweet look it gives. But you can embroider one if you prefer.
Step 9: Make a Skirt for the Bear
I decided my bear needed a little something extra — a skirt. This step was not intended by the original manufacturer because there are no pattern pieces for it.
- I cut a strip of fabric long enough to go around the bear with some gathering room – 25” x 2 ¾”. This is my pattern. Of course I used a fabric that matches with my choices for the bear body.
- Using my serger, I finished the long edges of the strip with a rolled hem stitch. This gave it neat edges without adding bulk.
- I ran two rows of long stitches along the top edge and gently pulled the threads to gather the fabric until it fit the bear’s waist.
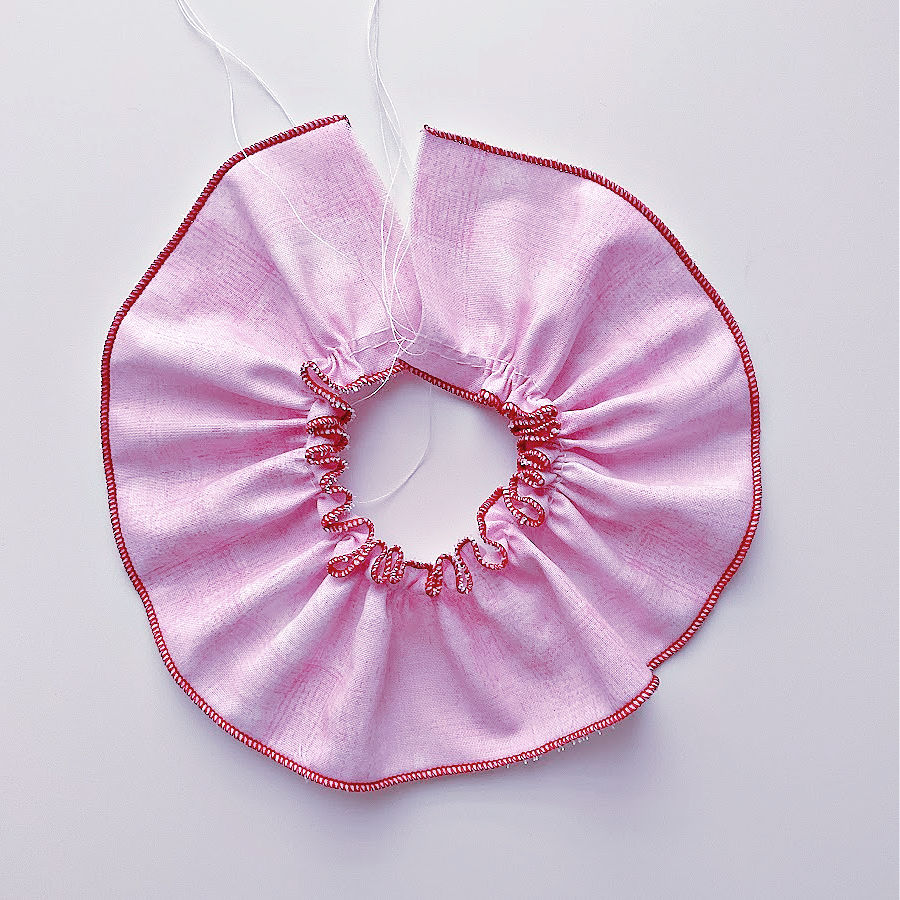
- Then I stitched the skirt into a loop, slid it onto the bear, and adjusted the gathers so they sat evenly.
Instant bear fashion!
Final Thoughts and a Little Buyer Beware
This bear turned out quite cute. My granddaughter likes it very much! However, there was one big surprise: this is a sitting bear. The way the legs are designed — sewn sideways — means it can’t have straight legs. So it’s perfect for sitting on a shelf, bed, or chair, but not for standing. That was not so obvious from the pattern images.
Speaking of images — here’s the Amazon listing where I bought my template:
So, this photo on Amazon? A completely different bear. In fact, I’ve noticed several Amazon sellers using that same incorrect image for similar bear templates. So if you’re expecting the bear in their picture… that’s not what you’ll get. The bear you make from this template will not match the advertised one — but it will be a charming little memory bear that’s great for keepsakes made from sentimental fabrics.
Also, this bear may be a sitting bear, but it’s still wonderfully soft and huggable — just the kind of cuddly friend kids love to keep close.
So, my verdict on the Memory Bear Template:
- Cutting was a breeze. The template was sturdy, mostly accurate, and the pieces matched nicely.
- It had seam allowances included, which I loved, and the shapes were easy to trace with my Frixion pen. I’ll absolutely use plastic templates again — they make the work faster, more reliable, and a lot less fussy.
But there were a few surprises along the way:
- The darts didn’t line up perfectly – the left and right sides didn’t match.
- One piece of the head was not quite symmetrical.
- The biggest drawback: no clear instructions. You get the shapes but little guidance on putting them together.
Will you try to make a bear for someone you love? If so, this tutorial may come in handy, so save this pin (see below) on your sewing board so you can come here later when you are ready, and follow me on Pinterest for more tips, tutorials, and inspiration!
latest posts
- Butterfly Quilt Block Tutorial – Foundation Paper Piecing
- How To Sew Quilt Squares So The Corners Match
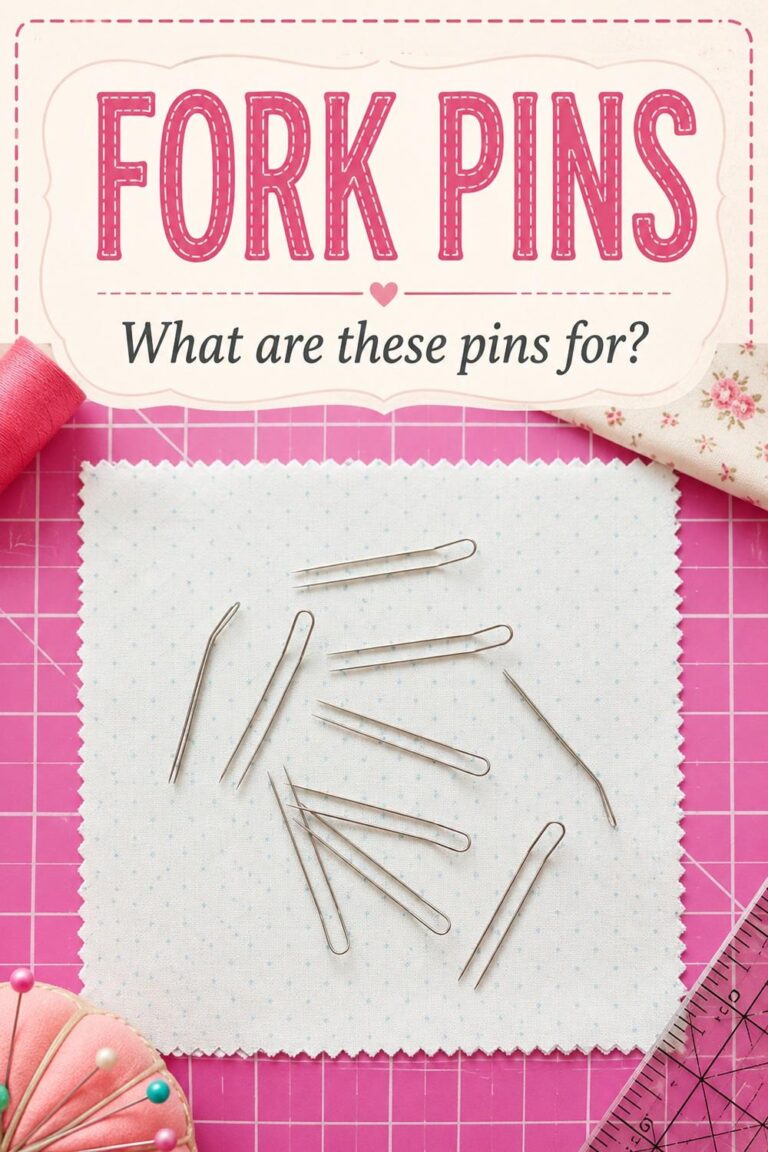
- Sewing With Fork Pins: How They Help With Pattern Matching, Slippery Fabric, And Seams
- How Much Fabric Do I Need? 21 Helpful Tips For Calculating Fabric Yardage
- Easy Simple Sewing Project: Fabric Jar Opener
- DIY Oven Mitts: Step-by-Step Sewing Tutorial
- Easy DIY Potholder: New Design
- Tailor’s Clapper: What It Does, Why It Works, And How To Use It Right
- Heat Resistant Batting for Sewing: What It Is, How It Works, and What Makes a Difference

Thanks for the directions. I have sewn at least 25 bears with a similar pattern and have to refit it to make it fit. Putting darts in then the body back don’t fit. Nothing fits together. I have to redesign every time to make it go together. Bought a different pattern and hope it works better. Again thank you so much for showing the details 😊