Scrunchies are curly pieces of fabric that you put around your hair to hold it together. They come in many colors, patterns, and styles, and they’re also really easy to make! They’re simple to use, you just wrap the scrunchie around your hair, and voila! Your hair is now done!
They are also great as gifts because they’re so cute!
Table of contents
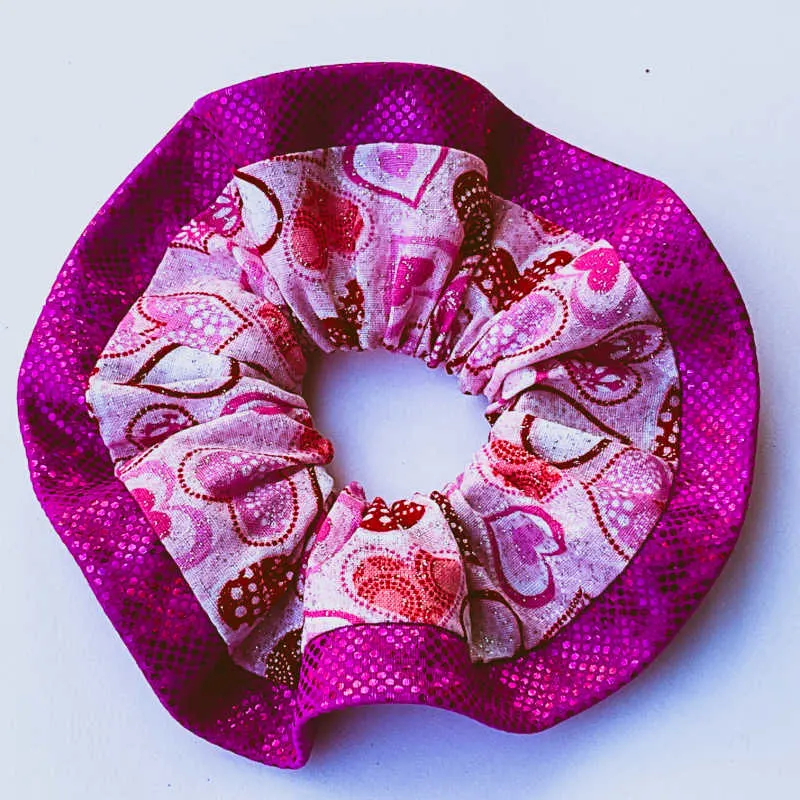
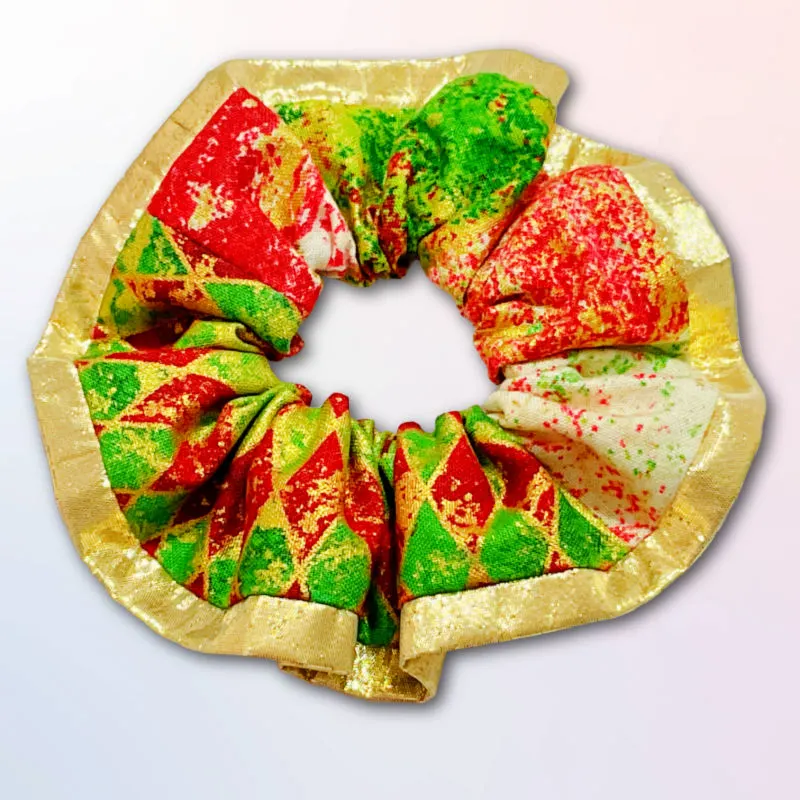
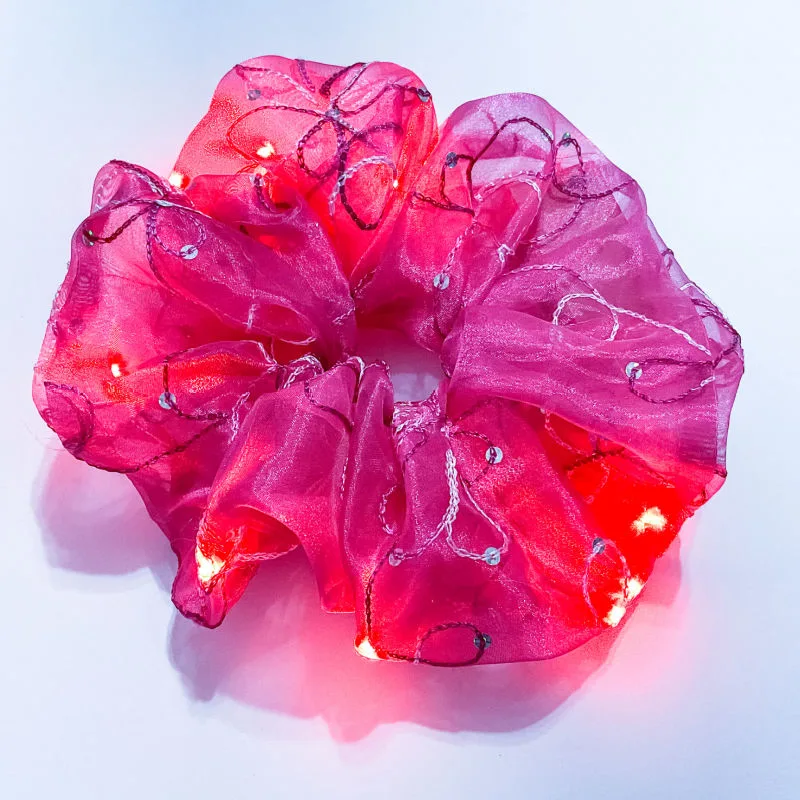
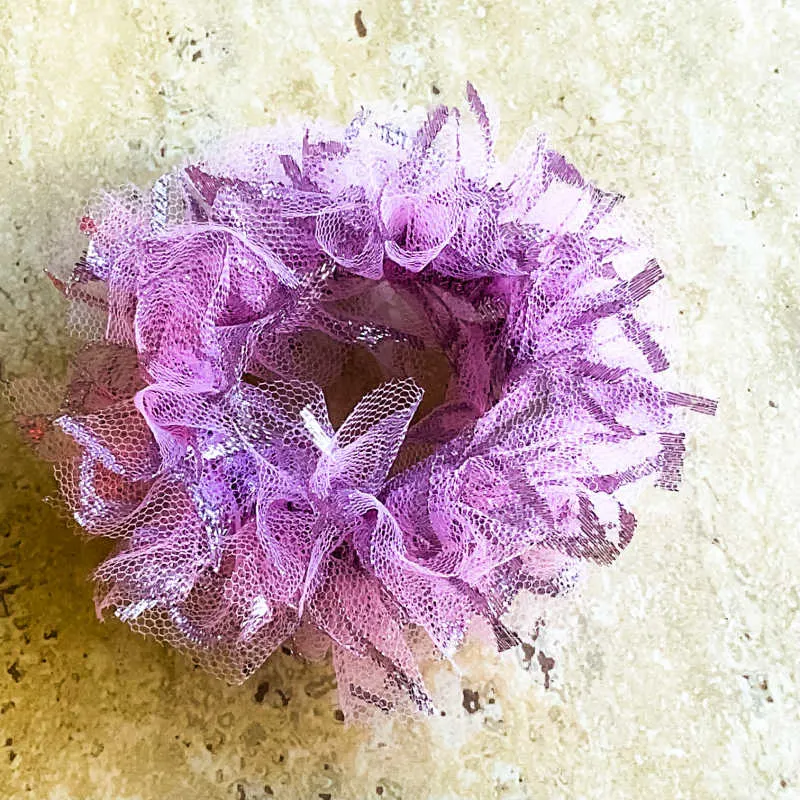
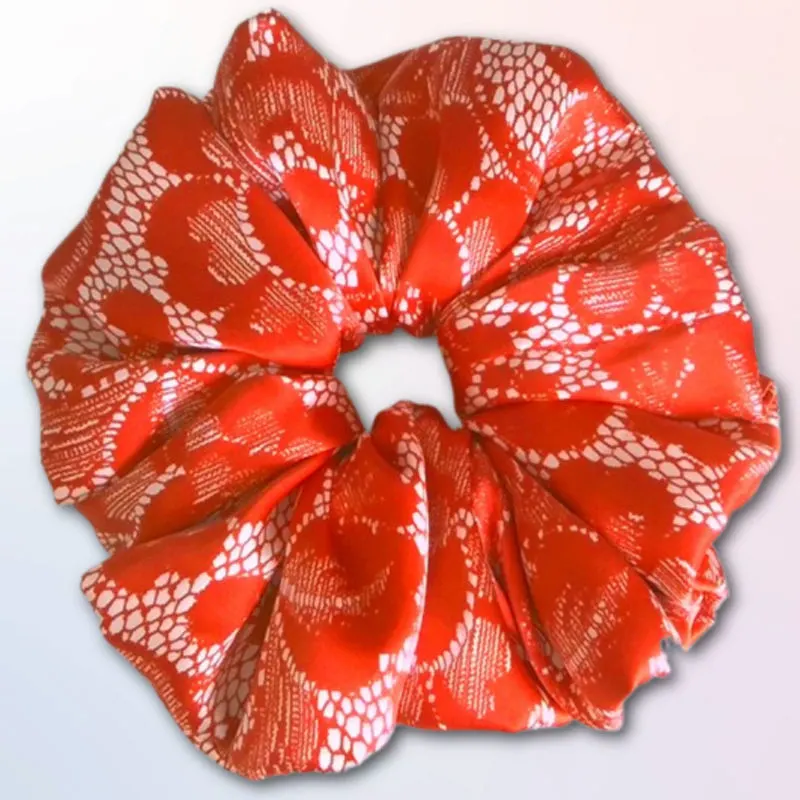
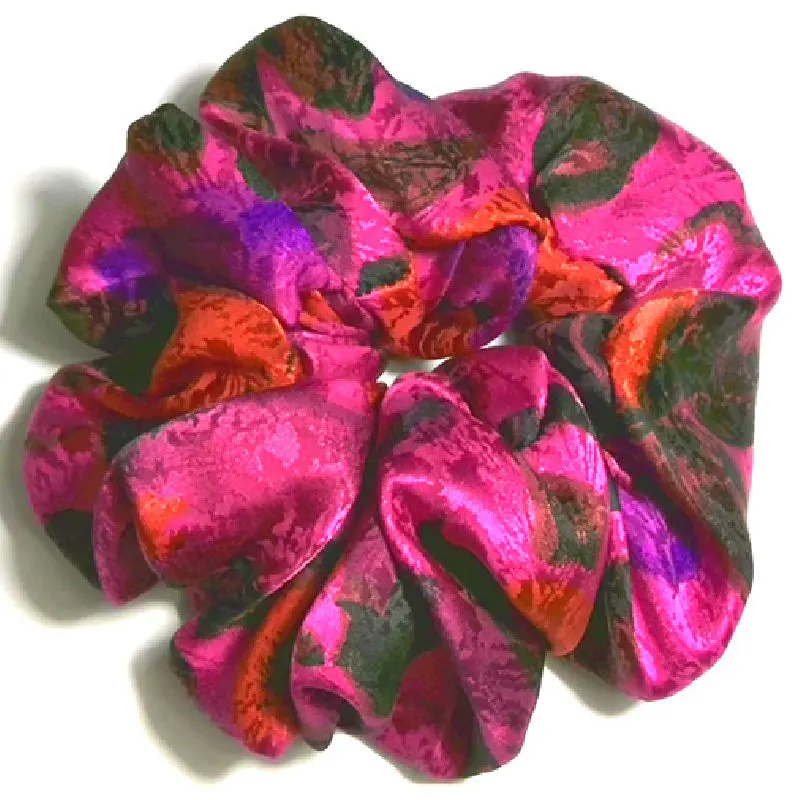
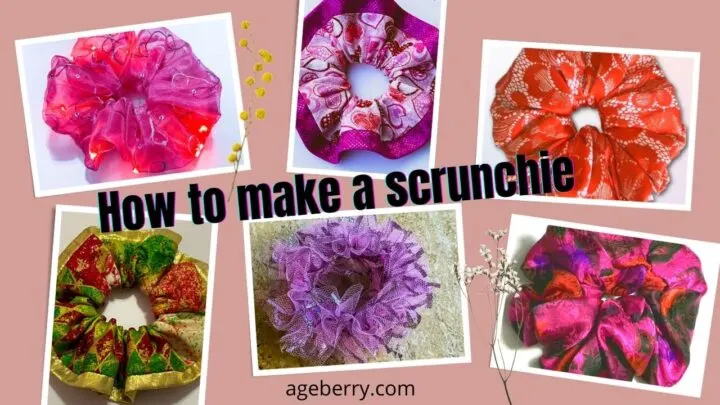
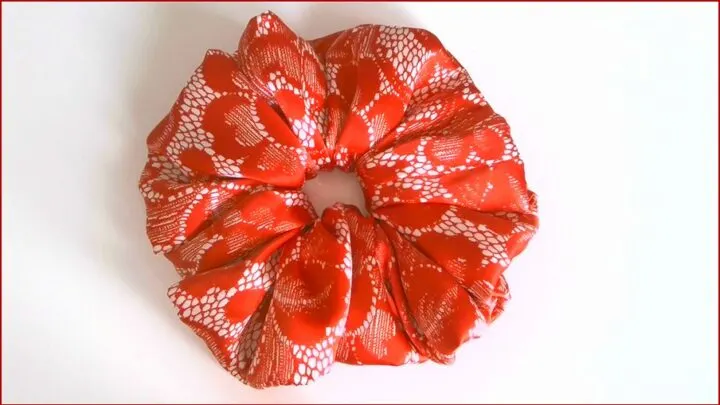
Here are the images of all scrunchies I made for this tutorial.
Are scrunchies better than rubber bands?
I love scrunchies, my daughters love scrunchies, everybody loves scrunchies! They’re cute, they keep your hair out of your face, and they don’t get stuck in your hair like rubber bands sometimes do. However, are they better for your hair than rubber bands?
Rubber bands and scrunchies both serve the same purpose. However, there are a few key differences between them. First, their colors. Scrunchies come in so many colors and patterns! You can find solid colors, flowers, hearts, stripes… rubber bands tend to be more monochromatic. Also, scrunchies tend to have a bit more stretch to them than rubber bands do.
Scrunchies are meant to gently grip hair so that it can be held together in a ponytail or bun.
Some people think scrunchies are better for your hair because they don’t put as much tension on the roots of your hair as rubber bands do. A scrunchie doesn’t hurt or damage your hair especially if you made it yourself from natural fabric like cotton or silk.
At the end of the day, it’s up to you which you choose. Do you prefer scrunchies or rubber bands for your hair?
In this tutorial I will show you 5 different ways to make a scrunchie.
How to make a scrunchie with a sewing machine
This project is perfect if you’re just starting out sewing or looking for something fun and simple that doesn’t require much fabric. There are no complicated techniques involved.
The best part about making these scrunchies yourself is that they’ll be unique and personalized, so no one else will have the same ones as yours. You can find the perfect fabric for any outfit and have fun with designing. And if something doesn’t seem right (like the length of the elastic) you can easily adjust things.
Once you’ve made one scrunchie, try making another one using different fabrics or different methods. The possibilities are endless when it comes to creating unique scrunchies that match any outfit or mood.
How to make a professional scrunchie
Let’s make a beautifully sewn professional-looking scrunchie.
When you make your own scrunchies, it’s almost inevitable that there will be some imperfections. It doesn’t matter if they are just small things like a crooked seam or wider cut pieces of fabric – even the best handmade items have flaws.
And sometimes our projects fall short, right? Threads showing through the seams; uneven stitches which leave puckering marks behind; poor quality threads breaking after the first use… so keep an eye out. Try to avoid these problems by paying attention to every step and making sure everything is properly done before proceeding to the next step.
So, let’s try our best to make a scrunchie that is even nicer than what we can get in stores.
I will show you an interesting way to make a scrunchie. There are hundreds of sewing tutorials on making them, but this technique I’m about to share with you today is kind of unique and not found in many videos online.
But it’s a fast and easy way to make a scrunchie and you’ll get an awesome final product! There are no visible seams, and it looks professionally done.
What you will need to make a scrunchie
Piece of fabric for the scrunchie ( It’s better to use natural fabric for this scrunchie like 100% cotton)
Piece of fabric for embellishment
Piece of regular elastic ( 7 – 8 inches)
Sewing machine
Regular sewing notions (use threads of matching colors)
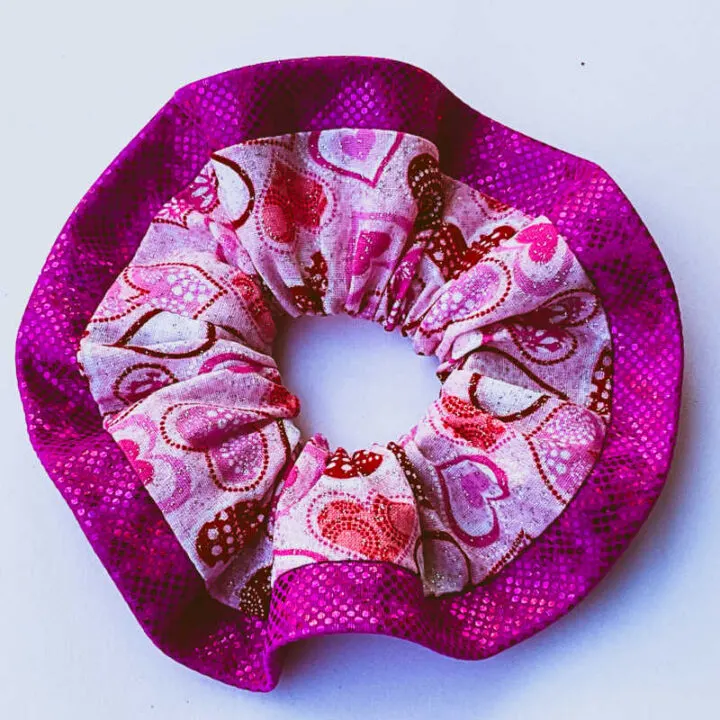
For this DIY scrunchie you will need one piece of fabric 20” long and 4” wide, and one piece of fabric for embellishment 20” long and 2″ wide (the pink scrunchie) or 1.5” wide (the Christmas scrunchie). These are the sizes I used for my scrunchies.
The strip of fabric for embellishment is a very useful addition to the scrunchie. Why? Because the scrunchie will keep its shape better with it.
Read all the steps first before proceeding. That is the only way to ensure that you don’t get things done wrong.
Prepare your sewing machine for making a DIY scrunchie
Choose a straight stitch and check all the settings:
The stitch length should match your fabric thickness, if you are using cotton fabric put the stitch length to 2.5 mm.
set the right tension and check it on a scrap piece of the same fabric you are using for your scrunchie.
Want to improve your sewing skills?
Get my detailed guide on SEWING MACHINE TENSION ADJUSTMENTS free!
Subscribe to my weekly newsletter with sewing tips and tutorials, free sewing patterns, printable PDFs, and other useful content and you’ll find the eBook in your inbox.
Subscriber exclusive offer.
Don’t miss the free HELPFUL eBook!
Check the needle – is it the correct size for the fabric? Use an 80/12 Universal needle. Insert a new needle if you are not sure how worn out the needle is. Check if it’s not bent.
Thread the machine with good-quality thread that matches the fabric colors.
Step 1
Cutting fabric for a DIY scrunchie
You can cut these rectangles (see the sizes above) right on your fabric. Or you can draw it first on paper and then cut it from fabric.
Press the fabric before cutting to get all wrinkles out of the fabric and make it nice and flat.
And if you have a rotary cutter and a cutting mat you don’t even need to draw the rectangles on the fabric. You can use the grid lines of the mat to cut perfect rectangular shapes.
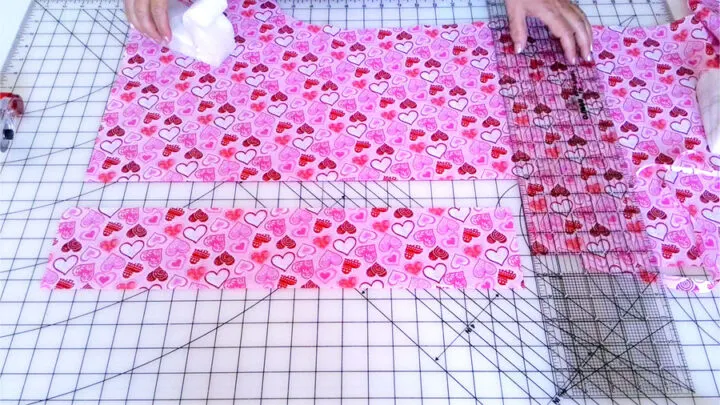
Step 2
Sewing short edges
Fold prepared pieces right sides together, pin, and stitch short edges. Seam allowances are ⅜ inch. Don’t sew over pins. After you are done sewing, carefully press the seam open.
Step 3
Attaching embellishment to the main fabric
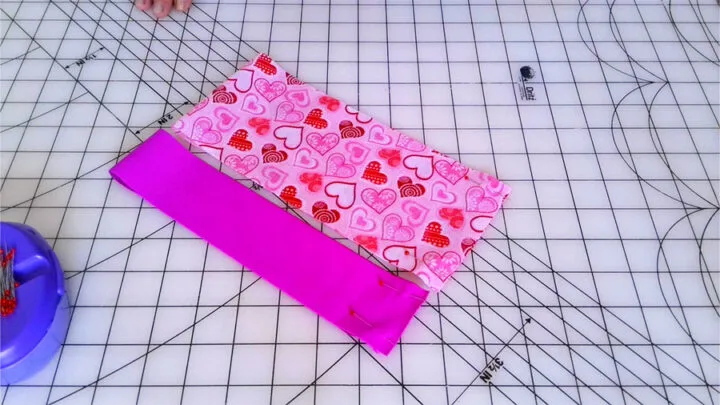
Fold the narrow piece (from embellishment fabric) lengthwise in half wrong sides together. Use pins to secure the fold or just press with a hot iron.
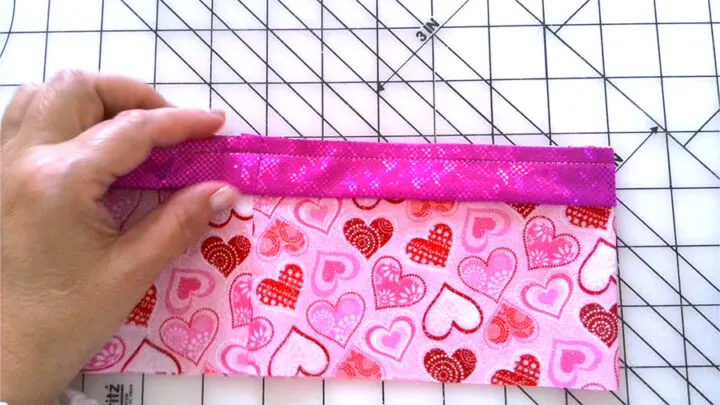
Pin the narrow piece to the big piece’s right sides together and stitch. Seam allowances ¼ inch.
Step 4
Sewing the tube
Now comes the trick.
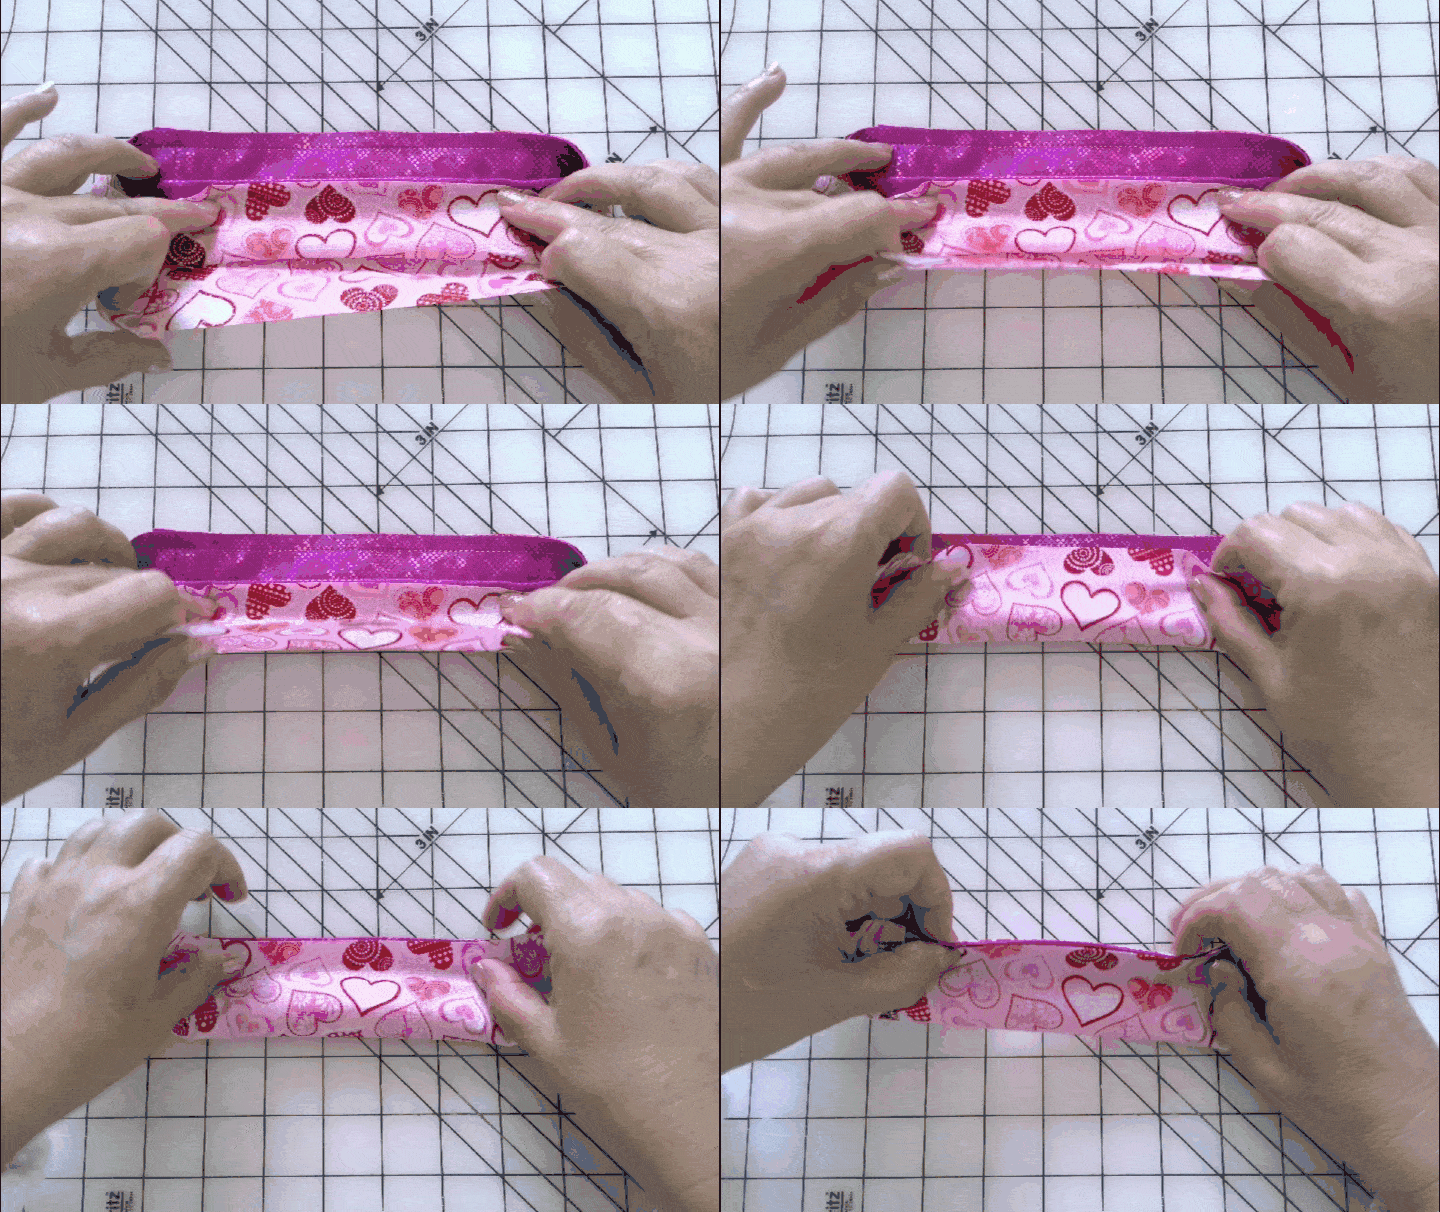
Fold the prepared piece as you see in the images below. It’s hard to describe it but I will try to explain it. If my explanations are not clear you can watch my video tutorial on YouTube.
So, we have a sandwich of 4 layers here and we need to sew the outer layers together; the top layer and the bottom layer are now the wrong sides out. We will sew them together, then turn them.
We have to take the inner two layers away from the stitching line.
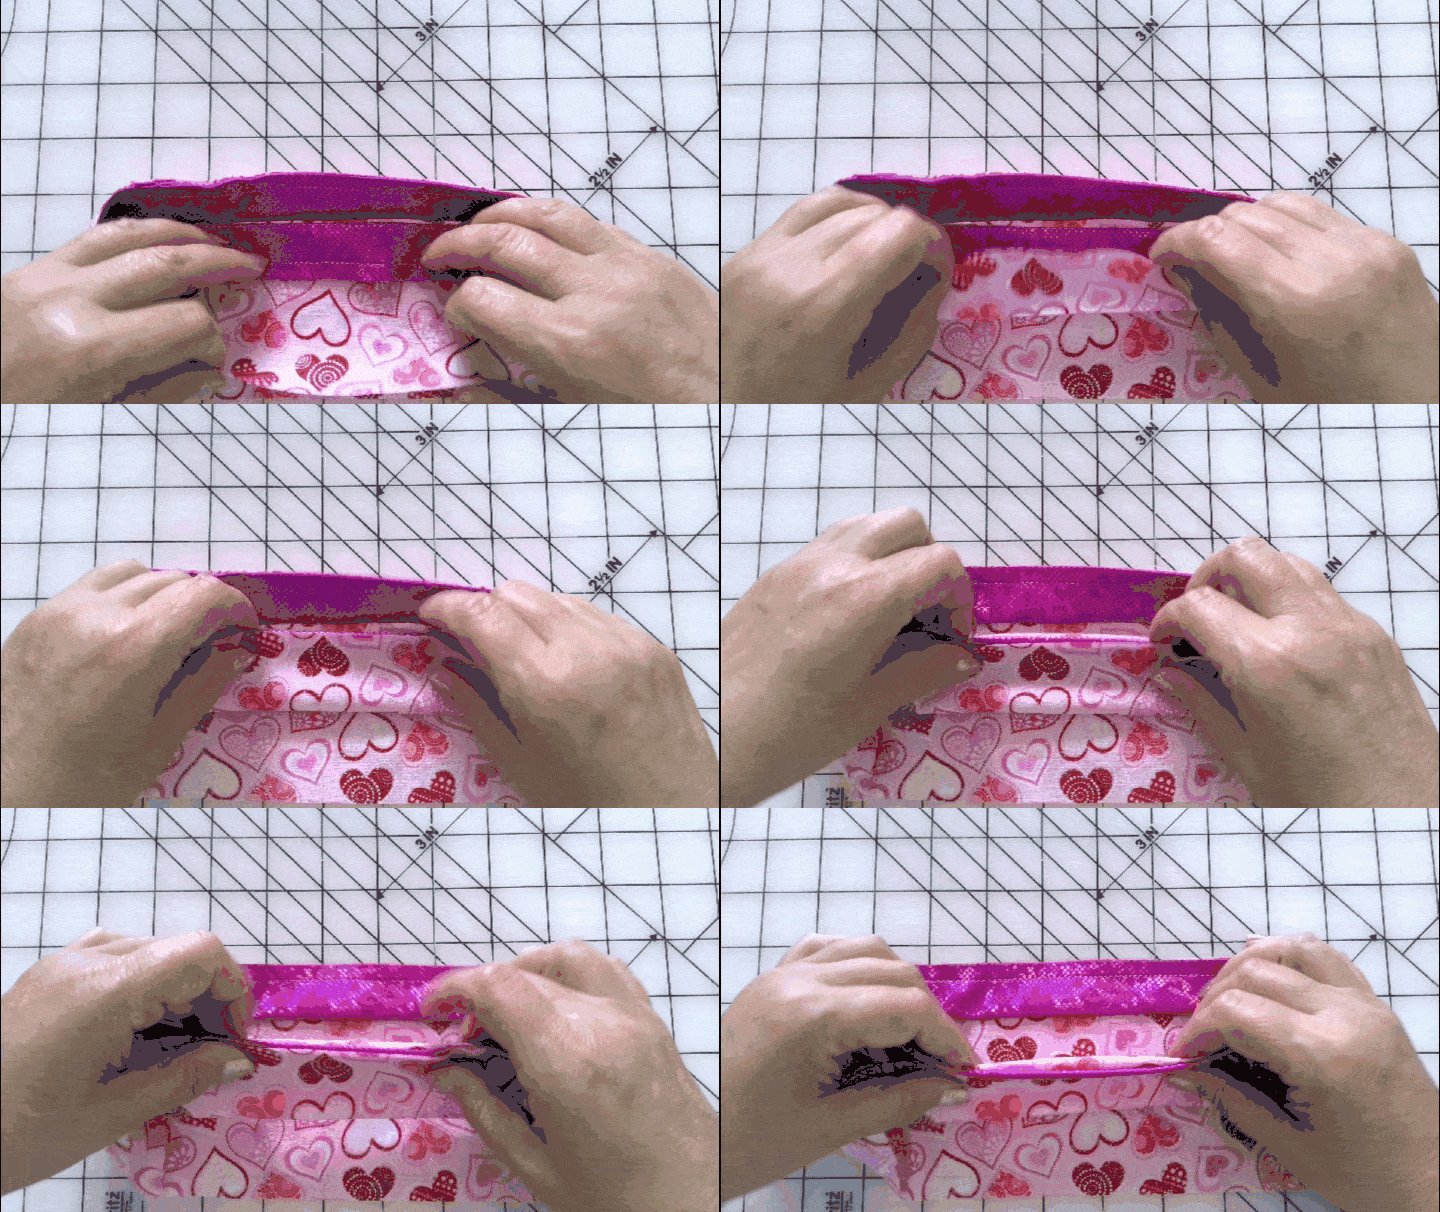
What is now the inner two layers will be unfolded and pulled out and will become part of the tube itself.
Now pin 2 outer layers together, make sure that you don’t pin the folded inner layers.
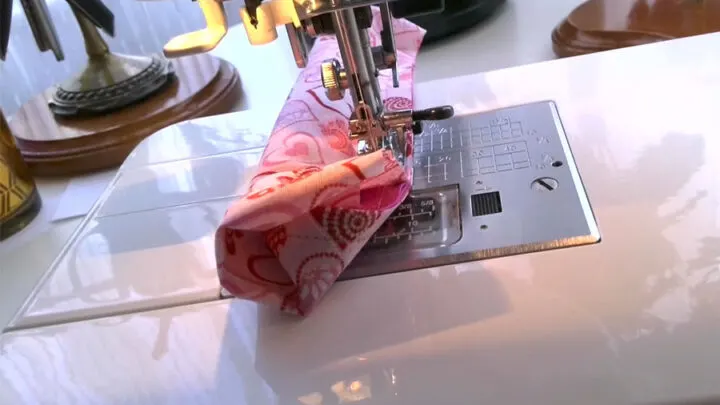
Start stitching this tube using ⅜ inch seam allowances.
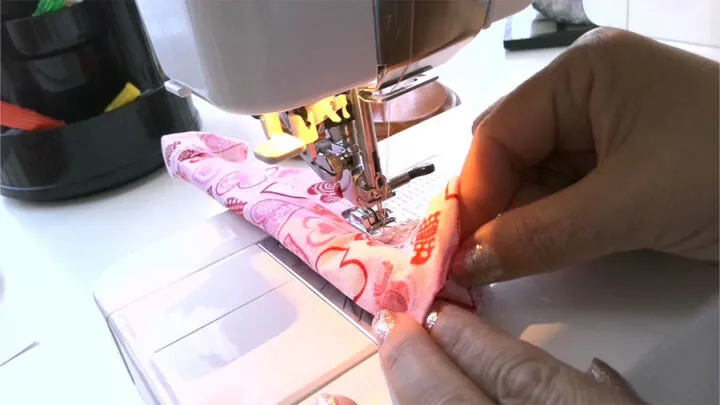
Stitch until close to the folded edge, then pull the inner layers. The inner layers will come out, we arrange them manually and continue stitching.
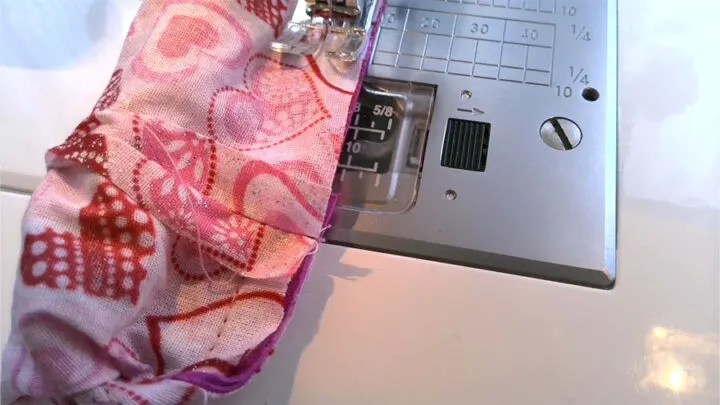
We do this until we are close to the start of the stitch. Leave about 1.5 inches not stitched for turning it right side out.
Step 5
Preparing the tube
So now we have this shapeless piece. How do we make it a scrunchie? Well, easily!
Turn the scrunchie right side out through the opening and press. Now you will have a tube with a small opening on one side.
Step 6
Inserting elastic for the DIY scrunchie
Use a 7- 8 inches strip of elastic.
I use 2 safety pins and put a safety pin on each end of the elastic. I like to secure one end of the elastic with a pin. This lets me keep track of the elastic as I feed it in. Use the safety pin for feeding the elastic strip through the tube. When you are done, both ends will be accessible through an opening on one side of the tube. Try to make sure that the elastic hasn’t twisted inside the tube.
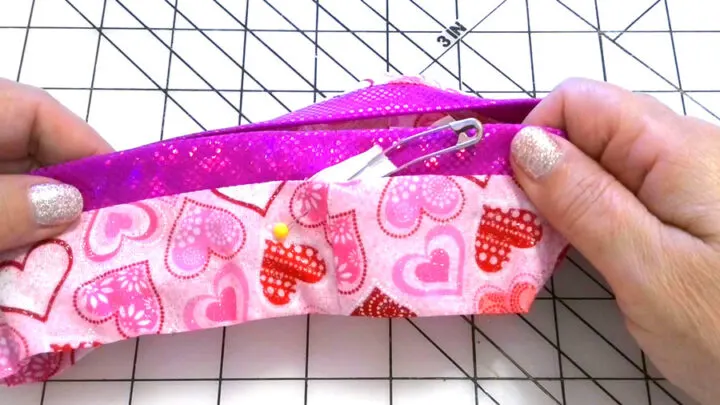
Take the two ends of the elastic and tie a knot or overlap the ends of the elastic and sew them together on the machine or by hand. The elastic should not come apart when you use the scrunchie, so the ends must be properly sewn or tied together.
Step 7
Sewing the opening closed
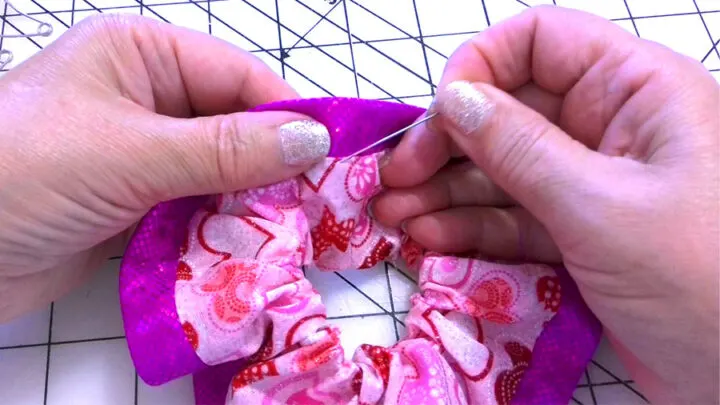
Hand-sew the hole in the stitches if you want a nice seamless finish. Close the opening using an invisible ladder stitch.
I have a detailed tutorial on how to do an invisible stitch by hand, so check it out.
How to make an oversized scrunchie
Oversized scrunchies are the newest trend in hair accessories. They look like a luxury items, but they’re not hard to make yourself. You can easily create your own oversized scrunchie with just a few simple steps.
Plus, making them yourself means that you get exactly what you want – whether it be color, fabric, or size – without having to settle for something else from the store.
It’s also fun and satisfying when you see the finished product in front of you. Once you try making one, we guarantee that you will want to create more for yourself or as gifts for friends and family members.
It’s also very rewarding because you will have something unique that nobody else has!
I made a few of them for different outfits.
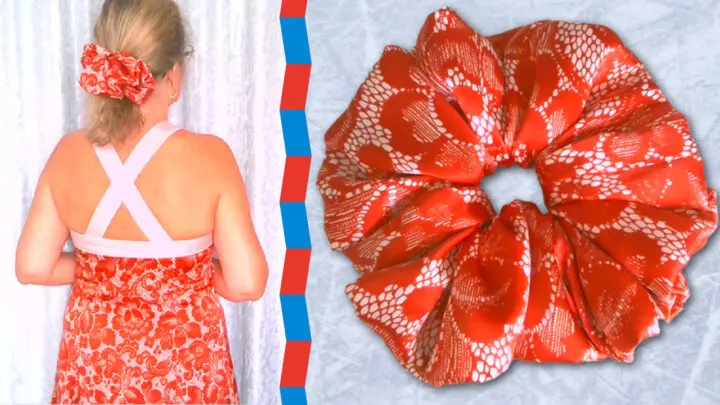
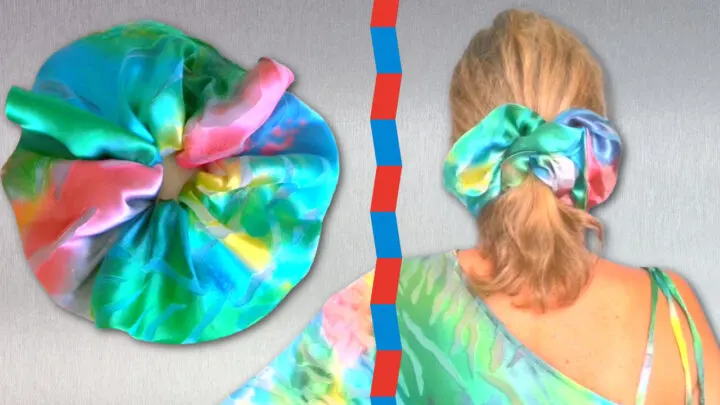
Here are the step-by-step instructions on how to make an oversized scrunchie for yourself or someone special. Now I will show you the most common way and it’s different from what I described above.
First of all, choose the fabric that you like most – cotton, silk satin, or velvet are great choices. I am going to use 100% silk fabric that was left after I made a dress.
The measurements for this oversized scrunchie are different from the previous one.
Cut one rectangle from the fabric of your choice 40 inches by 9 inches.
Prepare your sewing machine for making an oversized scrunchie
Use an 80/12 or 75/11 Universal needle. Insert a new needle if you are not sure how worn out the needle is. Check if it’s not bent.
Choose a straight stitch and check all the settings:
The stitch length should match your fabric thickness, if you are using medium-weight fabric put the stitch length to 2.5 mm.
set the right tension and check it on a scrap piece of the same fabric you are using for your scrunchie.
Thread the machine with good-quality thread that matches the fabric colors.
Step 1
Cutting the fabric for the oversized scrunchie
Press out all of the wrinkles to make the fabric nice and flat.
If you plan to use a rotary cutter, lay the cutting mat with its grid lines underneath your fabric so that you can cut a perfect rectangle (you don’t need to draw the rectangle on your fabric in this case).
If you are not using a rotary cutter and a cutting mat and plan to use fabric shears don’t forget to find some way of measuring the length of each side of your rectangle. You can draw it first on paper and then cut it from the fabric, or you can draw the rectangle right on your fabric using fabric markers and then cut it.
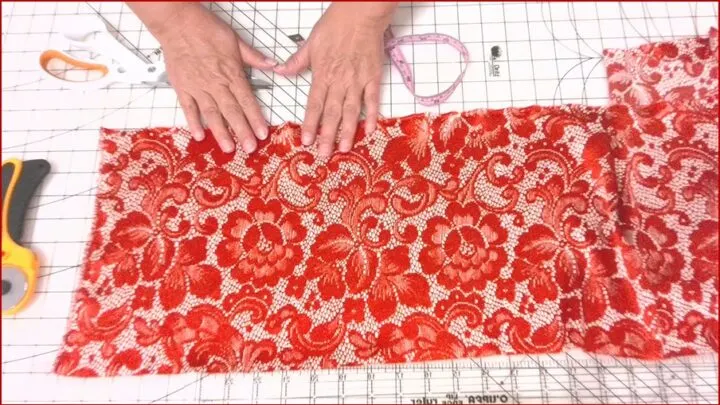
Step 2
Sewing long edges together
Fold the rectangle in half lengthwise right sides together. Secure the fold with pins.
Start stitching at about 2 inches from the one edge and end the seam at 2 inches from the other edge. You can mark the beginning and the end with pins or fabric markers so that when you go to your sewing machine you remember where to start and stop. Secure the seam with backstitching.
Seam allowances are 3/8 inch.
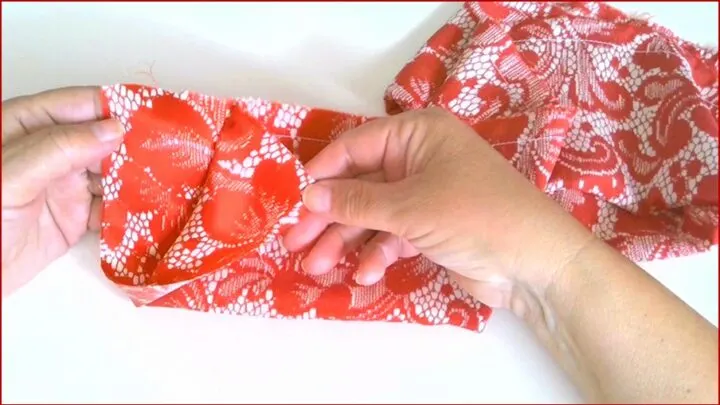
Step 3
Sewing short edges together
Now you have a tube of fabric. Turn it right side out. As we are making an oversized scrunchie, it’s easy to turn the tube just by hand.
Line up the short edges of the tube and pin them right sides together. We need to sew the two sides together. Seam allowances are 3/8 inch. Iron the seam when you are done stitching.
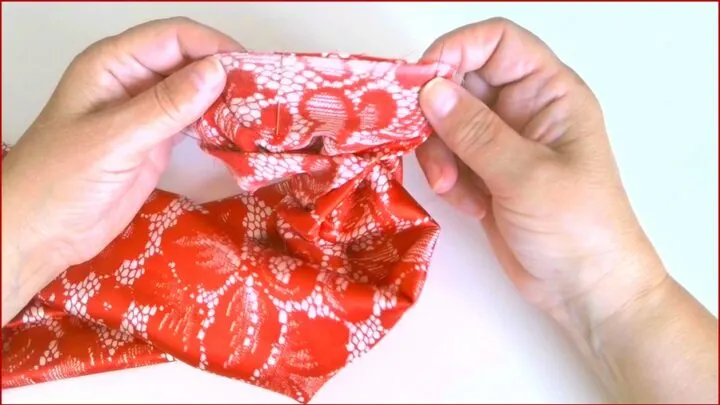
Step 4
Inserting elastic
Now it’s time to insert elastic. Cut a strip of elastic about 7 or 8 inches long. I used a 7″ strip. Usually, you should be able to twist the scrunchie twice around your hair. If your hair is thick you might want to use a longer strip. If you have a hair band compare the length of your elastic with the length of the hair band but don’t forget that you will need to overlap the ends of the elastic to sew them together.
How wide is the elastic? I used 3/8 inch elastic, but ¼ inch and ½ inch wide elastic can be used.
I use a safety pin for inserting elastic. Usually, I secure one end of the elastic strip with a pin so I don’t lose the elastic as I feed it in. When you are finished, both ends will be accessible through an opening in the tube.
Take the two ends of the elastic and tie a knot or overlap the ends of the elastic and sew them together on the machine or by hand. The elastic should not come apart when you use the scrunchie, so the ends must be properly sewn or tied together.
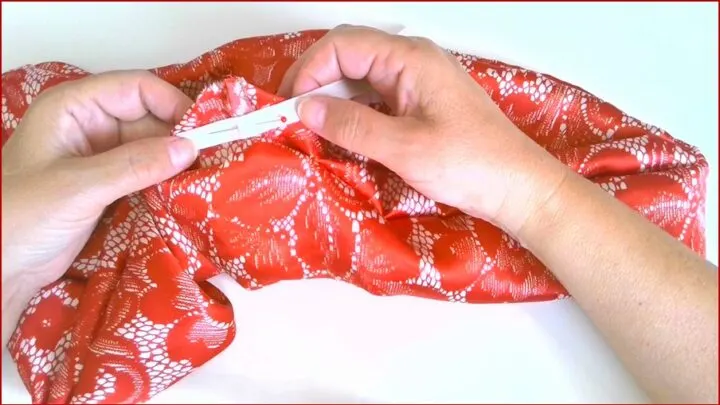
Step 5
Sewing the opening closed
Hand-sew the hole in the stitches if you want a nice seamless finish. Close the opening using an invisible ladder stitch.
Learn how to do an invisible stitch by hand.
But it’s also possible to sew the opening using your sewing machine.
————————
Tie up your new oversized scrunchie around your hair and enjoy wearing it!
How to make a silk scrunchie with a zipper
There are many benefits to wearing a silk scrunchie in your hair, including the fact that it will look and feel great.
Silk scrunchies are stylish and functional accessories for your hair, they are soft and comfortable but durable. You have seen them being sold in stores. They still have to be stretchable and fix your hair well. I thought that silk scrunchies are slippery and might slip off your hair. But after I made a few silk scrunchies for my daughters and myself I see that they work well and don’t slip. I guess the secret is to choose the right elastic to insert because that’s what’s holding your hair.
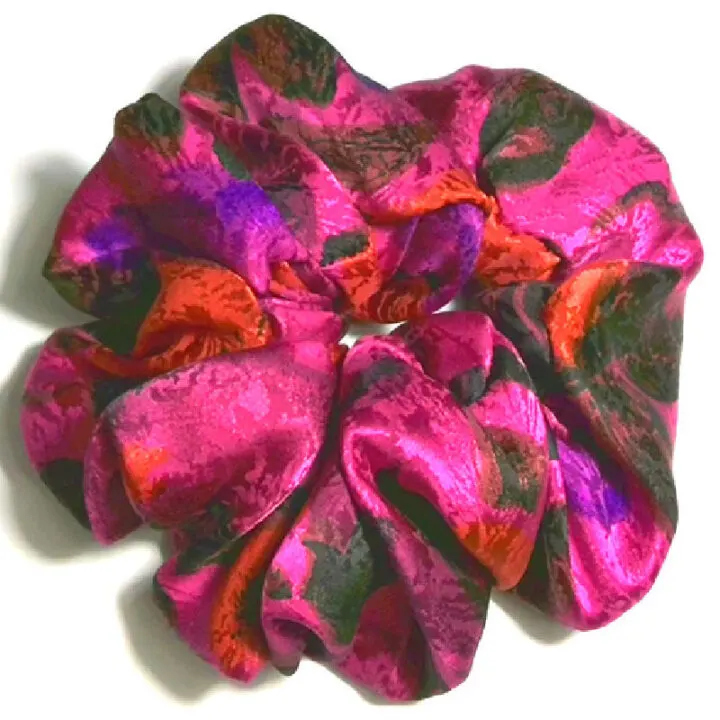
There are many types of pure silk fabric. So, what types of silk fabrics are suitable for scrunchies? Well, many lightweights to medium-weight silk fabrics can be used but probably woven silk satin is the best. It’s better to avoid very lightweight silk fabrics like georgette or chiffon, knit silk fabric, or stiff silk fabrics used for home decorating projects and bedding.
But this is not all! I made a silk scrunchie with a zipper and will show you how you can make it too.
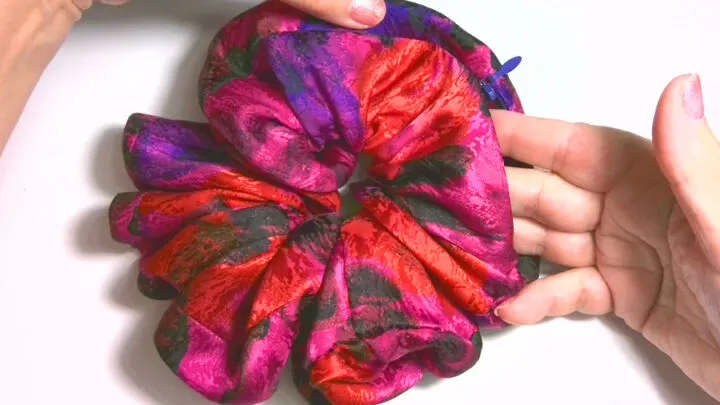
These DIY scrunchies with an invisible zipper are ideal for carrying small items (like a credit card, for example) around with you.
I didn’t even have time to make an image wearing this scrunchie because my daughter took it as soon as I finished making it to wear at a party and of course, she didn’t have any spare minutes for the images.
What you will need
Silk fabric
Invisible zipper suitable for delicate silk fabric
Sewing machine
Invisible zipper presser foot (optional)
Regular sewing notions
Note: Some of the links on this page are affiliate links. This means I will receive a commission if you order a product through one of my links. I only recommend products I believe in and use myself.
Invisible zippers come in different colors, so it’s important to find one that matches your fabric. But the more important thing is to choose a zipper suitable for lightweight silk fabric: the fabric of the zipper should be very lightweight and flexible. And also the zips should run very smoothly and be neat.
It’s not easy to find this kind of zipper in fabric shops. For example, zippers sold in Joann Fabrics are heavy, not flexible, and have woven twill fabric which is not suitable for lightweight silk.
But I found very lightweight zippers on Amazon, they are great but longer than the zipper I used for my scrunchie. But it doesn’t really matter, you can easily cut a zipper to the size you need.
The measurements for this silk scrunchie with a zipper are similar to the previous one (the oversized scrunchie).
But you will need to cut 2 rectangles from the fabric of your choice and they measure 40 inches by 4 1/2 inches each.
I prefer to make this scrunchie from 2 pieces of fabric because it’s easier to insert a zipper when they are cut like this.
Prepare your sewing machine for making a silk scrunchie with a zipper
Use a 75/11 Universal needle (this size is better for silk fabric). Insert a new needle if you are not sure how worn out the needle is. Check if it’s not bent.
Choose a straight stitch and check all the settings:
The stitch length should match your fabric thickness, if you are using silk fabric put the stitch length 2 – 2.5 mm.
Set the right tension and check it on a scrap piece of the same fabric you are using for your scrunchie. Make sure there is no puckering in the seams.
Thread the machine with good-quality thread that matches the fabric colors.
Use special pins for silk fabric: they are very thin and sharp and don’t leave any holes in delicate silk fabric.
Step 1
Press out all of the wrinkles to make the silk fabric nice and flat.
If you plan to use a rotary cutter, lay the cutting mat with its grid lines underneath your fabric so that you can cut perfect rectangles (you don’t need to draw the rectangles on your fabric in this case).
If you are not using a rotary cutter and a cutting mat and plan to use fabric shears don’t forget to find some way of measuring the length of each side of your rectangle. You can draw it first on paper and then cut it from the fabric, or you can draw the rectangles right on your fabric using fabric markers and then cut.
Step 2
It’s better to overcast all raw fabric edges of these rectangles with overlock stitches of your sewing machine or with a serger. I didn’t do it when making my silk scrunchie with a zipper but realized later that if we are going to use the scrunchie to put small things inside, the fabric edges will easily fray and it will get messy inside from all those fraying threads. This was my mistake but you don’t need to make it too.
✅ Related tutorial: How to use a sewing machine’s overcast presser foot for finishing seams/video sewing tutorial
Step 3
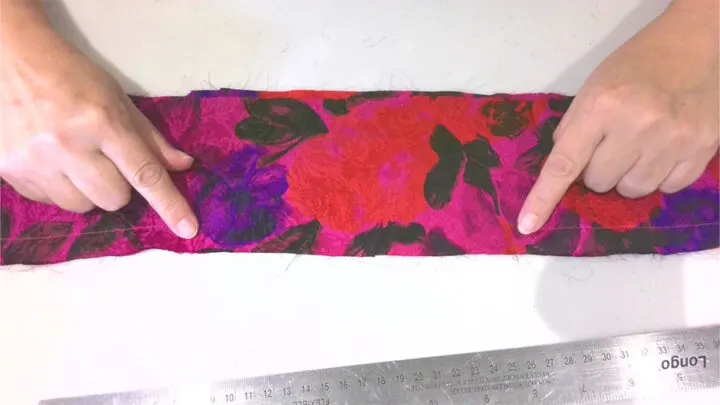
Using a fabric marker, mark the space where you want to sew a zipper. Make the length of this opening a little bit smaller than the zipper length. For example, my zipper was 4 inches long, so I left the space for the zipper 3.5 inches.
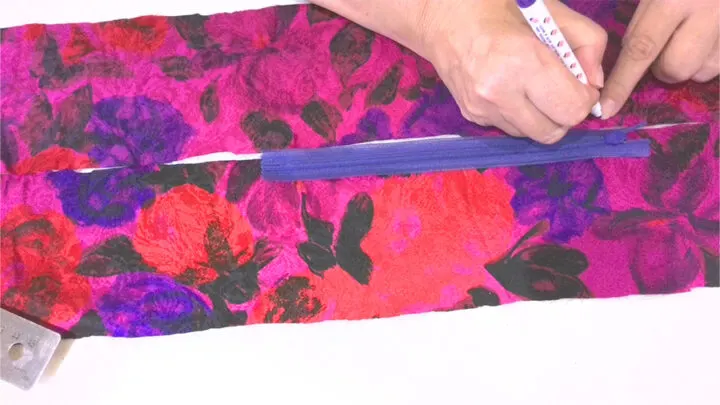
Place the fabric rectangles right sides together and pin. Stitch, leaving an opening for inserting the zipper.
Start stitching at about 2 inches from the edge and also leave 2 inches unstitched from the other edge. Mark the beginning and the end of these 2 seams with fabric markers so that when you go to your sewing machine you remember where to start and stop. Secure the seams with backstitching.
Seam allowances are 5/8 inch in this case because we are using silk fabric that is fraying more.
Step 4
Sew the zipper in place.
If you don’t know how to sew an invisible zipper check out my special tutorial on inserting zippers.
But here are a few tips specific to the project.
Find the top stopper on your zipper and align it with the marks you made on your fabric. Open the zipper and baste both parts of the zipper (to hold the zipper in place for stitching) with the zipper teeth facing inwards.
Use a special invisible zipper presser foot.
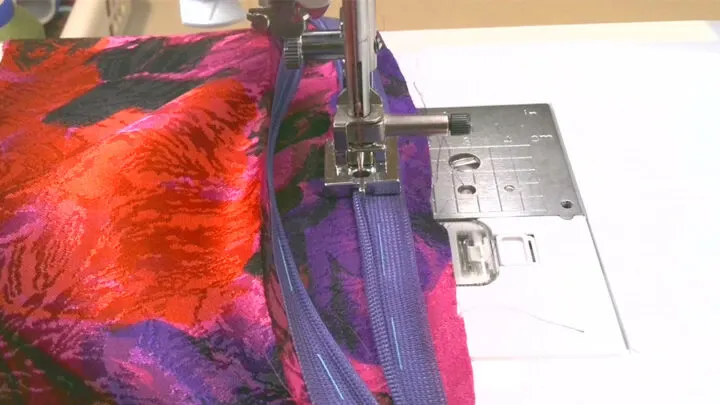
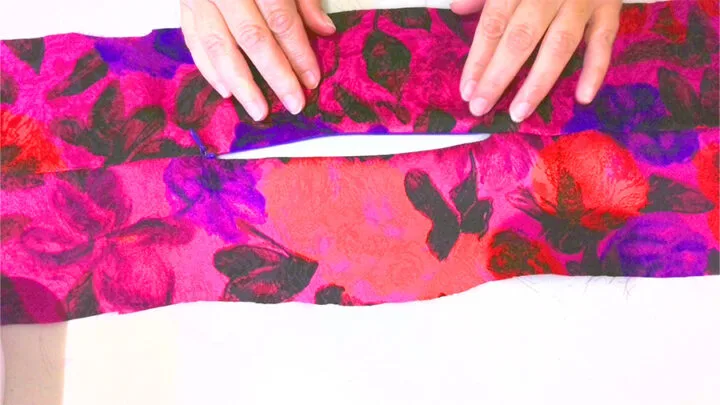
Don’t forget to sew a few stitches on the right side of the fabric at the end mark after you finished inserting the zipper.
Press the seams open.
Step 5
Sew together the opposite long edges of the fabric keeping 5/8 inch seam allowances.
Press the seam.
Step 6
Turn this fabric tube right side out using a safety pin or just by hand. Keep the zipper closed and from this point treat it like a regular scrunchie, so the steps below are pretty much the same as above for oversized scrunchie (from step 3).
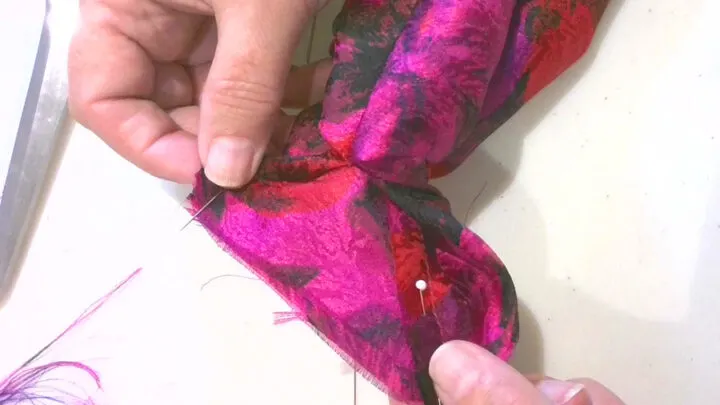
Line up the short edges of the tube and pin them right sides together. We need to sew the two short sides together. Seam allowances are 3/8 inch in this case. Iron the seam when you are done stitching.
Step 7
Cut a strip of elastic about 7 or 8 inches long. I used a 7″ strip. Usually, you should be able to twist the scrunchie twice around your hair. If your hair is thick you might want to use a longer strip. If you have a hair band compare the length of your elastic with the length of the hair band but don’t forget that you will need to overlap the ends of the elastic to sew them together.
I used a ¼-inch elastic for this scrunchie.
Use a safety pin for inserting elastic. Usually, I secure one end of the elastic strip with a pin so I don’t lose the elastic as I feed it in. When you are finished, both ends will be accessible through an opening in the tube.
Take the two ends of the elastic and tie a knot or overlap the ends of the elastic and sew them together on the machine or by hand. The elastic should not come apart when you use the scrunchie, so the ends must be properly sewn or tied together.
Step 8
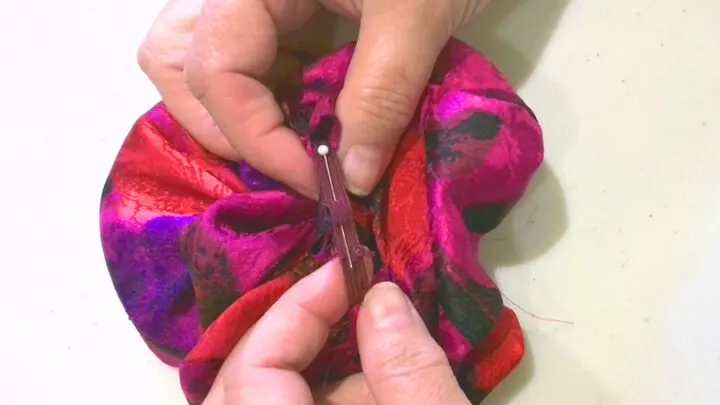
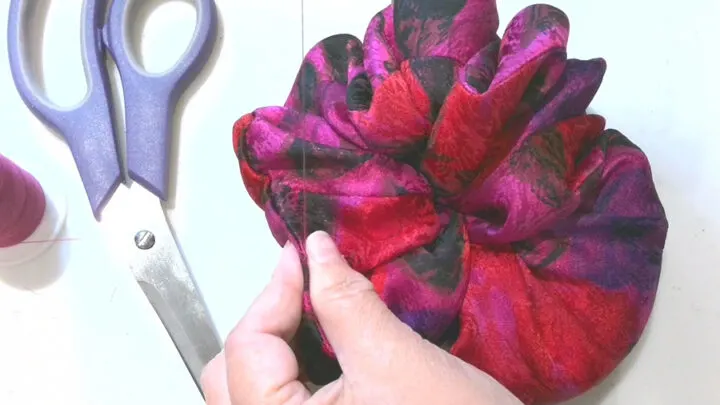
Hand-sew the hole in the stitches if you want a nice seamless finish. Close the opening using an invisible ladder stitch.
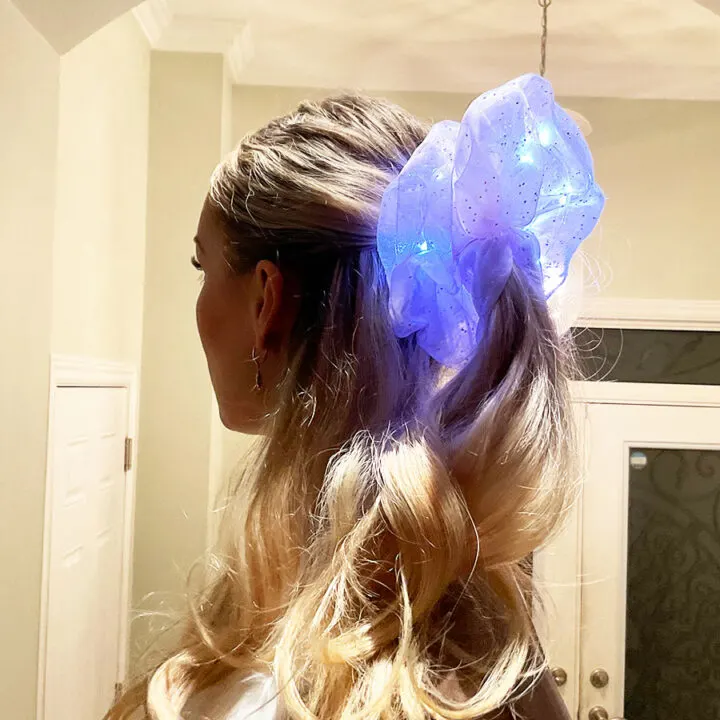
How to make an organza scrunchie that lights up
This cute scrunchie is a novelty item and a lot of fun! I think you agree it’s very pretty and eye-catching.
And believe it or not, you can easily make one like this if you have some beginner sewing skills.
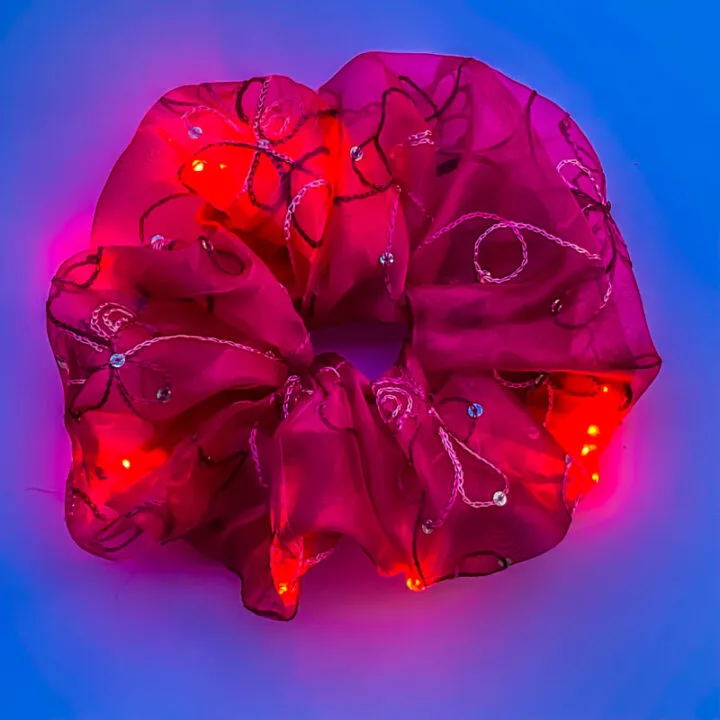
This scrunchie should be made oversized so it has enough space to insert a string of lights with a battery. It’s made from pretty organza fabric.
—————————————————
You might be also interested in this tutorial.
I created a helpful Printable PDF eBook How to choose clothes and patterns to give the appearance of a flatter stomach. The original article is free on my site at this link
How to choose clothes and patterns to give the appearance of a flatter stomach
The PDF version is provided for convenience, it is ad-free, if printed it does not require any electronic device around and it will be available for you to refer to anytime you want.
You can purchase the PDF file for only $5. Click on the image below to purchase.
————————————————————–
First of all, choose the fabric that you like most – it should be sheer fabric but not very lightweight, it needs to have some stiffness.
I used these measurements for the organza scrunchie:
One rectangle from the fabric of your choice is 40 inches by 9 inches.
Prepare your sewing machine for making a scrunchie
Use a 75/11 Universal needle. Insert a new needle if you are not sure how worn out the needle is. Check if it’s not bent.
Choose a straight stitch and check all the settings:
The stitch length should match your fabric thickness, if you are using organza fabric put the stitch length to 2.5 mm.
set the right tension and check it on a scrap piece of the same fabric you are using for your scrunchie.
Thread the machine with good-quality thread that matches the fabric colors.
Step 1
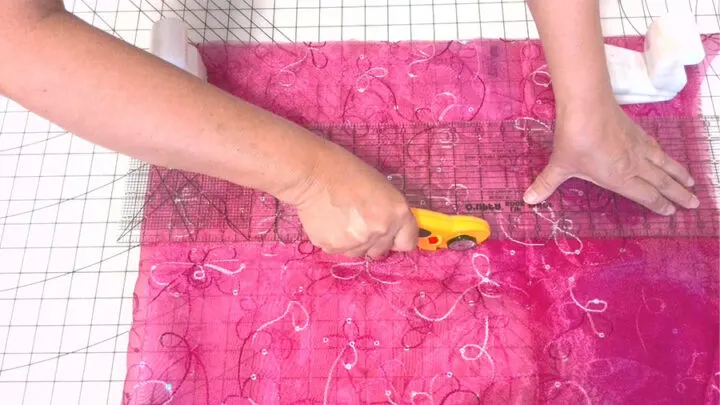
If you plan to use a rotary cutter, lay the cutting mat with its grid lines underneath your fabric so that you can cut a perfect rectangle.
If you are not using a rotary cutter and a cutting mat and plan to use fabric shears, draw the rectangle on paper first because it’s not easy to draw the rectangle on sheer organza fabric.
Step 2
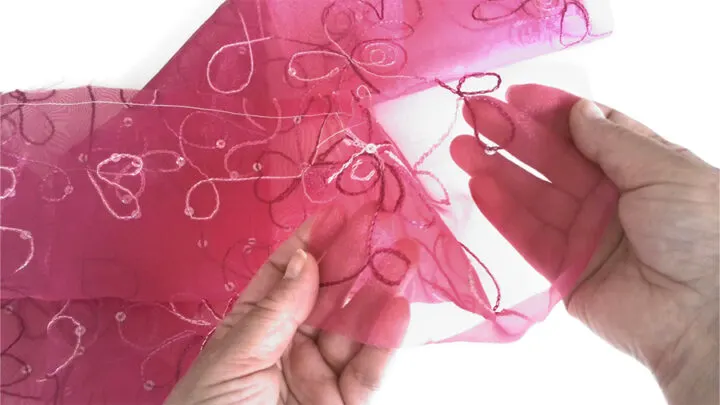
Fold the rectangle in half lengthwise right sides together. Secure the fold with pins. It was easy to find the right side of my organza fabric because it has some embroidery. But if your fabric doesn’t have any embellishments on the right side then you can use both sides as the right side.
Start stitching at about 2 inches from the one edge and end the seam at 2 inches from the other edge. You can mark the beginning and the end with pins or fabric markers so that when you go to your sewing machine you remember where to start and stop. Secure the seam with backstitching.
Seam allowances are 3/8 inch.
Step 3
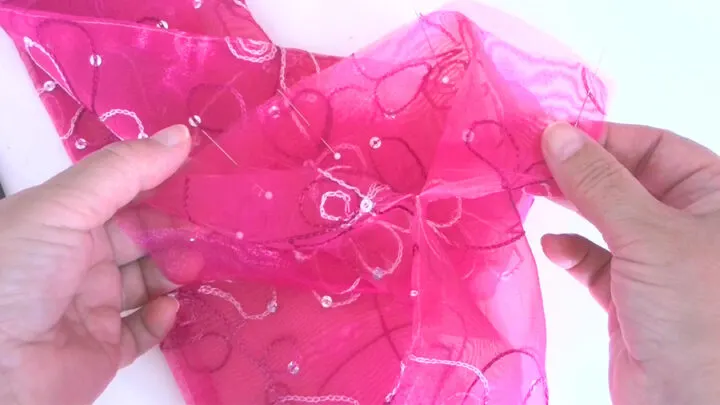
Now you have a tube of fabric. Turn it right side out. As we are making an oversized scrunchie, it’s easy to turn the tube just by hand.
Line up the short edges of the tube and pin them right sides together. We need to sew the two sides together. Seam allowances are 3/8 inch. Iron the seam when you are done stitching.
Step 4
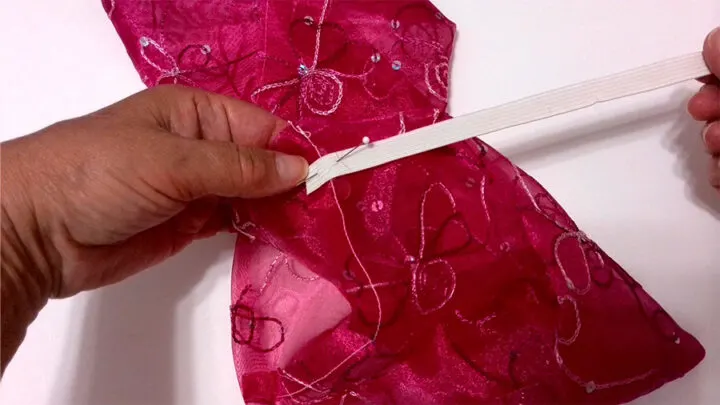
Insert elastic. Cut a strip of elastic about 7 or 8 inches long. I used a 7″ strip. Usually, you should be able to twist the scrunchie twice around your hair. The scrunchie should be tight enough so it doesn’t slip off. If your hair is thick you might want to use a longer strip.
I used ⅜ inch elastic for this scrunchie.
I use a safety pin for inserting elastic. Usually, I secure one end of the elastic strip with a pin so I don’t lose the elastic as I feed it in. When you are finished, both ends will be accessible through an opening in the tube.
Take the two ends of the elastic and tie a knot or overlap the ends of the elastic and sew them together on the machine or by hand. The elastic should not come apart when you use the scrunchie, so the ends must be properly sewn or tied together.
Step 5
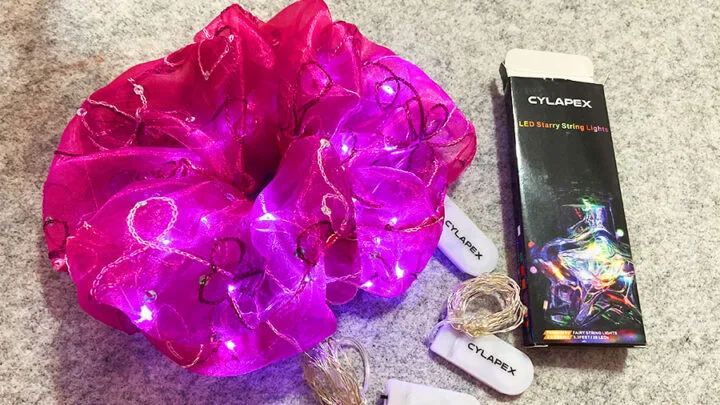
Through the opening, insert the small string of led lights together with the battery. Distribute the lights throughout the scrunchie so the lights are not all in one place.
There are many sellers of this kind of light on Amazon. I bought this and they work great.
Step 6
Hand-sew the hole in the stitches if you want a nice seamless finish. Close the opening using an invisible ladder stitch.
You can wear this kind of scrunchie with lights on or off.
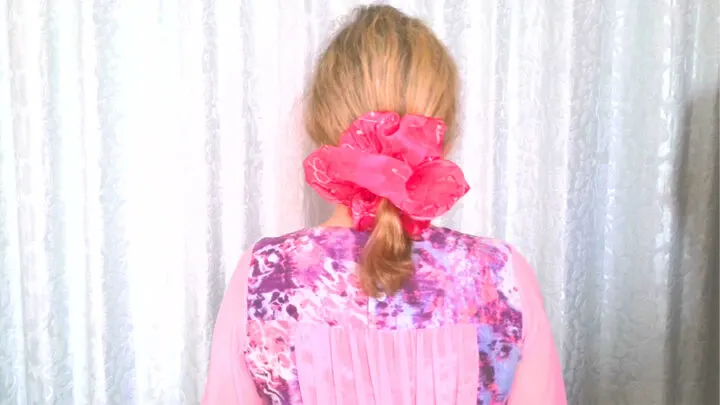
This is a scrunchie I made for my daughter from different organza fabric.
How to make a scrunchie without a sewing machine
There are ways to make scrunchies without sewing! No matter if you’re not so great at using the sewing machine or don’t have a machine, this simple tutorial will show how.
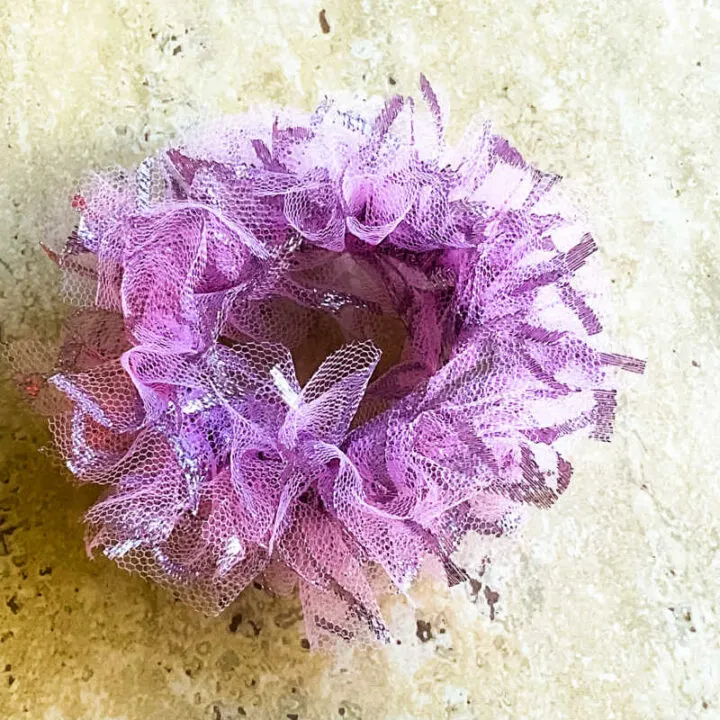
How to make a knot scrunchie
What you will need
Fabric that doesn’t fray
Hair band
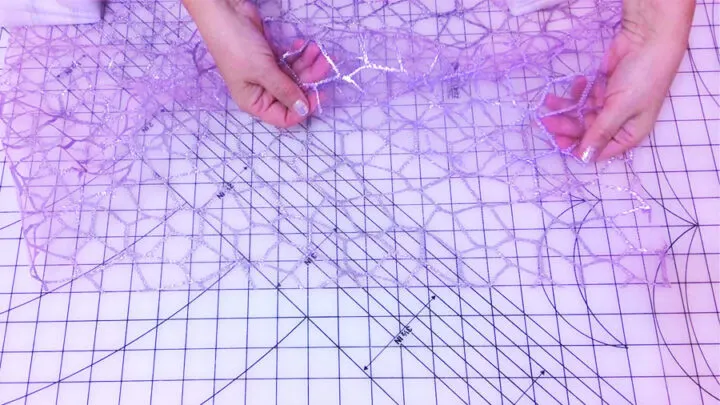
For this scrunchie, the best fabric is tulle – a very fine, stiff netting fabric used for veils, gowns, tutus, and dresses. Can be easily found in any fabric store. This is the tulle I used for my no-sew scrunchie.
Step 1
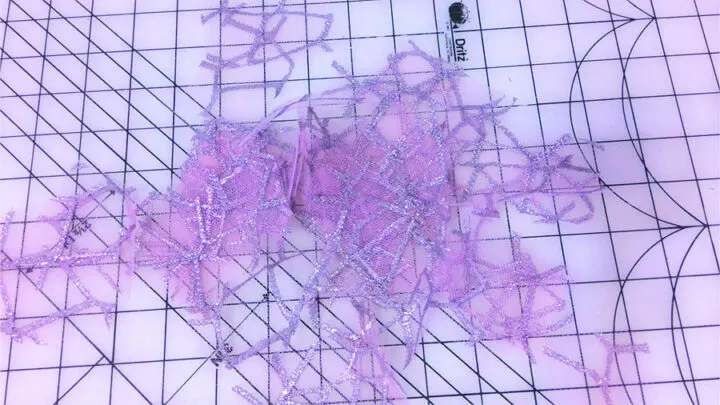
For this scrunchie, you will need to cut many small pieces of tulle netting. The size of one piece is 3 inches by 2 inches. And to cut them easily, you better use a rotary cutter.
Place the fabric on the cutting mat folded in half. Cut a strip 2 inches wide and as long as the whole piece of fabric.
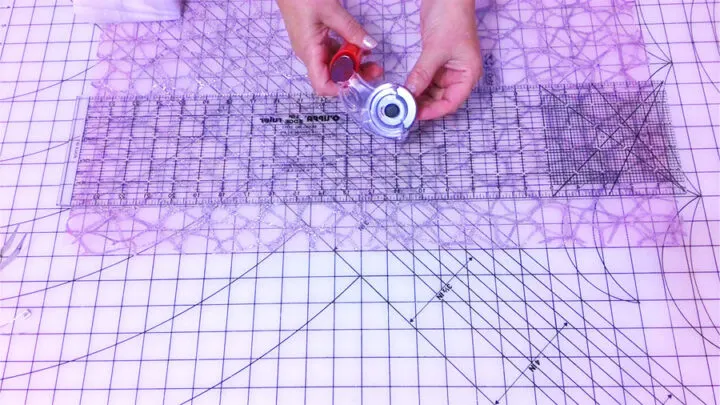
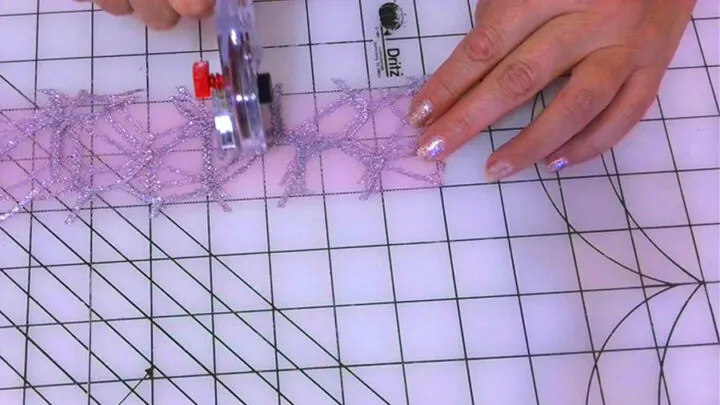
Cut 2 more strips like that. Place all 3 strips on top of each other and using a grid of the cutting mat cut them into small pieces 3 inches each.
Step 2
Take a hair elastic and start tying the tulle pieces on it. You need to place them very close to each other so you cover the whole elastic. This process is very easy of course but a little time-consuming as you need to tie a lot of these small pieces. But the result is great!
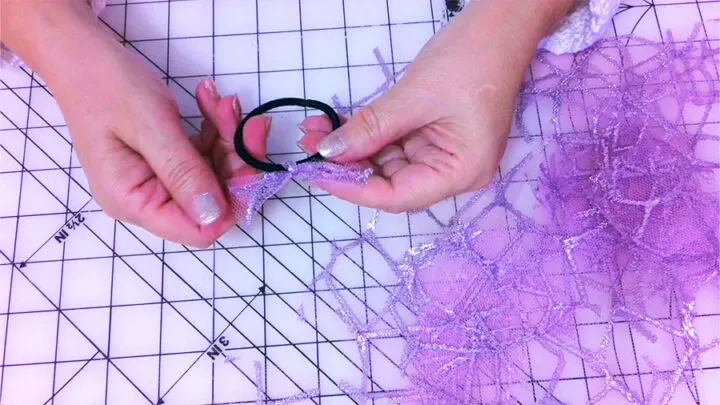
If you tie the pieces tightly enough, they won’t come apart when you’re using the scrunchie.
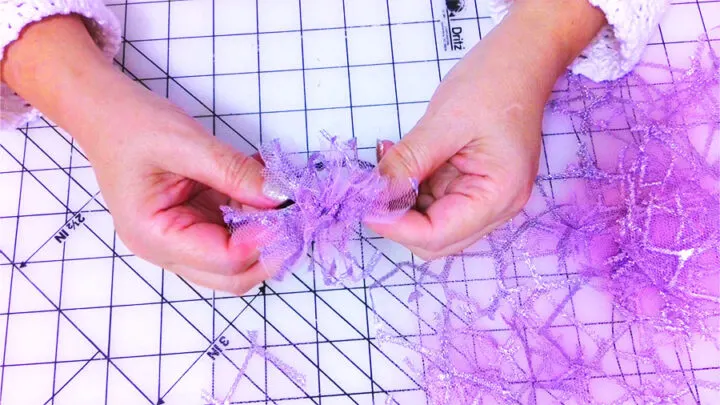
It’s as simple as that. Do this all across the hair band until you fully cover it and all strips are knotted off.
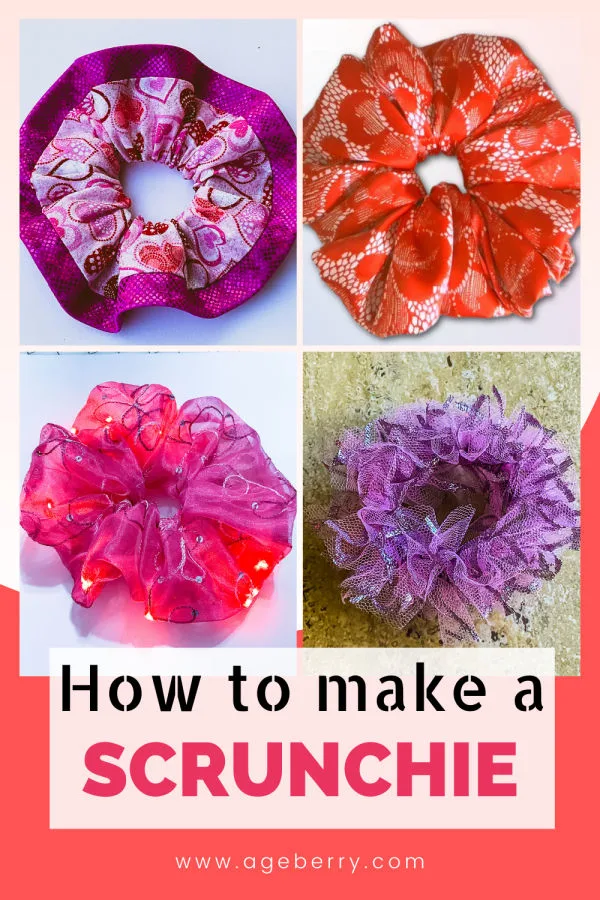
Did you find this tutorial helpful? If so, save this pin (see below) on your sewing board so you can come to this tutorial later when you need this information on how to make a scrunchie, and follow me on Pinterest for more tips, tutorials, and inspiration!
latest posts
- Ditch My Sewing Machine? Not in This Lifetime!
- Adorable DIY Needle Book | Easy Tutorial for Beginners
- Master the Seam Ripper: Your Ultimate Guide to Precision Stitch Removal
- Think You Know Zippers? This Installation Guide Might Surprise You
- Why Does Your Seam Ripper Have a Red Ball? Discover Its Purpose!
- Topstitching Troubles? This Simple Trick Will Turn It Around Instantly!
- How to Sew Shirring: A Step-by-Step Guide to Elastic Thread Gathering
- Are Self-Threading Needles Really Useful?
- Amazon Spring Sale: Best Choices

