Narrow Hem On Curves: A Unique Sewing Hack For Slippery Fabrics
In this sewing tutorial, I want to show you exactly what I used to easily make a narrow hem on curves in slippery satin, and why this method worked so well.
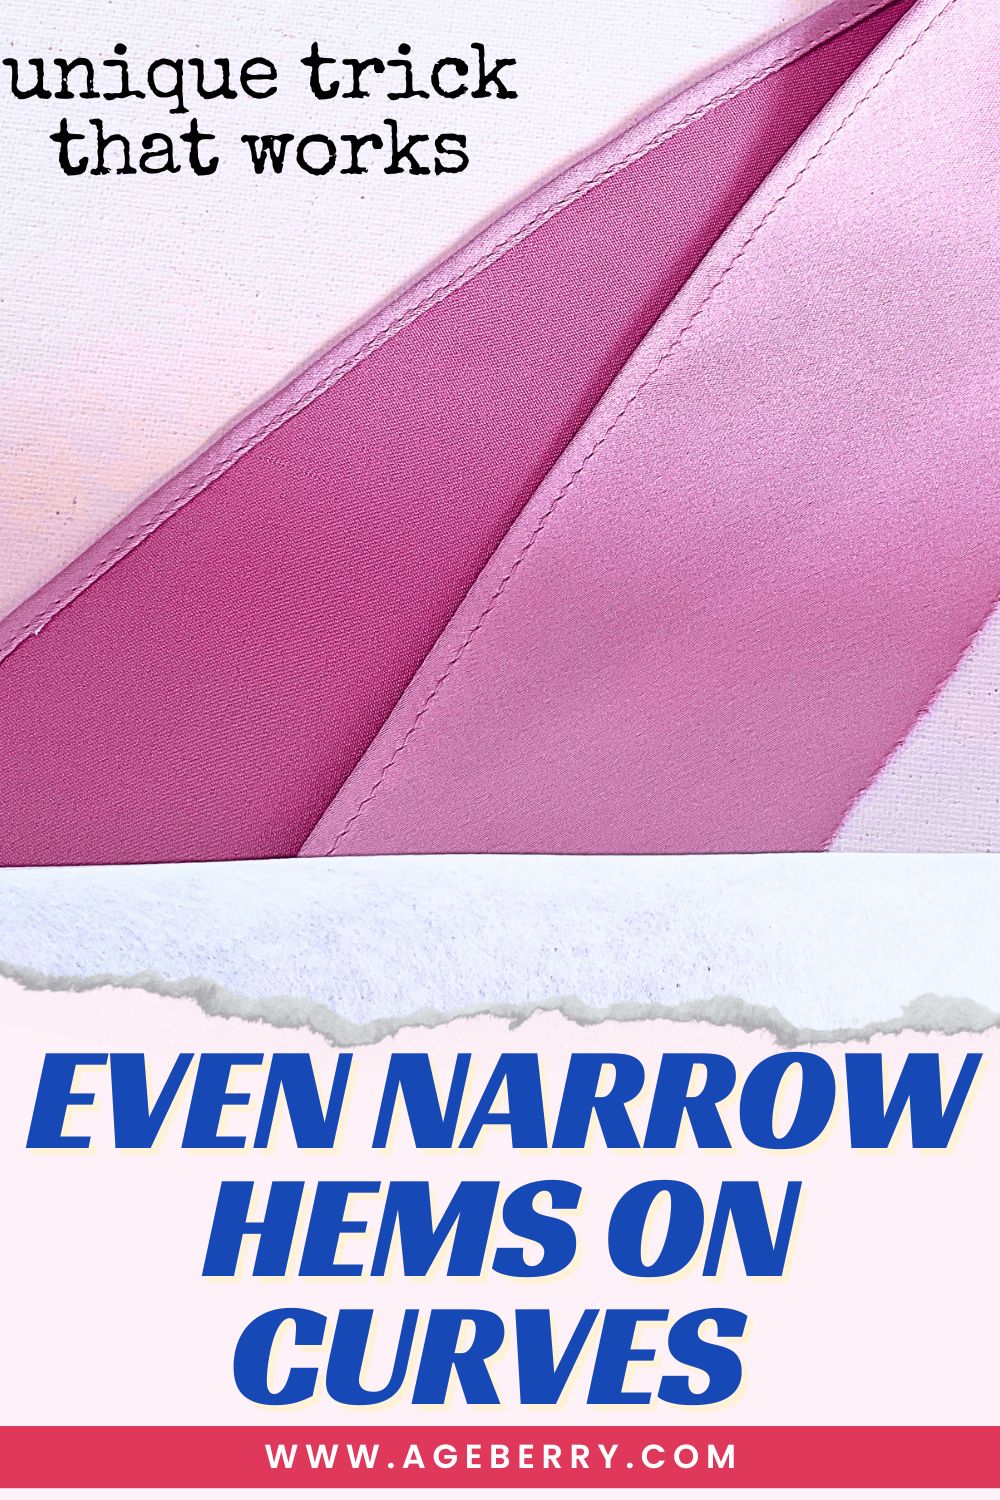
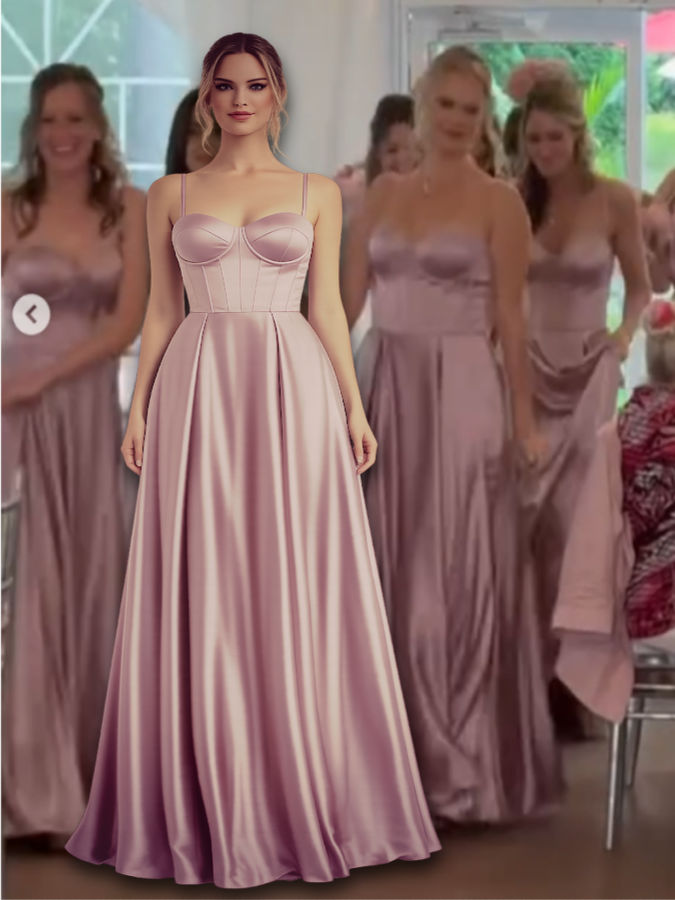
My daughter was supposed to be a bridesmaid, and the dress was lovely. The color was soft and elegant, the satin had that beautiful glow, and the style was just right. The only problem was the length. It was much too long, and the skirt was very full. After I marked the new hemline and cut off the excess, I realized I was dealing with almost 9 yards of hem. Yes, 9 yards. On satin. At that moment, the dress and I stopped being friends for a little while.
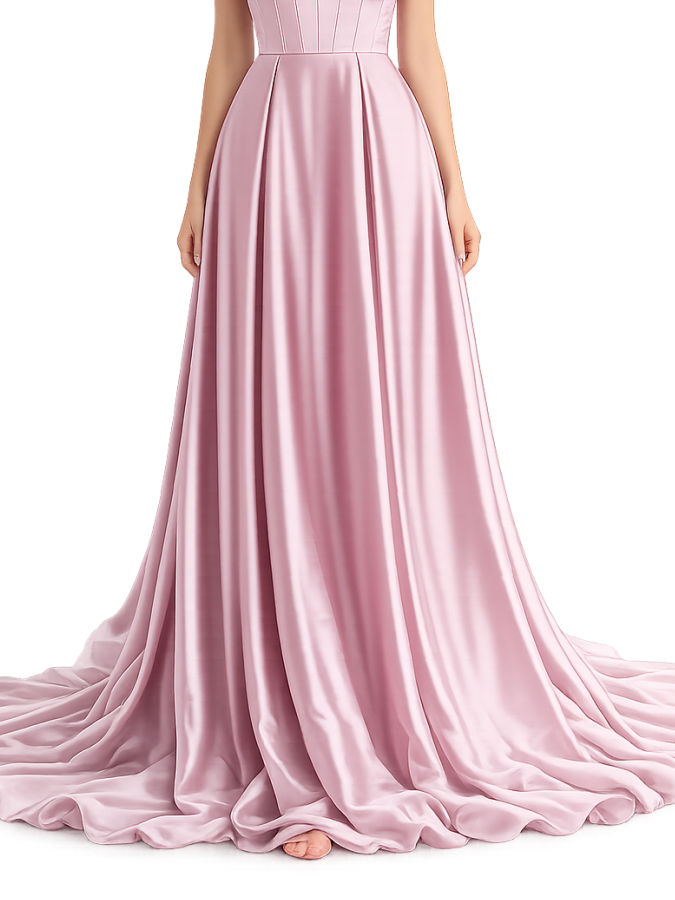
If you sew, you already know that satin slips, shifts, and slides away the second you think you have it under control. A narrow hem on a full satin skirt is not the kind of job that inspires calm, cheerful thoughts. It inspires deep sighs and a quick look through your sewing room to see what might save the day.
I needed a method that would be fast, neat, and dependable. I did not have time for a long battle with 9 yards of slippery fabric. So I decided to try a real sewing trick. Not a fancy trick. Not a mysterious trick. Just one of those clever little solutions that makes you stop and think, well, that was smarter than wrestling with satin for the next five hours.
I reached for tear-away embroidery stabilizer.
To be honest, I was not expecting miracles. But after I tested it, I was impressed. The narrow hem came out smooth, even, and surprisingly neat. On a full satin skirt, that felt almost suspicious.
Why I Couldn’t Use The Ban Roll Method For Narrow Hem
If you have been reading my tutorials for a while, you probably know that I really like the ban roll method for making a narrow hem. I even have a popular tutorial on it – Narrow hem tutorial: how to make a narrow hem using a Ban Roll tape. It is neat, smart, and very helpful when the hem edge is straight or close to straight. Ban roll gives you a tidy guide, and the hem comes out beautifully even.
But this dress had other plans.
The skirt was very full, and after I cut off the extra length, the hemline was not straight. It had a gentle curve all the way around. Not an extreme curve, but enough to matter.
That is why ban roll was not the right choice here.
Ban roll is stable. That is exactly what makes it useful on straight hems. But on a curved hem, that same firmness can work against you. Instead of helping the edge fold naturally, it can fight the curve. You may end up with ripples, distortion, or a hem that simply does not want to lie flat.
So I decided to try a different method.
I needed something that would support the satin, keep the width of the hem even, and still allow the curved edge to behave like a curved edge. That is when I reached for tear-away embroidery stabilizer.
This turned out to be a very useful little trick. The stabilizer gave me control without making the hem stiff or bulky. It helped me form a very narrow hem on a curved satin edge, which is not exactly the kind of task that usually fills a person with optimism.
For this tutorial, I need to mention one practical thing. I could not show the entire dress hem in the video and step-by-step photos. The hem was simply too large and too awkward to film well. So for the demonstration, I used a section cut from the hem of the dress. It is the same satin, the same curve, and the same method. Just much easier to fit into the frame without needing an aerial drone and a gymnasium.
So in the next steps, I will show you exactly how I used tear-away embroidery stabilizer to make a narrow hem on this curved satin edge.
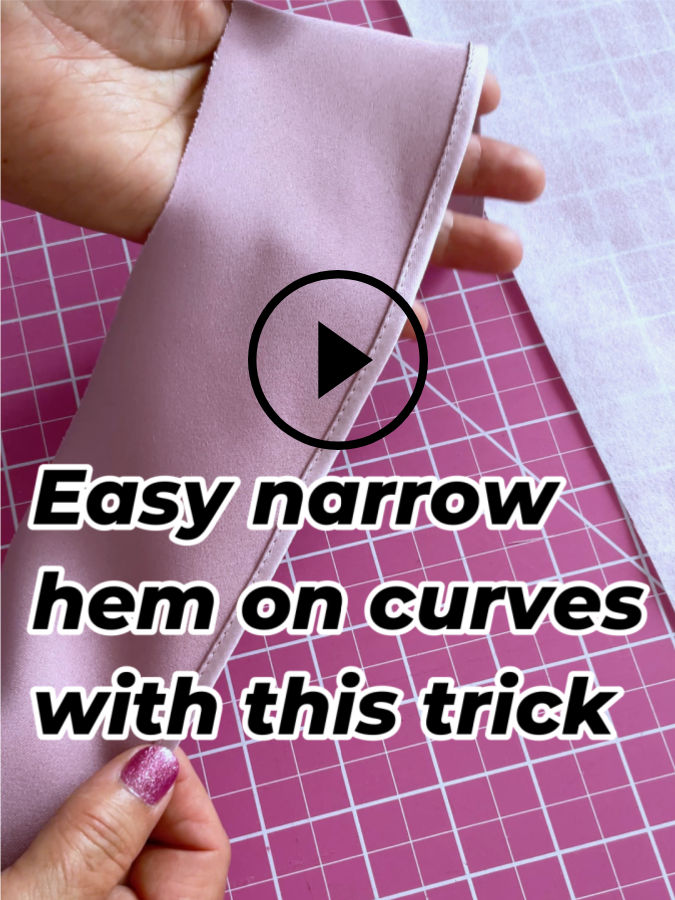
This Facebook reel shows a quick version of the method I used for curved narrow hems.
Step 1. Measure And Trim The Length
This step sets the tone for the entire hem. Satin does not forgive uneven lines, so this part deserves a bit of patience.
Start with the person who will wear the dress. She needs to stand straight, relaxed, and in the exact shoes planned for the event. Even a small heel difference changes the hem length more than expected. Ask her to stand on a flat, hard surface. Carpet can shift the hem slightly, which leads to uneven results.
This dress already had a finished hem, which changes the whole approach. I was not starting from raw fabric.
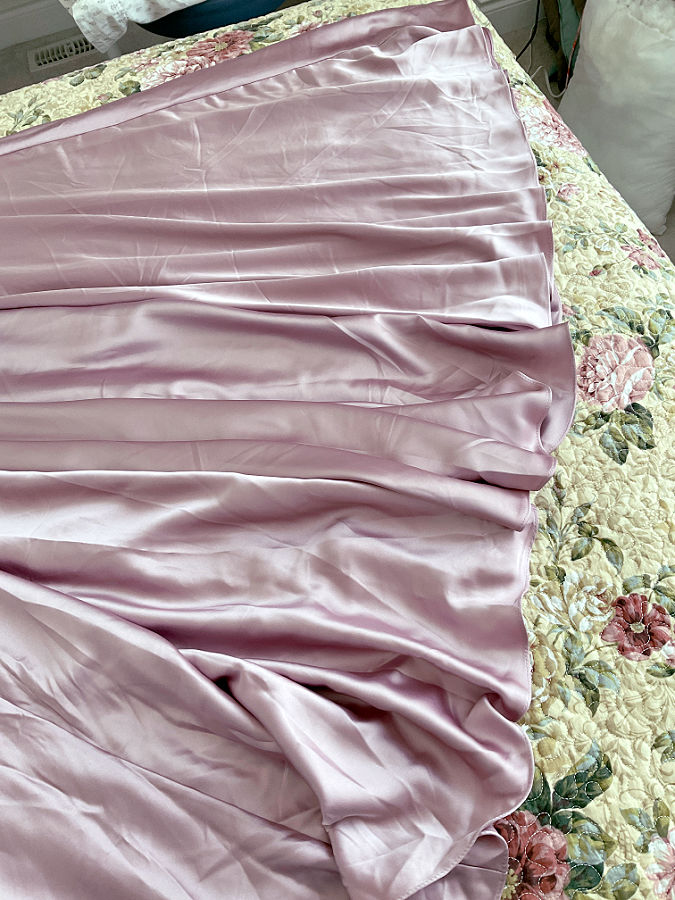
So I did not pin the entire hem. Pinning 9 yards all the way around is not realistic unless you have a full afternoon and a lot of patience. I pinned the new length only in a few places, about quarter yard long.
Place pins horizontally at the desired length and keep the pins parallel to the floor.
From there, I measured the difference between the original hem and the new desired length. Once you know that difference, you no longer need to work on the body.
In my case, the dress needed to be shortened by 3.5 inches (close to 9cm). But I also had to think ahead. I was planning to make a new narrow hem, so I needed to leave fabric for that.
My new hem allowance was going to be ½ inch (about 1.3cm).
So instead of cutting off the full 3.5 inches, I needed to cut only 3 inches (~7.6cm) from the old hem all around the dress.
I laid the dress flat on a large surface. A bed worked best here because the skirt was very full. Then I measured the same distance from the existing hem edge all around the skirt and made small marks with a disappearing fabric pen.
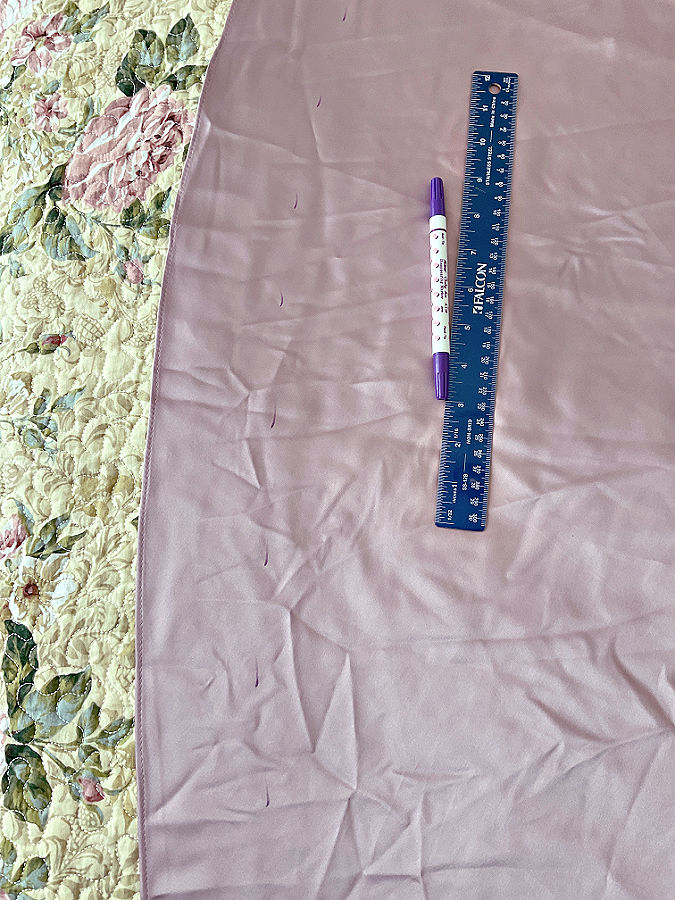
This method works beautifully for satin because:
- You avoid excessive handling
- You do not distort the shape of the skirt
- You keep the measurement consistent
Note: Some of the links on this page are affiliate links. This means I will receive a commission if you order a product through one of my links. I only recommend products I believe in and use myself.


For marking on satin, choose your tool carefully. Satin has a long memory when it comes to marks.
Good options:
- Disappearing ink fabric pens (which is what I used)
- Very fine tailor’s chalk
- Chalk pencils with a sharp tip
Avoid:
- Regular pens or markers
- Anything that requires pressure to show
Before marking the dress, test your tool on a scrap or an inside seam. Satin can react in surprising ways. Some marks refuse to leave when you expect them to.
A circle skirt will not form a straight edge. You will see gentle curves. Follow them. Do not try to force a straight line where the fabric naturally curves.
The goal is a smooth, continuous cutting line.
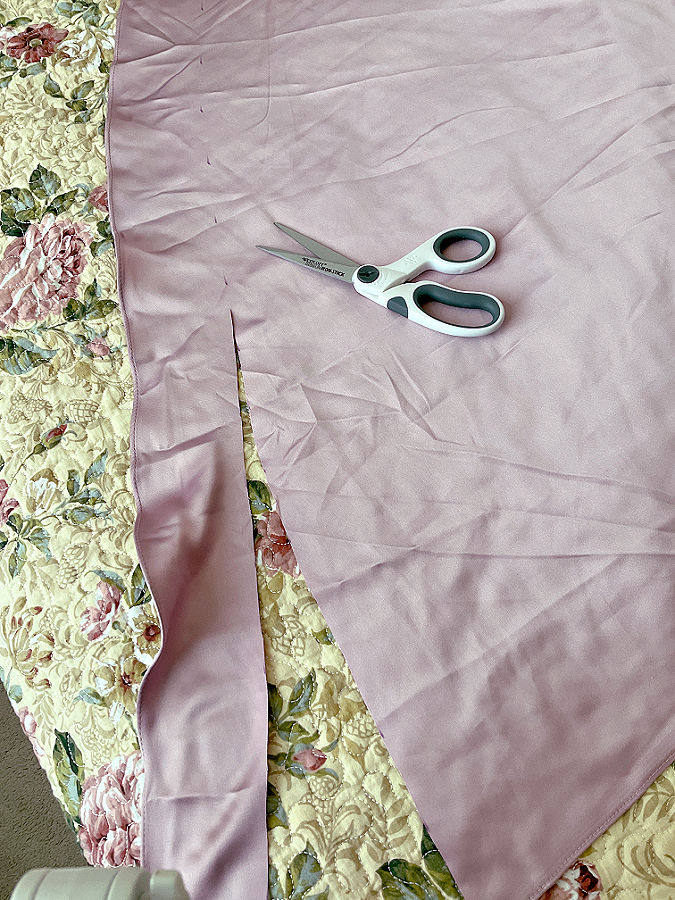
When cutting:
- Use sharp fabric scissors
- Support the fabric so it does not hang off the edge
- Cut slowly and evenly


With a full satin skirt, it often feels like you are cutting forever. That is normal. I had an extra problem: my favorite scissors are much, much better than what my daughter had (now she has good scissors!). It was not a pleasure to use them.
The result should be a clean, newly shaped edge that is ready for hemming.
Step 2. Choose The Right Stabilizer
Before I show the hemming steps, let’s talk about the stabilizer itself, because this part matters more than it may seem at first.
For this method, I used tear-away embroidery stabilizer. This is a temporary support material that is often used in machine embroidery. It goes under the fabric to add stability while stitching, and then it tears away when the sewing is done. In this project, it plays a different role. I used it as a narrow guide inside the hem.
Now here is the important part: not all tear-away stabilizers are the same.
At first glance, they can look very similar when they are rolled up. But once you touch them and tear them, the differences become obvious. Some tear-away stabilizers feel almost like soft paper. Those are usually too soft for this technique. They crumple too easily, they do not hold the edge well, and they are not very helpful when you are trying to make a narrow hem on slippery satin.
For this project, you want a stabilizer that has some body. Not stiff like cardboard, of course. That would turn the hem into a strange little sculpture. But not floppy either. You need something in the middle. It should feel stable enough to support the folded edge, yet flexible enough to follow a gentle curve.

Another thing to check is how the stabilizer tears away from the stitches. This is very important. Some stabilizers tear neatly and come away in a smooth line. Others leave behind fuzzy bits, uneven edges, or tiny jagged notches. That may not sound dramatic, but when you are making a very narrow hem, even small imperfections can affect the result.
So before I started on the dress, I performed a quick test.
I took both rolls of tear-away stabilizer that I had and tore a small piece from each one. Then I looked closely at the torn edge.
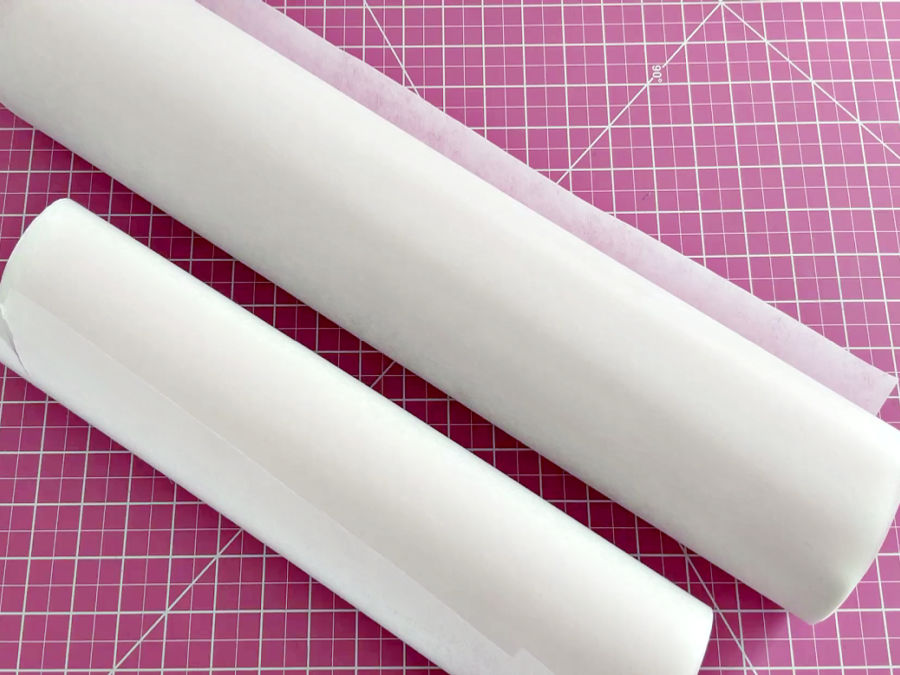
This is what you want to see:
- a smooth, even tear
- very little fuzz
- no tiny “teeth” or rough little notches along the torn edge
One of my stabilizers tore with a rougher edge. It had little jagged bits all along the tear, and I could tell right away it would not give me a clean result. The other one tore much more neatly. The edge looked smoother and more even, so that is the one I used.
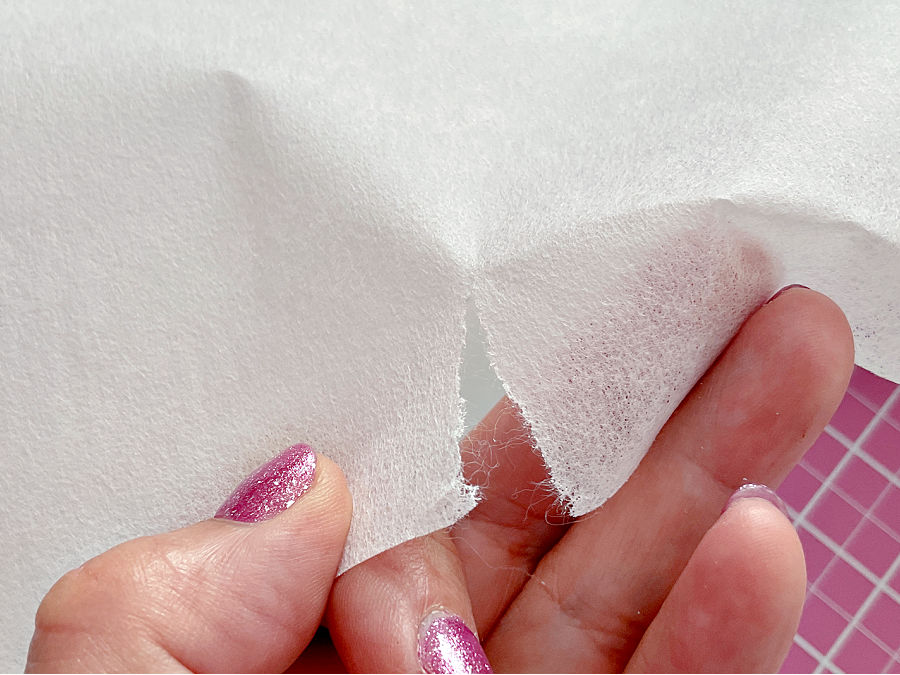
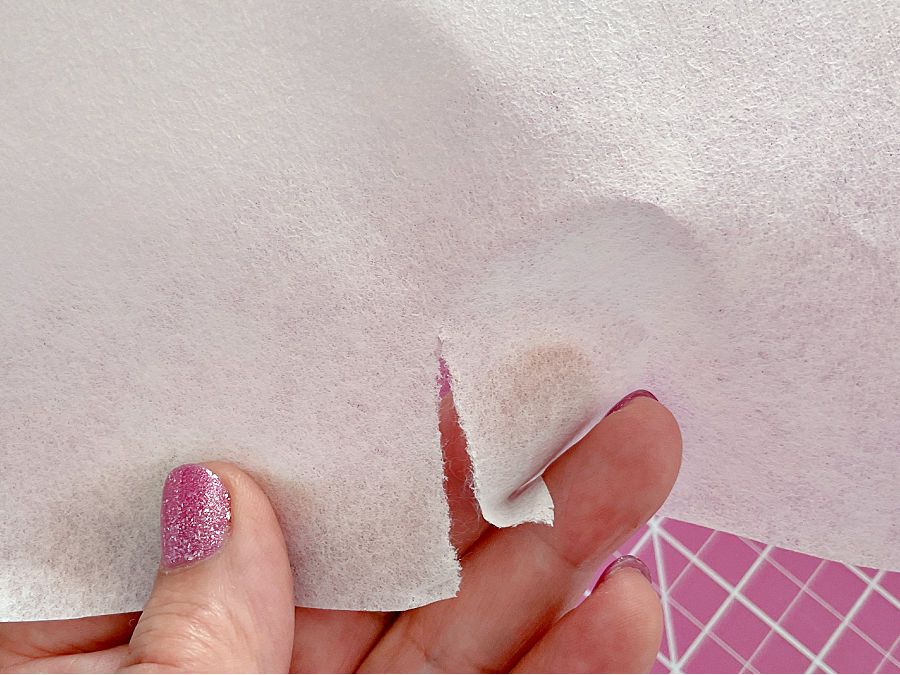
It seems like a tiny detail, but it matters. In a narrow hem, the stabilizer becomes your guide, and a better guide gives a better hem.
Step 3. Place Fabric On Stabilizer
Now comes the part where satin meets its new “assistant,” and this is where things start to feel much more manageable.
I am showing here only a demo on a piece of the same fabric, the whole dress is too large to fit well in the images
Cut a piece of tear-away stabilizer to begin with. I used a strip about half a yard long and around 5 inches wide (45 x 12.5cm). There is no need to cut the entire length for the whole skirt. Working in sections keeps everything under control and saves your patience.Place the satin on top of the stabilizer with the right side facing up.
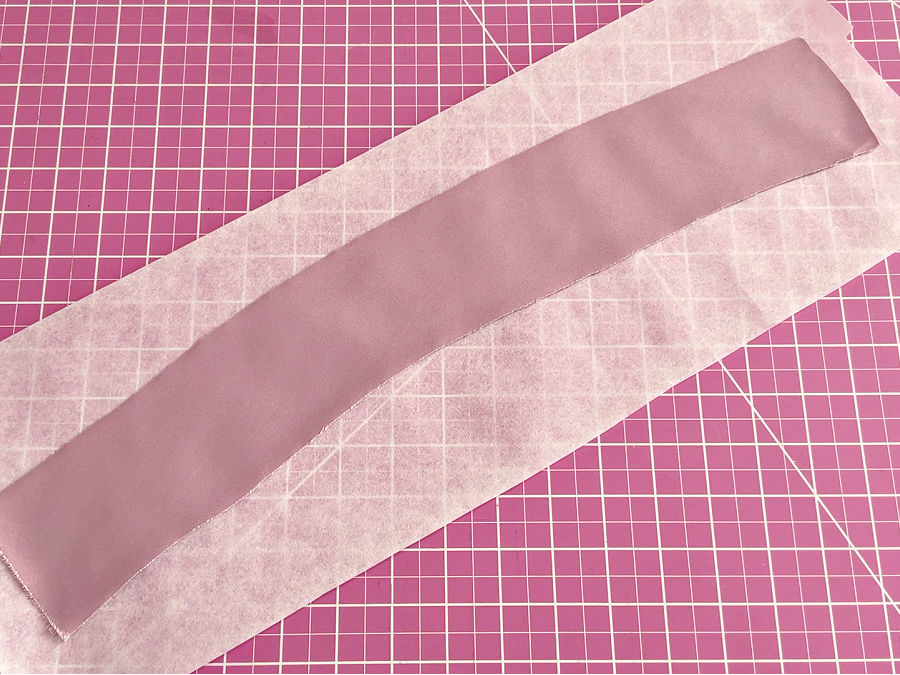
Do not stretch the fabric, do not flatten the curve, and do not try to “improve” the shape.
Just let the satin rest the way it naturally wants to.
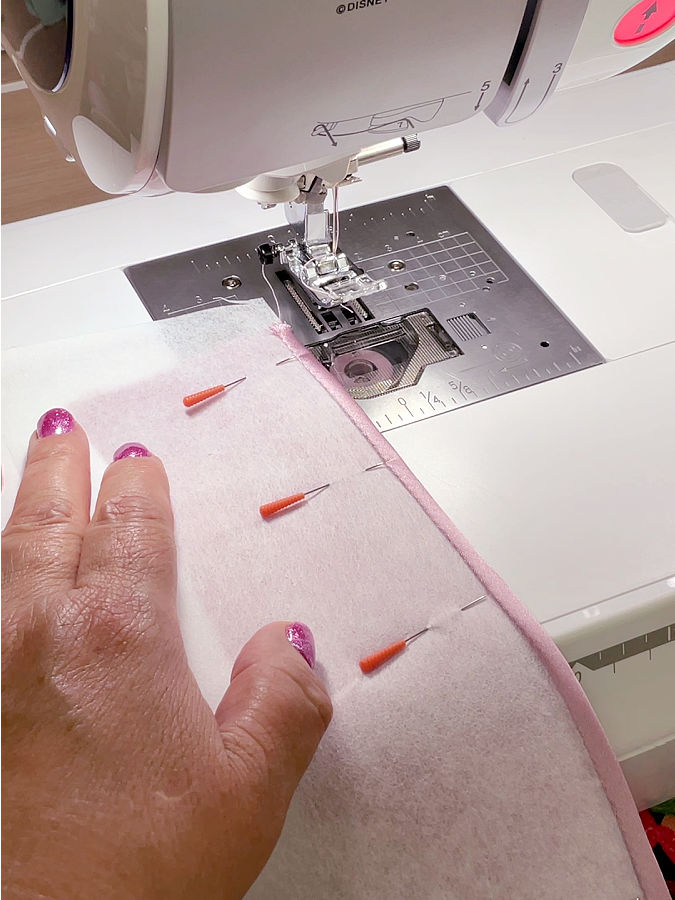
Now start pinning.
- Use very fine silk pins
- Place pins perpendicular to the edge
- Space them evenly

As you pin, focus on keeping the fabric smooth, but not stretched. Gently adjust the fabric so it lies naturally on the stabilizer.
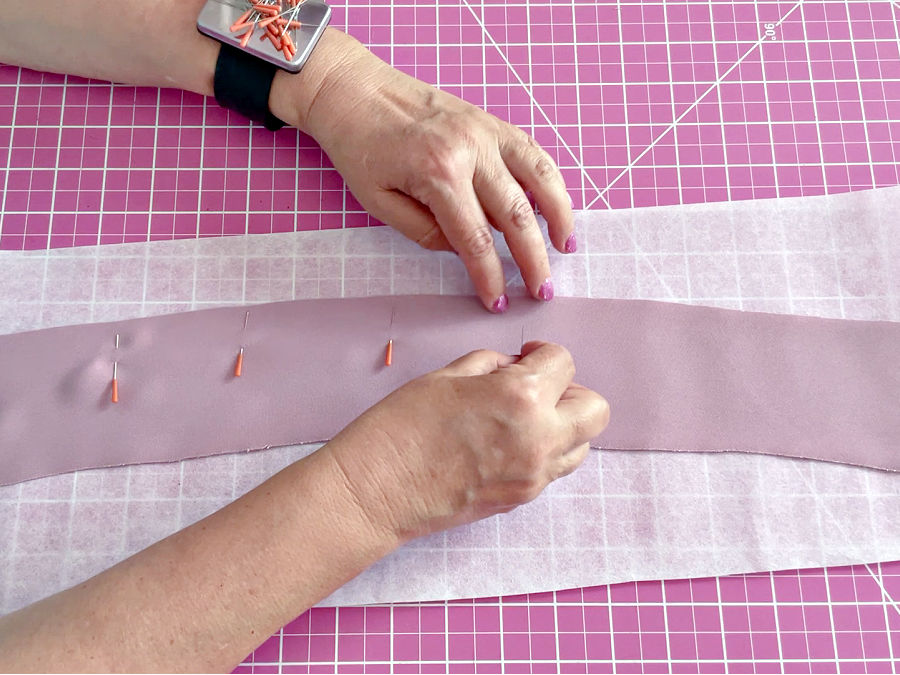
At this point, you have a strip of satin pinned smoothly onto the stabilizer, following its natural curve.
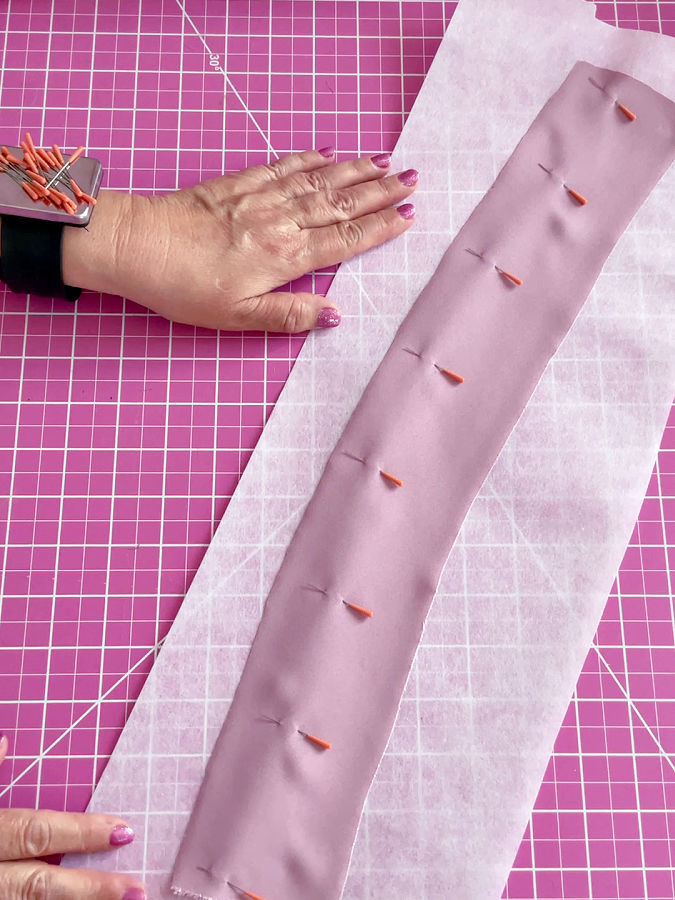
Step 4. Stitch The First Line
Now we move to the sewing machine, and this is where everything starts to come together.
Before you begin stitching, take a moment to set up your machine properly. Satin does not forgive careless settings, and this first line of stitching will guide the entire hem.
Here is what I used:
- A new needle, size 75/11
- Matching thread that blends well with the satin
- Stitch length set to about 3 mm
A fresh needle is important here. Satin can show skipped stitches or tiny pulls if the needle is even slightly worn.
Now place your pinned piece under the presser foot, with the stabilizer underneath and the satin on top.
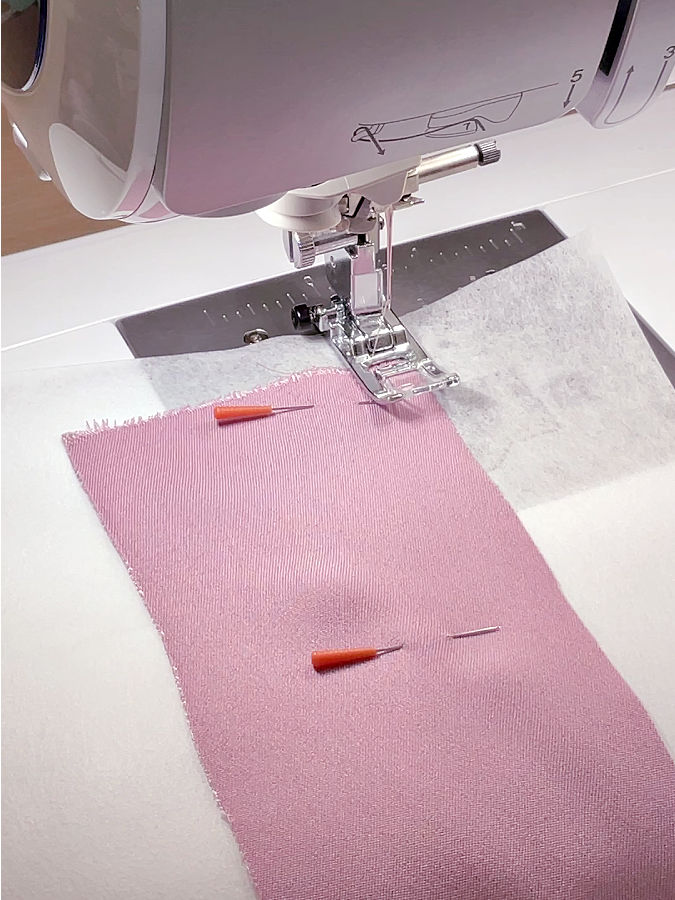
Start stitching along the raw edge.
- Keep your seam allowance at about 5 mm (a little less than 1/4 inch)
- Sew slowly and steadily
- Let the machine feed the fabric without pushing or pulling
This is not the moment for speed. Satin tends to shift when rushed, and the stabilizer is there to help, not to fight against fast hands.
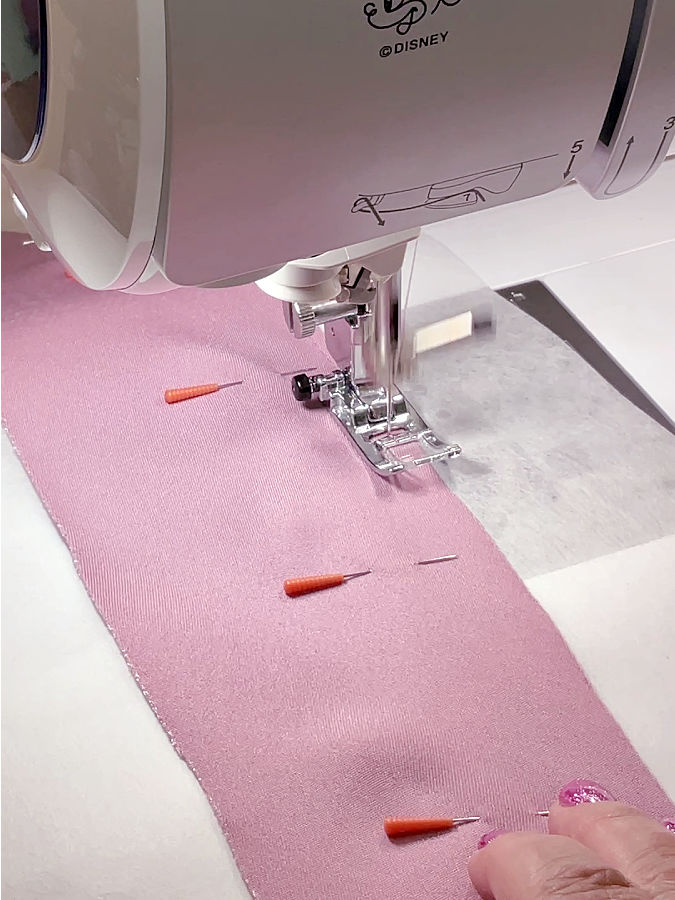
This first line of stitching is very important. It defines the exact width of your future narrow hem. Think of it as drawing a precise line that you will fold along in the next step. If this line is even, your hem will be even. If it wobbles, the hem will remember that.
After you finish stitching, take a look at the edge. You will see that the satin is now attached to the stabilizer with a clean, consistent line.
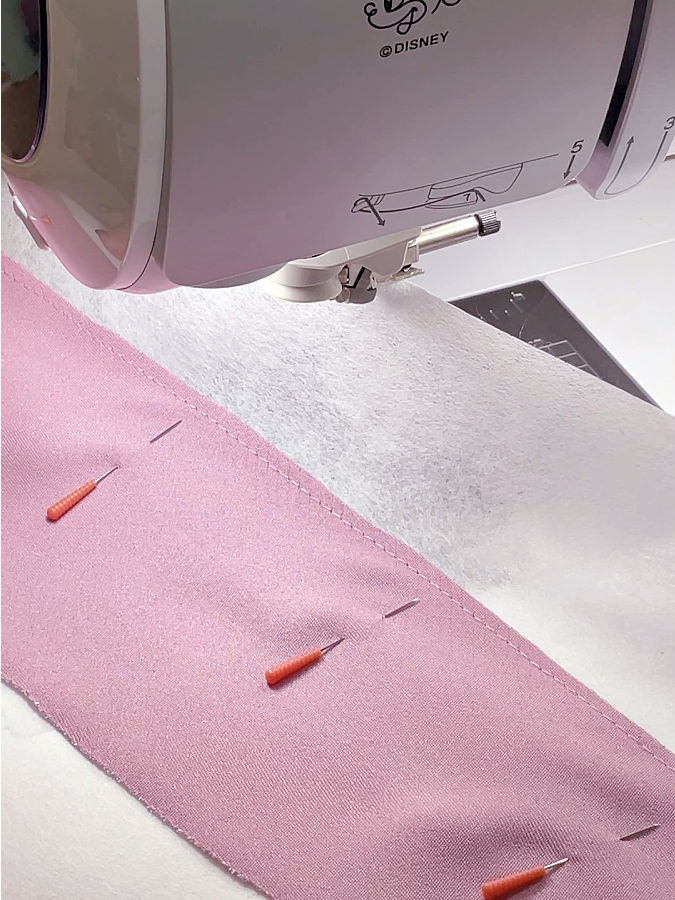
At this point, remove all remaining pins. The piece is now ready for trimming and forming the actual narrow hem.
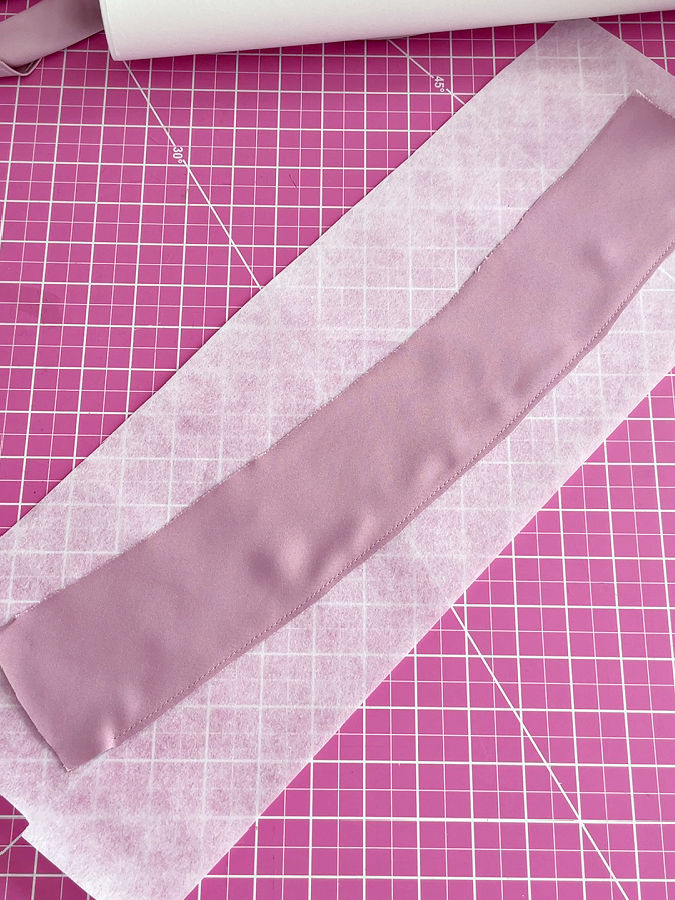
Step 5. Trim The Stabilizer Precisely
Now it is time to trim the stabilizer to match the seam allowance you just stitched.
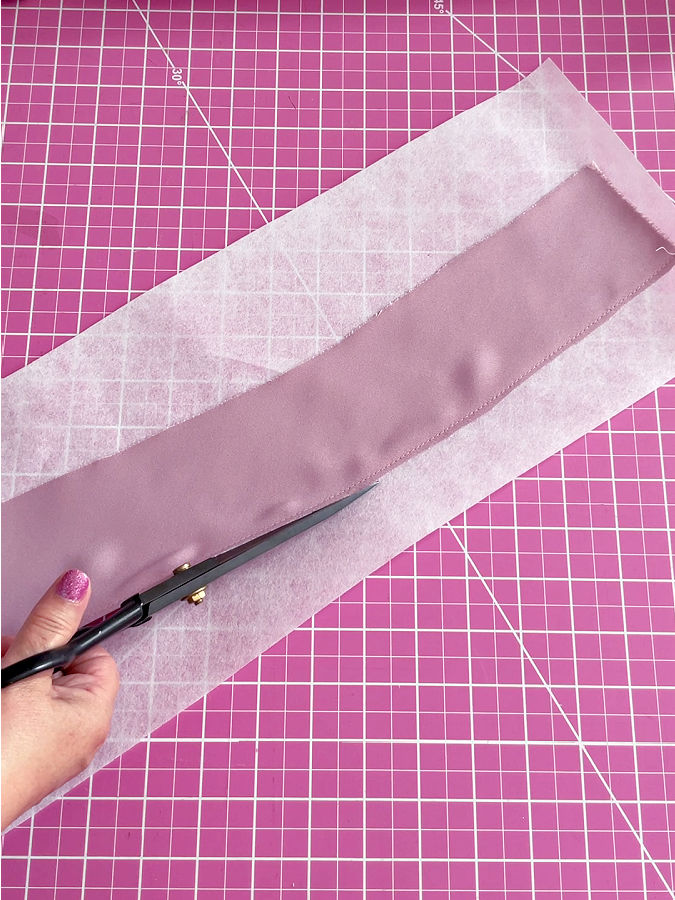
In my case, that seam allowance was about 5 mm (a little less than 1/4″), I cut the stabilizer so that its width matched that measurement exactly. In other words, the cut edge of the stabilizer sat right along the stitching line, leaving only that narrow strip under the fabric.
Follow the stitching line carefully and keep the cut smooth. The stabilizer strip should be even all the way along the edge. If it suddenly becomes wider in one place and narrower in another, your hem will copy that little mistake without any hesitation.
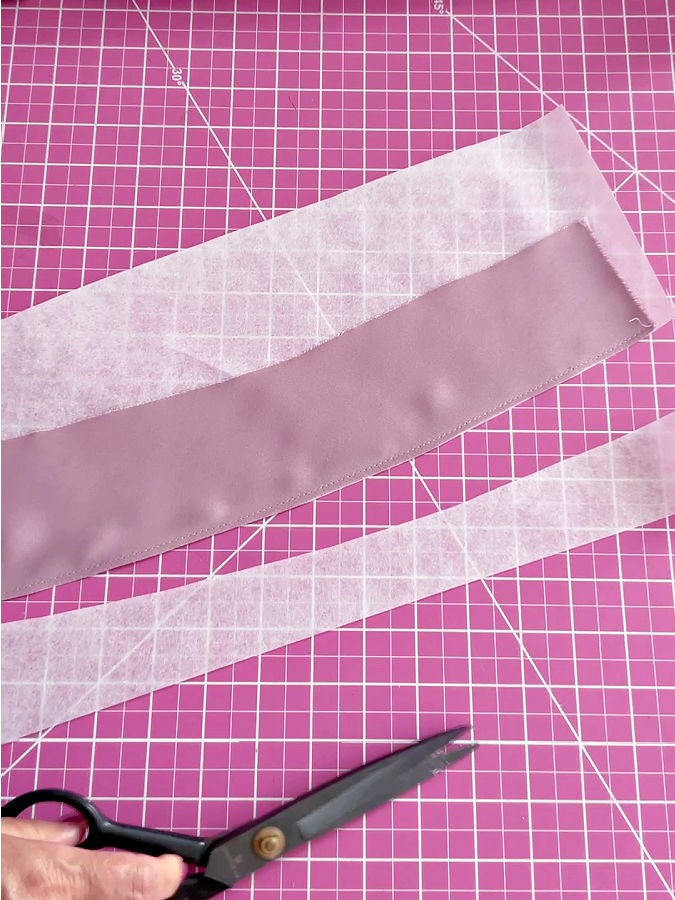
Use sharp scissors and cut slowly. I found it easiest to keep the piece flat on the table and trim with long, controlled cuts rather than little nervous snips. Little snips often create a slightly jagged edge, and that is not what you want here.
The narrow strip of stabilizer that remains will sit inside the folded hem and act as a built-in guide. That is why this step matters so much. You are not just trimming away extra material. You are creating the exact width of the future hem.
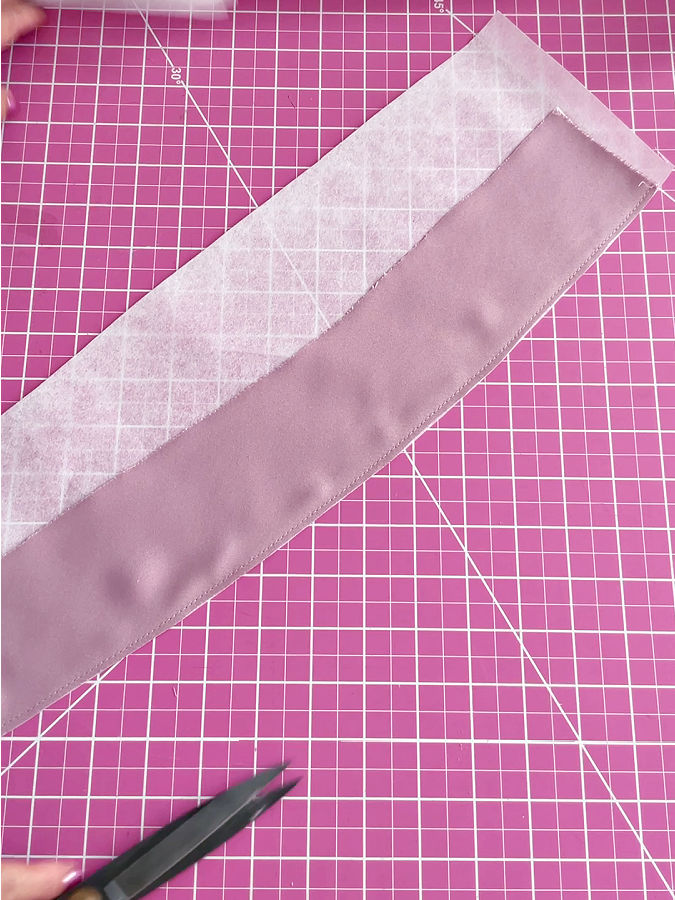
Step 6. Fold And Stitch The Hem
Fold the fabric over the stabilizer along the stitching line. In the image below the fabric is under the stabilizer.
That first line of stitching shows exactly where the fabric should turn. The stabilizer supports the fold and keeps the width even along the entire edge.
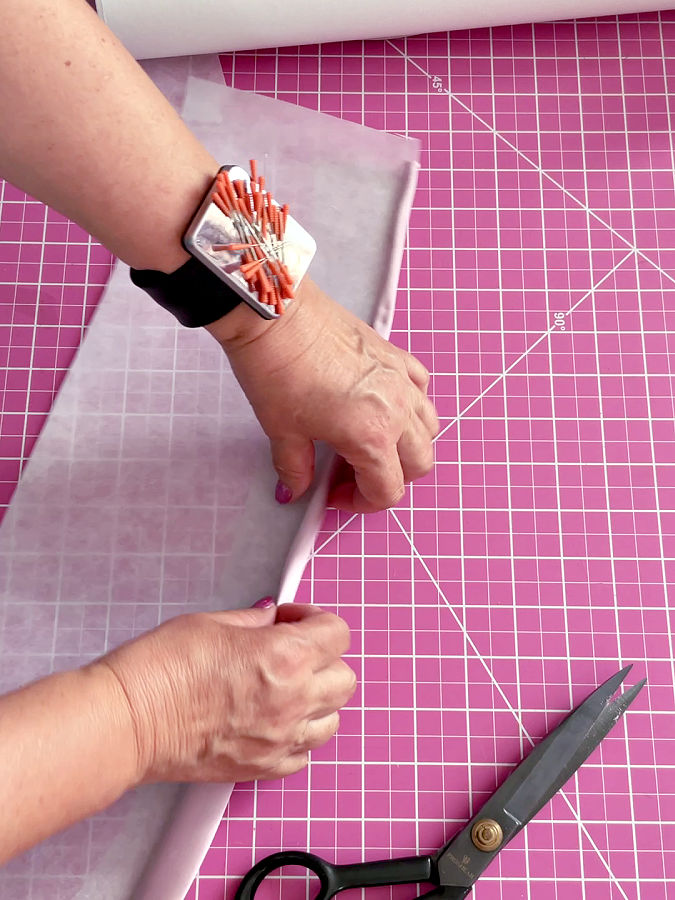
Keep the fold narrow and smooth. Do not stretch the fabric. Let it fall into place. Satin shifts easily, so gentle handling matters here.
Think of the stabilizer as a narrow strip that sets the width for you. There is no need to measure at this stage.
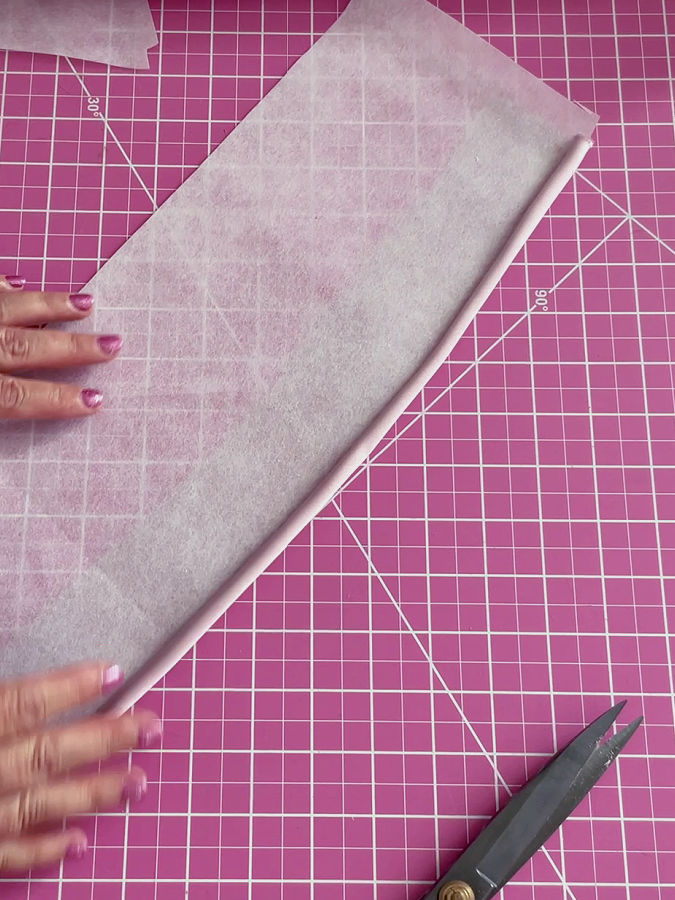
Pin again if you want more control. I used pins because satin tends to move right when stitching begins. Fine silk pins work best and help keep everything stable.
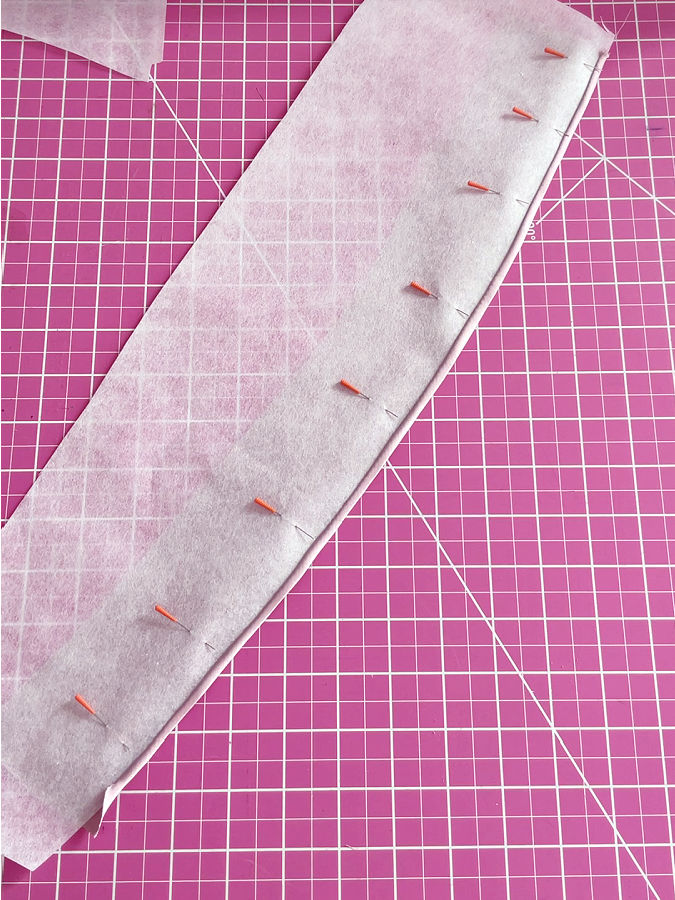
I tried presseing the fold here before stitching. It felt like the logical next step. The pins I used are heat-safe, so pressing over them seemed fine.
But the fabric had other ideas. Lucky me I first tried on a test piece!
Even those fine pins left small impression marks on my test piece. They were visible enough to make me stop. For that reason, I skipped pressing at this stage for the real dress hem. I did not want any marks on my dress.
✅ Important: Whenever possible, test before!
Now stitch close to the folded edge.
Stay consistent with your distance from the edge. This stitching secures the hem and gives it a neat, even look from the right side.
This method works best when your topstitching is neat and controlled — especially so close to the edge. I wrote a detailed guide with 17 practical tips that can help you get that clean finish – How To Topstitch | 17 Topstitching Tips Every Beginner Should Know
Sew slowly and guide the fabric carefully.
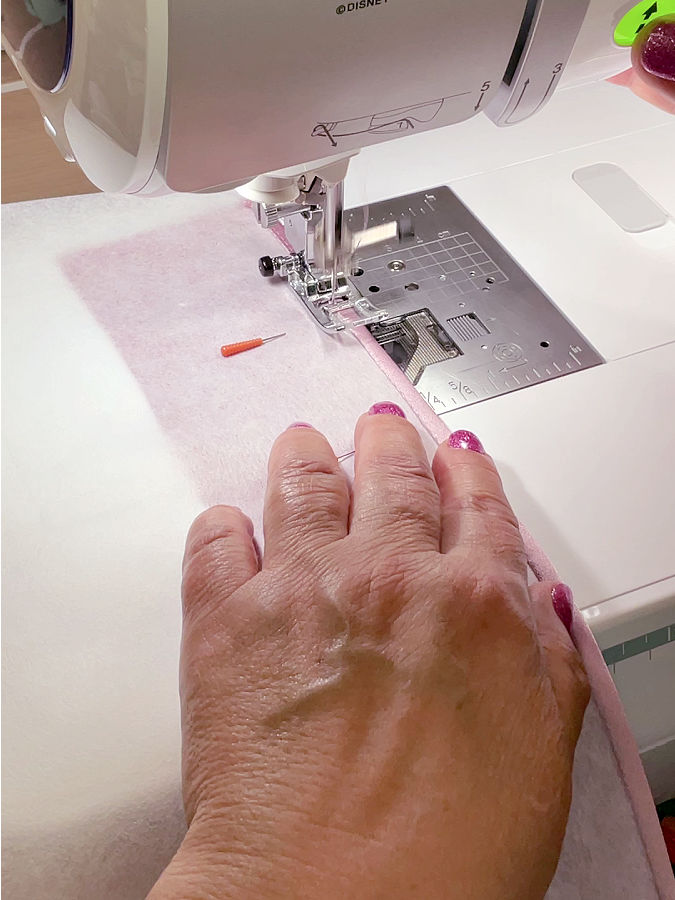
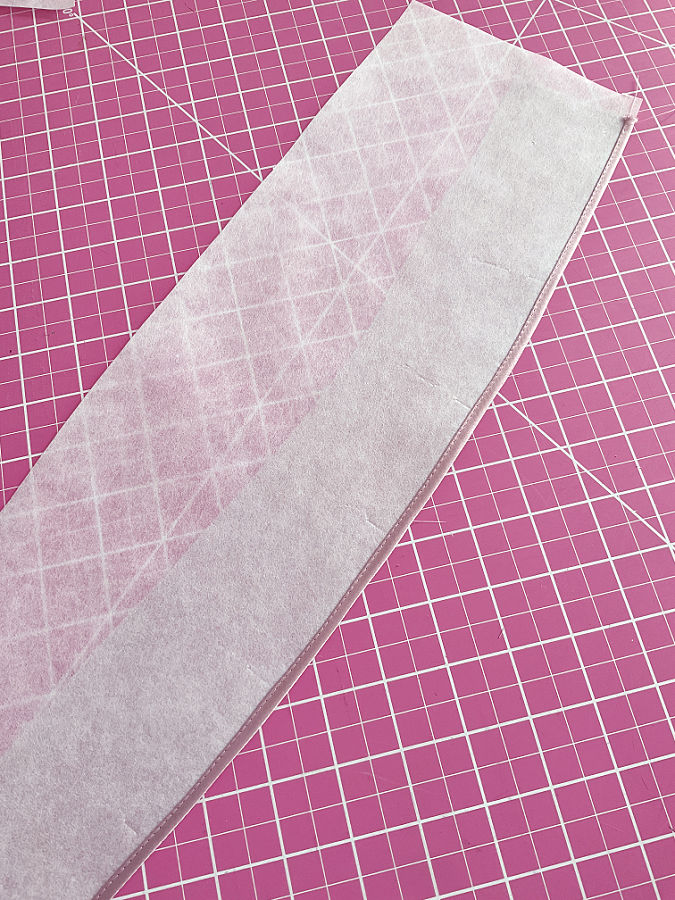
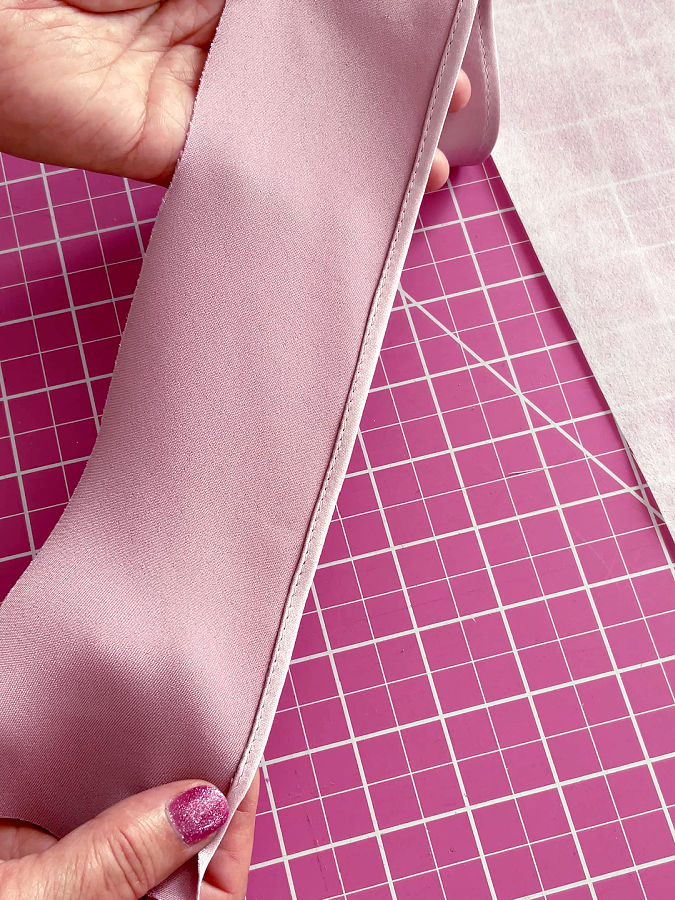
At this point, the hem should already look even and narrow, even before removing the stabilizer. That is a good sign that everything is aligned well.
Step 7. Tear Away The Stabilizer
Once the second line of stitching is done, the stabilizer has finished its main job. It helped control the satin, supported the curve, and gave the narrow hem a very even width. Now it is time to remove the extra stabilizer from the seam.
Gently tear it away.
Do not yank it as if you are opening a stubborn package from the hardware store. Just hold the fabric close to the stitching and pull the stabilizer away carefully. It should tear off along the seam without much trouble if you chose the right kind in the beginning. This is exactly why I tested the stabilizers first. A good one tears neatly. A bad one turns this step into a small argument.
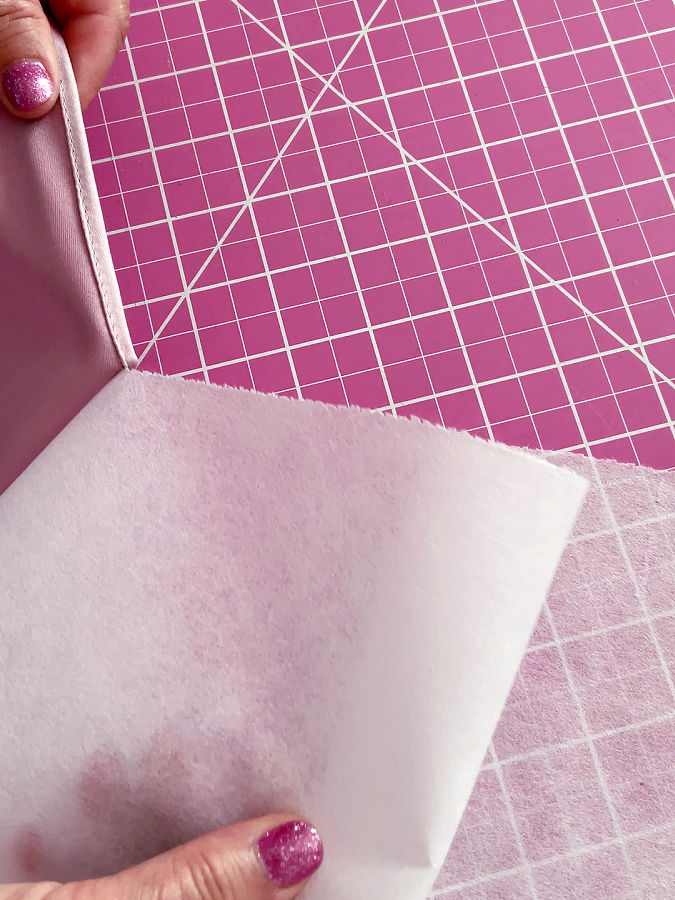
As you tear, the extra stabilizer comes away, but a very narrow strip remains inside the hem. That is completely fine. In fact, that tiny strip is part of what makes this trick work so well.
It does not make the hem stiff or bulky. The hem still feels soft and fluid, just as satin should. But it holds its shape better, and that narrow edge stays neat and even instead of behaving like a slippery little troublemaker.
This is the moment when you can really see the result. The hem looks narrow, smooth, and very tidy. And after working on satin, that kind of result deserves at least a small moment of admiration.
Pin this tutorial to your sewing board now so it is waiting for you when you need to hem a tricky curved edge. Follow me on Pinterest for more sewing tutorials and helpful tricks.

latest posts
- Knit Presser Foot: How It Works, How to Use It, and My Sewing Tests
- How to Sew Neat Mitered Corners at Acute Angles
- Sewing Machine Needle Organization: A Clever System I Tried
- DIY Car Armrest Organizer: Sewing Tutorial
- Easy DIY Potholder Sewing Tutorial: Better Shape, Better Grip, Smart New Design
- How to Buy a Sewing Machine (Even If You Already Have 10)
- 23 Kitchen Items That Belong in Your Sewing Room
- What Is a Sewing Machine Piping Foot And How to Use It
- Fixing Sewing Mistakes: Repair an Accidental Cut in Fabric