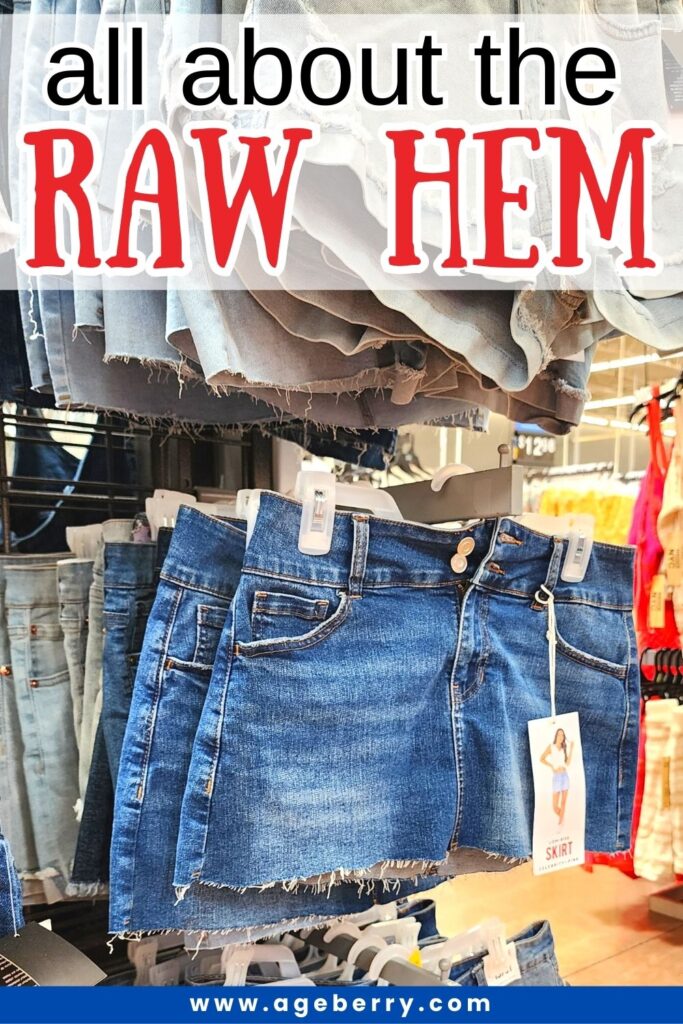
The Raw Hem: All About This Edgy And Chic Fashion Trend
Are you looking for a way to add a trendy finish to your new garment? Look no further than raw hems! This trend is all about embracing the unfinished look, the frayed edges, and the raw beauty of fabric. It’s a rebellious style that screams confidence and individuality.
Imagine a pair of jeans that look like they’ve been just cut with scissors, but in a way that looks intentional and stylish. Or a dress with a hemline that looks like it’s been torn, but in a way that adds texture and interest to the garment. That’s the raw hem in action. So if you’re ready to add a little edge and attitude to your wardrobe, then it’s time to embrace this latest fashion trend.
What Is A Raw Hem?
A hem is a finished edge of material on a garment, drapery, or other household items (like a tablecloth or curtains, for example).
Traditional hems usually involve some method of folding the edge under and sewing it into place.
A raw hem is a type of hem that is intentionally left unfinished without folding and sewing it. Then, depending on the type of material and the desired look, a row of stitching may be added to prevent the fabric from fraying too much.
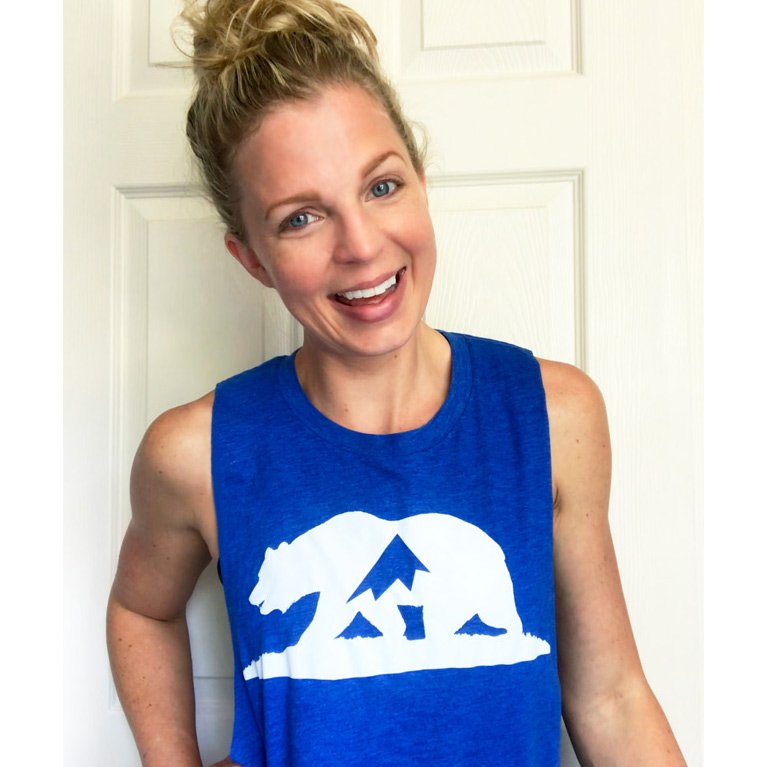
It’s one of the easiest types of hems to make and is commonly used on garments made from denim or other woven fabrics to give them a distressed or laid-back look. Raw hems can also be used on knit fabric to make casual garments, such as shirts, tank tops, or dresses.
You may also see raw hems on clothes made from leather, vinyl, velvet, and lace.
Different Types Of Raw Hems
There are a couple of different variations of a raw hem, including:
#1. Frayed Hem
This is the most common type of raw hem. A frayed hem is a type of hemline that has been intentionally left unfinished, with the edges of the fabric frayed or unraveled. This creates a textured, edgy look that is popular in fashion, particularly with denim jeans and shorts. The frayed hem can be created by cutting the fabric and allowing it to naturally unravel, or by using a tool to pull out threads from the edge of the fabric.
The frayed hem can be left as is for a more natural and effortless look, but it doesn’t have to be uneven all over the hemline – it can be trimmed to a desired length to create a specific look.
#2. Raw Edge Hem
This type of raw hem is created by cutting off the bottom of a garment to the desired length. The edge is left unfinished without any fraying or unraveling to create a raw look. This may be done with materials such as leather, vinyl, lace, etc. but it’s also used with jersey knits that don’t fray.
Materials Commonly Used For Raw Hems
The materials used for raw hems are typically the same as those used for traditional hems, but the finishing techniques are different to achieve the desired look.
Raw hems are often used on denim and other woven fabrics, for example, linen or cotton twill. These fabrics are able to withstand the fraying and distressing process without falling apart.
In addition to denim, raw hems can also be used on lace, leather, vinyl, suede, and knit fabrics. These fabrics are more delicate and require more care when creating a raw hem.
Note: Some of the links on this page are affiliate links. This means I will receive a commission if you order a product through one of my links. I only recommend products I believe in and use myself.
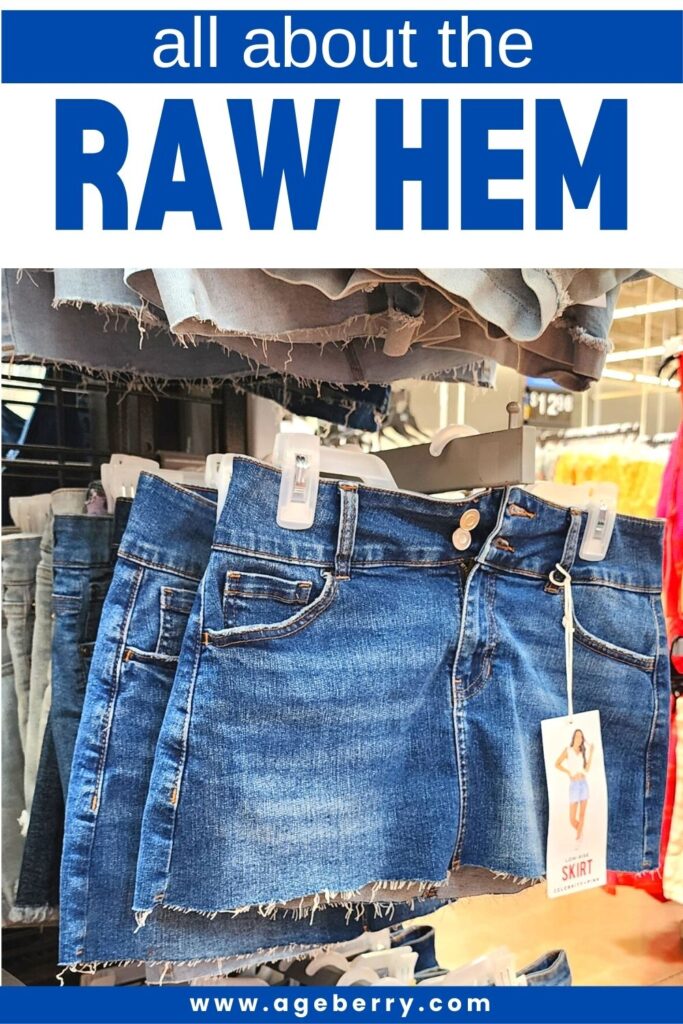
Raw Hem Jeans
Raw hem jeans have become a popular trend in recent years, with many fashionistas embracing the edgy and relaxed look of the unfinished hemline.
However, there is a distinction between fashionable raw hem jeans and unkempt raw hem jeans.
Fashionable raw hem jeans are intentionally designed with a raw hemline, with the edges of the fabric frayed or trimmed in a specific way to create a stylish and edgy look. The raw hem is typically clean and even, and the overall appearance of the jeans is polished and intentional. These jeans are carefully crafted to achieve a certain aesthetic and are often sold at a premium price point like the ones below.

This PAIGE high-rise slim straight leg jeans fall somewhere in between a skinny and a true straight for a modern and versatile fit. This pair comes in a medium vintage-inspired wash with lived-in distressing and a raw hem. Cut from our TRANSCEND VINTAGE denim, this style has the look of authentic vintage denim but is incredibly comfortable with plenty of stretch and recovery.
But I also saw many affordable raw hem jeans, shorts and skirts in Walmart.

Unkempt raw hem jeans, on the other hand, are the result of wear and tear, with the edges of the fabric frayed and unraveled due to natural use and washing. While some people may find the look of unkempt raw hem jeans appealing, the overall appearance of the jeans is not good. These jeans are not intentionally designed with a raw hemline, but rather the hemline has become raw over time due to regular use and washing.
Tools And Materials Needed For Creating Raw Hems
Here’s what you’ll need to make raw hems for your projects as well as the general process to follow.
Gather these tools and materials to make raw hems:
- Garment (often pants) on which you want to create a raw hem
- Sharp scissors or a rotary cutter
- A seam ripper
- A ruler or measuring tape
- A marking tool (e.g., chalk or a pencil)
- Sandpaper (optional)
- A washing machine and dryer (optional)
Fabric Scissors
A pair of sharp fabric scissors is crucial for cutting the hem to the desired length. These scissors should be designated solely for cutting fabric, as using them on other materials will dull the blades and affect their cutting capabilities.
✅ Related tutorial: Cutting Tools For Sewing: The Ultimate Guide
Seam Ripper
A seam ripper is a handy tool to have for creating frayed edges. It makes the process of pulling out individual threads from the fabric easier and more precise. With this tool, you’ll be able to create the perfect frayed hem without damaging the rest of the material.
✅ Related tutorial: How to use a seam ripper
How To Make A Frayed Raw Hem
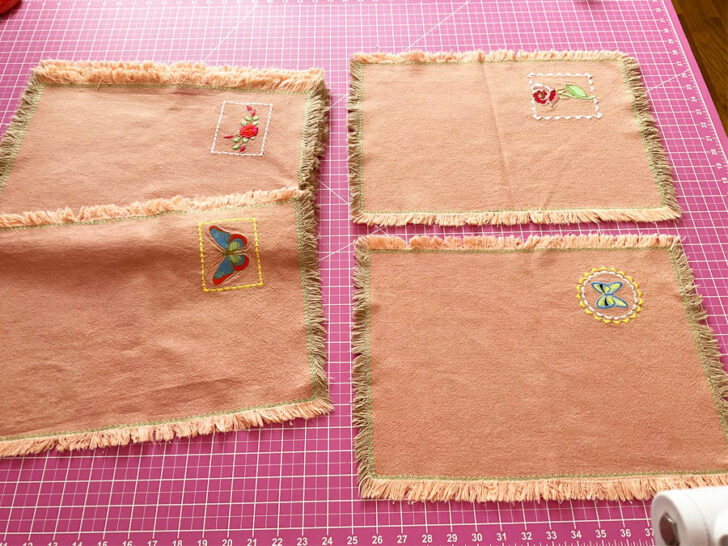
I have made many things with frayed edges over the years. My love for frayed hems started 20 years ago when I got my first embroidery machine with a 4 x 4 hoop. The first project I made was 16 machine-embroidered napkins with frayed hems. I made the fraying myself, which was easy to do on woven cotton material. And they are still in use in our family after so many years. Practically indestructible.
After that, I started making more clothing items with frayed raw hems, including skirts, dresses and a jumpsuit.
With a bit of practice and the right technique, you’ll find that creating a frayed hem is quite manageable. The key is to work carefully and patiently, ensuring an evenly frayed and stylish finish for your items.
The first step is selecting the right fabric. Consider the weight and texture of your fabric. Lighter weight fabric tends to fray more easily and provides a casual, relaxed look. On the other hand, a heavier weight fabric might not fray as effortlessly, but it can still achieve the desired effect with a bit of extra effort. Examining the thickness of the weaving will also offer insight into how well the fabric will fray.
In my previous tutorial, I demonstrated many effective methods to stop fabric from fraying – How To Stop Fabric From Fraying: 21 Proven Ways That Work In 2023.
Now let me show you how to fray fabric – it can be a fun and easy DIY project and there are a few slightly different ways to do it.
#1. Fraying The Fabric Evenly On Straight Grain Before Cutting The Pattern Pieces From This Fabric
Fraying fabric before cutting the pattern pieces is a technique that can make the process of fraying much easier and more efficient. When you have straight cut edges, fraying the fabric becomes much simpler, and you can achieve a cleaner and more uniform look for your frayed hems.
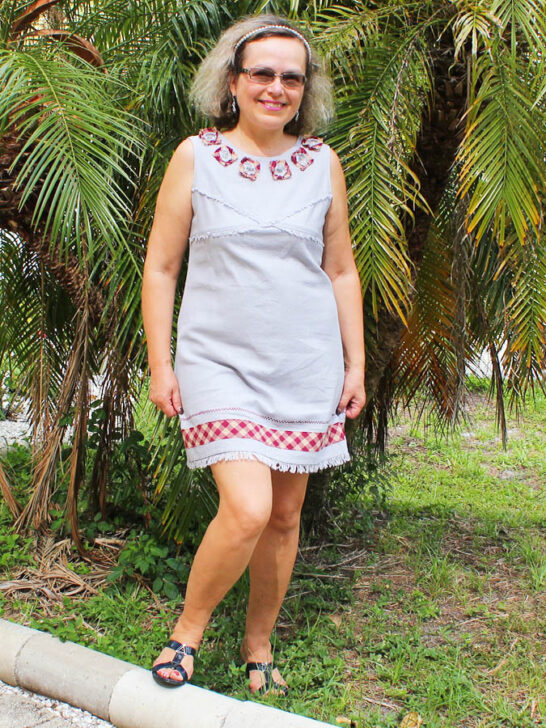
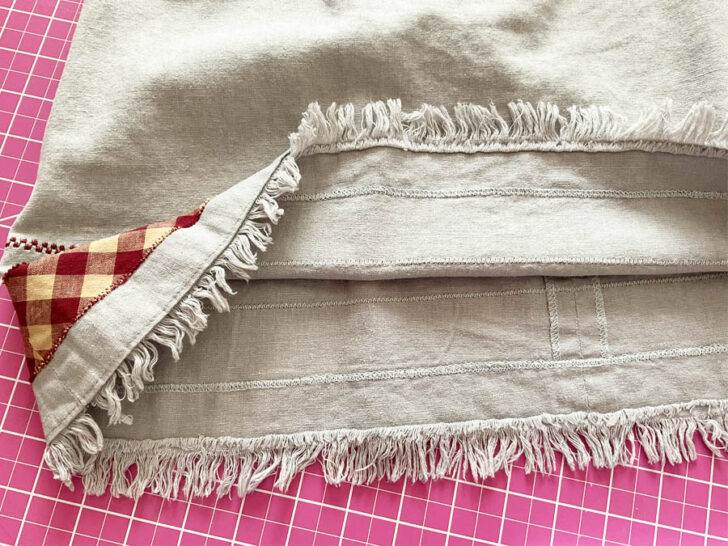
To fray fabric before cutting the pattern, it’s important to choose pattern pieces with a completely straight hemline. This will ensure that the fraying is even and consistent throughout the garment. Once you have selected your pattern pieces, you can begin the process of fraying the fabric. That’s exactly what I did when I was making my jumpsuit.
To fray fabric on cross-grain threads, you can start by cutting the fabric evenly, making sure to have a straight cut without any ridges.
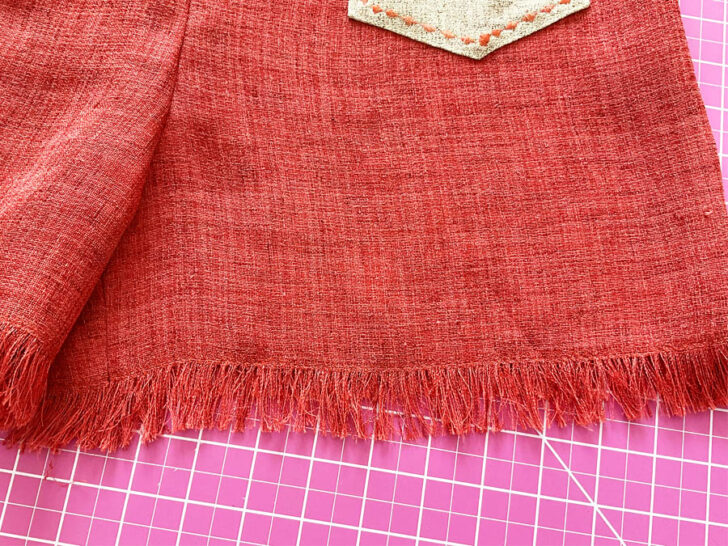
Here I have fabric similar to the fabric of my jumpsuit.

After cutting the fabric, I gently pulled out the threads at the cut line. It’s essential to do this carefully. This fabric is a loose-weave fabric, making it simple for the threads to come out.
As I continued pulling out the threads, the frayed appearance started to form. To keep it neat and controlled, I made sure to remove the threads evenly, so the fray looks consistent throughout.
After I am done with fraying I put a stitch along the non-frayed part so the fraying doesn’t go further.
#2. Fraying The Fabric Evenly On The Bias
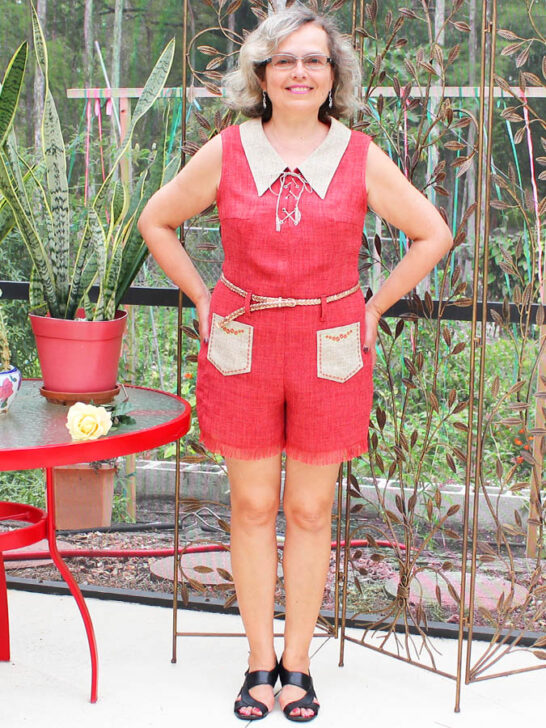
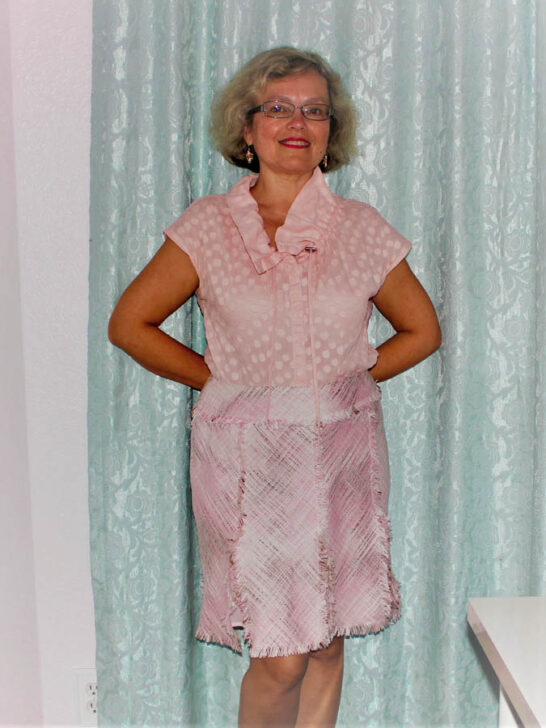
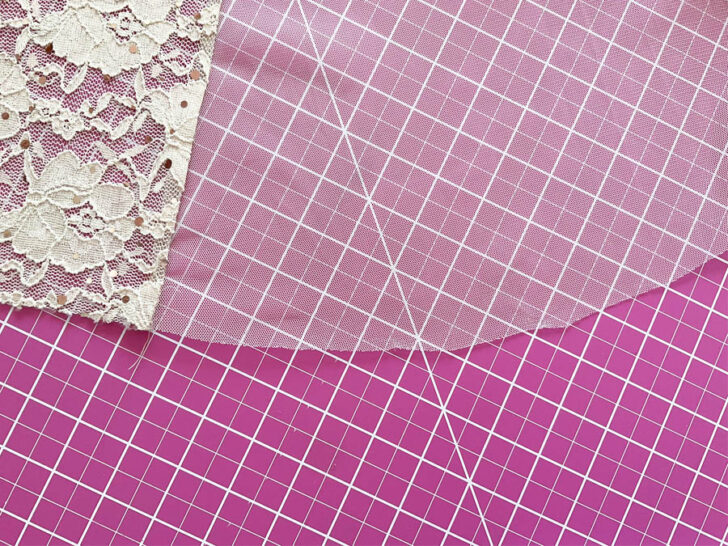
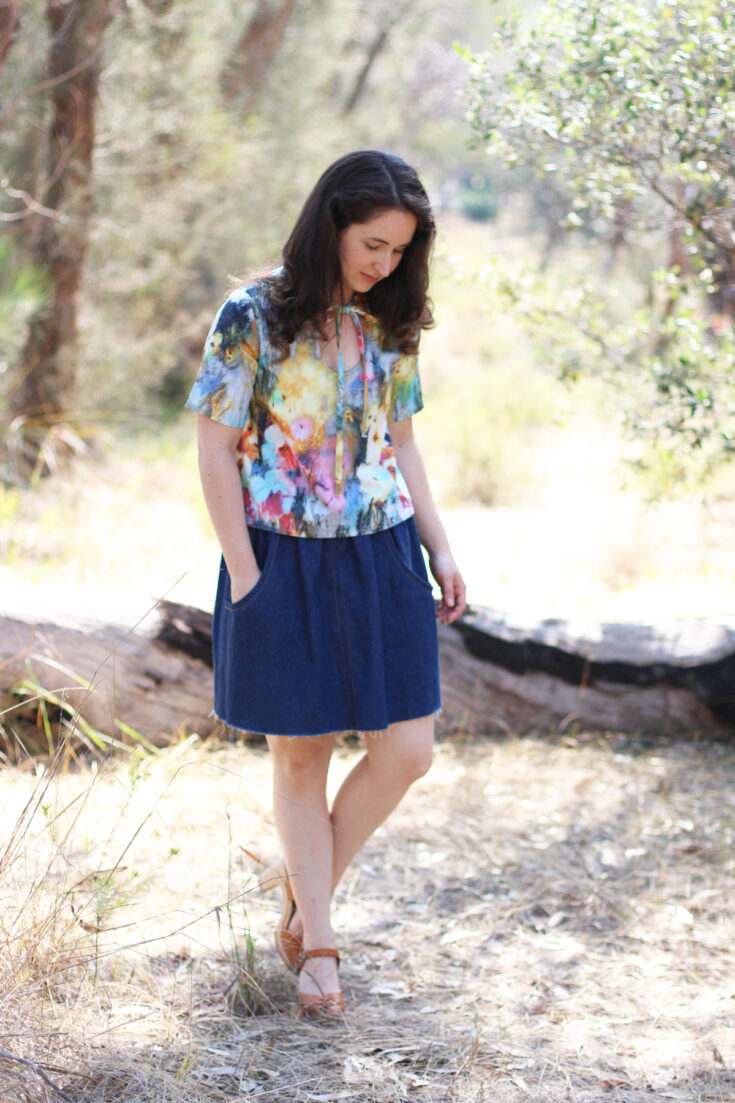
This way is a bit more complicated than the way #1. I used it when I made the skirt you see in the image below.
For this kind of frayed hem, you need to cut pattern pieces first and fray them after cutting.
It can be a bit more challenging than fraying the fabric on the straight grain.
Bias-cut fabric frays differently than straight-grain fabric. This is because the threads are cut at a diagonal angle, which can cause the fabric to fray unevenly.
I usually sew a line of stitches (straight stitches or zigzag) about 1 inch from the edge of the fabric before fraying. This can help to stabilize the fabric and prevent it from fraying too much or too unevenly.
After sewing the stitches, you can begin the process of fraying the fabric. To do this, gently pull at the fabric along the cut edge. The bias-cut fabric will naturally start to fray along the diagonal threads.
Pull at the fabric until you are close to the stitched line you sewed on the pattern pieces. Continue pulling at the fabric until you have achieved the desired level of fraying.
#3. Making An Uneven Frayed Raw Hem
This technique is often used on store-bought items, and it involves cutting the hem to create a raw edge and then fraying it. The result is an uneven hemline with threads going out of the hem, giving the garment a distressed and casual look.
It’s very easy to do – cut the hemline to the desired length and use your fingers to pull at the threads along the cut edge. This will start to fray the fabric and create a rough, uneven edge. You can continue pulling at the threads until you have achieved the desired level of fraying.
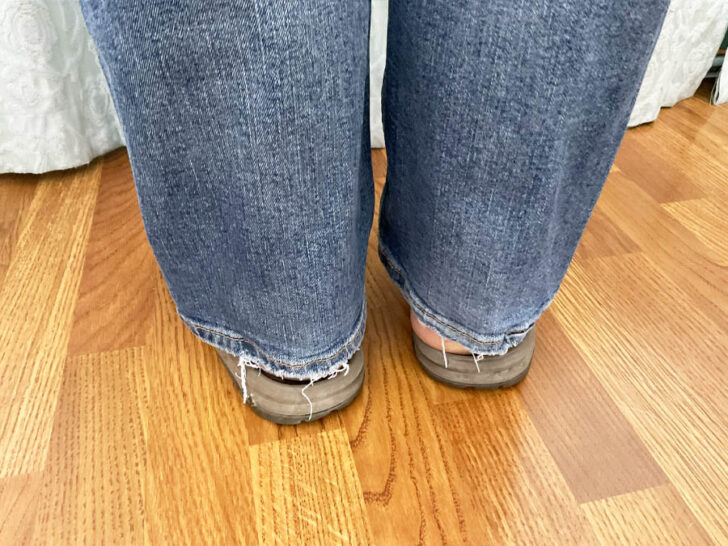
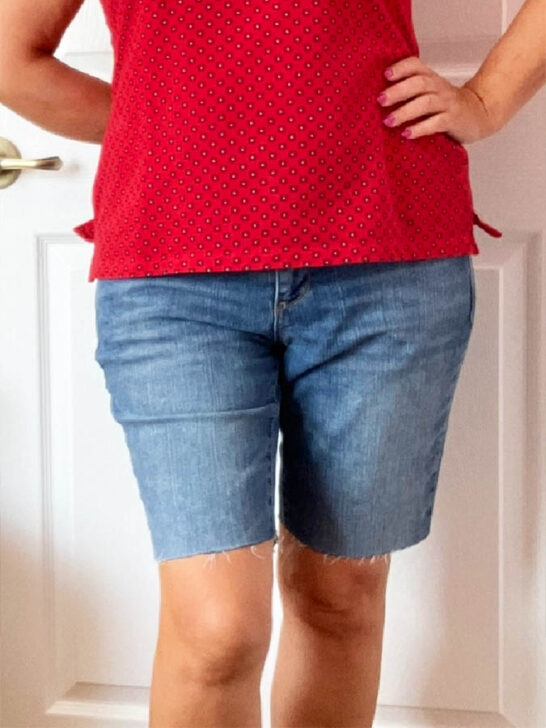
How to Make Raw Hem Shorts from Jeans
I just made a pair of shorts with a raw hem from an old pair of jeans. By the way, it’s a great way to repurpose old clothing and create a unique piece that’s perfect for summer.
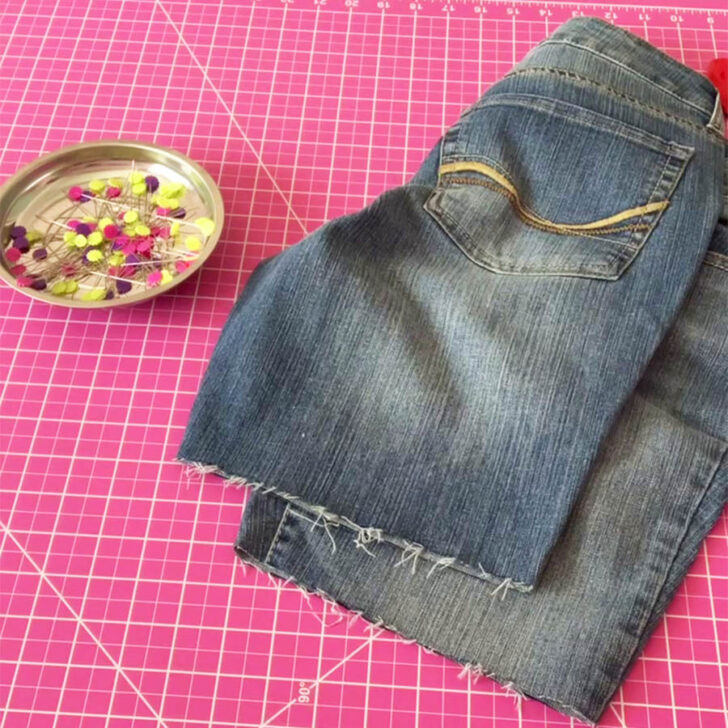
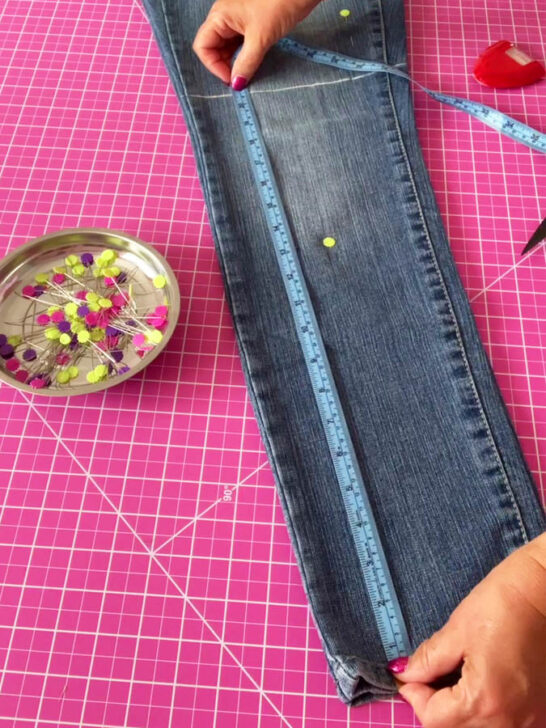
To get started, you’ll need a pair of jeans that you no longer wear or want to repurpose. You’ll also need a pair of scissors, a ruler or tape measure, and a marker or chalk.
First, lay your jeans flat on a table (or another flat surface) and use your ruler or tape measure to mark where you want to cut them. Don’t add a little extra length for the raw hem because you are not going to fold it. Just measure it to the desired length of your shorts. Mark it with your marking tool – chalk or a pen. Make sure the hem is straight.
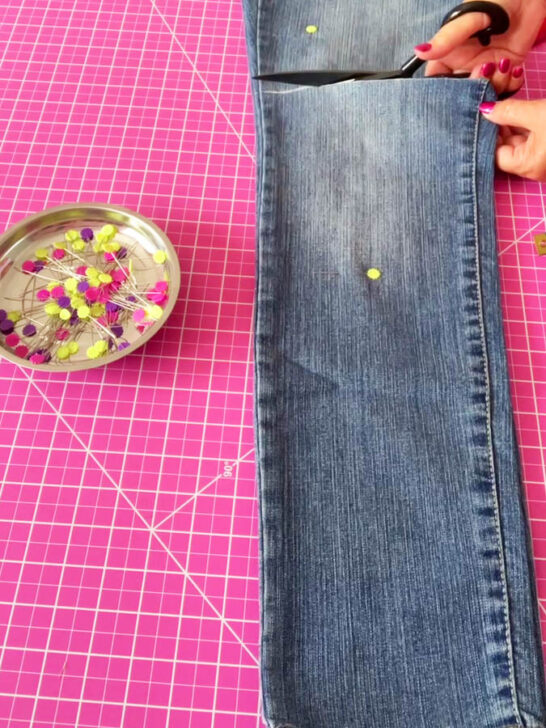
Once you’ve marked your cutting line, cut off the legs of the jeans along the line you’ve marked. Be sure to cut both legs evenly, so that your shorts are the same length.
Next, use your fingers to pull at the threads to release the fibers and help create that frayed look. Or you can leave the hem as is because denim is a woven fabric and woven fabrics will fray naturally with time. You can also create a more distressed look by roughing up the edge with scissors and sandpaper.
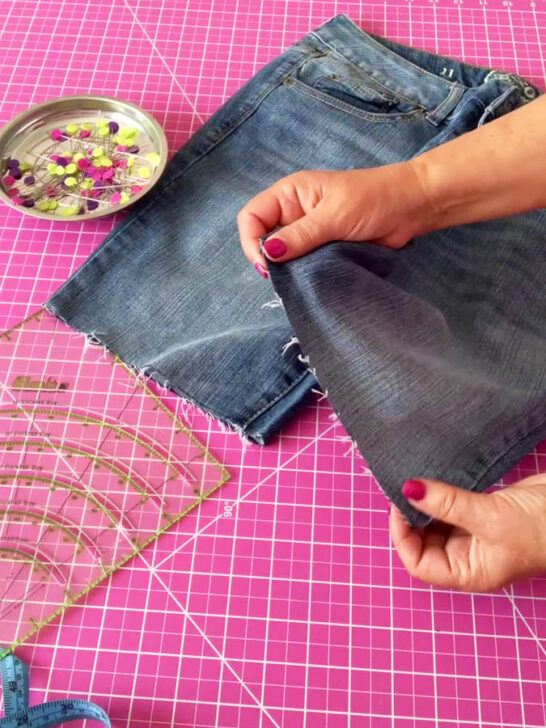
I often notice that there are excess threads that need to be trimmed. So carefully cut away any stray threads or overly long strands to maintain a clean look. You might also notice that threads curl up slightly. This is happening because modern jeans have elastane in the fabric.
Once you had pulled enough threads to achieve the desired frayed look, you can use a washing machine to help secure the frayed threads in place. Place your shorts in a laundry bag, set the washing machine on a gentle cycle, and use cold water to avoid shrinkage. After washing, transfer the shorts to the dryer on low heat for a brief period.
Drying the shorts may enhance the frayed effect.
Once this process is complete, try on your new shorts and make any adjustments if necessary.
That’s it! Creating raw hems is a simple and easy way to give your garment a new look.
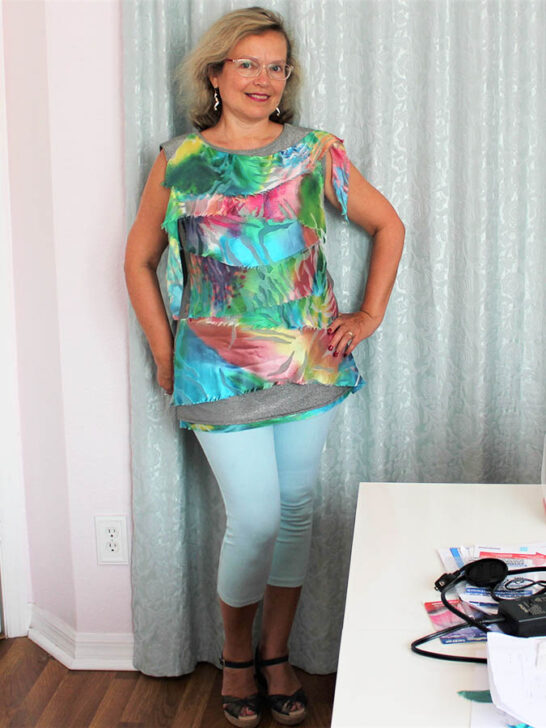
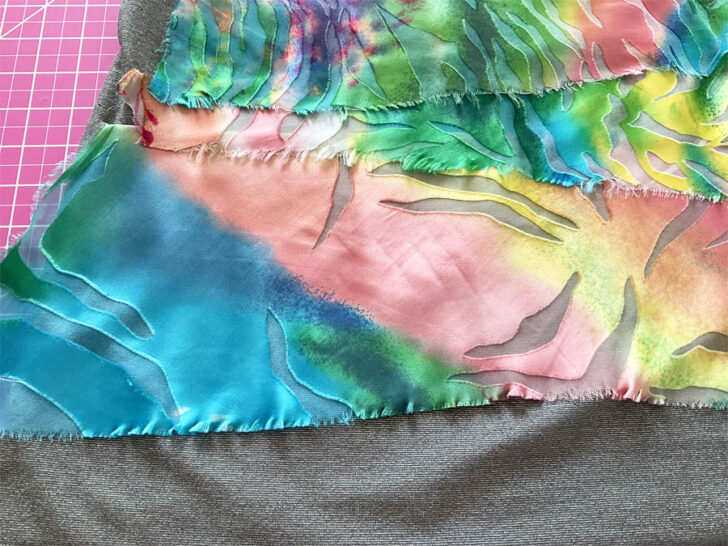
Speaking of a new look, I have a great example of how to use scraps to create something new. I made a dress from natural silk fabric, and while there were some silk cuttings left over, I didn’t want to throw them away. Instead, I decided to use them to upcycle an old dress. The silk cuttings had frayed edges, which gave them a unique character. By repurposing these scraps, I was able to create a beautiful new piece that I’m proud to wear. If you’re interested in seeing how to make something out of nothing, you can check it out at this link – How to upcycle an old dress.
How To Make A Raw Edge Hem
As I mentioned earlier, creating the raw edge hem involves cutting the bottom of a piece of clothing to the desired length without finishing the edge. This creates a raw, unfinished look that is popular with a variety of materials, including leather, vinyl, lace, velvet, mesh, and knits that don’t fray. I use this type of hems very often because I like to sew with leather, knits, lace, mesh, and velvet.
These materials don’t fray or unravel, which means that leaving the hem raw may not result in any unsightly fraying or loose threads. This can save time and effort that would otherwise be spent finishing the edge of the hem.
Leaving the hem raw on a leather or velvet skirt can create a more seamless and streamlined look. When the hem is finished with a folded or stitched edge, it can sometimes create a bulky or stiff appearance that detracts from the natural drape and texture of the leather or velvet.
By leaving the hem raw, you can maintain the natural stretch and drape of the lace and knit fabric, creating a more “fluid” garment.
While this may seem like a simple process, it’s important to be careful when cutting to ensure that the raw hem looks neat and professional.
One common issue with raw hems is that sometimes you will see loose threads coming out of the hem. These threads are not frayed threads caused by the unfinished edge – instead, they are coming from the garment’s seams.
Most dresses and skirts have at least two side seams, and some garments have even more seams that finish at the hem. If these seams (especially serged seams) are not secured properly, the threads can easily become loose and start to come out of the hem.
For example, in the image below you can see the hem of my party dress I bought to attend a wedding. The seams were not secured properly and now almost every seam at the hem has some loose threads.
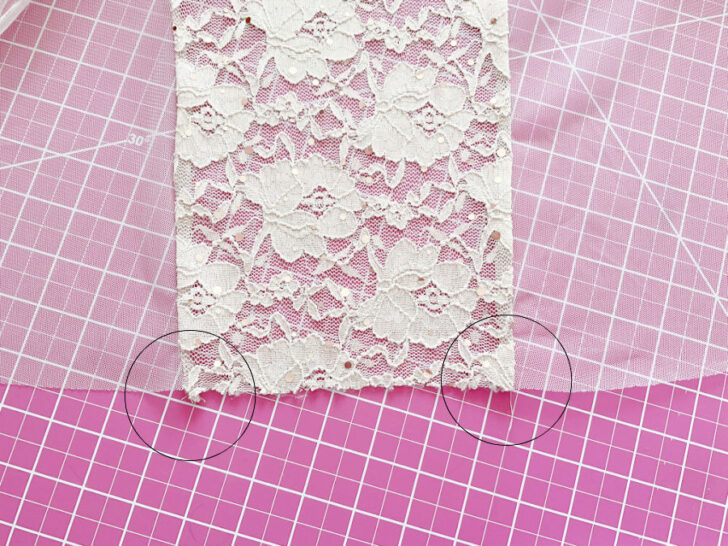
To avoid this issue, it’s important to secure the seams at the hem. This can be done by either hand-sewing them to ensure that they are firmly in place or by using a fabric glue or fray check to seal any loose threads and prevent them from unraveling further. This will help to create a neat, clean finish that is free from any unsightly loose threads.
That’s where our sewing skills come into play. While it’s possible that mass-produced dresses may not have their seams secured correctly, when we make a dress or skirt ourselves, we have the opportunity to ensure that every detail is perfect.
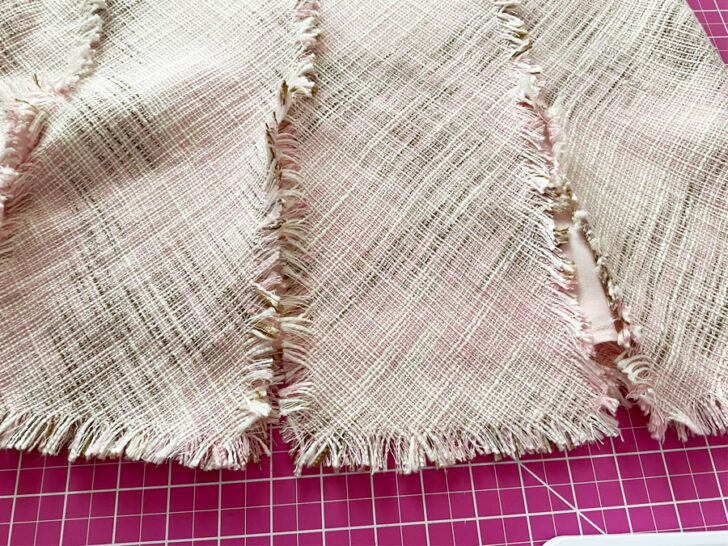
I made this skirt using a 3-thread overlock stitch of my serger and I secure the seams at the raw hem by hand sewing. The skirt is made from knit fabric so I could keep the hem raw (without finishing the edge) to showcase the natural drape of this fabric.
✅ Related tutorial: What Is A Serger & What Can I Do With It?

When creating a raw hem, another problem that can arise is the appearance of small ridges or bumps from the cutting process. This can be especially true when working with thinner fabrics, or when using scissors that are not sharp enough.
It’s not uncommon to find raw hems on store-bought garments, and in the image below you can see that the raw hem of this maxi dress is not cut smoothly and results in an uneven and jagged edge.
This may not be noticeable due to the length of the maxi dress. However, if you’re someone who values attention to detail and prefers a polished look, it’s understandable that you may not be satisfied with the not smooth cut at the hem.
To avoid this issue, use sharp scissors and cut slowly and carefully, following the line of the pattern exactly. This will help to create a clean and even cut that is less likely to result in any ridges or bumps.

I use these scissors and I like them very much.
However, even when using sharp scissors and being careful, it can sometimes be difficult to achieve a perfectly smooth and even cut. In these cases, using a rotary cutter can be a great option.
✅ Related tutorial: Rotary cutter tips and tricks – what mistakes to avoid
Also, using a rotary cutter can be faster and more efficient than using scissors, which can save time and effort when working on larger projects.
Another common issue that can arise when creating a raw edge hem is an uneven cut. This can happen when the fabric is not cut evenly on all sides, resulting in a hem that is longer on one side than the other.
To avoid this issue, it’s important to use a ruler or measuring tape when cutting the fabric for your raw edge hem to create a proper cut that is free from any uneven edges.
Now allow me to present a dress I designed for my site some time ago. This dress is not only stylish but can be made in just 30 minutes. With only one seam at the waist and a raw hem, this dress is perfect for those who want to create a chic look without spending hours on a complicated project. The dress is made from a knit fabric that won’t fray, making it even easier to create. If you’re interested in making this dress for yourself, check out the full tutorial on my site at this link – How to sew a dress without a pattern {make this stylish, flattering, and fun dress in 30 minutes}. The tutorial includes a video and step-by-step instructions to help you create your own version of this interesting dress.
Examples Of Raw Hems In Different Types Of Clothing
Raw hems can be found in a variety of clothing styles, making them a versatile addition to any wardrobe. Here are some examples of raw hems in different types of clothing:
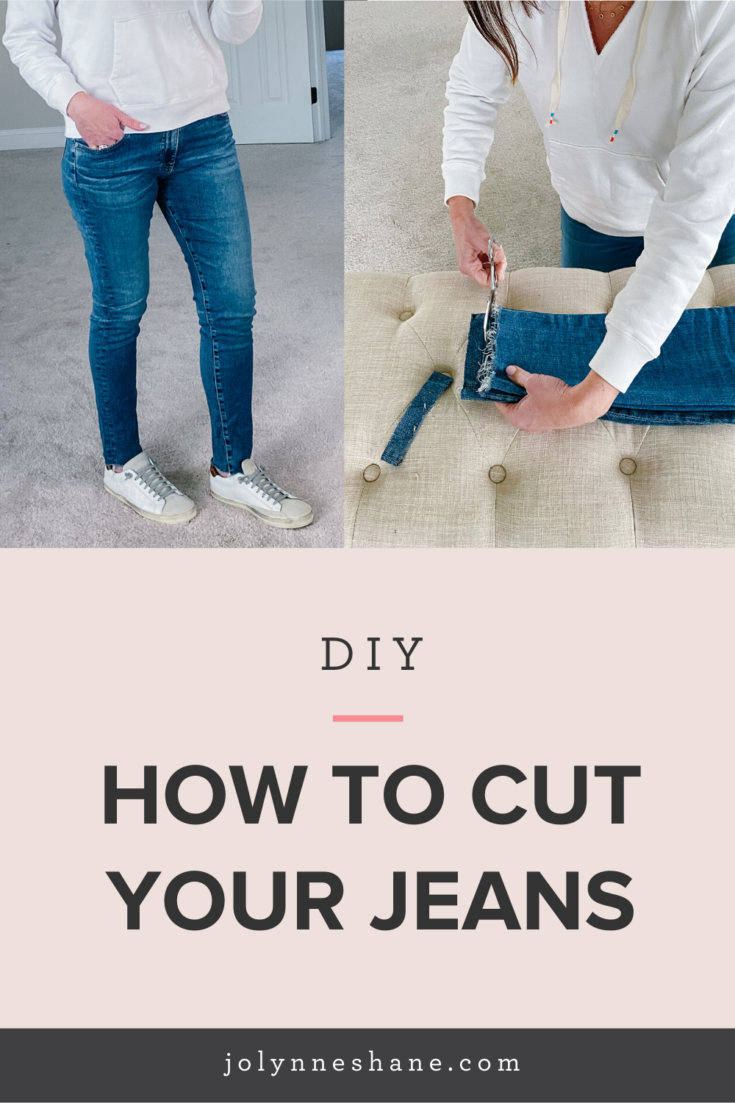
Raw hem jeans have become a popular trend in recent years, with many brands releasing their own versions. They are available in different styles, from skinny jeans to wide-leg jeans (and everything in between). You can find a terrific step-by-step tutorial on turning your jeans into a pair of raw hem jeans from Jo-Lynne Shane.
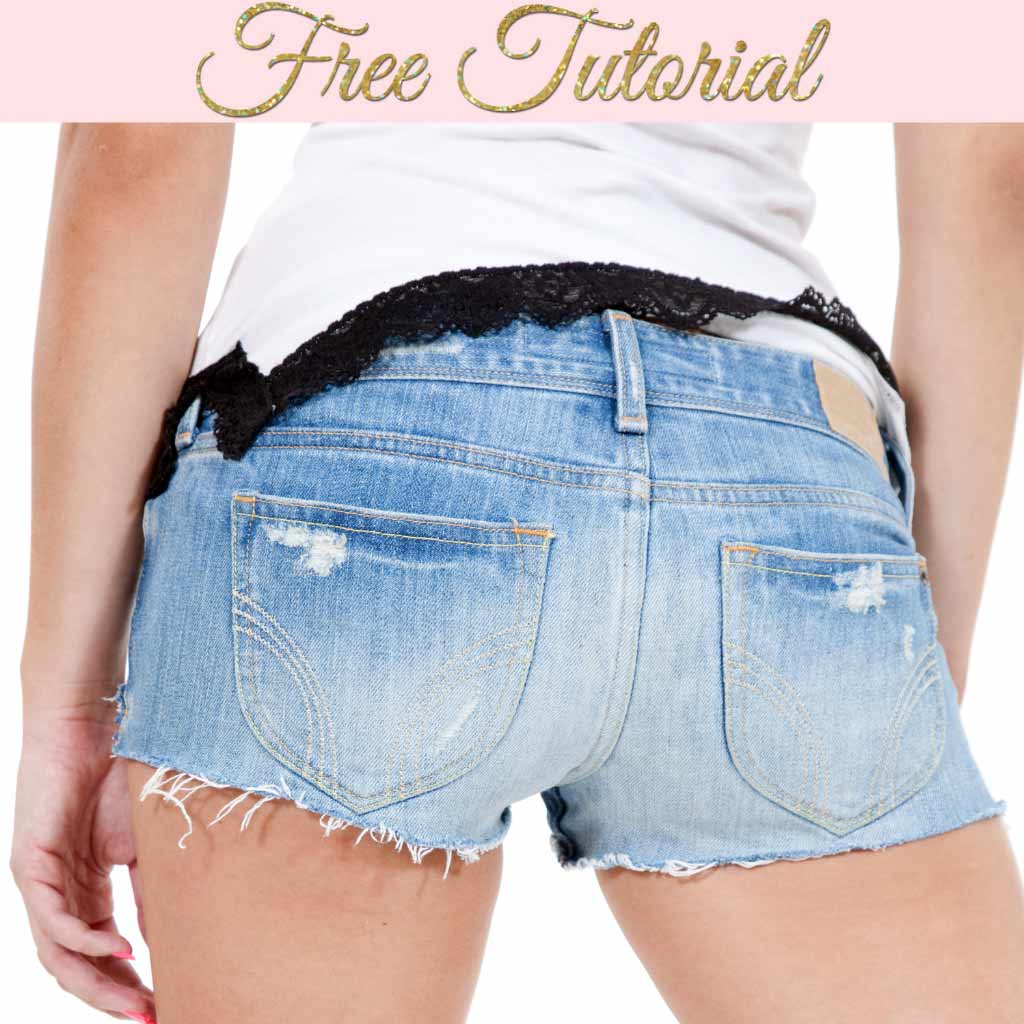
The trend doesn’t stop with pants! It’s also popular with denim shorts, and Treasurie has a great tutorial on how to turn your jeans into raw hem denim shorts. I’ve also seen some knit shorts with raw hems.
A sweatshirt without the band hem at the bottom is very relaxed and cozy. Since sweatshirts are knit with a bit of fleece, you can crop the bottom hem off and leave a raw hem. Merrick’s Art has a step-by-step tutorial that shows how to do it.

It’s most common to see raw hems on dresses made of knit fabric. This dress is made from a soft knit fabric that drapes beautifully on the body. The dress features a simple, yet elegant design with a raw hemline. What's more, this dress is incredibly easy to make, with step-by-step instructions and a helpful video tutorial provided on the site.
Denim skirts look great with a raw hem! Check out the tutorial from Megan Nielsen to learn how to make a raw hem on a denim skirt.
Transform an old t-shirt into a tank top with raw hems! Kristen Boehmer has a tutorial that shows how to do this.

Like denim, flannel is a fabric that can deliver a terrific-looking fray. Check out this tutorial from Hearth and Vine to learn how to make a flannel scarf with a raw hem.
In conclusion: Raw hems are a popular trend that’s likely here to stay for a while, thanks to their versatility. With the proper technique and care, a raw hem can deliver the necessary final touch to give your garment the look you want. Let your creativity run free as you have fun with raw hems!
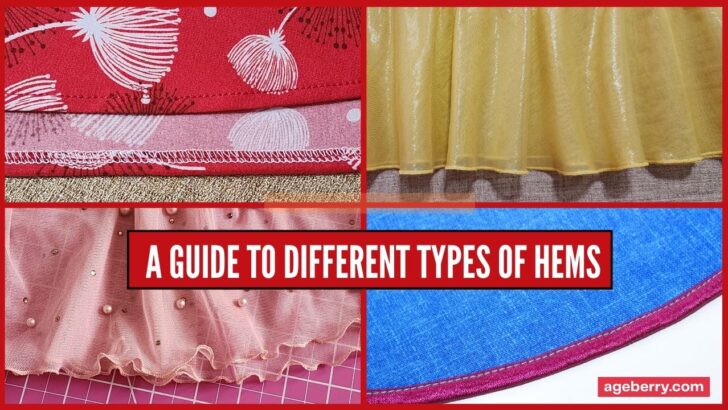
If you liked this article on raw hems, there’s something else you’ll want to check out. Before you move on to the next cool fashion trend, take a peek at our article about different kinds of hems. You’ll discover all sorts of ways to hem your clothes – Hemming 101: A Guide To Different Types Of Hems.
Did you find this tutorial helpful? If so, save this pin (see below) on your sewing board so you can come to the article later when you need this information on raw hems, and follow me on Pinterest for more tips, tutorials, and inspiration!
latest posts
- What Do You Call a Person Who Sews? I Asked My Readers and Got 1,408 Opinions
- DIY Round Purse: PDF Sewing Pattern and Detailed Instructions
- Mini Wonder Clips By Clover: Useful Sewing Tool Or Just Another Notion?
- Non-Slip Grips For Quilting Rulers: A Small Notion With A Useful Job
- Fabric Eraser for Sewing: What It Removes and When to Use It
- What Is The Best Thread For Sewing Machine Projects? Let’s Find Out!
- Butterfly Quilt Block Tutorial – Foundation Paper Piecing
- How To Sew Quilt Squares So The Corners Match
- Sewing With Fork Pins: How They Help With Pattern Matching, Slippery Fabric, And Seams