
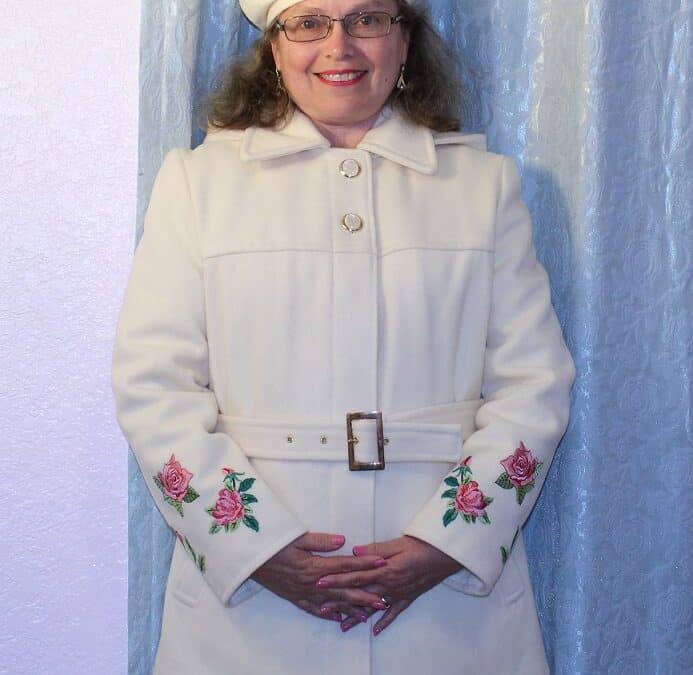
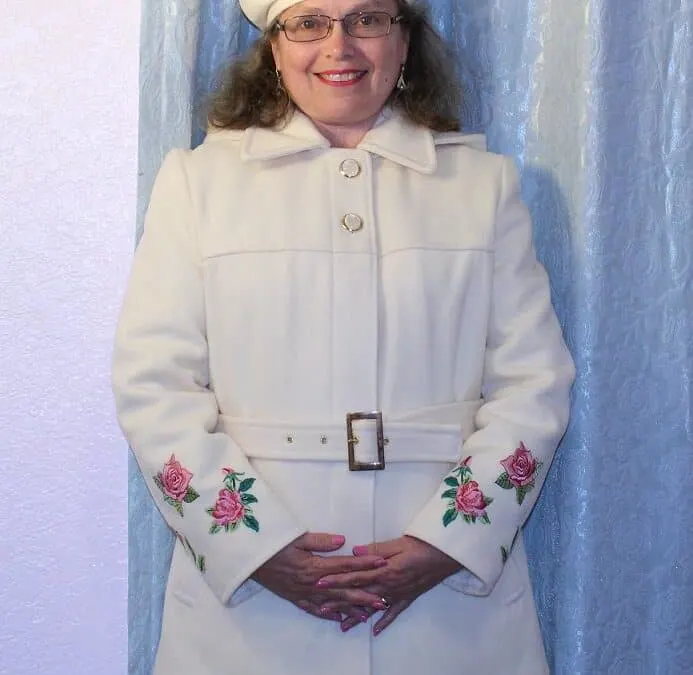
Do you know what is a fabric nap?
Nooo, it’s not what you see in this image. It’s just me after making a YouTube sewing tutorial.

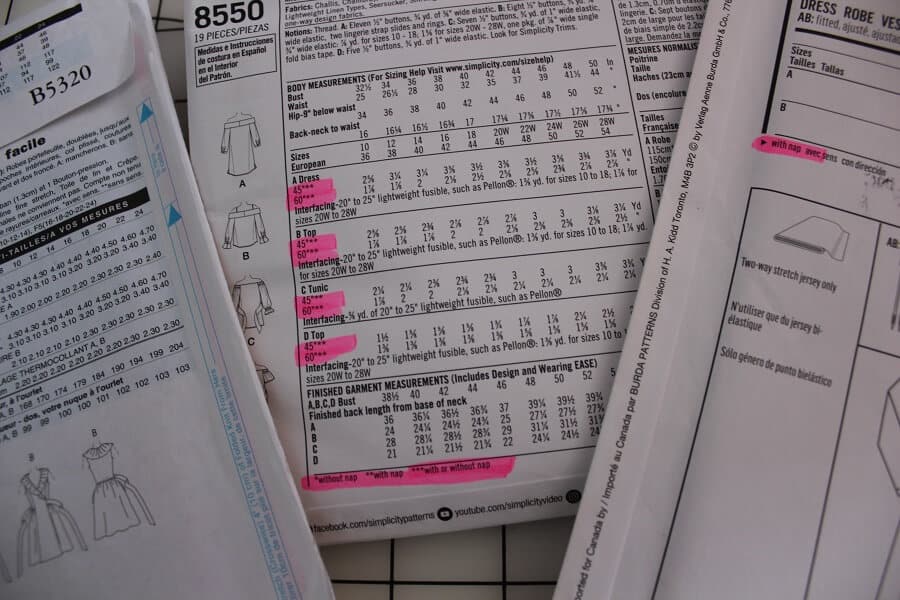
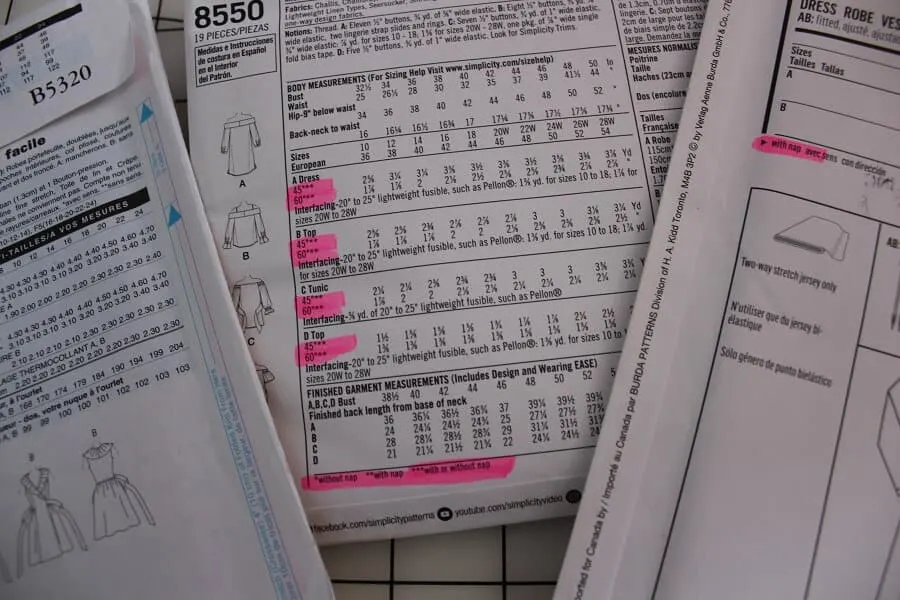
If you use commercial patterns you can see on almost every envelope this: *with nap or **without a nap and sometimes ***with or without a nap. It must be very important if they print it on EVERY envelope. It affects many things: the amount of yardage you need for your project, how the pattern is cut, and how the garment is sewn and pressed.
I guess pattern companies think that everybody who sews is supposed to know what fabric nap is and how to use it. If you ever wondered about this, continue reading.
So, what is a “nap” in sewing?
NAP definition
I want to quote Wikipedia: “Primarily, a nap is the raised (fuzzy) surface on certain kinds of cloth, such as velvet or moleskin. A nap can refer additionally to other surfaces that look like the surface of a napped cloth, such as the surface of a felt or beaver hat. Since the 15th century, the term nap generally refers to a special pile given to the cloth. The term pile refers to raised fibers that are there on purpose, rather than as a by-product of producing the cloth. In this case, the nap is woven into the cloth, often by weaving loops into the fabric, which can then be cut or left intact. Carpets, rugs, velvet, velour, and velveteen, are made by interlacing a secondary yarn through woven cloth, creating a nap or pile.” {https://en.wikipedia.org/wiki/Nap_(textile)}
If you prefer a video tutorial on What is NAP in sewing go to my YouTube channel here.

Fabrics with nap usually have surface texture because of the raised fibers which all lie in one direction. But these raised fibers don’t “raise” exactly vertically, they are slanted in one direction, and because of this, we have 2 directions on napped fabrics – “with nap” when the nap is going down (and usually parallel to the selvage) and “against nap” (but still parallel to the selvage).
You can feel it if you run your hand over the napped fabric: in one direction it is smooth and soft ( with a nap ) and in the opposite direction it feels rough or even scratchy ( against a nap ).
I want to show you this using faux fur because it’s much easier to explain what I mean. I stroke the pile down – and it’s smooth, and when I go in the opposite direction it’s completely different.

Note: Some of the links on this page are affiliate links. This means I will receive a commission if you order a product through one of my links. I only recommend products I believe in and use myself.
So, why is it important to know the direction of the nap when you work with napped fabrics?
First of all, you need to understand the nap when you want to cut the napped fabric. You have to cut all pattern pieces IN THE SAME direction. If they are not laid out correctly you may be surprised by differences in the color of the fabric. This is the velvet fabric for my new dress, if I put it this way, it looks like I have two different fabrics.
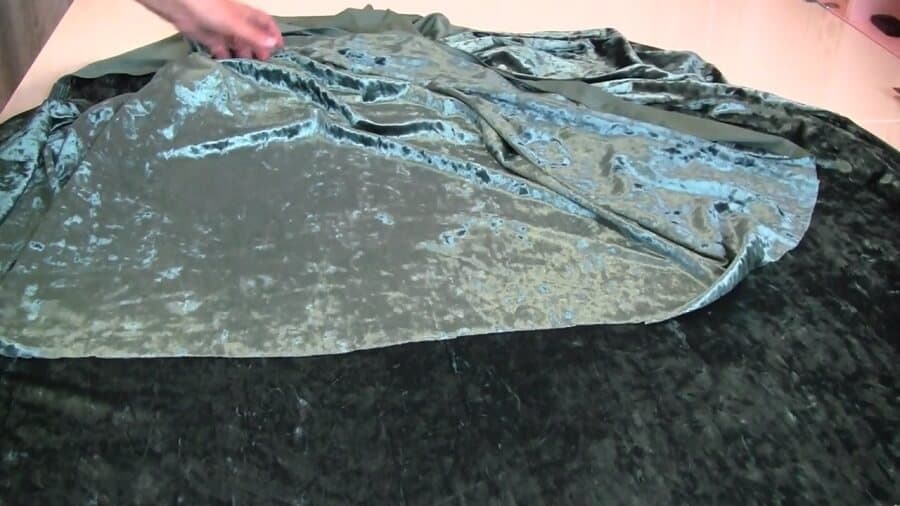

It catches the light differently at different angles because on one piece the pile is going down and on the other piece of the same fabric, the pile is going in the opposite direction.
And if I put the pieces with the pile going in the same direction there is no difference in color.
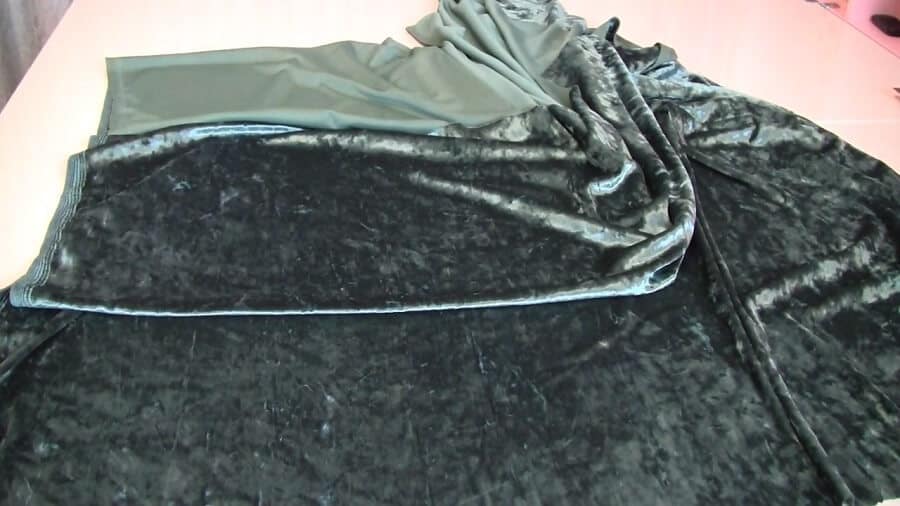

Some fabrics have a more pronounced difference than others, it depends on the length of the pile and the color of the fabric, and sometimes it’s not easy to detect the difference at a first glance.
✅ Related tutorial: How to sew velvet/tips and tricks
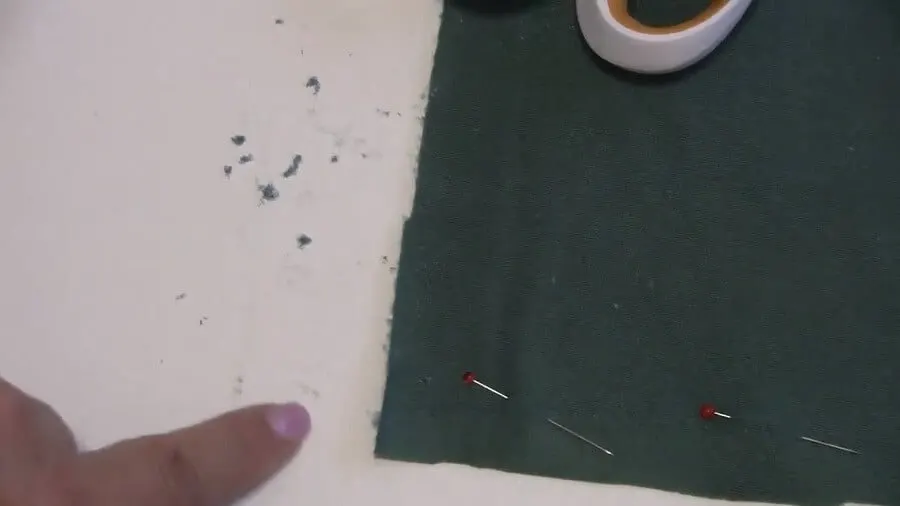
So it’s very important to test for nap direction before laying out the pattern pieces for cutting. I usually even mark my fabric with pins so that I know the direction of the nap and don’t make mistakes. The pins remind me to place each pattern piece correctly so my finished garment doesn’t have unexpected nap troubles.
Does it matter in what direction to cut the fabric with the nap? With the pile going down or up? There is no strict rule – if you want the lighter color then cut it with nap down, if you want the deeper color then you may cut in the opposite direction. The main thing is that you have to cut all the pieces in the same direction. Pay particular attention to small details, like pockets, sleeves, and waistbands.
Focus on your sense of style: go to the mirror, attach the fabric in both directions and select the option that you like best. But still, we prefer to cut with the nap going down from the shoulders to the feet because this often shows off the nice shimmer in the napped fabric.
Unless you want it to be different shades as a design element. Then you can cut certain pieces like patch pockets and yokes in different directions to create some shading. For example, I chose for my velvet dress to cut the yoke in the opposite direction because I wanted it to be darker in color.

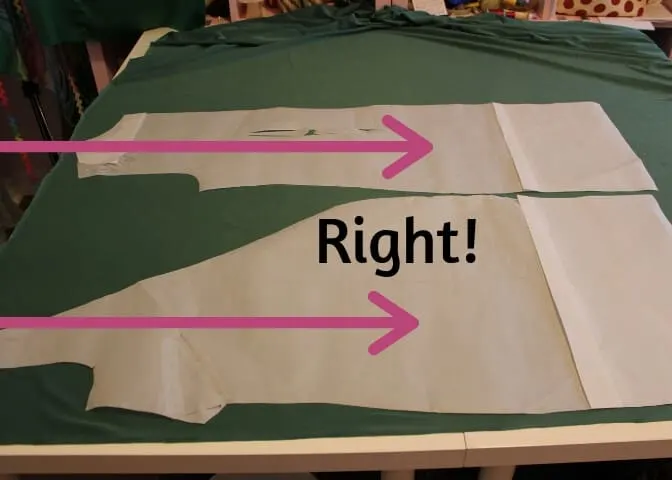
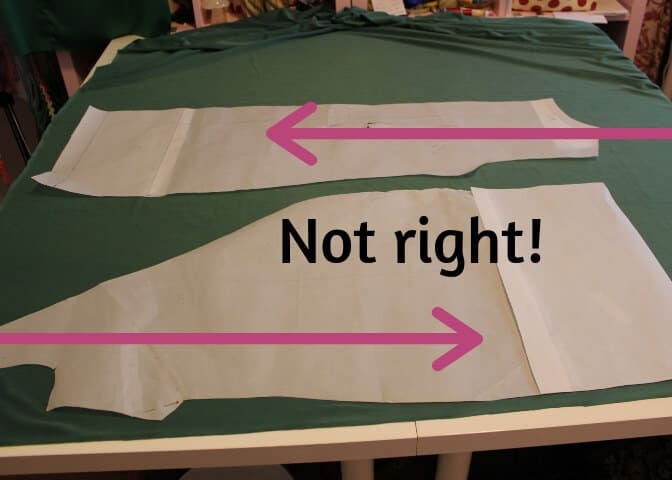
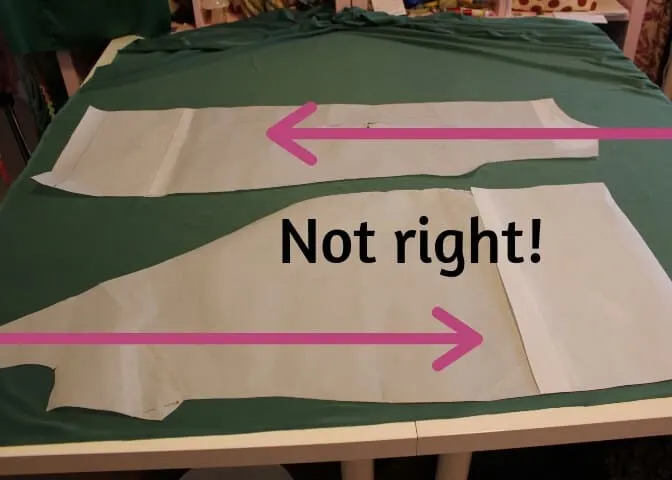
If you have to arrange all the pattern pieces facing the same direction you may need more fabric for the project than if you cut from fabric without a nap. That’s why you see “with nap” and “without nap” layouts on pattern envelopes. “With nap” means that you cut all the pattern pieces (even the facing) in the SAME direction, and “without nap” means that you can cut regardless of the direction (just don’t forget to follow the grain line though).
The layout “with nap” doesn’t necessarily mean that you will use fabric with pile (like velvet).
If you use any directional fabric (like one-way print fabric) you have to cut it in the same direction and use a “with nap” layout so that the fabric print all runs in the same direction on the finished item.
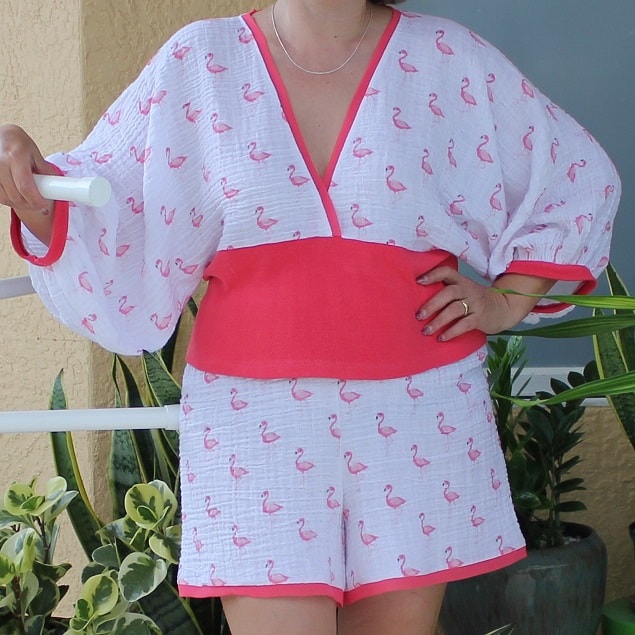
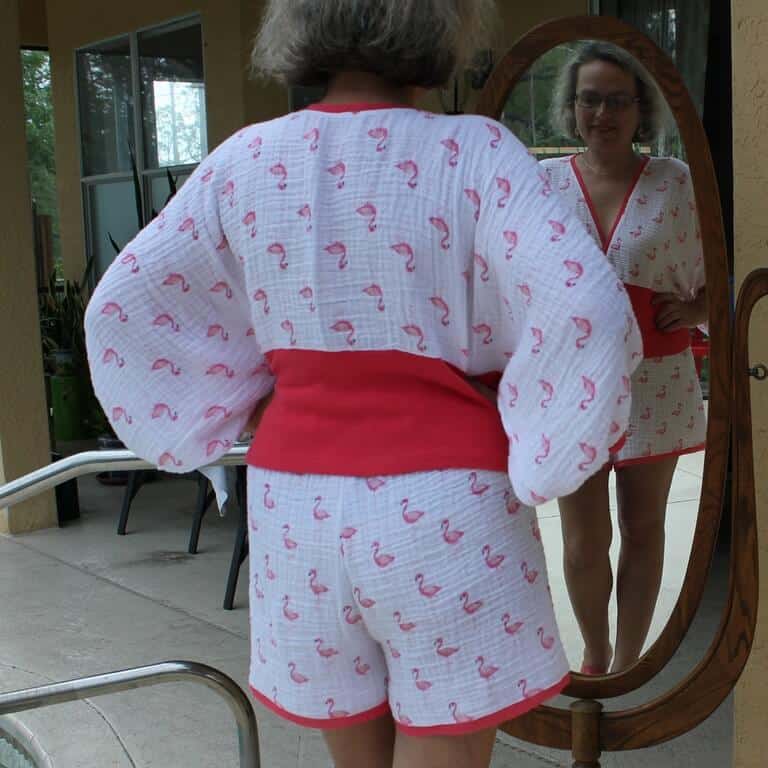
This is the directional fabric from which I made my pajamas. I have a tutorial on my site on how to make 2 pajama tops without a pattern. Check it out – it’s really useful!


But look at the back – all my flamingos are upside down at the back of the top. That’s what you need to consider when cutting pattern pieces from directional fabric and use the “with nap” layout for directional fabrics like this even if the fabrics don’t have any nap.
And layout “without nap” means that you can cut the pattern pieces in just any arrangement you like.
The majority of sewing patterns have a pattern layout especially for fabrics “with nap”. That’s why most of the time you will need 30% less fabric for your project than they recommend on the pattern envelope if you will just use regular fabric for your project without any direction or nap. But even if you buy more fabric than you will use for your project it’s not a problem – you can always use it later for different projects or embellishments.
Also, the fabric with nap has to be cut on a single layer. Don’t cut the opposite pattern pieces on the fold because the two pieces of fabric will move relative to each other. The fabric pile is really shifty, especially when the right sides are together.

When you cut fabric with a nap you will have lots of little fuzzy bits. You can’t avoid that. All those little “hair” cut from the pile will fly around and go everywhere. It’s better if you cut with the wrong side up and the pile facing down, this will keep the fuzz on the table instead of allowing it to fly. Clean the table right away. Or keep the vacuum cleaner handy.
But it’s also very important to understand the direction of the nap for sewing pattern pieces and not only for cutting.
You will realize that it’s not very easy to keep the right sides of the napped fabric together even if the nap is going in the same direction. During stitching when pile meets pile the layers will move independently and you may have a displacement of the fabric.
It’s almost impossible to pin, baste and sew pattern pieces not cut in the same direction. They always slide. So all stitches should be made in the same direction along with the nap.

What fabrics have a nap?
Velvet, velour, velveteen, corduroy, terrycloth, faux fur, suede, just to name a few.
It’s also important to understand fabrics with a nap for pressing.
How to press fabric with the nap?
Use a terrycloth towel. Press ONLY from the wrong side. And through pressing cloth. I use 100% silk organza as my pressing cloth.
The basic rule – is not to press too hard on the iron, the touch should be barely perceptible, just press lightly with the tip of the iron. Be sure to check the selected mode on the fabric scrap.
Or put one piece of fabric with nap on top of another piece of napped fabric. Otherwise, you can flatten the nap, and it will have a different color.

Did you like this guide? If you want to save it for future reference and to use it later when you are ready to use napped fabric, pin the image below to your sewing board on Pinterest and follow me on Pinterest for more tips, tutorials, and inspiration.

Ready to take the next step in your sewing journey? Check out more step-by-step tutorials from my blog and don’t forget to share!


latest posts
- Ever Tried This on Your Serger? This Differential Feed Feature Will Amaze You
- Ditch My Sewing Machine? Not in This Lifetime!
- Adorable DIY Needle Book | Easy Tutorial for Beginners
- Master the Seam Ripper: Your Ultimate Guide to Precision Stitch Removal
- Think You Know Zippers? This Installation Guide Might Surprise You
- Why Does Your Seam Ripper Have a Red Ball? Discover Its Purpose!
- Topstitching Troubles? This Simple Trick Will Turn It Around Instantly!
- How to Sew Shirring: A Step-by-Step Guide to Elastic Thread Gathering
- Are Self-Threading Needles Really Useful?
