Sewing Room Organization Ideas: A Practical Guide to Organizing Fabric
Fabric is fun. Organizing it? Not so much. And that’s exactly why sewing room organization can feel overwhelming — especially when the fabric stash and all the “extra” materials quickly outgrow whatever storage you originally set aside for them.
One day your sewing room looks tidy, and the next — fabric piles on chairs, batting rolls in corners, and interfacing sheets flatten themselves under a cutting mat.

Fabric is floppy. Batting is bulky. Interfacing gets wrinkly. Scraps multiply like gremlins. And somehow, everything you need is always in the last bin you check.
This guide will walk you through simple ways to organize fabric — so your space feels lighter, easier to work in, and hopefully a lot less chaotic.
Start With a System — Not Just Storage
Before you start folding fabric into cute little stacks, take a step back. Sewing room organization works best when you build a simple system first. Without one, even the prettiest storage bins turn into mystery boxes in a week.
This first part is all about setting the foundation: what you have, how you use it, and where it can realistically live.
Step 1 — Sort by Type, Not Color (Yet)
Color-coding looks gorgeous in photos, but it’s not the best place to begin. Start with type, because different fabrics and materials may need different kinds of storage.
Fabric types to sort (for example):
- wovens (quilting cotton, linen, poplin)
- knits (jersey, rib knit, interlock)
- home-decor fabrics (canvas, upholstery blends)
- quilting cotton
- silky/slippery fabrics (satin, charmeuse, organza)
- fur
- lace
- scraps
- vinyl, felt, cork, and other specialty pieces
Once the types are separated, then you can sort by color or project category if you want a more visual layout.
Step 2 — Decide How You Use Materials
Now that everything is in logical piles, think about your workflow. The goal is simple: make the items you use most the easiest to reach.
Ask yourself:
- What do I use weekly?
(quilting cotton?, knits? interfacing?, etc.) — keep these close. - What needs to be within reach?
If you forget it exists unless you see it, give it a shelf or clear bin. - What can go into deeper storage?
Rolls of home-decor fabric, bulk batting, stabilizers you rarely touch — these can live higher, lower, or even in another room.
This step keeps your workspace from turning into a search-and-rescue mission every time you start a new project.
Step 3 — Measure Your Space
Before choosing storage solutions, measure the space you have.
Pay attention to:
- Shelf height and depth — How to fold fabric to fit?
- Closet space — Hanging rods, floor space, potential for extra shelves. Will bins slide in easily?
- Under-table space — Rolling carts, low bins, or soft baskets
- Vertical wall space — Perfect for shelving units
Fabric Storage Essentials: The Three Rules to Follow
You can store fabric on shelves, in bins, in closets — whatever works for your space. But no matter how you store it, these three rules matter the most. They’ll help your fabric stay clean, vibrant, and usable for years.
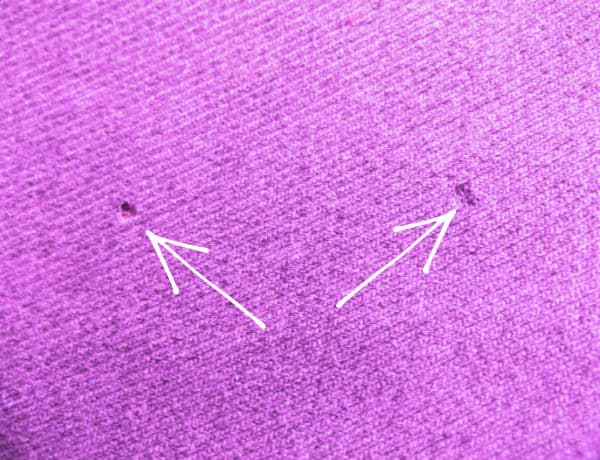
1. Keep Fabric Away From Light
Daylight may look harmless, but it slowly fades fabric — especially natural fibers like cotton, linen, and wool. Even indirect sunlight hitting the same edge of a folded piece for months can leave a pale stripe you can’t wash out.
Now let me show you something. Here’s a folded fabric stash displayed on open shelves — everything neat, color-sorted, picture-perfect. But take a closer look.

What’s wrong with this image?
It looks organized, yes. The machine is in front of a large window, there is plenty of daylight for sewing. And here is the problem.
One thing many sewists forget is that fabric fades in daylight. Even indirect sunlight can lighten one edge of your fabric over time. So while open shelving is great for visibility, it’s important to keep fabric out of light to protect it.
Note: Some of the links on this page are affiliate links. This means I will receive a commission if you order a product through one of my links. I only recommend products I believe in and use myself.
2. Store Fabric Away From Moisture
Fabric absorbs moisture like a sponge. Even slightly damp air can lead to musty smells, mildew, or “soft wrinkles” that never fully disappear.
Moisture risks include:
- basements
- garages
- closets on exterior walls
- rooms without good airflow
If your climate is humid (hello, Florida), this is especially important. I use a dehumidifier in my house — especially in winter — because here in Florida the AC barely runs when it’s cooler, and that’s when humidity loves to creep in.
It’s not just for protecting fabric — it helps keep finished projects, quilts, embroidery pieces, and even your clothes from getting musty or developing that “soft damp” feel that never quite goes away. A small dehumidifier can make a big difference, especially in humid climates.

From personal experience I can tell you this: in a normal day, working about 5-6 hours, my dehumidifier extracts about 1 gallon (~4 liters) of water! It seems incredible, it is surprising, and it is something you should not ignore. I actually have two of these.
How to protect your stash:
- Use airtight bins for long-term storage.
- Add silica gel packs or moisture absorbers inside bins.
- Keep fabric off the floor — use shelves, cubbies, or raised storage.
- Make sure your sewing room stays reasonably ventilated.

I personally prefer a dehumidifier, these packs, while very convenient (and quiet) will need to be monitored and exchanged from time to time. The dehumidifier I can start when I leave the room (it is relatively noisy) and when I come back all I need to do is empty the water reservoir.
3. Keep Fabric Away From Clothing Moths
Moths love natural fibers, humidity, and darkness — the exact conditions where fabric often lives. And unfortunately, they don’t just eat wool. They’ll nibble on cotton, linen, and anything with natural fiber content.
How to avoid unwelcome guests:
- Store fabric in sealed bins or behind closed doors.
- Vacuum shelves occasionally and remove lint — moths love dust.
- Use natural repellents like cedar, lavender, or clove sachets (they smell nice and help discourage pests).
- Inspect any inherited, secondhand, or garage-sale fabric before adding it to your stash.
Related tutorial – DIY sachets: how to make lavender sachets for closets and drawers
Fabric Storage Options
About 20 years ago, I didn’t have a fabric stash at all. I bought fabric for one project (maybe two, maybe three), finished them, and then went shopping again. Easy. I lived in New York back then, and the fabric stores on 34th–39th Streets in Midtown were practically my second home. If I needed fabric, I just walked over and bought what I needed. No stash required.
Then life happened.
When my mother-in-law passed away, I inherited all of her fabric. A little later, I bought an entire sewing room at a garage sale — fabric included. And around the same time, I began building this website, which meant much less time to actually sew. So the fabric stayed… and multiplied.
✅ Related tutorial: Confessions of a Fabric Collector: Why I Keep Buying Fabric (and How I Stopped Feeling Guilty)
Then came the move to Florida. Suddenly, no more quick trips to the New York Garment District. My only local option was Joann (may it rest in peace). So whenever I visited New York, I stocked up. And now, I’m honestly grateful I have everything I need — and plenty more.
But here’s the truth: Fabric takes space. A lot of space. And once you have enough of it, organizing becomes not just helpful… but necessary.
There aren’t dozens of ways to store fabric — realistically, we all use some combination of shelves, bins, and boxes. The real trick isn’t what you use… it’s how you use it so fabric stays organized without turning into a weekly chore.
I want to spend my time sewing, not constantly rearranging my stash, so these are the methods that actually work. I also don’t look forward to searching my stash for an elusive piece which I am sure is somewhere, only if I could remember where.
Shelving and Cabinets
Let me say this again: no open shelving in direct daylight. Fabric fades, and the damage can be permanent. But shelving itself? That’s my favorite storage method.
One important detail: shelves should be narrow. Deep shelving might look spacious, but it quickly turns into a black hole where fabric disappears behind other fabric. Narrow shelves keep everything visible and prevent forgotten stacks hiding in the back.
The best option is cabinets with shelves. They keep everything fully protected behind doors. There are many great cabinet styles that fit sewing rooms, even small ones.
One excellent option is the Sauder HomePlus Storage Cabinet (often used as a pantry cabinet, but perfect for fabric)

This cabinet comes in 5 different finishes. Inside, you’ll find four adjustable shelves that you can set to the exact height you need for folded fabric. The double doors keep everything out of sight and protected from light, and the shallow depth helps prevent fabric from getting shoved behind other stacks.
72″ Tall Kitchen Pantry Cabinet

This tall, narrow cabinet works surprisingly well in a sewing room. At just 12″ deep, it keeps fabric easy to see and reach without letting stacks disappear behind each other. The cabinet includes five shelves (two adjustable), so you can customize the height for mini bolts, bins, or folded yardage. The double doors keep fabric protected from dust and light. It’s sturdy, stable, and the slim profile makes it a great fit for small sewing rooms or a tight corner that needs extra storage.
Utility Storage Cabinet

Inside, you get five shelves (three adjustable), so you can customize the layout for fabric stacks, boxes, or even rolls of stabilizer. The soft-closing doors keep everything protected, and the adjustable feet help the cabinet stay level on uneven floors — helpful in older sewing rooms. Or newer ones.
It’s sturdy, easy to wipe clean, and includes a wall anchor for safety.
I use IKEA Kallax units, and I love them because I can add doors to keep fabric protected and out of sight.

Some sewists prefer Ikea Billy bookcases, which also work wonderfully if you add doors. I am using some myself.
✅ Related tutorial: Organizing a Craft Room with IKEA Kallax: Styling, Storage, and Desk Hack
If your sewing room has a closet with a door that closes, you may not need a full cabinet at all. A closet shelving system can be the perfect solution — especially if you want everything stored neatly out of sight. Here’s one option that works well for fabric, bins, and heavier sewing supplies.

This wire shelving unit is simple, sturdy, and incredibly practical for a sewing room closet. The five adjustable shelves let you set the height exactly where you need it for fabric stacks, project boxes, or storage bins. Each shelf holds up to 350 pounds, so it can easily support fabric (which is surprisingly heavy when you store a lot of it). The open wire design keeps airflow moving, which is helpful in humid climates, and the leveling feet keep the unit steady even if your closet floor isn’t perfectly flat. It also assembles without tools — a nice bonus.
I also use open shelves inside my closet:
- upper shelves → fabrics I don’t reach for often
- middle shelves → fabrics I plan to use soon (at least that’s the plan… sewing life doesn’t always follow my plans)
For most sewing projects, organizing by type keeps things more practical. But for quilters with lots of quilting cotton yardage, sorting by color works really well. It makes choosing fabric for blocks easier, because you can immediately see all your quilting cottons arranged in a clear color order.
Bins, Boxes & Cubes
Another popular option is storing fabric in bins and boxes. Clear bins with lids make it easy to find what you need without opening everything.
You can dedicate bins to:
- wovens
- knits
- precuts (smaller bins work best here)
- home-decor remnants
- seasonal fabrics

These large clear bins are ideal if you prefer to store fabric in closed containers rather than on shelves. The see-through design makes it easy to spot what’s inside without opening each lid, which is especially helpful if you sort fabric by type — wovens in one bin, knits in another, precuts in a smaller bin, etc.
Just remember: everything must be protected against light somehow.
The plastic is impact-resistant, so the bins won’t crack under the weight of fabric, and the snap-tight latching lids keep dust and moisture out. They also stack securely and offer more interior space thanks to their straight-wall design. For anyone storing fabric under tables, in closets, or in a garage, these bins are a practical, long-lasting option.

These Sterilite containers are a great option if you need sturdy, long-term fabric storage in larger quantities. The set includes both 70-quart and 116-quart containers, giving you flexibility for different types of fabric — smaller cuts in the 70 qt bins, and big yardage, home-decor fabrics, or batting in the 116 qt size. The totes have secure latching lids that stay firmly attached, protecting your fabric from dust and moisture. The clear base makes it easy to see what’s inside, and the stackable design helps you use vertical space efficiently in closets, under tables, or in storage rooms. Made in the USA and built to last, these are solid workhorse bins for sewists with larger stashes.
For less-used fabrics, labeled fabric storage cubes make life much easier.

These lightweight fabric cubes work perfectly with shelving units and are great for storing fabrics that don’t fold neatly — silks, knits, satins, or slippery materials that tend to slide off shelves. They’re also useful for patterns, small precut collections, UFOs, or project bundles you want to keep together. Each cube has a sewn-in handle for easy pulling, and they can be used as open-top bins or as “drawers” inside cubby systems. Because they’re soft and breathable, they’re ideal for fabrics that need gentle storage. Just keep in mind that each cube supports up to 5 lbs, so they’re best for lighter materials rather than heavy yardage.
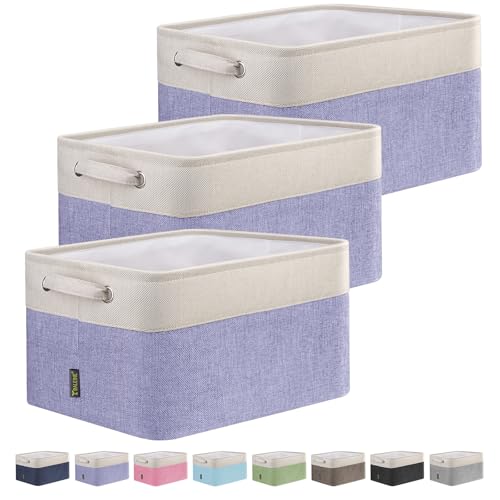
These linen-style fabric bins are a stylish option for organizing lighter sewing materials inside shelving units, closets, or cubbies like IKEA Kallax. They’re sturdy enough to hold fabric you don’t want exposed on shelves. The linen fabric is durable and easy to clean. Each bin has two strong side handles, making it easy to pull them out or move them around the room. Their neutral, modern look blends in with almost any sewing room decor while keeping smaller collections contained and tidy.
I especially like the Kallax cubes because they come in so many designs and hide slippery fabrics beautifully. I store silks in them, because silky fabrics refuse to stay folded neatly and bins keep them contained.
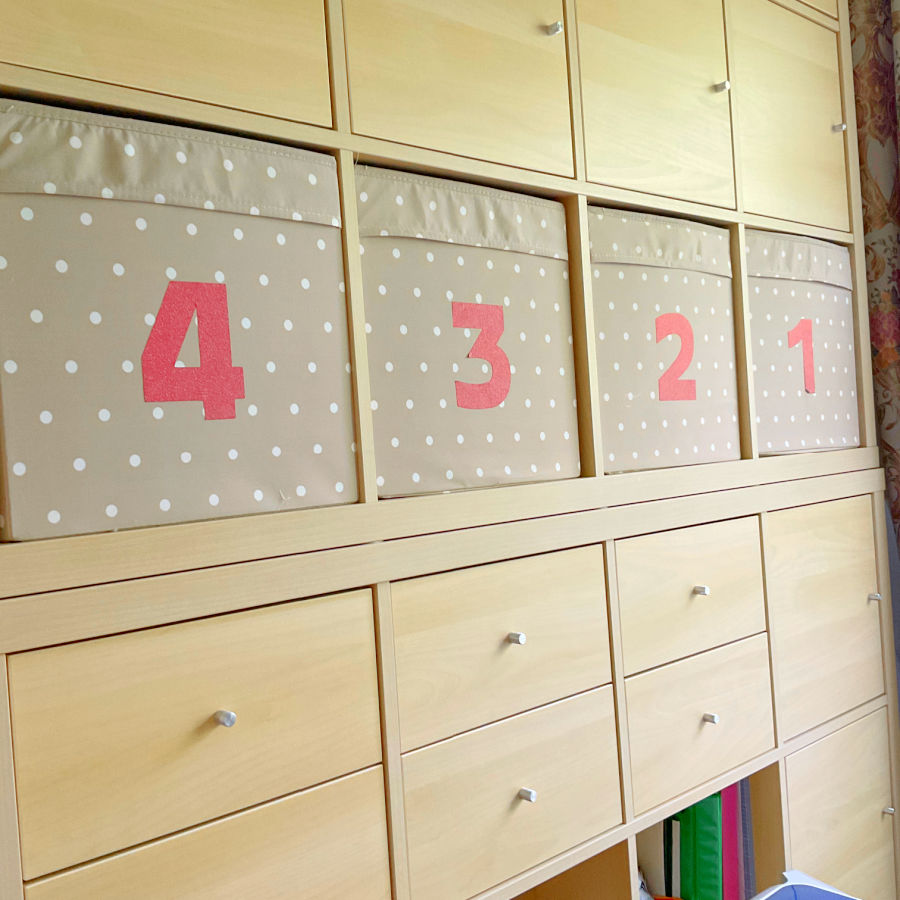
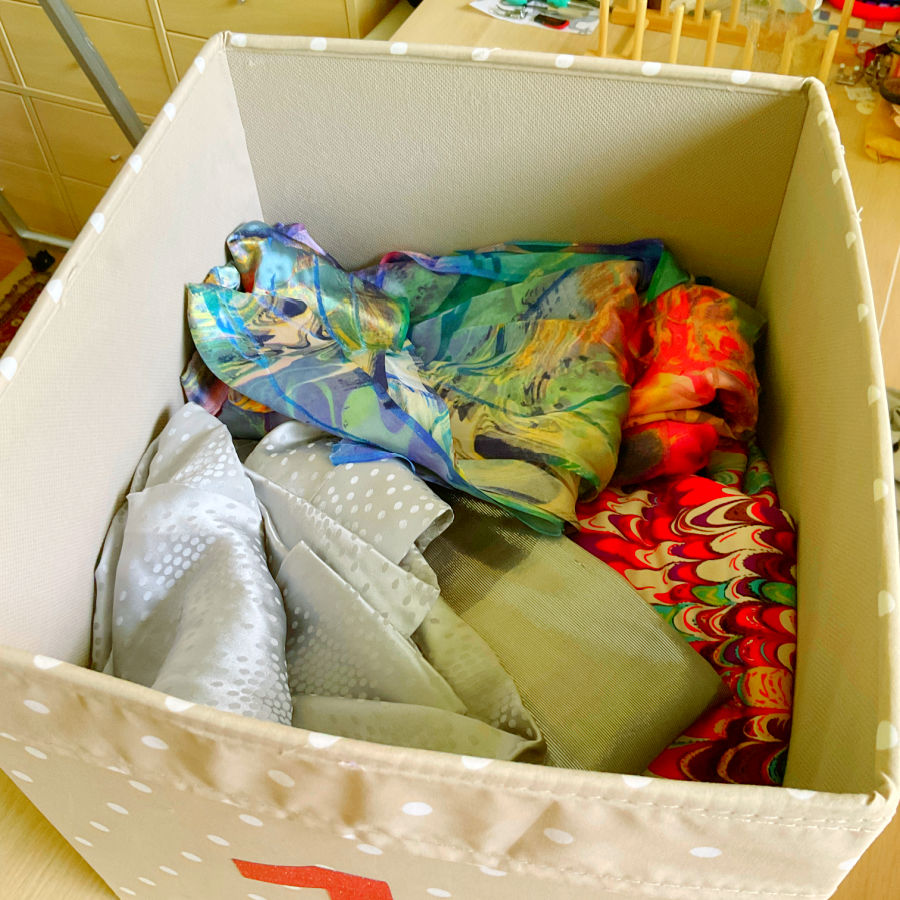
Cubbies within a Kallax unit also help break your stash into manageable categories so nothing collapses into a messy rainbow avalanche.
✅ Related tutorial: IKEA Sewing Room Ideas for small spaces
Hanging Fabric
Some sewists use hangers for storing fabric, and it can be a workable system in certain situations — especially if you handle a lot of garment fabrics or have a generous amount of closet space.
Pants hangers are the most popular choice, because they let you hang multiple cuts of fabric in a narrow space. You can keep everything neatly in the closet.
No-slip hangers work even better. They keep slippery fabrics in place so nothing falls to the floor, and the hanging method helps prevent the deep wrinkles or fold lines that sometimes develop in stacked fabric.
That said, this system makes the most sense if you sew garments frequently or run a sewing business. In my opinion, for most home sewing rooms, hanging fabric isn’t the most efficient use of space — but it can be a helpful option for certain fabrics or workflows.
I really do like these hangers — but I use them for pants, not for fabric. I have plenty of clothes to hang, and these organizers are perfect for that. For fabric, I still prefer shelves and bins because they use space more efficiently in a sewing room.

These space-saving trouser hangers work surprisingly well for storing fabric—especially garment fabrics, larger cuts, and slippery materials. The slim, tiered design helps you reduce closet bulk while keeping different fabrics easy to see and access. Each bar is padded with non-slip EVA foam, so material stays in place rather than sliding to one side. Made from stainless steel, the hanger can handle heavier fabrics like denim or twill, along with lighter options such as linings, knits, or even stabilizers.

These S-shaped hangers are another option for storing fabric in a closet. Because each hanger holds several layers without squeezing them together, your fabric doesn’t get creased or wrinkled. They’re sturdy enough to support heavier materials—denim, canvas, home-decor fabric—and won’t sag under the weight. The slim design replaces multiple single hangers and helps you save closet space while keeping each cut of fabric visible. Made from premium stainless steel, they’re durable, smooth, and easy to slide fabric on and off.
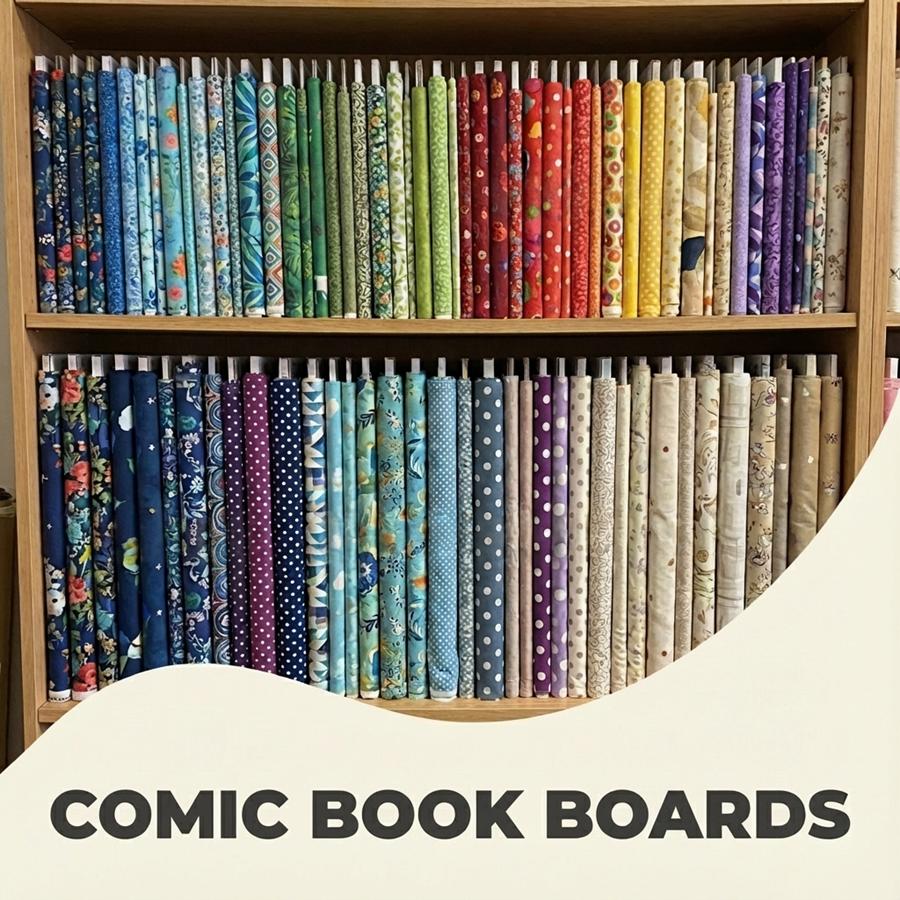
Fabric Organizer Boards
Fabric organizer boards are a simple way to keep your fabric neat, flat, and easy to store. You wrap your fabric around a sturdy board, secure the end, and line the boards up on a shelf or inside a bin. This keeps everything uniform in size and prevents stacks from collapsing or turning into messy piles.
There aren’t many specialty fabric organizer boards made specifically for sewing, but most sewists don’t use the specialty ones anyway. Instead, they use comic book boards.
What are comic book boards? These are thin, acid-free cardboard pieces originally made for comic book collectors. They’re slipped behind each comic inside a protective sleeve to keep the pages flat and prevent bending.


Sewists discovered that the boards are the perfect size and stiffness for wrapping fabric — and they’ve become a popular, budget-friendly way to create “mini bolts” at home.
Comic book boards work for:
- small pieces that would otherwise bunch up
- 1–2 yard cuts
- even larger yardage, depending on how tightly you wrap
They keep fabric easy to see, easy to grab, and easy to file neatly on shelves or in storage bins. For anyone looking to organize a growing stash without spending much, these boards are a simple and effective solution.

This set is a ready-made solution for turning your fabric into neat, uniform “mini bolts.” It includes 50 smooth organizer boards and 200 clear plastic alligator clips, so you can fold and secure a large portion of your stash. The boards are made from a 0.5 mm thick material that’s sturdy, smooth, and resistant to bending, which helps keep your folded fabric tidy and wrinkle-free.
To use them, you simply fold your fabric to the right width, wrap it around the board, and secure it with one of the included U-shaped clips. Unlike metal pins, these plastic clips hold fabric gently without snagging or leaving marks. Once wrapped, each board stacks neatly on shelves or tucks into storage bins.
This system is especially helpful if you want consistent sizing, easy visibility, and a workspace that feels tidy rather than overwhelmed by uneven piles.

This larger set gives you plenty of boards to organize a big fabric stash. The 0.6 mm thick boards are sturdy enough to stand upright on shelves without bending, which keeps your fabric neat and easy to see. The included U-shaped clips make it simple to secure each fold so the fabric doesn’t unwind.
You can also make your own boards from sturdy cardboard — DIY versions work just as well.
As for me, I don’t use comic book boards, but I did make a custom board from a Dollar Store foam board. I cut it to the exact dimensions of my IKEA Kallax shelves, and now I use it every time I fold fabric. Because the board matches the shelf size perfectly, all the folded pieces fit neatly with no gaps and no wasted space. It’s one of the easiest ways to maximize every inch of a Kallax unit.
You can see exactly how I fold my fabric in my YouTube video.

Storing Rolls of Fabric
Most home sewists don’t buy fabric by the roll — unless you sew a lot of home-decor projects, curtains, cushions, or upholstery. Those fabrics often come on large rolls because they’re wide, stiff, and expensive, and buying the whole roll is sometimes cheaper than purchasing smaller cuts. Some garment fabrics (like tulle, netting, and specialty materials) also come on rolls.
Rolls are great… until you try to store them.
They’re long, awkward, and too bulky for shelves or bins, so you need a spot where they can stay straight and protected.
Here are a few ways to store rolls at home:
Store them horizontally under the bed
This is what I do with a few of my rolls. The space is long and narrow, which is perfect for rolls of home-decor fabric. Just make sure you wrap the roll first — either in plastic, muslin, or leftover fabric — to keep dust and moisture away.
Stand them upright in a corner
Some sewists place rolls upright in a sewing room or garage corner. If you choose this method, wrap the rolls first and avoid direct sunlight. Use a tall basket or a cardboard tube to keep them from falling over.

Use a closet floor
If you have a deep or unused closet floor, rolls can fit nicely along the back wall. Again: wrap them first so they stay clean.
Shelves built for long items
Some people use long garage shelving or utility racks to store rolls horizontally. This works especially well for people who sew home décor or upholstery regularly.
Why wrapping is important
Rolls collect dust quickly, and the outer layer can fade or discolor if exposed to light. A simple wrap — even a trash bag or a strip of old fabric — protects the entire roll. It also keeps the edges clean so the fabric stays usable for years.
Did you find any usable ideas in this article? If so, save this pin (see below) on your sewing board so you can come to this tutorial later when you are ready, and follow me on Pinterest for more tips, tutorials, and inspiration!

latest posts
- What Do You Call a Person Who Sews? I Asked My Readers and Got 1,408 Opinions
- DIY Round Purse: PDF Sewing Pattern and Detailed Instructions
- Mini Wonder Clips By Clover: Useful Sewing Tool Or Just Another Notion?
- Non-Slip Grips For Quilting Rulers: A Small Notion With A Useful Job
- Fabric Eraser for Sewing: What It Removes and When to Use It
- What Is The Best Thread For Sewing Machine Projects? Let’s Find Out!
- Butterfly Quilt Block Tutorial – Foundation Paper Piecing
- How To Sew Quilt Squares So The Corners Match
- Sewing With Fork Pins: How They Help With Pattern Matching, Slippery Fabric, And Seams