How To Make Perfect Pinwheel Quilt Blocks
Pinwheel quilt blocks are a fun and easy way to make your next quilting project unique. In this tutorial, I will show you how to create these blocks as well as discuss the following: what is a pinwheel quilt block, how to match points on pinwheel blocks, how to reduce bulk in pinwheel seams, and how to press a pinwheel quilt block.
Making a pinwheel quilt block is a great way to get started in the world of quilting.
While most tutorials for making this type of block are fairly straightforward and easy to follow, they can be missing some small but important details that will help you create your own beautiful version. Why am I saying this? Because I am not a very experienced quilter ( I made maybe only 10 quilts until now) and when I started to make pinwheel quilt blocks for my quilted Christmas table runner I ran into a few problems which I had to solve. While they may seem like easy blocks to create, there’s more to them than meets the eye.

In this tutorial, I will try to cover everything you need to know to create perfect pinwheel quilt blocks using half-square triangles in alternating colors.
What are pinwheel quilt blocks?
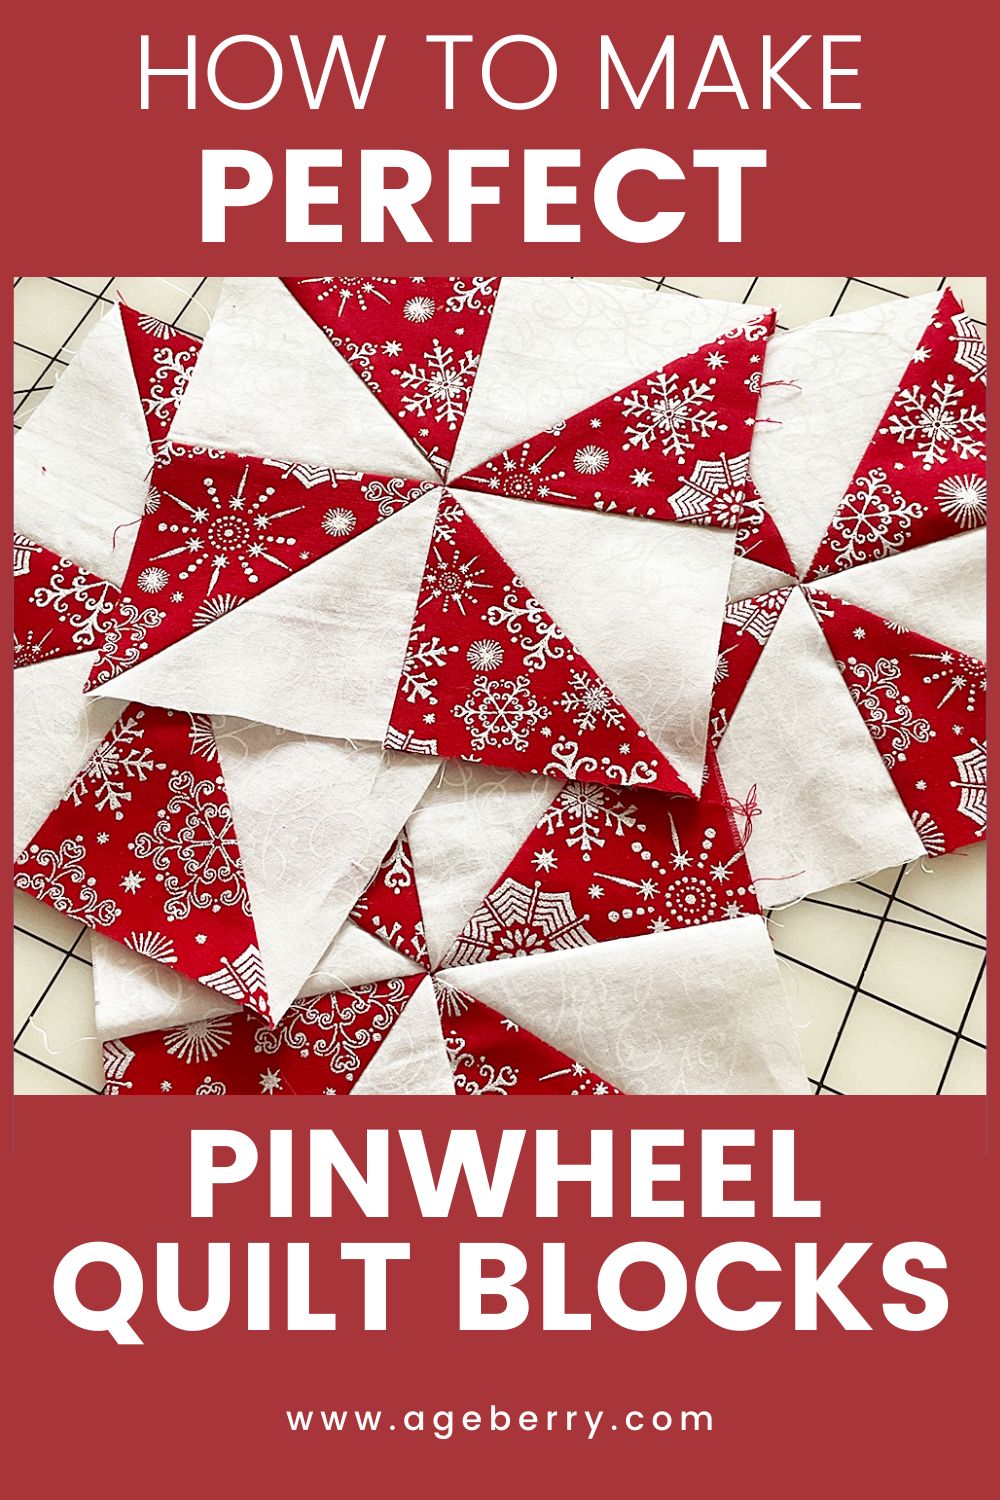
The pinwheel quilt block is one of the most basic, and oldest blocks in quilting.
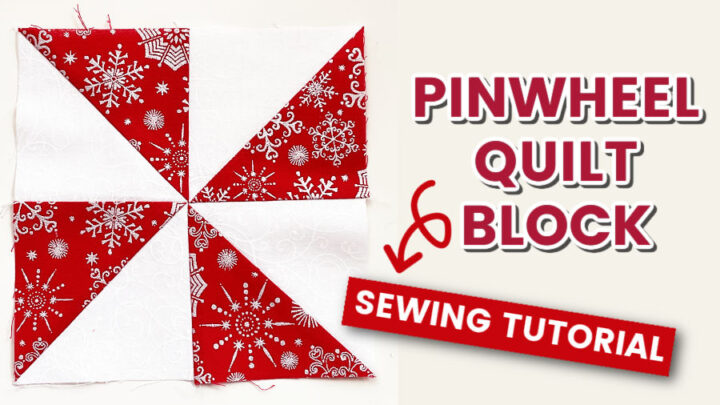
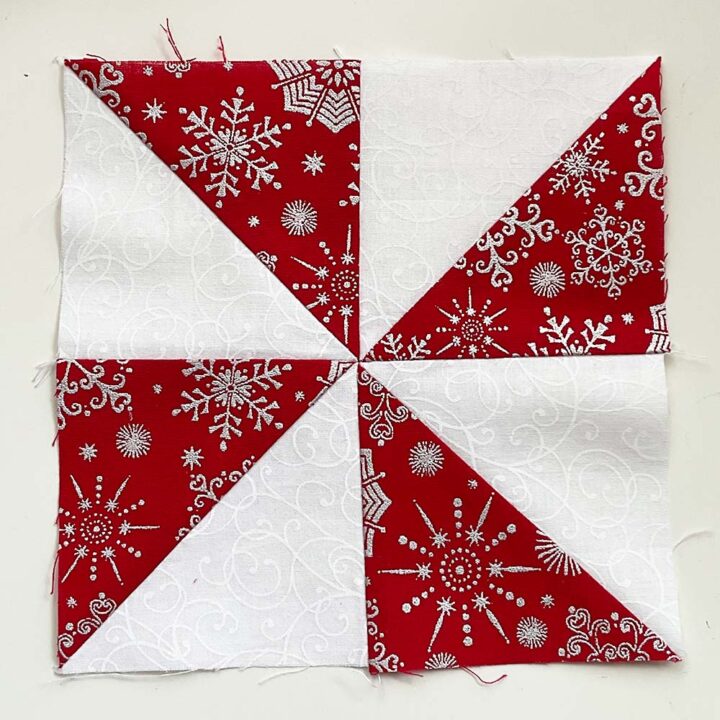
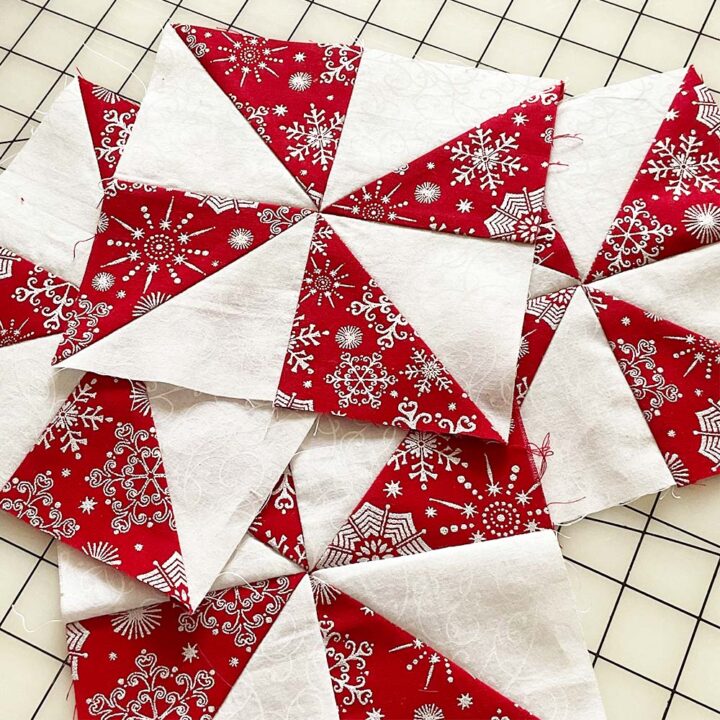
Usually, pinwheel quilt blocks are made from 8 half-square triangles in 2 contrasting colors. As you see in the image below, my pinwheel block has a significant contrast between the two tones which gives this block its characteristic pinwheel look. The bigger the contrast the more the pinwheel design stands out.
How to make half square triangles for pinwheel quilt blocks
So, for my Christmas table runner, I need 12 pinwheel blocks; each pinwheel has 8 half-square triangles. This means that I need to cut 96 triangles and sew them together to make a square. Huh! This would take me forever. So I had to find an easy way to do it. And there IS a fast and easy way!
I can actually show you 2 ways how to make 16 half-square triangles at once and they will be already sewn into 8 squares.
You have to be absolutely precise with cutting and sewing your half-square triangles if you want your pinwheels to always have nice pointy centers.
So, the first way – I use my Brother Luminaire embroidery machine. You can do it with Babylock Solaris as well.

I digitized this embroidery design myself and it works great as my template for making identical half-square triangles. I made this template for the finished size of my HST (half-square triangles) exactly 3.5 inches after cutting (3 inches after sewing them together). This is the size that I like the most for my HST. The only downside of this method is that you can’t easily change the size of the triangles. Why not? I can’t make it bigger because of the hoop size (I am using the biggest hoop size available for home embroidery machines – 10 1/2 x 16 inches). And I can’t make it smaller because digitizing this design takes forever.
The whole embroidery takes only 5 minutes. But with changing threads it will be a bit longer.
I can use this design as many times as I need and the resulting squares are completely identical and don’t need trimming to size. They all exactly are 3.5 x 3.5 inches, period!
I have a step-by-step video tutorial on my site on how to make 16 half-square triangles at once with the Brother Luminaire machine if you want to see the process in detail.
The second method is the manual one. You don’t need Brother Luminaire for this.
Note: Some of the links on this page are affiliate links. This means I will receive a commission if you order a product through one of my links. I only recommend products I believe in and use myself.
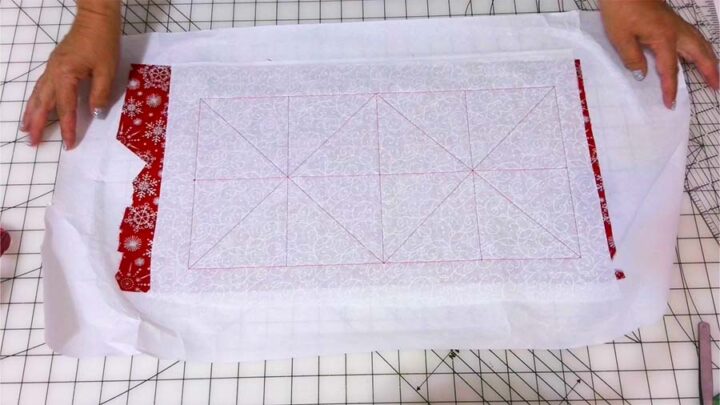
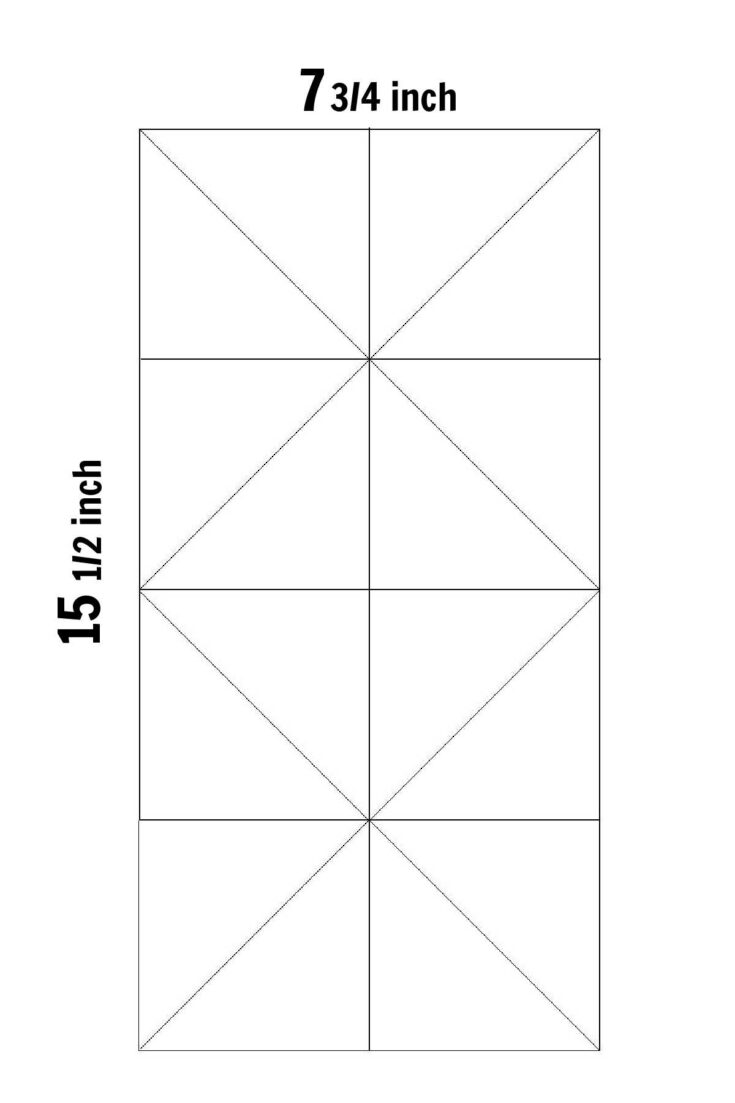
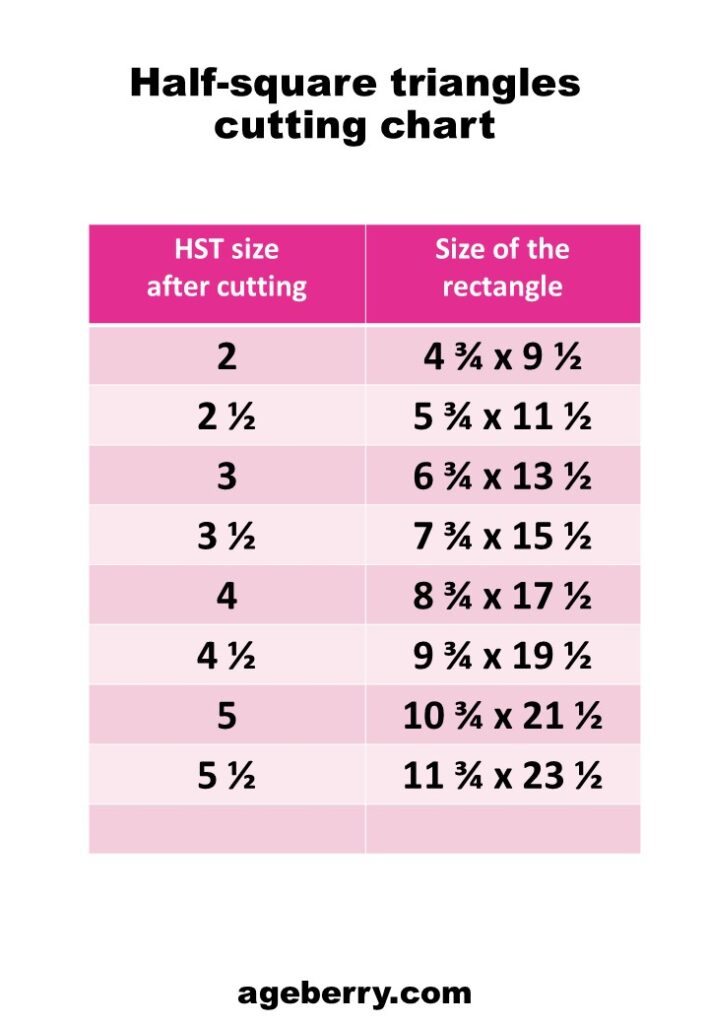
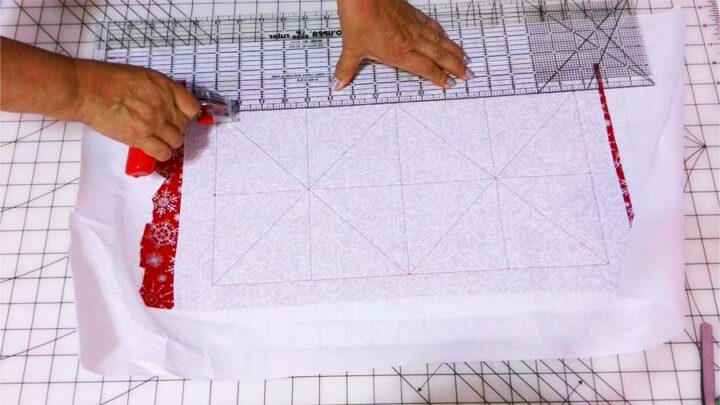
Just draw this rectangle (see the image below) 7 3/4” x 15 ½” on the wrong side of the fabric you want to use for your HST. This example is for the same size as the HST – 3.5″ after cutting before sewing (3″ in the pinwheel quilt block). Use a very nice fabric marking tool for this drawing. I prefer to use a disappearing marking pen. Use a ruler to make the lines inside of the rectangle.
These black lines in the image ARE CUTTING LINES.
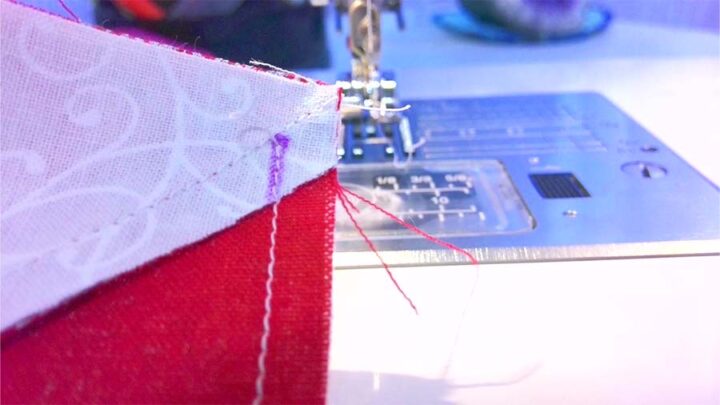
Next, place this piece of fabric on top of the other piece of fabric you want to use for making 16 HST – right sides together.
Sew on the offset diagonal lines (red lines in the image below). The seam allowances MUST BE exactly ¼ inch. You don’t need to mark the red stitching lines on your fabric if you are sure you can sew precisely ¼-inch seam allowances. But if you are not sure you can do it – accurately mark them and stitch along these lines.

If you are using this method you can change the size of the HST easily. For example, if you want HST with the sides 3 inches you will need to draw a rectangle of 6 3/4” x 13 1/2”.
Here is the size chart for different sizes of HSTs.
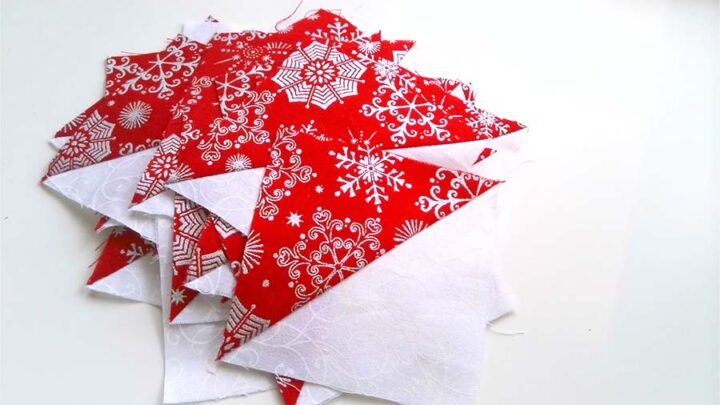
After you are done with stitching (either by embroidery machine or by sewing machine) start cutting. Cut exactly over black diagonal lines if you want your squares to be identical. I am using my favorite rotary cutter – Martelli rotary cutter.
I used my Brother Luminaire for making HSTs so I need to tear away the stabilizer which is really easy to do. The needle perforated the stabilizer and it’s tearing away easily.
Next, we need to press these squares. Make sure you press seam allowances toward the darker fabric ON ALL PIECES. It’s very important to have all seam allowances pressed the same way on all squares.
And the last thing – trim the “dog’s ears” on all pieces.
How to match points on Pinwheel blocks
So, I have made 48 squares for my project: they are all sewn and pressed. Let’s assemble the pinwheel blocks.
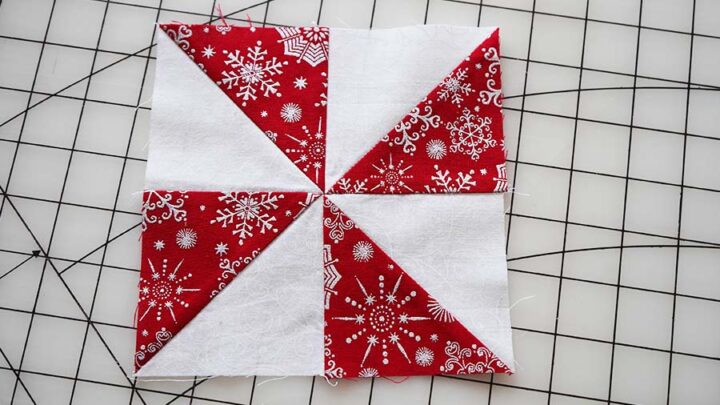
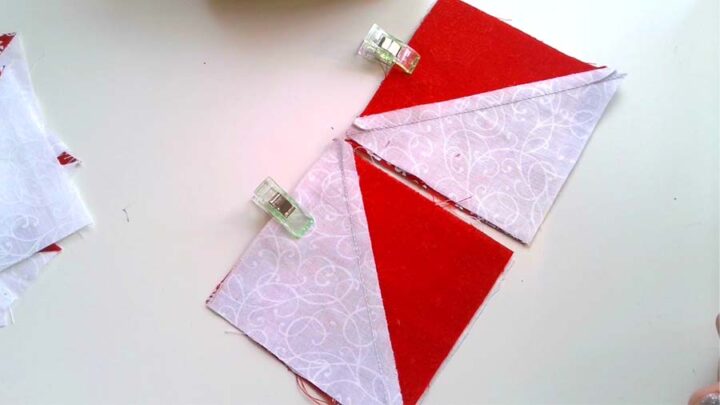
First, place four squares to form pinwheels, as you see in the image below. You have to make sure that all triangles are placed in the correct direction.
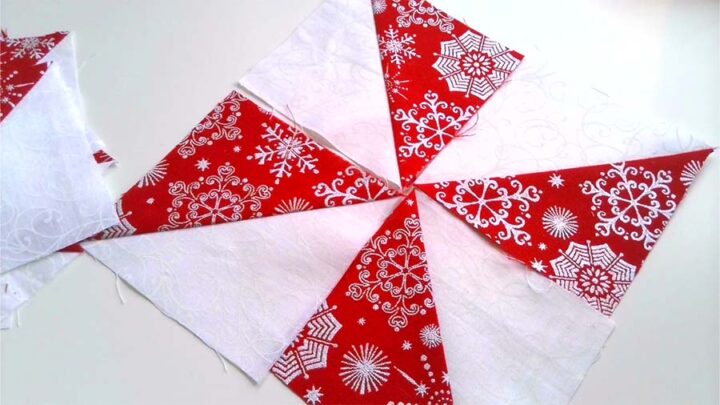
But now I see another problem – how in the world am I going to line up the 8 points in the center of the pinwheel block so they all meet exactly in one central point?
Surprisingly, it’s not difficult at all if your half-square triangles are made correctly (they all must be exactly the same size, no 1 mm here, 1 mm there). And my triangles are perfect because my embroidery machine made them. Let me show you how to do it.
Place two and two squares right sides together. Mark the sides you need to stitch with a wonder clip (for example).
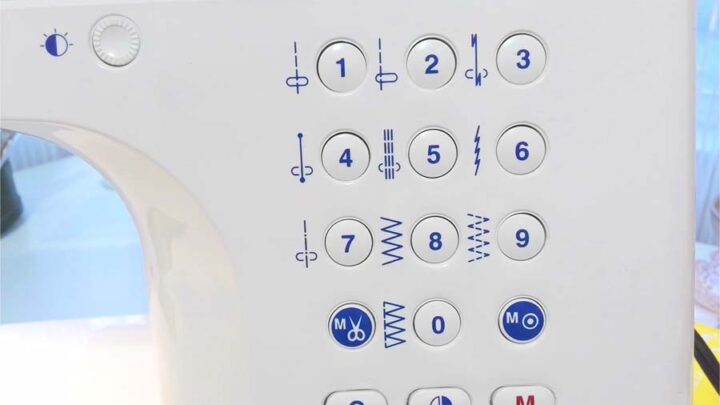
Set your sewing machine for making the block. I advise you to use a special straight stitch (called a locking stitch) that most modern sewing machines have (it’s stitch #4 on my Janome) – with this stitch you don’t need to sew backstitches to secure the thread, the machine will secure the thread by sewing 5 locking stitches in the same place (at the beginning and at the end of sewing) and continue sewing forward or stop sewing automatically.
So, what sewing machines have this lock stitch? Below is a small list of machines with locking stitch.
- Janome 3160QOV Sewing Machine
- Janome Sewist 780DC Sewing Machine
- Janome Memory Craft 9850 Sewing and Embroidery Machine
- Janome Skyline S5 Sewing Machine
The next setting I really like to use – automatic cutting. On my machine, there’s a button with scissors on it. Press this button when you finish a stitch and the machine will automatically trim the threads.

Many sewing machines have this feature (an automatic thread cutter), for example, these two:
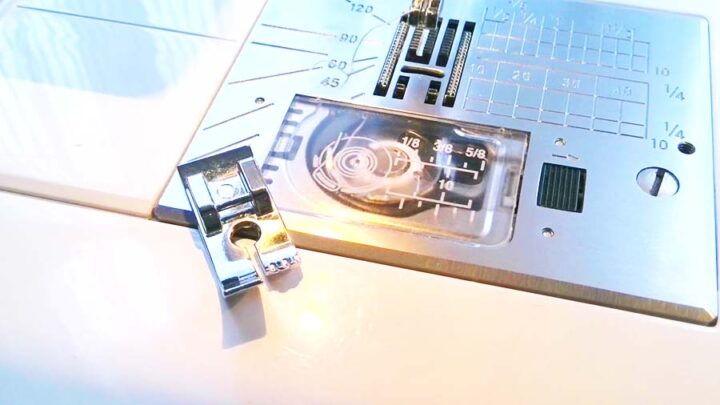
You have to adjust the stitch length too – I put mine on 2 mm.
And change the presser foot – a special foot allows to easily make 1/4 inch seam allowances.
If you are a quilter you probably already have this presser foot. But if you don’t have it and want to quilt you better buy this foot because it’s an essential tool for quilters.
- Janome Snap-on 1/4-inch Seam Foot with Edge Guide
- Singer 1/4inch presser foot
- Pfaff 1/4 inch Quilting Foot for IDT System
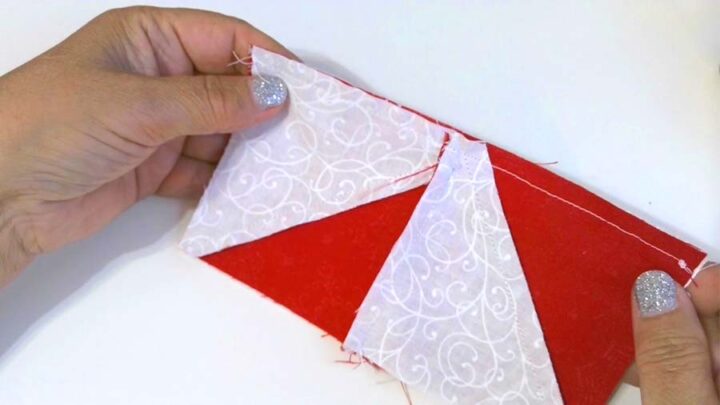
Now you can sew the squares together. And here comes the trick.
The diagonal seams are pressed in different directions on every 2 squares. This will allow you to nest the seams right up against each other and help to align them exactly in the middle of the pinwheel block. The seams must go in the opposite direction and perfectly fit together like puzzle pieces. You can read more about nesting seams at this link https://thesewingloftblog.com/nesting-sewing-term/.
How to reduce bulk in pinwheel seams
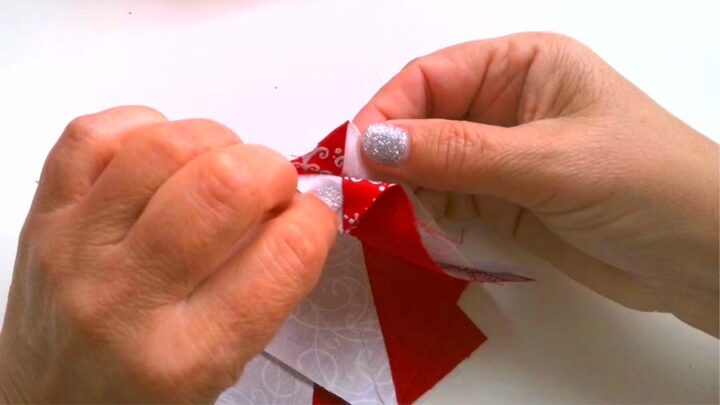
Now we need to tackle another problem – how to reduce bulk in these seams when 8 HSTs come together at one point.
There is another “trick” – start stitching these squares together not from the beginning but from the point on the diagonal seam that’s 1/4 inch from the edge. Basically, leave 1/4 ” from the top unstitched. You will see below why it’s important.
Press these seams toward darker fabric (red in my case) on all pieces.
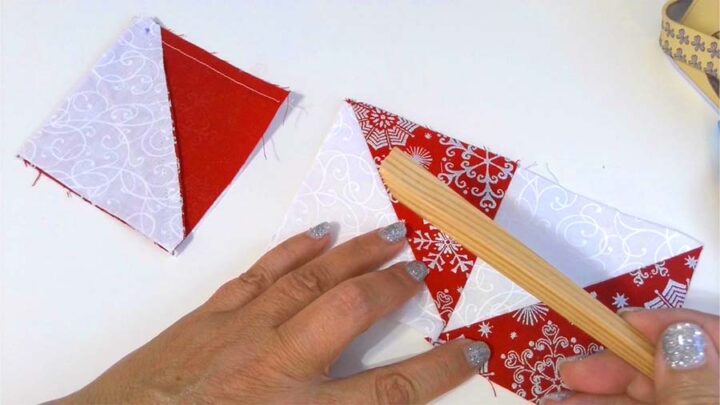
Before pressing I like to use my finger presser – it’s actually a wooden stick specially made for pressing short seams. It works so well!
Next, join the two rectangles you just made together and stitch. Make sure the middle seams nest against each other (they are pressed in opposite directions).
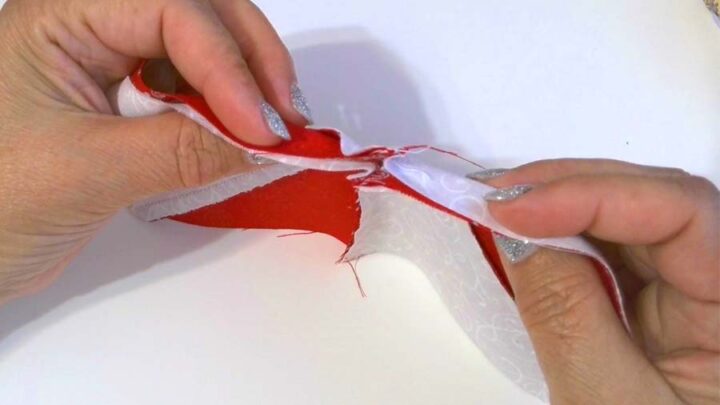
Now use your fingers and press the center of your pinwheel seams. Press one side up and one side down toward the darker fabric as you see in the image below. As we didn’t stitch those seams from the beginning they are easily getting open. If you did everything right you will see a mini pinwheel in the seam allowances!
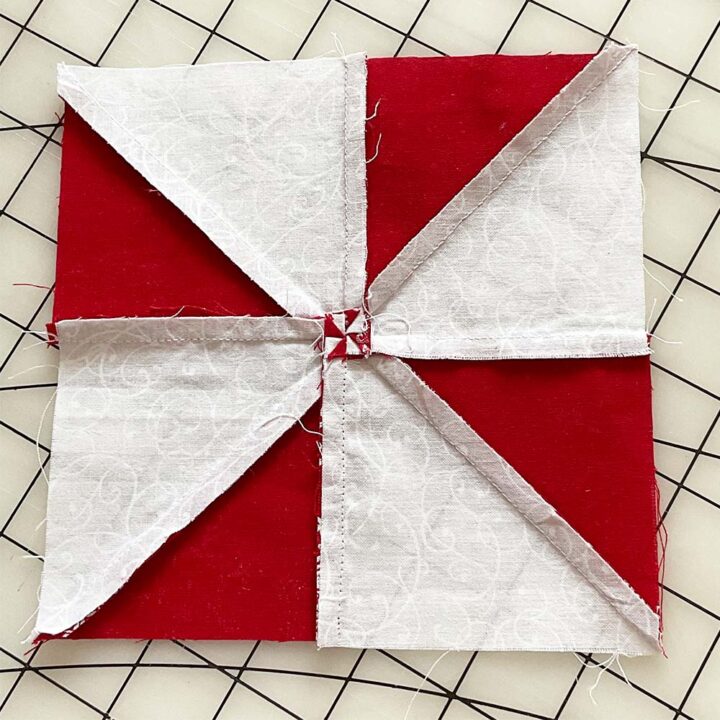
Take your pinwheel quilt blocks to the ironing board and give them a good press.
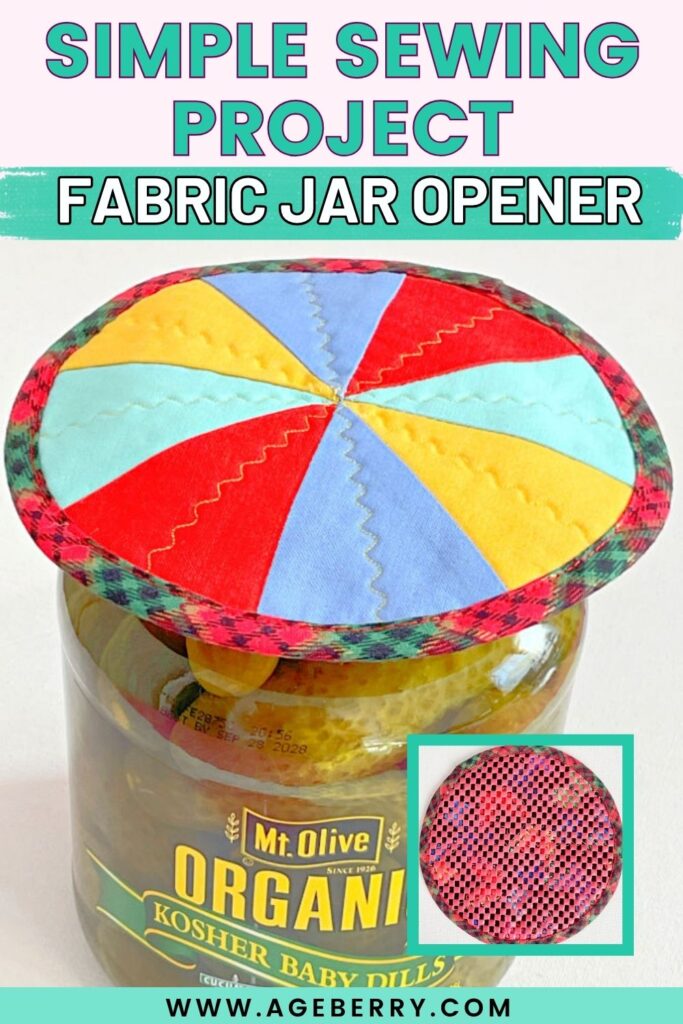
Want to practice getting pinwheel points to meet neatly? I used this exact technique in a small sewing project — a fabric jar opener. It’s a quick way to practice matching all 8 points in the center and actually use the result in your kitchen.
👉 See the full tutorial here — Easy Simple Sewing Project: Fabric Jar Opener
Did you find this tutorial helpful? If so, save this pin (see below) on your sewing board so you can come to this tutorial later when you are ready to make perfect pinwheel quilt blocks, and follow me on Pinterest for more tips, tutorials, and inspiration!
latest posts
- What Do You Call a Person Who Sews? I Asked My Readers and Got 1,408 Opinions
- DIY Round Purse: PDF Sewing Pattern and Detailed Instructions
- Mini Wonder Clips By Clover: Useful Sewing Tool Or Just Another Notion?
- Non-Slip Grips For Quilting Rulers: A Small Notion With A Useful Job
- Fabric Eraser for Sewing: What It Removes and When to Use It
- What Is The Best Thread For Sewing Machine Projects? Let’s Find Out!
- Butterfly Quilt Block Tutorial – Foundation Paper Piecing
- How To Sew Quilt Squares So The Corners Match
- Sewing With Fork Pins: How They Help With Pattern Matching, Slippery Fabric, And Seams