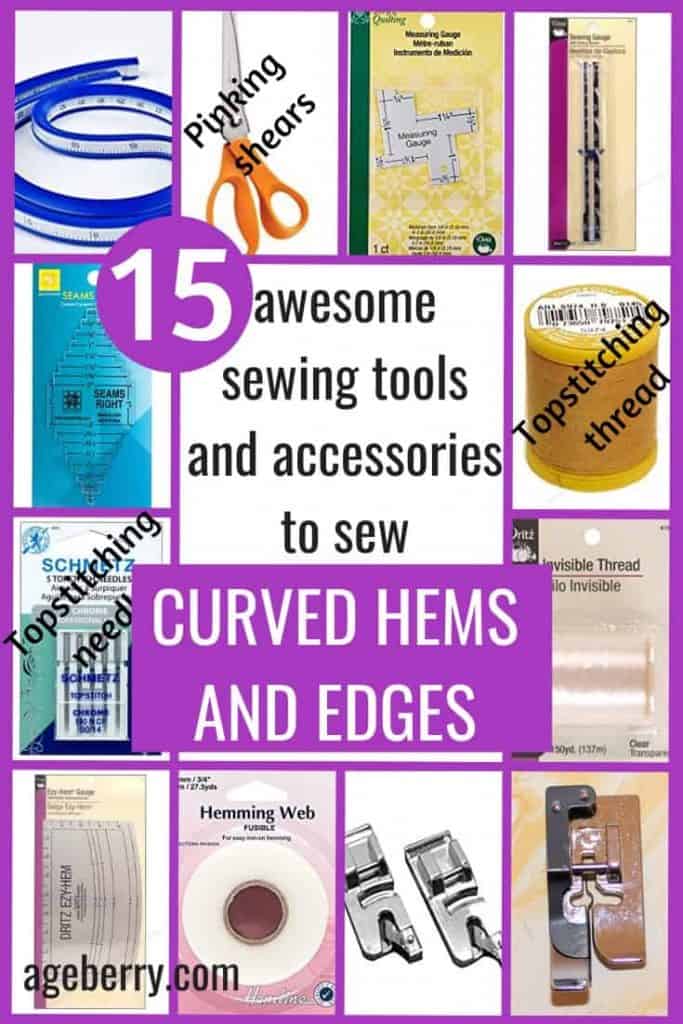
15 Hemming Tools For Sewing Curved Hems and Edges Easier
I think people who sew are always interested in any tool that could help to save time and improve accuracy and the tools presented here will really help in sewing curved hems and edges. Some of them are well known, some are not – but all are helpful.
There are myriads of sewing tools, accessories, and notions on the market now. And the assortment is time expanding, new inventions are created constantly to greatly simplify the work and help in mastering some sewing techniques.
In this article, I will tell you which sewing tools and accessories will definitely be needed for sewing curved hems and edges. If you are interested in 20+ methods to sew curved hems read my ultimate guide “How to sew a curved hem”. I will not describe all common sewing tools and notions you already have like sewing machines, needles, threads, scissors, etc. I will share only those tools that, in my opinion, can be useful to sew curved hems, that can make sewing easier and more enjoyable and your projects look more professional.
Wherever possible I will try to provide alternatives for buying the tools, it is always good to look around and compare prices!
Note: Some of the links on this page are affiliate links. This means I will receive a commission if you order a product through one of my links. I only recommend products I believe in and use myself.
Sewing tools for measuring
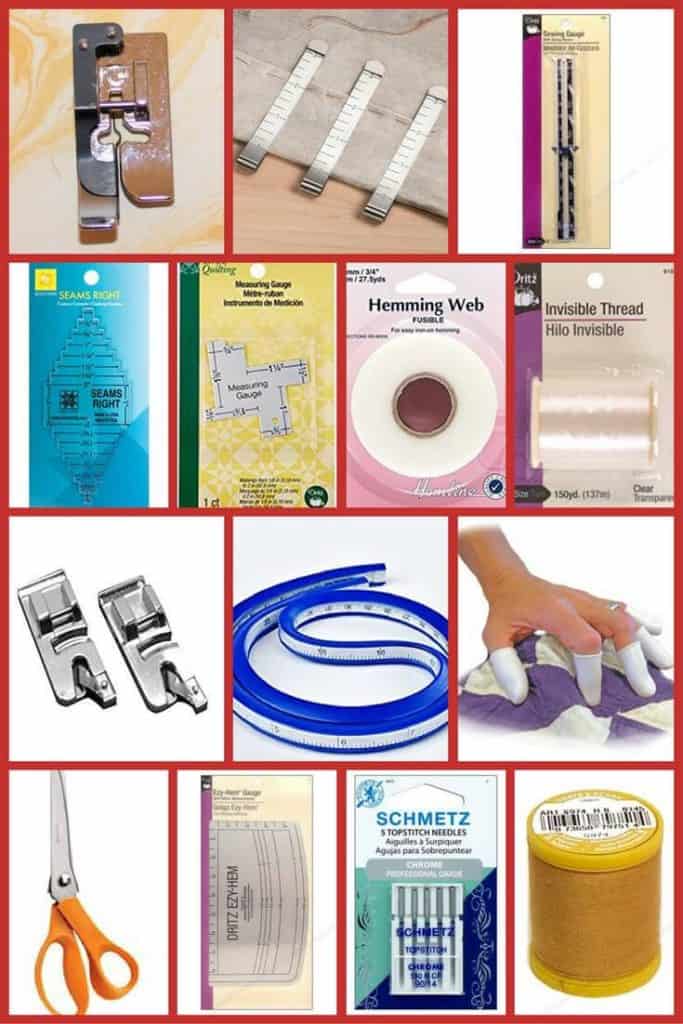
1. Hem Gauge for sewing by Dritz.
This hem gauge is a very helpful tool for sewing curved hems. Ezy-Hem Gauge has standard and metric measurements. It can be used to make a hem from 1/4″ to 4″ on a straight edge and from 1/4″ to 2 1/2″ on a curved edge. Use with a steam iron.
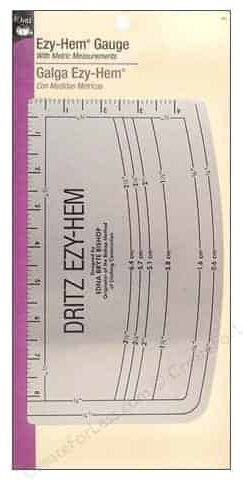
Always test a fabric sample for proper heat and moisture. There are complete illustrated instructions on the back of the package. The only problem with this gauge is that it gets hot when you press hems with it. Below is also an Amazon link for comparison.
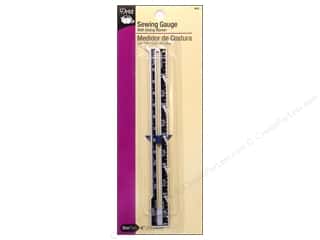
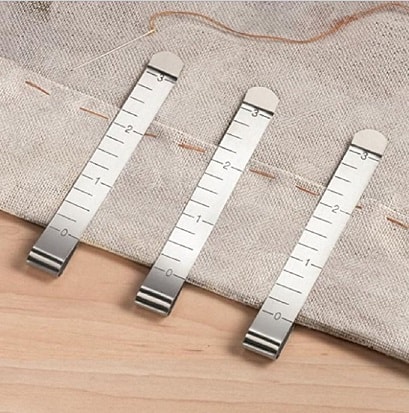
2. Hem measuring tool (seam gauge). I really love to use it.
This hem tool measures in inches and centimeters. There is a slider on it to hold the position for repeated marking.
3. I also use this hem gauge for sewing from Collins. It is the perfect tool for easily and quickly measuring anything, even in small or tight spaces. 14 in 1 Measuring tool. A double-sided gauge has 14 functional measurements. Pity they don’t have it in centimeters.
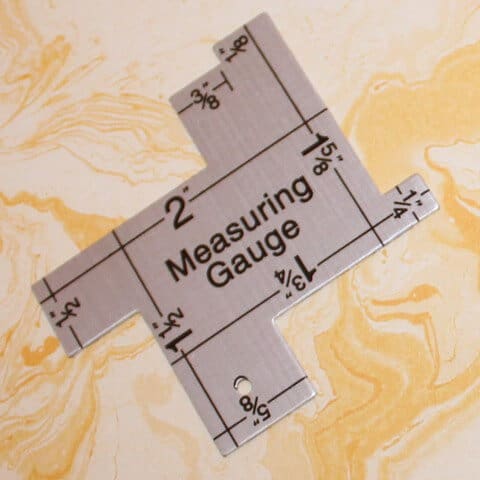
4. Clover Nancy Zieman Seams Right Multipurpose Tool is very handy for measuring all those small hems. I like that this tool is made from metal so I can iron over it. You can also measure buttonholes up to 1″.
Special sewing machine presser feet to sew hems professionally
5. Rolled hem presser foot. With it, you can hem lightweight and some medium-weight fabrics without pre-ironing hem edges. I find it quite difficult to use (it curls my fabric too easily) but if you don’t have a serger then it can be a useful option for sewing curved hems. Here is a very nice video “How to Use a Rolled Hem Presser Foot: by Babs at Fiery Phoenix“
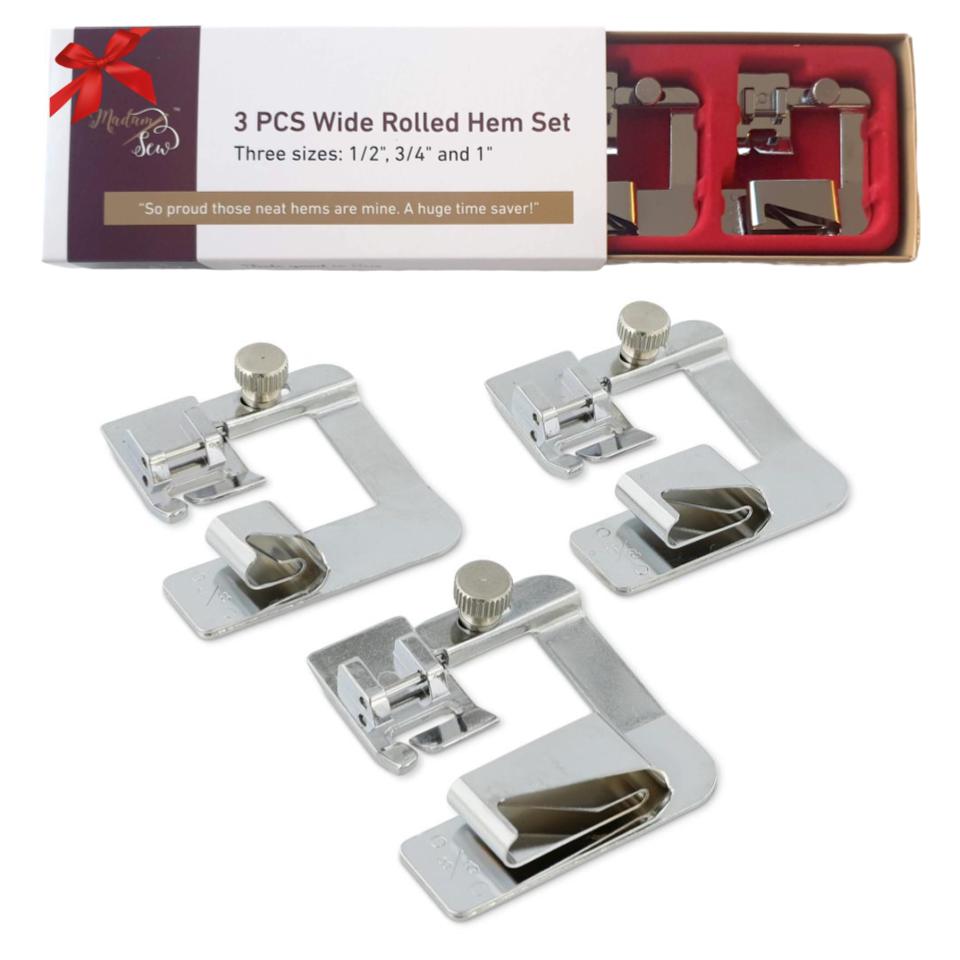
The rolled hem presser feet come in various sizes depending on how wide you need the hem to be. Here is another smaller size

 for All Low Shank Snap-On Singer, Brother, Babylock, Euro-Pro, Janome, Kenmore, White, Elna Sewing Machines")
Madam Sew feet also come in sets and the store sells many other types of feet and an entire assortment of useful accessories, check it out: MadamSew
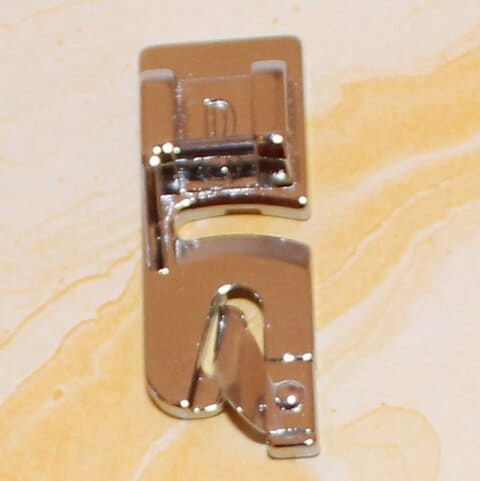
I have a detailed tutorial and a YouTube video on using the blind hem foot. Check it out – Blind hem foot: How to sew an invisible hem with a sewing machine. It makes sewing beautiful curved hems so much quicker!
This blind hem foot has a very easy-to-adjust guide that is set to follow the fold of the hem. Sew slowly to make sure that the guide travels along the fold. Practice using this foot on scraps several times before you stitch the actual garment.
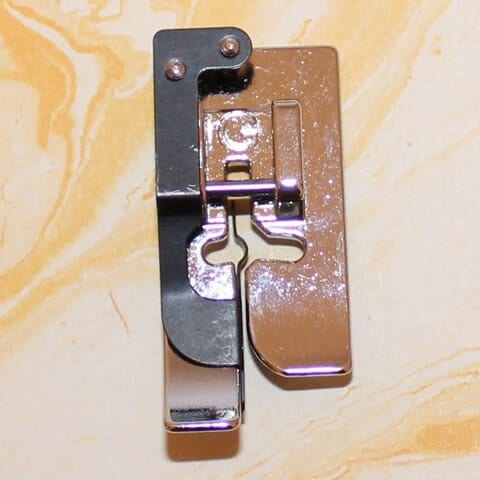
7. Adjustable Bias Binder (or Binding) Presser Foot
It fits sewing machines that use snap-on presser feet. Adjustable to fit bias tapes in different widths, from 5mm to 20 mm. There is no need to use pins or baste the bias strips. If you do not have this foot but you do have a serger, you can use the classic method described in this article: Making quilt binding with a serger
Drafting tools in sewing
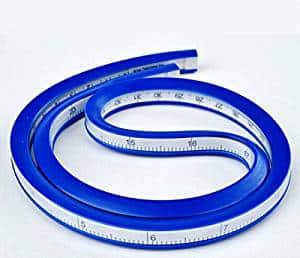
If you need to draw a curved edge when making a pattern then you can use a Flexible Curve Ruler.
This one is made from vinyl that will not discolor with age and is exceptionally flexible. With it, you can draw a perfectly contoured curve. It is also great for measuring curved seams and adjusts quickly from one shape to another.
Cutting tools in sewing curved hems
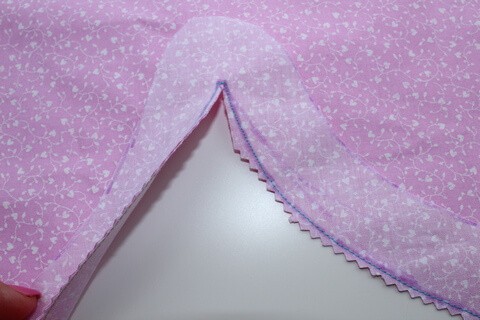
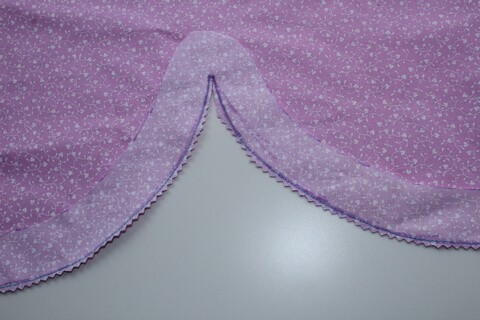
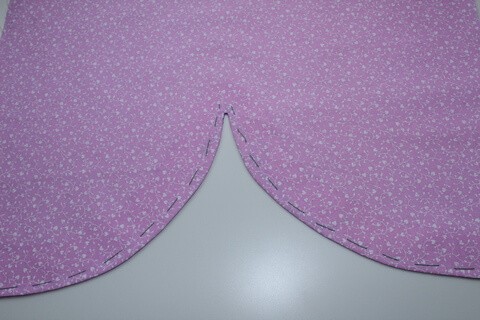
If you are using facing to sew curved edges you usually have to clip the seam allowance with a snip every 1/2 inch. But you can do it easier if you just use pinking shears.
You know, the simplest little technique can make your project look very professional.
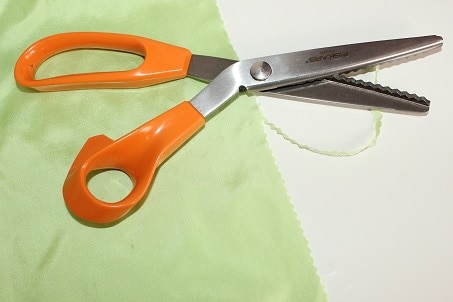
When we sew a facing to a curved edge we need to cut small notches in the fabric approximately every 2 inches to remove bulk from the insides of seams and keep curved hems and edges flat and even. Notches are those little triangles on the seam allowances that look like V’s.
If you turn the facing right side out without those notches, you will have too much fabric in there jamming it up. Usually, we cut these notches in the fabric with sharp small scissors, but now I learned to cut them differently.
It’s a time-consuming job to cut many of them at once when following the curved lines. It’s also really easy to accidentally cut past a notch and break your stitches. But cutting notches can be done in a simpler way just by using pinking shears and the images below show the result.
Sewing notions useful for sewing curved hems and edges
10. Iron-on hem tape
You can use strips of iron-on hem tape (also known as fusible web) that sticks to the fabric and securely bonds the fabric. Let me tell you how to use iron-on hem tape.

Most often we use these strips for hem repair, but we also can easily apply temporary hem tape with the steam iron before stitching the curved hem or for joining trims and laces.
It works only for non-sheer fabrics that can be steam pressed. Don’t go beyond the hem or you will make your iron dirty (the strip will melt not on the fabric but on the iron).
Also, at very high temperatures the melted adhesive can penetrate the right side of the fabric. The trick with the fusible web is to make the width of the hem not bigger than the width of the web. Otherwise, you may get some distortion of the hem.
The fusible web can also create some hard areas in the hem and make the hem stiff for some fabrics. So always test on scrap fabric before applying.
Here is a link to Amazon for this type of material.
11. Premium Invisible thread for sewing curved hems.
Once I bought an invisible thread in a dollar store and used it in my Janome sewing machine. Big mistake! After winding the bobbin it contracted somehow and the wound bobbin could not be taken out of the winder. I thought at first that the winder got broken, fortunately, I only had to unwind the bad thread. And immediately discard it. For invisible thread, I can tell from experience that brand name makes a difference.
But the invisible thread from Sulky or other sewing brand names is really good – it is soft and strong. It’s just ideal for hems. It doesn’t tangle, snarl, or break. And the bobbin thread flows easily. But I still remember that fiasco and when I use invisible thread, I sometimes put the thread on the bobbin manually (just in case).

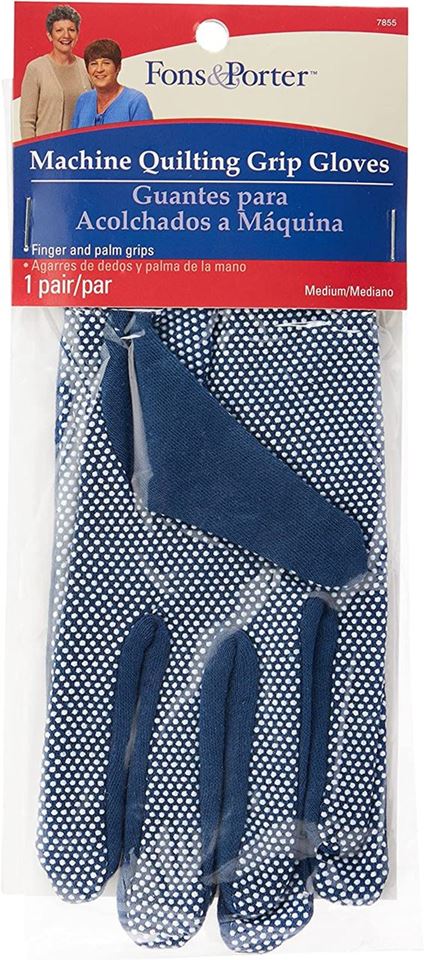
12. Quilting Gloves for Free-Motion Sewing – Lightweight and Form-Fitting
There are many brands available, the generic brands are much cheaper but the brand name ones are better quality in my opinion. However all seem to have an equal number of good/bad reviews. They are perfect for securely gripping the fabric and promise to reduce tension in the hands and neck.
Quilting gloves are great not only for quilting but for everyday sewing also.
They are made from soft flexible plastic so you are still able to feel your work. They are good for pulling a needle and also good to protect your fingers from hot steam when you apply a fusible web, for example.
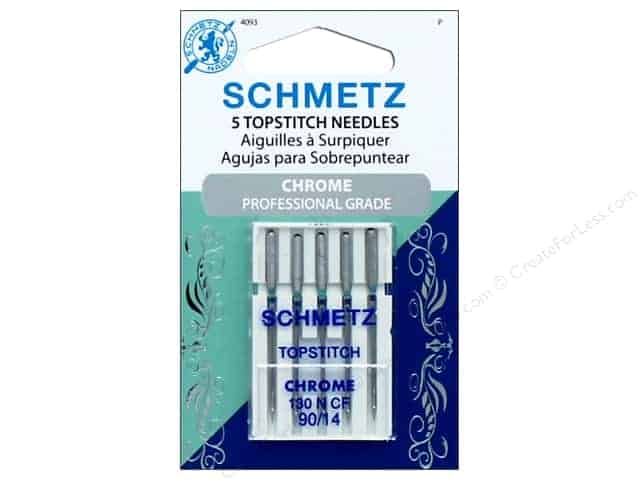
13. Topstitching threads and needles
Topstitching is defined as one or more rows of stitching visible from the garment’s right side. In my article “How to sew straight” you can read more about this technique. I use these special threads mostly for sewing denim – extra-strong heavyweight cotton-covered polyester and the colors are just right for denim!
Topstitching needles have a long eye to accommodate thicker threads.
There are special topstitching threads and topstitching needles you can use for sewing curved hems to achieve a professional look. Both links will display current offers at Amazon.
Below are two specific examples from the Amazon offers:


14. Hemming clips
Metallic clips to help hem any skirt, pants, or shorts – they hold the hem while you sew. These are of great quality and very easy to read. They make hemming curved hems so much easier! It is like having an extra set of hands! But don’t use these on thin or stretchy fabric. They are best for heavier fabrics like wool, denim, fleece, drapery, and upholstery. Also, they really come in handy to keep the fabric steady while you hand sew.
15. Lead weights
Sometimes you will need to add some weights to a curved hem for balance.
These weights are especially useful when you make an evening or wedding gown with a train or a long circle skirt from heavy fabric. They can also work to keep your dress down in gusts of wind and are not noticeable at all. Place them inside the hem fold. They were designed initially for drapes or heavy curtains, to keep them in place, but I found out that for certain special dresses they are equally good.
Did you find this tutorial helpful? If so, save this pin (see below) on your sewing board so you can come to this tutorial later when sewing a curved hem, and follow me on Pinterest for more tips, tutorials, and inspiration!
Ready to take the next step in your sewing journey? Check out more step-by-step tutorials from my blog and don’t forget to share !


latest posts
- Butterfly Quilt Block Tutorial – Foundation Paper Piecing
- How To Sew Quilt Squares So The Corners Match
- Sewing With Fork Pins: How They Help With Pattern Matching, Slippery Fabric, And Seams
- How Much Fabric Do I Need? 21 Helpful Tips For Calculating Fabric Yardage
- Easy Simple Sewing Project: Fabric Jar Opener
- DIY Oven Mitts: Step-by-Step Sewing Tutorial
- Easy DIY Potholder: New Design
- Tailor’s Clapper: What It Does, Why It Works, And How To Use It Right
- Heat Resistant Batting for Sewing: What It Is, How It Works, and What Makes a Difference