
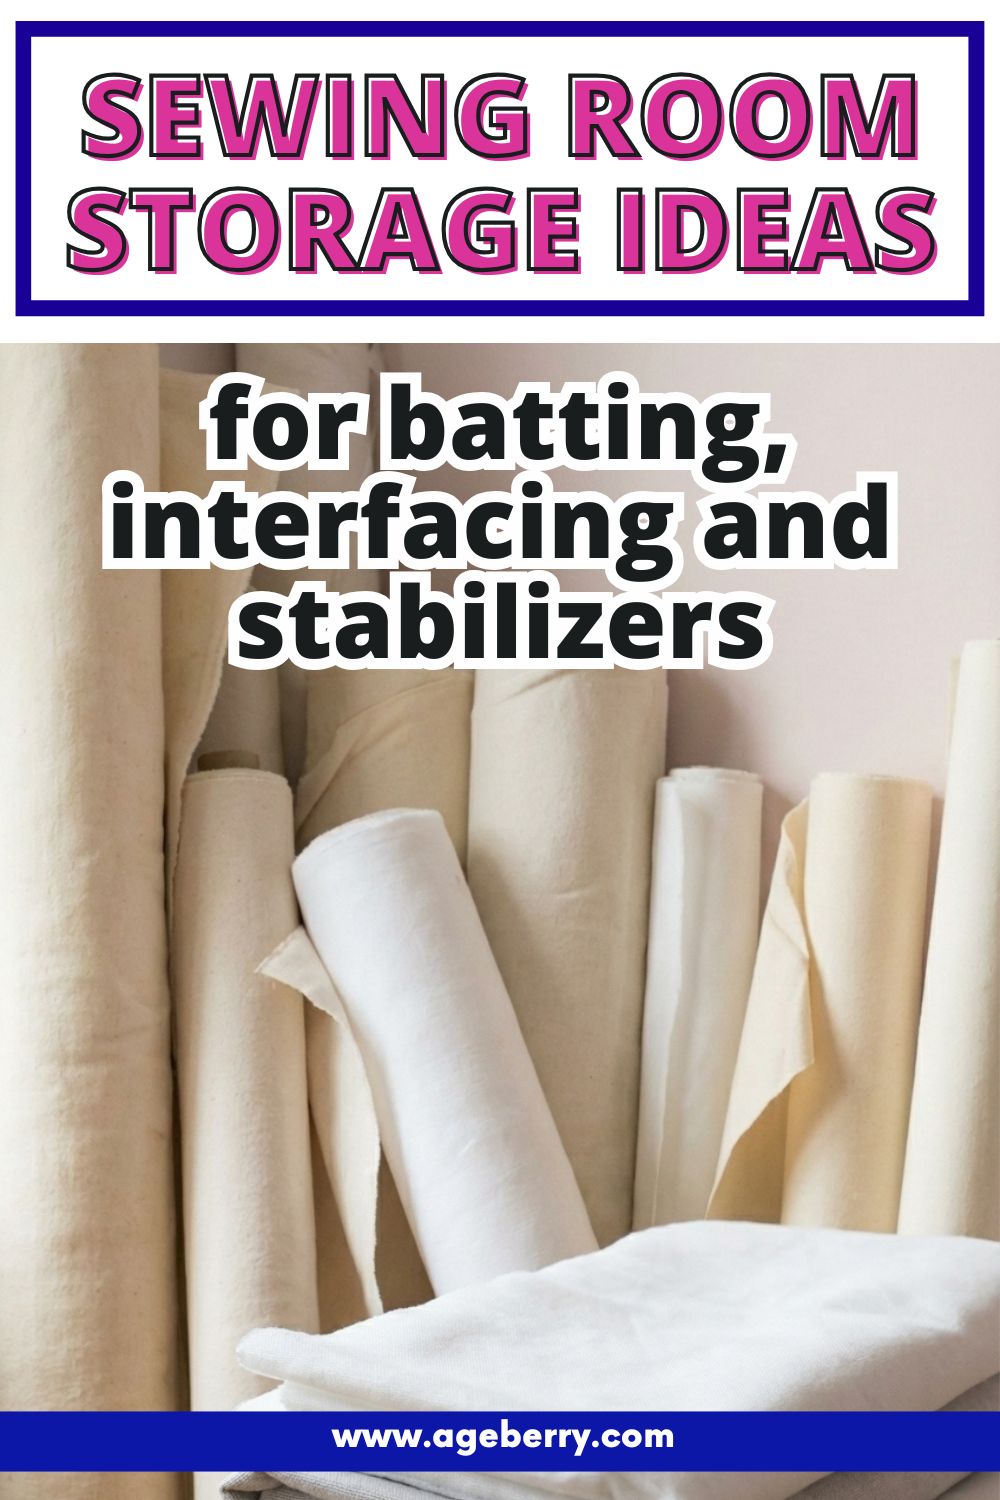
Sewing Room Organization Ideas for Storing Batting, Interfacing, and Stabilizers
Sewing room organization often starts off simple enough, until the specialty materials show up. That’s usually when the real storage challenges begin.
These supplies – batting, interfacing and stabilizers – are essential, but they love to take up space and cause chaos.
Storing fabric is simple. You fold it. You stack it. You move on. But batting? It’s bulky and refuses to stay where you put it. Interfacing crumples the second you turn your back. And stabilizers? Some of them roll, some fold, some curl.
They don’t play by the same rules as the rest of your stash. They don’t fit on comic boards, they don’t stay rolled, and sometimes it’s hard to tell them apart.
But there are ways to make them easier to manage—and to keep them clean, labeled, and ready for your next project.
In this post, I’ll walk you through simple, practical ways to store batting, interfacing, and stabilizers so they’re easy to find, easy to use, and stay in good shape until you need them.
Note: Some of the links on this page are affiliate links. This means I will receive a commission if you order a product through one of my links. I only recommend products I believe in and use myself.
How to Store Batting Without It Taking Over the House
Batting is one of those materials that refuses to be subtle. It’s bulky, fluffy, and never folds the way you want. It doesn’t stack well, and once it expands, good luck trying to get it back in the package it came in.
Ideally, the easiest way to store batting is… not to store it at all. Buy what you need, when you need it. Making a table runner? Buy just enough for a table runner. Planning a queen-size quilt? Pick the batting that fits the project and move on. That way, you’re not left figuring out where to hide a giant puff of polyester or wool.
But then … sales happen. Big ones. Irresistible ones.
When Joann stores started closing, I stocked up on batting for practically nothing. I didn’t need it all right away, but walking past it felt impossible. And now? Well, now I have a storage problem.
And there is another issue: seldom can you buy “just enough” batting for a project. How much is “just enough”? Is it one package? What if I need more? You will probably always have some left over after finishing a project.


For storage, I’ve tried two solutions that work surprisingly well—for the most part.
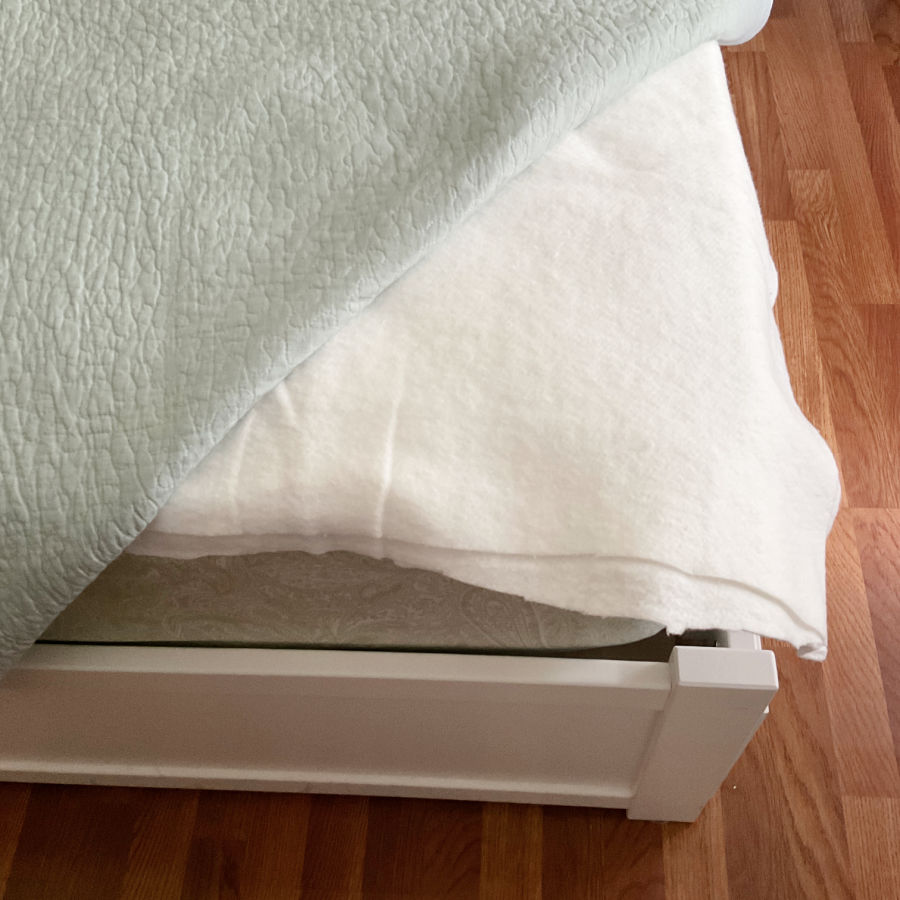
First: I have a queen bed in the guest bedroom, so I spread the batting roll out like a giant quilt and cover it with an actual quilt. Looks normal, works great… until someone comes to visit. Then the batting gets evicted and ends up on the couch.
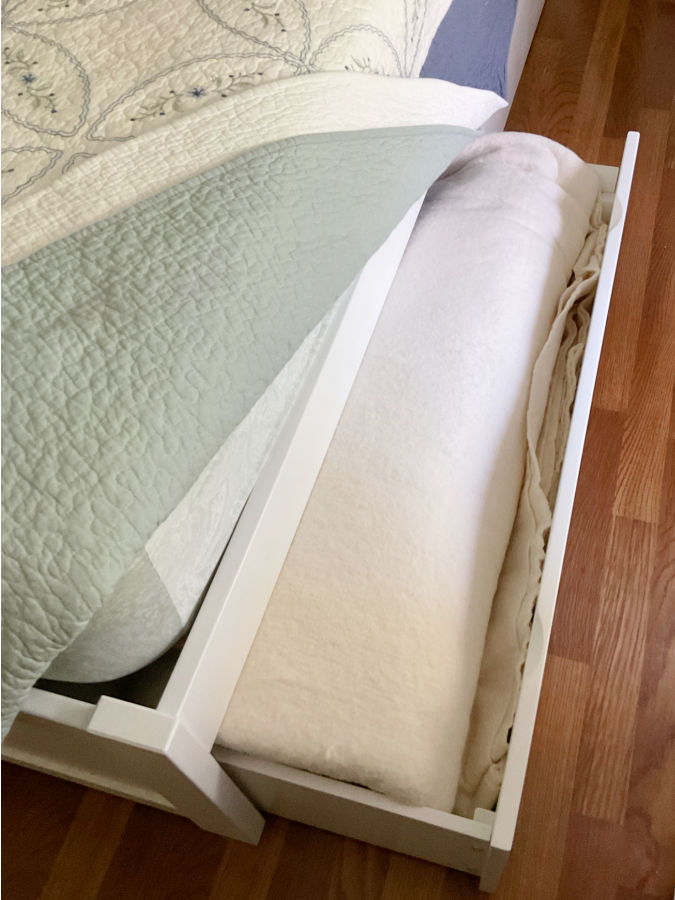
Second: My IKEA bed has two deep drawers underneath, and one of them now holds a rolled-up stash of batting. It’s tidy, it’s mostly out of sight—but of course, this means I’ve lost space for my comforters. Trade-offs, right?
Here are some more practical ways to store batting, depending on how much you have and the space you’re working with.
Large Rolls of Batting
- Wrap in a clean cotton sheet or use a breathable garment bag to protect from dust.
- Store upright in a closet or unused corner. This takes up less space.
- Clip a swatch to the outside with notes—type, loft, brand—so you don’t have to unroll it every time you forget what it is.
But … batting rolls love to flop over like they’re fainting. “Store upright in a closet” sounds simple until you open the door and find the entire roll slouched in the corner.
If you’re trying to store batting rolls vertically to save floor space, you’ll need to give them a little support. Here are a few tried-and-true methods that work.
1. Use a Tall Laundry Hamper or Waste Bin
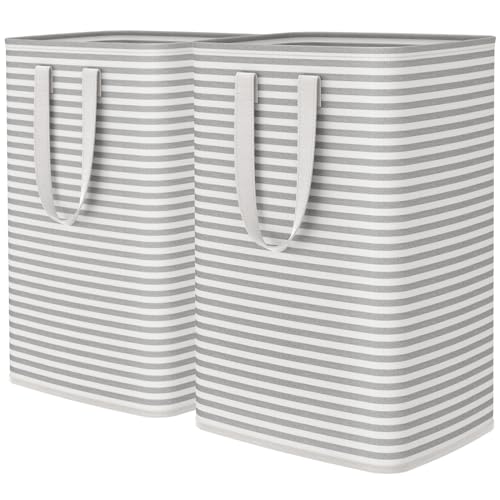

- Find a tall plastic hamper or lightweight trash bin that’s just wide enough to hold the roll snugly.
- Drop the roll inside vertically. The walls of the bin will keep it from tipping or sliding.
- If you’re storing more than one roll, you can place cardboard dividers between them to keep them from nesting together.
2. Strap It to a Wall Hook
- If your closet has a wall or door that can handle a screw-in hook, use one to anchor a soft strap (like an old belt or Velcro strip).
- Stand the roll upright and loop the strap around the middle, securing it loosely to the hook.
- It stays upright but is still easy to remove when you need it.
3. Wrap it in a Sheet of Muslin
If your batting roll is really floppy and doesn’t want to stay rolled, wrap it in a sheet of muslin or even brown kraft paper before standing it up. This gives it more structure and keeps the edges from catching on things.
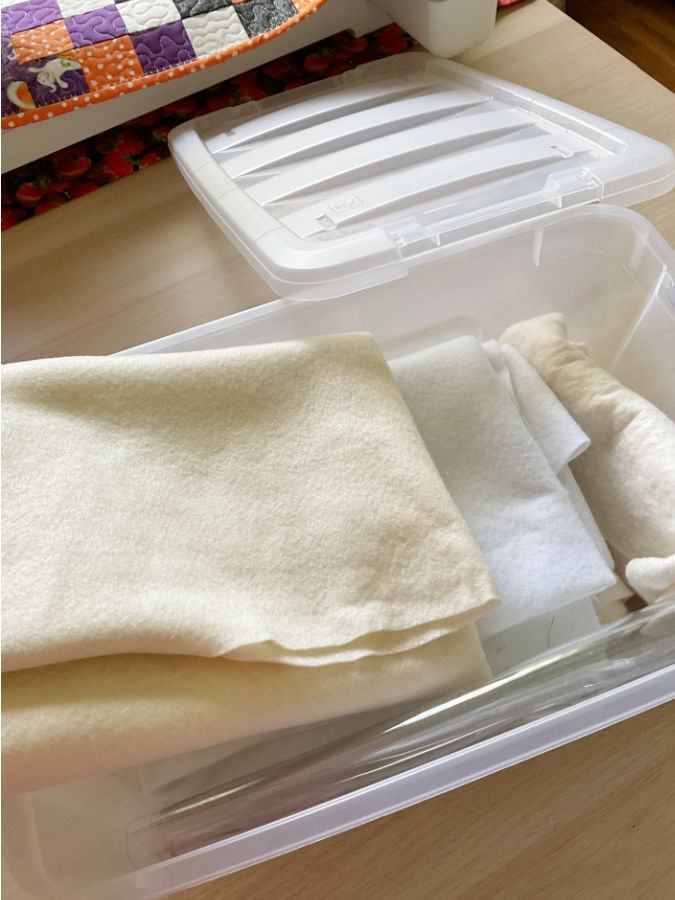
Folded Batting
- Fold it gently—don’t mash it down—and place it inside a clear zippered bedding bag or a large storage cube.
- Avoid vacuum-sealing unless you’re storing long-term. It can compress the loft in ways that don’t recover well.
Batting Scraps
Scraps are tricky. Some are big enough for placemats or zipper pouches. Others are just… oddly shaped fluff — and those can go. If it’s too small to be useful or full of thread and lint, it’s fine to let it go. Not every scrap deserves storage space.
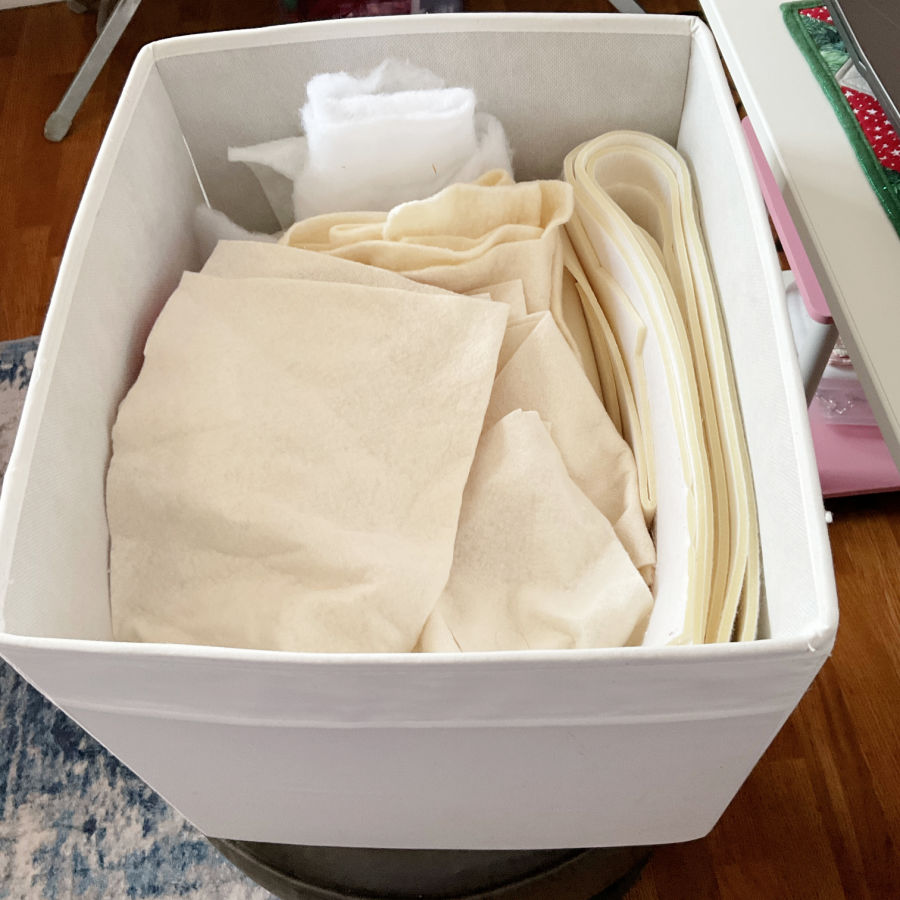
- Toss all your usable batting scraps into a clear bin or fabric cube.
- Fold larger pieces if you can. Smaller bits? Just stack them or tuck them into the corners.
- Choose a storage bin with a lid if you want to keep dust and threads out. Bonus if it’s see-through—you’ll actually use what you can see.
You might not need that weird triangle today, but next time you’re making a small quilt sandwich for testing stitches or practicing free-motion quilting, you’ll be glad you didn’t throw it out.

This isn’t always a one-size-fits-all problem. You’ll probably use a mix of solutions over time. Just try to keep it clean, labeled, and accessible. Because nothing’s worse than knowing you have the right batting… but not knowing where it is.
How to Store Interfacing
Interfacing seems like it should be easy to store. It’s thin. It’s flat. It doesn’t take up much space. But somehow, it always ends up wrinkled, unlabeled, and shoved in a drawer with a corner fused to something it wasn’t supposed to touch.
The main issue? There are just too many types—and they all look the same until it’s too late.
You’ve got fusible or sew-in. Woven or non-woven. Lightweight, medium-weight, knit… Some stretch. Some don’t. And they all love to wrinkle.
So if you’ve ever pulled out a crumpled sheet of interfacing and had no idea what it was or how to use it—yes, this section is for you.
✅ Related tutorial: How To Use Fusible Interfacing (Video + Tips And Tricks)
If You Bought It on the Bolt or a Roll (Lucky You)
This is the easiest situation to manage, but it still needs a little structure.
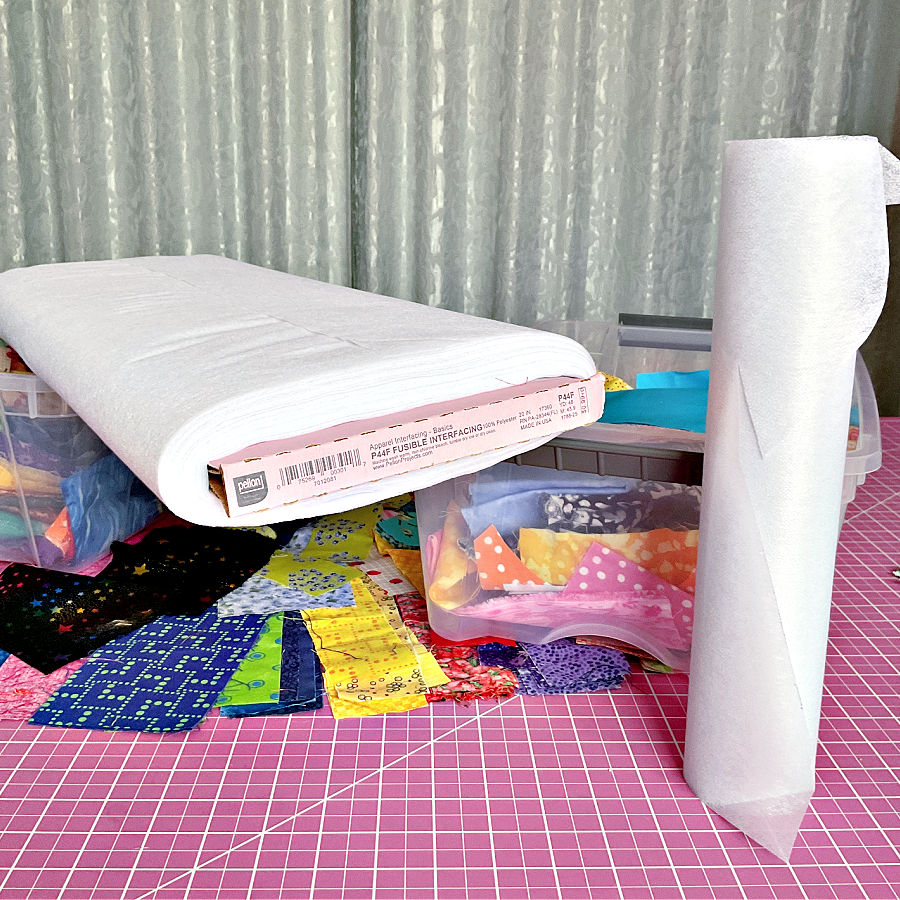
- Store bolts and rolls vertically in a closet or deep bin to save space.
- Use binder clips to keep the edges from unrolling.
- Add a sticky label or tag to the end of the bolt with the type, weight, and fusible info—because you won’t remember in six months. No one does.
If You Bought Cut Pieces
This is where things can get messy fast. To keep it useful and usable:
- Roll interfacing around cardboard tubes or comic book boards (available online or at craft stores). This helps prevent deep folds and creases.

- Store flat in plastic bins or wide drawers if rolling isn’t an option. Keep different types separated to avoid the “what is this again?” problem.
- Add labels to everything. A simple note with fusible/sew-in, weight, and stretch info goes a long way. Just tape a scrap of paper to the roll, or use a sticky label directly on the edge. It sounds fussy—but it’s very helpful, especially if you use a wide variety.
Clear storage and good labeling mean you’ll actually use what you already have, instead of re-buying interfacing just because you can’t identify what’s in that wrinkled pile on the shelf.
How to Store Stabilizers
Stabilizers have a mind of their own. Some are stiff, others are soft, and they all behave differently once you take them out of the package. Rolls want to roll. Sheets want to slide into a pile you can’t identify later. And if you don’t label them? You won’t remember which one is tear-away and which one is cut-away.
This part of the sewing room can get disorganized fast — especially if you do embroidery or making bags and use multiple types.
If You Have Stabilizer Rolls
I use a lot of stabilizers, and for a long time they lived in my sewing room like this — stacked wherever they fit and rolling into each other. It worked, but only to a point. Eventually I realized I needed something more practical, so I started looking for better ways to keep them tidy and easy to reach.
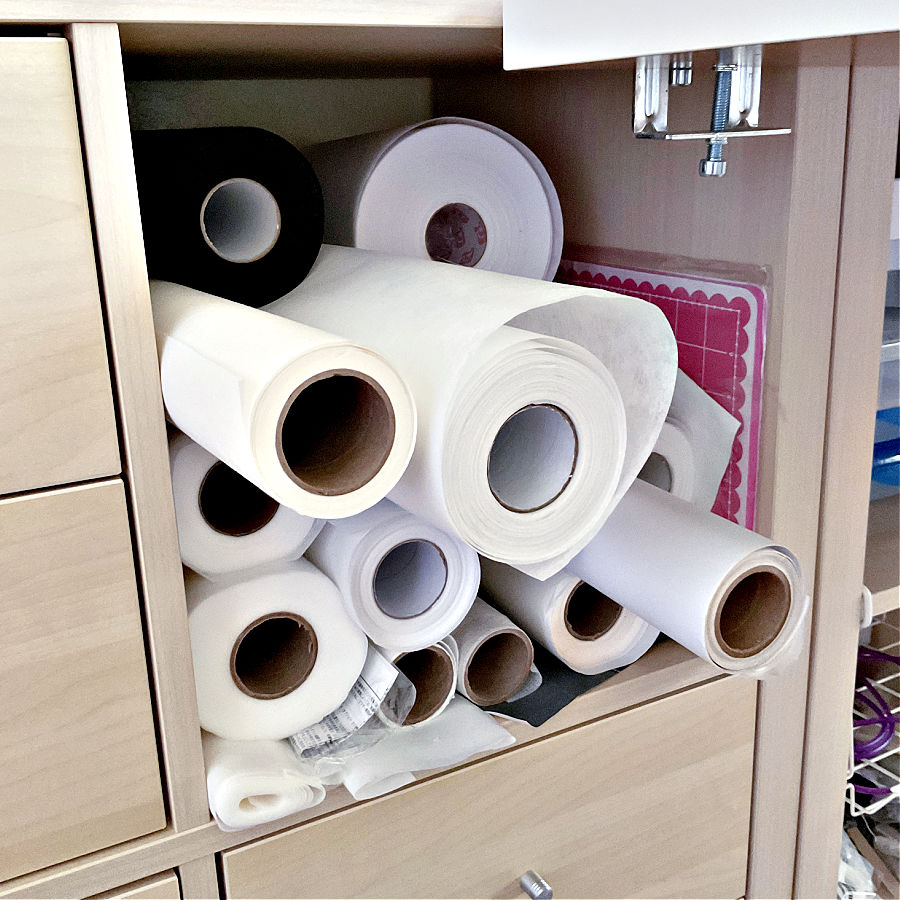
Many people use organizers originally designed for storing vinyl rolls, wrapping paper, wallpaper, posters, or other materials — but they work for stabilizer rolls, fabric rolls, craft vinyl, and similar materials too. Some examples:
- Wall‑mounted roll racks — These look like horizontal or vertical rods spaced on a wall, into which you slide the stabilizer roll so it hangs in place. These are often metal or wood racks and sometimes marketed as vinyl or craft‑roll holders.

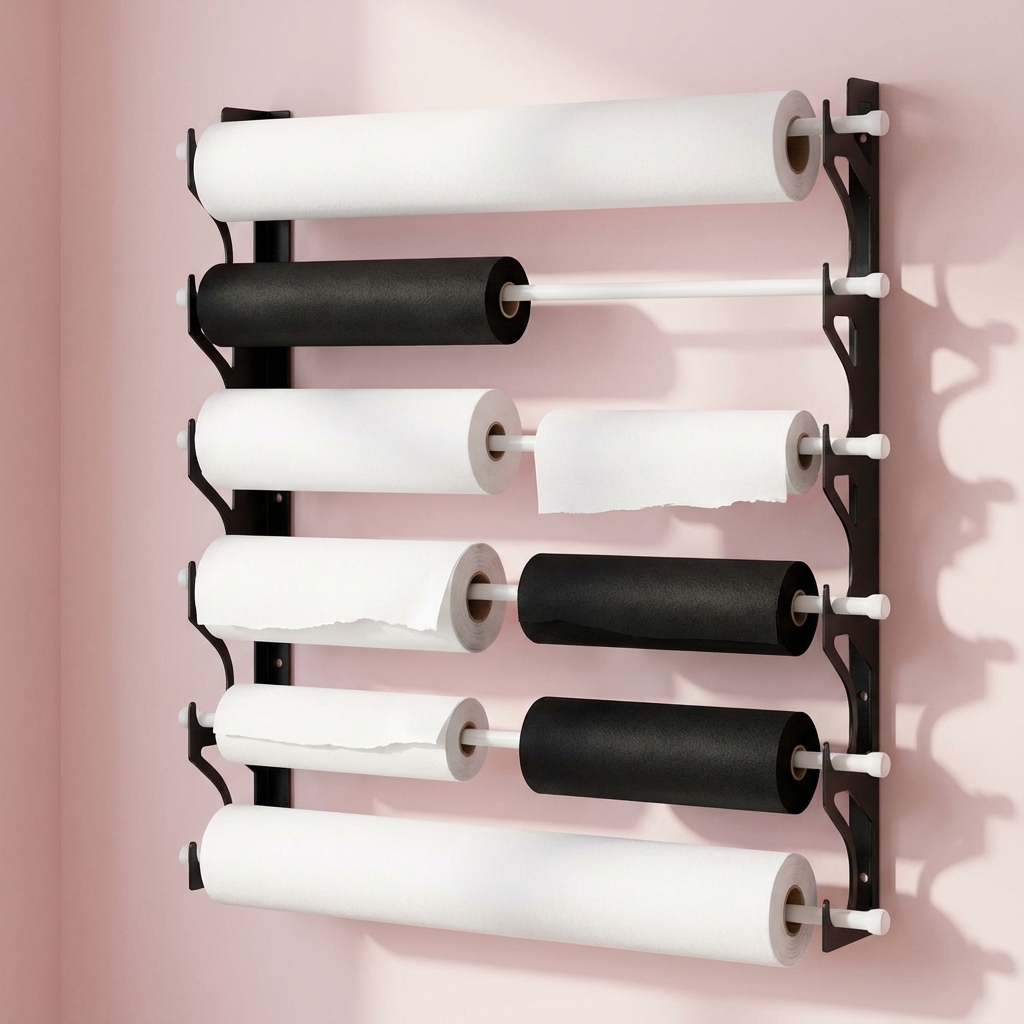
- Pegboard + hooks — A pegboard on a wall (or the side of a shelf) with hooks tailored for holding rolls. Hooks can support each roll so it stays off the floor and easy to access. Doesn’t take heavy rolls though.

- Over‑the‑door or hanging vinyl organizers — Some organizers built for vinyl rolls or wrapping paper are essentially a series of sleeves or tubes hanging on a wall or door. Their width and diameter sometimes match stabilizer rolls, so you can slide those rolls into the sleeves.

- Roll dispensers with dowels or rods — More workshop‑style holders where each roll rests on a rod and can slide out easily when you need a piece. This works nicely if you use stabilizers often and want quick access (I am using one for stabilizer,and one for my kitchen paper towel roll).

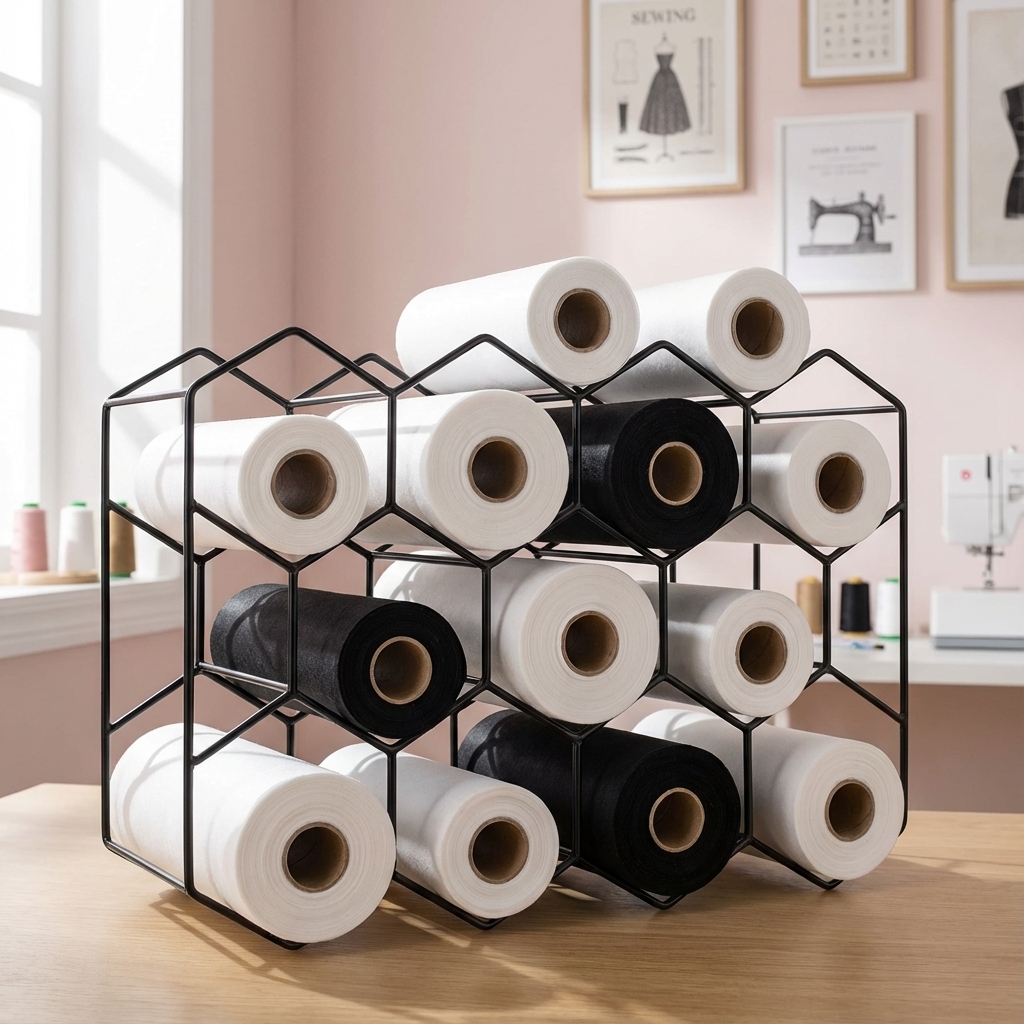
- Wine bottle racks work surprisingly well. The roll slides into a single compartment and stays put.

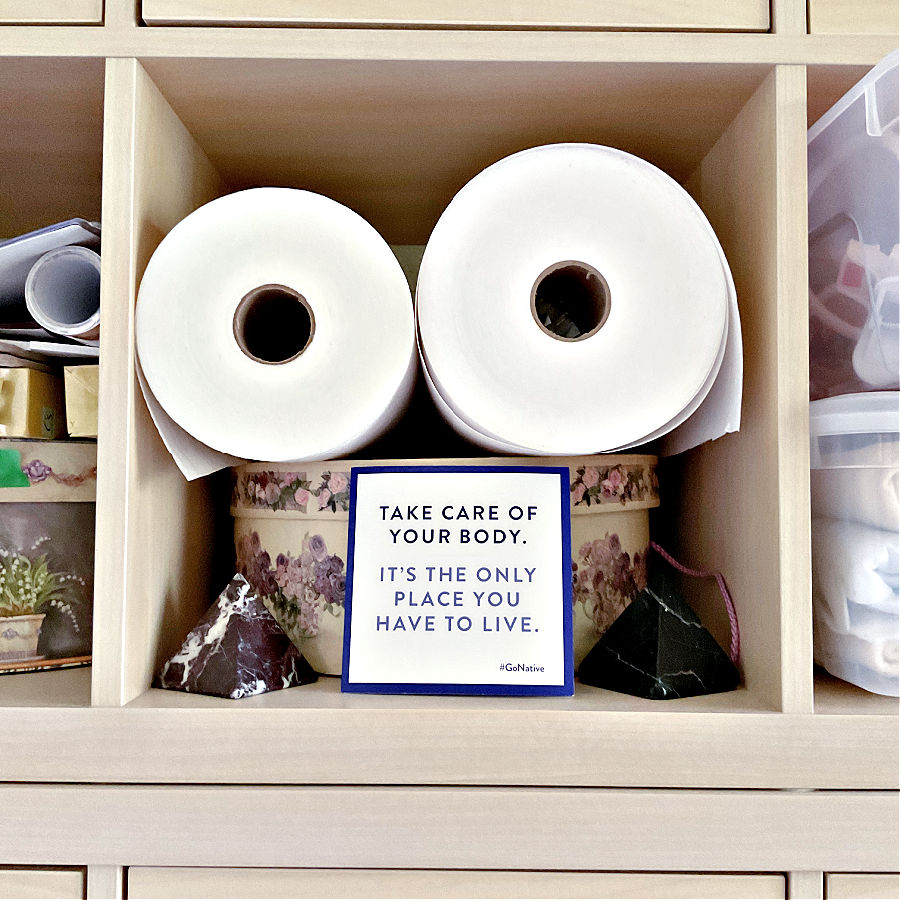
- You can also store rolls upright in a tall bin. Just drop them in vertically. To keep things neat:
- Wrap each roll with a rubber band or large binder clip.
- Add a label right on the end of the roll with the type, brand, and use. A simple Sharpie on masking tape does the job.
- Wrap each roll with a rubber band or large binder clip.
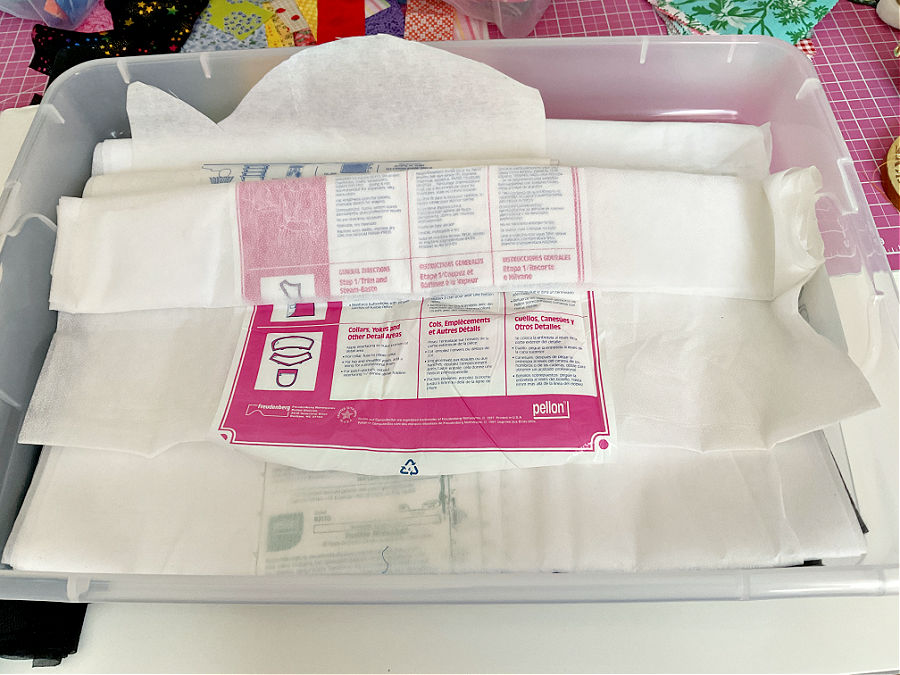
If You Have Sheets or Small Pieces
Flat storage works best here. You want to keep each type easy to find—and wrinkle-free.
- Use a hanging file organizer—yes, like the ones you’d use for paperwork.
- Assign one folder per type: wash-away, cut-away, tear-away, adhesive-backed, etc.
- Label each folder clearly so you’re not guessing when it’s time to hoop.
- Assign one folder per type: wash-away, cut-away, tear-away, adhesive-backed, etc.

This works especially well for stabilizer packs that come pre-cut or those partial sheets that are too big to toss, but too small to leave loose.
If you don’t have a filing drawer, a shallow bin with dividers can also work—just keep the sheets flat and sorted so you don’t end up with a jumbled stack.
Stored right, your stabilizers will stay wrinkle-free, easy to access, and ready to use—not hiding under your fabric stash.
If you picked up a few new storage ideas from this article, feel free to save the pin below to your sewing board. It’s an easy way to find this guide again when you need it. You can also follow me on Pinterest for more tips, tutorials, and inspiration!
latest posts
- Types Of Sewing Machine Feet And Their Uses
- The Interfacing Cutting Guide: Methods, Folds, and Seam Lines
- Steam or Dry Heat for Fusible Interfacing: Which Actually Works
- Essential Sewing Tips: How to Apply Fusible Interfacing Correctly
- Types of Interfacing Explained: Woven, Non-Woven, Knit, Fusible, and Sew-In
- Fabric Eggs DIY: Quick Easter Craft Decorations From Scraps
- Stuffed Bunny Sewing Pattern And Tutorial (Free Download)
- Sewing Machine Basics: Simple Maintenance Tips Every Sewist Should Know
- Interfacing vs Stabilizer: Is There Really a Difference?


Hi Olga
I have enjoyed reading your emails regarding storing fabric/stabilisers etc. and it reminded me of a particular storage problem I have; a way of storing sewing machine needles. I buy them in small sealed packages which specify the sizes, and whether they are for knitted, woven or stretch fabric and whether they are ball point or for more general sewing etc. That’s fine as far as it goes, but the problems arise once the packages have been torn open leaving a flimsy paper packet or, in some cases, a small open, clear plastic box affair, with no way of closing it again,or knowing what it contains. A related problem is where to store needles that have been used in a project, but still have some sewing time left in them. Where do I store them and how do I tell what size etc they are, or what type of fabric they are used for etc., without resorting to a magnifying glass? Holing a very thin needle in one hand, and a magnifier in the other hand, is difficult for people whose eyesight may not be as good as it once was and whose fingers are much less dexterous due to arthritis. While this can eventually show the size of the needle, if one is very lucky and has the patience to persevere, it would not always show what kind of fabric it should be used for; although I did print off a copy of your list of needle markings included with one of your emails some time ago – if only I could remember where I filed it!
I have thought about this and wondered if there are small cabinets, made up of small drawers, that can be labelled with the sizes and types etc. of the needles, and if they are only part used etc. My late husband had a similar type of cabinet, with small clear plastic drawers, which he attached to the garage wall, for holding different types and sizes of screws, nuts, bolts and washers etc. He had a label on the front of each small drawer to designate what it held. It saved such a lot of time when he needed a particular type or size of nut, screw, or washer, when he could go to the relevant drawer and pick out the correct one immediately, rather than having to rummage through a large box or tin of a mishmash of different types and sizes.
Sorry about this long explanation, Olga, but I just wondered if you know of any such cabinets that would have small drawers for storing sewing machine needles. I look forward to hearing from you and thank you for all your welcome emails.
Kind regards,
Liz
Thank you for the nice words! The answer for the used needles is: the needle book. I made an example here: https://www.ageberry.com/diy-needle-book/
I buy only Organ and Schmetz needles and all of them come in packages that can be closed again, even if they are paper (Organ). Schmetz needles in bulk come in hard cases of 100 or smaller cases of 5 which can be closed again, and on the box is written the size. I usually keep all these individual boxes of new needles in a bigger plastic box (about 10x8x4 inches I think) near one of my machines. But yes, it is becoming difficult to find a particular type of needle in this box. But yes, a magnifier with light is also something I keep handy, I think I even have a link to it in one of my articles. Can’t be helped, I guess.