Sewing Machine Buttonhole Troubleshooting (With Video!)
Learn all about making perfect buttonholes through troubleshooting common problems sewists encounter when making a machine buttonhole!
Today’s tutorial is all about machine buttonholes. Many tutorials and YouTube videos focus on how to make perfect buttonholes using a buttonhole foot on a sewing machine. I am going to try to do the same thing from another angle.
For today’s machine buttonhole tutorial, I’m going to focus on sewing machine buttonhole troubleshooting. That way, no matter what fabric you use or how many buttonholes you make, you will have a much greater chance of success.

Making buttonholes can be intimidating for many new sewists because they realize that it’s important to do it right the first time since a mistake at this point could ruin your almost finished project.
Attention! If you like the video format, at the bottom of this post, look for a YouTube video version where there is a step-by-step video sewing tutorial on buttonhole troubleshooting. For a more complete picture, I recommend exploring both versions.
I really like to make buttonholes because I have so many beautiful buttons and want to use them all!
✅ Related tutorial: How to sew on a button
To help you reach the same level of comfort, I am going to give you some really useful tips and tricks so you can sew buttonholes right the first time, every time.
Sewing Machine Buttonhole Troubleshooting: Common Problems
Every sewist runs into some common challenges from time to time when they sew a buttonhole with a sewing machine:
- Suddenly fabric doesn’t move anymore under the buttonhole foot.
- The needle starts sewing in the same spot over and over, so you end up with a knotty mess.
What could possibly be causing the problem?
You thought you did everything right by checking your manual and verifying the necessary steps. You checked your needle to make sure it wasn’t bent. Finally, you even checked to make sure the buttonhole level was all the way down.
And even more confusing, the machine worked just fine previously and started making the current buttonhole fine but somehow stopped in the middle.
Does the question, “why is my buttonhole foot not moving” sound familiar?
It’s very hard to unpick a buttonhole without damaging the fabric, especially if you are sewing with silk or other lightweight fabric.
In 30 years of sewing, I have made more than 1000 buttonholes, and I’ve had to solve all kinds of small and big automatic buttonhole problems. My goal is to show you how to troubleshoot the number one problem of the buttonhole foot getting stuck and refusing to move.
Check these 9 different areas when your buttonhole foot is not working:
1. Buttonhole Foot Movement Restriction
Maybe you were touching the fabric under the buttonhole foot, and the fabric was touching the toe of the foot when you were sewing? You don’t make buttonholes on a small piece of fabric, so you can end up holding parts of the fabric without realizing it.
Solution: Make sure the whole project is behind your sewing machine buttonhole foot, as I demonstrate in the video clip below.
Maybe the fabric is touching the buttonhole lever (did you pull the lever all the way down)?
Solution: If you aren’t paying attention to this, the buttonhole foot may stop moving in the middle of the process. Feed the fabric carefully by hand while the buttonhole is sewn but make sure your hand (or the fabric you are feeding) doesn’t interfere with the movement of the foot.

Note: Some of the links on this page are affiliate links. This means I will receive a commission if you order a product through one of my links. I only recommend products I believe in and use myself.
By the way, I used many sewing machines with a 1-step buttonhole feature, and by far my favorite machine that makes buttonholes better than others is Janome Memory Craft 6600. There are newer Janome models now, so if you want to upgrade your machine, consider one of Janome’s models.
My model of a sewing machine is now a number of years old. Technology evolves, and it is unlikely that next month the offer for sewing machines will be the same as one month ago, and perhaps newer versions will appear.
2. Check The Buttonhole Foot Level
The buttonhole foot is different from any other sewing machine presser foot because it’s longer and wider. Because it’s larger, keeping it completely flat while sewing a buttonhole is not easy.
But it’s necessary so the feed dogs can have exactly the same amount of traction on the fabric throughout.
Very often, when we are sewing buttonholes, we have uneven layers in seam allowances. Or we are sewing buttonholes on thick fabric or near seam allowances (or the edge), which can tip the foot.
As soon as it happens, the feed dogs lose their traction, which is why the fabric can’t be fed correctly. Then the fabric stops moving, and the needle gets stuck in one spot, making a ton of stitches.
Solution: Keep the buttonhole foot level so the fabric can be moved by feed dogs from start to finish. Also, check to make sure the buttonhole lever isn’t stuck.
It’s a good idea to compensate for different layers in the fabric, especially if you are working with thicker fabric.
For example, one part of the buttonhole has 2 layers of fabric, and the other part has 4 because of the seam allowances. You can put 2 pieces of fabric between the two layers of fabric to make it even. Make sure to glue them or use fusible web as interfacing to prevent them from moving.

3. Use Stabilizers And Interfacing For Sewing A Machine Buttonhole
Feed dogs have to feed fabric evenly when you are making a buttonhole. But sometimes, the upper level of fabric is moving slightly different than the down level of the fabric, and we have fabric layers shifting.
It happens when you are working with stretchy fabric, for example. In this case, you will have some kind of jam under the buttonhole foot.
Solution: Using stabilizers and interfacing can help solve this problem. Attach interfacing to the back of the stretch fabric to prevent it from stretching and to make the fabric stable. You can also use a machine embroidery tear-away stabilizer on the top or the bottom (or even both).
My tutorials on how to use fusible interfacing may help even more.
In my experience, I’ve noticed that it’s easier to make buttonholes when the fabric is stiffer. So it’s a really good idea to use interfacing and stabilizers on the area that needs buttonholes. Stabilizers also improve the quality of buttonholes.

4. Adjust The Sewing Machine Settings
If you have you found yourself asking the question “why is my buttonhole stitch not working?”, it might be a problem with your machine settings.
Set your machine on slow speed. Chances are that if your buttonhole foot gets stuck, your machine will not make as many stitches in one place before you stop it if it is sewing slower. And the goal is to make as few stitches as necessary.
If the buttonhole foot is stuck in one place and isn’t moving, try to see if your sewing machine can sew on the same fabric using normal narrow and short zig-zag stitches with a regular presser foot.
A buttonhole stitch is just a special type of zig-zag stitch with more narrow zig-zag width and a very short stitch length.
Solution: If you have the same problem of the fabric not moving when using a regular zig-zag stitch using a regular foot, I recommend adjusting the sewing machine settings so it would be able to sew a close zig-zag stitch on the fabric.
Try to change the:
- Tension
- Foot pressure
- Needle
- Thread you are using
For example, don’t use a buttonhole thread because this thread is very thick (maybe 3x thicker than the regular sewing thread) and made for sewing buttonholes by hand instead of by the machine.
Then use the same settings for the buttonhole with the buttonhole foot.
You can also change the stitch length for your buttonhole stitch to make it a little longer, for example. Maybe your stitch length was too small for your particular fabric.

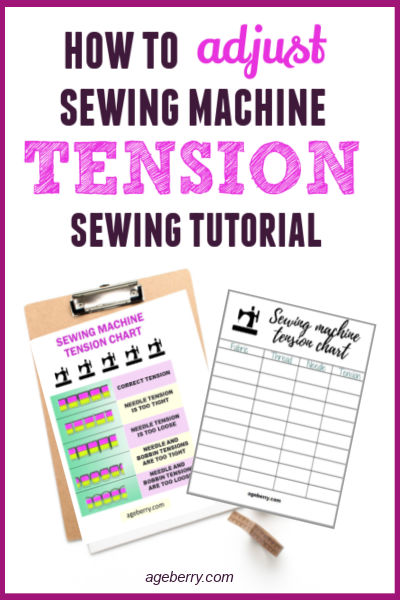
Want to improve your sewing skills?
Get my detailed guide on SEWING MACHINE TENSION ADJUSTMENTS free!
Subscribe to my weekly newsletter with sewing tips and tutorials, free sewing patterns, printable PDFs, and other useful content and you’ll find the eBook in your inbox.
Subscriber exclusive offer.
Don’t miss the free HELPFUL eBook!
5. Check The Bobbin Holder
Is it clogged with some lint, dust, or lose threads?
Solution: Try to clean it and see if it solves the problem.

I have a very nice vacuum cleaner for this job, my Fuller Brush Mini Maid Handheld Vacuum cleaner. It’s small but powerful, and it cleans small areas easily.
Mine is relatively old, not available anymore for purchase, and it has a cord. There are newer, cordless versions, which promise to work even better because they are easier to handle.

6. Curved Buttonhole Foot
When you use excessive force while sewing or when attaching or removing the buttonhole presser foot, you may create a slight curve in the foot which can cause it to not work properly anymore.
Solution: Don’t pull the buttonhole foot with excessive force. Also, resist the temptation to pull the fabric while sewing a buttonhole.
7. Not Testing On Scrap Fabric
It happens to everyone at least once: you are so excited to finish your project that you just go ahead and try to sew a buttonhole on your fabric without testing on a piece of scrap fabric first.
Or you do a test, but you do it on fabric that’s different from the material you’re using in your project.
Solution: Don’t test on any simple piece of fabric. Instead, try to replicate the conditions. Interface it and fold it to make as many layers as the real garment has. Make sure you are using the same fabric for your test as your project fabric.
Pro Tip: I usually sew more than one buttonhole on my test fabric just to be sure that I got everything right.
8. Your Machine Needs A Professional Adjustment
I had a big problem with a buttonhole foot 15 years ago when I bought my first computerized Brother sewing machine. The machine was making 1 step buttonholes, and I was so happy that I could do them so nice and fast…until it stopped working.
I don’t know what the problem was because I didn’t read sewing blogs then. I tried and tried but still couldn’t get it to work. So I bought another sewing machine – a more advanced Brother. To my surprise, I started to have the same problem with that machine too.
So, I decided that it wasn’t the machine at fault, but rather it was something I was doing while preparing my project. I have shown you what can be wrong in this case.
Solution: While user error can be the problem, it’s also possible that your machine needs a professional adjustment. Find a sewing machine dealer near you and bring the machine for repair.
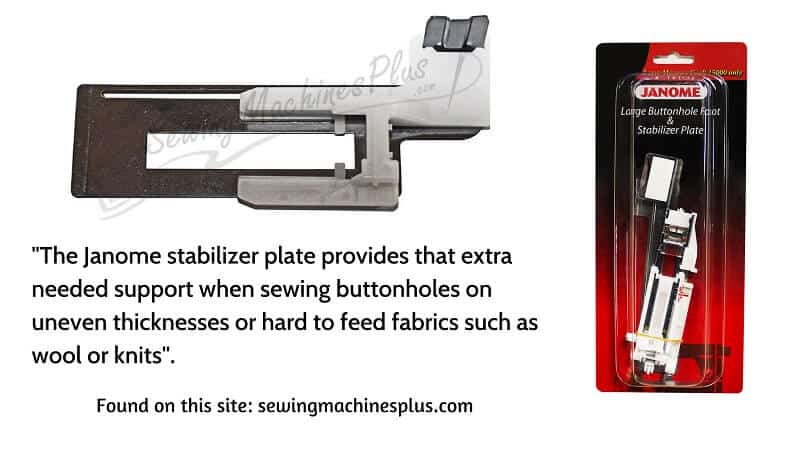
9. Add Extra Stabilization
Sometimes, despite all the tips above, you just need a little extra stabilization.
Solution: I have seen an interesting new gadget called a Buttonhole Stabilizer Plate from Janome and some other brands.
I haven’t used one myself because I can confidently sew perfect buttonholes on my machines. However, this gadget is made especially for this case when you have problems with the buttonhole foot not moving and stuck in one place.
They say that “it provides a clever way to feed the fabric evenly when you are dealing with thick or difficult fabrics”
Sewing Machine Settings For Buttonhole Stitch
As you prepare your machine for sewing a buttonhole, there are a few things you need to check and settings to set:
- Select your buttonhole stitch (there are a few of them usually).
- Choose the buttonhole length by placing a button into the buttonhole foot (if your machine has an automatic buttonhole function).
- Insert the buttonhole presser foot.
- Press down the buttonhole lever until you feel it stops (if your machine has this lever).
- Set the stitch length (or use the machine default).
- Set the correct tension (test on scrap fabric)
- Set the correct presser foot pressure for the fabric you are using.
- Check the needle (if it’s not worn out, dull, etc.)
If you would like a video tutorial on this subject head over to YouTube and check out my video on sewing machine buttonhole troubleshooting and while you are there subscribe to my channel.

Best Sewing Machines For Sewing A Machine Buttonhole
Janome 3160QDC-T
This machine is a gem for making buttonholes! It comes with an Automatic Buttonhole “R” Sewing Foot and six different 1-step buttonhole stitches.
SINGER Quantum Stylist 9985 Computerized Sewing Machine
This machine has even more built-in stitching possibilities. It comes with a Buttonhole Underplate and has 13 different programmed 1-step buttonholes.
Janome HD3000 Heavy-Duty Sewing
This Janome machine is more basic, which also means it’s more budget-friendly. However, this is a 1 one-step buttonhole sewing machine.
Janome Skyline S3 Sewing Machine
This sewing machine offers more in terms of options than the previous model, so it is more expensive. It comes with an Automatic Buttonhole Foot R as well as seven 1-step buttonholes.
SINGER | 9960 Sewing & Quilting Machine
This SINGER model is the most budget-friendly option on this list, but don’t let that influence you when searching for a sewing machine with a buttonhole stitch. It doesn’t disappoint when it comes to helpful features. You’ll find the SINGER exclusive buttonhole underplate and thirteen 1-step buttonholes.
I hope these sewing machine buttonhole troubleshooting tips help you resolve any problems you may encounter swiftly and effectively. And if you’re searching for a new machine, the recommendations I offered will have you covered.
Is your sewing machine acting up? I created the ultimate troubleshooting guide to help you out and compiled a detailed list of solutions to common sewing machine problems. Many of these problems can be solved with some basic troubleshooting or maintenance. Is your thread getting tangled or breaking? I’ll walk you through the steps to fix it. Are you struggling with tension settings, broken needles, or jammed threads? I have tips for that too. Don’t let sewing mishaps get in the way of your creative flow. Check my guide and show your sewing machine who is the boss – Troubleshooting Common Sewing Machine Problems (+ Solutions)
Did you find this tutorial helpful? If so, save this pin (see below) on your sewing board so you can come to this tutorial later when you are ready to make perfect buttonholes, and follow me on Pinterest for more tips, tutorials, and inspiration!

latest posts
- 10 Types of Buttonholes: How to Choose the Right One and Avoid Common Mistakes
- The Best Sewing Tools for Slippery Fabric, Bulky Layers, and Stretchy Knits
- 25 More Smart Sewing Shortcuts for Better Results With Less Effort
- 25 Sewing Shortcuts That Make Sewing Easier and More Efficient
- Types Of Sewing Machine Feet And Their Uses
- The Interfacing Cutting Guide: Methods, Folds, and Seam Lines
- Steam or Dry Heat for Fusible Interfacing: Which Actually Works
- Essential Sewing Tips: How to Apply Fusible Interfacing Correctly
- Types of Interfacing Explained: Woven, Non-Woven, Knit, Fusible, and Sew-In