Sewing machine cover tutorial
Our sewing machines need covers so dust and sunlight don’t get into the essential parts.
My Janome 6600 P (which is the best sewing machine for advanced sewists, by the way) came with a plain white plastic cover which I used for years but I have always wanted to make some soft fabric cover that looks beautiful. And as I started to do some simple quilting I decided that a quilted sewing machine cover is a good beginner quilting project.
So, in this sewing tutorial, I will show you how I made my sewing machine cover with piecing and quilting in the hoop with my modern embroidery machine (Babylock Destiny2).
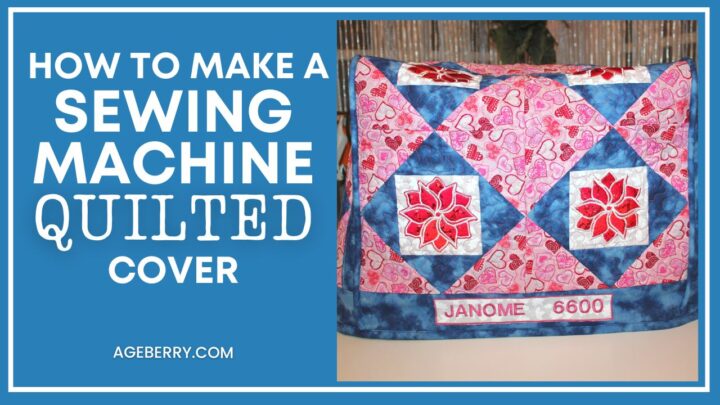
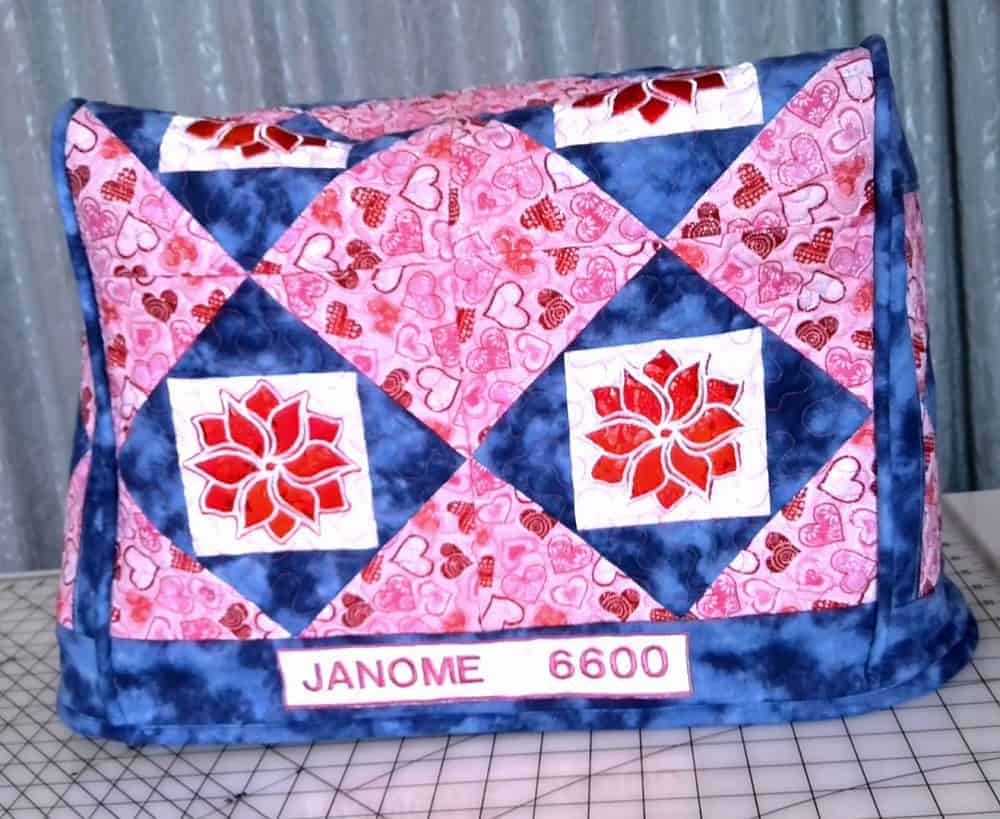
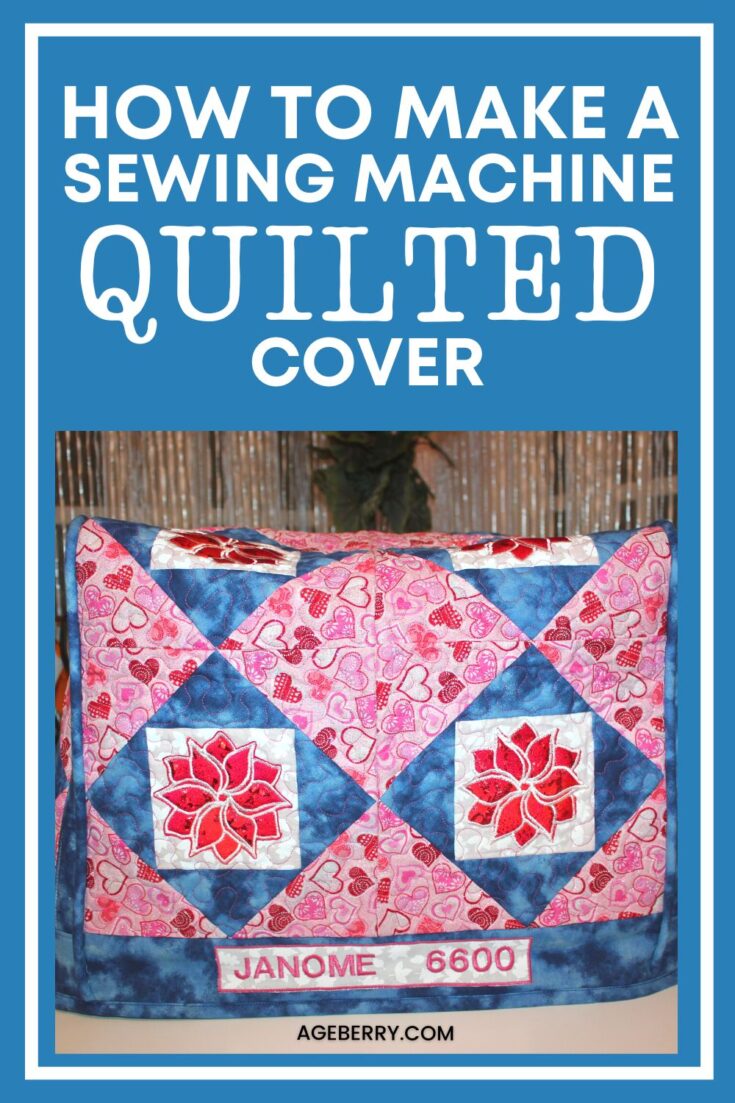
This is the image of the cover I made.
Note: Some of the links on this page are affiliate links. This means I will receive a commission if you order a product through one of my links. I only recommend products I believe in and use myself.
What you may need
Quilting cotton fabric
Batting – it’s always recommended to use batting for quilting projects – a layer of insulation between fabrics
Modern embroidery machine – for piecing and quilting in the hoop
Magnetic hoop
Sewing machine, threads, needles, pins
If you prefer to watch the tutorial GO TO MY YOUTUBE CHANNEL TO SEE THE VIDEO

Step 1.
Prewash your fabric before cutting and iron it
Pre-wash your quilting cotton fabric in warm water. Iron it with a steam iron.
Step 2.
How to make a sewing machine cover pattern
I have chosen a very simple but functional design – one big rectangle and two smaller rectangles for the sides. I needed to make some calculations but it was easy.
My calculations for my Janome 6600 P are following
1 rectangle 351/2 “ x 161/2”
2 rectangles 10 1/2 “ x 13”
So I calculated that I will have 8 square blocks for the top 81/4” x 81/4” and will add small pieces of fabric for both edges, two of this size 161/2” x 11/4”.
And for the sides, I will have only one block and will add some fabric pieces on each side of the block to make it the correct size for the cover’s sides.
Step 3.
Designing the quilt block
I found out that I DON’T enjoy traditional quilting – I always want to make something faster and simpler. So the idea of precise cutting for my quilt was not very appealing to me.
I discovered that I like (really like) to make pieces in the hoop because 1) I don’t need exact cuts, 2) it’s much easier and faster and 3) every block will be exactly the same – millimeter to millimeter, a computer (that’s what my embroidery machine is – a powerful computer) is not going to slide off lines and I am not going to lose my patience trying to connect pieces precisely.
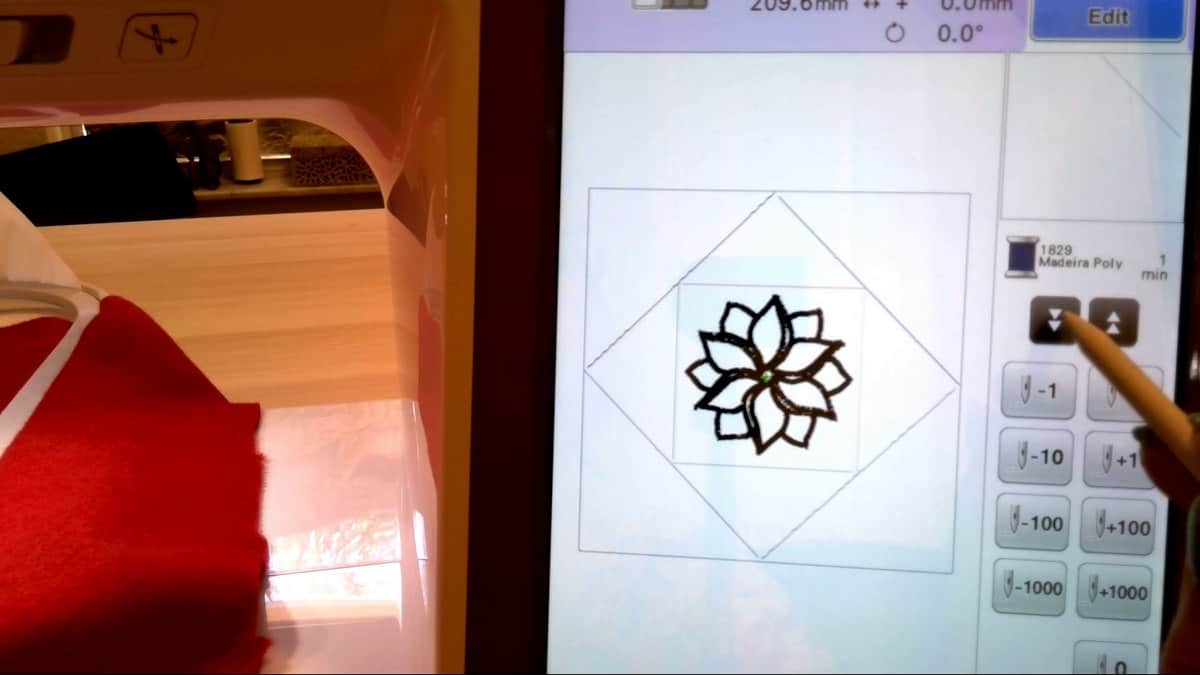
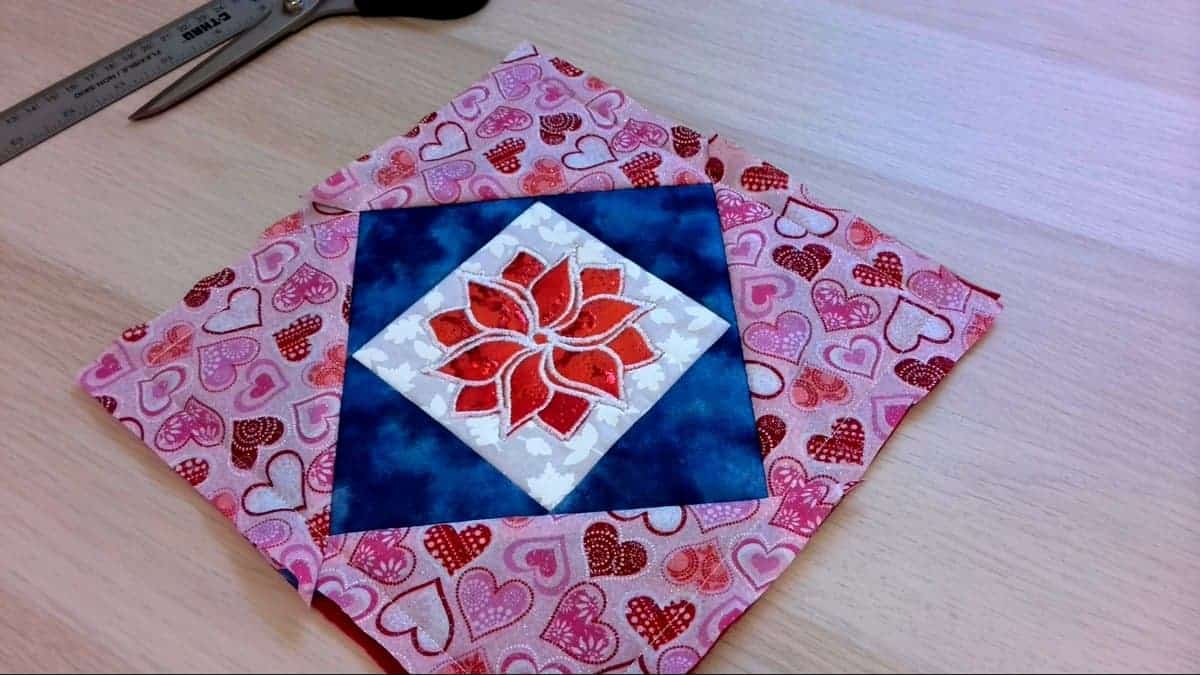
So I got to work with my Destiny 2 and make the quilting pattern in IQ designer. Here is the block I created – it’s one of the simplest ones I guess.
I also decided to add an applique to the block – why not? It’s FUN!
Step 4.
Choosing and cutting the fabric
I wanted to use 4 colors – white, pink, red and blue. I didn’t need to cut exact sizes for my block – with piecing in the hoop you don’t really care if your seam allowances are not equal. Don’t believe me? In the video below (in step 5) you will see how it’s done.
I used mostly quilting cotton but for the applique, I decided to use spandex fabric – this sparkling red is great for the flower.
Now I want to show you how fast I cut all the necessary pieces.

Step 5.
Piecing in the hoop
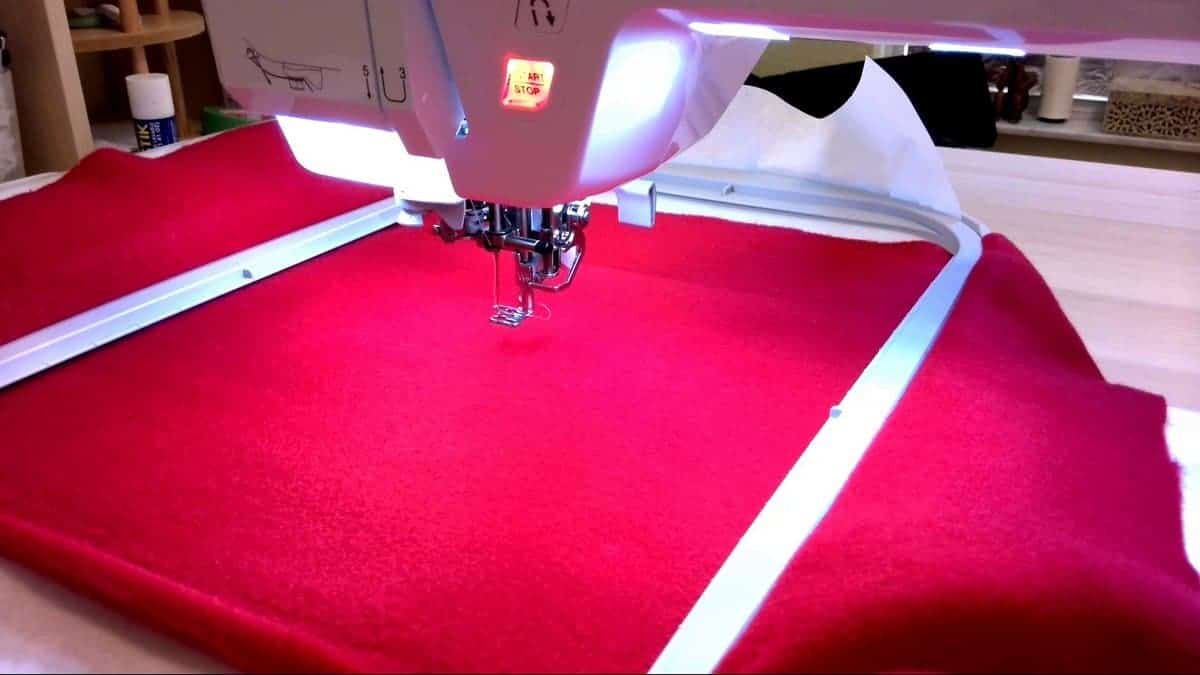
I have decided to use fleece as batting. I have a huge roll of red fleece ( I bought it at a garage sale for $5) and I need to use it somehow. I don’t make clothes from fleece, it’s the synthetic fiber I am trying to stay away from. But for the sewing machine cover, it’s quite suitable.
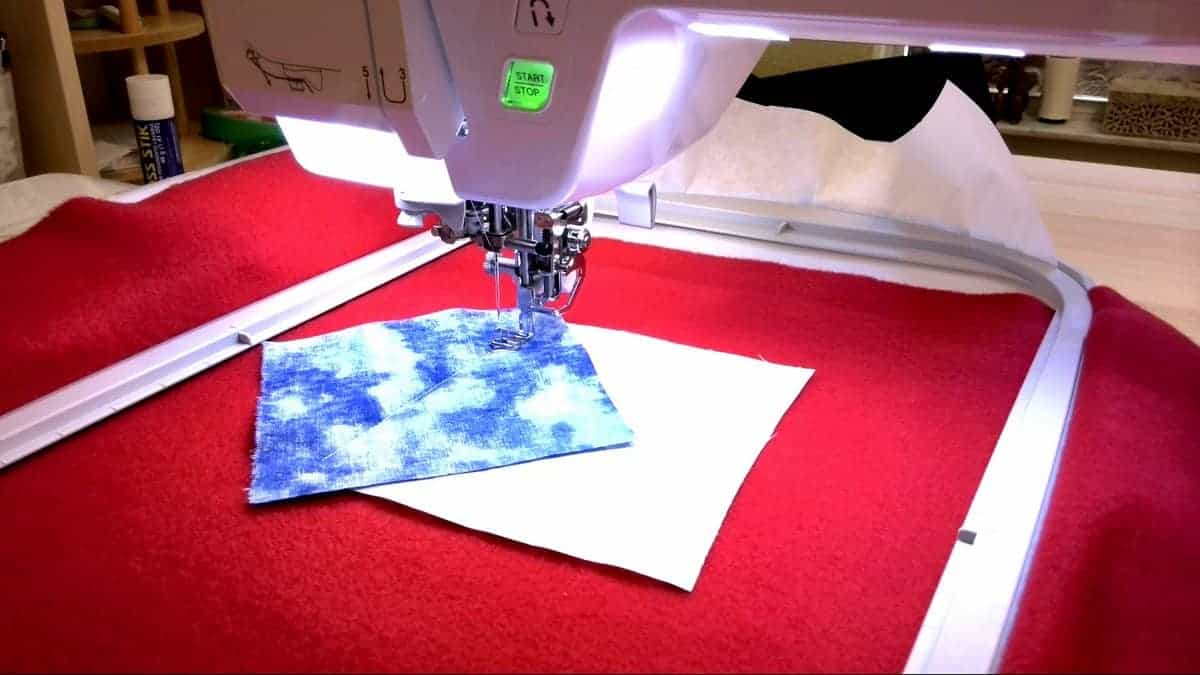
So I hooped a piece of tear-away stabilizer and a piece of red fleece (as batting). I used the biggest hoop I have.
Amazon has a wide range of tear-away embroidery stabilizers, this is in fact where I buy my stabilizer.
First I just stitch the placement line on the batting – the first line of a white square. The first piece is the white square in the middle.
I threaded the machine with my best quality embroidery thread – I chose a white color.
Embroidery thread I also buy on Amazon, the brand name thread is usually less expensive than in-store. Not always.
As for the bobbin – I am using prewound bobbins – they are real-time-savers – well, I am sure you know this already but anyway. I don’t need to change the thread for each piece, I will use this thread for all piecing.
Now I know where to put my white square piece. But at the same time, I have to put the second piece – it’s a blue piece, I place it over the placement line wrong side up and stitch the same line again.
After that, I just flip the blue fabric and finger press the seam to create a nice crease.
I don’t need to trim the seam allowances in my case because the quilting cotton I use is quite dense and the seam allowances can’t be seen under the fabric.
But it may not be the case always though. I guess sometimes you need to be precise in your cutting and if you have the see-through fabric you will need to cut it differently – as you cut for traditional quilts.

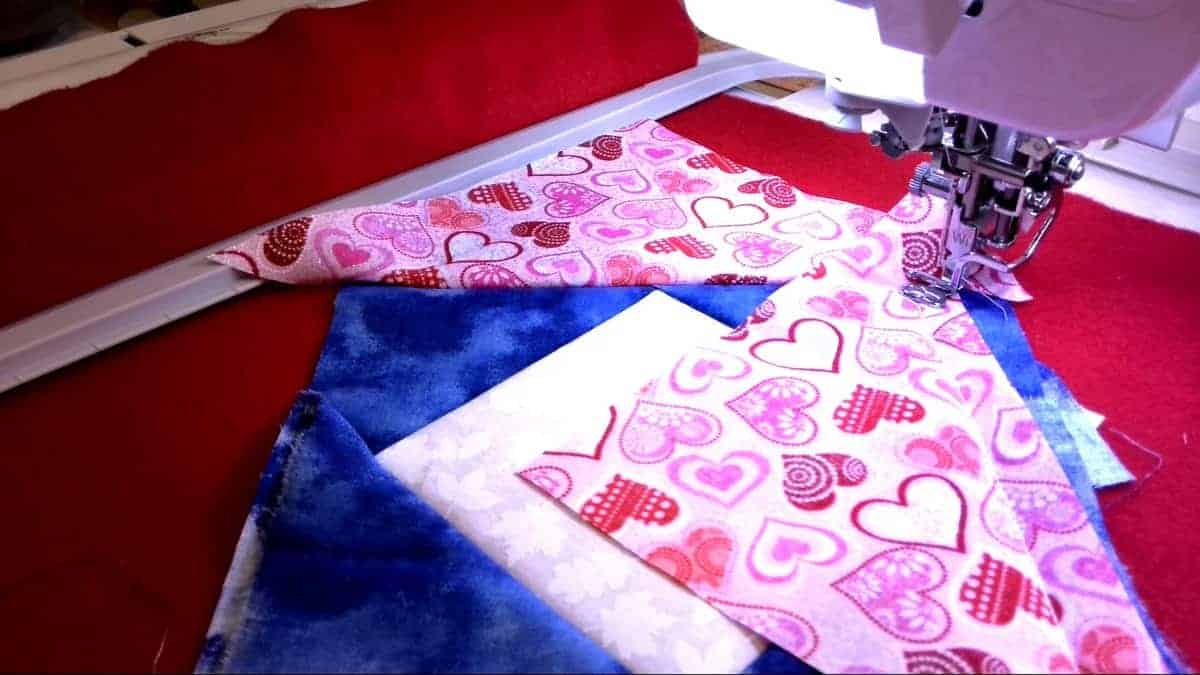
I repeat the same process with 3 other sides of the square. Always check where the next piece of fabric needs to be put.
I do the same with bigger triangles – placing, stitching, and flipping.
And after that, I just stitch the biggest square.
Next, I stitch the placement line for the applique, trim away excess fabric beyond the stitching line with my favorite duckbill scissors and finish the edges with satin stitches.
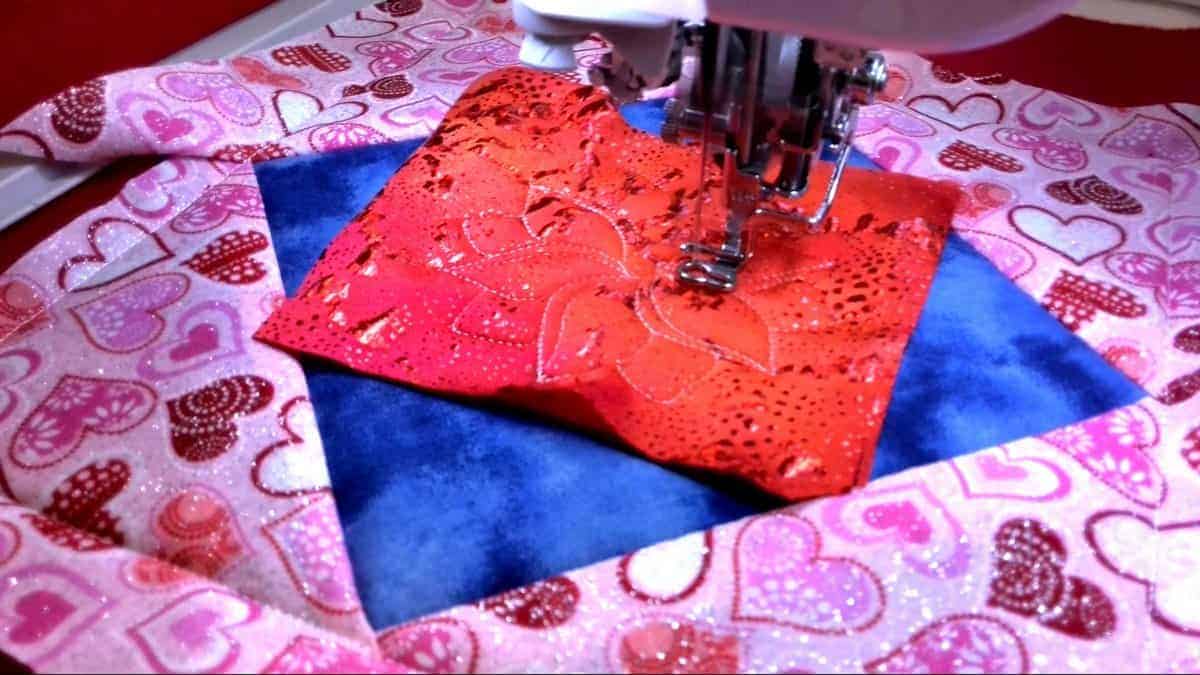
Let me tell you something about these duckbill scissors – they are absolutely essential if you like sewing and embroidery.
You can trim around edges without worrying you will cut the fabric or the thread. You can cut very close to the stitches. They are so great for applique! I can’t live without them now.
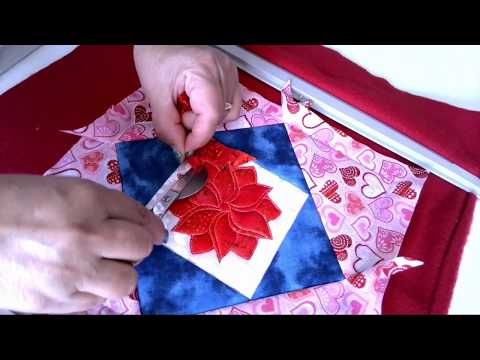
Aaaand this is the block – I had to trim all outside edges of course with my sharp Olfa rotary cutter.
After the first one, I easily made 9 of them.
It was easy to make these blocks but now I would do it differently a little bit and will show you in my next quilting project. Well, this was the first time I ever did that, and I learned how to make some improvements so it will be even faster to produce a block.
For example, I would NOT use square pieces for the triangle placements – I should cut triangles, not squares.
Step 6.
Sewing the blocks together
It wasn’t difficult to sew the blocks together with my Janome 6600 P Acufeed system. See how high I can raise the presser feet. The machine goes over 8 layers of fabric and fleece without any problem.

Step 7.
Quilting with the embroidery machine
I used the quilting design I have in my machine. Before putting the fabric in the hoop I attached the backing fabric – the same blue cotton.
It really fascinates me to watch how fast the quilting can be done with modern embroidery machines. The only thing I need to do is move the blocks in the hoop. Well, and change the empty bobbin from time to time.
Also, I used my magnetic hoop – it’s the best for quilting in the hoop.
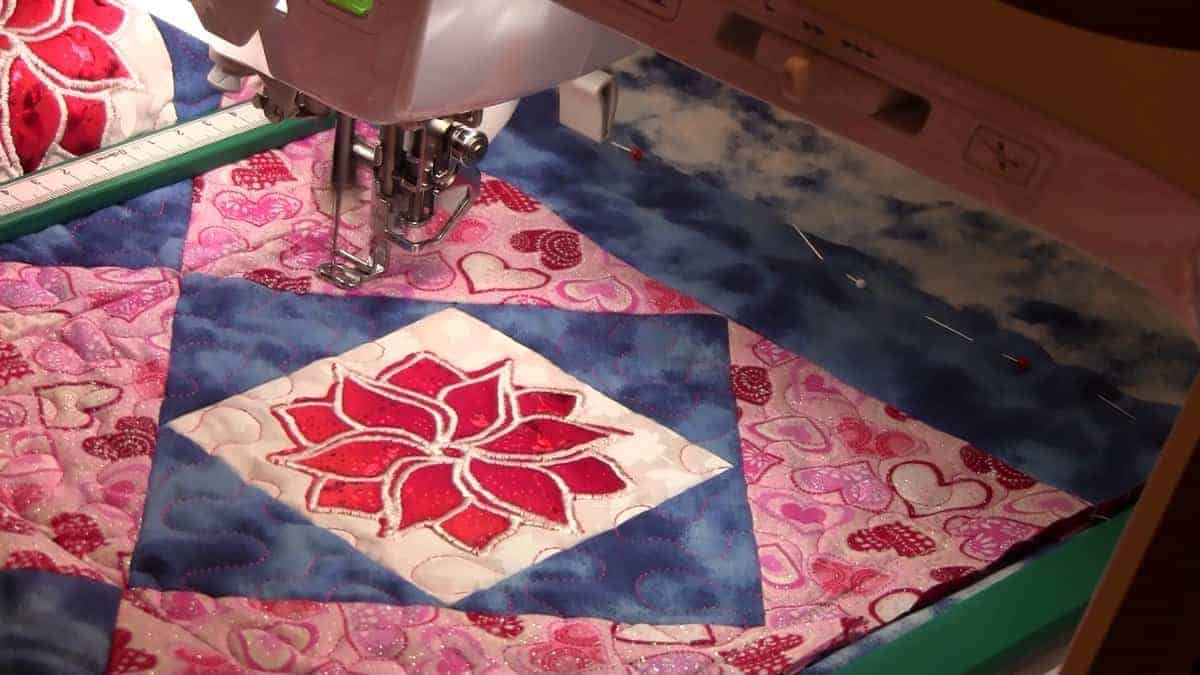
Magnetic hoops are not cheap, but they are much easier to use than regular hoops and it damages the material much less. You can also rearrange the material easily once inside the hoop.
Step 8.
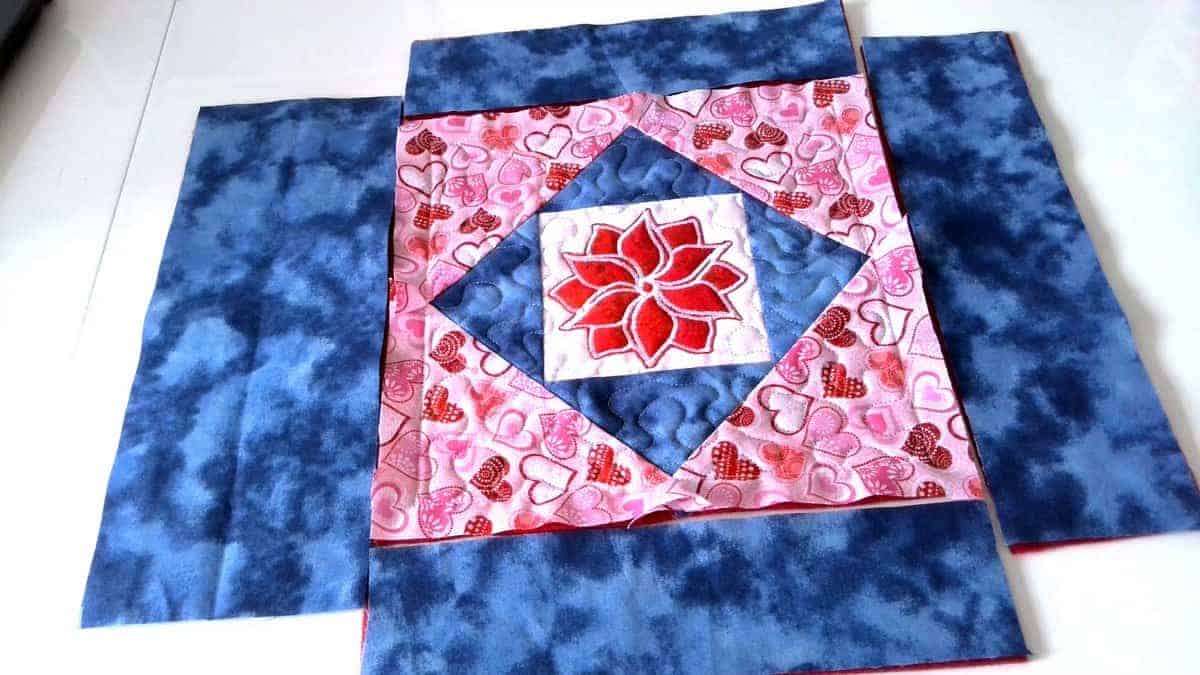
Putting all the pieces together
I cut the remaining pieces for the pattern (from the blue fabric and fleece) and stitched them together. When I laid out the pieces it looked like this in the image below.
Seam allowances looked a bit bulky to me – so in some places, I decided to cut the fleece from the seam allowances. I was using my duck bill scissors again.
Even if I tried to be very accurate and precise my blocks after I stitched them with my sewing machine still needed some trimming with my sharp rotary cutter – as you can see in some places the fleece batting was visible, and in some places the edges were not straight.
Step 9.
Making piping
For the piping, I had to cut 2 bias strips to insert them into the sides. I wanted to make one long piece for each edge, not a few smaller strips. I made them 2” wide.
I make piping like this: first I fold them in half lengthwise and stitch them together with a basting stitch (do you know how to do the basting stitch by machine?) ½” from the edge. After that I insert the plastic rope inside – it goes easily.
Next, I pin it to the main piece and stitch – ¼” from the edge. And after that I just sew the pieces together 5/8” from the edge.
For stitching close to the piping I use a clear zipper presser foot and set the needle position to the most left.

Step 10.
Finishing the sewing machine cover
So, I stitched the side panels to the main quilted panel. Now it’s almost finished and already has the shape of the cover. I just need to finish the remaining two top seams.
After that, I made bias binding all around the bottom edge. I forgot to mention that I finished the raw edges of 2 inside seams on my serger.
In the Pinterest pin below you can see the finished sewing machine cover again.
Did you find this tutorial helpful? If so, save this pin (see below) on your sewing board so you can come to this tutorial later when you are ready to make a sewing machine quilted cover, and follow me on Pinterest for more tips, tutorials, and inspiration!
latest posts
- What Do You Call a Person Who Sews? I Asked My Readers and Got 1,408 Opinions
- DIY Round Purse: PDF Sewing Pattern and Detailed Instructions
- Mini Wonder Clips By Clover: Useful Sewing Tool Or Just Another Notion?
- Non-Slip Grips For Quilting Rulers: A Small Notion With A Useful Job
- Fabric Eraser for Sewing: What It Removes and When to Use It
- What Is The Best Thread For Sewing Machine Projects? Let’s Find Out!
- Butterfly Quilt Block Tutorial – Foundation Paper Piecing
- How To Sew Quilt Squares So The Corners Match
- Sewing With Fork Pins: How They Help With Pattern Matching, Slippery Fabric, And Seams