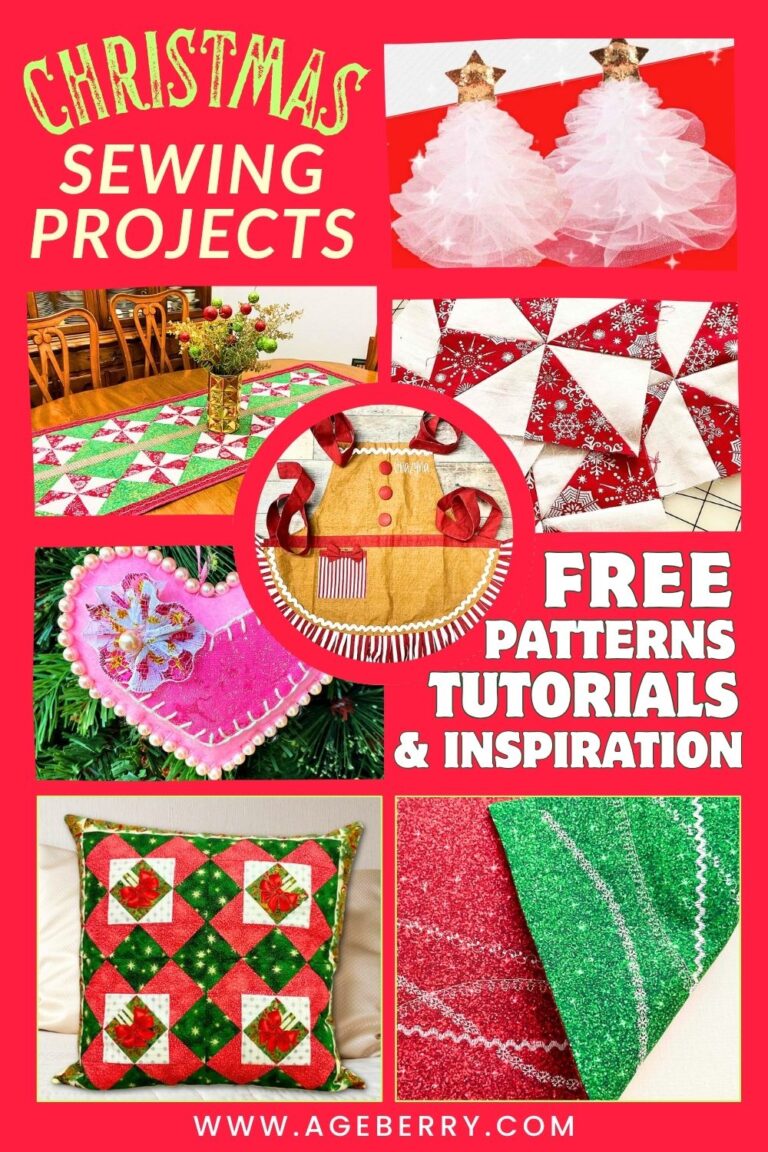
How to Make an Easy Reversible Christmas Placemat
Ho-ho-hold onto your Santa hats, crafty elves! We’re about to create the most versatile placemat in the North Pole. Can’t choose between jolly red or merry green? Why not both? This reversible Christmas placemat is the kitchen equivalent of having your fruitcake and eating it too.
It’s so easy to make, even Rudolph could do it with his eyes closed (though I don’t recommend sewing blindfolded). Red side up when you’re feeling saucy, green side for when you’re in a ‘peas and thank you’ mood.

So, go to your sewing machine, grab your most festive fabrics, and let’s create a Christmas placemat that’ll make your holiday table the talk of the North Pole gossip circuit.
What You’ll Need
- Red Christmas-themed fabric
- Green Christmas-themed fabric
- Fusible interfacing
- Embroidery thread
- Sewing machine with decorative stitch capabilities
- Rotary cutter (optional)
- Cutting mat (optional)
- Clear, non-slip ruler (optional)
- Basic sewing supplies (scissors, pins, iron, etc.)
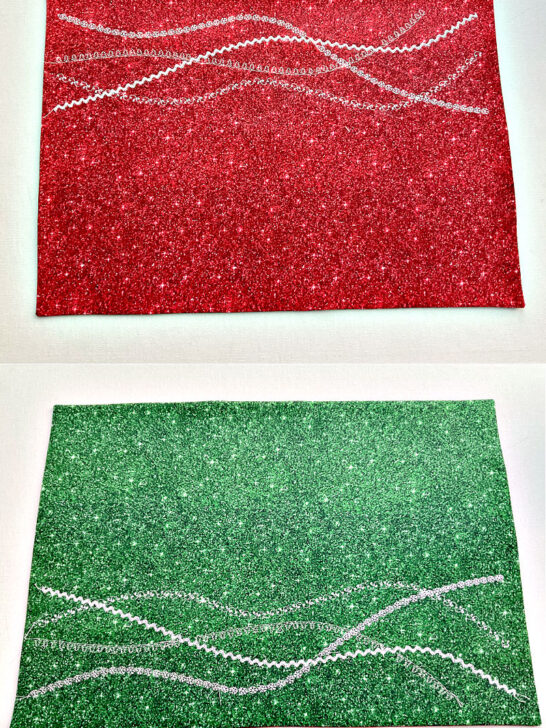
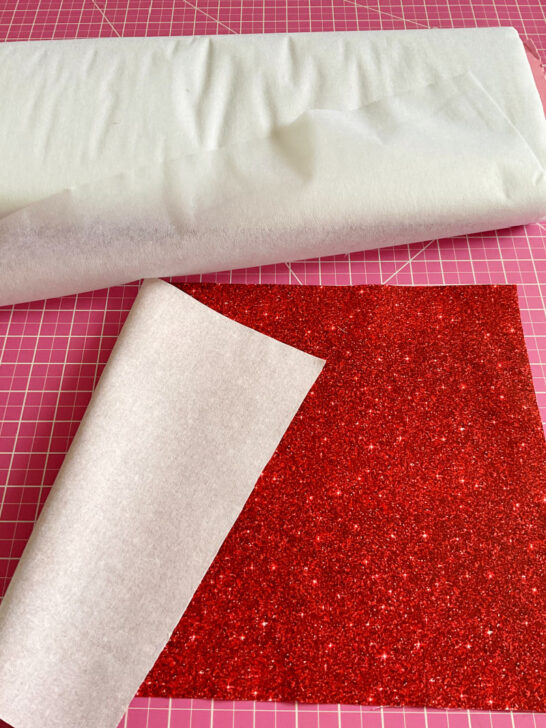
- Red Christmas-themed fabric. I picked a vibrant red fabric with a spark-like pattern. This wasn’t just for festive flair – the busy design is a clever trick to hide small spills or stains. Because let’s face it, holiday meals can get messy, and who wants to spend the whole dinner worrying about cranberry sauce disasters?
- Green Christmas-themed fabric. To complement the red, I chose a green fabric with a similar spark-like pattern. The matching patterns ensure a cohesive look no matter which side is up.
- Fusible interfacing (medium weight). It gives our placemats some backbone without the bulk of batting and keeps everything smooth and in place.
- White embroidery thread. White thread pops beautifully against both red and green, creating a snow-like effect that’s perfect for those Christmas vibes.
- Sewing machine with decorative stitch capabilities. Those fancy stitches your machine’s been itching to use? It’s their time to shine. We’re talking snowflakes, Christmas trees, and other festive patterns that’ll make your placemats look like they’ve been touched by Jack Frost himself.
The beauty of these materials is their versatility and practicality. The fabrics are festive yet functional, the interfacing keeps things neat, and the decorative stitches add that handmade charm without requiring you to be a master embroiderer. It’s all about creating something special without needing an elf workshop to do it.
Step-by-Step Tutorial
Step 1. Cutting and Fusing Fabric for the Christmas Placemat
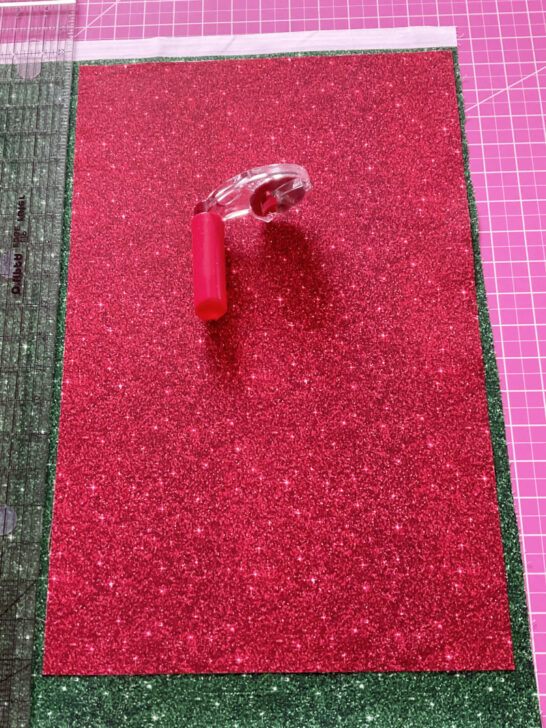
Cut one rectangle each from the red and green fabrics (typically 12″ x 18″ or 14″ x 20″ plus 1/4″ seam allowances on all sides)
Cut two pieces of fusible interfacing the same size or slightly smaller than your fabric pieces.
Following manufacturer’s instructions, fuse interfacing to the wrong side of each fabric piece.
So, cutting a rectangle. Sounds easy-peasy, right? Just a few straight lines, no curves, no fancy patterns. How hard could it be? Well, let me tell you – for beginners, it’s about as straightforward as untangling Christmas lights after a year in storage.
You see, what starts as a simple rectangle can quickly turn into a wonky quadrilateral (fancy word for ‘shape that used to be a rectangle but got lost along the way’). Before you know it, your placemat looks less like a tidy rectangle and more like a geometric Picasso painting.
But don’t let your placemats go all abstract art on you. The secret to success? Cutting your fabric straight. It’s the difference between a placemat that looks nice, and one that looks like it’s trying to escape the table.
So, do you know how to achieve those perfect right angles?
#1. Use a rotary cutter and a cutting mat. The grid lines on the mat will be crucial for achieving straight cuts.
#2. Fold your fabric selvage to selvage and place it on the cutting mat, aligning one edge (usually a folded edge but the selvage edge can be used as well) with a horizontal grid line. Smooth out any wrinkles or folds.
#3. Place a clear, non-slip ruler perpendicular to the selvage edge, aligning it with a vertical grid line on the mat. This ensures your cut will be straight and at a right angle to the selvage.
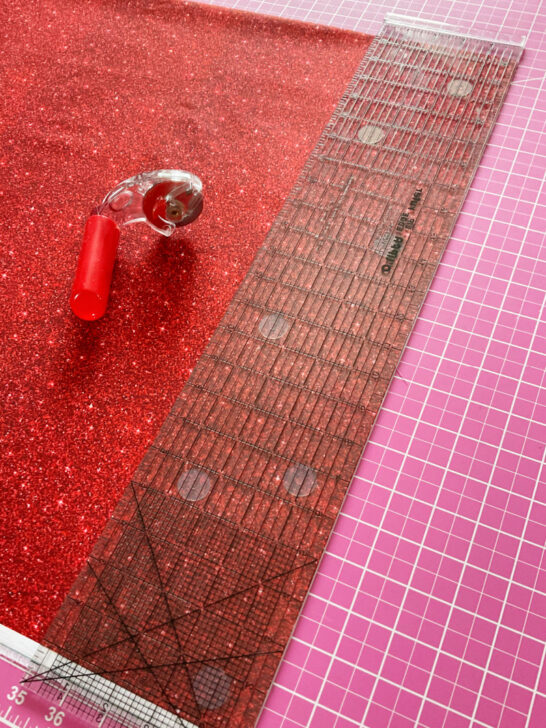
#4. Cut with the rotary cutter. Hold the rotary cutter perpendicular to the mat. Apply gentle but consistent pressure as you roll the blade along the edge of the ruler. Move in one smooth, continuous motion for the cleanest cut.
#5. After cutting one side, reposition your ruler to cut the next side. Always ensure your ruler is perpendicular to the previously cut edge.
#6. Use the grid on the cutting mat to measure your desired rectangle size.
If you find yourself needing more guidance go over to my detailed tutorials:
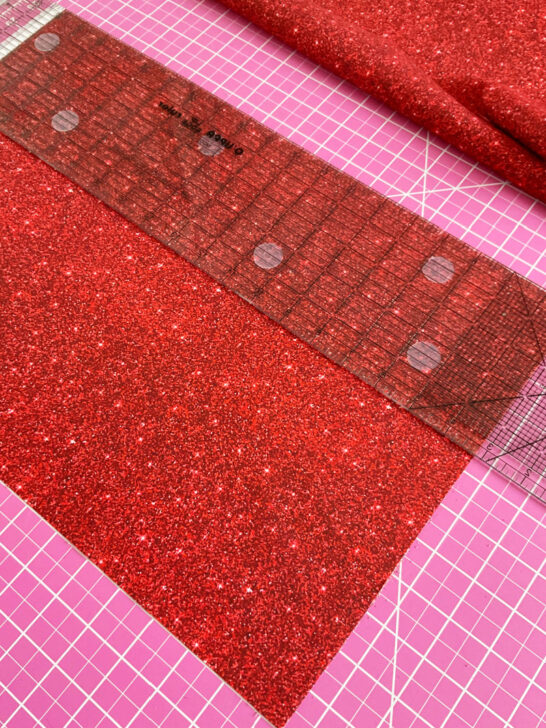
Once you’ve cut your first two rectangles, don’t put them aside just yet – they’re now your perfect templates for the rest of your placemats.
Take one of your cut rectangles and lay it flat (and straight) on your remaining fabric. Now, simply cut around all four sides to create identical rectangles for all your placemats.
It ensures all your placemats will be exactly the same size and shape. Plus, it’s much faster than measuring and marking each rectangle individually. Before you know it, you’ll have a stack of perfectly matched placemat pieces ready for the next steps.
Now, I know what some of you might be thinking – ‘But what if I don’t have a rotary cutter? Can I still make these placemats?’ Well, you absolutely can cut proper rectangles with good old-fashioned scissors. It just requires a slightly different approach.
First, you’ll need to draw the rectangles on your fabric. A ruler, a fabric marker or chalk, and a steady hand are your best friends here. Draw your rectangles with care – remember, measure twice, cut once! Cut them out with your scissors. Follow those lines like you’re tracing a treasure map.
Whether you’re using a rotary cutter or scissors, the goal is the same – nice, straight edges for professional-looking placemats. So choose your tool, and let’s get cutting!
Now that you have fabric rectangles cut and ready, it’s time to give them some structure with fusible interfacing. Fusible interfacing can be a bit tricky if you’re new to it.
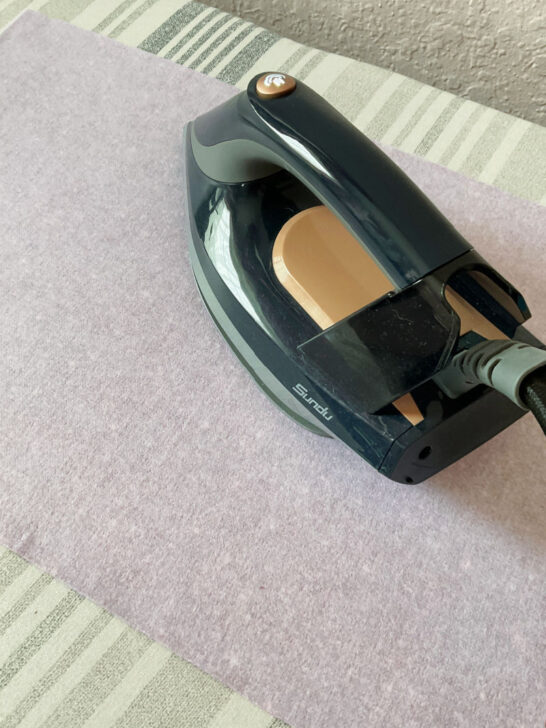
So, before you heat up that iron, take a quick detour to my tutorial How To Use Fusible Interfacing (Video + Tips And Tricks). It covers everything from choosing the right type of interfacing to achieving that perfect fuse without any bubbles or wrinkles.
Once you’ve brushed up on your fusing skills, come on back here, and we’ll continue creating these fabulous reversible placemats.
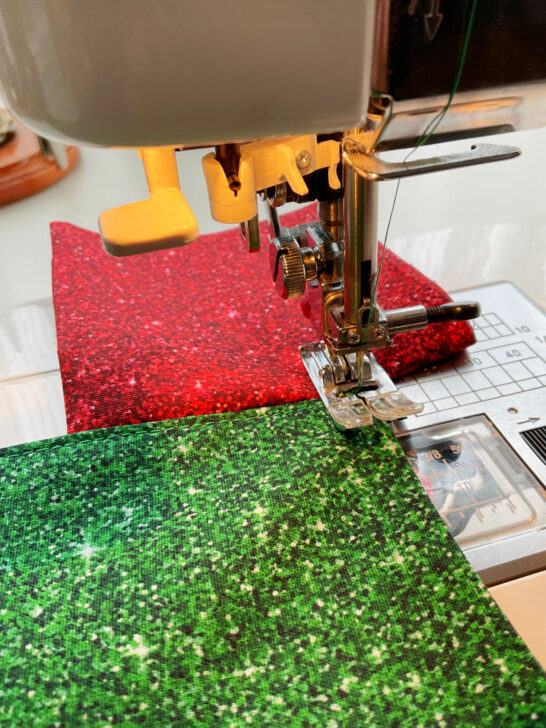
Step 2. Assembling the Christmas Placemat
Place fabric pieces right sides together and pin.
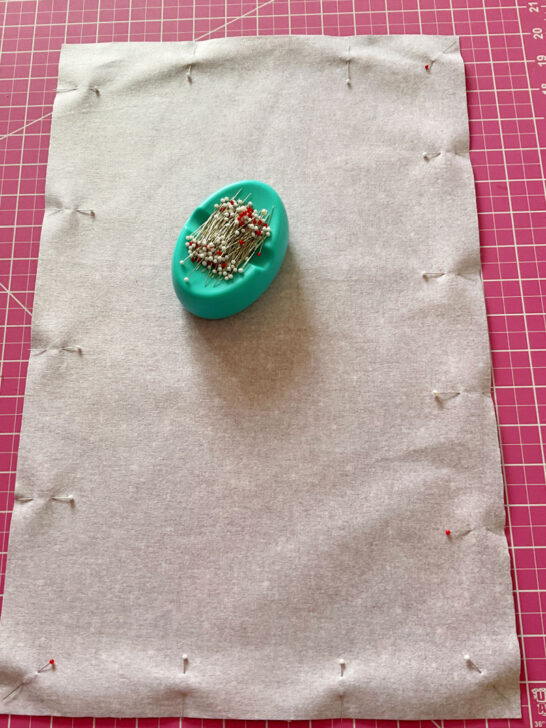
Sew around the perimeter with a 1/4″ seam allowance, leaving about 4″ opening on one side for turning.
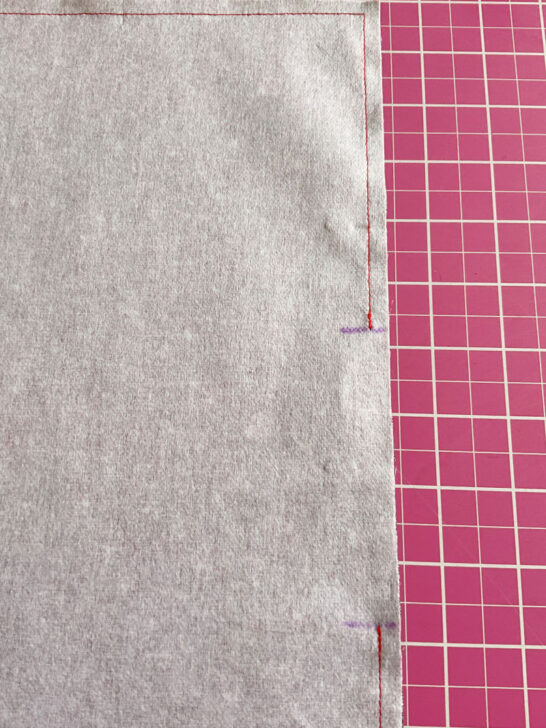
Clip corners and turn right side out.
Now, this might sound simple, but there’s an art to it. You need to get this step right. If you want to level up your corner-turning game, go over to my tutorial Basic sewing techniques: How to sew corners and curved seams.
Take a quick study break, absorb some corner wisdom, and then hurry back. You’ve got placemats to perfect!
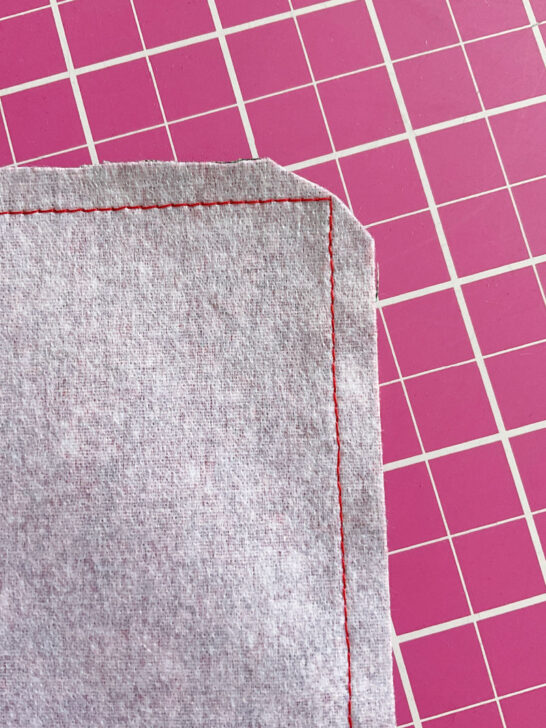
Press the edges flat, tucking in the raw edges of the opening.
Topstitch around the entire perimeter, closing the opening in the process. Oh sure, sounds as easy as pie, right? Well, not for everybody.
First off, those corners. Four of them, lurking there like mischievous little troublemakers. Without the right know-how, your needle might decide to throw a tantrum right at the corner, refusing to move forward just when you need it most. Sounds familiar? I thought so!
But I’ve got a trick up my sleeve that’ll turn you into a corner-conquering champion. It’s so simple, you’ll wonder why you didn’t think of it yourself. Curious? Go to my YouTube video where I spill the beans on this technique.
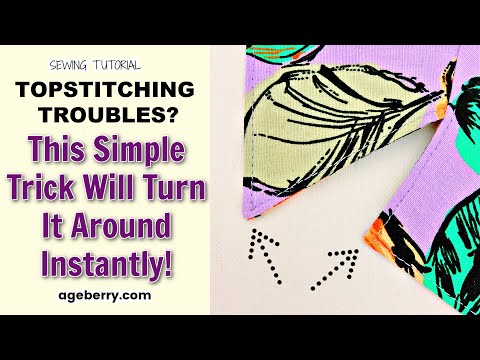
Once you’ve got this trick, you’ll be topstitching around those corners with the confidence of a seasoned pro. No more stuck needles, no more muttering under your breath – just picture-perfect topstitching.
And while we’re at it, let’s talk about that wobbly topstitching that looks like you’ve had one too many … eggnogs. Want to sew straight? Did you spot the secret weapon in this image? Can you guess which presser foot I’m using?
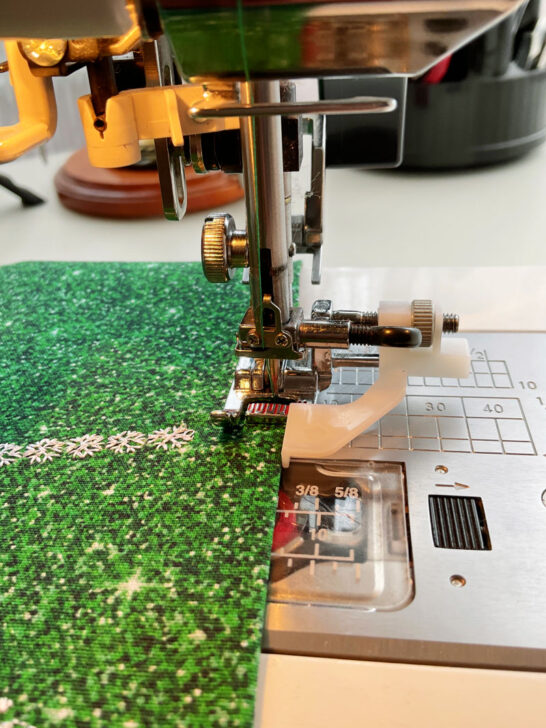
So, take a detour to my tutorial How to sew straight.
Step 3. Decorative Stitching
Select four decorative stitches on your sewing machine (For example, I chose snowflakes, Christmas trees, and two complementary patterns).
Thread your machine with white embroidery thread in both the needle and bobbin.
Starting about 1/2″ from one short edge, sew the first decorative stitch line across the width of the placemat.
Repeat with the remaining three stitch designs.
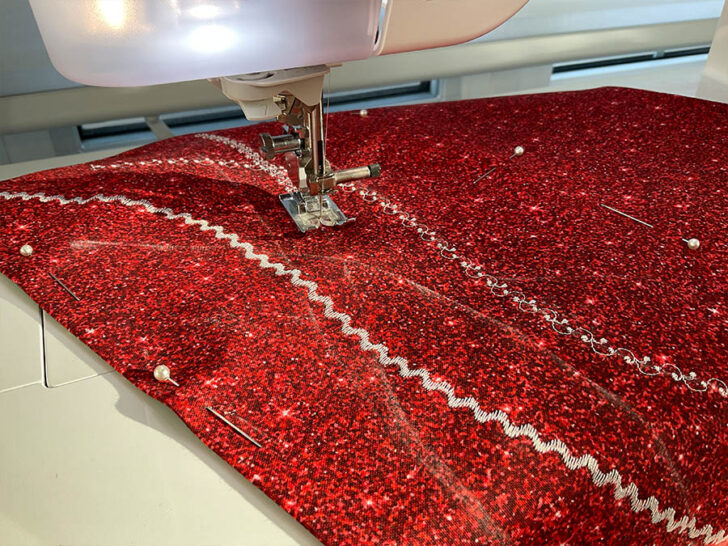
Unlike simple straight lines, we’re going for a more intricate and eye-catching design here: elegant curved lines that “dance” across the placemat, intersecting at various points to create a visually appealing pattern. It’s like a festive roadmap for Santa’s sleigh, if you wish.
You see, it’s not just about stitching from one side to the other – we’re creating a miniature work of art that’ll have your dinner guests wondering if you’ve secretly enrolled in a master class on embroidery.
The beauty of this pattern is that it looks complex, but it’s actually quite straightforward to execute. You’ll follow a pre-designed pattern, guiding your machine along the curvy lines.
Remember, this pattern will be visible on both sides of your reversible placemat, so you’re essentially getting double the decorative bang for your stitching buck. It’s efficiency and style, all wrapped up in one crafty package.
Now, let’s talk about that decorative topstitching design. I’ve created a PDF template for you (you can find it in my Resource Library), but it’s not the standard 12 x 18 placemat size. Why? Well, I didn’t want to turn this into a jigsaw puzzle by splitting it across multiple pages to print. So, I’ve gone with a smaller version to keep things simple.

This template is just to get your creative juices flowing. Feel free to use it as a starting point. Draw your own unique design that fits your placemat perfectly.
Once you’ve crafted a design you love, trace it onto vellum paper to create a reusable template. Now you can transfer that same fabulous design onto each placemat in your set, ensuring a consistent look.
Step 4. Final Press and Inspection
Time for the grand finale – the final press! This is where we transform our placemats from ‘fresh off the sewing machine’ to ‘ready for their dining table debut’.
For this, I use the Sundu ironing station. It’s a great tool that makes pressing easier and more effective. I’ve been using it for a while now and really like how it performs.
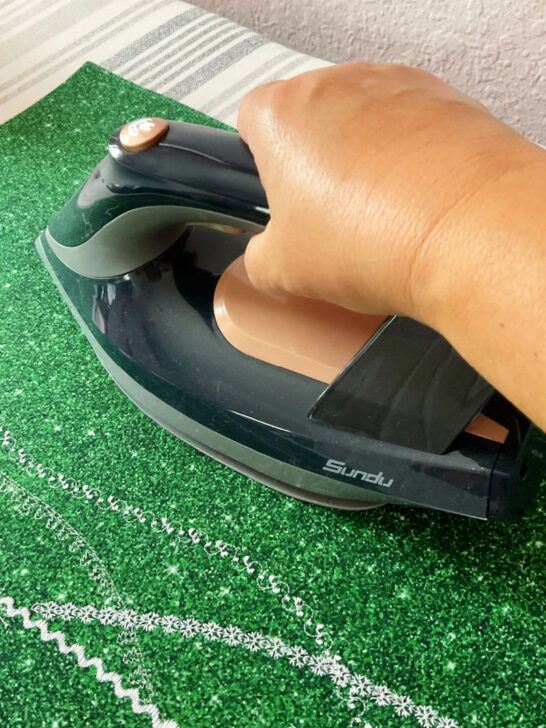
Interested in learning more about it? I’ve written a detailed review on my site. If you’re thinking about upgrading your ironing setup or just curious about what’s out there, you might find it helpful.
So, before you reach for that old iron that’s been hiding in your closet since the Stone Age, why not take a quick look at my review? It might give you some ideas for your own crafting setup.
✅ Related tutorial: Sundu Pro Steam Station with Ceramic Soleplate Review: Iron-y Good?
Inspect for any loose threads and trim if necessary.
Tips
Oh, would you look at that? I managed to create this tutorial in only 4 steps. Usually, I have more steps than Santa has reindeer!
And thank goodness for that simplicity, because I had to whip up 13 of these placemats while visiting my daughter. Talk about a holiday crafting sprint. I was stitching faster than elves on espresso. This project is so quick, you could probably make a set for the entire North Pole before the cookies are done baking. Now, before you zoom off to start your own placemat marathon, here are a few tips to keep in mind.
The spark-like pattern in the fabric helps hide small spills or stains, making it practical for everyday use.
Using the same thread in needle and bobbin ensures the decorative stitches look identical on both sides, perfect for reversible use.
This method allows for quick production, ideal for making multiple placemats or when time is limited.
Enjoy your festive, reversible placemat that’s ready to brighten up your holiday meals from either side!
Did you like this sewing tutorial? If you did, don’t forget to bookmark this pin (see below) on your sewing Pinterest board! That way, you can easily return to this post on how to make a Christmas placemat whenever you’re ready to start using it. Plus, make sure to follow me on Pinterest to stay updated with more sewing advice, step-by-step guides, and creative inspiration!

latest posts
- What Do You Call a Person Who Sews? I Asked My Readers and Got 1,408 Opinions
- DIY Round Purse: PDF Sewing Pattern and Detailed Instructions
- Mini Wonder Clips By Clover: Useful Sewing Tool Or Just Another Notion?
- Non-Slip Grips For Quilting Rulers: A Small Notion With A Useful Job
- Fabric Eraser for Sewing: What It Removes and When to Use It
- What Is The Best Thread For Sewing Machine Projects? Let’s Find Out!
- Butterfly Quilt Block Tutorial – Foundation Paper Piecing
- How To Sew Quilt Squares So The Corners Match
- Sewing With Fork Pins: How They Help With Pattern Matching, Slippery Fabric, And Seams