
Crumb Quilt Tutorial: Easy Ideas for Making Fabric from Scraps
I’ve discovered something interesting, and I need to share it with you. You know how we sewists are basically fabric COLLECTORS? Like, we see a sale and suddenly we need seventeen fat quarters we have no plans for?
Yeah, we’re living our best hoarder lives and we’re NOT sorry about it!
But the REAL treasure isn’t even the fabric you buy. It’s the LEFTOVERS.
That little pile of fabric crumbs on your cutting table? It’s not trash. It’s future “designer yardage” in disguise. You know the pile I mean. The stringy bits. The odd angles. The pieces so tiny you feel guilty keeping them… and somehow even more guilty throwing them away.
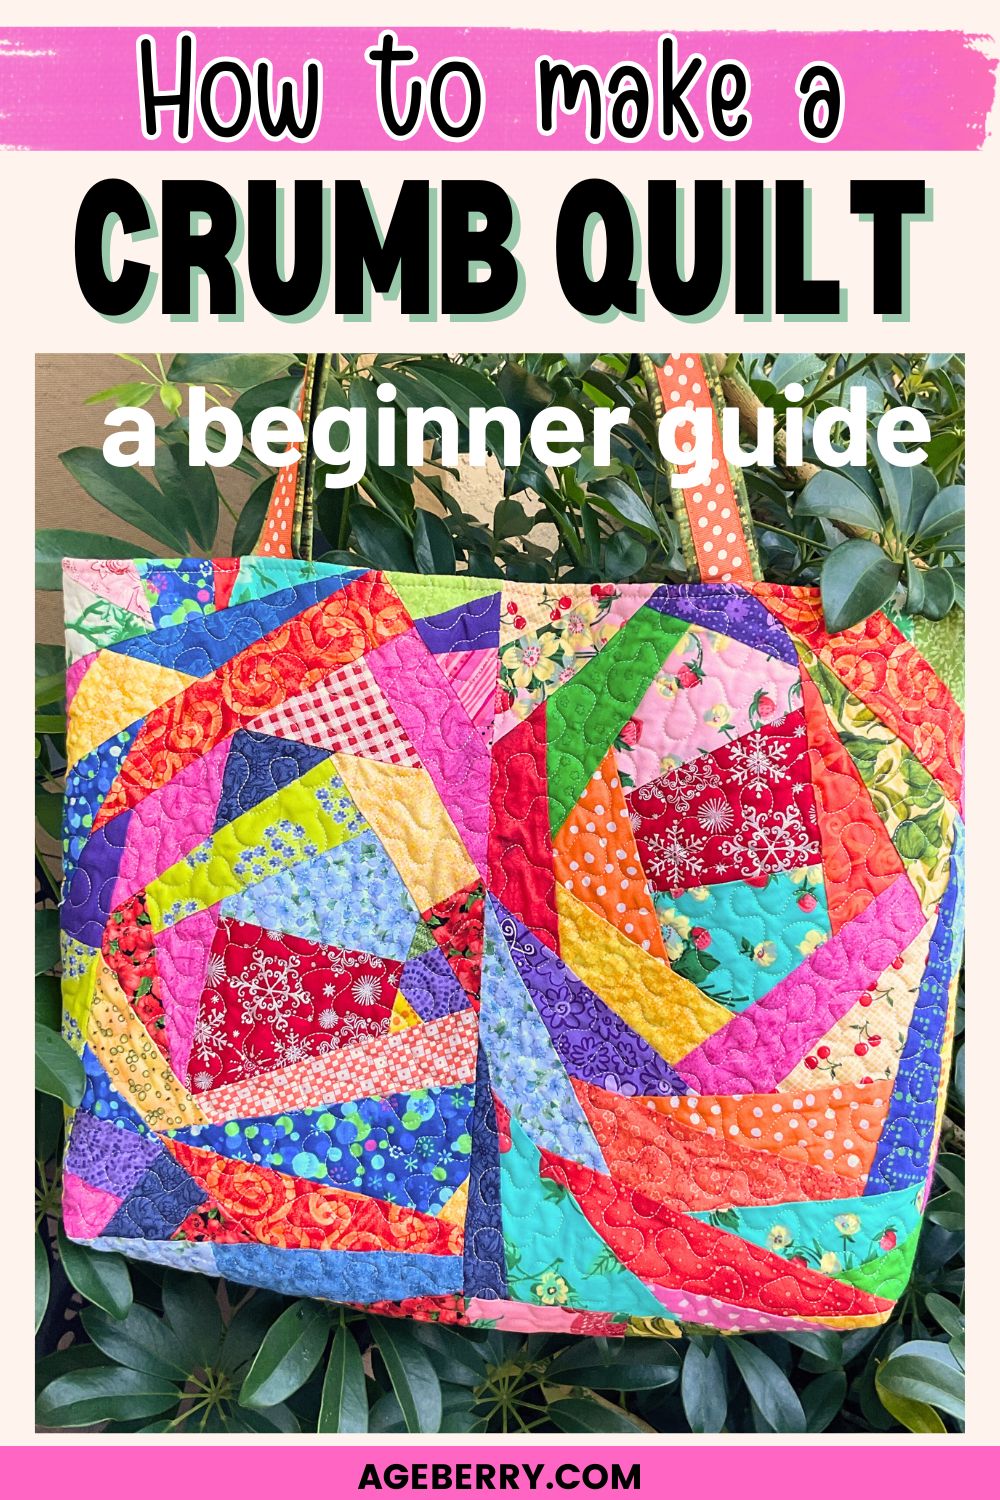
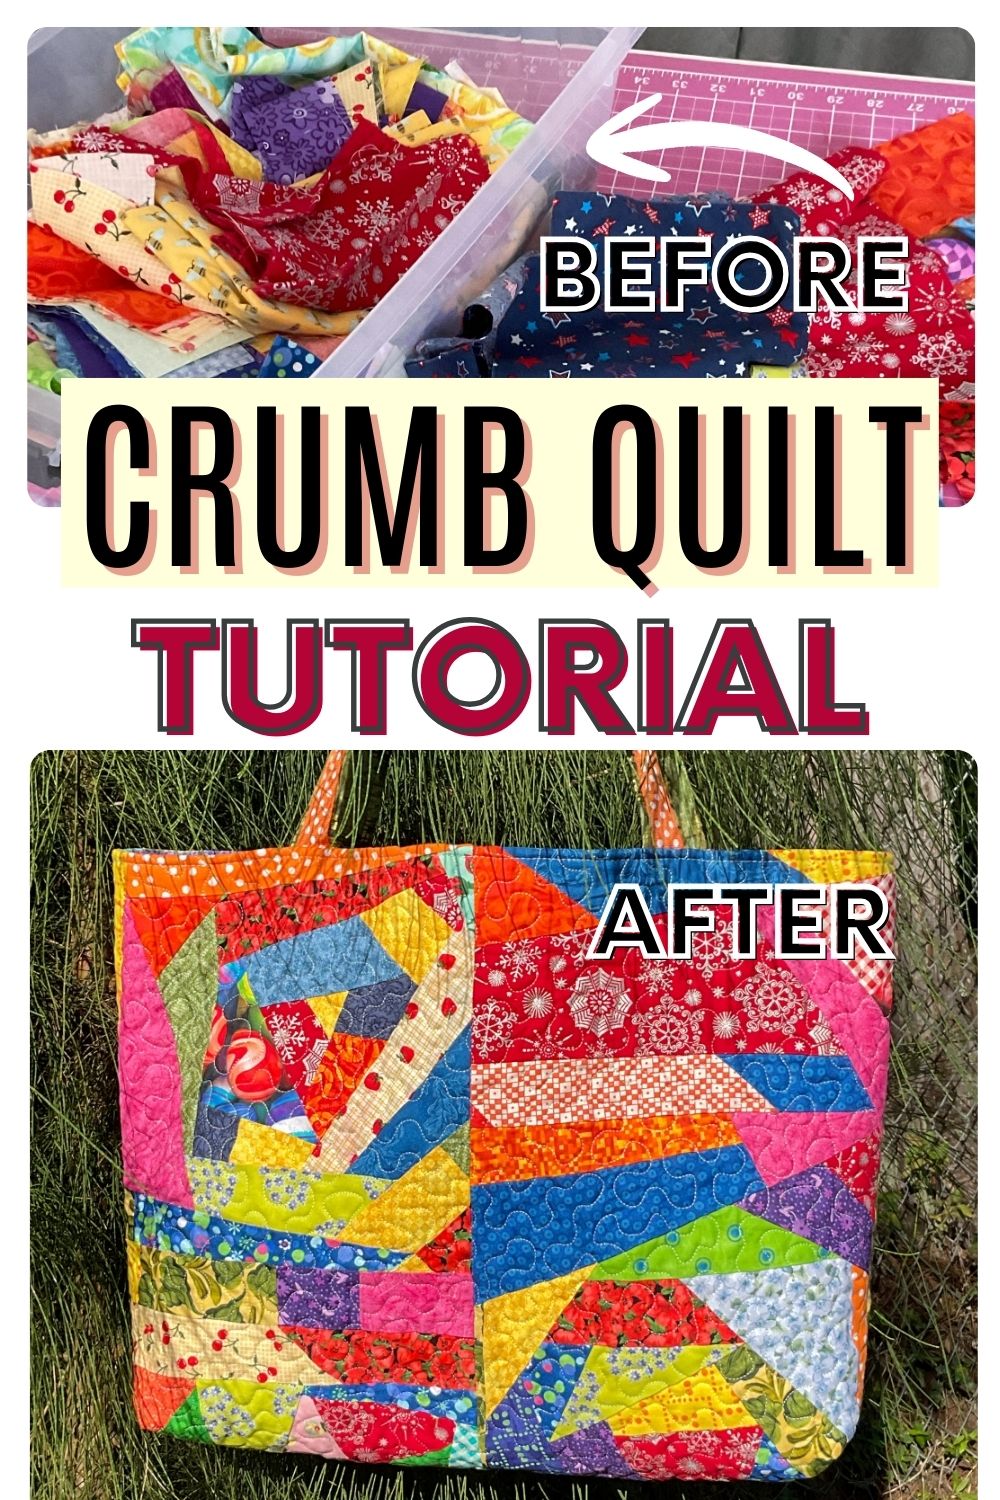
This tote bag of mine started from a box of those “useless” scraps I almost tossed. Crumb quilting turned that fabric guilt into the most joyful, chaotic, gorgeous “new fabric.”

And of course, right in the middle of my sewing epiphany, my husband walked into the sewing room. He saw me joining tiny, crooked crumbs into something that definitely did not look like a quilt yet. He stared. Then he opened the cabinet with my neatly folded quilting cotton and said:“You have cabinets full of nice fabric… and you’re sewing this crap (well, scrap)? Where is the logic?”
And I’m sitting there like, “Logic?? No, this is quilting. We don’t do logic here. We do MAGIC!”
Honestly, I did not have a good answer. But I have a quilted tote bag in the end, so I win.
✅ Related tutorial: Pins, Patience, and Pajamas: The Hilarious Truth About Sewing with Husbands Around
This tutorial will show you exactly how to make your own crumb quilt “fabric,” and then turn it into something real: a tote bag, a quilt, a cushion, placemats… whatever your project heart wants.
What Is a Crumb Quilt?
Crumb quilting is patchwork with a lot of personality.
In simple terms:
Crumb quilting uses very small, irregular fabric scraps (crumbs) to sew new pieces of patchwork “fabric” that you later cut into blocks, borders, or shapes.
You build it in two stages:
- Patchwork stage – You sew tiny pieces together until they grow into larger, irregular panels.
- Quilting stage – You layer those panels with batting and backing and quilt them.
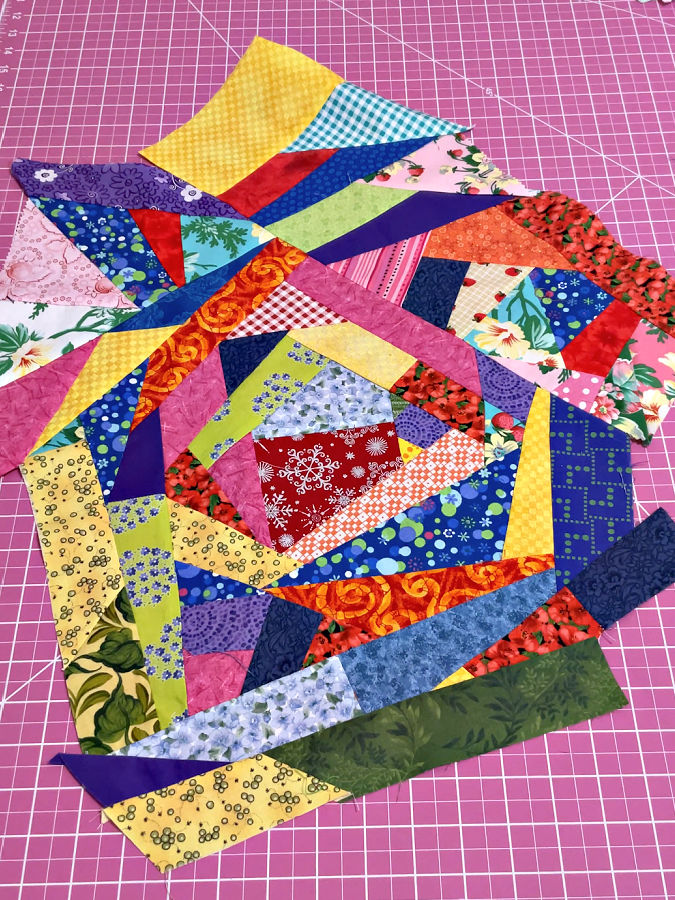
So instead of starting with tidy 2 ½” strips or carefully cut squares, you start with whatever chaos fell off your cutting table last week. And end up with something like this:
Crumb quilting vs traditional scrap quilting
Traditional scrap quilting usually still follows a plan. You cut leftover fabric into controlled shapes:
- squares
- rectangles
- half-square triangles
They might come from many fabrics, but the shapes are regular and predictable.
Crumb quilting… does not care about any of that. You:
- join odd angles
- sew seams that are not parallel to anything
- use pieces that would scare a rotary cutter
The result looks more like a mosaic than a classic quilt pattern.
Is crumb quilting the same as crazy quilting?
Not quite. They are cousins, but not twins.
- Crazy quilts often use decorative stitches over the seams. Think Victorian, fancy, and embellished.
- Crumb quilts usually stick to quilting cotton and normal piecing. The “crazy” part comes from the tiny pieces and wild mix of prints, not from fancy embroidery.
You can absolutely add decorative stitches if you want, but crumb quilting works very well even with simple straight-line quilting.
✅ Related tutorials: 21 Scrap Fabric Projects to Transform Your Textile Trash into Treasure
The “new fabric” concept
This is the part that makes crumb quilting so fun. You do not treat crumbs as pieces in a layout.
You treat them as… raw ingredients.
You sew them into crumb panels. Those panels become your:
- new “yardage”
- new borders
- new blocks
- new bag exteriors
You are not trying to place each little print perfectly. You are growing a chunk of fabric that never existed before.
What counts as a “crumb”?
Crumbs are just scraps that shrank.
If a regular scrap is big enough to cut a 2 ½” square, a crumb is:
- smaller
- weirder
- and often shaped like something a toddler cut with safety scissors
Rough idea:
- Little pieces under about 2 ½” in at least one direction
- Narrow strings that are maybe ¾”–1 ½” wide
- Corners from trimming blocks
- Bits left after trimming seam allowances
If you only have big pieces, you can absolutely cut them smaller. Yes, on purpose. I know that sounds wrong, but it works.
Best fabrics for crumb quilting
Crumb quilting is friendliest if you keep the fabrics similar in weight.
Best choice:
- Quilting cotton (100% cotton, medium weight)
Fabrics to avoid mixing into the same crumb panel:
- Heavy denim
- Upholstery fabric
- Bulky corduroy
- Sweater knits
- Super sheer voiles or chiffons
These can work in separate projects, but if you combine them with regular quilting cotton in one crumb block, the seams get lumpy.
What You’ll Need
A few years ago, I made a decision that every sewist understands and every non-sewist finds suspicious. I bought an entire sewing room at a garage sale.
The woman had been a quilter. Along with rulers, notions, and mysterious templates, I brought home a huge container full of fabric cuts:
- small rectangles
- random squares
- leftover triangles
- strange strips
Nothing matched. Nothing looked big enough for a regular quilt. So that container sat in my room. Waiting for its glorious hour.
Crumb quilting was that hour. I decided to use those bits, free some space, and turn chaos into something useful.
Here is what you need to do the same.
Note: Some of the links on this page are affiliate links. This means I will receive a commission if you order a product through one of my links. I only recommend products I believe in and use myself.
Supplies
- Box of scraps / crumbs
Anything small, odd, and cotton. The weirder, the better.
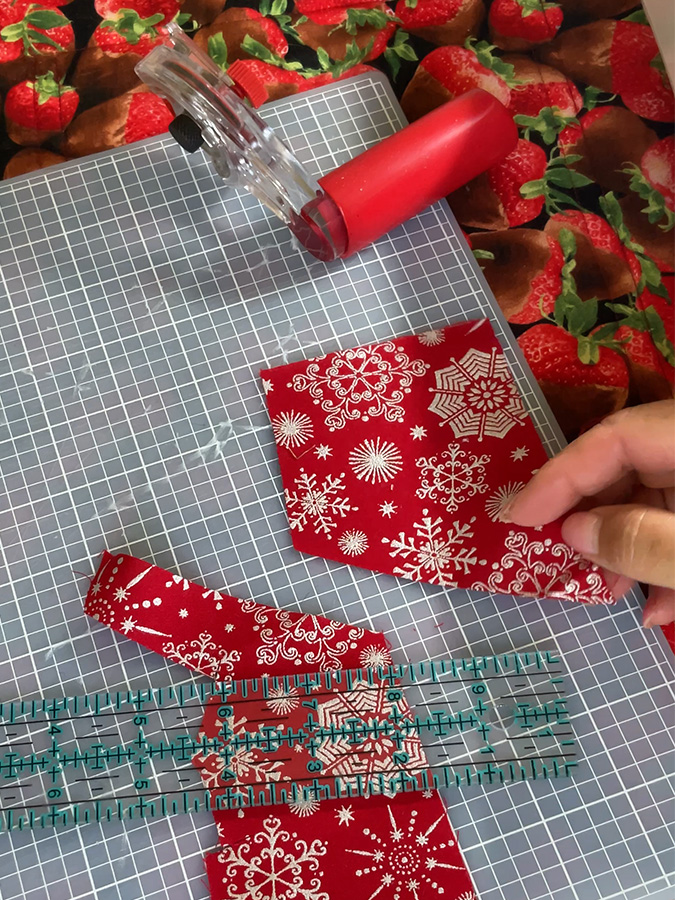
- Finger presser or seam roller
A little gadget to press seams with your hand at the machine. A strong fingernail also works.


- Rotary cutter and cutting mat
You will use them later to tame your crumb panels into actual rectangles.


- Fabric scissors
Great for trimming uneven seam allowances down to about ¼”.


- Sewing machine with a universal presser foot
No special foot required. A regular straight-stitch foot or universal foot is fine.
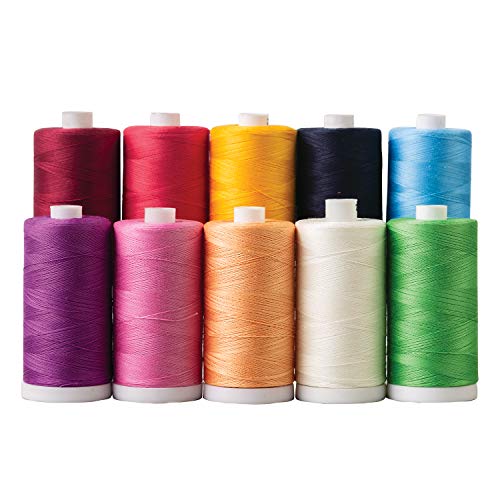
- Strong thread
I like a 40 wt polyester in off-white or light beige. It hides well among many colors and holds up to dense piecing. Avoid serger thread.
- Batting
Cotton or cotton/poly blend works well. Choose a thin batting with low to medium loft so seams flatten nicely.


- Backing fabric
For the quilt or tote bag you want to make.
- Fusible interfacing (optional)
Nice if you plan to turn your crumb fabric into bags, pouches, or other structured items. It adds stability.


- Iron and ironing board or pressing mat
You will steam those crumb panels into obedience before cutting.


- Ruler
A regular quilting ruler, at least 12″ long, is helpful for squaring and cutting blocks.


Do I need to sort my crumbs?
Short answer: No.
If you enjoy sorting, you absolutely can:
- lights
- darks
- solids
- novelty prints
This may help if you want stronger contrast or a specific color story.
But I am not that organized. I keep everything in one box. I dig through, grab what looks interesting, and sew. The random mix often creates the most charming results.
How to Make a Crumb Quilt – Step-by-Step Tutorial
There are no rules (but a few gentle suggestions)
Crumb quilting is very forgiving. Still, a few guidelines make it more pleasant.
Fabric thickness
Try not to combine very different thicknesses. Quilting cotton with quilting cotton is ideal.
A tiny stripe of lawn among quilting cotton is fine. A chunk of heavy denim next to a voile triangle in the same block is not as friendly.
Grainline
Ignore it. Truly.
Pieces will sit straight grain, bias, and everything in between. The heavy quilting later will stabilize the whole thing.
Backstitching
I do not backstitch my crumb seams. And no, they do not fall apart.
Why?
- I set my stitch length very small – about 2 mm.
- Almost every seam will cross another seam later.
- The final quilting layer stitches across everything again.
So you save time and thread, and the quilt is still very sturdy.
Color combinations
This is improvised patchwork. Nothing has to match.
Still, a few tricks can help:
- Avoid placing the same fabric twice right next to itself. Spread that print around.
- Add a plain or tone-on-tone fabric here and there to give the eye a place to rest.
- If a section looks too busy, add a strip of solid or near-solid. It behaves like a deep breath.
Thread and stitch settings
- Thread: medium-value neutral (off-white, light gray, beige). It blends into most fabrics.
- Stitch length for piecing: 2 mm. Short and strong.
- Foot: Universal presser foot is fine. Walking foot comes later during quilting if you want.
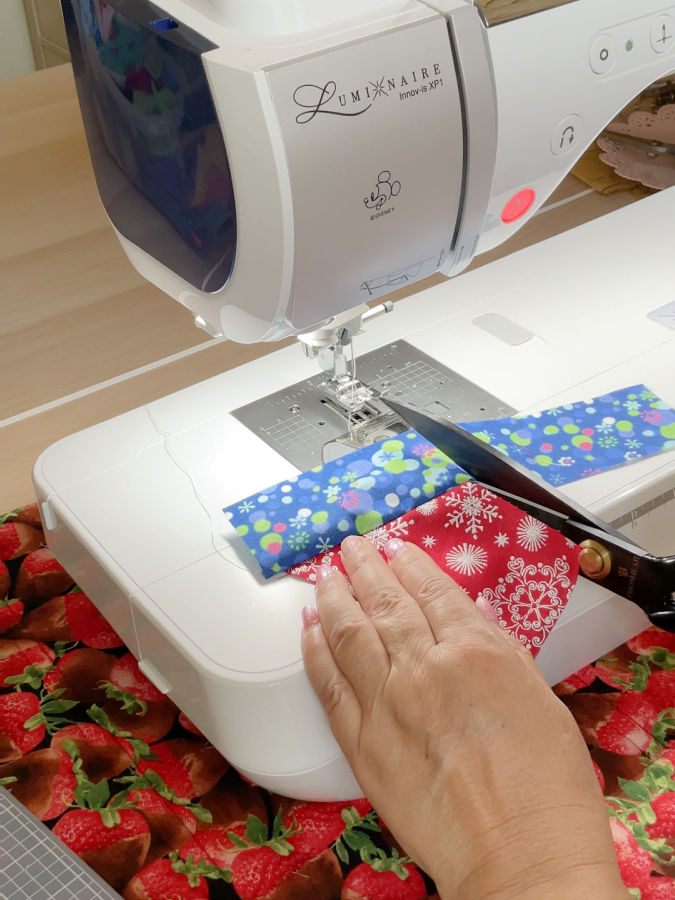
Step 1 – Choose two crumbs and sew the first seam
Pick two small pieces with at least one reasonably straight edge each; doesn’t have to be perfectly straight. If you do not have straight edges, no problem. Make them. With scissors or a rotary cutter.
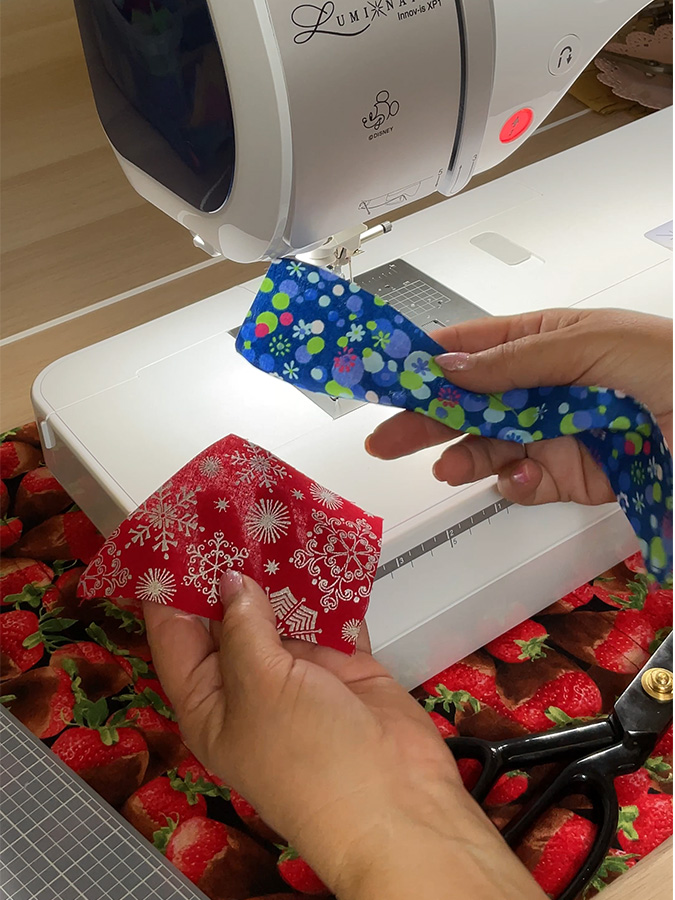
Put them right sides together and decide where you want the seam. Arrange the pieces and see what position looks best (to you).
Sew a straight line. The seam allowance will be a mystery amount in places. That is fine.
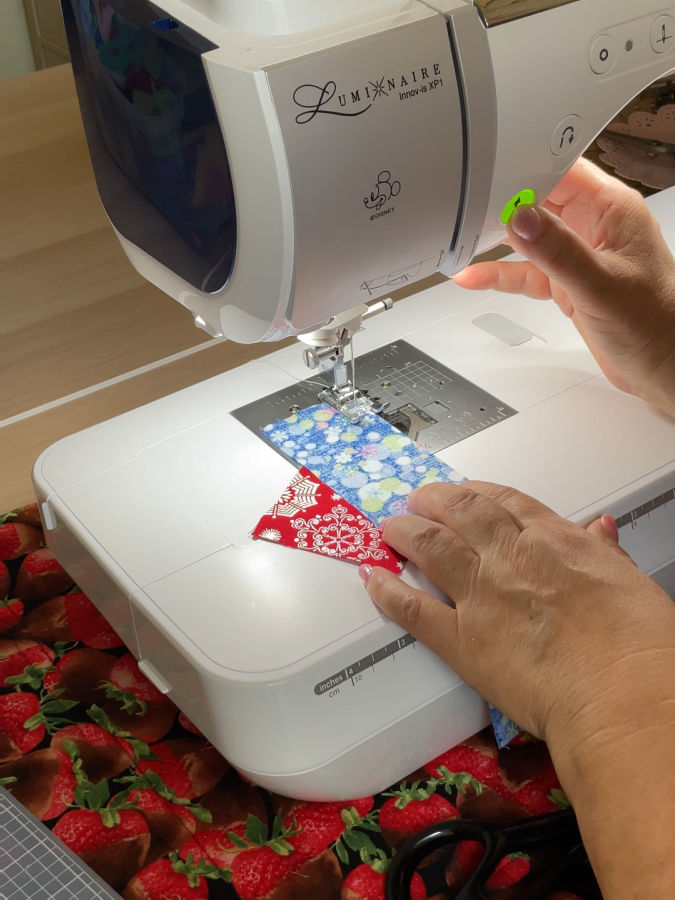
After sewing, finger press the seam to one side with your finger presser or your nail. Do not open the seam allowance. Always press them to one side in crumb work.
If the seam allowance is wildly uneven, trim it roughly to about ¼” with scissors. No need to be exact.
You now have a tiny, slightly awkward two-piece unit.
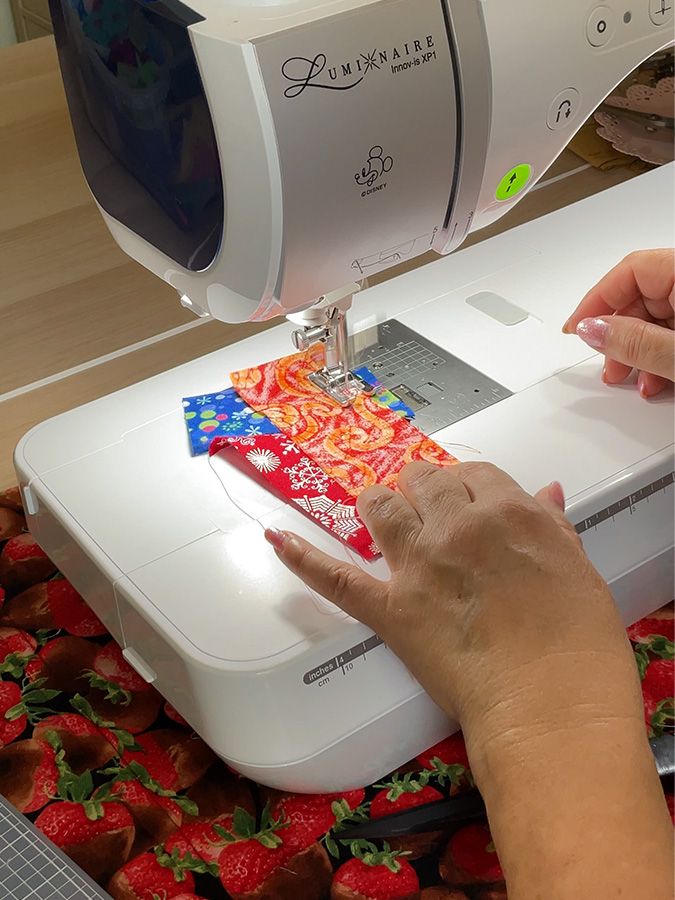
Step 2 – Add more pieces and “grow” the unit
Now the fun part starts.
- Take another crumb with a straight or straight-ish side.
- Place it right sides together along one edge of your unit.
- Sew the seam.
- Finger press the seam to one side.
- Trim seam allowance flaps down to about ¼” if needed.
Repeat, repeat, repeat.
Do not worry about creating perfect squares. The goal is to grow the piece, not to stay tidy. Your unit will become an irregular shape that looks like a country on a map.
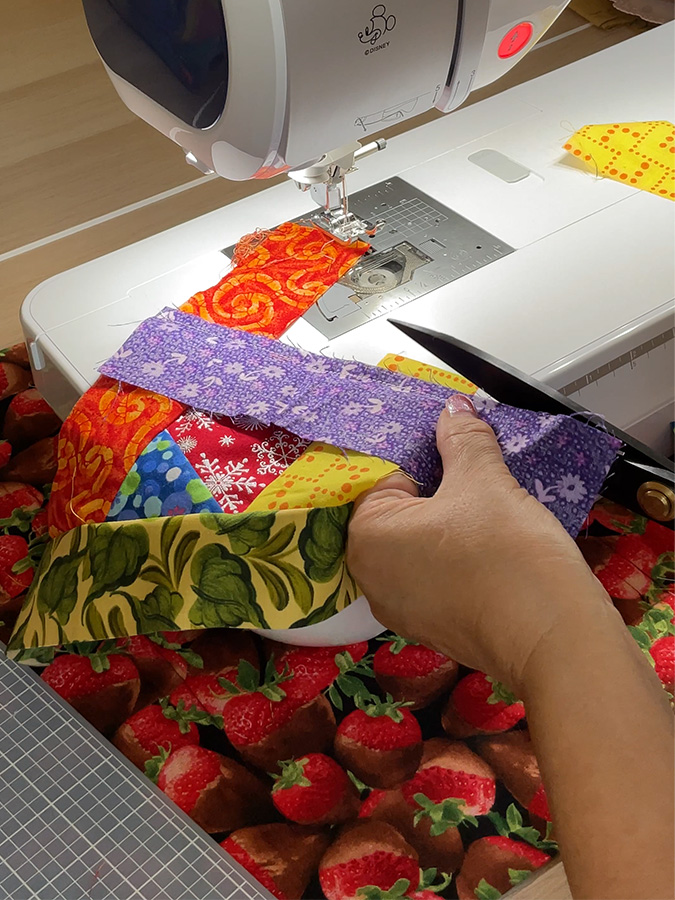
You can also:
- Sew a little “crumb strip” by joining several small pieces end to end.
- Then cut off segments of that strip and add them to the edges of your main unit.
Try not to place the same fabric right next to itself. If a favorite print pops up again, rotate it or move it to another unit.
Also remember to slip in plain or non-directional fabrics sometimes. They calm down strong prints and help the whole piece look intentional instead of noisy.
If you have bigger scraps and you notice they are taking over, cut them smaller.
This process is very relaxing. You decide how your new “fabric” looks. There is no rush. Just sew, press, trim a little, and watch the piece grow.
Keep going until the unit reaches roughly 8–10 inches in both directions. No need to square it yet. You just want enough area to cut proper blocks later.
Step 3 – Know when to stop and start a new piece
At some point, you will notice something. The edges of your unit are long, but the crumbs in your box are short. You keep auditioning pieces and nothing seems to stretch far enough or feel quite right.
That is the sign: this unit has grown enough.
Stop. Set that piece aside.
Start a fresh unit with two new crumbs. Repeat the process:
- sew
- finger press
- trim
- grow
Make another. Then another. Continue until you have enough crumb “fabric” to cut the pieces for your chosen project.
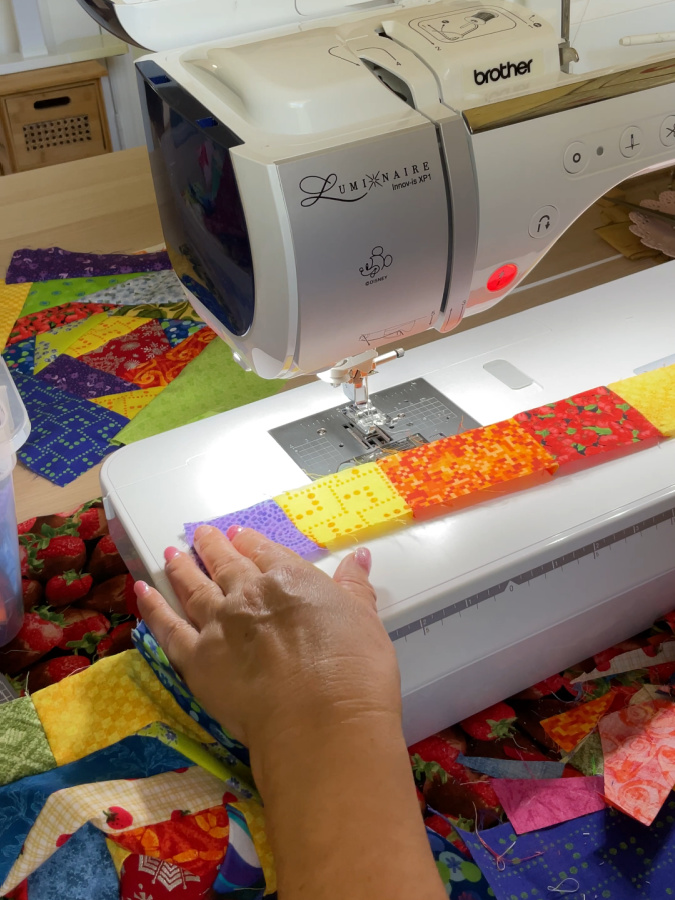
Step 4 – Turn crumb panels into blocks
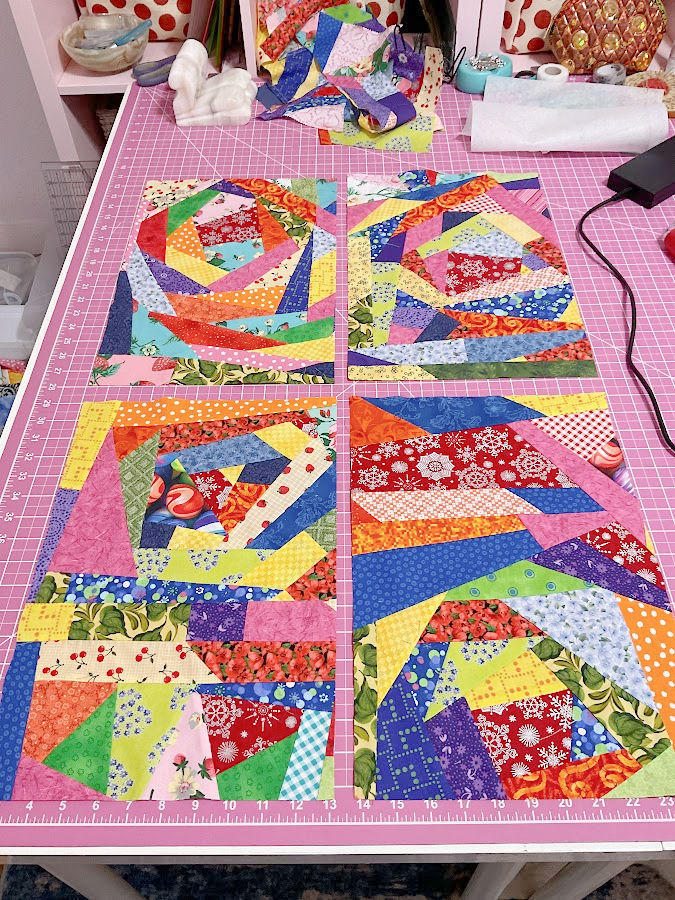
Once you have a pile of irregular crumb slabs, it is time to tame them. You will need to arrange and combine them in such a way to obtain pieces large enough to be used later for whatever project you have in mind.
I will call these pieces “crumb blocks”; each such block is made out of two or more crumb panels made before. They are still irregular in shape of course.
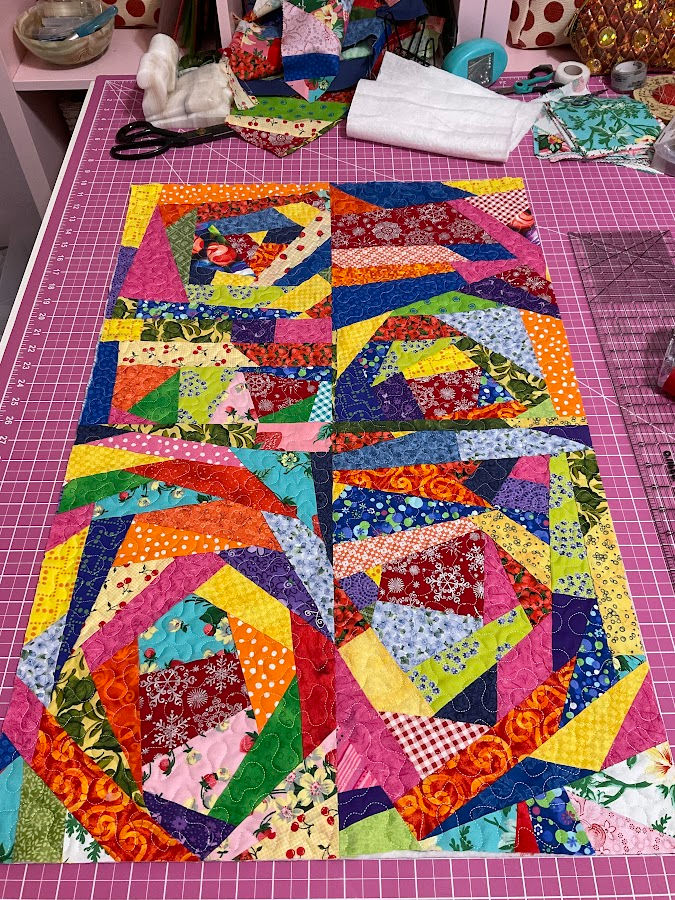
For my tote bag, I wanted four rectangles of crumb fabric, each 11″ x 16.5″. That meant I needed several slightly larger rectangular panels to cut from.
- Bring the crumb blocks to the ironing board.
- Press each one with a hot iron and steam. Press from the right side and the back. This flattens seams and helps everything behave.
- Check for little gaps or missed seams. At this time fix any obvious problem spots.
Now place a template and a quilting ruler on top. Align the ruler so you can cut out a full rectangle (or square) filled with crumbs. Trim away the uneven edges.
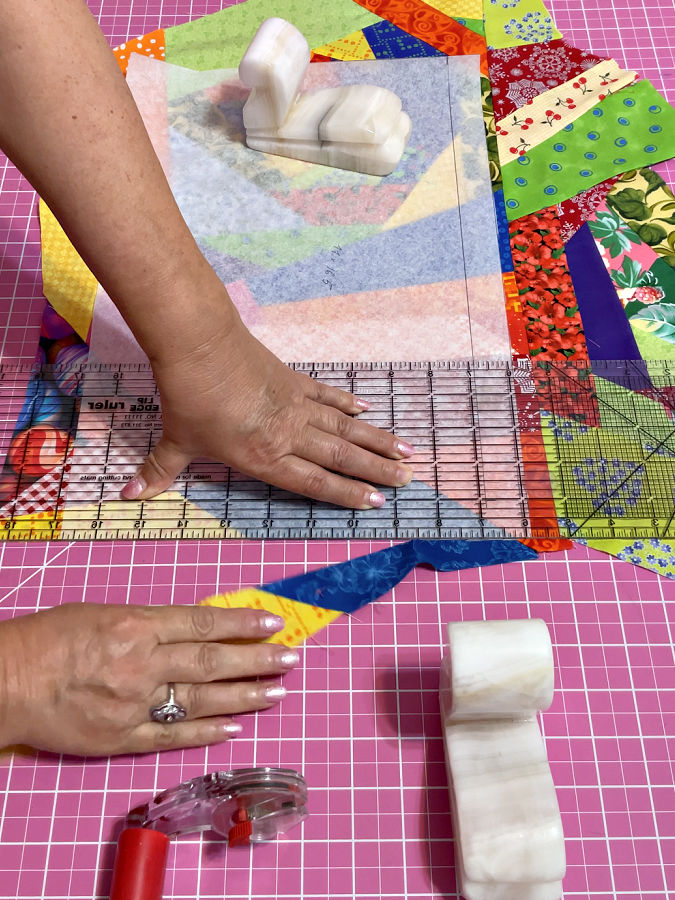
✅ Related tutorial:Adorable DIY Needle Book | Easy Tutorial for Beginners
For my tote bag, I cut four rectangles, 11″ x 16.5″. Then I sewed the rectangles together to form one big piece of crumb fabric large enough for the front and back of the bag.
Press the seams where you join these crumb rectangles as well.
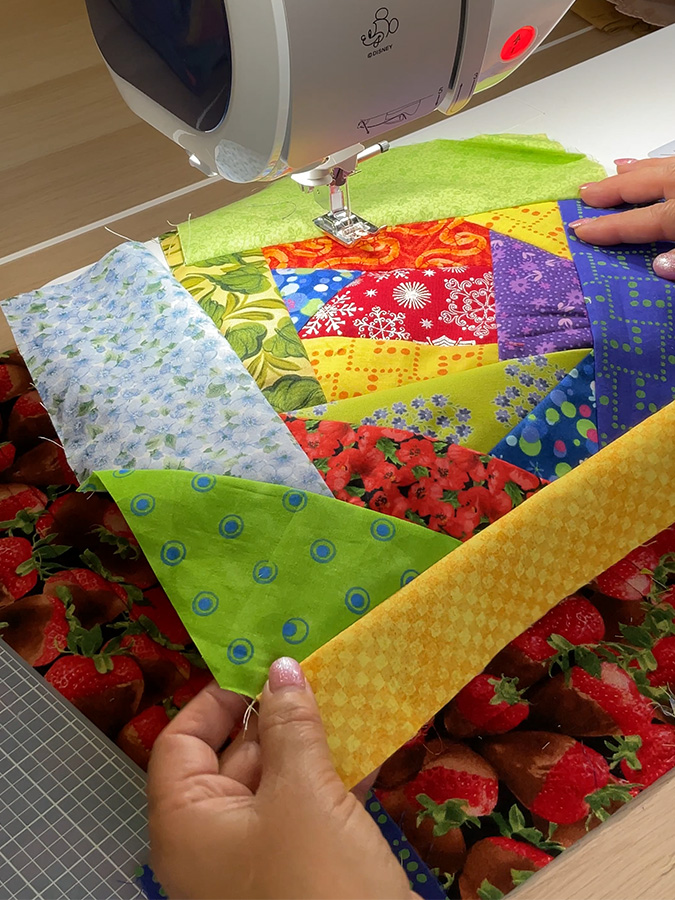
Step 5 – Make the quilt sandwich and quilt your crumbs
Now your crumb fabric behaves like real yardage. Time to quilt it.
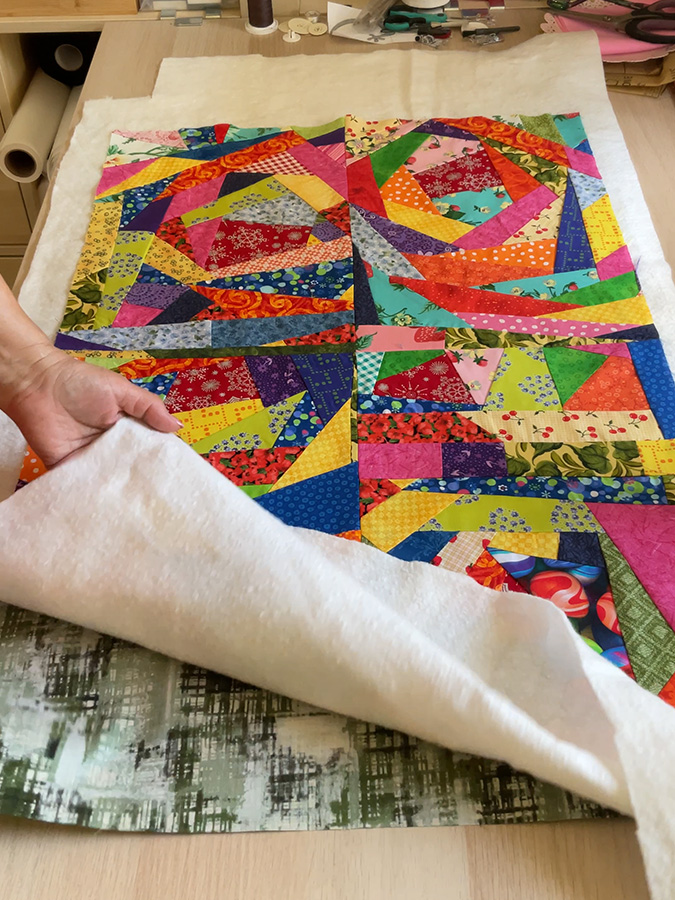
Build your quilt sandwich in this order:
- Backing fabric – wrong side up.
- Batting.
- Crumb top – right side up.
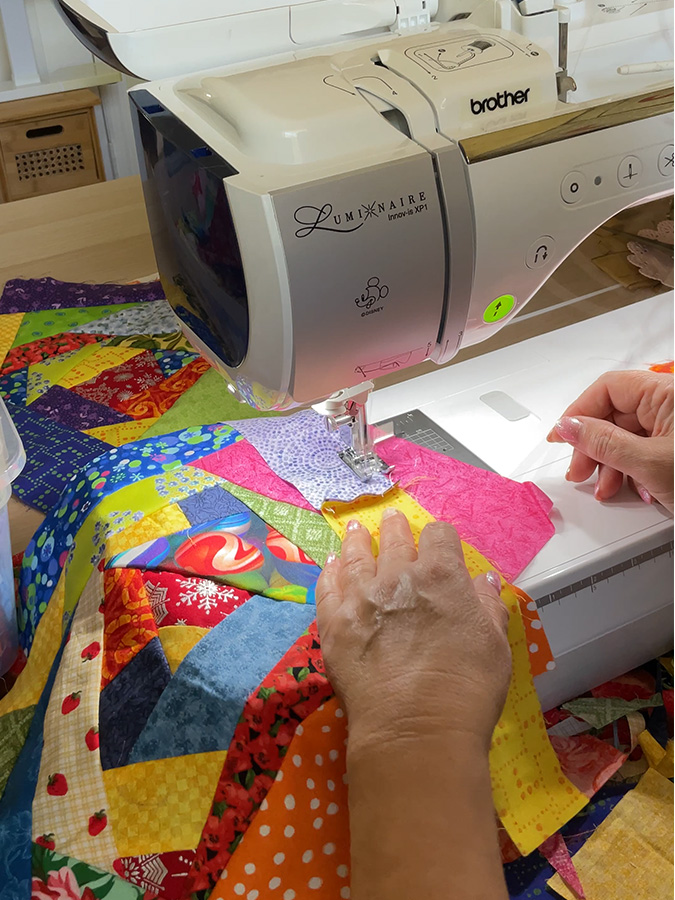
For my tote bag, I hooped each rectangle separately in a 10″ x 16″ magnetic embroidery frame and quilted them with a stipple design on my embroidery machine. One rectangle at a time.
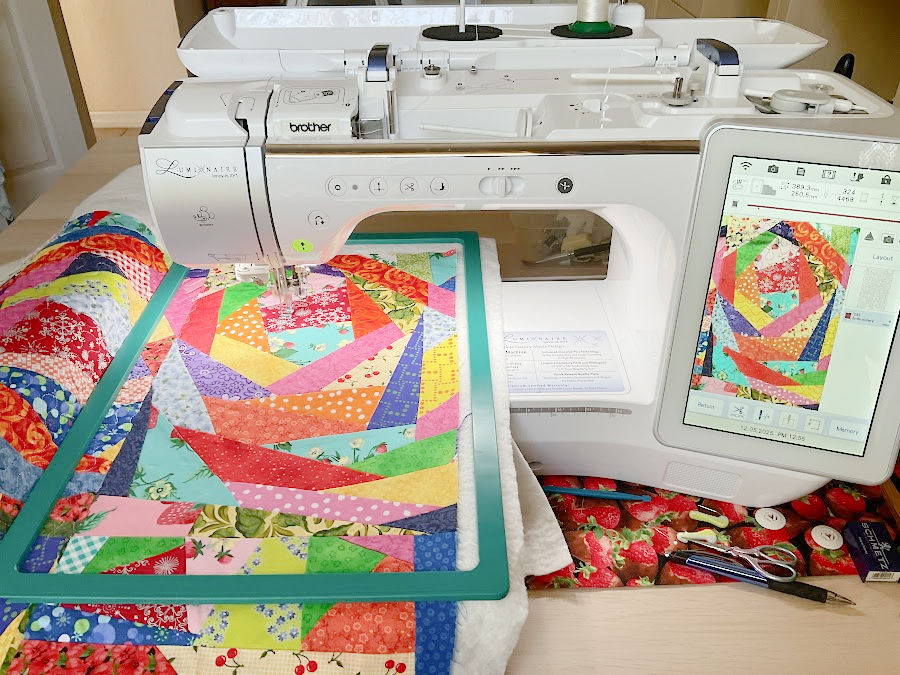
You can also quilt:
- with a walking foot in straight or gentle wavy lines
- with free-motion quilting in swirls, loops, or meanders
Quilting does something magical here. It flattens bulky seams and makes all those tiny pieces feel like one solid sheet of fabric.

Thread choices for quilting
- Medium-value neutral thread (light gray, beige, off-white) blends nicely across many colors. It softens the visual noise and lets the crumbs shine without extra drama.
- High-contrast thread (dark on light, bright color on muted crumbs) emphasizes the quilting texture. This works well if you want the stitch pattern to stand out as much as the patchwork.
Once you finish quilting, trim the edges so the piece is perfectly rectangular.
Now you can proceed with whatever project you had in mind: tote bag, table runner, cushion cover, or a whole crumb quilt.

Crumbs as Skill-Building, Not Only Scrap Disposal
As I pieced and trimmed crumb blocks, something funny happened. Every time I cut a seam allowance down, I created new crumbs.
The really microscopic bits went into the actual trash. I do not keep threads and dust-sized pieces. At some point, fabric truly becomes garbage and it is fine to recognize that.
But along the way, I noticed something: I was not just sewing a cute crumb panel. I was learning a lot.
Here is what this kind of sewing quietly teaches:
- Color “rules” are much more flexible than the books say.
They always say “this color does not work with that one.” After a few crumb blocks, I can tell you: every color finds a friend eventually. Put enough prints together, and the whole thing starts to blend. I now believe that orange, magenta, lime, and brown can share one block and everyone survives. - Value suddenly matters more than color.
I started noticing that if everything is medium in value, the crumbs kind of mush together. Add one very light patch or one very dark strip and the whole block wakes up. So now, when a section looks sleepy, I toss in near-white or almost-black. - Pressing habits improve without effort.
Crumb seams are short and often thick. If you skip pressing, your panel begins to puff like a badly made pillow. After a while, your hands almost automatically press after each seam. It becomes a rhythm: sew, finger press, sew, finger press, press with iron later. - You stop being precious about perfection.
A seam is slightly crooked? That corner does not meet another corner because there are no corners? Wonderful. You realize you can sew happily without the seam ripper in your hand. No one will notice that strange angle under layers of quilting. - Your machine control improves.
Small pieces mean short seams. Short seams mean plenty of starts and stops. You get very good at controlling speed, stopping at the edge, and turning work neatly. That skill helps when you go back to “proper” piecing. - You become a human fabric quality detector.
After sewing many crumbs together, you feel which cottons fray like crazy and which ones behave. Your hand starts to recognize good quilting cotton vs sad, floppy stuff almost instantly. - You learn your own tolerance for chaos.
Some people enjoy total randomness. Others prefer to keep crumbs to one color palette. After a few panels, you will know which type you are and how much “wild” your eyes enjoy.
Crumb quilting looks like nonsense to my husband. For me, it turned into a free workshop in design, color, and seam handling.
And fabric crumbs are not only for quilts. I use crumbs in smaller projects like bookmarks and fabric confetti designs too.
Crumb Quilts Feel So Addictive
Once you start, it is very hard to stop after just one panel. There are a few reasons for that.
The emotional side
- You finally use fabric you thought you “ruined” or “wasted.”
Those offcuts from trimming blocks? They get a second life. - Past projects turn into a memory collage.
You recognize the dress you made, the baby quilt, the table runner. All in one piece. - The whole thing feels low-pressure.
Nothing matches on purpose. If one seam is not straight, it is in good company.
What To Do With Leftover Leftovers
There is a lot of talk about “no waste” sewing.
But…sewing creates at least some waste. Full stop.
Crumb quilting reduces the amount of waste and that is wonderful. I used a whole box of scraps from that quilter’s sewing room, and it finally earned its space.
But I also created a new little bucket of:
- tiny threads
- odd shreds from trimming
- bits that are literally too small to stitch
And that bucket goes in the trash.
You can use some of the tiniest bits as stuffing for a pet bed or a small pillow, but even that has limits. At some point, garbage is just garbage. It is fine to accept that and still feel proud that you saved a big portion of your scraps and turned them into something beautiful and useful.
Your Next Step
Crumb quilting does not need a big plan. You do not need a full pattern before you start.
You just need:
- a pile of crumbs
- your machine set to a 2 mm straight stitch
- and two little pieces to sew together
So pull out that scrap box. Sew one small seam. Then another. Grow one panel to about 8–10 inches.
Once you finish your first crumb block, come back and decide what your new “fabric” wants to be. A bag? A pillow? A wall hanging?
And if your husband walks in, looks at the chaos, and asks why you are sewing “this scrap crap” when you own beautiful fabric… just smile. You are making your own custom fabric.
He will understand when you carry your new crumb tote to the store.
If you want to come back to this crumb quilt tutorial later, save the pin below to your sewing or scrap quilting board. It’s an easy way to keep these fabric-from-scraps ideas handy when you’re ready to start your own crumb quilt project. You can also follow me on Pinterest for more tips, tutorials, and inspiration!
latest posts
- What Do You Call a Person Who Sews? I Asked My Readers and Got 1,408 Opinions
- DIY Round Purse: PDF Sewing Pattern and Detailed Instructions
- Mini Wonder Clips By Clover: Useful Sewing Tool Or Just Another Notion?
- Non-Slip Grips For Quilting Rulers: A Small Notion With A Useful Job
- Fabric Eraser for Sewing: What It Removes and When to Use It
- What Is The Best Thread For Sewing Machine Projects? Let’s Find Out!
- Butterfly Quilt Block Tutorial – Foundation Paper Piecing
- How To Sew Quilt Squares So The Corners Match
- Sewing With Fork Pins: How They Help With Pattern Matching, Slippery Fabric, And Seams
I was given 2 boxes of scraps. This looks like the perfect way to use them. Thank you for sharing this information. I will share photos of what I make.
Scrap is useful; I have a number of projects that use scrap fabric, this is one of them. A more comprehensive list is here https://ageberry.com/tag/scrap-projects/