
Double Eye Sewing Machine Needle Guide: What It Is and How to Use It
A double eye sewing machine needle is a specialty needle with one point and two separate eyes positioned one above the other.
The first time I saw this needle, I had to look twice. Two eyes in one needle seemed unusual, and I wanted to know what it could actually do. Would the second thread create an interesting decorative effect, or was this simply another specialty needle that looked more useful than it really was?
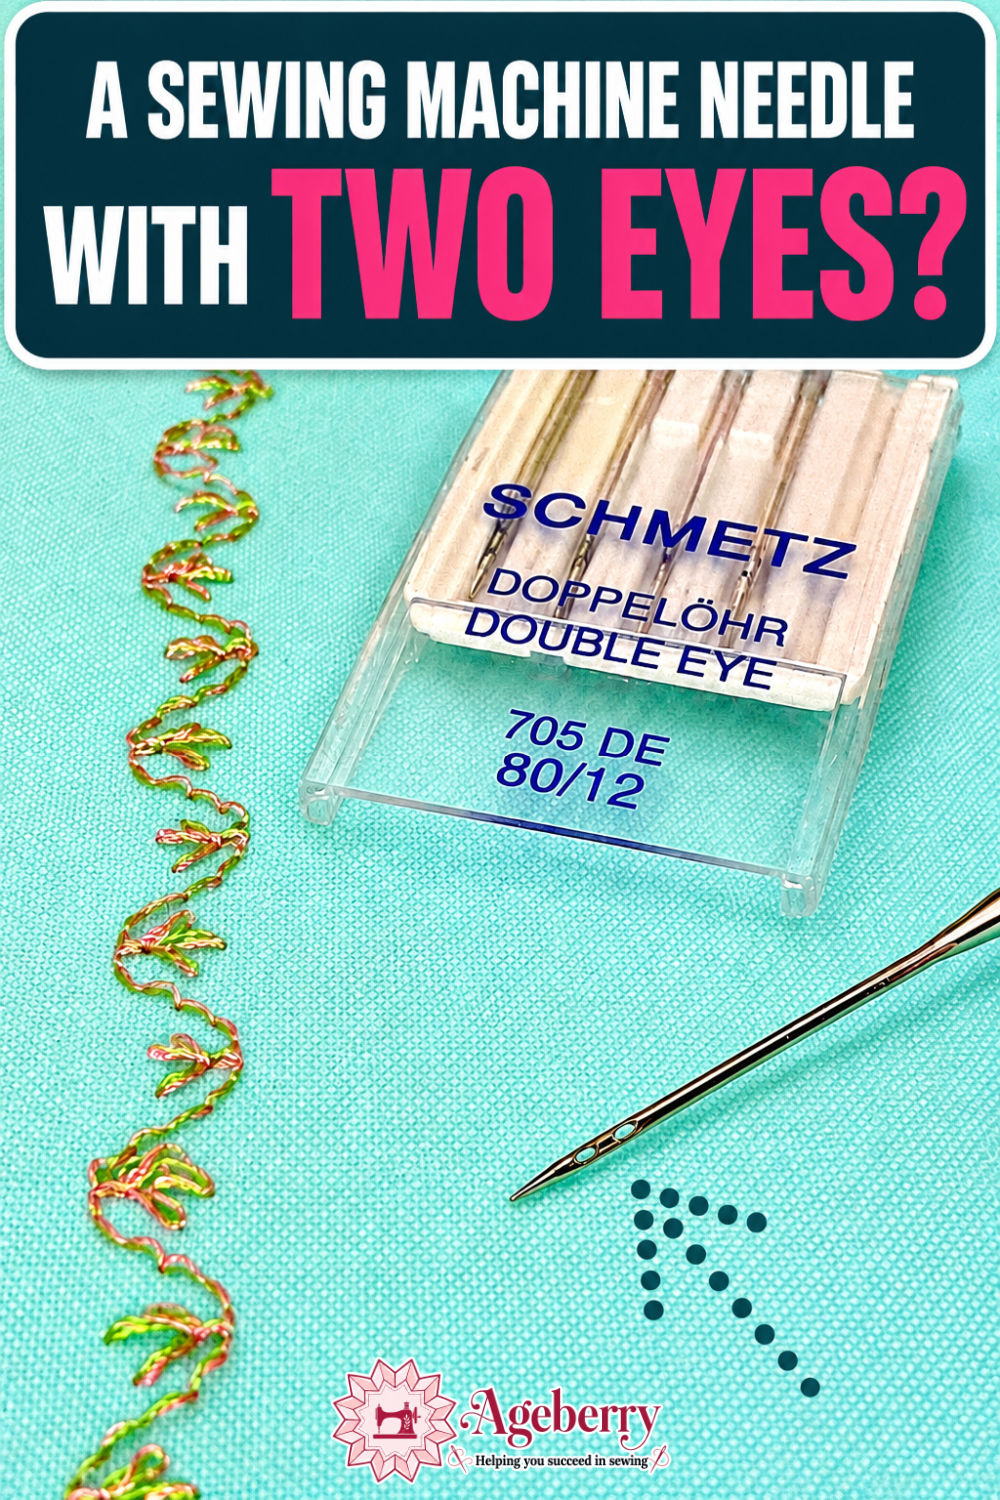
So I tested the double eye needle with different threads and sewing machine stitches. In this article, I’ll show you how the needle works, how to thread it, which stitches worked best, and what the finished stitching looks like.
Prefer to read without ads?
I created a PDF version of this guide for anyone who likes to keep sewing guides saved, printed, or easy to read without ads. It includes the same helpful information in a simple format you can download and use whenever you need it.
The PDF is available in my shop for a small fee. It’s a nice option if you want to support my work and keep this tutorial close to your sewing machine.
What Is a Double Eye Sewing Machine Needle?
Unlike a regular sewing machine needle, the double eye needle carries two upper threads at the same time. One thread passes through the upper eye and the other through the lower eye. When the needle enters the fabric, both threads pass through the same hole made by its single point. A regular bobbin thread catches and secures both threads underneath.
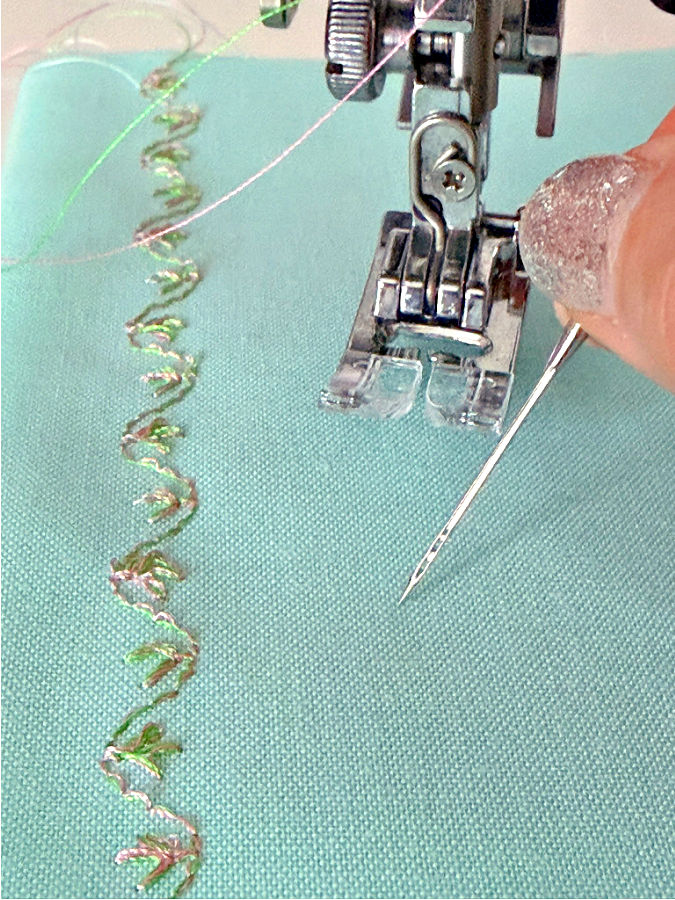
It is easy to confuse this needle with a twin/double needle, but they are not the same. A twin needle has two separate points and creates two parallel rows of stitching. A double eye needle has only one point, so both threads follow the same stitch path.
Note: Some of the links on this page are affiliate links. This means I will receive a commission if you order a product through one of my links. I only recommend products I believe in and use myself.
The double eye needle is mainly used for decorative machine stitching, topstitching, embellishment, shading, and texturing. It can add two colors to ordinary sewing machine stitches without requiring two separate rows of stitching.
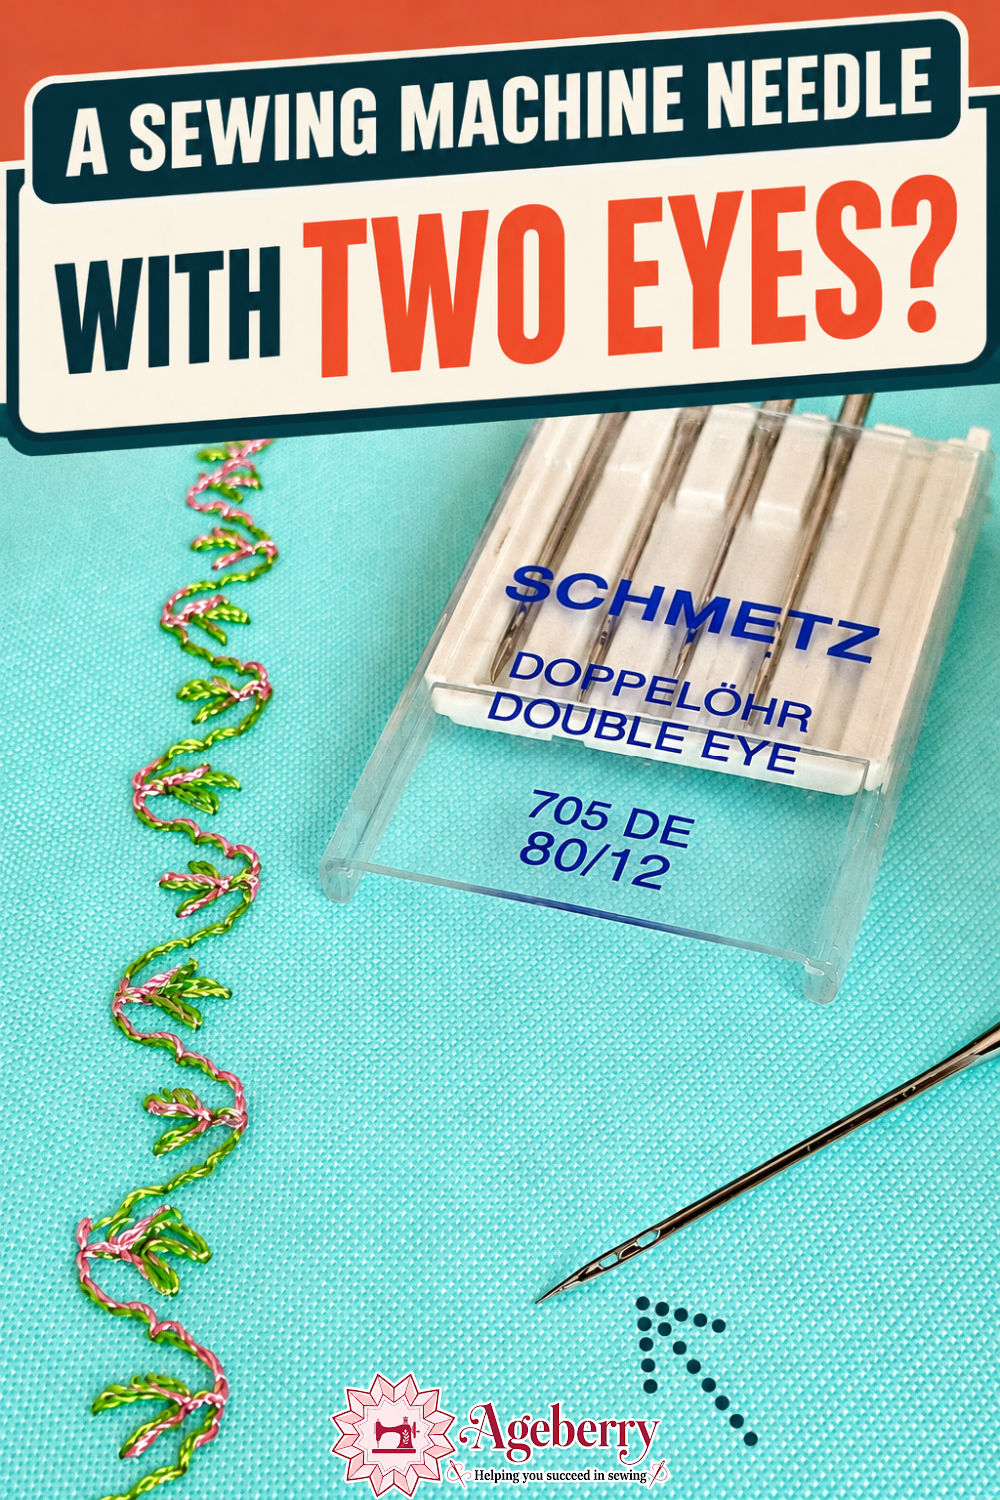
The SCHMETZ double eye needle is a Universal size 80/12 needle with a slightly rounded point. It uses the 130/705 H needle system made for standard household sewing machines.

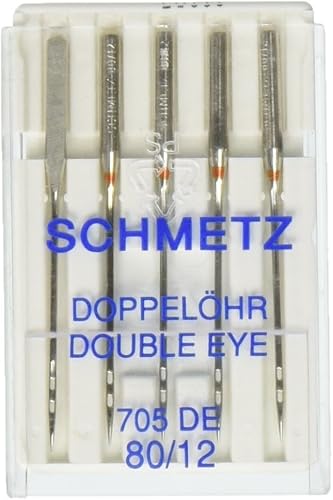
The two separate eyes do more than hold two threads. They keep the threads in a fixed order as the machine sews. This can affect where each color appears, especially in zigzag and decorative stitches. When two threads are placed together through one regular needle eye, their positions are not controlled in the same way.
Choosing Threads for a Double Eye Needle
Thread choice affects both the appearance of the decorative stitching and how smoothly the double eye needle works. The two threads must travel through separate, relatively small needle eyes at the same time, so it is best to begin with threads that move easily through the machine and are similar in thickness.
For the first test, use two smooth all-purpose polyester threads. Two cotton threads of the same weight are another good option. Once the machine is forming even stitches without skipped stitches, tangling, or thread breaks, you can begin experimenting with more interesting combinations.
Good combinations to test
- Two all-purpose polyester threads
- Two cotton threads of the same weight
- Light and dark shades of one color
- Two strongly contrasting colors
- Solid thread plus variegated thread
- Matte thread plus shiny embroidery thread
These combinations can make decorative machine stitching much more noticeable.
If you are unsure which thread fiber or construction is suitable, see my guide to sewing thread types and their uses. Thread thickness matters too, especially because both threads must pass freely through the two eyes. My tutorial on sewing thread sizes and how to choose them explains how thread weight and thickness are marked.
Some combinations require more testing. Two heavy topstitching threads may be too thick for the needle eyes and may create excess tension.
Very fuzzy threads, old thread, poor-quality thread, and two threads with dramatically different weights may produce uneven decorative stitches or repeated thread breaks.
What Thread Should You Use in the Bobbin?
For the bobbin, use a smooth thread that works well with the fabric and the two upper threads. It can be the same weight as the upper threads or slightly finer, but it should not be thicker. A heavy bobbin thread may add too much bulk and make it harder to balance the tension.
With two all-purpose polyester threads on top, regular polyester thread works well in the bobbin. With cotton upper threads, you can use cotton or all-purpose polyester bobbin thread.
With embroidery threads, I used prewound bobbins that I normally use for machine embroidery. The thread is smooth and slightly finer than regular sewing thread, and it worked well with the double eye needle.


The bobbin thread does not have to match both upper threads. If the back of the stitching will not be visible, choose a color close to the fabric. If both sides will show, use a neutral shade or a color that looks good with the upper threads. Always test the combination on a fabric scrap before sewing the project.
How to Install the Double Eye Needle
Before threading the double eye needle, install it carefully just as you would a regular sewing machine needle.
- Turn off the sewing machine.
- Raise the needle to its highest position.
- Remove the regular needle.
- Check that the new needle is straight and undamaged.
- Position the flat side of the shank as required by the machine.
- Push the needle into the needle bar as far as it will go.
- Tighten the needle-clamp screw securely.
- Confirm that both eyes are visible and accessible.
- Turn the handwheel slowly before sewing.
How to Thread a Double Eye Sewing Machine Needle
Threading a double eye needle is similar to threading a sewing machine with a twin needle because both setups use two upper threads. The main difference is at the needle, where each thread goes through a separate eye.
Step 1: Position the two thread spools
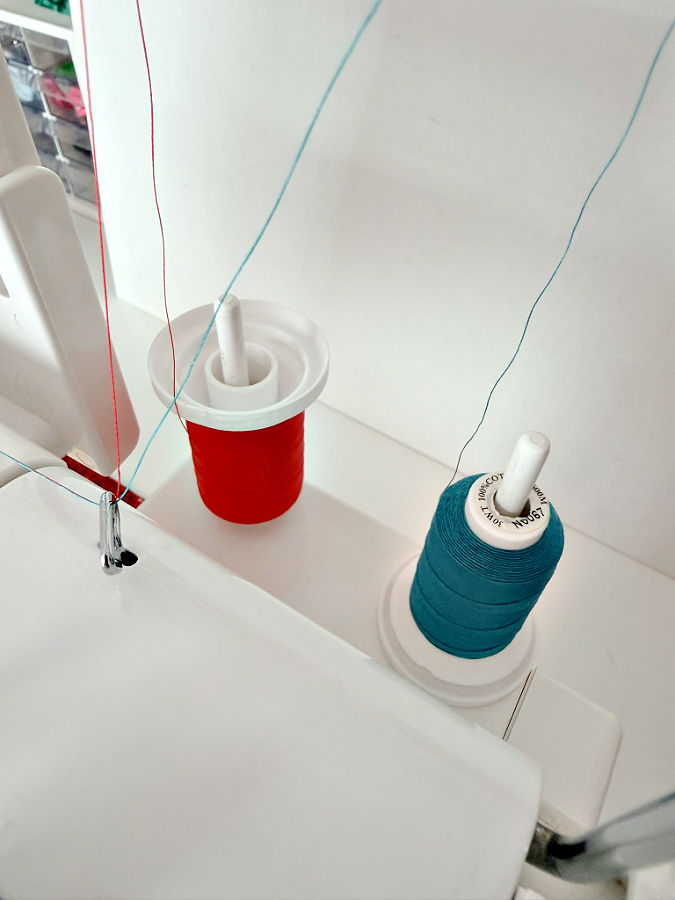
Place two spools of thread on the machine. You can use the main spool pin and an auxiliary spool pin. If your machine does not have room for a second spool, a separate thread stand is another option. You can read more about choosing and using one in my sewing machine thread stand tutorial.
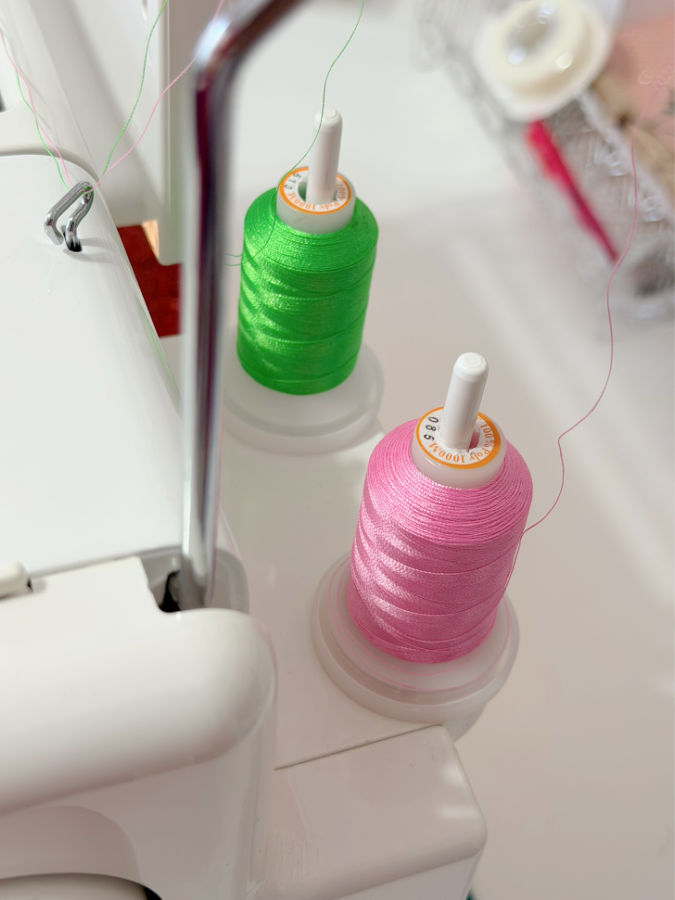
It is recommended that the two spools unwind in opposite directions to help reduce twisting. However, I tested the double eye needle with both spools unwinding in the same direction, and it worked well too. Opposite directions may help on some machines, but they are not always necessary.
Step 2: Follow the normal upper-thread path
Raise the presser foot before threading so the tension discs are open. Bring both threads through the usual upper-thread path, following the threading diagram for your sewing machine.
Both threads can usually follow the same path. Just watch that they do not twist repeatedly around each other.
Your machine manual may include instructions for sewing with two upper threads. You can also see my twin needle sewing tutorial for another example of threading a sewing machine with two spools.
Step 3: Separate the threads above the needle
Some sewing machines have a final thread guide that allows the two threads to remain separated just above the needle. My Janome has this type of guide, but my Brother Luminaire does not.
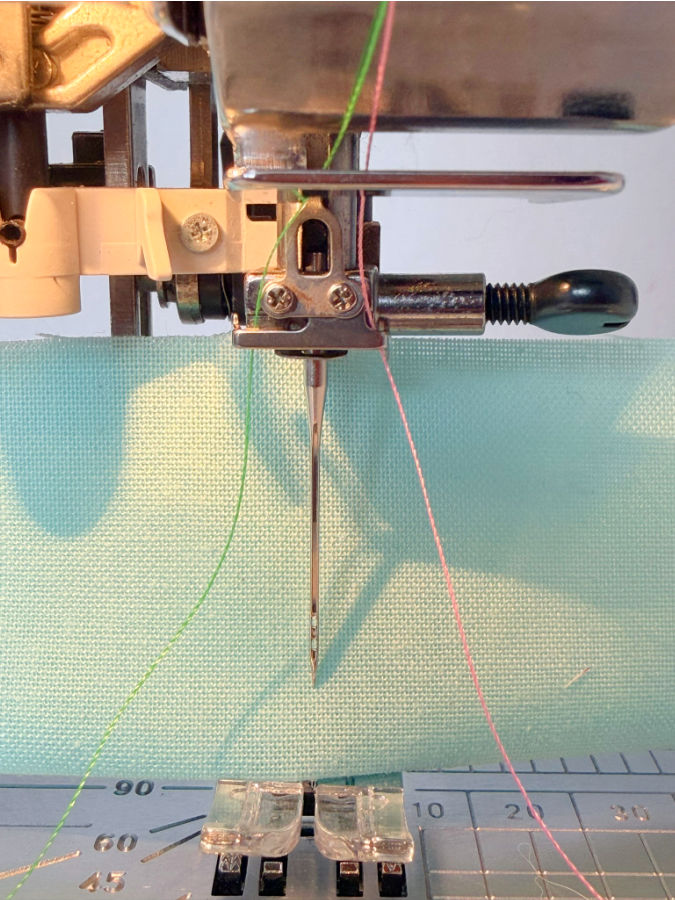
Use separate guides when they are available. If your machine has only one guide, pass both threads through it or follow the instructions in the machine manual. The double eye needle can still work without a special separation guide.
Step 4: Thread the two needle eyes
Pass one thread through the upper eye and the second thread through the lower eye. Thread both eyes in the usual direction required by your sewing machine.
Pull both thread tails under the presser foot and toward the back of the machine. Leave generous tails so the threads are not pulled back through the needle when you begin sewing.
Step 5: Bring up the bobbin thread
Hold both upper-thread tails lightly and turn the handwheel toward you. Lower and raise the needle once to catch the bobbin thread. Pull the bobbin-thread loop completely through the needle plate, then place all three thread tails under the presser foot and toward the back.
My tutorial on how to thread a bobbin also shows how to bring the bobbin thread to the top before sewing.
Before starting, confirm that neither upper thread is wrapped around the needle and that both threads move freely when gently pulled. Keep the presser foot raised while checking the thread movement so the tension discs remain open.
Thread Tension and Stitch Quality
Because a double eye needle carries two upper threads, the tension may need a little more attention than it does with regular sewing. Always begin with your machine’s normal tension setting and sew a test sample using the same fabric, threads, and stabilizer planned for the project.
Look at both sides of the sample before changing any settings.
Check the Front of the Stitching
Both thread colors should appear consistently throughout the stitch. Neither upper thread should form loose loops, and the fabric should remain flat rather than puckering around the stitching.
Dense decorative sewing machine stitches can pull lightweight fabric inward, even when the thread tension is correct. In that case, try a less dense stitch or place stabilizer behind the fabric. My guide to interfacing vs. stabilizer explains the difference and when a stabilizer is the better choice.
Check the Back of the Stitching
On the back, the bobbin thread should catch and secure both upper threads evenly. Small amounts of the upper threads may be visible where the stitches interlock, but there should not be large, loose loops hanging underneath.
The bobbin thread should not be pulled strongly to the front of the fabric. If it is clearly visible between the decorative stitches, the upper tension may be too tight. The stitch formation should look even, without sudden changes from one section to another.
My sewing machine tension adjustment guide has detailed examples of balanced and unbalanced stitches and explains how to read the stitching on both sides of the fabric.
Change only one setting at a time so you can see what corrected the problem. Return the tension to its default setting before testing a different thread or stitch combination.
If the double eye needle begins missing parts of the stitch rather than simply producing loose or tight stitching, the problem may not be tension alone. My tutorial about sewing machine skipping stitches covers other possible causes, including threading, needle installation, thread choice, and fabric preparation.
Testing Decorative Stitches with a Double Eye Needle
The double eye needle did not work equally well with every thread or every decorative stitch on my machine. I had the best results when both upper threads were the same type: two cotton threads, two polyester threads, or two machine embroidery threads. Mixing very different thread types or weights did not produce reliable stitching.


In all cases I used good quality thread (like the ones above). My suggestion is avoid low quality thread, such a thread is only an endless source of grief and delays.
All my threads were cross-wound and fed from the top of the spool. Even so, I found that positioning the two spools so the threads unwound in slightly different directions helped keep them from twisting around each other.
Thread quality mattered too. Thick threads did not pass smoothly through the two small eyes, and threads that produced lint caused problems. The most successful combinations were smooth, fine, good-quality threads that could move freely through the machine.
Not every decorative sewing machine stitch worked with the double eye needle. Some stitches formed poorly, while others did not sew correctly at all. A straight stitch worked, but there was very little decorative effect. Both threads followed almost the same line, so there was no strong reason to use the double eye needle for ordinary straight stitching.
Two Embroidery Threads
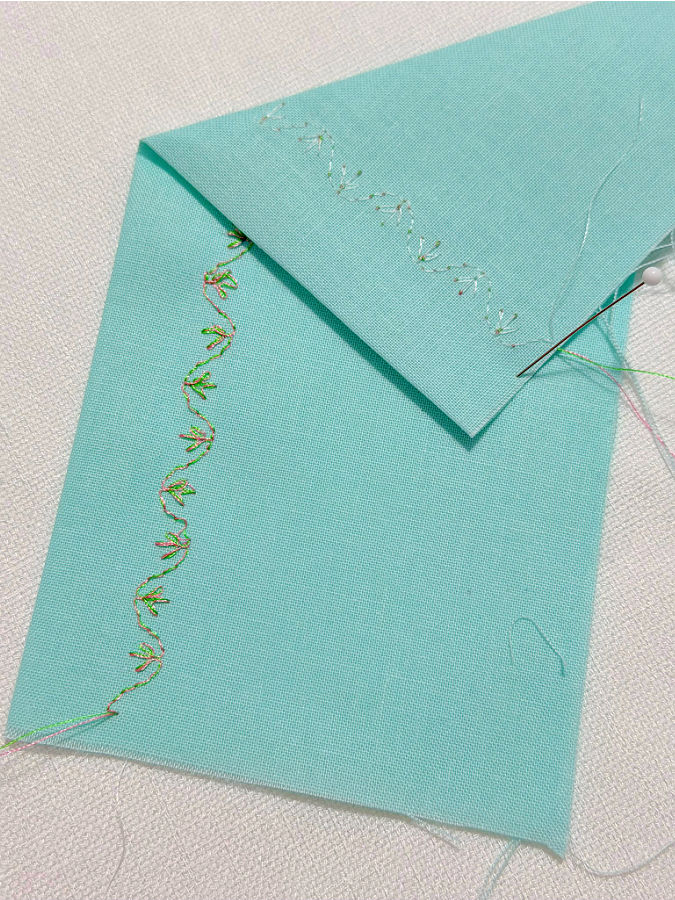
My first test used pink and green machine embroidery threads in the needle, with a prewound embroidery bobbin underneath. This combination stitched beautifully.
The decorative stitch forms a loose, winding vine with small leaf-like clusters along both sides. The pink and green threads remain clearly visible throughout the design. In some areas, they run closely beside each other; in others, they cross and wrap around one another, creating a slightly twisted, corded effect.
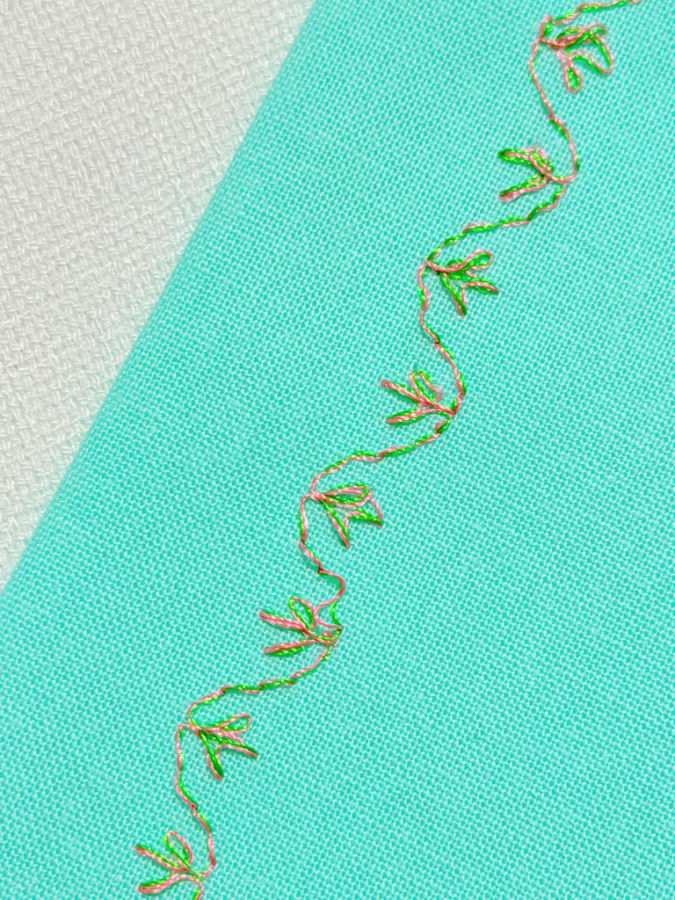
The green thread is especially noticeable inside many of the small leaves, while the pink thread often outlines the shapes and follows the curves of the vine. The two colors do not blend into one solid line. Instead, they give the decorative machine stitching more depth and make the individual parts of the design easier to see.
This test showed that smooth machine embroidery thread can be a very good choice for a double eye sewing machine needle, especially when using contrasting colors and an open decorative stitch.
Two Polyester Threads
For the next test, I used two Gütermann polyester threads and the same polyester thread in the bobbin. The two upper colors were fairly close, so the contrast was much softer than with the pink and green embroidery threads.
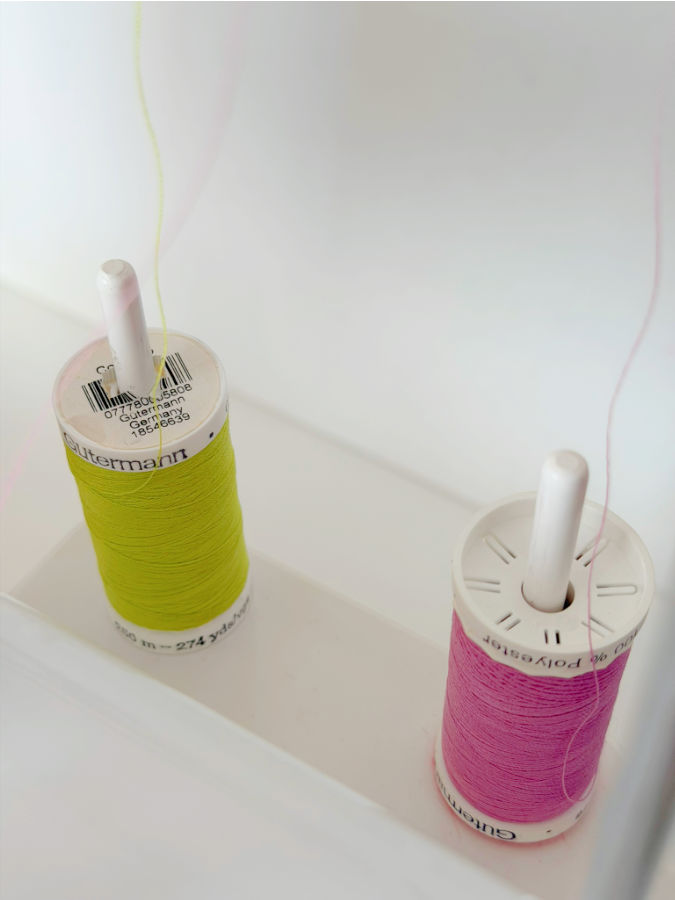
I tested three sewing machine stitches: a straight stitch, a zigzag stitch, and a decorative stitch.
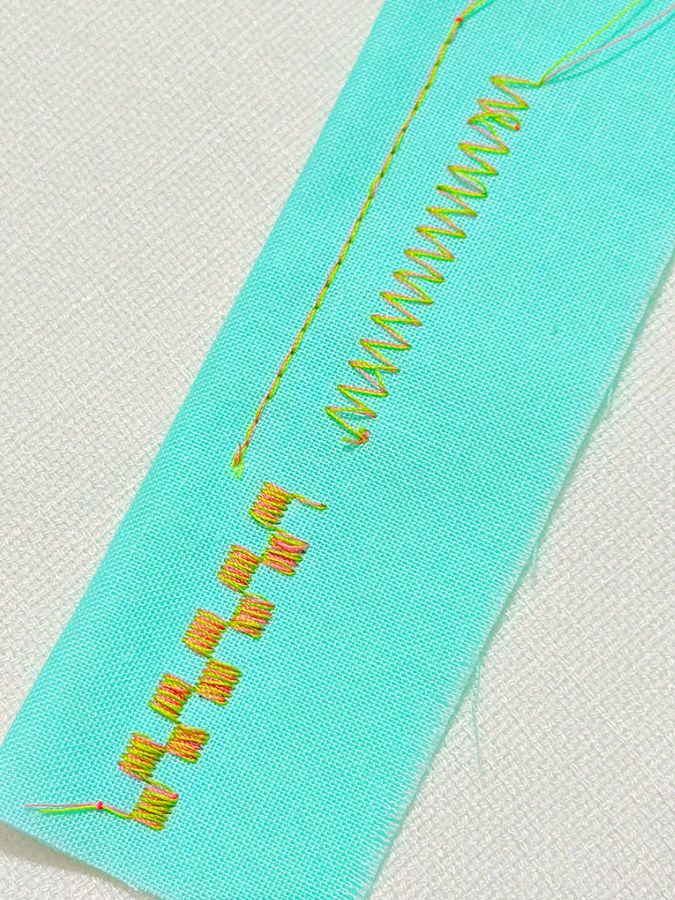
The straight stitch sewed correctly, but both colors blended into one narrow line. The two threads added a little thickness, but not enough decoration to make this stitch especially useful with a double eye needle.
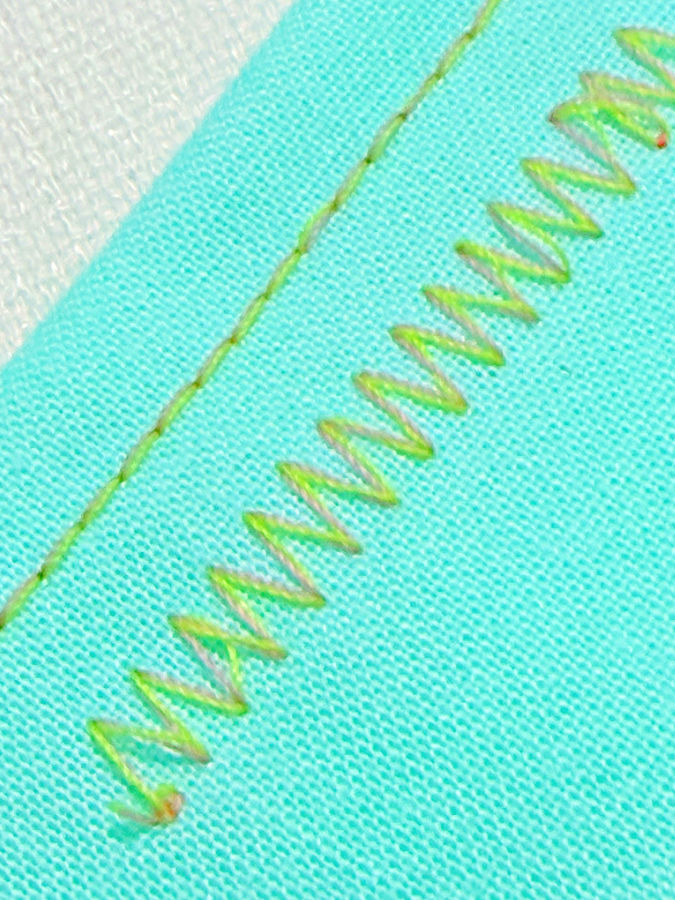
The zigzag stitch showed the two colors more clearly. One color appeared along one side of the zigzag while the second color remained visible beside it, creating a subtle two-tone outline. Because the shades were similar, the effect was noticeable mainly in the close-up view.
The decorative stitch produced the strongest result. It formed small filled blocks arranged in an alternating pattern. Both polyester threads remained visible inside each block, creating fine parallel lines of color. The shades blended well but still gave the decorative machine stitching more texture than a single thread would have produced.
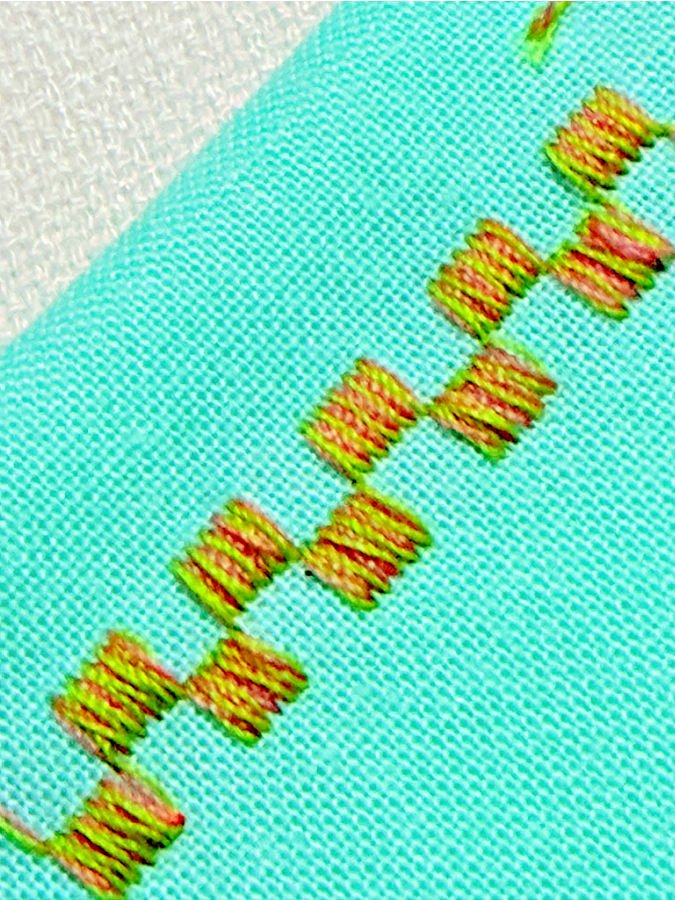
This test confirmed that two smooth, good-quality polyester threads can work very well in a double eye sewing machine needle. However, when the colors are close, open or dense decorative stitches show the two-thread effect much better than a straight stitch.
Two 100% Cotton Embroidery Threads
For this test, I used two Brothread 100% cotton embroidery threads, one red and one green. The stronger color contrast made the two-thread effect much easier to see than in the polyester sample.


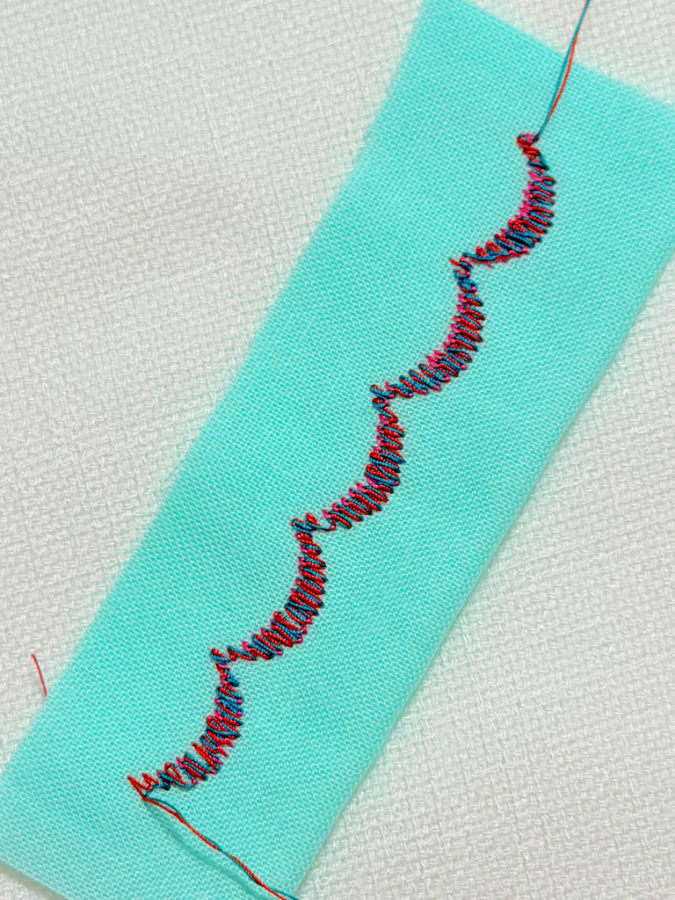
One decorative stitch formed a flowing wavy line filled with short, closely spaced stitches. In this sample, the red and green threads sat side by side through the whole design, creating a bright candy-cane effect along the curves. The stitch looked full and textured, and both colors stayed visible instead of blending into one line.
The other decorative stitch created a row of square, scroll-like motifs. Here the double eye needle produced a very interesting result. The outer edges of the shapes were outlined mostly in red, while the green thread remained visible beside it and inside the small inner curls. This made the stitch look more dimensional and gave each motif a clearer shape.
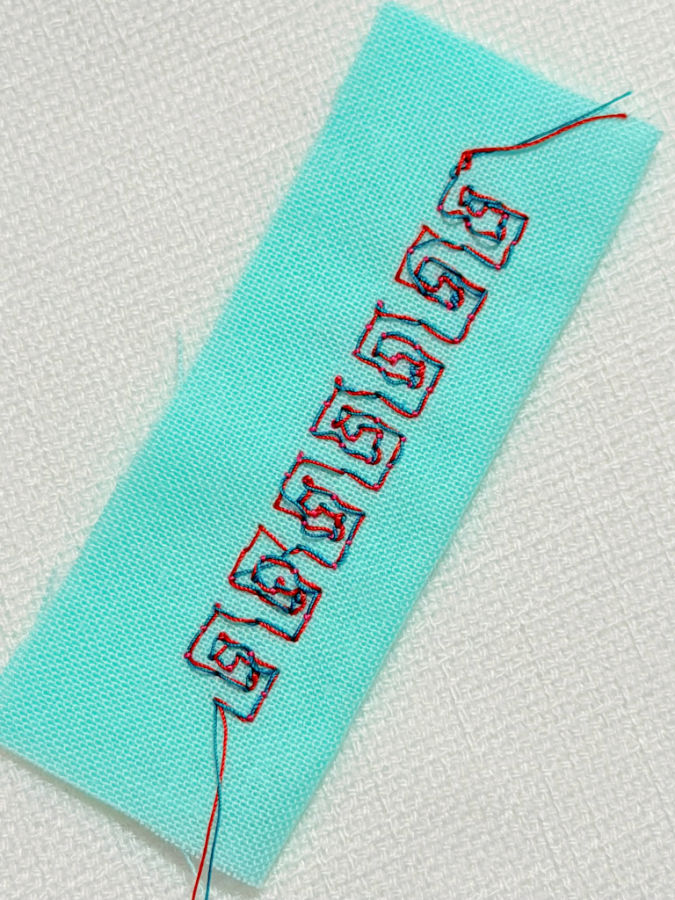
These samples showed that cotton embroidery threads can also give attractive results with a double eye needle, especially when the colors contrast well. In both stitches, the two colors were easy to see, and the decorative effect was much more noticeable than it would have been with a single thread.
Cotton Threads: One Variegated and One Solid
In this sample, I used two cotton threads again, but this time the combination was different: one thread was variegated in green and blue, and the other was solid orange.

This produced a much livelier effect than using two solid colors. The variegated thread changed color as the stitch formed, so the decorative line shifted between green and blue while the orange thread stayed constant throughout. That gave the stitch more movement and made the pattern look less predictable.
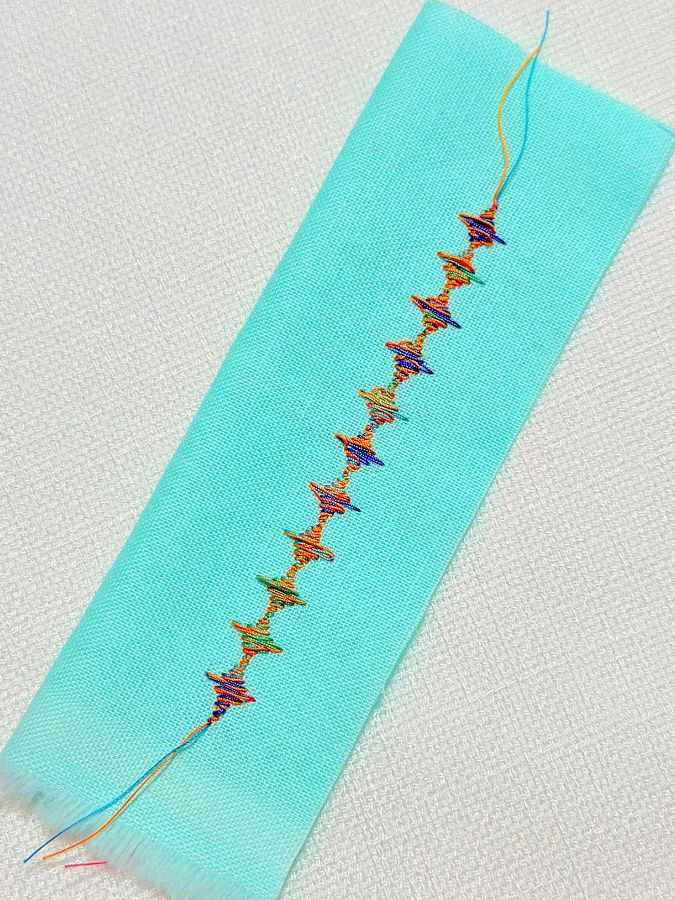
The stitch itself formed a narrow, irregular line with small peaks, dips, and denser clustered sections. In some places, the orange thread outlined the shape, while the variegated thread filled parts of the stitch with blue or green. In other areas, the colors twisted together and created a slightly blended effect.
I liked this sample because it showed how a double eye needle can make even a fairly narrow decorative stitch look more interesting. The orange thread gave the design a steady outline, while the variegated thread added color changes that made the stitching look more decorative without changing the stitch pattern itself.
This kind of combination can work well when you want decorative stitching that has more color variation but do not want to switch threads constantly.
18. Project Ideas for a Double Eye Needle
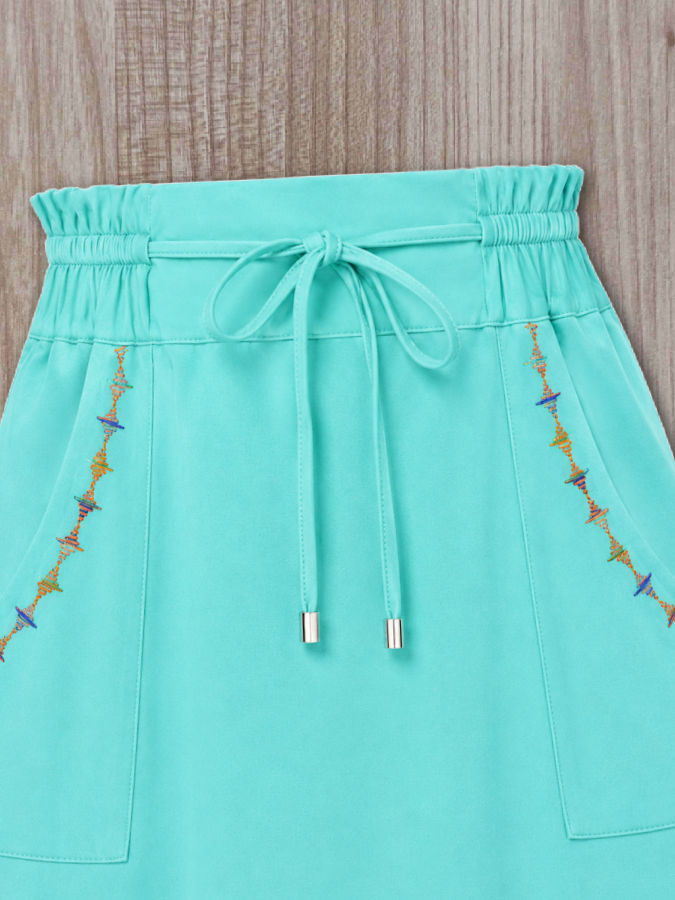
- Decorative topstitching on pockets
- Contrast stitching on a bag
- Embellishing fabric before cutting a project
- Decorative lines on a table runner
- Quilting along seam lines
- Stitching in the ditch with two colors
- Decorative borders on napkins
- Pillow-cover embellishment
- Crazy-quilt seams
- Fabric postcards
- Greeting cards sewn from paper and fabric
- Decorative stitching on cuffs
- Collar or yoke topstitching
- Jeans-pocket decoration on lightweight denim
- Quilt labels
- Bookmark edges
- Visible mending embellishment
- Decorative stitching around appliqué
Did the double eye needle give you a few ideas for your own projects? Save the pin below to your sewing board so you can easily return to this tutorial when you’re ready to try it. And follow me on Pinterest for more sewing tips, tutorials, and ideas.

latest posts
- How to Make a Lightweight Summer Neck Scarf with a Lettuce Hem
- What Sewists Hate About Sewing: Common Complaints and Practical Fixes
- Knit Presser Foot: How It Works, How to Use It, and My Sewing Tests
- How to Sew Neat Mitered Corners at Acute Angles
- Sewing Machine Needle Organization: A Clever System I Tried
- DIY Car Armrest Organizer: Sewing Tutorial
- Easy DIY Potholder Sewing Tutorial: Better Shape, Better Grip, Smart New Design
- How to Buy a Sewing Machine (Even If You Already Have 10)
- 23 Kitchen Items That Belong in Your Sewing Room
I like the idea of the double eyed needle. Could you tell me where I can purchase one. Thank you.
I put in the article links to Amazon, but other sites probably carry it too.