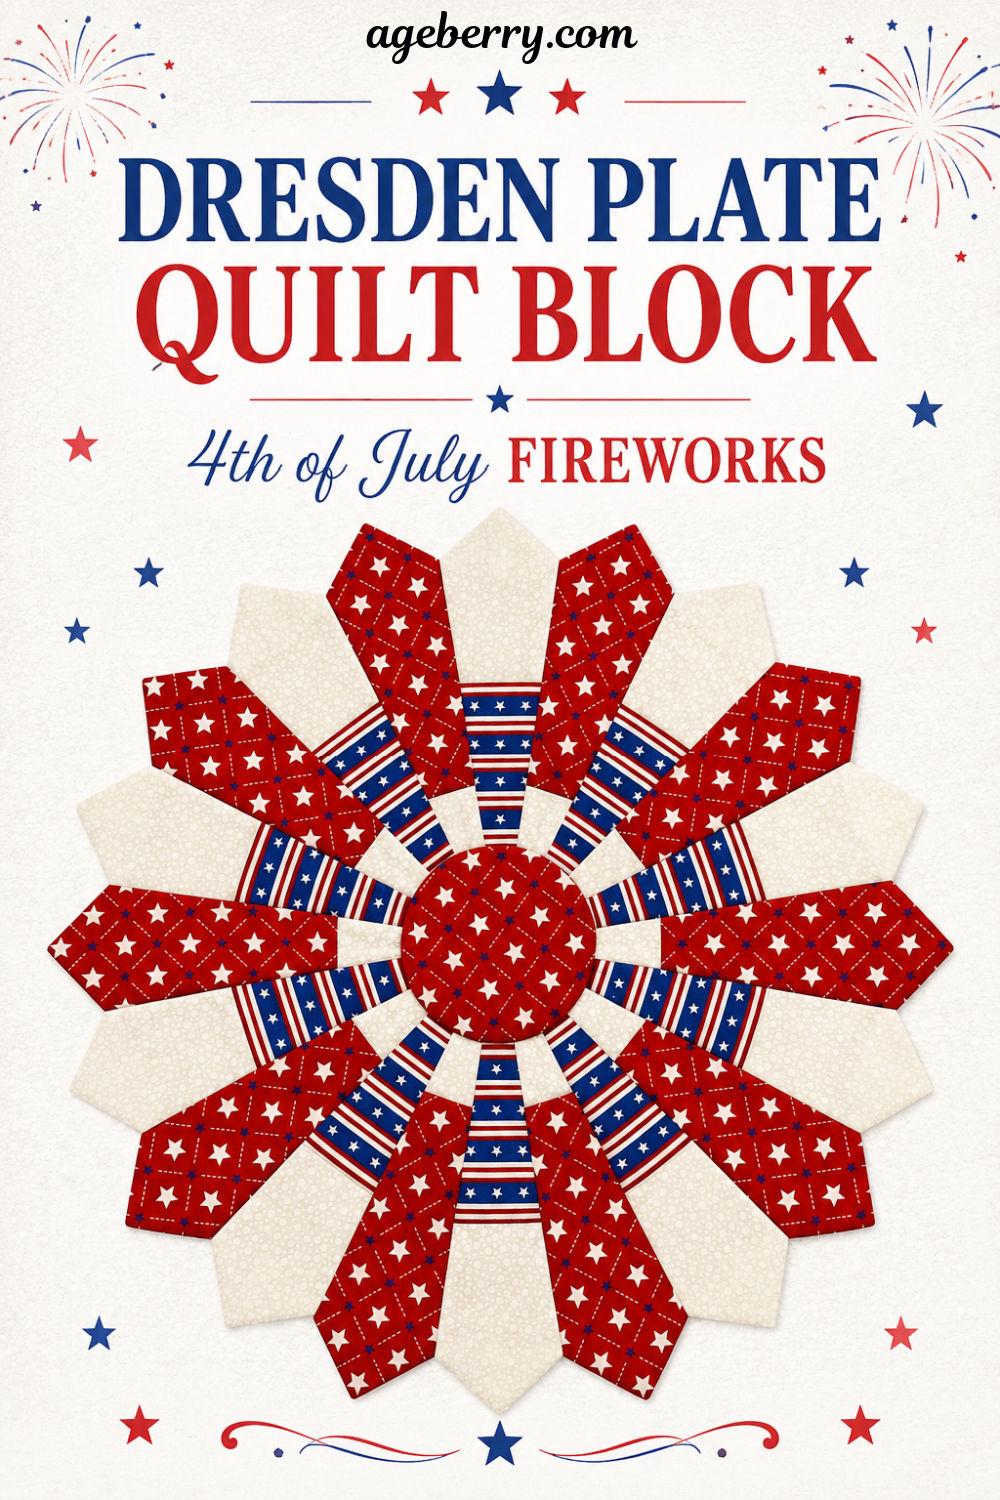
Dresden Plate Quilt Block: 4th of July Fireworks
This patriotic quilt block takes the classic Dresden plate shape and gives it a red, white, and blue Fourth of July mood.
I chose red stars, blue stripes, and a quiet white print for this design. The result reminds me of fireworks in fabric form. It has movement, contrast, and plenty of patriotic color without complicated piecing.
A printable version of this article is available in my shop: Fireworks Dresden Plate Quilt Block. For a small fee, you can get the PDF, save it to your device, and read it anytime without ads.
This tutorial shows how I made the Dresden plate block. The full quilt is not finished yet. I will share that part in the next tutorial after I decide how I want to finish the project.
For now, this is the block stage. It can become a small wall quilt, a table topper, a pillow front, a mini quilt, or even the center of a larger quilt.
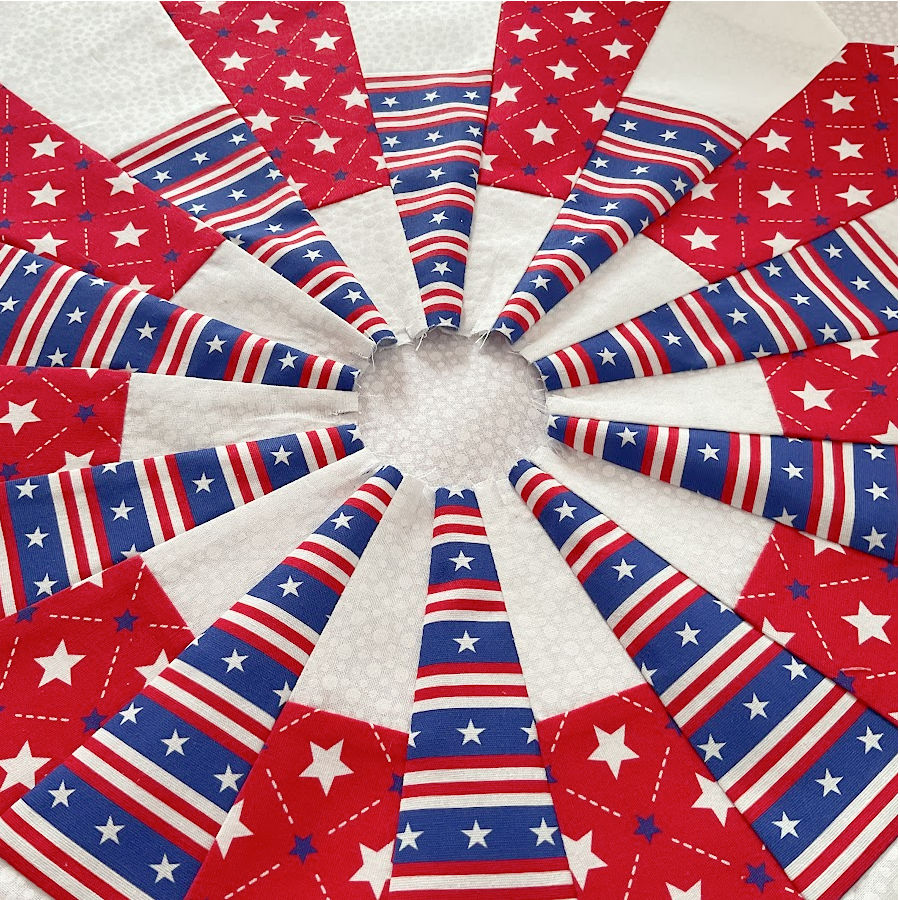
This block is made out of 20 blades in alternating red and blue colors with a white background. No special skills are necessary and despite the very beautiful result the block is suitable even for a beginner sewist.
I am calling it 4th of July Fireworks, but I want your opinion on the name before I finish the quilt.
Materials and Tools
For this Dresden plate block, you will need:
- Red quilting cotton for the large blade sections and center circle
- Blue quilting cotton for the smaller blade sections
- White quilting cotton for the light sections
- Background fabric, if you want to audition the finished plate on a quilt top
- 10 inch Dresden plate ruler
- Circle template for the center circle
- Regular sewing tools and notions
Because this tutorial is published only two weeks before the 250th anniversary of the US independence, I chose a red/blue pattern to celebrate. Of course you can choose any color combination, the below images offer some suggestions.
Step 1. Select Fabrics for the Dresden Plate
For this quilt block, I chose three high-contrast cotton fabrics in a red, white, and blue color scheme.
This combination works well for a Dresden plate because each blade needs to stand out from the next one. Dresden plates have many narrow pieces, so low-contrast fabrics can blur together. The design loses its crisp “sunburst” shape when the fabrics look too similar.
The red fabric brings bold color to the outer sections. The blue striped fabric adds movement near the center. The white fabric breaks up the strong prints and keeps the block balanced.
For this type of patriotic Dresden design, I recommend:
- Use quilting cotton with a stable weave.
- Choose at least one bold print.
- Add one quieter fabric, such as white, cream, or a low-volume print.
- Be careful with stripes. They look wonderful, but they do not forgive crooked cuts.
- Press the fabrics well before cutting.
The blue stripe fabric needs extra attention. A tiny slant can make the stripes look tipsy. Place the ruler so the printed stripes stay straight across the blade pieces.
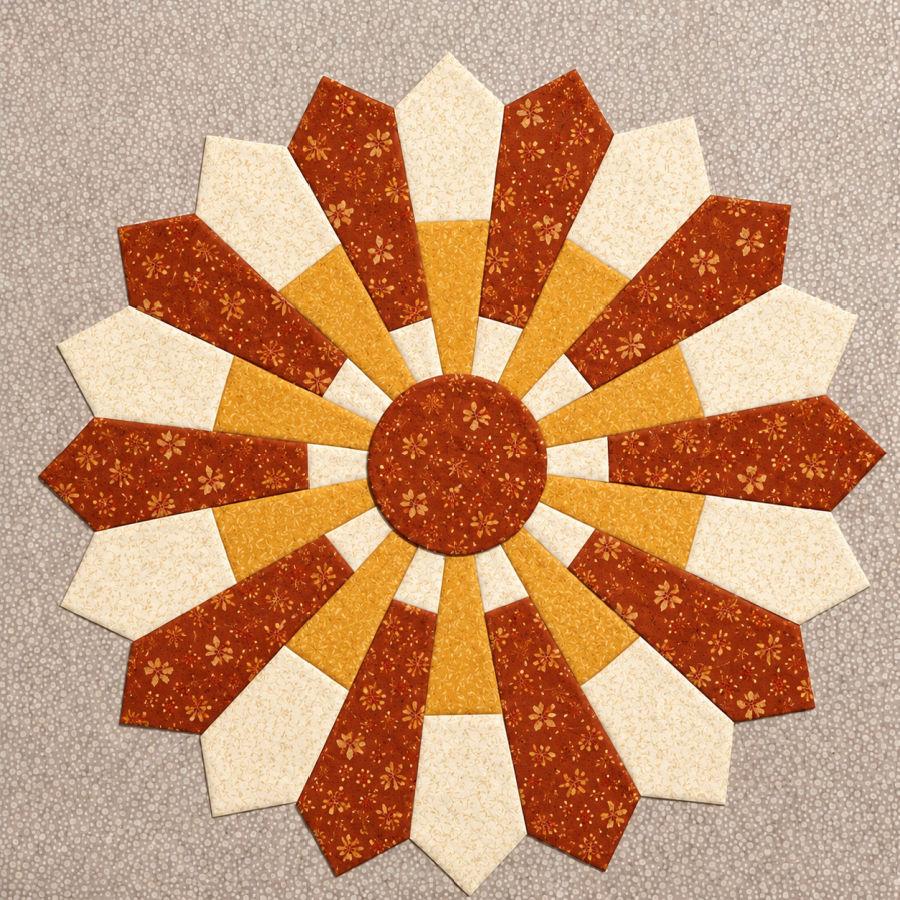
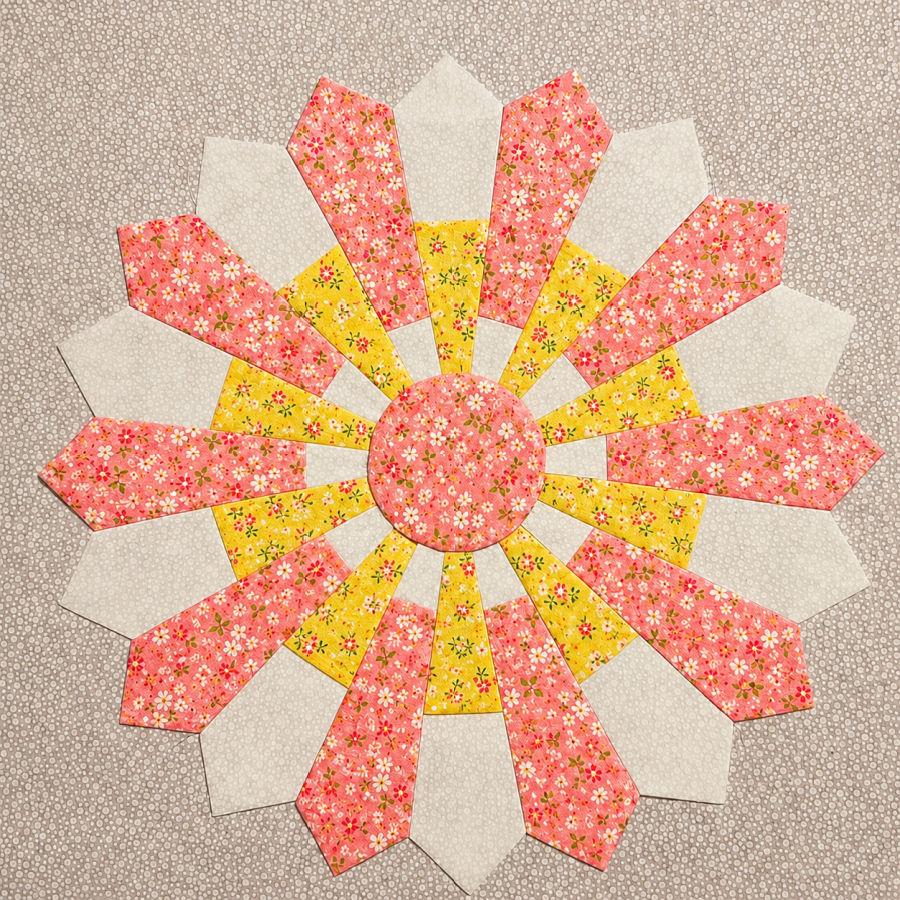
However, this Dresden plate quilt does not have to be only for the 4th of July. The same design can work for many seasons if you keep the three-fabric plan: one bold fabric, one accent fabric, and one quiet fabric. The images above offer some alternatives.
For a Christmas version, try red as the bold fabric, green as the accent fabric, and gold or white as the quiet fabric. The Dresden plate would have a festive wreath look.
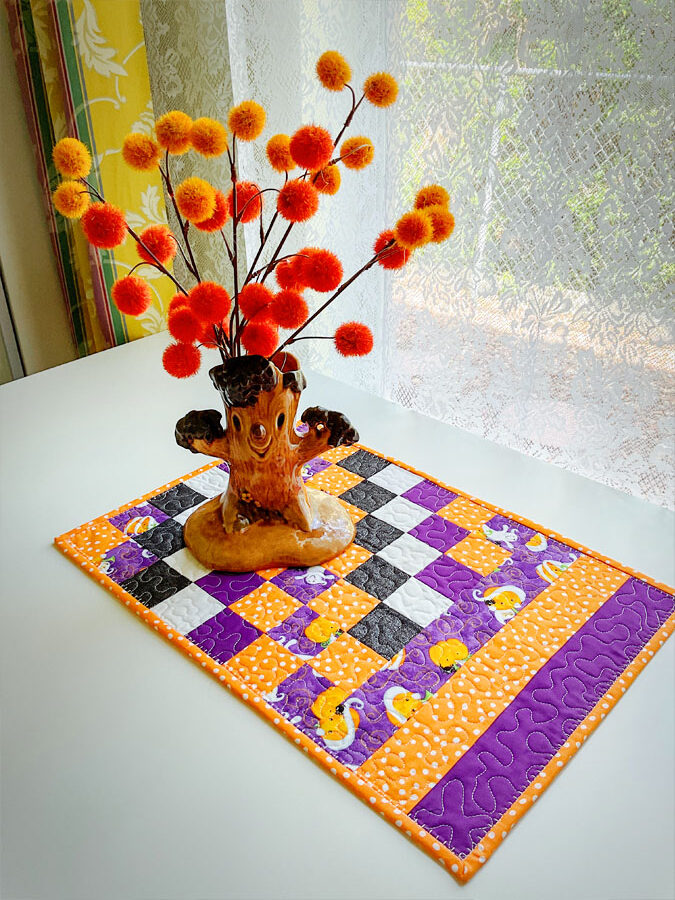
For fall, try rust, golden yellow, and cream. The block would feel warm and cozy, almost like a sunflower or a fall table centerpiece.
For spring, choose a floral print, a soft pink or lavender accent, and white. This would make the Dresden plate feel lighter and more delicate.
For a baby quilt, try one sweet novelty print, one small dot or stripe, and a soft solid. The quiet fabric helps the design stay gentle instead of too busy.
For a modern version, use black and white prints with one bright accent color. The Dresden shape will look bold and graphic.
The important part is contrast. If all three fabrics have the same value, the blades may blend together. One fabric should lead, one should support, and one should give the eye a resting place.
Note: Some of the links on this page are affiliate links. This means I will receive a commission if you order a product through one of my links. I only recommend products I believe in and use myself.
Step 2. Cut the Fabric for the Dresden Blades
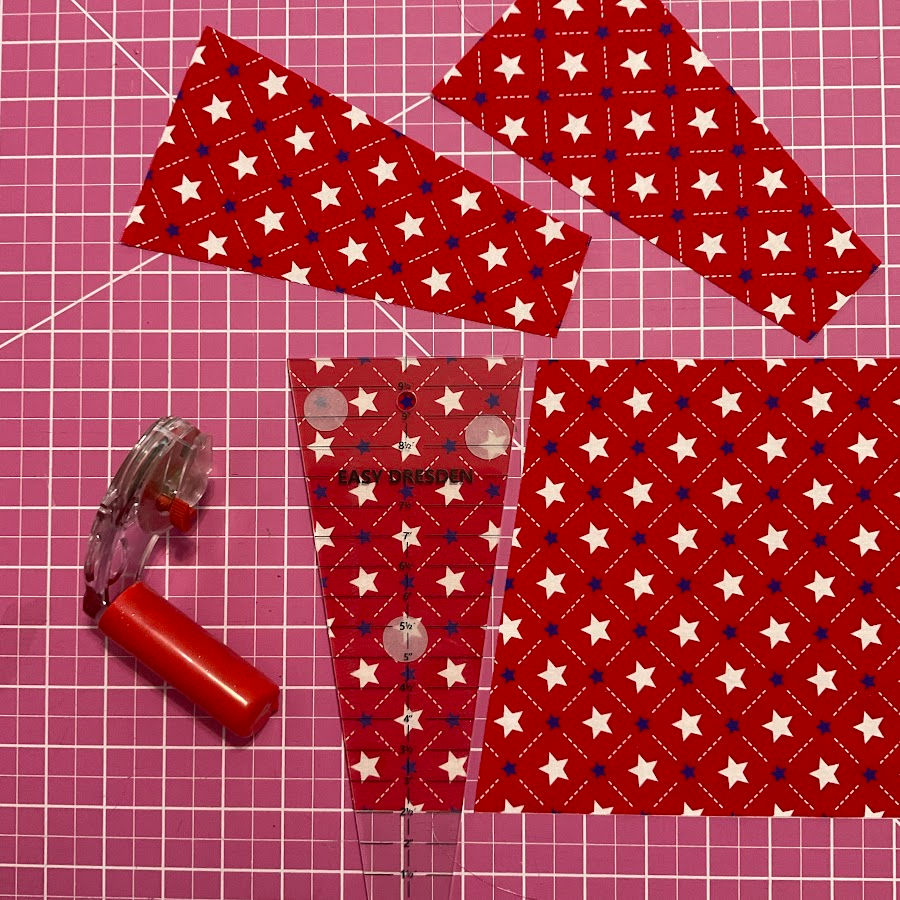
For this project, I used a 10 inch Easy Dresden plate ruler. This ruler makes the blade shapes much easier to cut because the angles are already built in.

Cut the red blade pieces
From the red star fabric, cut a rectangle 7 1/2 inches wide by about 30 inches long.
Place the Dresden ruler on the fabric so:
- The 10 inch mark (top) sits along one long edge of the fabric.
- The 2 1/2 inch mark sits along the opposite long edge.
Cut along both sides of the ruler.
For the next blade, turn the ruler around. The cut line from the first blade becomes one cut line for the second blade. This saves fabric and keeps the angles consistent.
Cut 10 red blade pieces.
These are not full Dresden blades. They are partial blades cut only from the 10 inch mark to the 2 1/2 inch mark.
✅ Related tutorial: How To Accurately Cut Fabric For Quilting With A Rotary Cutter
Cut the blue blade pieces
From the blue stripe fabric, cut a rectangle 5 1/2 inches wide.
For 10 nested pieces, a length of about 24 inches should usually be enough, but use a longer piece if you want to control stripe placement. With striped fabric, extra length is helpful because the print may need adjustment.
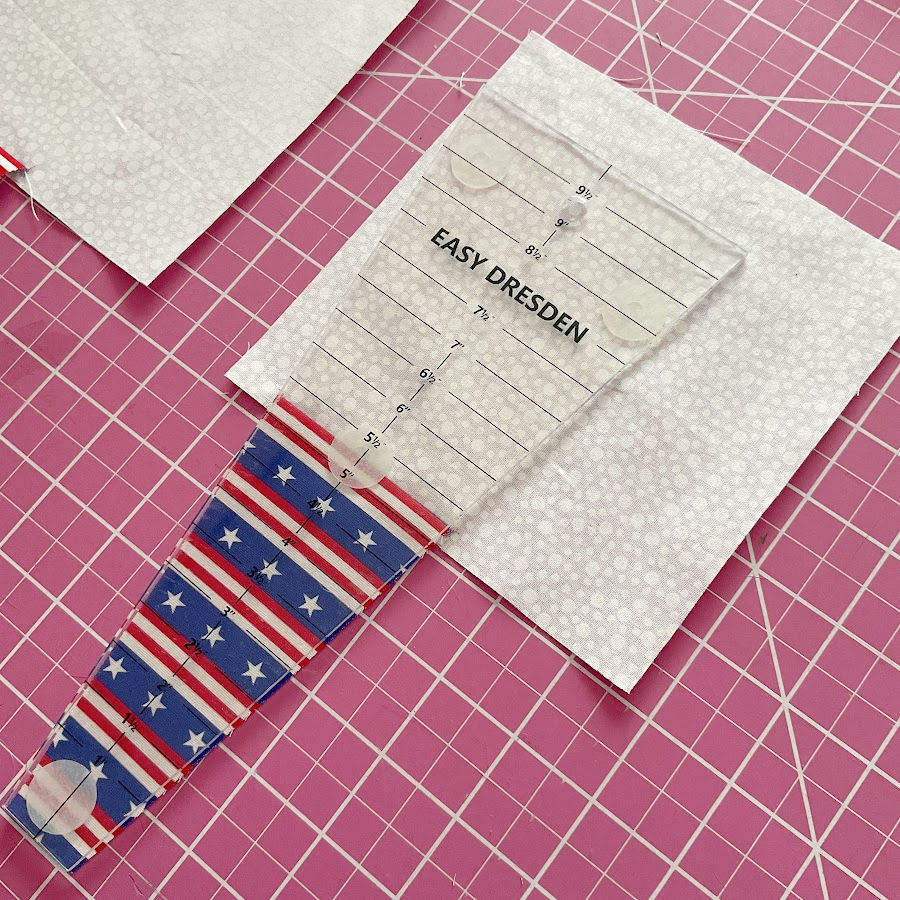
Place the Dresden ruler so:
- The 0 inch end (bottom) sits along one long edge of the fabric.
- The 5 1/2 inch mark sits along the opposite long edge.
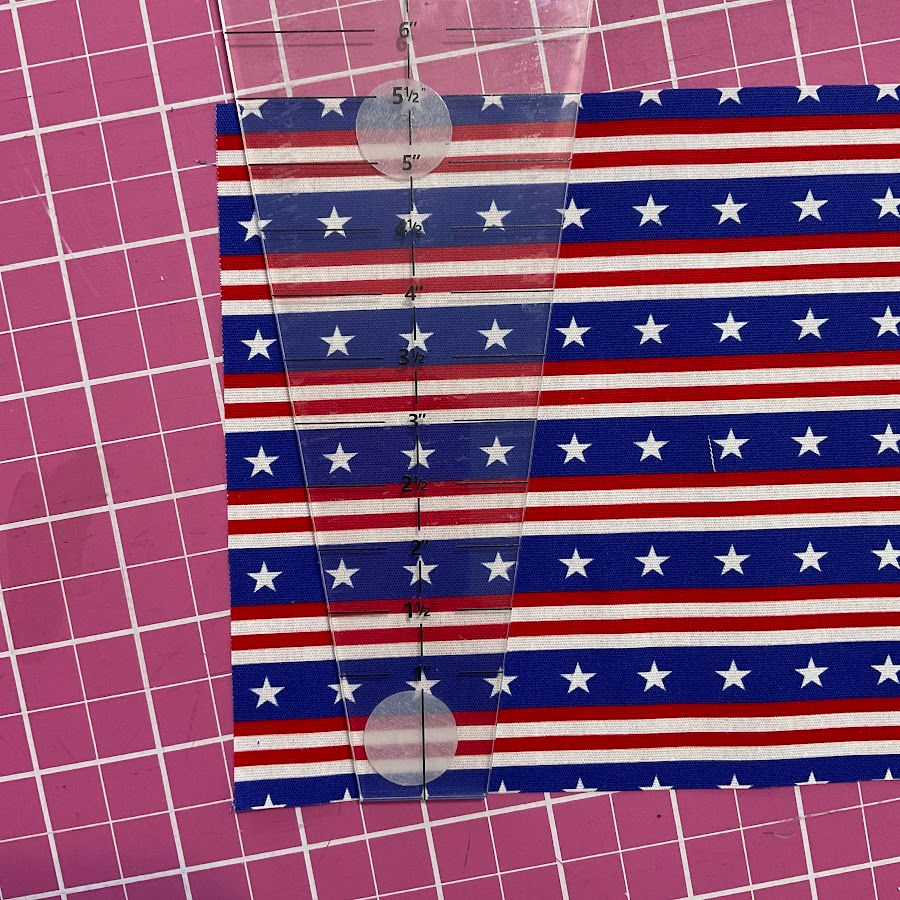
Cut along both sides of the ruler. Turn the ruler around for the next blade so the pieces nest together.
Cut 10 blue blade pieces.
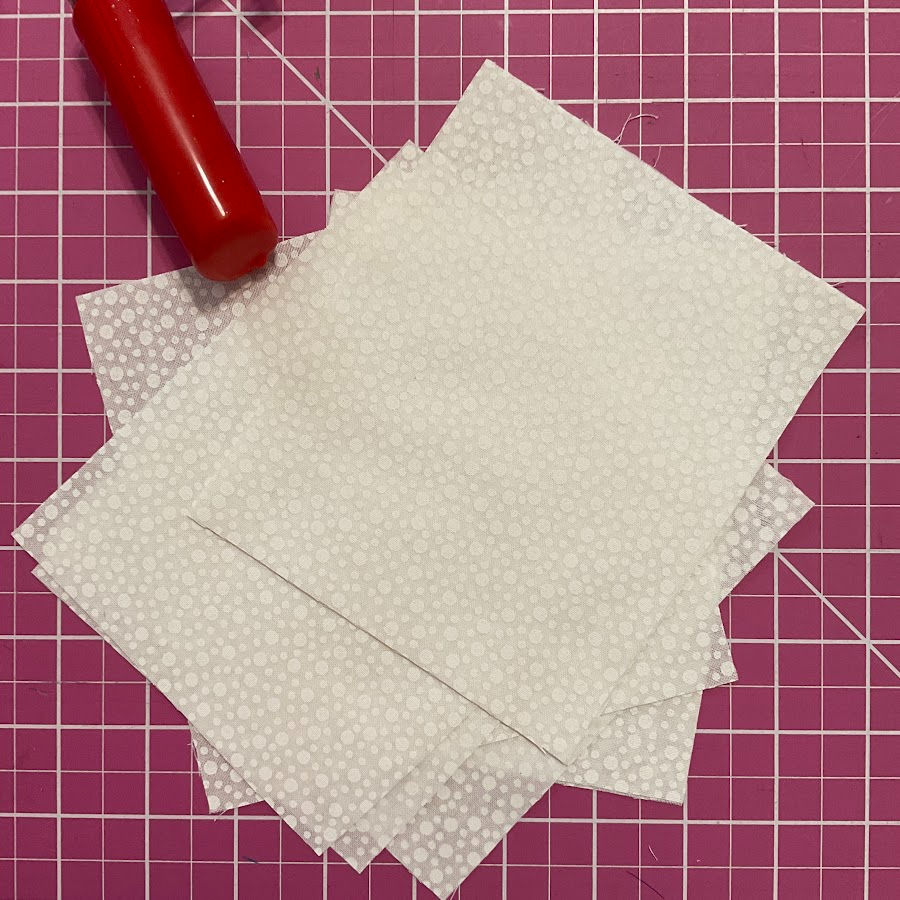
Cut the white fabric pieces
From the white fabric, cut 10 rectangles, each measuring 6 inches by 7 inches.
The white fabric adds light spaces between the bold patriotic prints. It also helps the Dresden design look more defined after all the pieces form the circle.
Step 3. Make the Two-Color Dresden Blades
Now attach the smaller blue blades to the white rectangles. This step may look a little odd at first because the white piece starts as a plain rectangle. The Dresden ruler will trim it into shape after the seam is sewn.
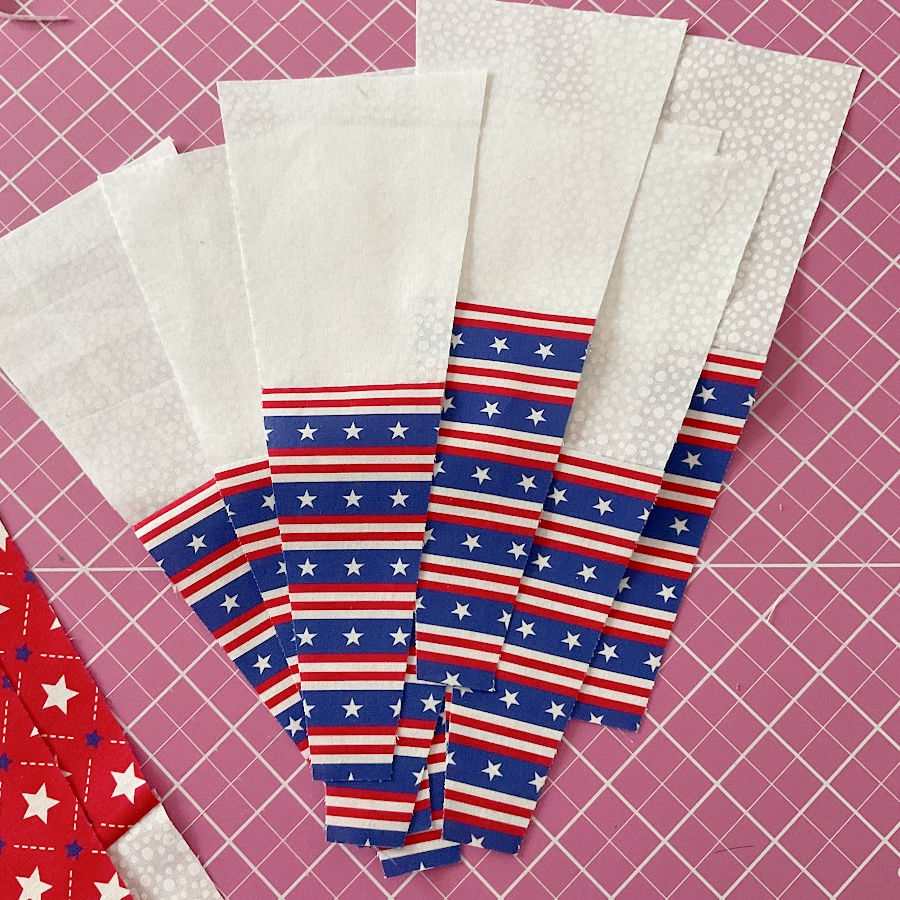
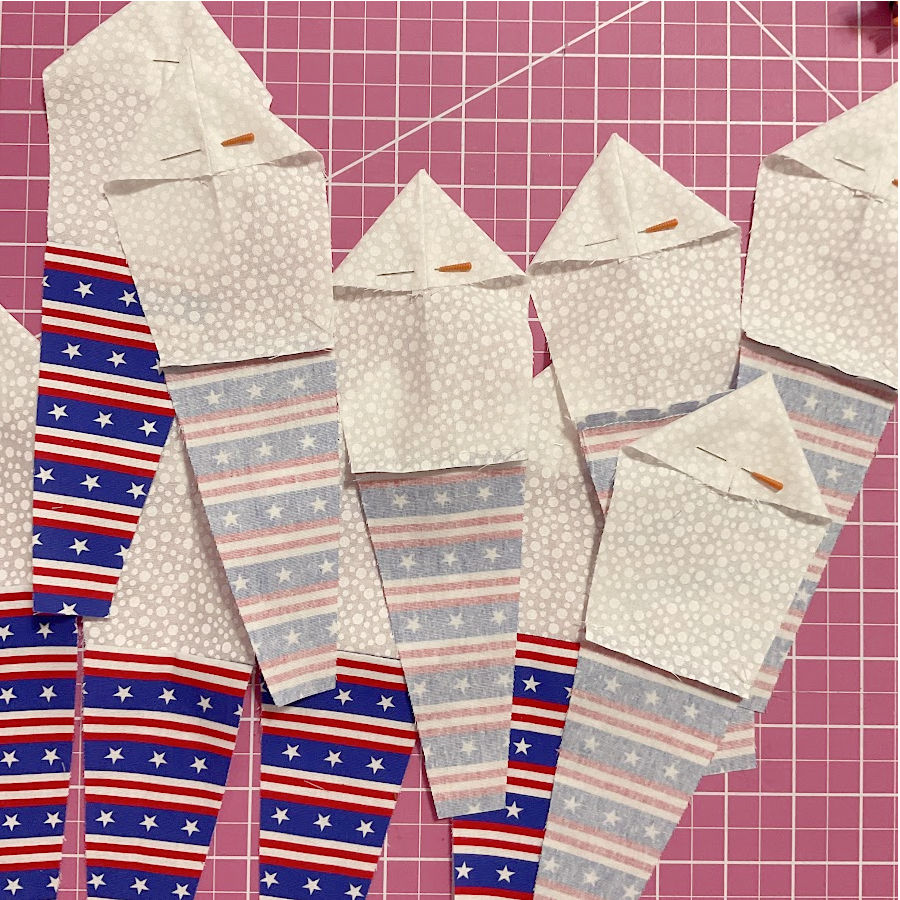
Attach the blue blades to the white rectangles
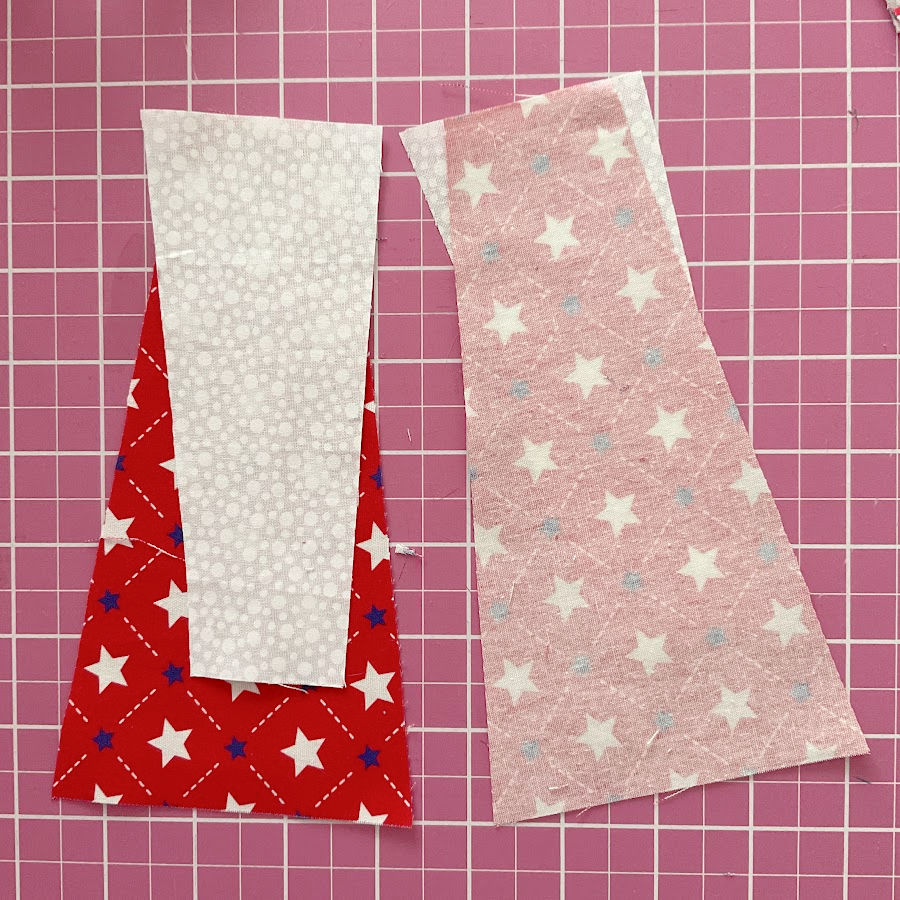
Place one white rectangle on the table with the right side up.
Place one blue blade on top of it, right sides together. The wide end of the blue blade should sit along one edge of the white rectangle.
Do not center the blue blade on the white rectangle. Place it a little toward one side, as shown in the photo. This gives enough white fabric on one side for the ruler cut.
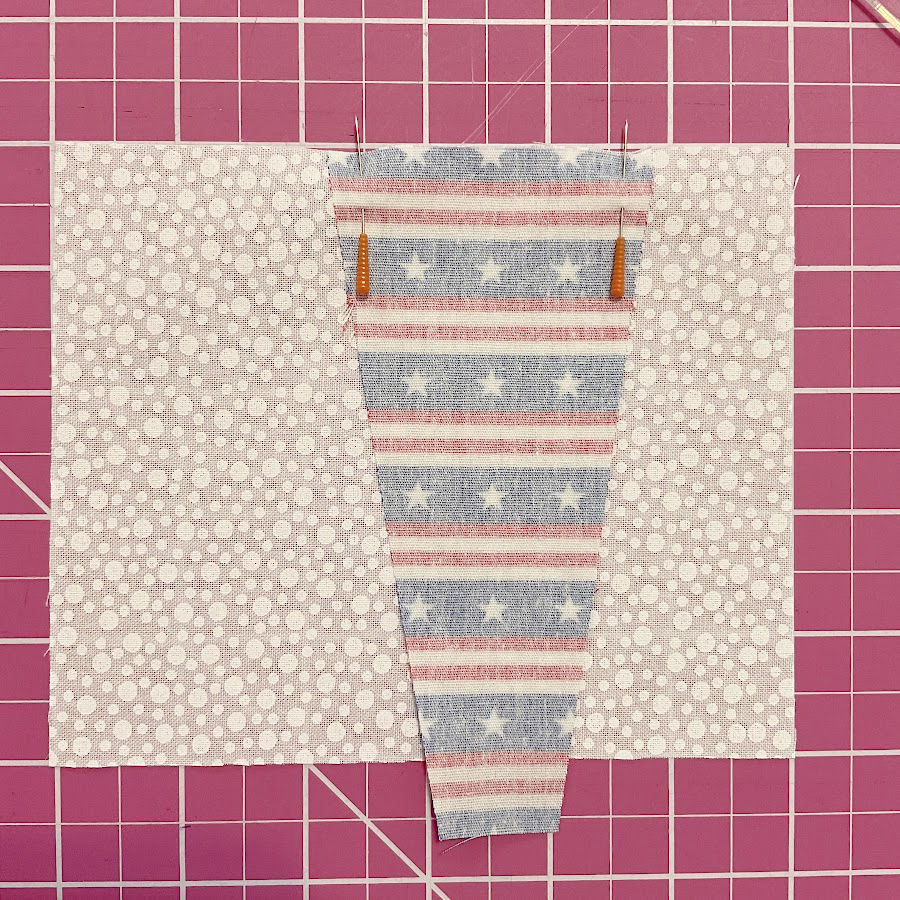
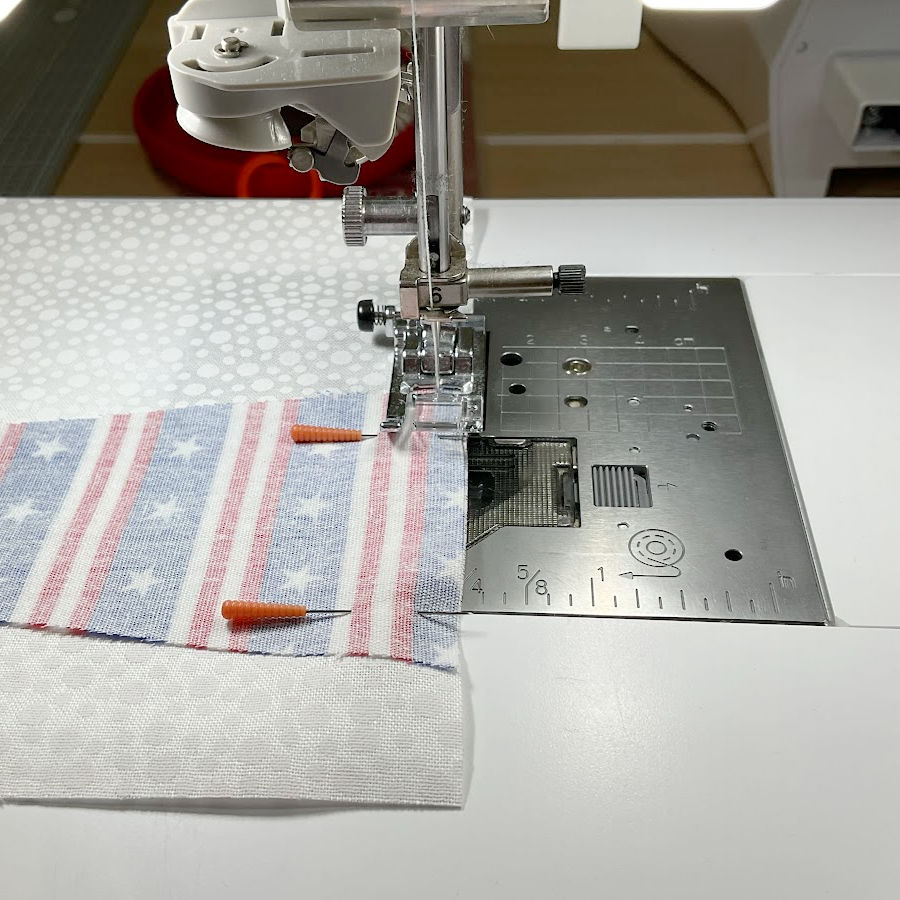
Pin the blue blade in place. Stitch with a 1/4 inch seam allowance. Press the seam allowance toward the blue fabric.
✅ Related tutorial: Quarter Inch Seams and Quilting Math: True, Scant, and Everything In Between
Repeat this for all 10 blue blades and white rectangles.
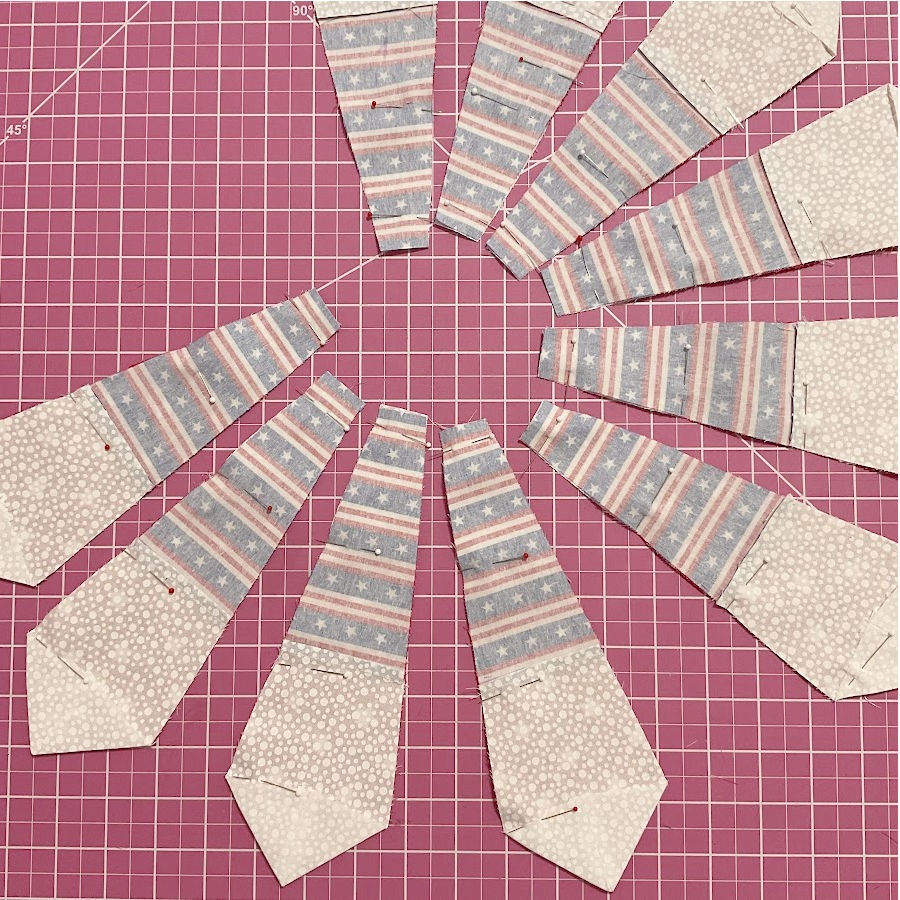
Trim the blue-and-white blades
Place the Dresden ruler over the sewn unit.
Line up the ruler with the blue blade first. The narrow end of the ruler should follow the narrow end of the blue fabric. The seam between the blue fabric and the white fabric will fall near the 5 1/4 inch area of the ruler.
The white rectangle will extend past the ruler. That is exactly what we need.
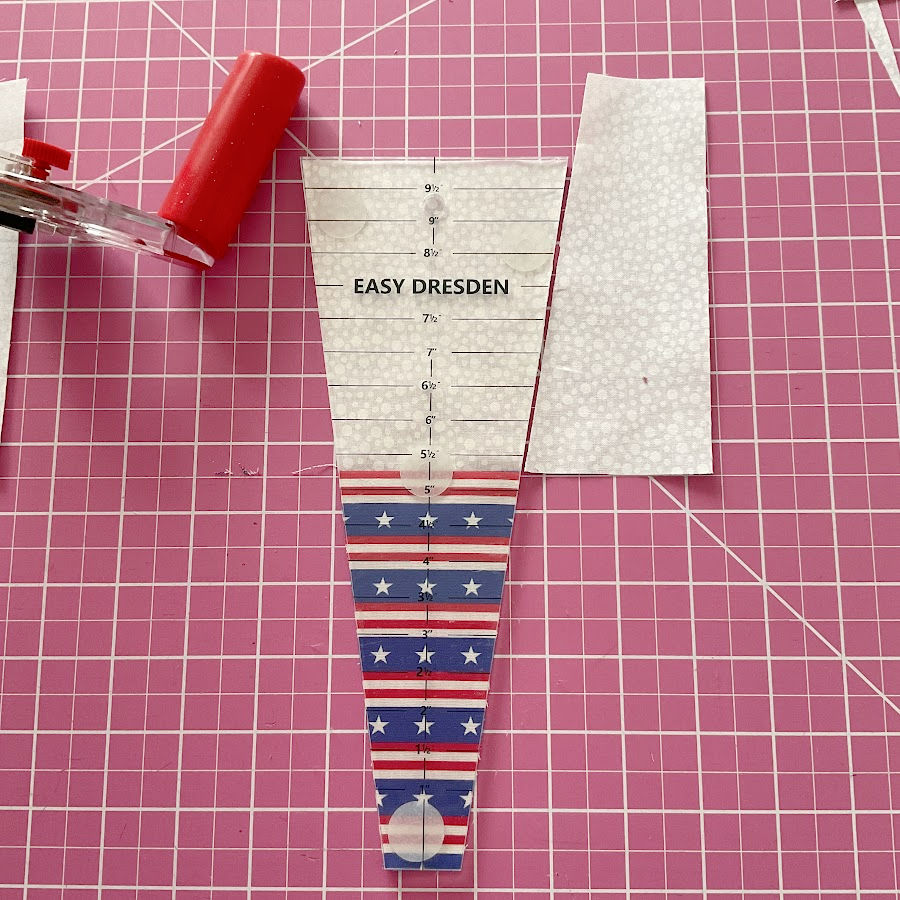
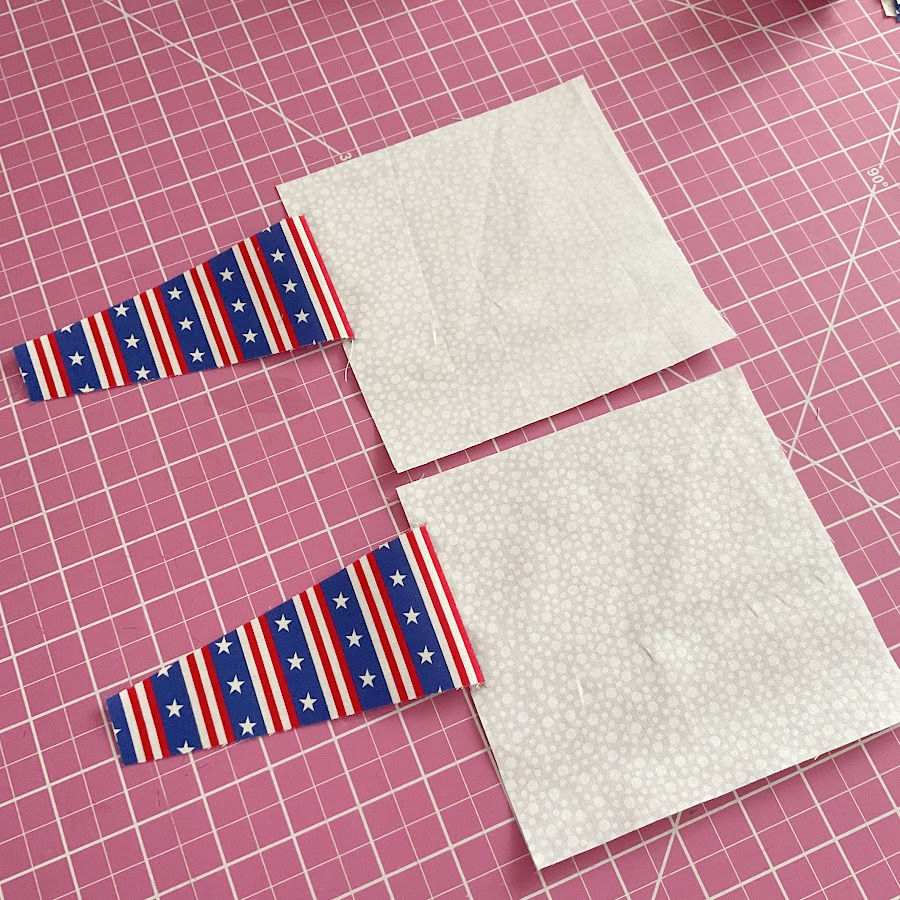
Cut along both sides of the ruler. Now you have a new Dresden blade with two fabrics: blue on the narrow end and white on the wide end.
Do not discard the white piece you cut away from the rectangle. Save it. This angled white piece will be used with the red blade next.
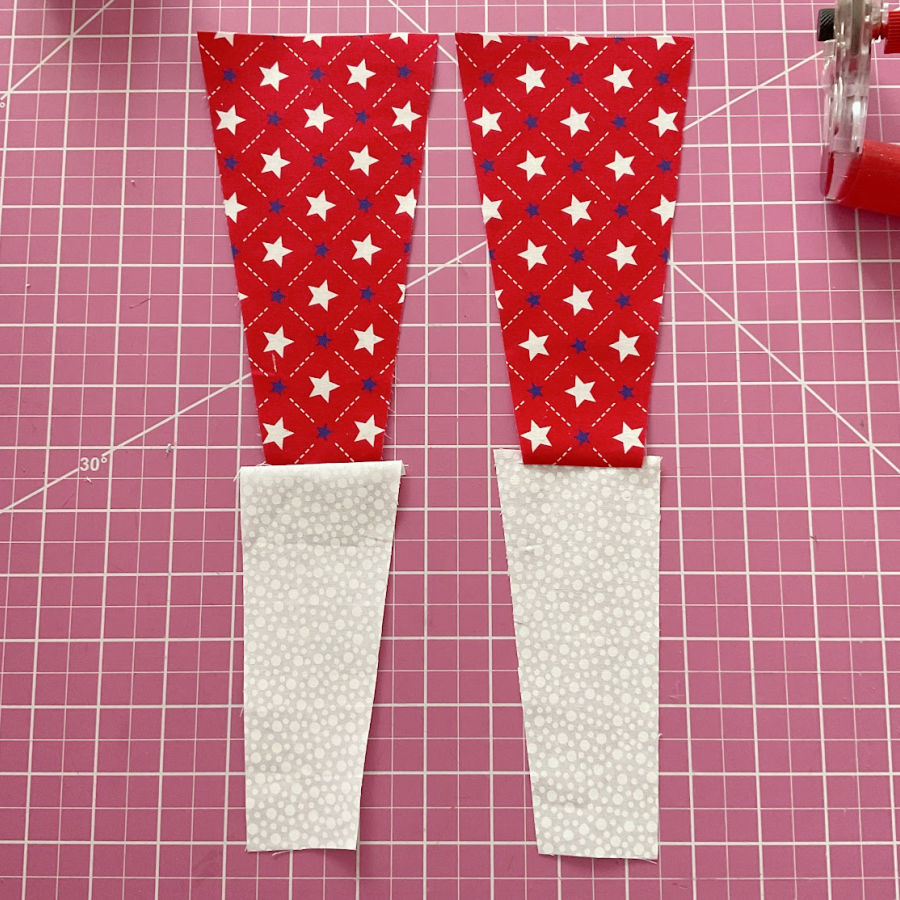
Attach the saved white pieces to the red blades
Take one red blade and one saved white angled piece.
Place them right sides together at the narrow end of the red blade. Match the straight seam edges.
Press the seam allowance toward the red fabric. This keeps the darker fabric from showing through the white section.
Trim the red-and-white blades
Place the Dresden ruler over the red-and-white unit.
Line up the ruler so the red fabric follows the upper part of the blade. The seam between the red and white fabrics should sit near the 2 3/4 inch mark. The saved white piece fills the narrow lower part of the blade.
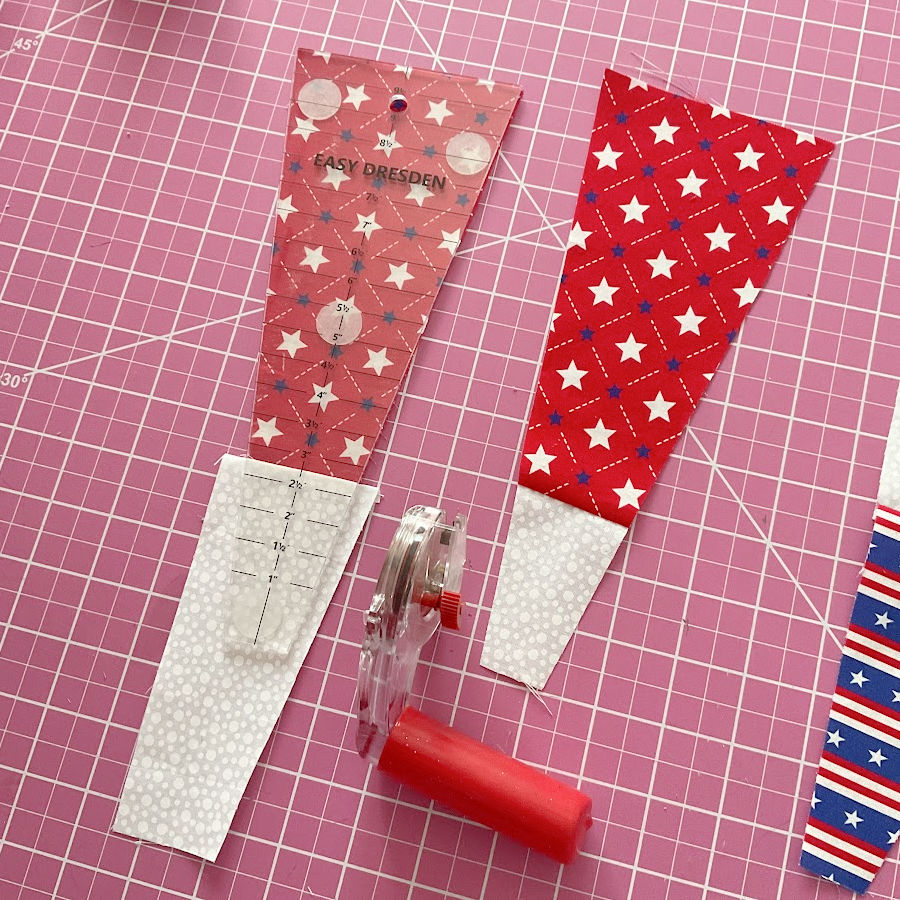
Cut along both sides of the ruler to create the full Dresden blade shape.
Now you have a second type of two-color blade: red on the wide end and white on the narrow end.
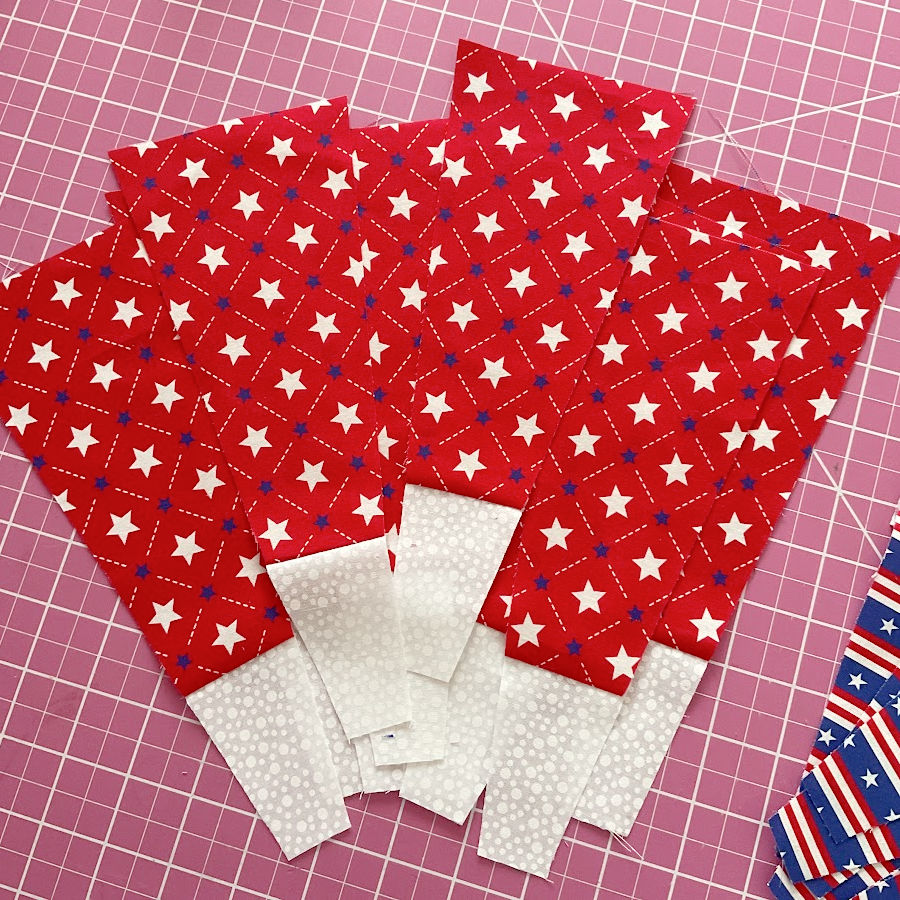
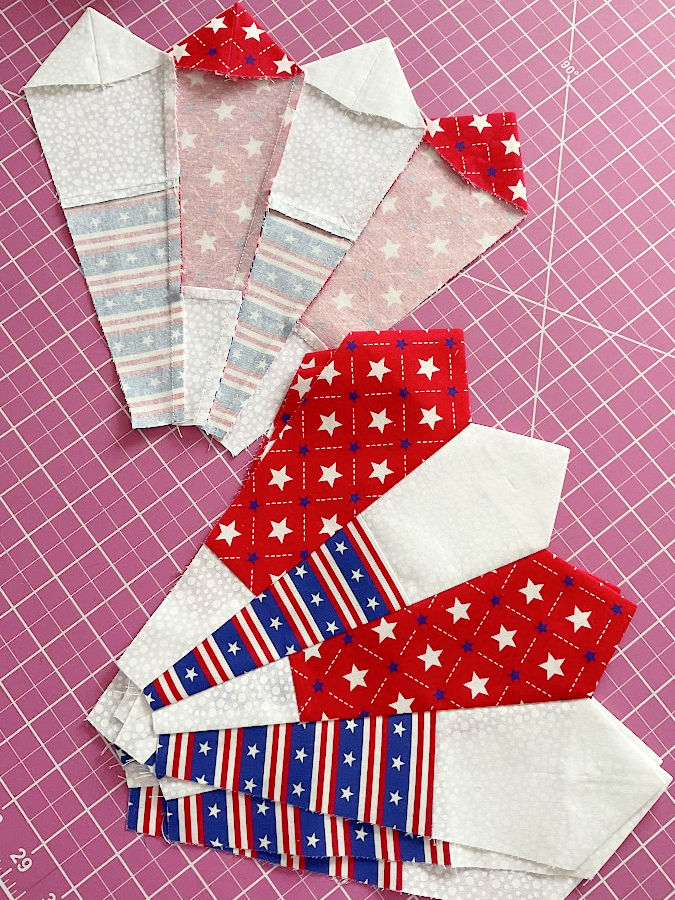
Repeat until you have:
- 10 blue-and-white blades
- 10 red-and-white blades
These two blade styles will alternate around the Dresden plate. The white sections help separate the bold prints, and the red and blue fabrics create the firework effect.
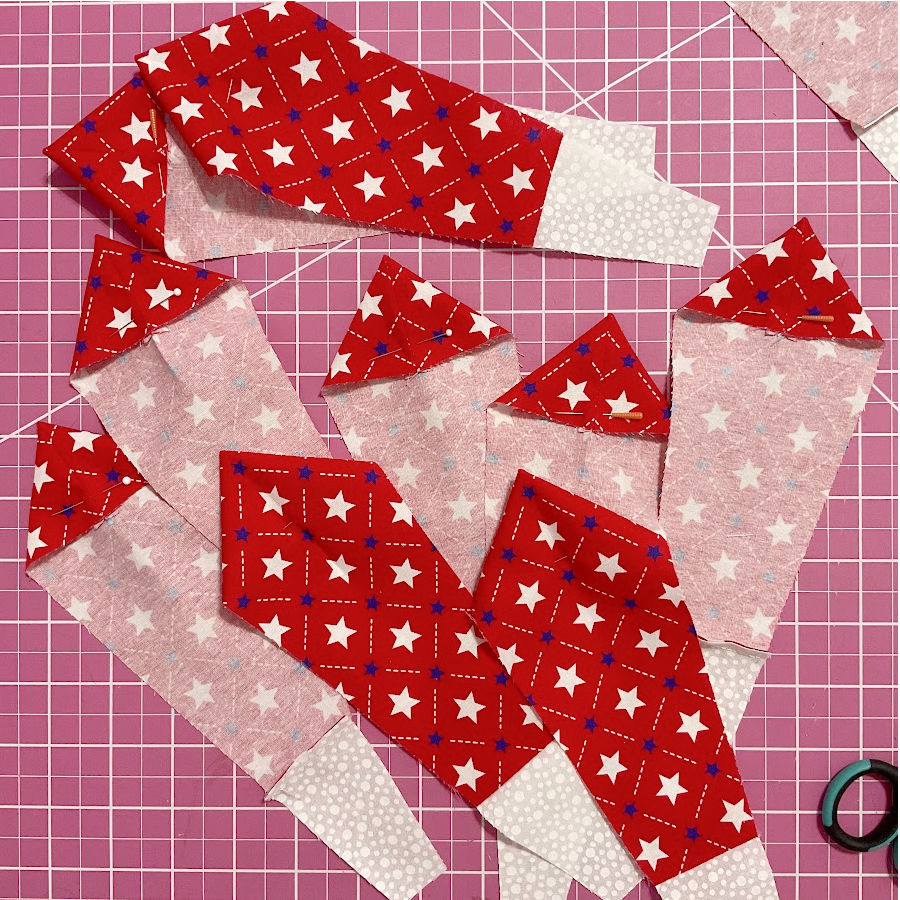
Step 4. Sew the Dresden Blade Tips
Now it is time to make the pointed ends of the Dresden blades. These are usually called the blade tips or Dresden points.
Each blade needs one folded and stitched tip. This gives the Dresden plate that sharp petal shape instead of a plain flat end.
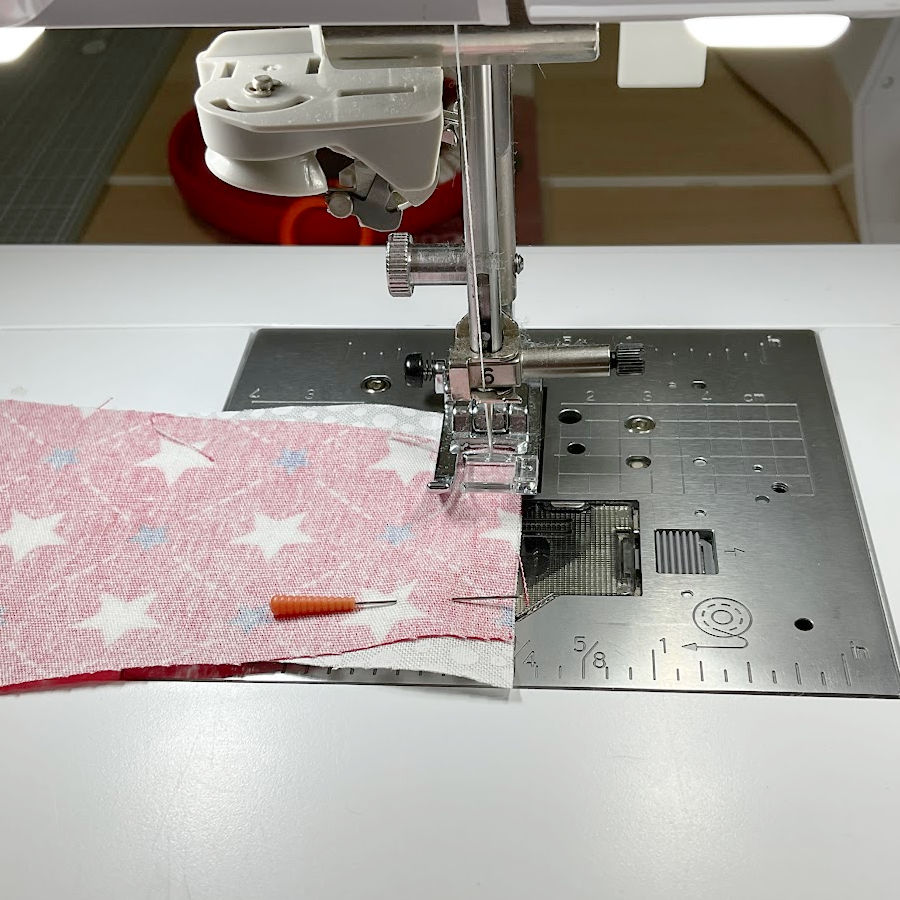
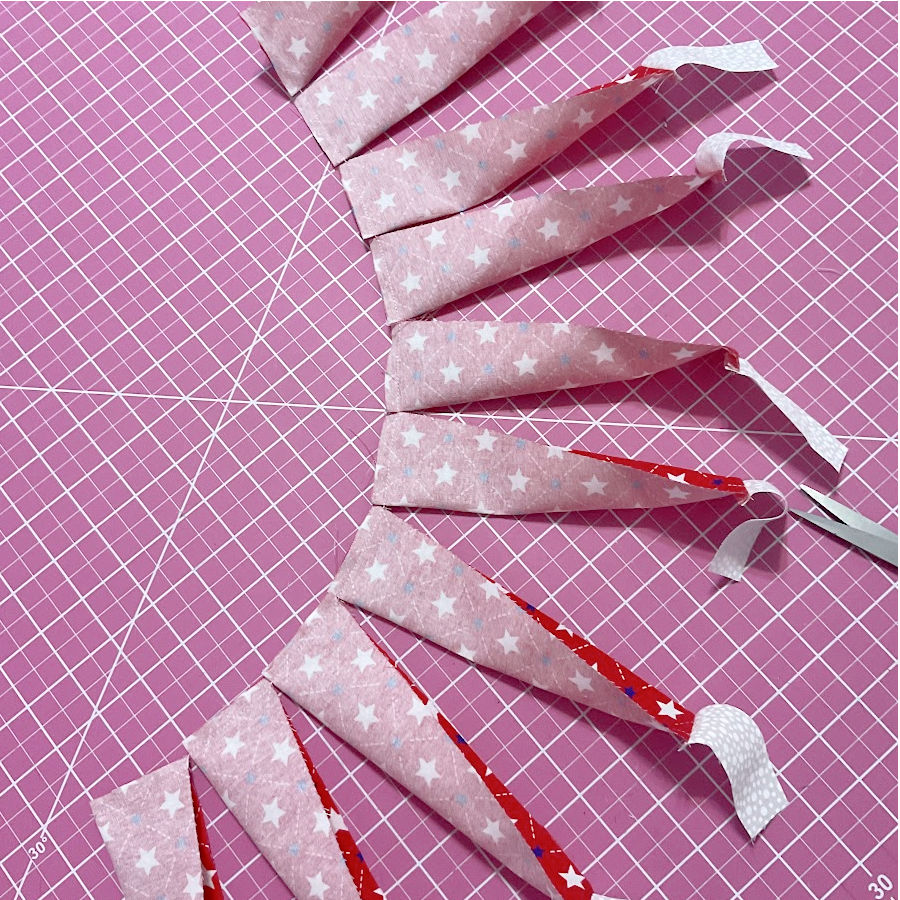
Fold one blade in half at the wide top edge with right sides together. Match the two top corners and the side edges. Pin near the top so the fabric layers stay aligned.
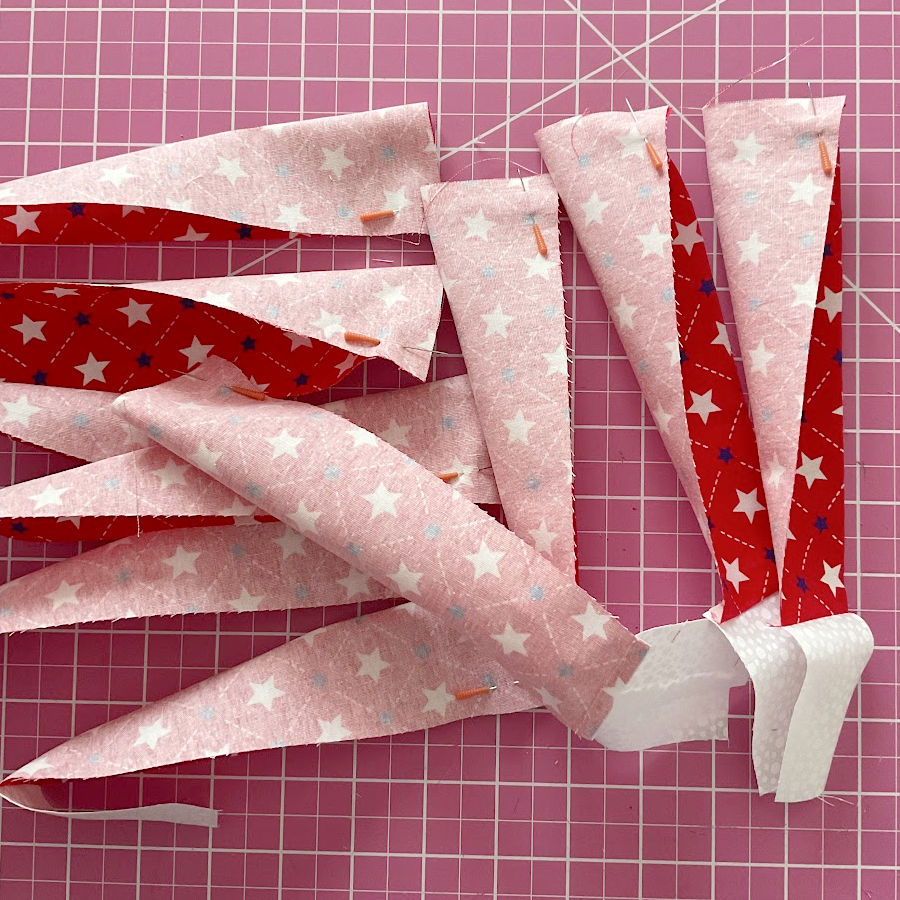

Sew across the top edge with a 1/4 inch seam allowance.
Use chain piecing for this step. Sew one blade tip, then place the next folded blade under the presser foot and keep sewing. Continue until all the blades in that group are sewn. Then cut the thread between the pieces. Only the red blade is shown here but the blue blades are sewn in a similar manner.
Repeat for both blade styles:
- 10 red-and-white blades
- 10 blue-and-white blades
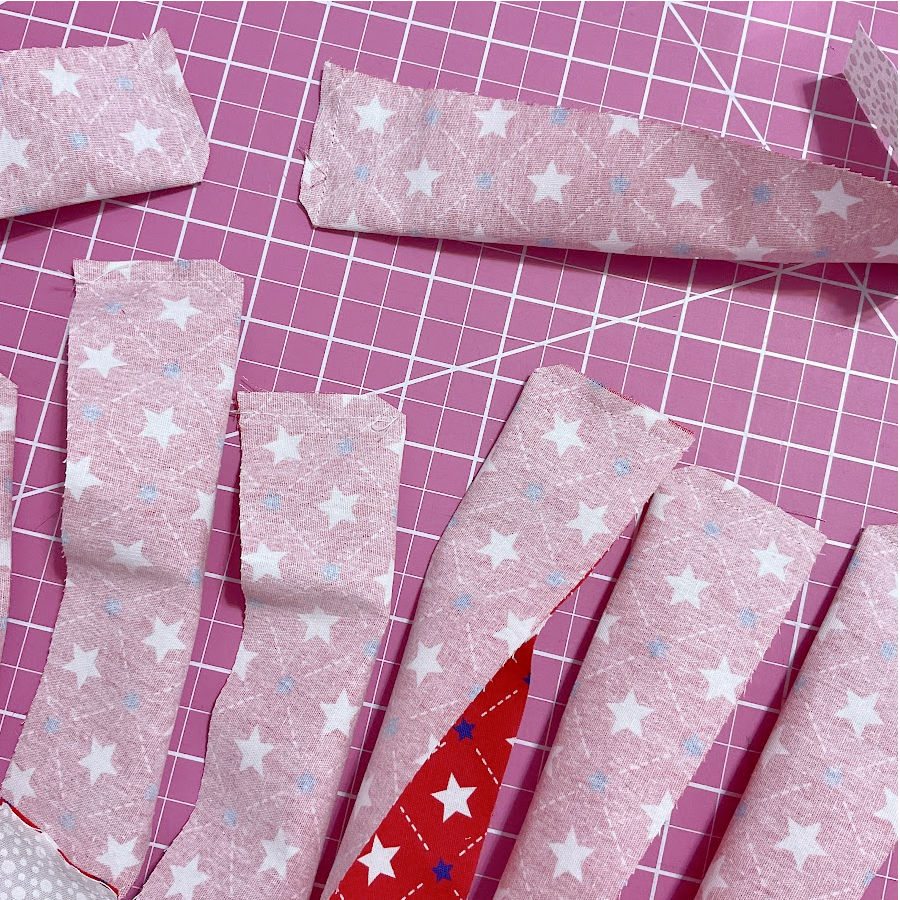
After the tips are sewn, trim the top corners close to the seam. Be careful not to cut through the stitches. This removes extra bulk, so the points turn out sharper.

✅ Related tutorial: Basic sewing techniques: How to sew corners and curved seams
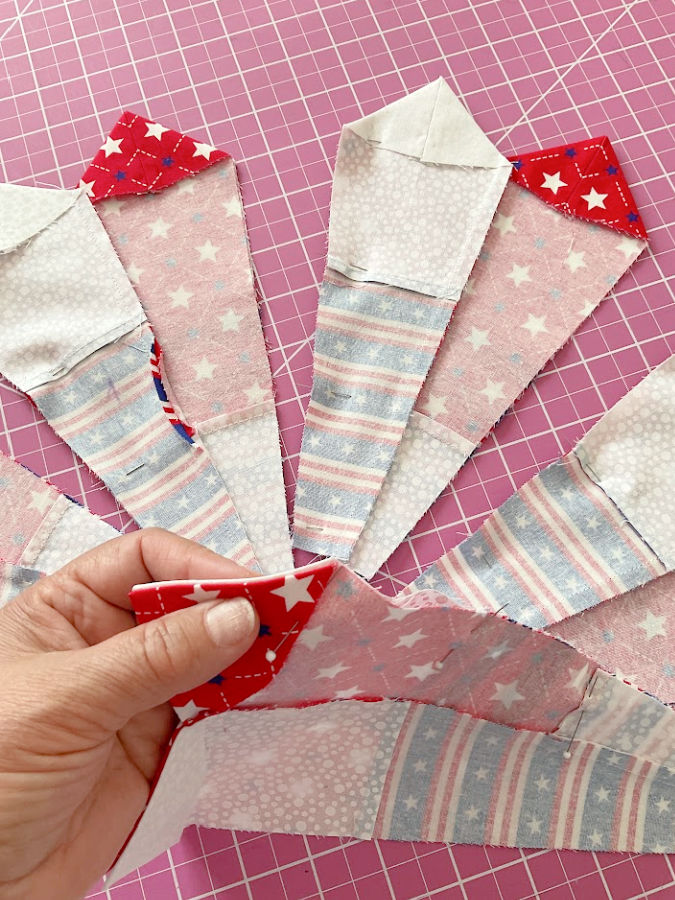
Finger-press the seam allowance open at the tip. This small step helps the point sit in the center after the blade is turned right side out.
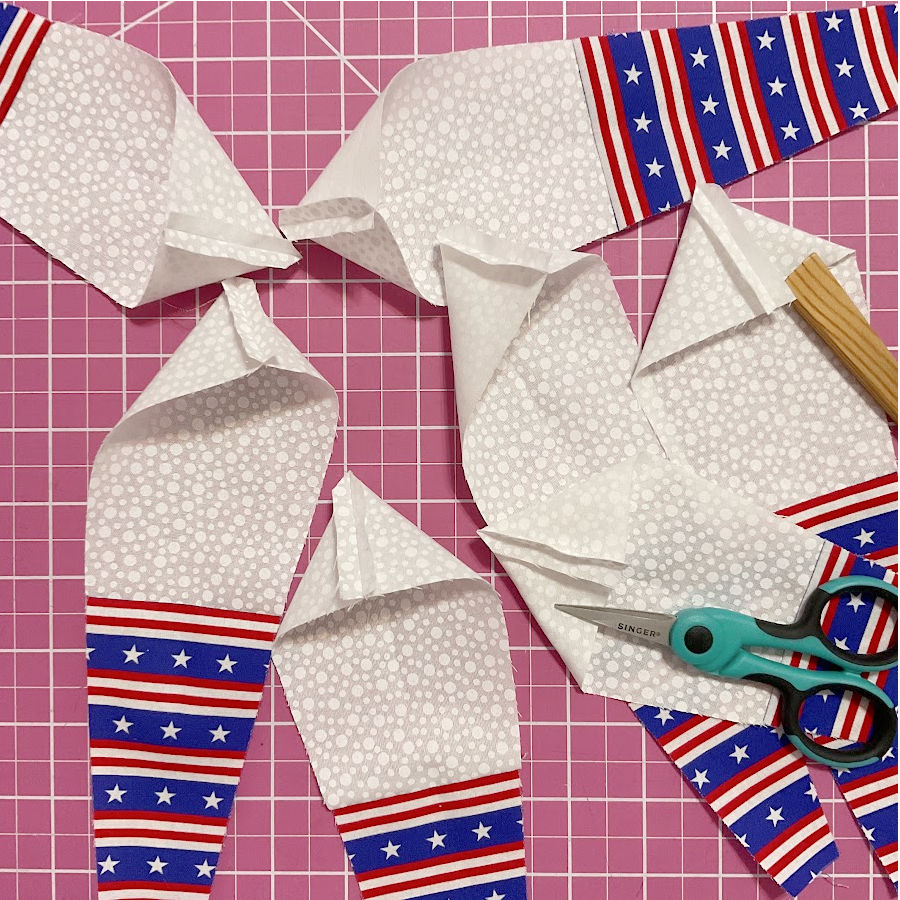


Turn each blade right side out. Place the seam in the center of the blade, not to one side. Use a point turner to gently shape the tip.
Press each blade flat after the point is shaped. The blade should have a neat point at the top, with the center seam lined up down the middle.
✅ Related tutorial: Pressing Matters: 15 Common Ironing Mistakes to Avoid
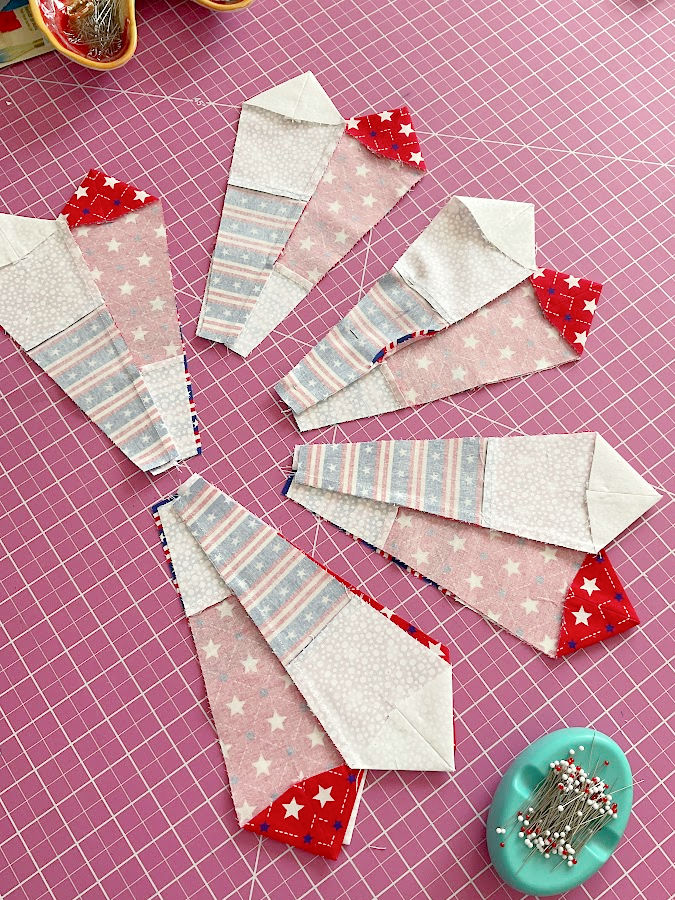
Do this for all 20 blades. Once the tips are finished, the Dresden pieces start to look much more like the final design. This is the moment when the pile of strips turns into something that feels like a quilt block.
Step 5. Sew the Dresden Blades Together
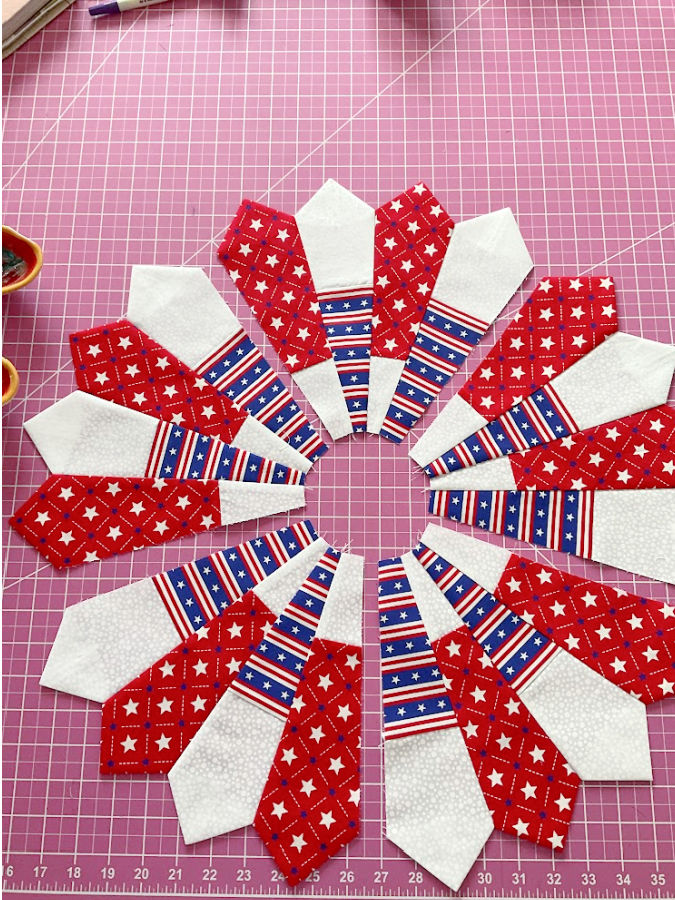
Place all 20 blades on your cutting mat first. Arrange them in the full Dresden plate design before you sew any seams.
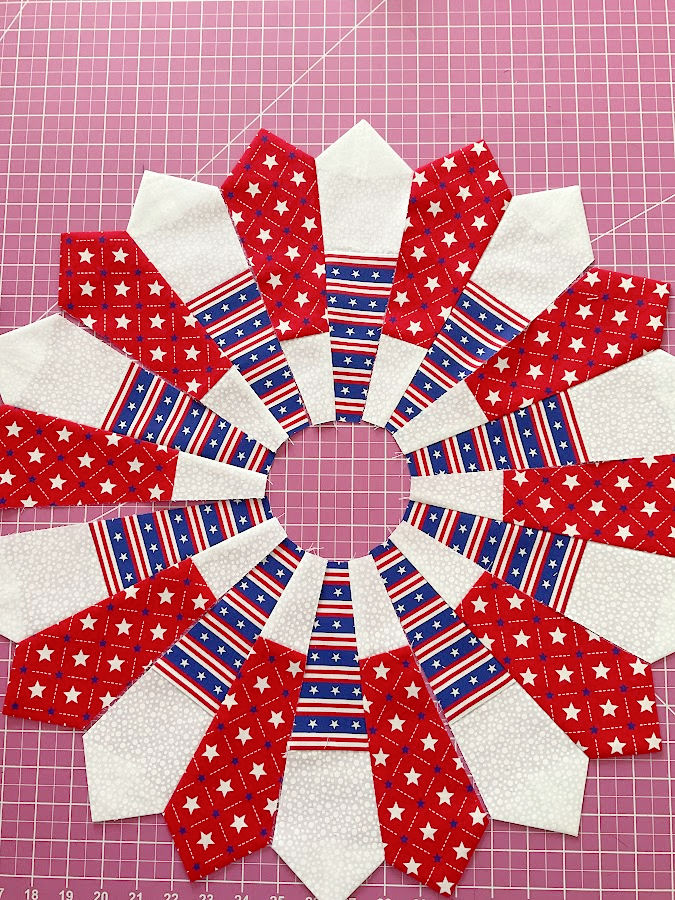
Alternate the blades so the red-and-white blades and blue-and-white blades form the firework pattern. Check the order from the front side. This is a good time to take a quick photo of the layout. The photo will help if a few pieces get turned around on the table.
I like to sew the blades together in pairs first.
Place two neighboring blades right sides together. Match the top edges, bottom edges, and the seam lines where the fabric colors meet. Pin the pieces so they do not shift.
Stitch along one long side with a 1/4 inch seam allowance.
Open the pair and press the seam allowance to one side. Press all seams in the same direction as you work around the circle. This helps the back of the Dresden plate stay more orderly.
Repeat until all blades are joined into pairs.
Next, sew the pairs together. Keep the pieces in the same order as your original layout.
Join one pair to the next pair with right sides together and a 1/4 inch seam allowance.
Open and press the seams in the same direction.
After that, join the smaller sections into larger sections. I usually sew:
- Two blades into pairs
- Pairs into groups of four
- Groups of four into larger sections
- Larger sections into the full circle
Keep checking the front side as you sew. The red, white, and blue sections should continue to alternate around the plate.
Step 6. Adjust the Dresden Plate So It Lies Flat
After I sewed all the blades together, I hoped for the best. Hope is free, after all, and it sits right there beside the seam ripper.
But … the Dresden plate was not completely flat.
It was close, but not close enough. The circle had a little extra fullness, and it needed some adjustment before I could attach it to the background fabric.
This can happen with Dresden plates. The design has 20 blades, which means 20 seam allowances. If a few seams are a tiny bit wider or narrower, those little changes add up around the circle. The angled edges can also stretch a bit as you sew and press. Add fabric thickness at the seams, and the plate may decide to lift slightly instead of lying smooth on the table.
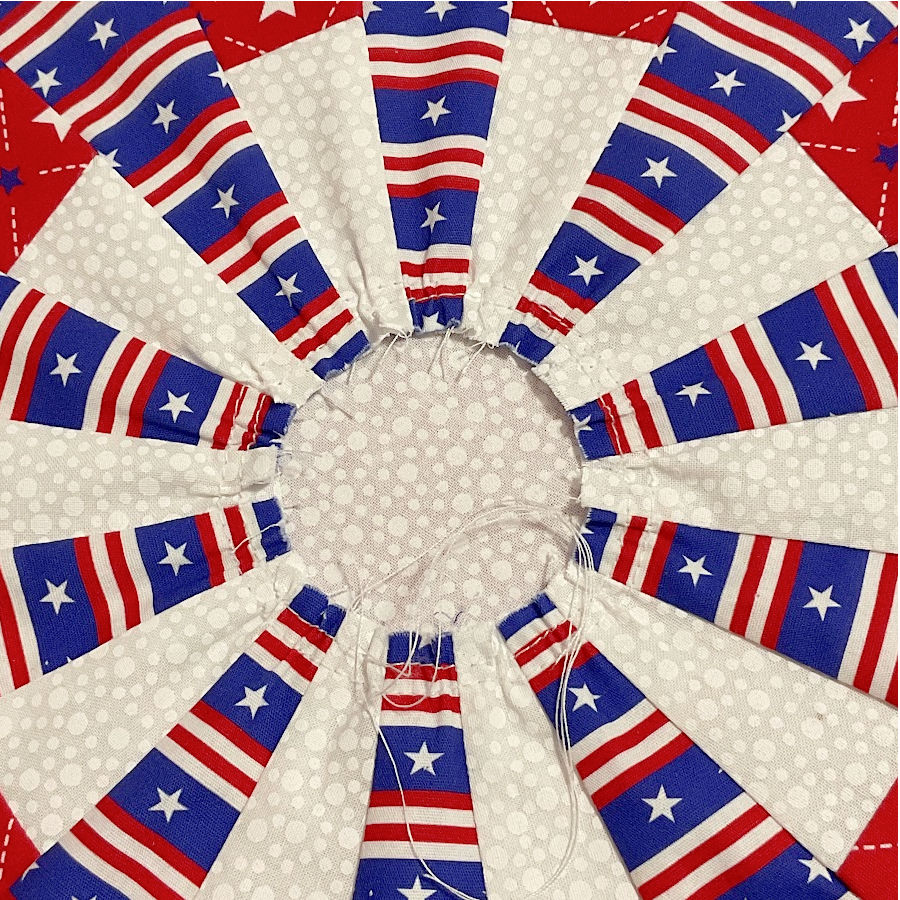
To fix it, I sewed two rows of gathering stitches around the inner raw edge of the Dresden plate.
✅ Related tutorial: How to Gather Fabric: 21 Tips for Even, Beautiful Gathers
Use a longer straight stitch on your sewing machine – 3.5 mm. Do not backstitch at the beginning or end. Leave long thread tails so you can pull them.
Sew the first row close to the inner raw edge. Sew the second row about 1/8 inch away from the first row.
Then gently pull the bobbin threads to gather the inner circle just a little. The goal is not to make ruffles. You only want to ease in the extra fullness so the Dresden plate lies flatter.
After I adjusted the inner circle, I pressed the Dresden plate with steam. The steam helped shape the fabric and settle the seams.
Press from the back first, then check the front.
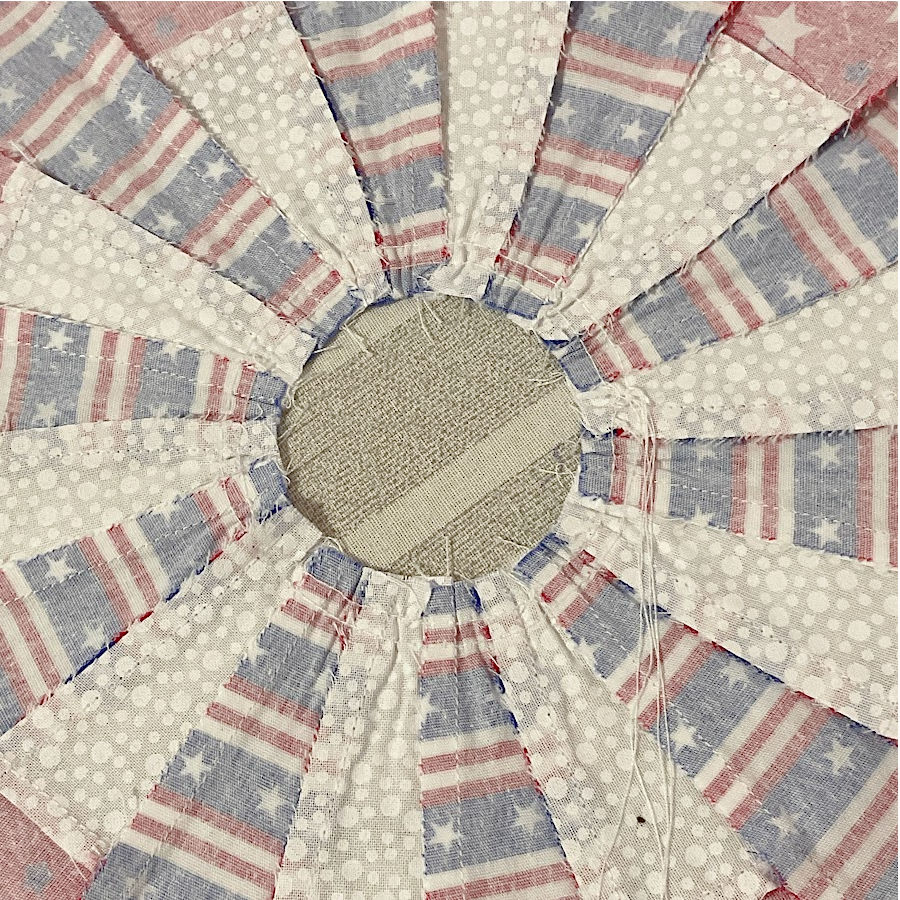
Use the iron carefully and do not stretch the plate while you press. Let the Dresden plate cool on the ironing board before you move it.
After this adjustment, the circle looked much better and was ready for the next step.
Step 7. Make the Center Circle
The center circle covers the raw inner edge of the Dresden plate. It also gives the design a strong focal point, which this block needs because there is a lot of movement around the circle.
I cut 2 circles from the red star fabric.
The circle templates came with my Dresden plate ruler, so I used one of those templates for this step. Choose a circle size that covers the center opening and overlaps the inner raw edges of the Dresden plate.
Place the two fabric circles right sides together.
Sew all the way around the circle with a narrow 1/8 inch seam allowance.
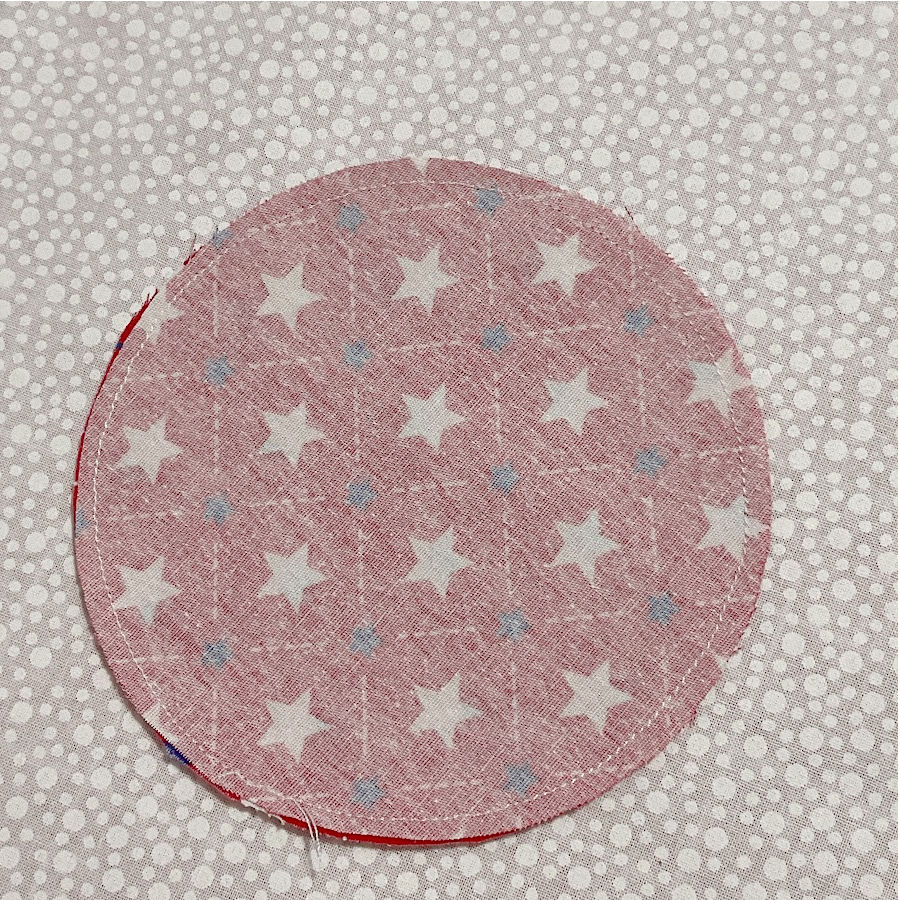

I did not leave an opening along the edge. This was intentional. Instead, I cut a small slit in the middle of the back circle only. The slit will not show later because that side will face the Dresden plate.
Cut the slit through only one fabric layer. Keep the front circle intact.
Before you turn the circle right side out, clip the seam allowance around the curved edge. I used pinking shears for this step. The little cuts help the curve lie smooth after the circle is turned. Curved seams need room to spread out, or they can look bumpy around the edge.
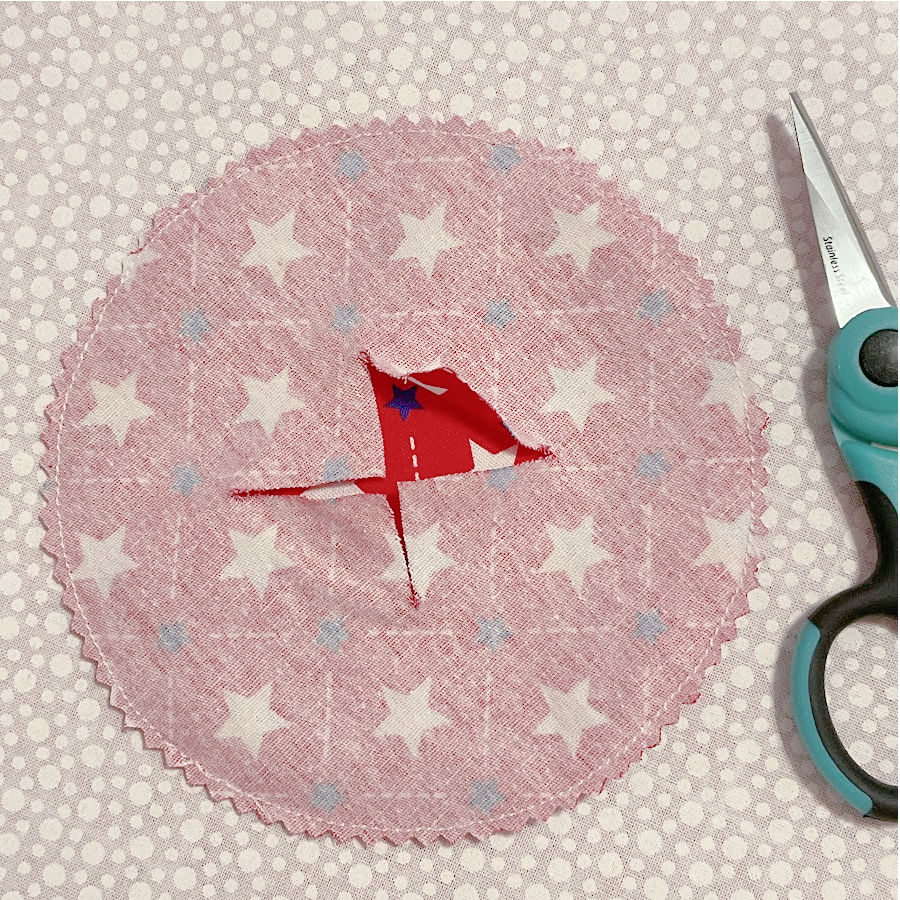

Turn the circle right side out through the slit.
Smooth the edge with your fingers. A point turner also helps, but use a gentle hand so you do not poke through the seam.
Press the circle well. Move the iron carefully around the edge and shape the circle as you press.
Now the center circle is finished. It can be placed over the opening in the middle of the Dresden plate.
What Will This Dresden Plate Become?
At this point, the 4th of July Fireworks Dresden plate block is assembled, and the center circle is made. The quilt itself is not finished yet. I still need to decide on the final layout and finish the project, so that will be a separate tutorial.
This block already gives me several ideas, though. It would work well as:
- A small wall quilt
- A patriotic table topper
- A pillow front
- A mini quilt
- A center medallion for a larger quilt
- One block in a full Dresden plate quilt
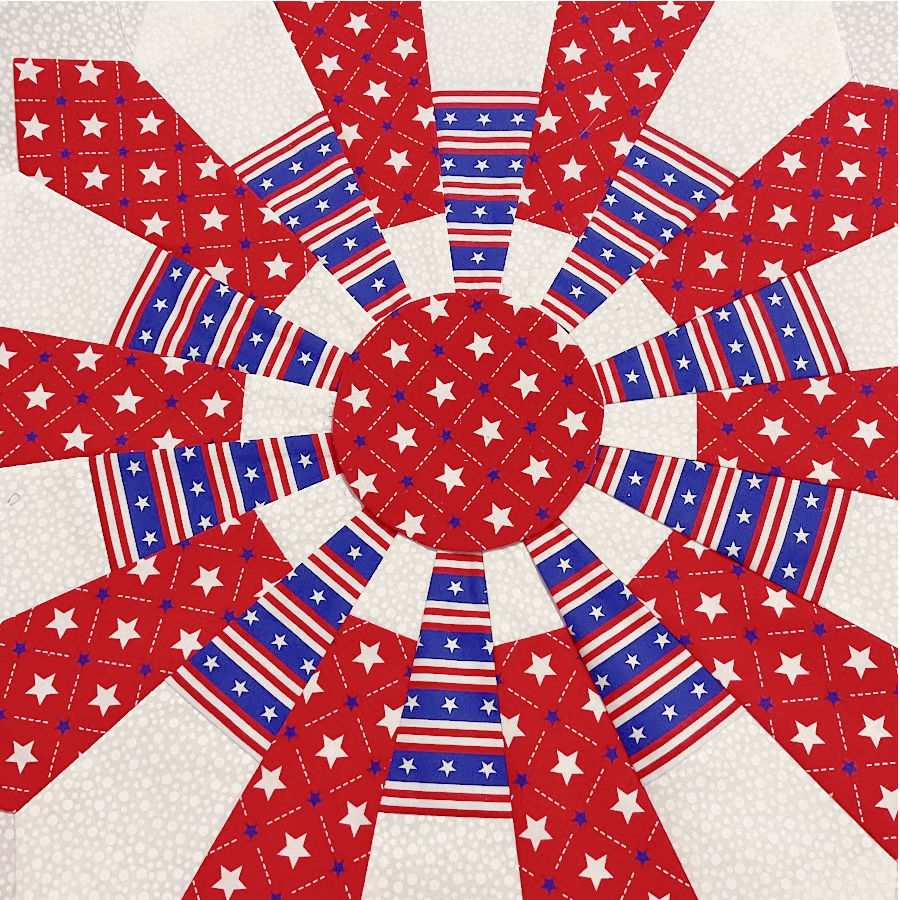
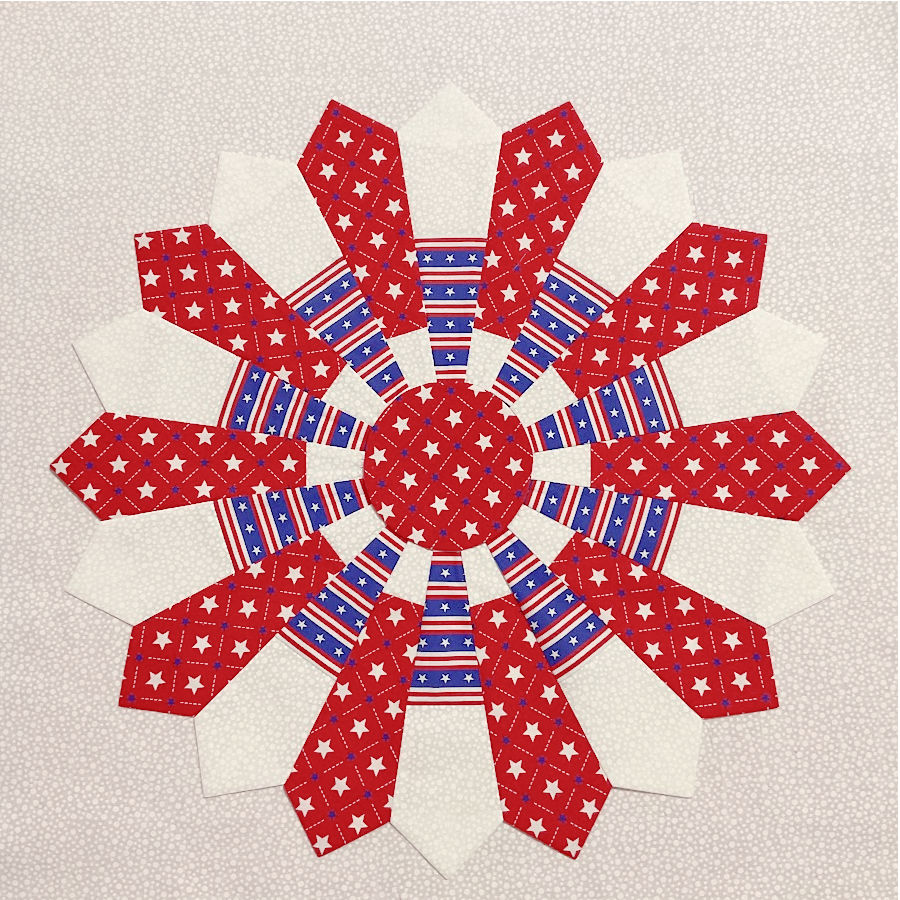
For now, I placed the Dresden plate on the background fabric to see how it looks. I like the way the red, white, and blue fabrics spread out from the center. It has that cheerful Fourth of July look without any extra shapes or appliqué pieces.
I am calling this design 4th of July Fireworks because the Dresden plate reminds me of a burst in the sky. The red star fabric gives it energy, the blue stripes add movement, and the white fabric keeps the design from looking crowded.
But I am still open to another name. Quilt names can be funny that way. Sometimes the first name sticks, and sometimes a better one shows up after the quilt sits on the table for a few days.
So tell me what you think. Does 4th of July Fireworks fit this Dresden plate, or would you give it another name? I would love to read your ideas before I finish the quilt.
Save the pin below so this Dresden plate tutorial is there when you need it. The block uses a few clever steps, and it helps to have the instructions close by when you cut the blades, sew the points, and adjust the circle. Pin it to your sewing or quilting board now and follow me on Pinterest for more tips, tutorials, and inspiration!

latest posts
- Dresden Plate Quilt Block: 4th of July Fireworks
- How To Sew Curves the Easy Way Using a Curve Master Presser Foot
- 30 Sewing Hacks That Turn Ordinary Items into Useful Sewing Tools
- Seam Allowances in Sewing Patterns: What They Are and How to Use Them
- What Do You Call a Person Who Sews? I Asked My Readers and Got 1,408 Opinions
- DIY Round Purse: PDF Sewing Pattern and Detailed Instructions
- Mini Wonder Clips By Clover: Useful Sewing Tool Or Just Another Notion?
- Non-Slip Grips For Quilting Rulers: A Small Notion With A Useful Job
- Fabric Eraser for Sewing: What It Removes and When to Use It