What is the stitch length and how to adjust it for different fabrics – a sewing tutorial
In this sewing tutorial, I want to talk about stitch length. When you are a beginner in sewing maybe you don’t think much about the stitch length. But as you sew more and more you notice that you need to change the stitch length quite often if you want to improve the quality of your quilting and sewing projects.
Note: Some of the links on this page are affiliate links. This means I will receive a commission if you order a product through one of my links. I only recommend products I believe in and use myself.
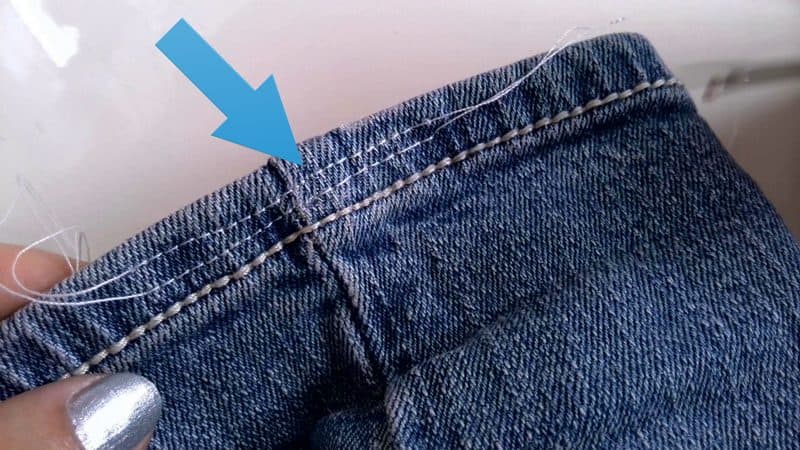
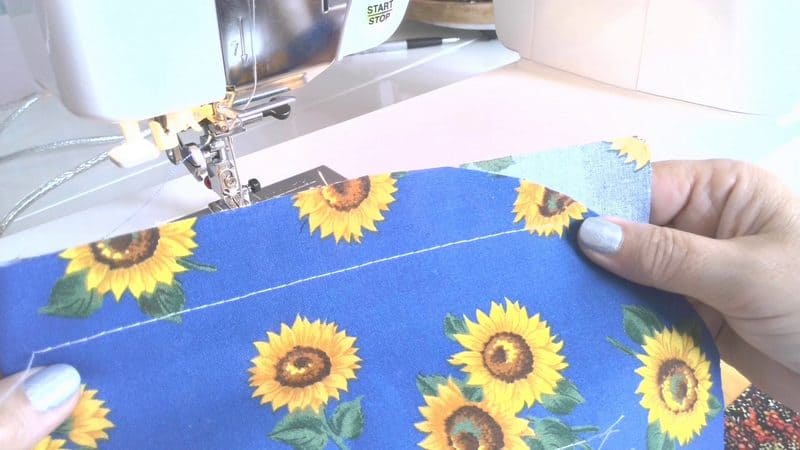
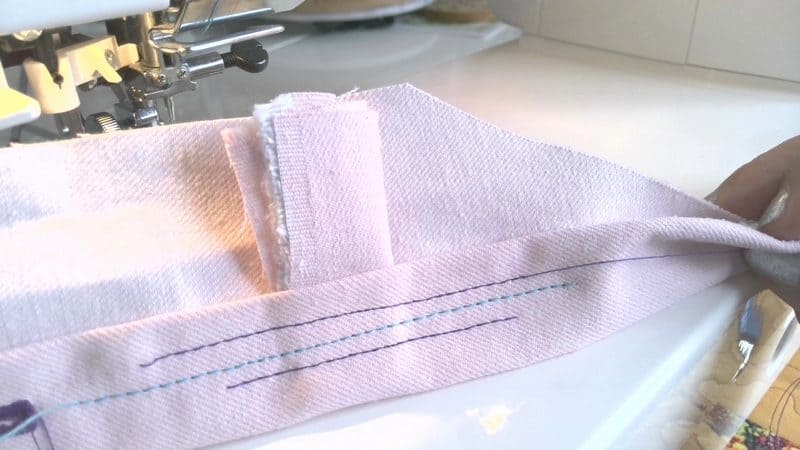
For example, look at this image below. This is a hem on jeans. Do you see a problem here? The stitch length is not constant in this seam and it obviously doesn’t look professional.
So, do you know how to fix this problem and choose the stitch length that is suitable for your fabric and the purpose of your stitch?
Read on.
Stitch length definition
What does stitch length mean?
It’s a distance between two consecutive punches of a needle in one step sewn by a sewing machine. Or maybe another way of defining it – it’s the distance the fabric advances between two punches of the needle.
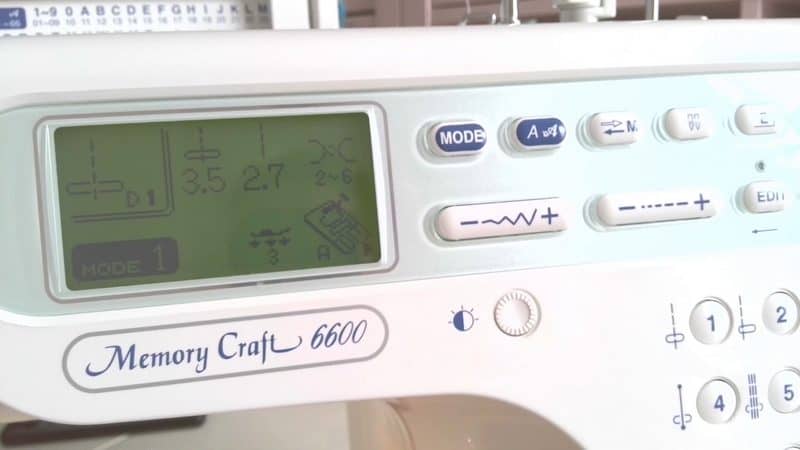
Most modern sewing machines indicate stitch length in millimeters. For example, if you set your stitch length to 2.7 it means that each stitch will be 2.7 millimeters long.
Most machines have stitch lengths from 0 to 5 mm, some have 7mm.
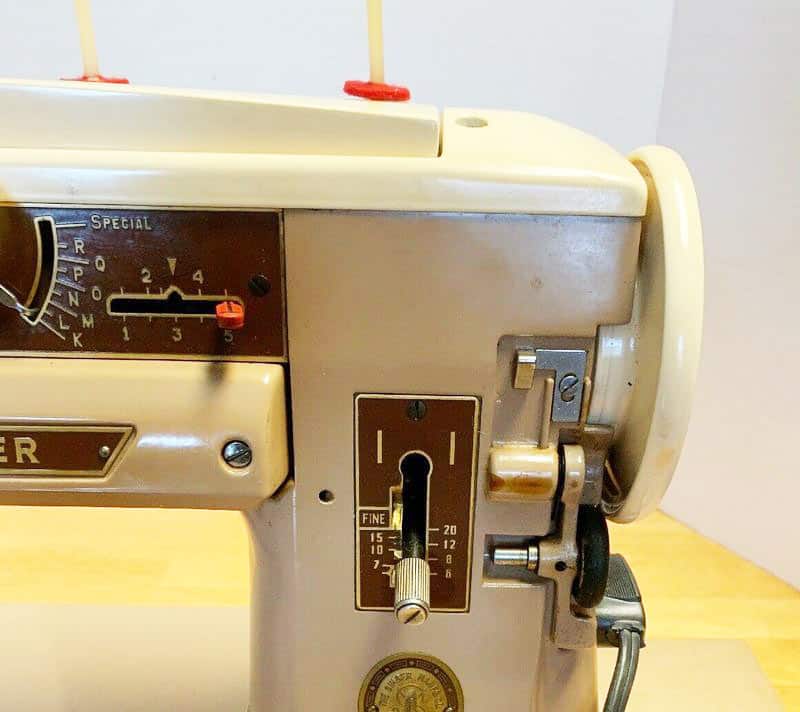
But what if you found an interesting old quilting pattern and it says that you need to set the stitch length at 15? It doesn’t mean you need to use those long stitches. And your sewing machine will not have that number anyway. In this case, they are using a different system – it’s called SPI (stitches-per-inch), and the number 15 means that the machine will sew 15 stitches in one inch of the seam.
We still can find some older machines (we call them vintage) that use this SPI system and if you have one you will have to set the stitch length accordingly in a range of 4-60. In this case, the bigger the number, the smaller the stitch, because more stitches will fit in an inch.
How do we convert between stitches per inch (SPI) and millimeters? There is an easy formula:
stitch length (in mm) = 25.4 DIVIDED BY stitches per inch
where 25.4 is the length of an inch in millimeters.
So, if your pattern says to use stitch length 15 you will have to divide 25.4 by 15 and it’s equal to 1.7 mm.
Stitch length regulator
Can you adjust the stitch length?
Yes, stitch length can be easily adjusted on most sewing machines for different types of stitches.
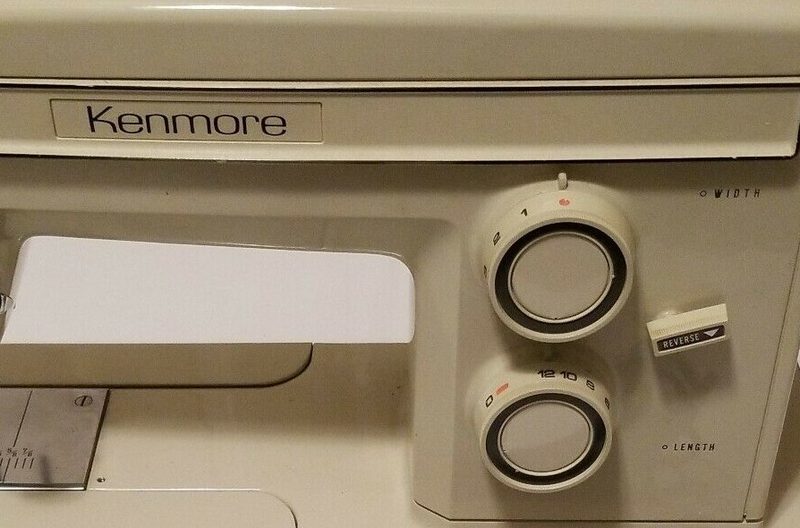
For a basic sewing machine look for the dial or knob with either “length” written next to it or the illustration that looks like a dashed line gradually increasing in size.
For modern computerized machines look for a selection on a touch screen or a button to press for adjusting the stitch length.
I think most sewing machines are programmed in 0.1mm increments – 2.1, 2.2, 2.3, etc. Some are set in 0.5mm increments – 2.0, 2.5, 3.0, etc.
If you are planning to buy a new sewing machine choose one with a more advanced stitch length regulator.
Do you know what happens when you change the stitch length?
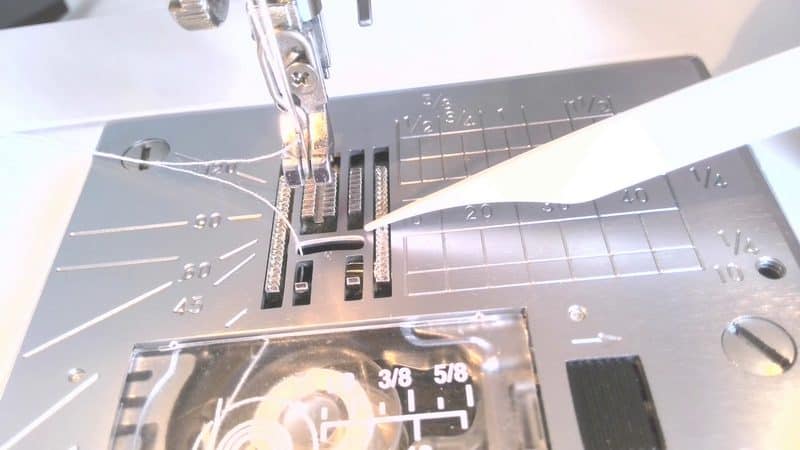
By changing the stitch length you tell the feed dogs how much fabric to feed between the stitches. If you increase the stitch length the fabric will advance for a longer distance between needle punches. If you make the stitch length smaller the feed dogs will make the fabric advance less. Below is an image of the feed dogs on my machine (in case you are wondering what I am talking about)
What is a standard stitch length?
Most sewing machines have a default stitch length set between 2.0mm and 2.5mm.
What stitch length to use
Use different stitch lengths for your projects to suit your fabric, the thread you are using, and the purpose of your stitch.
Let’s see why we need to adjust the stitch length.
First, you will need to consider the fabric you are using for your particular project.
- For lightweight and sheer fabrics like silk charmeuse or chiffon use a shorter stitch length (1.5-2). Otherwise, the fabric may pucker.
2. For medium-weight fabrics use the standard stitch length – of 2.0 – 2.5
3. For heavyweight fabrics and for quilts with a few layers of fabric and batting set the stitch length longer – 3.0 -4.0
4. For sewing leather and vinyl use longer stitches to reduce the number of holes made by a needle. 2.8 – 3.5
Second, you have to consider the purpose of your stitch.
- For basting stitches made by sewing machines use the longest stitch length 5mm (up to 7mm on some machines) so they will be easy to remove.
2. For topstitching, quilting and decorative stitching use a longer stitch length (2.5 – 3.5 depending on the fabric thickness)
3. For stay stitching set your stitch length shorter than 1.5 – 2.0
4. For paper piecing use a shorter stitch length of 1.3-1.6mm
5. For quilt piecing use a shorter stitch length of 1.8-2.0mm
6. For machine quilting set the stitch length longer (2.5 – 3.5)
7. For gathering use a stitch length of 4.5 or 5
8. For curves with a smaller radius use a shorter stitch
9. For free motion quilting the stitch length is irrelevant because the feed dogs are dropped and the fabric is not going to advance. But not all the machines can drop the feed dogs.
Next, you need to consider the thickness of the thread you are using for your particular project
- For thicker threads (like 30wt. cotton) use a longer stitch
- For thinner threads (like 100wt.silk) use a shorter stitch
- For metallic and rayon threads use a longer stitch length
- For invisible threads (monofilament threads) use a shorter stitch length – it will help to “hide” the thread even more.
I use good-quality threads (Gutermann Sew-All thread) from this online store.
But these are only the guidelines. Always test first on the scrap fabric you are using for your project. It’s up to you to decide what stitch length to use. Make sure that the stitch looks good and makes a strong seam.
Sewing machine stitch length problems
The most common problem with the stitch length is uneven stitches even if you don’t change your settings for the project.
There are a number of reasons for this.
The thickness of the fabric may be changing when you make a seam. For example, when you sew a hem on jeans: you start with 3 layers of jean fabric and when you reach a side seam – you suddenly have 5 layers. The feed dogs grip a thicker fabric differently than the thinner one. So the thicker fabric might not advance the same distance as the thinner one.
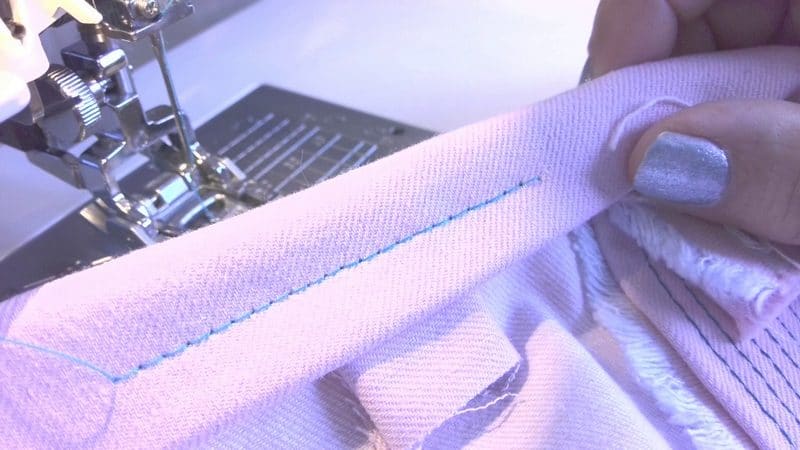
To solve this problem, slow down when you approach thicker areas, stop the machine with the needle down in the fabric at the last stitch on the thinner area, then raise the presser foot and lower it again; continue the seam. This is going to allow the thicker part of the seam to arrange itself better under the foot.
The next common reason is that you might be pulling the fabric behind the needle, forcing the fabric to go through.
To solve this problem – don’t keep your hand on the fabric behind the needle and let the feed dogs move the fabric.
For variable thickness fabrics, it’s better to use a walking foot. The correctly installed walking foot will keep the stitch length constant. The walking foot is designed to help to grip the fabric properly for different thicknesses.
The next problem – you used a stitch length not appropriate for your fabric.
For example, you used too short stitches for heavyweight fabric and they got bunched together (and the fabric didn’t even move, or the needle got broken). Or nothing bad happened but the seam looks weird like the stitches are forced into the fabric. Increase the stitch length and make it suitable for the fabric.
Or you used longer stitches for lightweight silk fabric and the fabric puckered under the presser foot. On lightweight fabric, longer stitches may look like basting stitches and it’s not a professional finish.
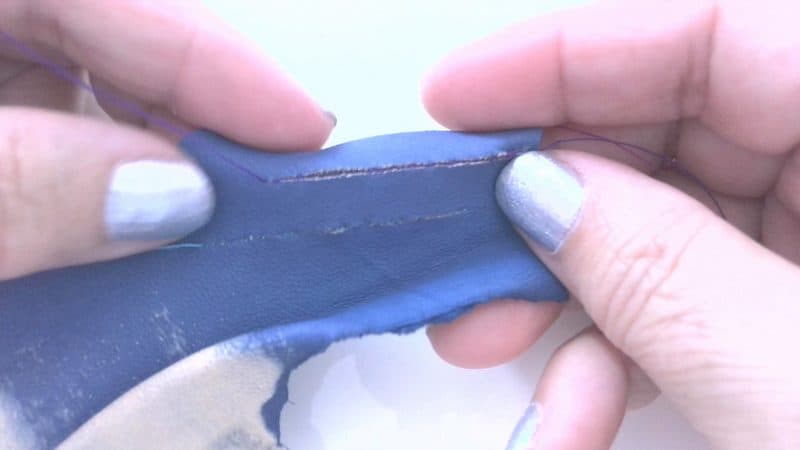
Too short stitches used on leather and vinyl can rip the fabric destroying your project completely. Always test first on a scrap before applying your settings.
Stitch length for quilting
For quilting the stitch length generally should be longer – 2.5 – 3.5 mm. It also depends on the thickness of the quilt and what batting you use, and what thread you use. Test your stitch length on a piece of scrap, try out different stitch lengths and adjust your settings to your liking. Longer stitches tend to be more attractive.
The stitch length for a beautiful machine quilt should be even throughout the whole quilt.
But I have been given a tip to use a very small stitch length (0.5mm) at the beginning and at the end of quilting to secure a machine quilted seam (instead of backstitching).
What stitch length to use for quilt piecing
For standard quilt piecing the recommended stitch length is 1.8-2.0mm. Shorter stitches are a bit stronger. Quilts are going to be washed many times and you don’t want your seams to break.
And for paper piecing a shorter stitch length of 1.3-1.6mm helps perforate the paper and make it easier to remove.
What is stitch length in knit fabric?
Use a longer stitch length for knits and other stretchy fabrics. If the stitches are too small the knit fabric will pucker a lot.
Stitch length for zigzag and decorative stitches
Stitch length can be regulated not only for straight stitches but also for all other stitches your sewing machine has.
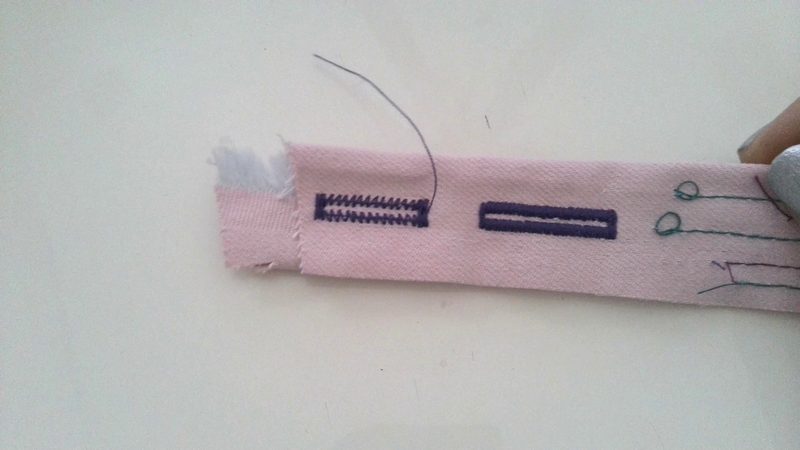
Let me show you for example 2 decorative stitches: the default length is set to 2.5 mm and I can change it to 2.0, 1.5, and 1.0 The stitches look completely different in these different settings.

On my Janome machine, almost all decorative stitches are programmed in 0.5 mm increments with the default setting at 2.5 mm.
Sometimes it’s very important to regulate the stitch length for zigzag and decorative stitches.
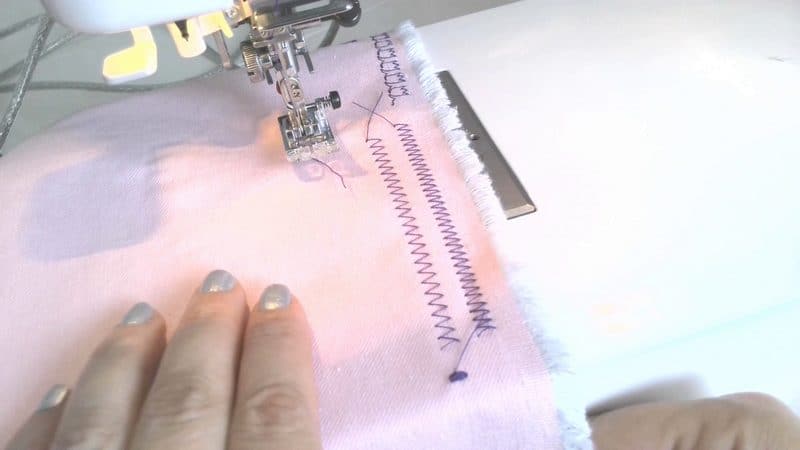
For example, when you are using zigzag stitches it’s advisable to make it look proportional. If you’re increasing the width you probably should increase the length also. With zigzag stitches you may need to put the stitch length to 0 – for example, I use it often to secure seams for pockets, zippers, slits, etc.
Or you might need to increase the zigzag stitch length to a maximum if you want to sew knit fabric on your regular sewing machine (not a serger).
Do you know that the stitch length settings may make or break your buttonhole sewing? If your sewing machine is stuck in the middle of the buttonhole making try to increase the stitch length and your problem with buttonholes might be solved. For example, the default stitch length for a regular buttonhole on my Janome is 0.45 but I can increase it to 1.0 if I need to. And I often need it when I make buttonholes for a coat or a jacket using thicker fabrics.
You might be interested in these tutorials also if you like to sew:
Did you find this tutorial helpful? If so, save this pin (see below) on your sewing board so you can come to this tutorial later and follow me on Pinterest for more tips, tutorials, and inspiration!
latest posts
- What Do You Call a Person Who Sews? I Asked My Readers and Got 1,408 Opinions
- DIY Round Purse: PDF Sewing Pattern and Detailed Instructions
- Mini Wonder Clips By Clover: Useful Sewing Tool Or Just Another Notion?
- Non-Slip Grips For Quilting Rulers: A Small Notion With A Useful Job
- Fabric Eraser for Sewing: What It Removes and When to Use It
- What Is The Best Thread For Sewing Machine Projects? Let’s Find Out!
- Butterfly Quilt Block Tutorial – Foundation Paper Piecing
- How To Sew Quilt Squares So The Corners Match
- Sewing With Fork Pins: How They Help With Pattern Matching, Slippery Fabric, And Seams