
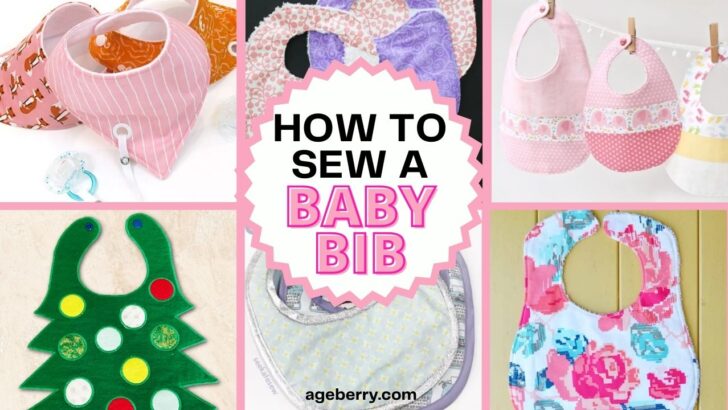
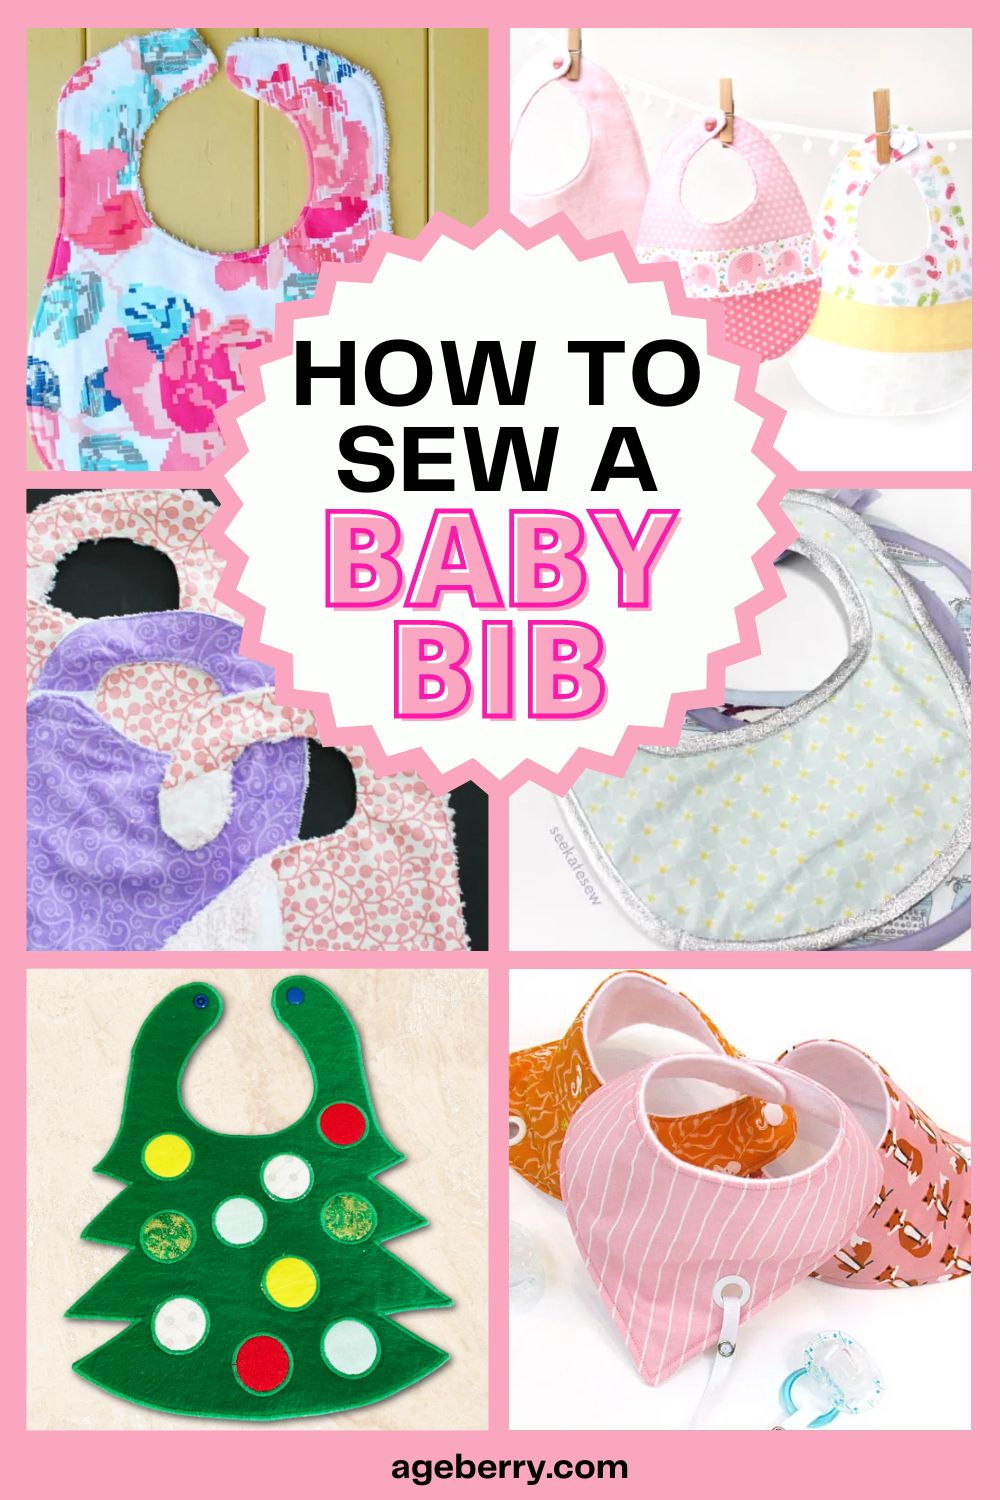
How To Sew A Baby Bib
Few sewing projects are as easy (or practical) as sewing a DIY baby bib. From keeping baby’s clothes clean to making a terrific handmade gift for new moms, there are plenty of reasons to learn how to make baby bibs yourself.
Whenever I know someone who is having a baby, there are a couple of things I like to make as a gift for the new mom: a DIY bunny lovey and a few bibs. Not only are these baby items quick and fun to create, but you just know that what you sew will be loved by little hands and hearts.
What Are Baby Bibs?
Baby bibs (also sometimes called dribble bibs) are items that parents use nearly constantly when babies are teething. Infants also wear them during meal times and when they have a bottle to catch and soak up spills to prevent their clothes from getting (and staying) wet.
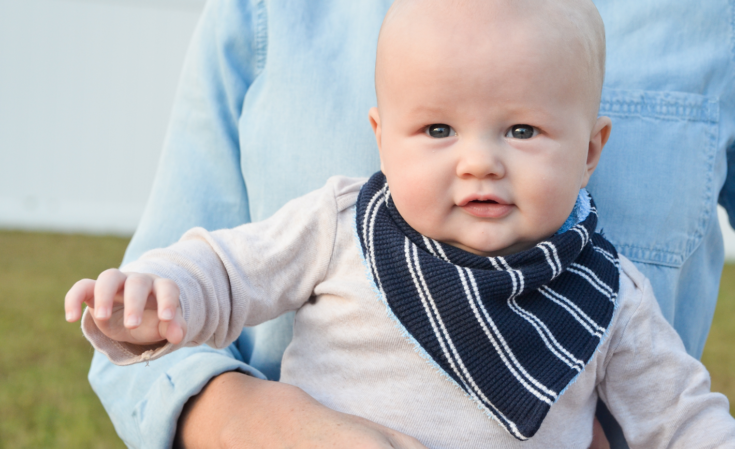
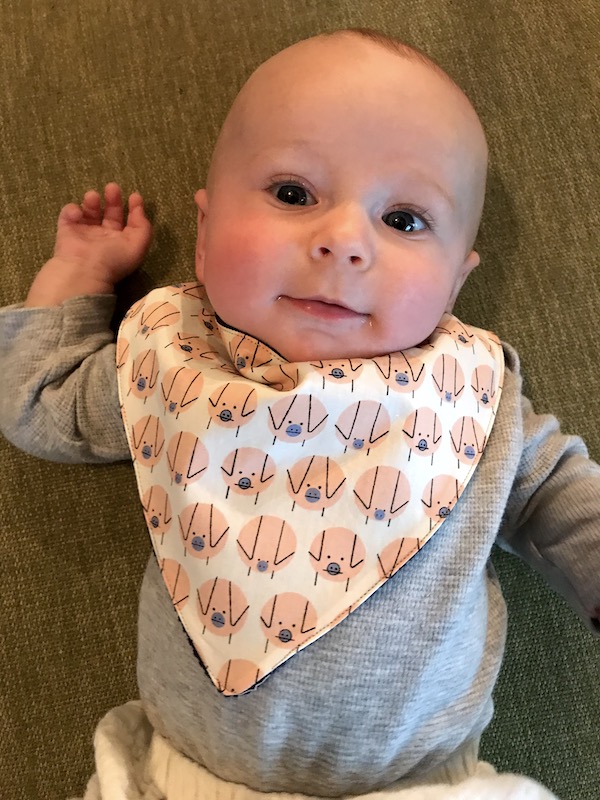
And while they’re oh-so-practical, bibs are also becoming popular baby fashion pieces. Moms everywhere are using adorable baby bibs as a decorative part of their child’s outfit for the day (or hour!), so they look cute in every way – even while drooling excessively. Over the last several years, the trend has been to move away from the traditional “U” shape in favor of a bandana-style bib.
Why Make Your Own Bibs?
So why make them instead of just buying cute trendy baby bibs? There’s absolutely nothing wrong with buying them. However, anytime you make a bib, you have the ability to completely customize it by choosing the specific design and fabrics you want to use. Your final result will be a high-quality, personalized item that’s also cheaper than what you can buy.
Given how simple it is to do a project like this, making your own is a no-brainer – even if you are new to sewing! I’m going over everything you need to know about making a DIY baby bib, from the best fabric to use to the best items for closures and everything in between. Keep reading to learn more.
It’s important to note that there are many ways to make a baby bib but recently I’ve seen tutorials on how to make a baby bib as in the hoop embroidery project and it includes this step-by-step tutorial on my site: In The Hoop Embroidery Project: Fabric Christmas Tree Baby Bib.
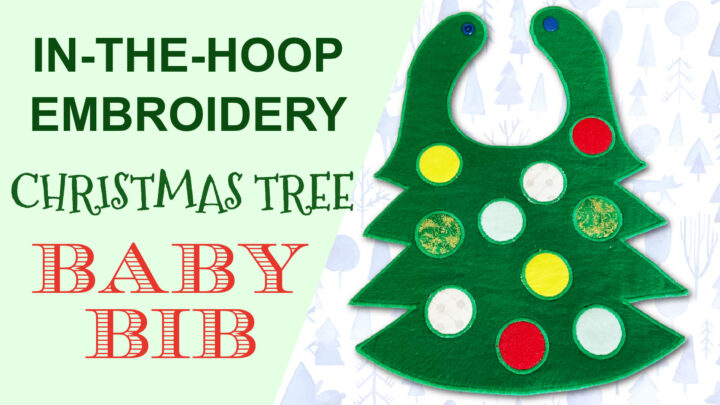
If you’re thinking of a lasting and meaningful gift for Christmas, making personalized baby bibs is the perfect option. It’s so much more meaningful than buying something at the store because you made it yourself with love!
In this tutorial, I will show you how to make a tree-themed baby bib using my favorite technique – in-the-hoop embroidery. A step-by-step photo tutorial is included that shows each step that goes into making your own baby bib from start to finish.
The Best Fabric Choices For Baby Bibs
When it comes to making homemade baby bibs, first and foremost, you’ll want to use very absorbent fabric. The entire purpose is to catch and soak up drool, after all! It’s a good thing that there are several types of fabric to choose from.
Fabrics You Can Use
Here are some fabrics to consider using when you make a baby bib:
- Cotton – Cotton prints are a classic choice. They’re affordable, available in a huge variety of colors and designs, and easy to work with. As a bonus, they’re not only very absorbent but also breathable, so they won’t make the baby too hot when wearing cotton bibs.
- Flannel – Flannel is basically brushed cotton to make it fluffier and softer. It’s also highly absorbent and comes in a large variety of colors and designs. When it comes to flannel, the tighter the weave, the better the bib will be.
- Bamboo – This is a fabric that I haven’t written much about (yet), but it’s a very good option to use for your DIY baby bib. It’s hypoallergenic, highly absorbent (up to 40% more absorbent than cotton!), and allows moisture to evaporate quickly, so it dries faster than cotton does.
- Terry cloth – Terry cloth is 100% cotton and the primary choice for bath towels, so you know it’s absorbent. Plus, it’s super soft, making it comfortable to wear all day and easy to clean.
- Polar fleece – This fabric acts as a moisture barrier by preventing wetness from passing through to the clothing. Although it’s not waterproof, it does serve as an effective barrier. That’s why it’s a common choice as the back fabric for baby bibs.
- Microfleece – Microfleece is a thin, soft fabric that’s thinner than polar fleece but just as effective at preventing the wetness from passing through. Plus, it comes in a large variety of colors to make coordinating with the front fabric a breeze.
- PUL – Weird name, right? PUL actually stands for Polyurethane Laminate, which is a lightweight knit fabric coated in polyurethane. The lamination creates an entirely breathable and waterproof fabric that makes a terrific backing for baby bibs. Plus, it comes in a large variety of patterns and colors for a beautiful finished product.
Fabrics To Avoid
Although knits and some stretchy fabrics are absorbent, I don’t recommend using them to sew baby bibs because they’re more difficult to cut and sew. Minky (plush) fabric is a popular choice, but if you’re new to sewing, I would choose other fabrics instead since it’s fluffy and stretchy, making them a challenge to work with.
Baby Bib Pattern Measurements
From newborn to 4 years of age, babies grow a tremendous amount. That is why babies have an entirely new wardrobe every three months for the first year!
Can you use the same baby bibs for newborns as you can for a 1-year-old or a 2-year-old, etc.? In order to be able to do that, you would need to have (very) adjustable bibs.
DIY baby bibs can be adjustable…to a point. But since babies grow so quickly, it’s not feasible to make them adjustable enough to carry a baby all the way from newborn through preschool age. Not only would the neck hole need to be adjustable, but the bib itself would need to be able to get larger in order to cover the baby’s growing body.
This is why I recommend making bibs in different sizes. They’re so easy to sew that it’s actually easier to make multiple in different sizes than it is to make them as adjustable as they would need to be.
Do you want to make baby bibs in different sizes? Here are a couple of tutorials you won’t want to miss.
A Bib For Babies Of All Sizes
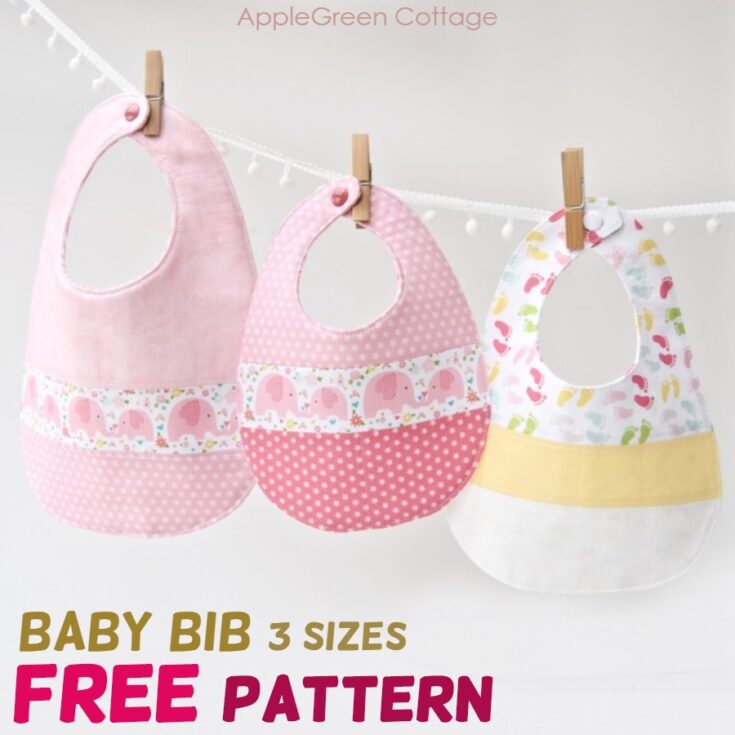
AppleGreen Cottage offers three different sizes of patterns for baby bibs: newborn, infant, and toddler. The post includes sizing for the different ages and a full tutorial for a traditional-shaped baby bib. In fact, this one tutorial will take you from birth to preschool without missing a beat, and the patterns are so cute!
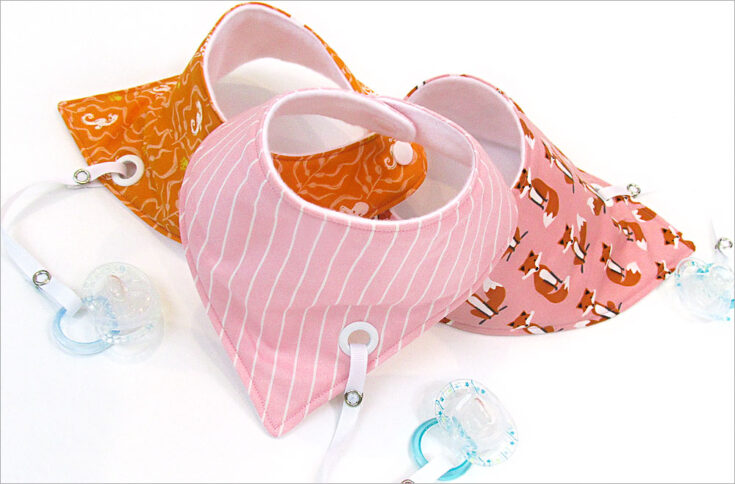
Bandana Style Baby Drool Bibs With Binky Leash
If you prefer the bandana-style baby bib, check out this tutorial from Sew4Home. It also has three different sizes of patterns for bibs to keep you (or rather, your baby) dry, well into their toddler years. And as a bonus, this pattern includes the ability to add a binky leash so that you don’t have to spend endless hours playing the “pick up the binky” game every time your baby drops it.
Closure Options For A Baby Bib
There are several different ways to close a baby’s bib. Here are several options, along with some examples for each style:
DIY Baby Bib Pattern With Velcro
In the past, I didn’t like using Velcro for baby bibs because it was rough and could irritate the baby’s skin if it wasn’t fastened completely. However, the new baby-friendly style of Velcro isn’t scratchy, so it works well for babies. Since it offers quick closure and quick release, it’s one of my favorite closure types.
Mary Martha Mama has a simple DIY baby bib tutorial that uses Velcro as the closure. This basic pattern is easy for beginners to make and will provide a cute baby bib that’s quick and simple to close behind the baby’s neck.
Bib Pattern for Beginners: You Can Make This! – Mary Martha Mama
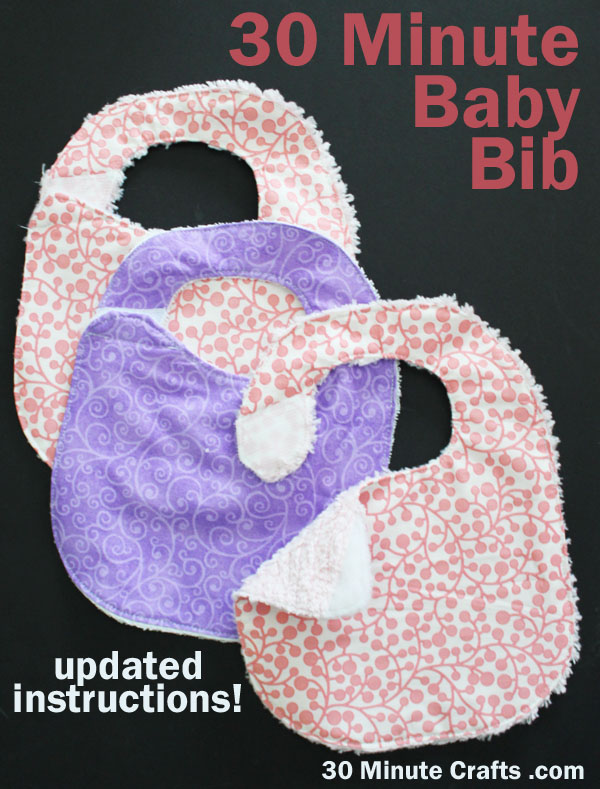
30 Minute Crafts has a baby bib design that uses Velcro for the closure, but the closure is in the front, where the neck strap meets the main portion of the bib. This design is better if you plan to use traditional Velcro, which can be a little scratchy against tender skin.
Baby Bib Patterns That Use Ties
On the one hand, tie closures are great because they’re non-irritating and adjustable so that the baby can wear the bib just a little longer. On the other hand, they can be difficult and time-consuming to close, especially when you’re dealing with a squirming, hungry baby!
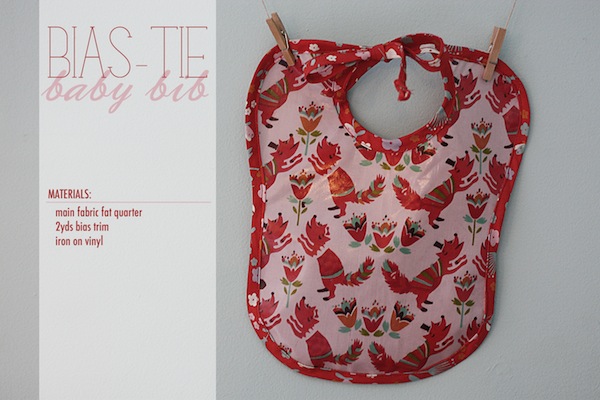
This traditional-style baby big pattern from Littlest Pretty Things via Birch Fabrics uses ties to close the baby bib. It’s the ultimate adjustable closure.
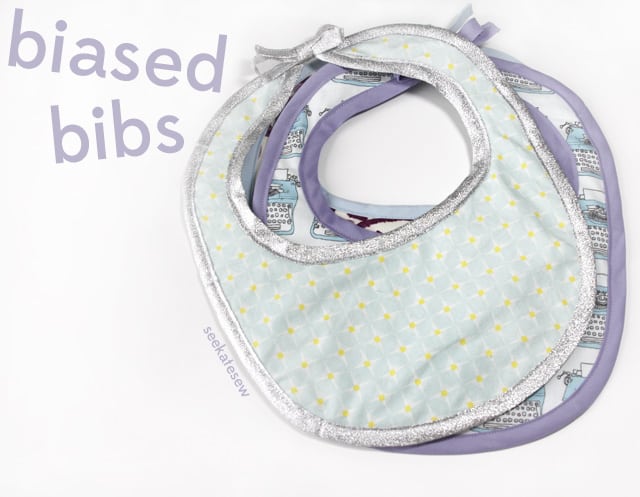
See Kate Sew has a baby bib tutorial that uses a tie closure as well. This pattern comes together a little differently and uses interfacing in between the layers of fabric.
DIY Baby Bib Patterns That Use KAM Snaps
Snaps are one of the most common closure types for baby bibs, and you can find them in both metal and plastic styles. While they are quick and easy to snap closed on a squirming baby, there is a small risk of the snaps breaking or coming off the bib and creating a choking hazard. However, since snaps are usually integrated into the fabric, that risk is minimal.
Project Nursery provides an adorable bandana-style bib that uses Terry cloth and KAM snaps for closure. This bib will fit babies from 3 months old to 2 years old.
Create Whimsy has a tutorial that also uses KAM snaps for the closure. It’s a simple tutorial that’s easy to follow.
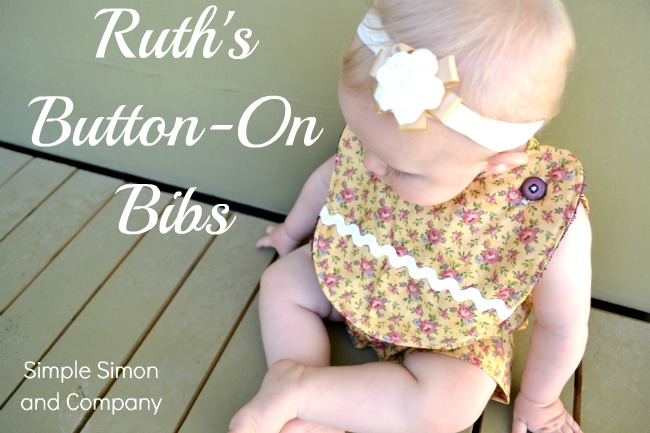
Baby Bibs With Buttons
Buttons have a much higher risk of coming off baby clothing and becoming a major choke hazard than snaps do. That’s why you rarely see baby clothing that uses button closures (or decorations). If you want to use buttons as the closure for a baby bib, I recommend using them on bibs for younger babies who aren’t strong enough to pull buttons off items.
Here is a DIY baby bib pattern from Simple Simon & Company that attaches to a baby’s clothing using the buttons on the shoulders of the romper. That means that the bib itself doesn’t need buttons on it, only buttonholes.
You can make a DIY baby bib quickly and for next to nothing. Plus, it’s so easy that even beginner sewists will be able to recreate this project with ease. As a great gift idea for new parents or grandparents, give one of these homemade projects a try today. The best part about sewing up some cute baby bibs is that you can customize them any way you want!
Did you find this tutorial helpful? If so, save this pin (see below) on your sewing board so you can come to this tutorial later when you are ready to sew a baby bib, and follow me on Pinterest for more tips, tutorials, and inspiration!
latest posts
- What Do You Call a Person Who Sews? I Asked My Readers and Got 1,408 Opinions
- DIY Round Purse: PDF Sewing Pattern and Detailed Instructions
- Mini Wonder Clips By Clover: Useful Sewing Tool Or Just Another Notion?
- Non-Slip Grips For Quilting Rulers: A Small Notion With A Useful Job
- Fabric Eraser for Sewing: What It Removes and When to Use It
- What Is The Best Thread For Sewing Machine Projects? Let’s Find Out!
- Butterfly Quilt Block Tutorial – Foundation Paper Piecing
- How To Sew Quilt Squares So The Corners Match
- Sewing With Fork Pins: How They Help With Pattern Matching, Slippery Fabric, And Seams

This post was perfect for me. I am trying to get back into sew as I have great-grandchildren coming! Quickly! I cut a pattern out and haven’t sewn it yet as I look at the neck and thing it’s too small. Now I know about the 3 stages of bibs. Thank you. I will get busy today. Maggie
@Maggie,
I want to know how to make bibs
Then you came to the right place! I bet you will like one of these.