Easy Self-Binding Placemats for Easter – A Fun & Quick Sewing Project
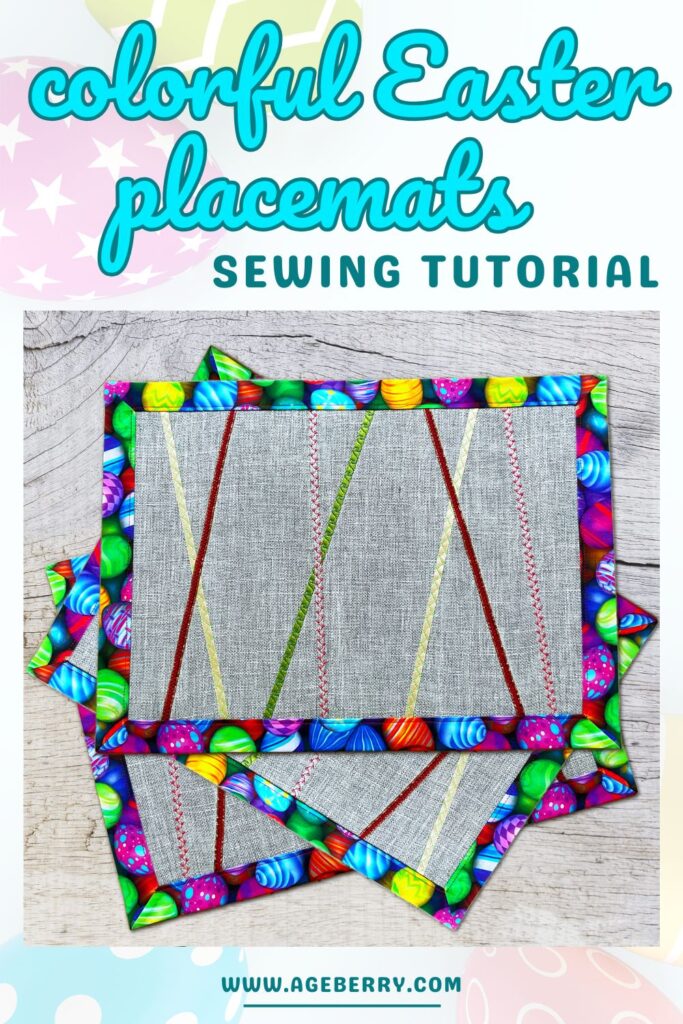
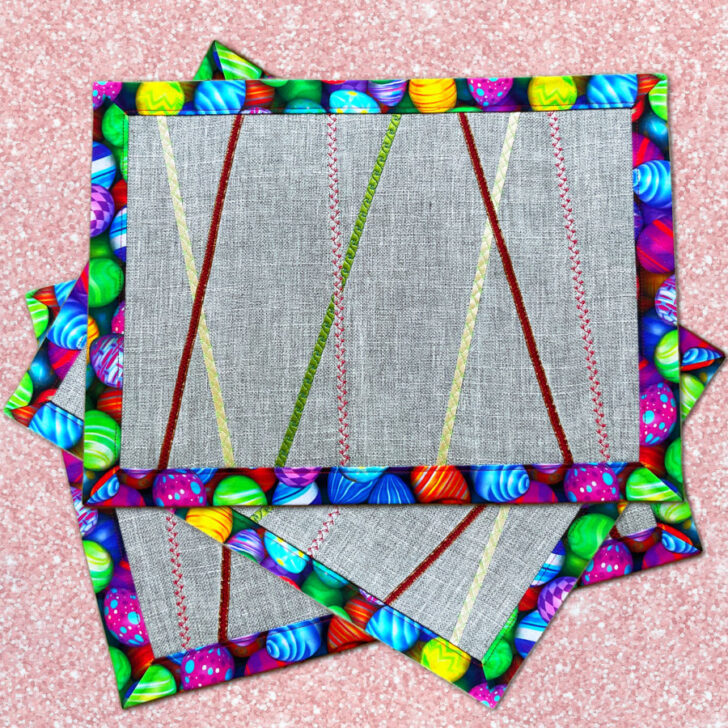
If you’re looking for a quick and beautiful sewing project for Easter, these self-binding placemats are a perfect choice. They are very easy to make, even for beginners, but they look good on any table. These placemats feature decorative ribbons sewn using a special ribbon presser foot.
The design includes a self-binding technique, meaning the backing fabric folds over to create a neat border. No separate binding is required, which makes the process faster and more beginner-friendly.
These placemats are not only practical but also a fun way to experiment with decorative stitches and specialty presser feet.
Set them out for an Easter brunch, or give them as a handmade gift. These placemats are the perfect combination of style and simplicity – elegant enough for a holiday table but easy enough for anyone to sew.
Note: Some of the links on this page are affiliate links. This means I will receive a commission if you order a product through one of my links. I only recommend products I believe in and use myself.
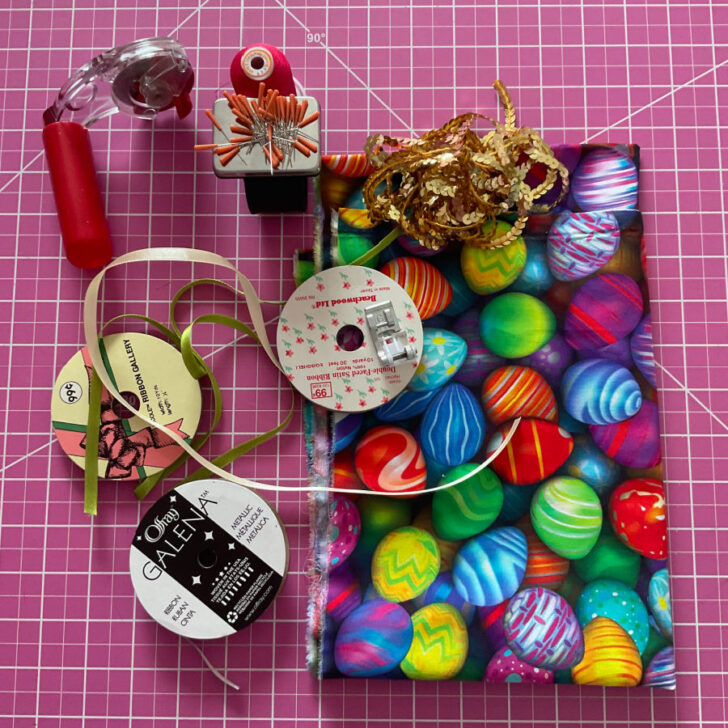
What you’ll need
- Main fabric (neutral or solid background)
- Backing fabric (festive Easter print)
- Fusible interfacing (for structure)
- Assorted ribbons
- Ribbon Presser Foot (for easy ribbon attachment)
- Thread (matching or contrasting, depending on design)
- Sewing machine with decorative stitches
- Fabric marker
- Ruler and rotary cutter
- Iron and pressing cloth
Amazon has an excellent selection of ribbons at relatively low prices: current Amazon decorative ribbon offers.


Step 1. Cutting and Preparing the Materials for Placemats
#1. Cut the main fabric to the desired placemat size
A standard placemat size is usually 12 x 18 inches, but you can adjust it to fit your table. If you prefer a square shape, 14 x 14 inches is a good option.
Use a rotary cutter and a ruler to achieve precise, straight edges.
A solid-colored fabric works best for the main piece because it allows the decorative ribbons and sequins to stand out. A medium-weight home decor linen, cotton, or a cotton-linen blend works well for this project.
For more tips on making clean, straight cuts, check out my Ultimate Fabric Cutting Guide: Tips, Tools & Techniques for Every Project.
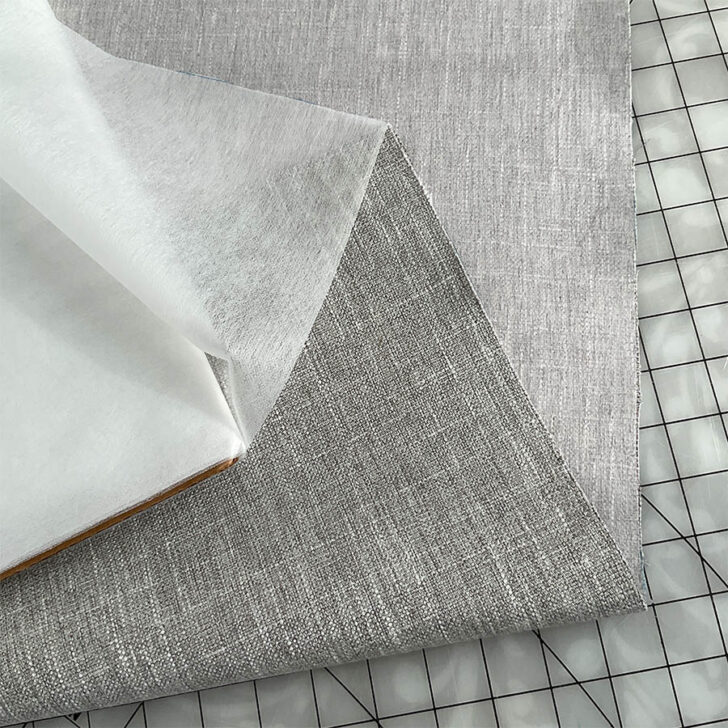
#2. Cut fusible interfacing to match the size of the main fabric
Interfacing adds structure and stability, helping the placemat lay flat and maintain its shape. Cut a piece of medium-weight fusible interfacing to the same size as your main fabric (12 x 18 inches or your chosen dimensions).
Follow the manufacturer’s instructions to fuse it properly, pressing with an iron on the recommended heat setting. Make sure to apply even pressure so the interfacing adheres smoothly without bubbles or wrinkles.
#3. Prepare the backing fabric
Choose a fun, festive print – such as an Easter-themed fabric with bright colors – to create a cheerful frame for your placemat.
#4. Gather your ribbons
Select a variety of ribbon colors and textures to create an interesting design.
#5. Press all fabrics before assembling
Iron the main fabric and backing fabric to remove any creases.
Step 2. Designing the Ribbon Layout
Lay out your ribbons across the fabric in various directions. You can create a random crisscross pattern, diagonal stripes, or a symmetrical design. Try a few different looks before deciding on your final arrangement.
Once you’re happy with the design, use a marking tool to lightly outline where each ribbon will go. This helps keep everything aligned while sewing.
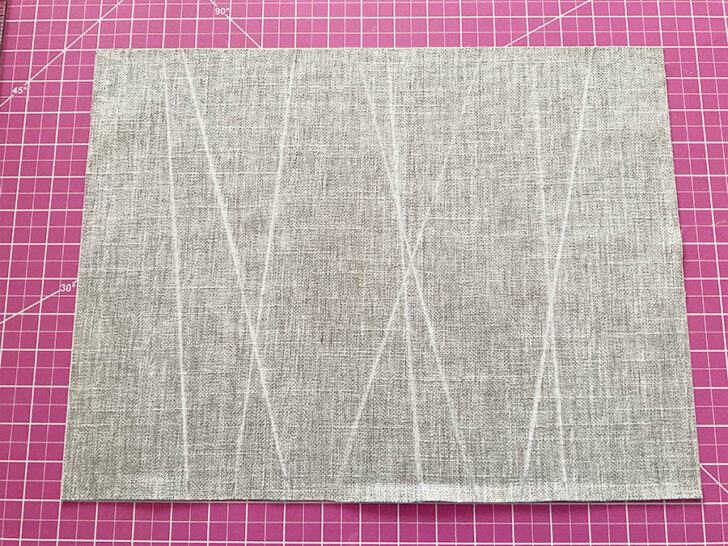
I used tailor’s chalk for this project, but you can also use:
- Disappearing ink pens – Ideal for light fabrics; the ink fades over time.
- Heat-erasable markers – The marks disappear instantly when ironed
- Water-soluble markers – Marks disappear when dabbed with water.
- Hera marker – Creates a crease instead of leaving color.

![LEONIS Water Erasable Fabric Marking Pen Blue 5 Count Pack [ 78008 ]](https://m.media-amazon.com/images/I/41z8SEIoPNL._SL500_.jpg "LEONIS Water Erasable Fabric Marking Pen Blue 5 Count Pack [ 78008 ]")

")
Step 3. Sewing the Ribbons
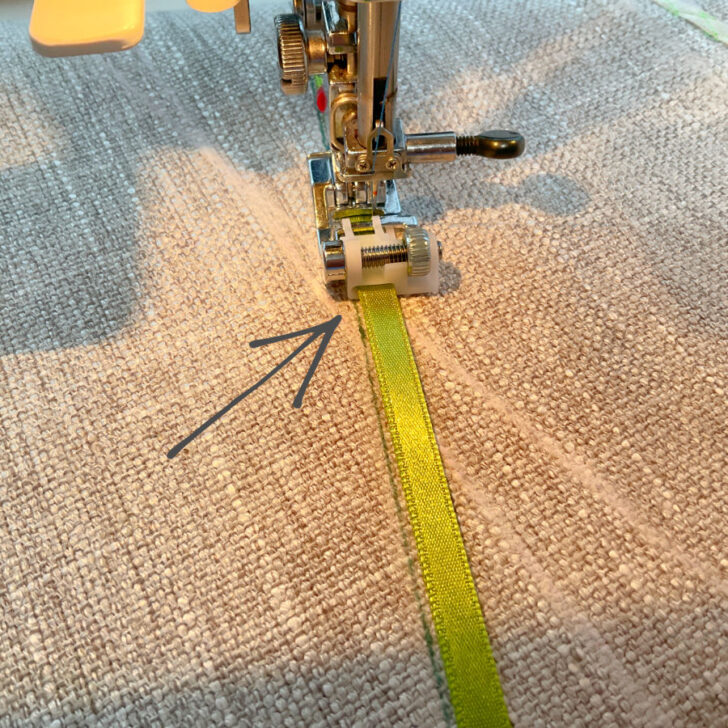
Using a ribbon presser foot makes this step much easier, as it helps guide the ribbon while stitching.
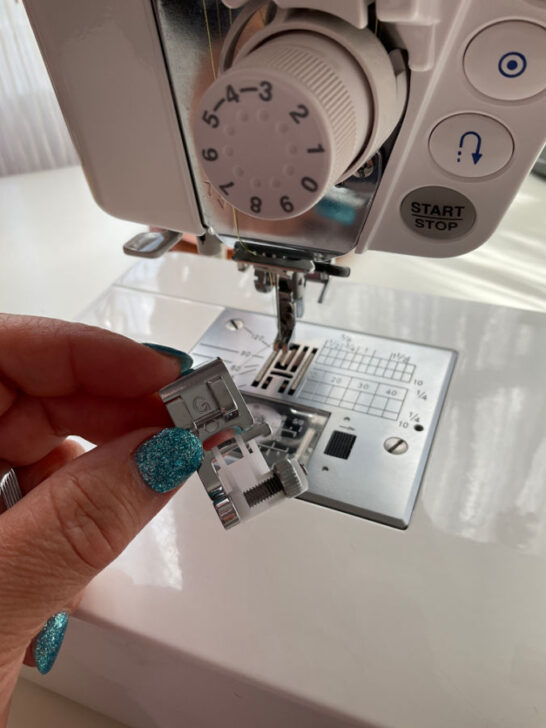
I inserted the first ribbon into the foot’s central guide and positioned the fabric under the needle. Instead of aligning the ribbon with the guideline I had marked, I made sure that the left edge of the presser foot’s plastic guide followed the guideline. This small adjustment helped keep the stitching straight and consistent.
I used decorative stitches for this project. They do more than just hold the ribbon in place – they create texture and make the placemat unique. Since my sewing machine has so many built-in stitches, this was a great chance to use them creatively. I also experimented with different thread colors to add contrast and depth.
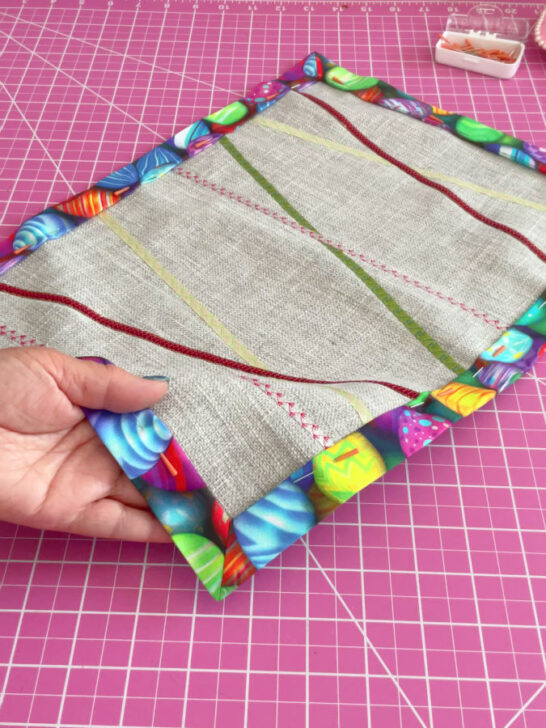
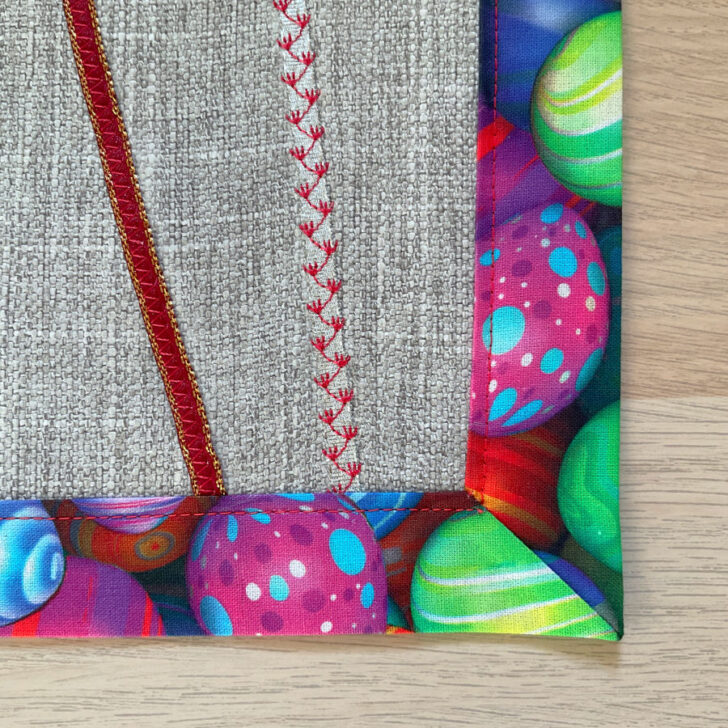
Let’s take a closer look at the stitches used on the ribbons.
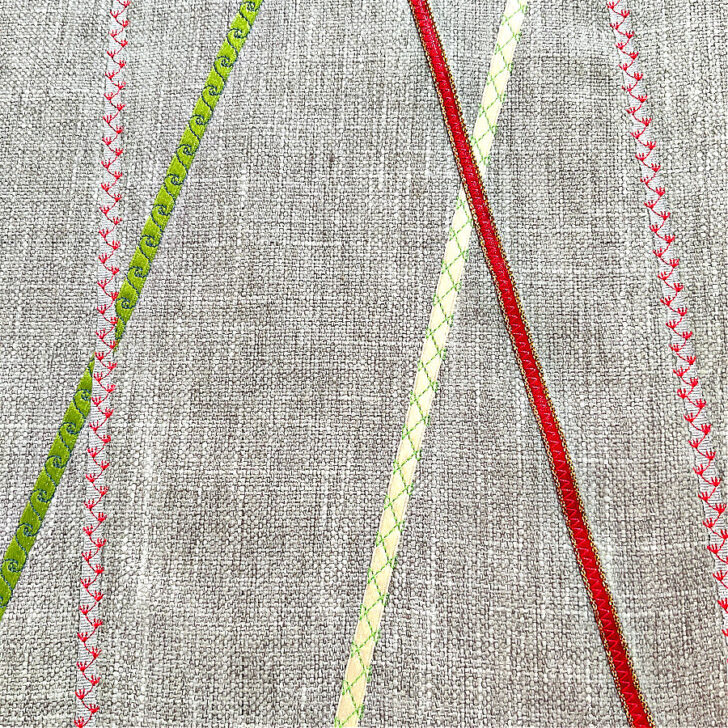
- Yellow ribbon – A delicate crisscross pattern in bright green thread, creating a quilted lattice effect.
- Green ribbon – A wave-like decorative stitch in blue thread, adding movement to the design.
- Silver ribbon – A striking contrast between bold red thread and metallic silver fabric, making the stitchwork stand out.
Once all the ribbons were attached, I pressed the fabric using a pressing cloth. Direct heat on decorative trims can melt or even distort them, so the pressing cloth protects them while still allowing me to smooth out the fabric.
Step 4. Calculate the Size of the Backing Fabric
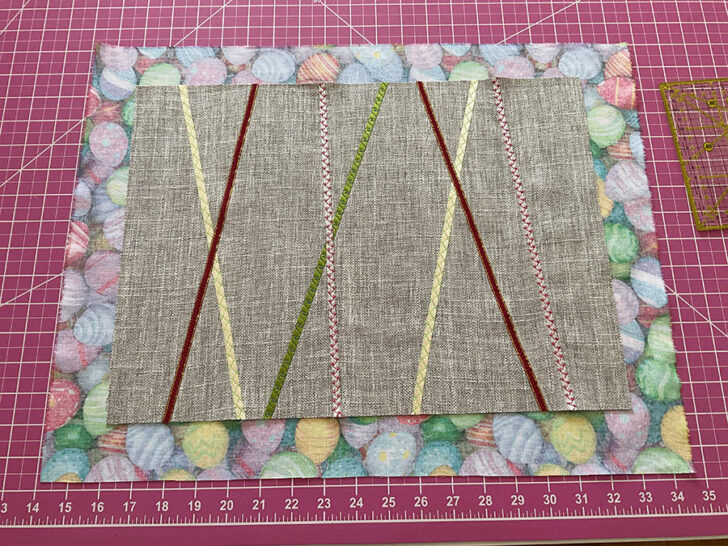
Before cutting the backing fabric, I needed to square up the placemat with the sewn ribbons. Sewing multiple ribbons, especially with decorative stitches, can cause the fabric to shrink slightly. This step ensures that the edges are straight and the final placemat has even sides.
I used a rotary cutter, a quilting ruler, and a cutting mat to trim away any uneven edges. I checked that the corners were at a 90-degree angle and that the sides were straight.
")

Since I used a self-binding method, the backing fabric needed to be larger than the top fabric. This extra fabric would fold over to form the binding, eliminating the need for separate binding strips.
How to Calculate the Backing Fabric Size
To determine how much extra fabric was needed, I used this formula:
- Decide on the binding width. I wanted a 1-inch-wide binding around the placemat.
- Add 5/8 inch for the fabric that will be folded under while sewing. This keeps the raw edges hidden and gives a clean finish.
- Add 1/8 inch for some wiggle room. This small allowance ensures the backing fabric fully covers the edges when folded over.
Final Calculation:
1 inch (binding) + 5/8 inch (fold-under) + 1/8 inch (wiggle room) = 1 3/4 inches extra on each side
Finding the Final Backing Fabric Size:
To determine the final size of the backing fabric, I took the dimensions of my squared-up placemat and added 1 3/4 inches to each side.
Cutting the Backing Fabric
- Measure the squared-up placemat and write down its final dimensions.
- Add 3 1/2 inches (1 3/4 inches per side) to both the width and length.
- Cut the backing fabric to this new size.
This method ensured the backing fabric was large enough to wrap around the edges, creating a neat self-binding border with perfect mitered corners.
Step 5. Sewing Mitered Corners
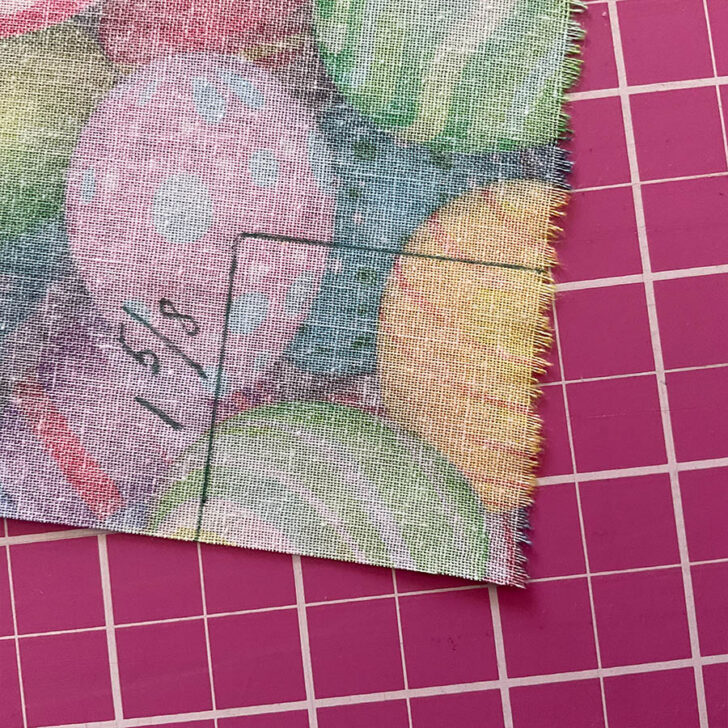
To prepare for self-binding, mark the corners of the backing fabric correctly. This method creates very nice mitered corners.
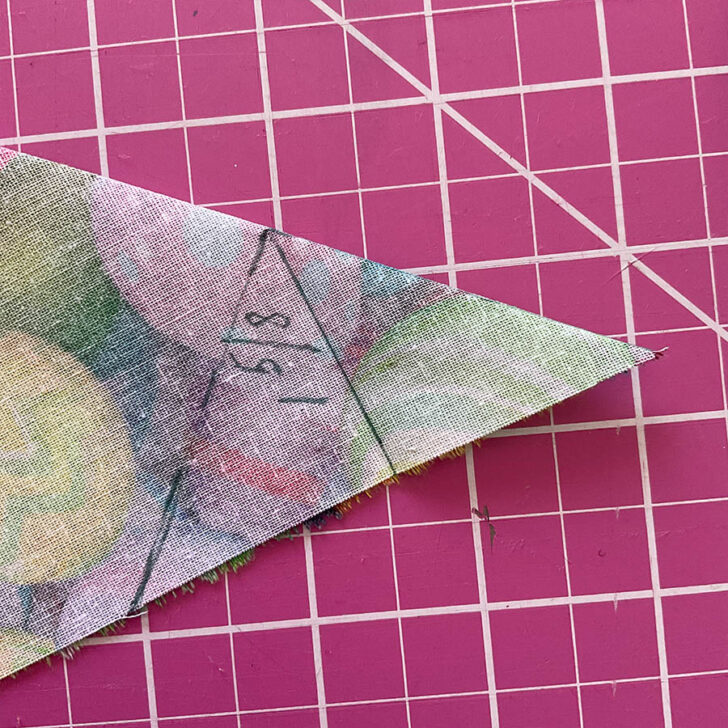
Measure 1 inch for the binding plus 5/8 inch for the seam allowance, making a total of 1 5/8 inches.
Use a fabric marker to draw a square of this size in each corner of the backing fabric.
Next – start with one corner of the backing fabric. Fold the corner diagonally so that the raw edges meet, with the right sides of the fabric facing each other.
Carefully align the edges, ensuring the fold is precise and straight. Any misalignment will affect how neatly the binding folds over later.
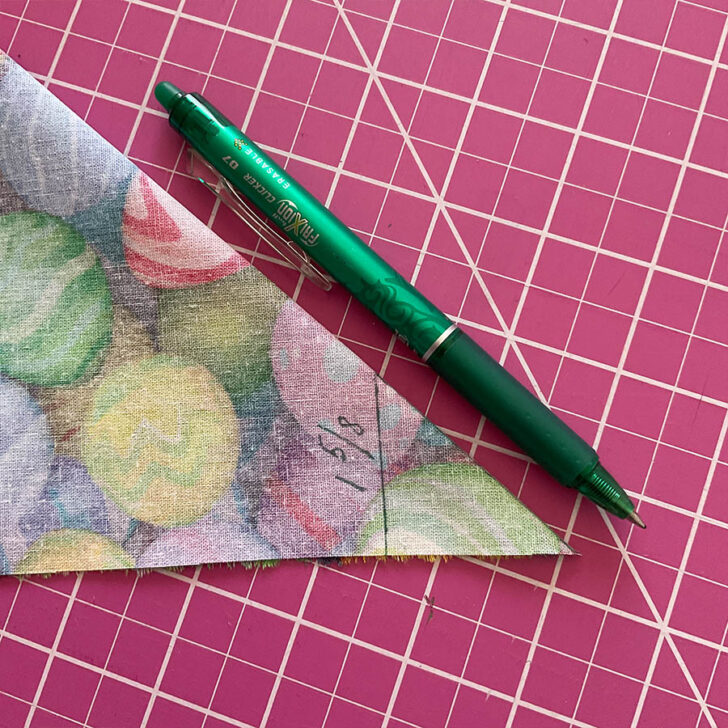
Fold the fabric along the marked line (1 5/8 inches), which runs perpendicular to the raw edges. This line was drawn earlier as part of the square marking.
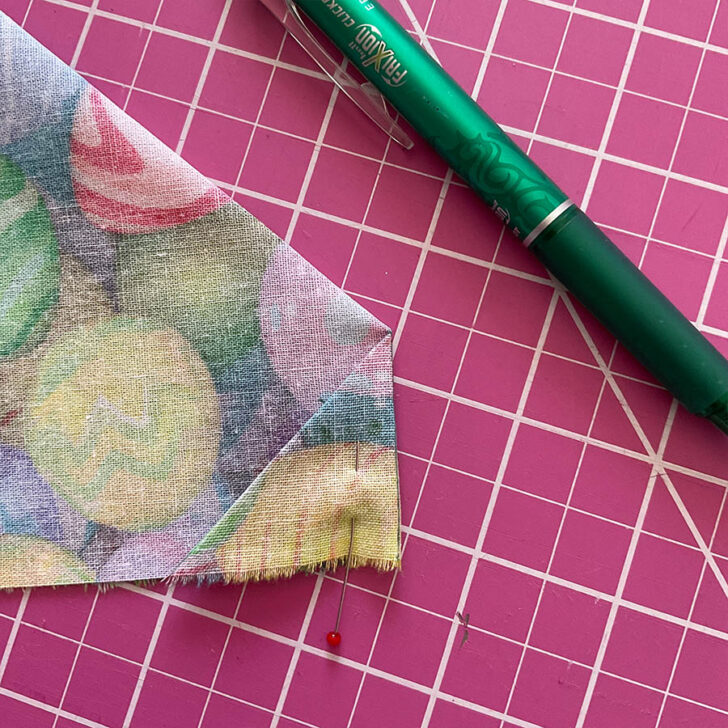
Align the raw edges carefully, as shown in the image below, to ensure the fold is neat and precise. To keep the layers from shifting, pin the folded fabric in place.
Use a fabric marking tool to trace along the folded edge. This line will serve as the stitching guide for creating the mitered corner. A Frixion pen, air-erasable marker, or chalk works well for this step.
The accuracy of this fold and the marked stitching line is essential. A precise mark ensures the mitered corner will lay flat and fold neatly over the edge of the placemat.
Find a spot on the marked stitching line (the one traced from the folded edge) where the perpendicular distance to the raw edges equals the seam allowance.
In this case, the seam allowance is 5/8 inch. Use a ruler to measure 5/8 inch perpendicular from the raw edges to the marked line.
Mark this exact spot clearly with a fabric marker. This point will guide the stitching for the mitered corner.
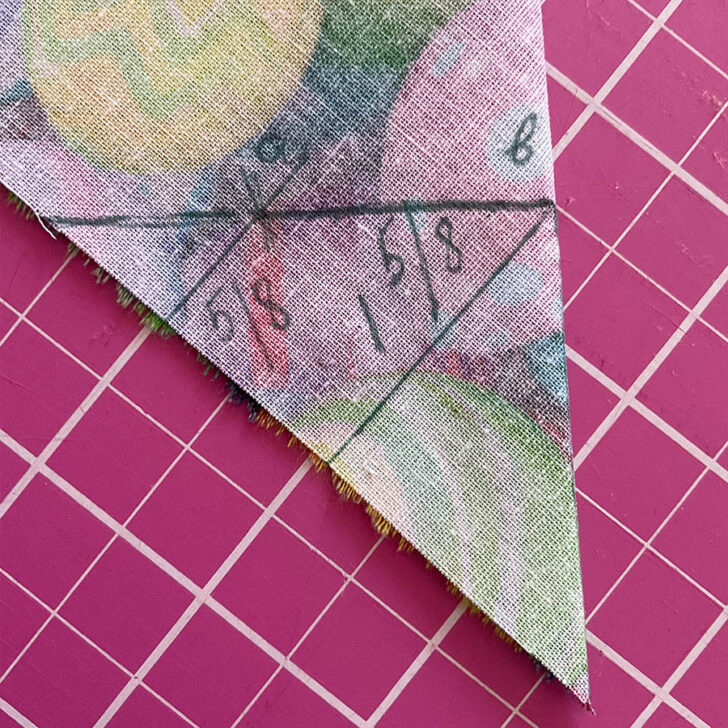
The line between points a and b is the stitching line for the mitered corner.
Use pins to secure the fabric along this line. Pinning prevents the layers from shifting while sewing and ensures a precise seam.
Take the fabric to the sewing machine and stitch along the marked line, from point a to point b.
Once the first corner is stitched, repeat the same process for the remaining corners of the backing fabric.
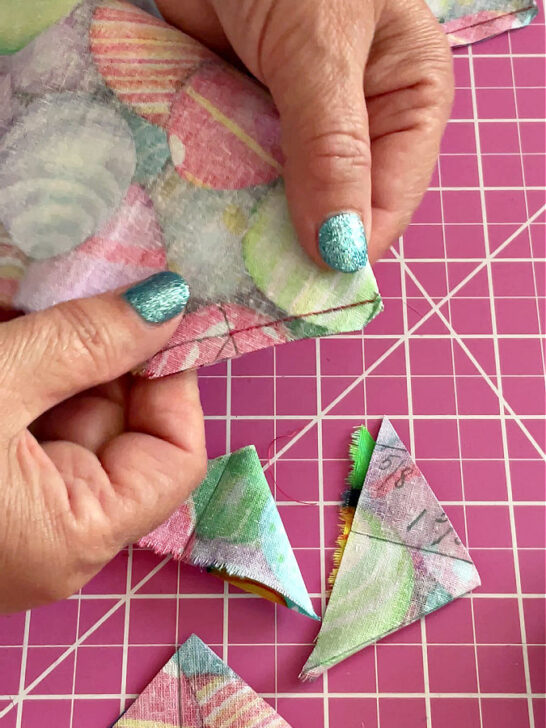
After stitching all the corners, use sharp fabric scissors to trim the seam allowance, cutting off the excess fabric from each corner as shown in the image.
Be careful not to cut into the stitching line.
This step reduces bulk, allowing the corners to lay flat and crisp when turned right side out.
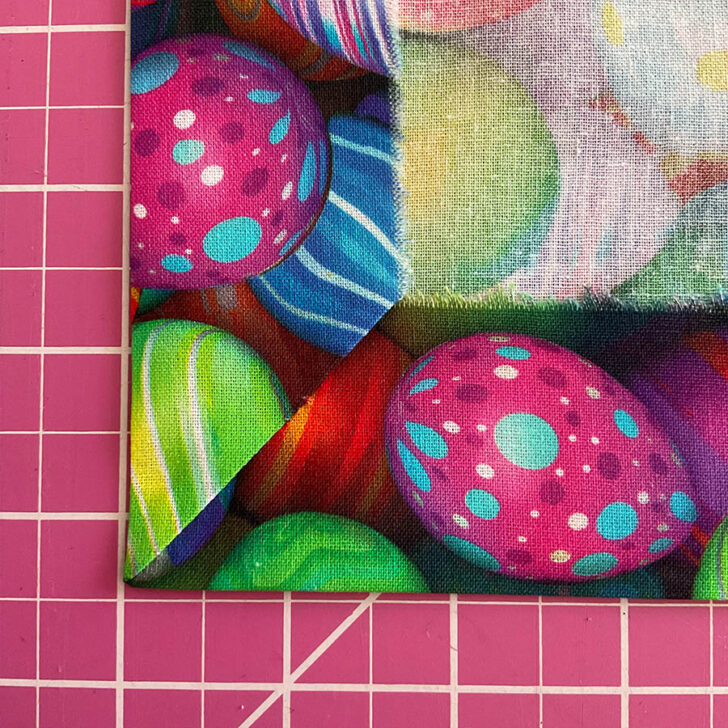
Flip each stitched and trimmed corner right side out, gently pushing the fabric through.
Use a corner-turning tool to carefully shape the corners into sharp points. Be gentle to avoid stretching or distorting the fabric.
Once all the corners are turned and shaped, the edges will begin to form clean mitered corners, creating a smooth and even binding for the placemat.
After turning all the corners right side out, the next step is folding and pressing the binding. Measure 1 5/8 inches from the edge of the backing on all sides. Fold the backing fabric over towards the front, making sure the fold is even along the edges of the placemat.
Use an iron to press the fold.
Step 7. Securing the Binding
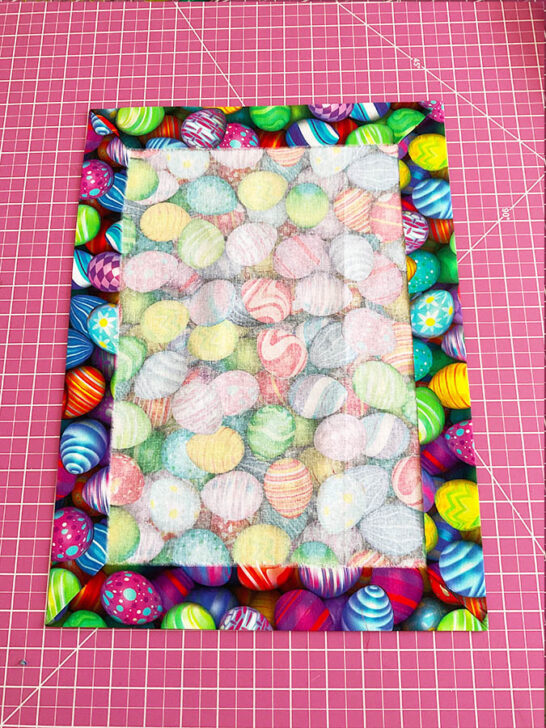
Lay the placemat onto the prepared backing, making sure it is centered within the folded edges. Adjust the placement carefully to ensure the corners are square and the placemat sits evenly inside the binding.
Fold the raw edge of the backing fabric under by 5/8 inch to create a finished seam. Work around the entire placemat, folding and smoothing the edges as you go.
Pin the folded edges in place, securing the binding neatly. To save time, I use “Magic Pins” because they can withstand heat, allowing me to press over them without removing them. This eliminates the need for basting and keeps everything in place.
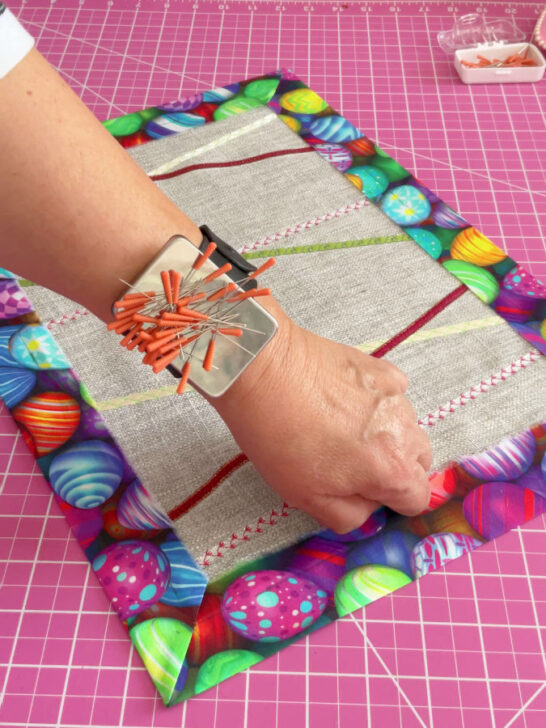

Taylor Seville Fine Magic Pins
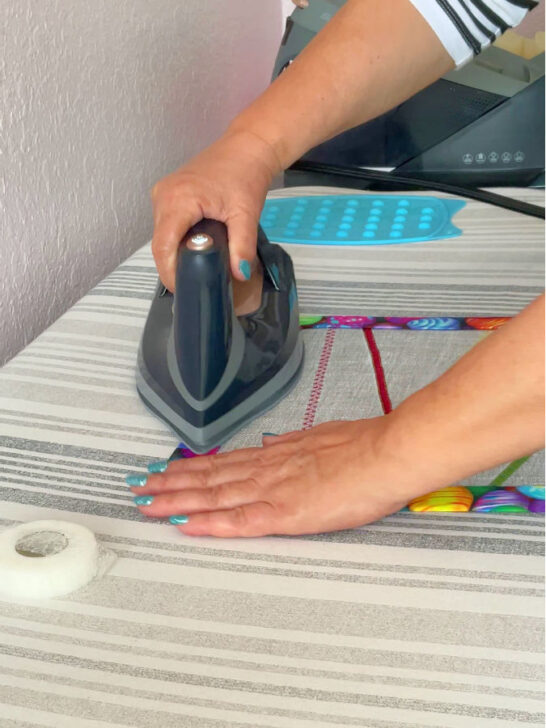
After pinning the binding in place, press over the placemat to set the folds. The heat from the iron helps crease the fabric and keeps the edges neatly folded. Once pressed, carefully remove the pins, as the binding will now hold its shape.
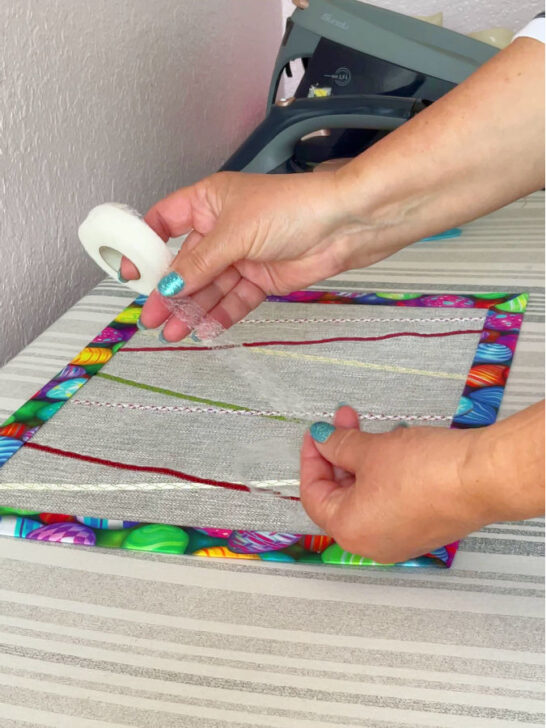
Before topstitching, apply Wonder Tape, a double-sided fusible tape, under the folded edges of the binding. Press the binding again to activate the adhesive, securing the edges firmly in place. This prevents shifting while sewing, making it easier to achieve a nice topstitch.
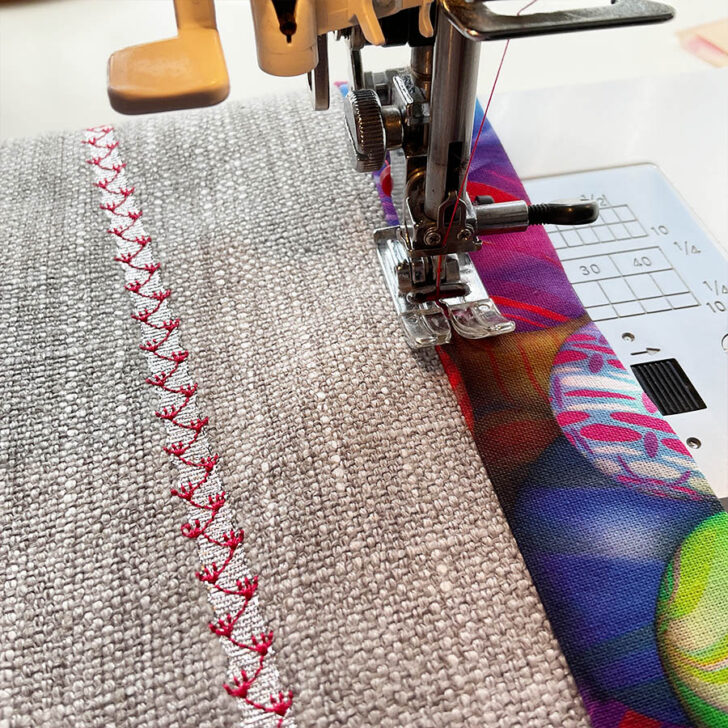
With the binding securely in place, stitch close to the inner edge of the folded backing fabric. A straight stitch works well for this step. .
Sew all the way around the placemat, ensuring the stitching stays even and close to the edge. Take your time at the corners to keep the mitered folds neat.
Now give the placemat a final press. Use a pressing cloth to protect the ribbons from direct heat. Pressing smooths out any wrinkles and helps set the stitches.
Now, the placemat is complete and ready to be used.
Make More Than One!
A single placemat is a great start, but once you finish one, use the same steps to create more. Since the process is simple and the materials are already prepared, making multiple placemats goes quickly.
For a coordinated look, you can:
- Use the same main fabric and backing but vary the ribbon arrangements.
- Experiment with different decorative stitches on each placemat.
- Mix and match thread colors for subtle variations.
If you plan to make a set of four or six, consider cutting all your fabrics and ribbons at once. This saves time and ensures uniform sizes. A full set of these beautiful self-binding placemats will make your Easter table look handcrafted and elegant.
Did you find this tutorial helpful? If so, save this pin (see below) on your sewing board so you can come to this tutorial later when you are ready to make these self-binding placemats, and follow me on Pinterest for more tips, tutorials, and inspiration!
latest posts
- Butterfly Quilt Block Tutorial – Foundation Paper Piecing
- How To Sew Quilt Squares So The Corners Match
- Sewing With Fork Pins: How They Help With Pattern Matching, Slippery Fabric, And Seams
- How Much Fabric Do I Need? 21 Helpful Tips For Calculating Fabric Yardage
- Easy Simple Sewing Project: Fabric Jar Opener
- DIY Oven Mitts: Step-by-Step Sewing Tutorial
- Easy DIY Potholder: New Design
- Tailor’s Clapper: What It Does, Why It Works, And How To Use It Right
- Heat Resistant Batting for Sewing: What It Is, How It Works, and What Makes a Difference