
What Is a Sewing Machine Piping Foot And How to Use It
Sewing a straight, snug line of piping can be trickier than it looks. Get the stitching too far from the cord, and you’re left with a loose, floppy edge. Get it too close, and you risk piercing the cord itself, leaving your piping stiff and hard to work with. That’s where a piping foot comes in.
In this tutorial, I’ll walk you through what a piping foot is, how it differs from an ordinary presser foot, and how to set one up on your machine — including the all-important needle position adjustment.
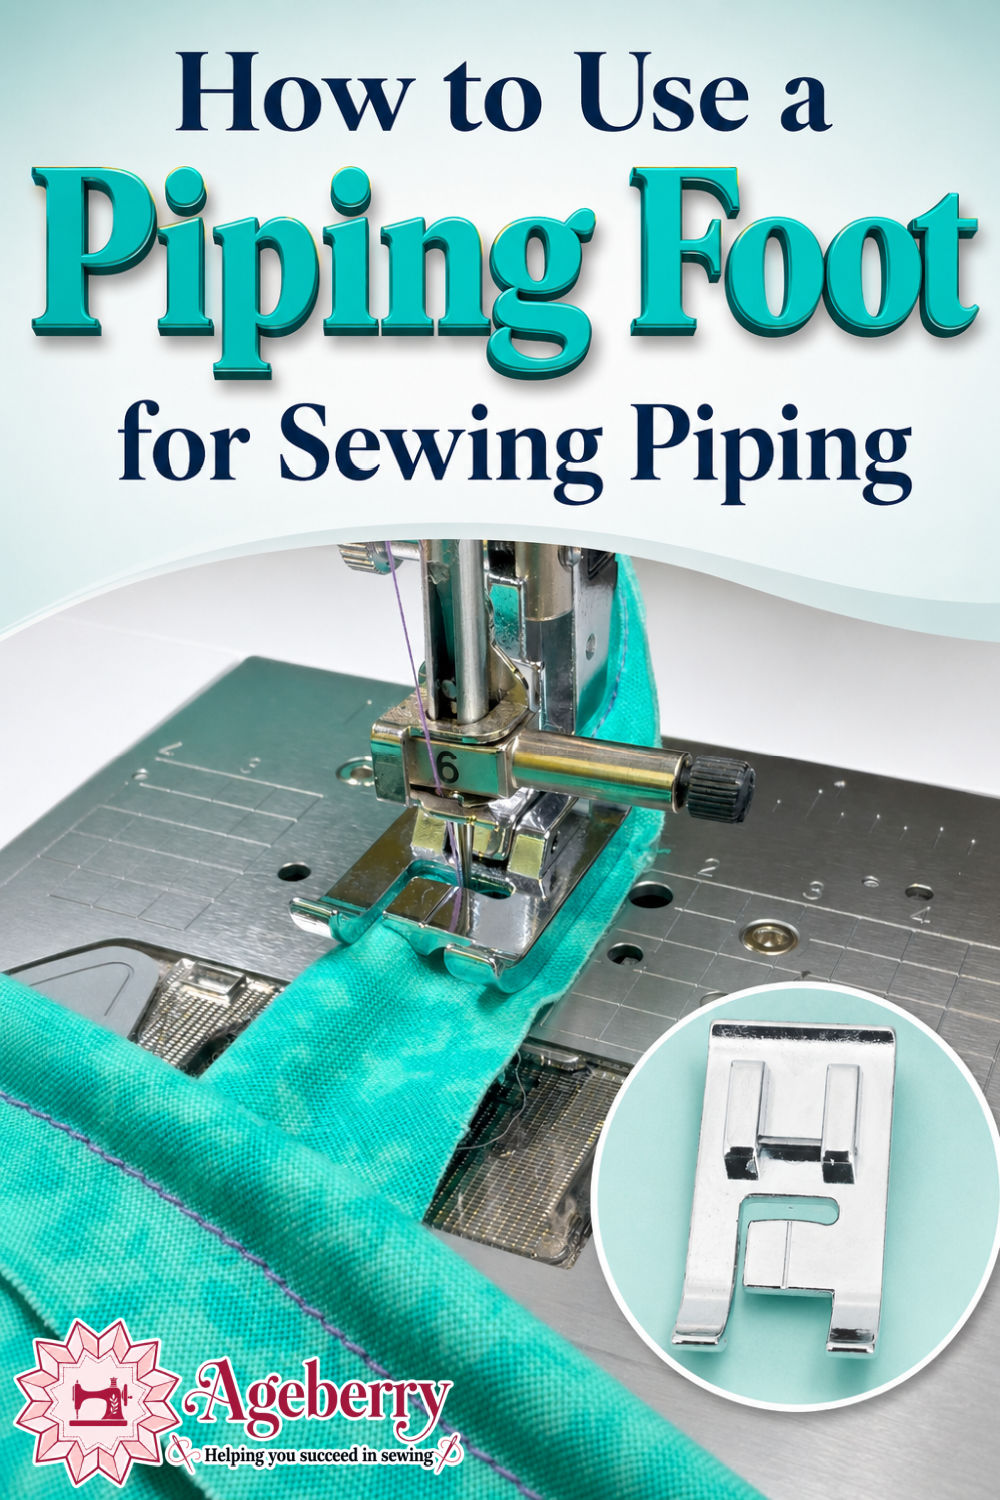
I’ll also share why I decided to try one out (hint: it involved six dining chairs and a lot of piping), compare two piping feet with different groove sizes, and explain when I actually prefer switching to a zipper foot instead.
By the end, you’ll have a clear idea of how to choose and use the right foot for your own piping projects.
Prefer to read without ads?
I created a PDF version of this guide for anyone who likes to keep sewing guides saved, printed, or easy to read without ads. It includes the same helpful information in a simple format you can download and use whenever you need it.
The PDF is available in my shop for a small fee. It’s a nice option if you want to support my work and keep this tutorial close to your sewing machine.
What Is a Piping Foot?
A piping foot is a presser foot made to guide piping as you sew. At first glance, it can look surprisingly similar to other specialty feet.
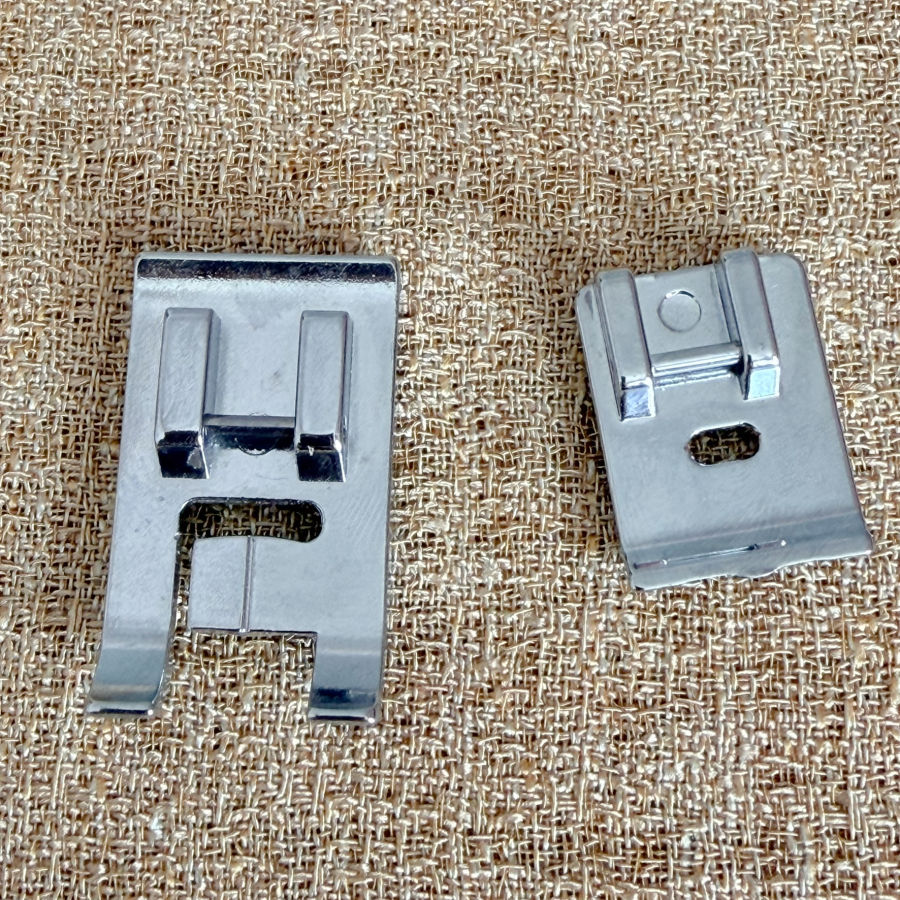
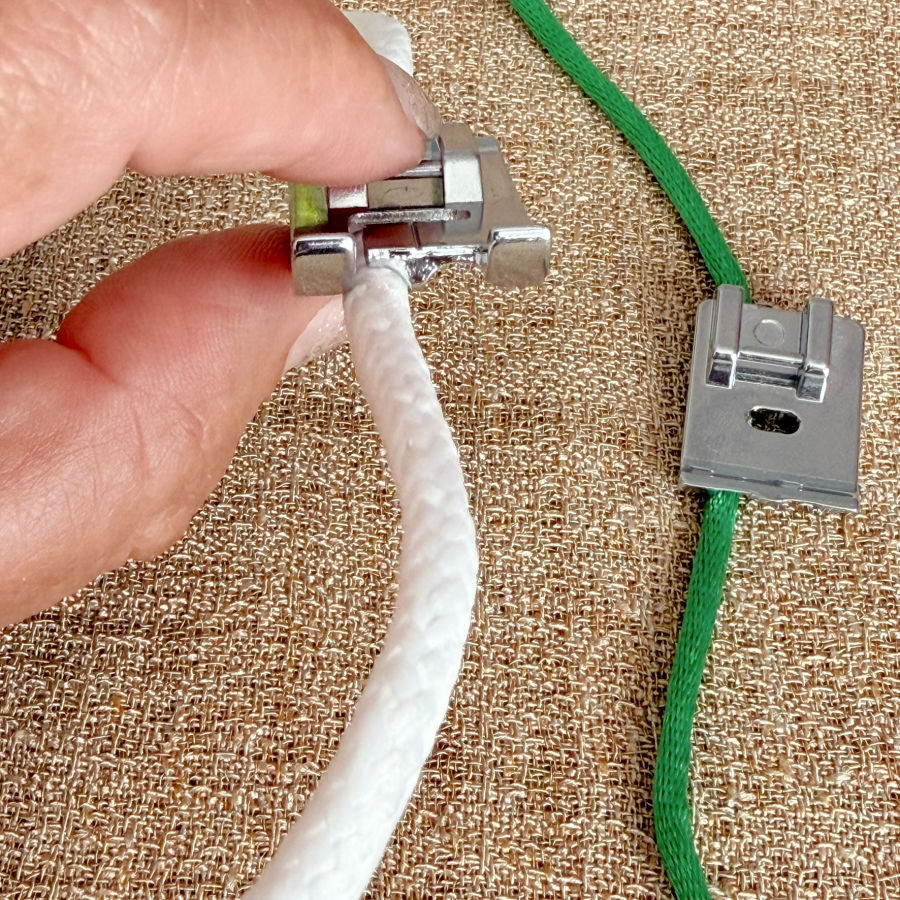
The smaller piping foot on the right in the photo had been in my collection for years, and for a long time I thought it was an invisible zipper foot. The two can look very similar from the top, so I never gave it much thought.
The larger piping foot confused me for a different reason. When I first saw it on Amazon, it looked so much like a regular zigzag foot that I almost skipped it. I remember thinking, Why is this called a piping foot? It looks completely ordinary.
The answer becomes much clearer when you turn the feet over. Then you will see two grooves or channels. These grooves are what makes the foot useful for piping.
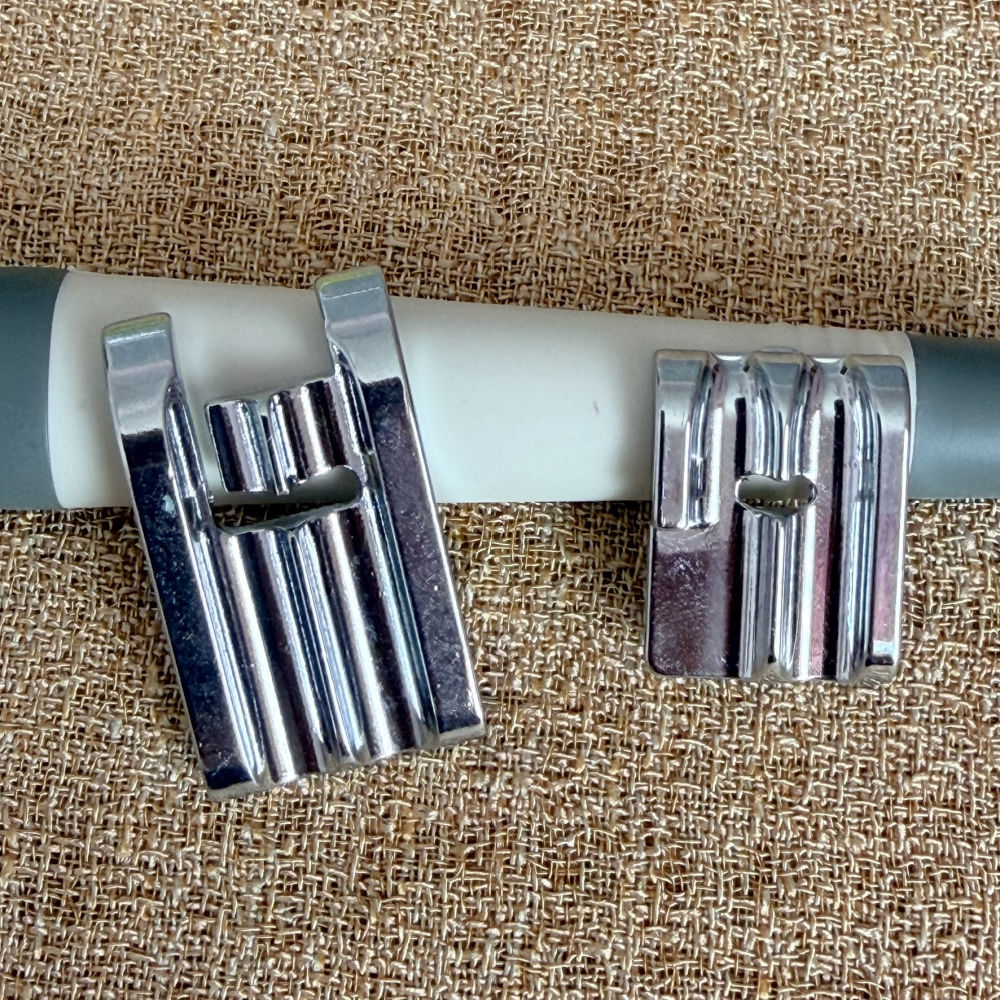
The piping sits inside the groove, while the fabric stays flat under the rest of the foot. It helps keep the piping in position while the needle sews close to the raised edge.
With an ordinary presser foot, the cord can push against the foot or shift sideways. You often have to guide it more carefully. A piping foot gives the cord its own space, so the foot can sit more evenly over the fabric.
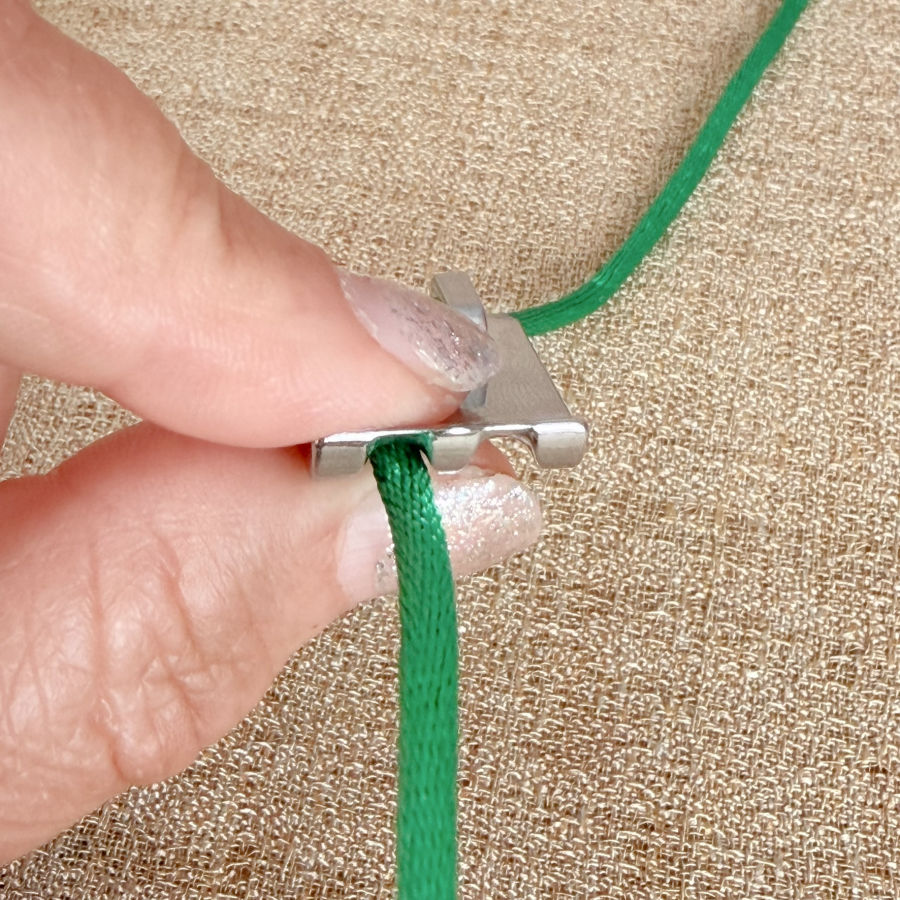
The groove also helps keep the stitching line close to the cord. That is important because piping looks much better when the fabric wraps snugly around the cord instead of leaving a loose strip beside it.
Not all piping feet look the same. The design depends on the sewing machine brand, the size of the piping cord, and the way the foot attaches to the machine. Some are snap-on feet, while others attach with a screw.
Note: Some of the links on this page are affiliate links. This means I will receive a commission if you order a product through one of my links. I only recommend products I believe in and use myself.


The size of the groove can also vary quite a bit. A foot made for narrow piping may have a small channel, while a foot made for thicker cord will have a deeper or wider one.
I have two piping feet with two grooves each: one for larger piping and one for smaller piping.
And, of course, I had to see what happens when I start using them.
✅ Related tutorial: Step-by-step sewing tutorial on how to sew piping with tips, techniques, and real project examples
My Reason for Trying a Piping Foot
I bought a piping foot because my six dining chairs needed new seats. The old seats had piping around the edges, and I liked how that detail looked, so I wanted to keep it.
Each chair had two rows of piping—one around the upper edge of the seat and another around the lower edge. With six chairs to redo, that meant a lot of piping to make and attach. So this seemed like a very good time to try a piping foot. I wanted a foot that would guide the thicker cord and make the process easier.
It worked very well for making the piping.
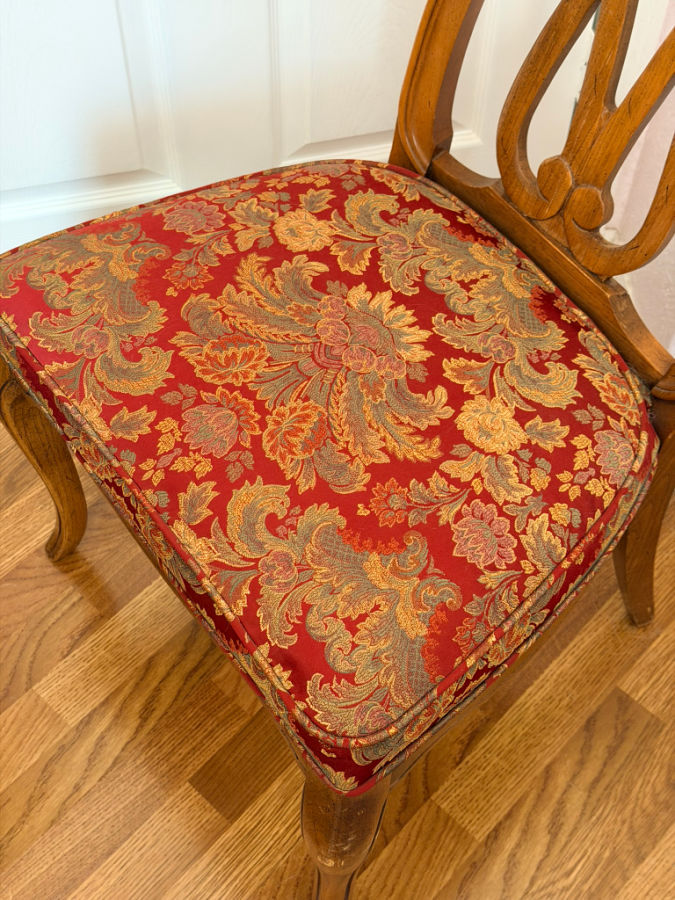
This is the finished item; I didn’t stop to photograph the chair project as I worked. With six seats to redo, setting up photos and videos for each step would have slowed me down too much.
Instead, I made separate samples from fabric scraps for this tutorial. That gave me a much better way to show exactly how the piping foot works.
And then, while looking through my presser-foot collection, I found another piping foot for smaller cord.
So now I had two piping feet with very different groove sizes to compare.
How to Set Up a Sewing Machine for a Piping Foot
My two piping feet are snap-on feet, so installation is simple. Raise the presser-foot holder, remove the current foot, and place the piping foot under the holder. Line up the small horizontal bar on the foot with the presser-foot holder, then lower the holder until the foot snaps into place.
Once the foot is attached, do not start sewing yet. The machine settings matter, especially the needle position.
Use a Straight Stitch
For making piping, I use a regular straight stitch with a 3 mm stitch length.
This is slightly longer than the stitch length I normally use for regular seams. The longer stitch works well here because this first line of stitching mainly holds the fabric around the cord.
Set the machine to a straight stitch before you adjust the needle position.
✅ Related tutorial: Types of Sewing Machine Stitches: Unraveling the Mysteries of the Straight Stitch
Adjust the Needle Position
This is one reason I wanted to compare my two piping feet.
Look at the openings in the feet from the top. They are quite different.
My larger piping foot has a much wider needle opening. This gives me a generous range for moving the needle from side to side.
My smaller piping foot has a much narrower opening. I can still adjust the needle position, but I have far less room to do it.
The goal is to place the needle close to the piping cord without stitching into the cord itself.
Put the covered cord into one of the grooves underneath the foot. Lower the presser foot. Then move the needle toward the cord until it sits just beside the raised edge.
The fabric should wrap snugly around the cord after stitching. If the needle sits too far away, you may end up with a loose strip of fabric between the cord and the stitching line.
Move it too far toward the cord, and the needle may sew into the cord. That can make the piping stiff and can cause trouble later when you attach it to your project.
The exact needle position depends on three things:
- the size of the piping cord
- the size and shape of the groove
- the needle opening in the foot
This is why I don’t use one needle-position number for every piping foot. I position the cord under the foot first, then adjust the needle according to what I see.
✅ Related tutorial: 19 Types of Sewing Machine Needles and What They’re Used For
With my larger piping foot, I have plenty of room for fine adjustments.
With the smaller foot, the needle opening limits how far I can move the needle. In that case, the size of the groove and the cord need to be a better match because the foot gives me less freedom to compensate with the needle position.
Check the Needle by Hand First
This small step is important whenever you change the needle position with a specialty presser foot.
Turn the handwheel toward you and lower the needle manually for the first stitch or two.
Watch where the needle enters the fabric and make sure it passes safely through the opening in the foot.
This is especially important with my smaller piping foot because its needle opening is narrow. A needle that sits even a little too far to one side can strike the metal foot.
If that happens at sewing-machine speed, the needle can bend or break.
So I always make this quick handwheel check first. Once I know the needle clears the foot and sits close to the piping cord, I can begin sewing.
✅ Related tutorial: How To Prevent Needle Strikes And Burrs On Your Sewing Machine
Testing the Piping Feet
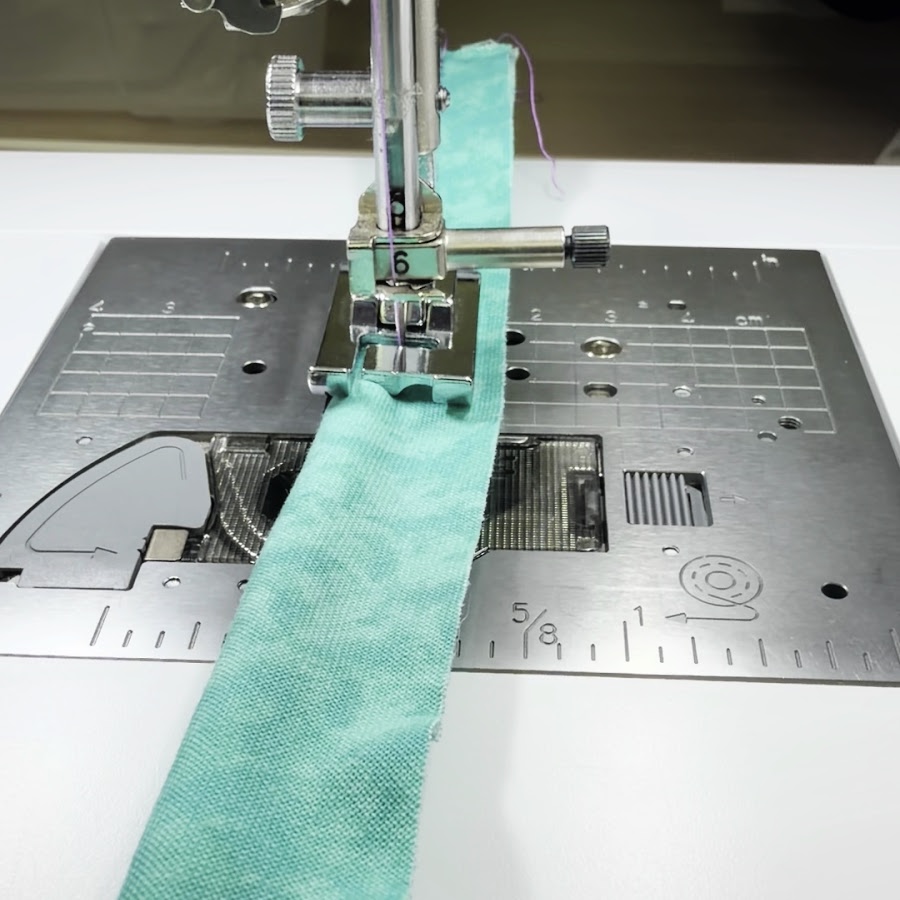
For my first test, I used the larger piping foot with a thicker cord and a bias strip. I placed the cord inside the strip, aligned the raw edges, and set the covered cord into one of the grooves under the foot.
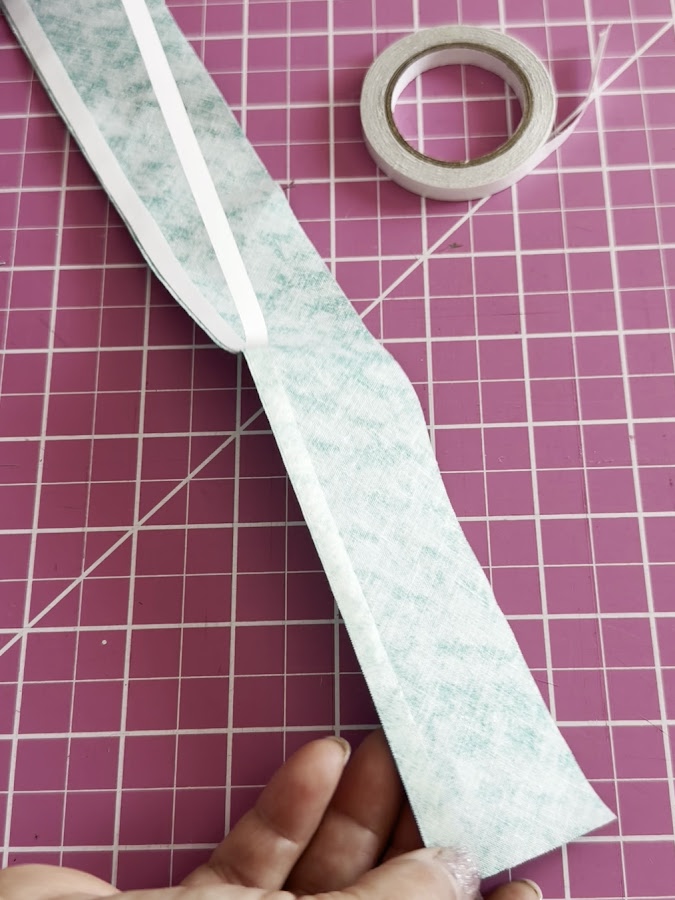
For long piping, I sometimes use Wonder Tape along one raw edge. This helps when the cord has twists from storage and does not want to stay straight. I place the tape near the edge, put the cord inside the strip, then fold the other edge over the tape. It keeps the layers together until they reach the needle, and it does not gum up my needle.

✅ Related tutorial: Are These ‘Magic’ and ‘Wonder’ Tools the Secret to Sewing Perfection?
I adjusted the needle so the stitches sat close to the cord without piercing it. Then I sewed with a 3 mm straight stitch.
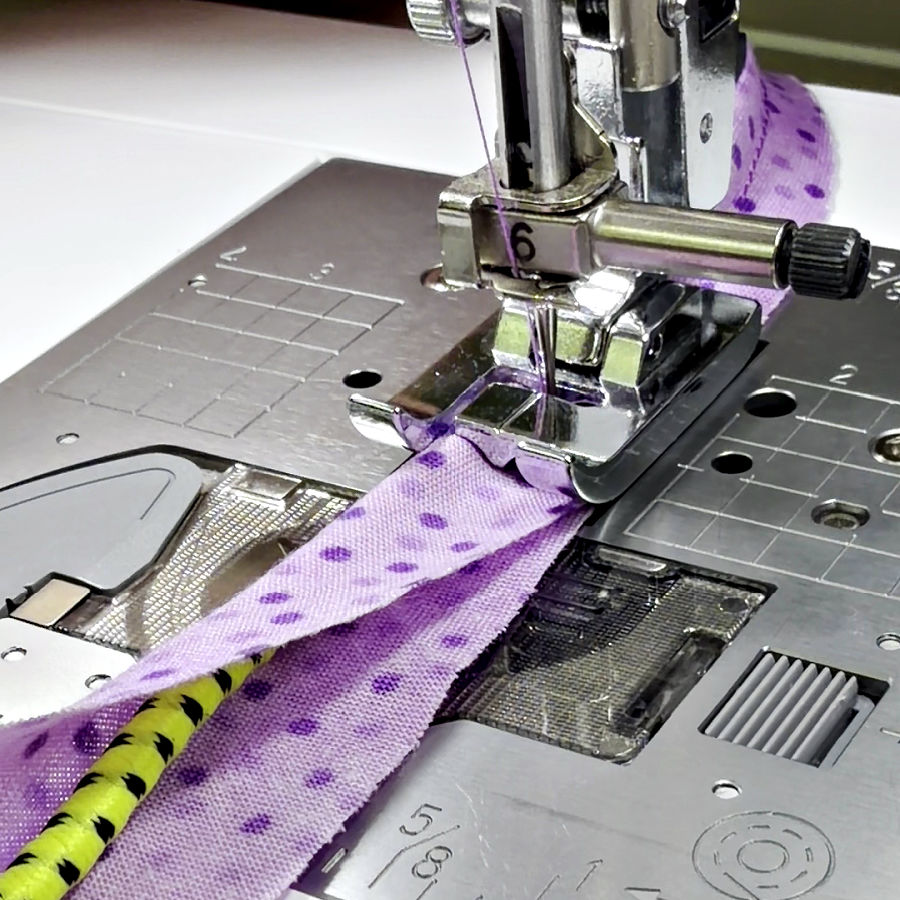
The larger foot handled the thicker piping very well. The cord sat comfortably inside the groove and stayed in place as I sewed.
Next, I tried my smaller piping foot with a thinner cord. The process was the same, but the difference in fit was easy to see. The narrow groove held the smaller piping much more closely.
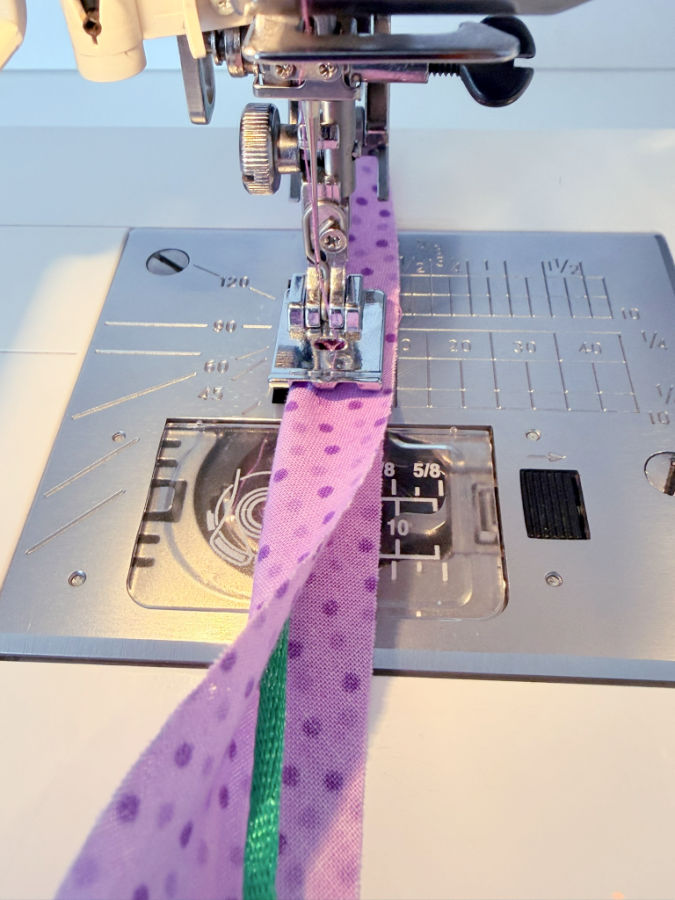
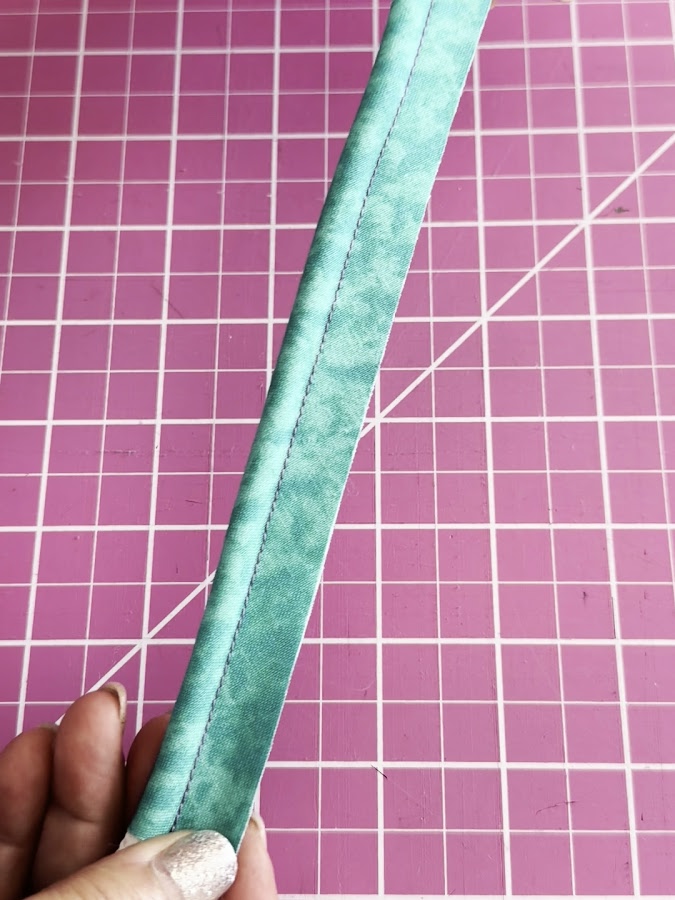
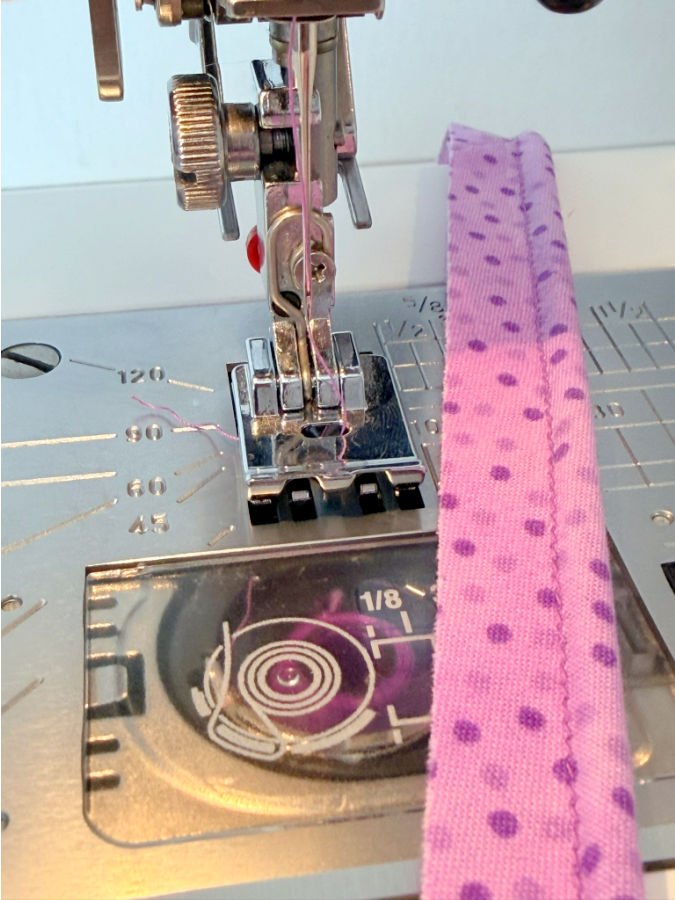
After each test, I checked the stitching from both sides. The fabric should wrap snugly around the cord, with the stitching close beside it. A wide gap means the needle needs to move closer to the piping.
The two feet do essentially the same job. The main difference is the size of piping each one can guide well.
Piping Foot vs. Zipper Foot
A piping foot does a bit more than making the piping itself. After the cord is wrapped inside the bias strip, the piping still has to be sewn to the fabric.
I tried both of my piping feet for this step, and I also used a zipper foot with the same piping.
For straight sections, the piping foot works very well. The groove follows the cord and keeps it in a steady position.
I also like it on curves. The groove gives the piping some guidance, so it follows the shape of the seam quite nicely.
Corners are where I prefer the zipper foot.
✅ Related tutorial: The Invisible Zipper Foot: What It Is And How To Use It
At a corner, I need to stop, pivot, arrange the piping, and continue in a new direction. With a piping foot, the cord has to find its way back into the groove after the turn. That can take a little fiddling, especially with thicker piping.
A zipper foot gives me more freedom around the cord. I can position the foot beside the piping instead of trying to fit the rounded cord back into a channel. This makes corners easier for me to control.
I also tried double piping. For the first cord, the piping foot worked well. The cord sat inside the groove, just as it does with regular piping.
For the second cord, I switched to a zipper foot. At that point, the first row of piping was already beside the new cord, so the piping foot did not have the same room to sit over the work.
The zipper foot was easier here because I could position it close to the second cord without trying to fit the first row of piping into a groove.
This was another reminder that I don’t see the piping foot as a replacement for my zipper foot. I use each one where it gives me better control.
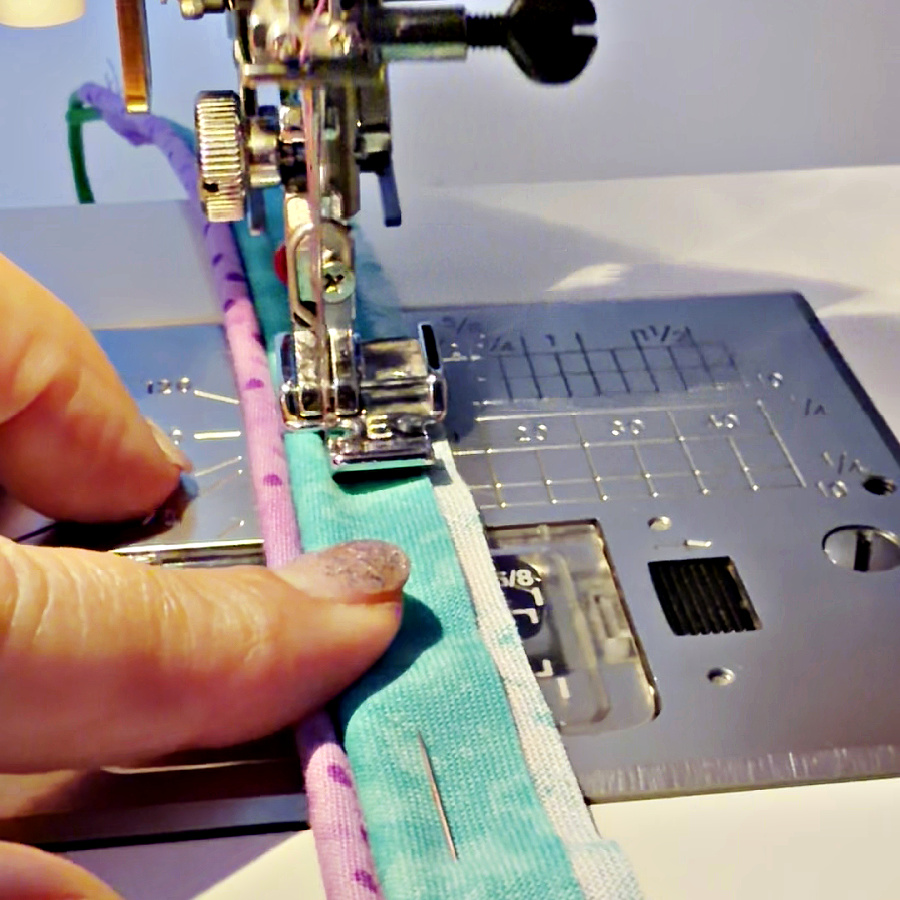
Visibility is different too. A piping foot surrounds more of the cord, so part of the seam area sits under the foot. With a zipper foot, I can see more of the piping and the fabric beside it. I find that helpful when I need to make small adjustments.
The zipper foot also works with many piping sizes. I can move the needle or change the position of the foot and sew beside thin or thick cord. A piping foot is more dependent on the size of its groove. It works beautifully when the groove matches the piping, but one foot may not work well for every cord size.

Conclusion
So after my tests, I see the two feet as useful for slightly different jobs. I like the piping foot for making piping. For attaching piping to a project, especially around corners, I find the zipper foot easier to maneuver.
The piping foot gives the cord more guidance. The zipper foot gives me more freedom. In my sewing room, I have a use for both.
If this piping tutorial gave you a useful idea for your next project, save the pin below to your sewing board so you can easily find the instructions again. You can also follow me on Pinterest for more sewing tips and step-by-step tutorials.

latest posts
- 10 Easy-to-Miss Features on Sewing Supplies You Should Be Using
- Twin Needle Sewing: My First Try Was a Mess, But Here’s What Worked
- 10 Rules That Made Me a Better Sewist
- How to Make a Lightweight Summer Neck Scarf with a Lettuce Hem
- What Sewists Hate About Sewing: Common Complaints and Practical Fixes
- Knit Presser Foot: How It Works, How to Use It, and My Sewing Tests
- How to Sew Neat Mitered Corners at Acute Angles
- Sewing Machine Needle Organization: A Clever System I Tried
- DIY Car Armrest Organizer: Sewing Tutorial
I do primarily heirloom sewing and make lots of tiny piping. For this I like to use a pintuck foot. I was also taught to not stitch right next to the cording when making the piping, but to move the needle one click away. Then when I stitch the piping to the garment, I set the needle right next to the cord. This way there’s no chance of the first row of stitching showing on the finished garment.
I just want to add that I love your blog, and after over 50 years of sewing, I’m still learning new tricks!
Thank you for the tip! I will probably review separately the pintuck foot, I have not thought about it as good for very small piping.