Sewing Tutorial: Embroider a Heart Using Decorative Sewing Machine Stitches
This project is a great way to make a plain sweatshirt look unique by using decorative stitches on a regular sewing machine. There’s no need for an embroidery machine, special software, or complicated techniques. With some planning and the right supplies, you can stitch a bold, eye-catching design that looks like professionally made embroidery.
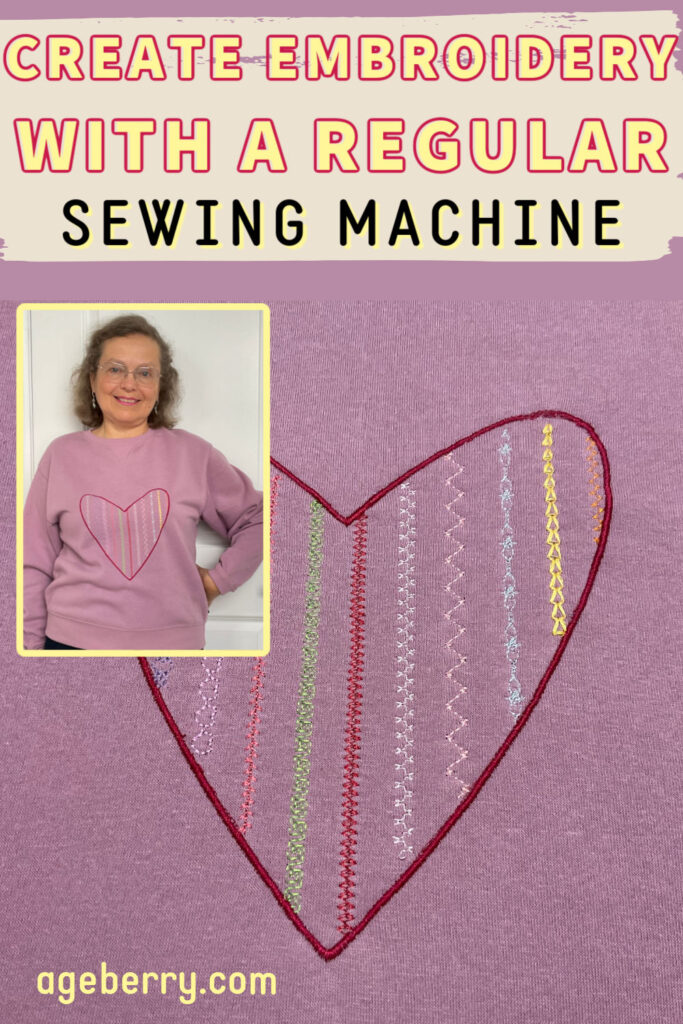
The heart shape is a great choice for Valentine’s Day, but this method works for any design. Try it to personalize clothing in a way that feels special. Experiment with different stitch patterns, colors, and shapes to create something that reflects your style.
What You’ll Need
- A plain sweatshirt
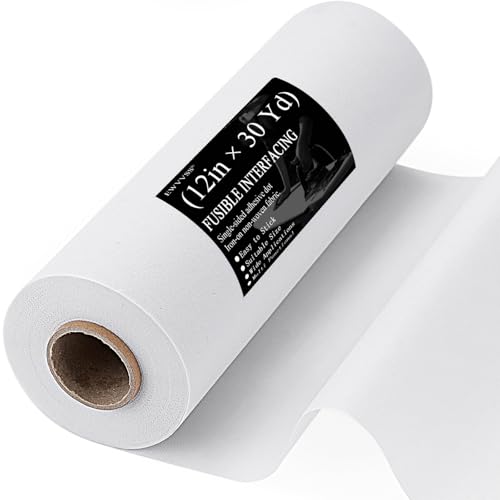
- Fusible interfacing (medium-weight)
- Fabric marking pen
- Polyester threads in various colors (I used embroidery threads but regular all purpose sewing thread can be used too)
- Sewing machine with decorative stitches
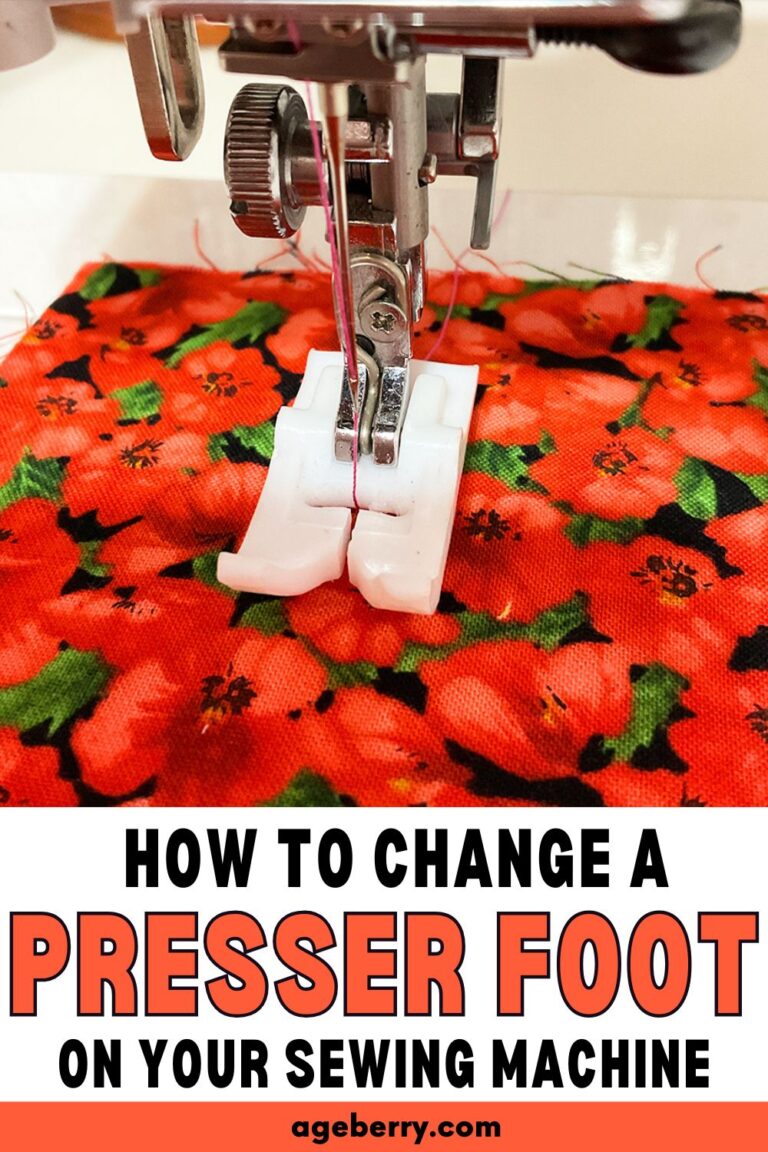
- Open-toe presser foot (optional but recommended)
- Regular sewing notions
Note: Some of the links on this page are affiliate links. This means I will receive a commission if you order a product through one of my links. I only recommend products I believe in and use myself.
 each Spool for Brother Babylock Janome Singer Pfaff Husqvarna Bernina Embroidery and Sewing Machines")
 Polyester Embroidery Machine Thread Kit for Professional Embroiderer and Beginner")
Step-by-Step Instructions
Step 1. Preparing the Fabric
I would like to keep the numbers in the list. But then you can’t insert images under some numbers. So maybe change them to this #1. And make them just regular paragraphs.
- Lay your sweatshirt on a flat surface. Decide where you want your heart design.
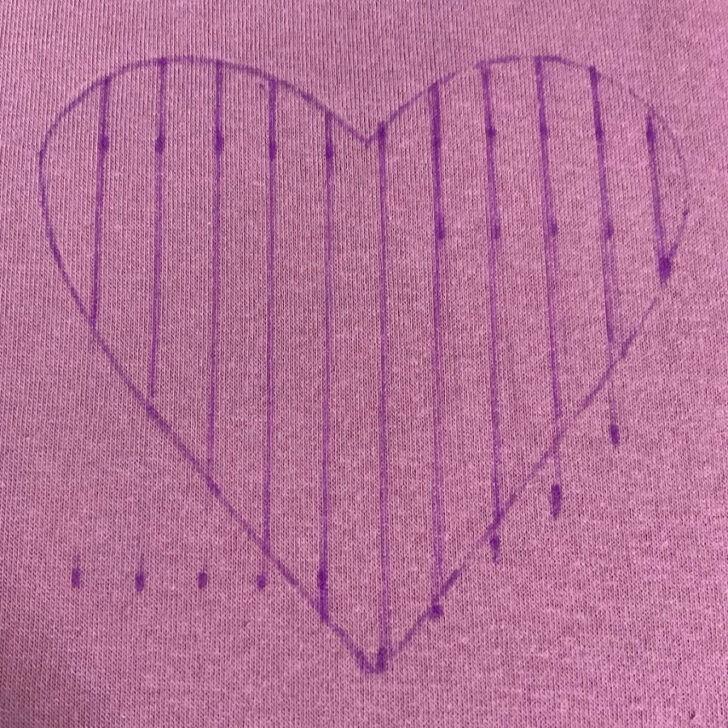
- Prepare a paper template. A symmetrical heart looks best, so fold a piece of paper in half, draw half of a heart, and cut it out to use as a template.
My heart shape measures approximately 8 inches in width and 9 inches in height. This size makes it large enough to be a focal point on the sweatshirt while still fitting comfortably within the fabric without distortion.
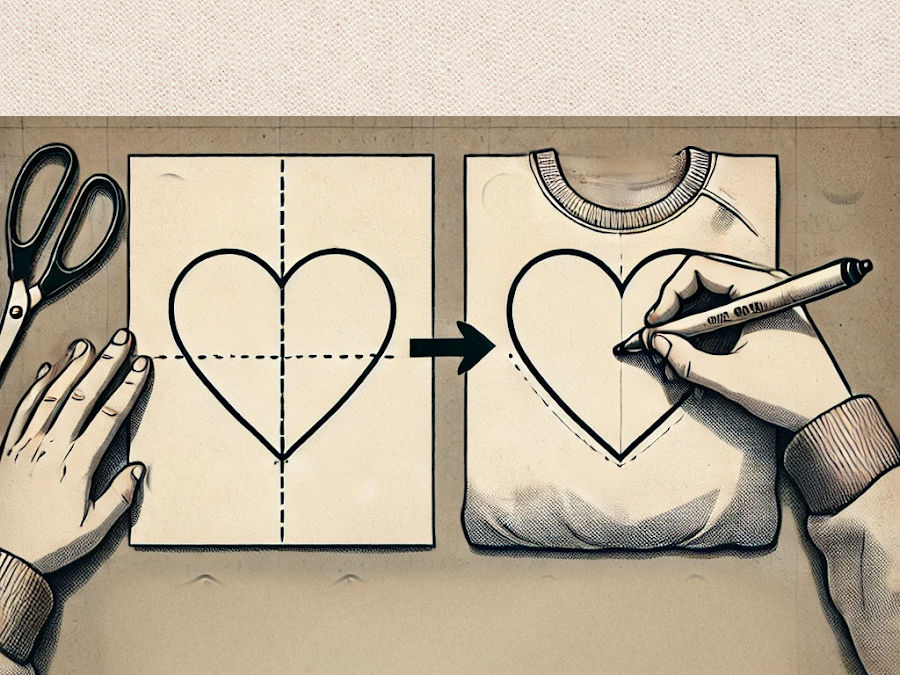
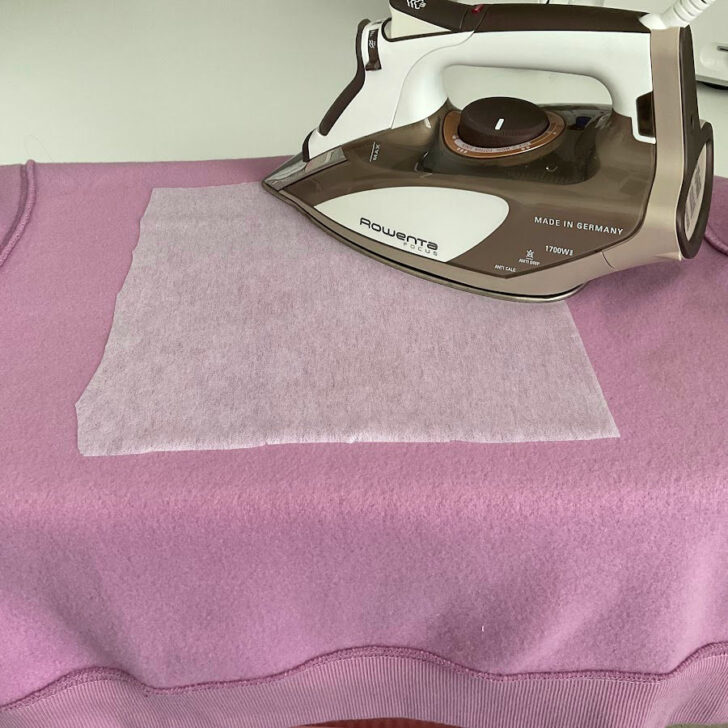
- Turn the sweatshirt inside out. Cut a piece of fusible interfacing slightly larger than the heart shape.
- Place the interfacing on the wrong side of the fabric. Press with an iron to fuse the interfacing. This will stabilize the fabric and prevent puckering when stitching.
- Use your paper template and a fabric marking pen to draw a heart shape on the front of the sweatshirt.

✅ Related tutorial: How To Use Fusible Interfacing (Video + Tips And Tricks)
Step 2. Marking Stitching Guidelines
Use a ruler and a fabric marking pen to draw parallel vertical lines inside the heart shape. Space them about ½ inch apart (1 – 1.5cm). I did 5/8 inch (~1.5cm), but I think it will be even better to place them a bit closer. These lines will serve as guides for your decorative stitches.
Step 3. Stitching the Decorative Design
Now that the heart outline is prepared and the interfacing is secured, it’s time to fill the shape with decorative stitches.
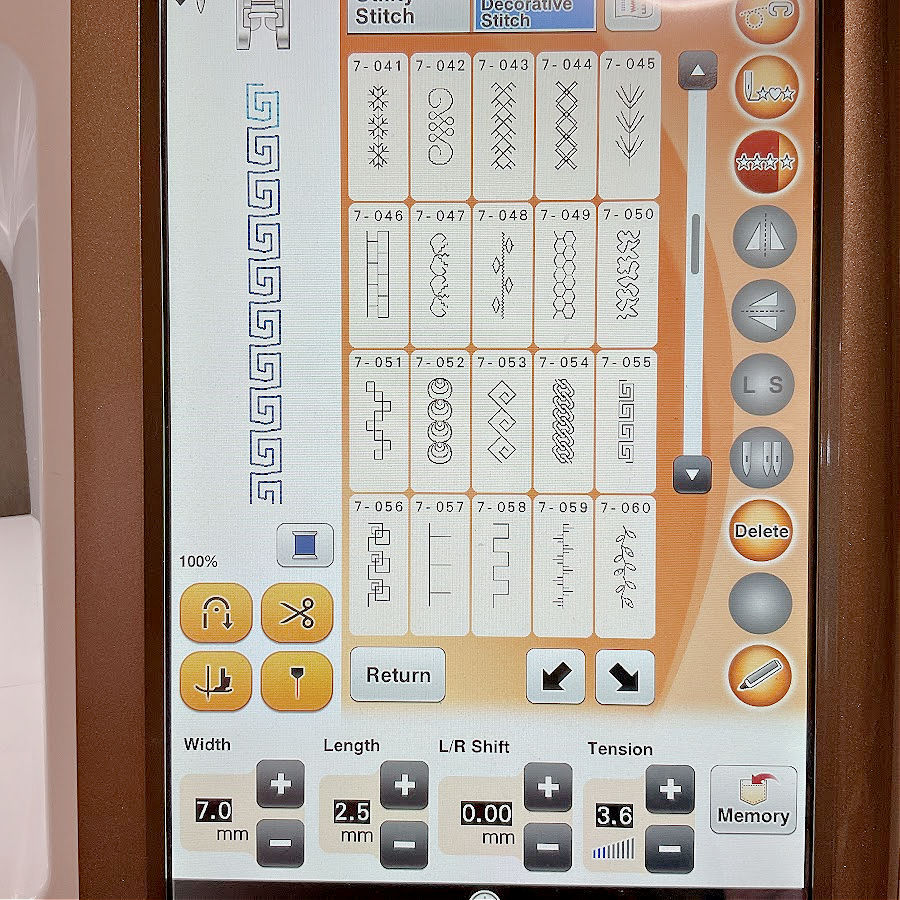
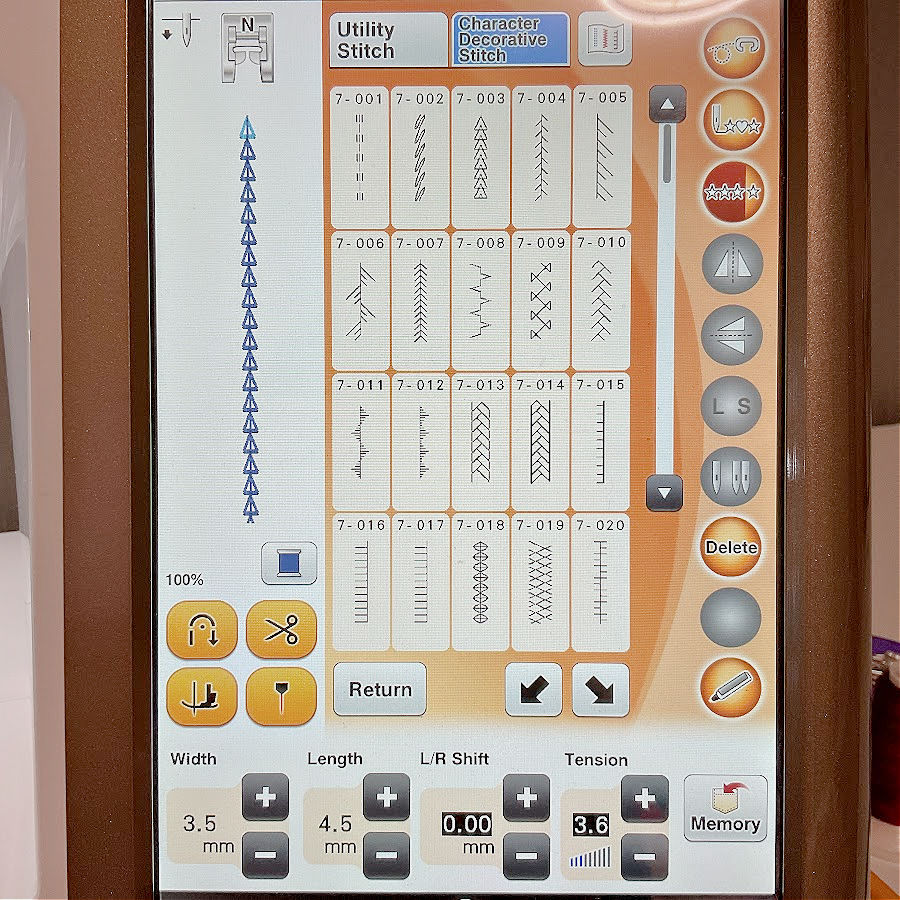
Sewing machines offer a wide variety of built-in decorative stitches, from simple scallops to intricate floral or geometric patterns. By combining different stitches, adjusting their size, and using contrasting thread colors, you can create a stunning design that looks like machine embroidery – all without an embroidery machine.
For inspiration and a deeper look into decorative stitch options, check out my tutorial Decorative Sewing Machine Stitches: Ideas, Projects and Inspiration. This guide explores how different stitches look, when to use them, and how to customize them for various projects.
How to Sew the Decorative Stitches Inside the Heart
- Start with a thread color that contrasts with the fabric. Adjust the stitch width and length based on how bold or delicate you want it to appear. Test on a scrap fabric before sewing directly on the sweatshirt.
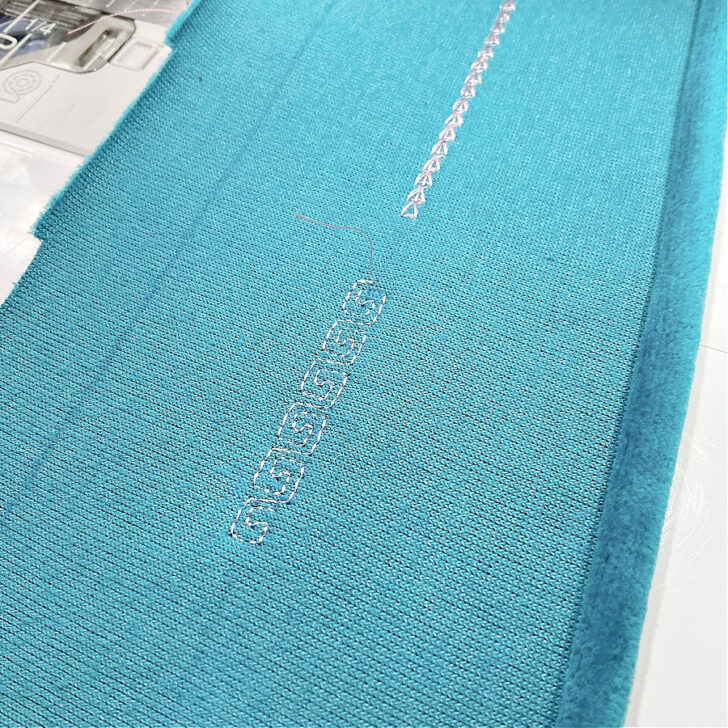
I had a small piece of similar sweatshirt fabric, so I applied interfacing to the back to make it similar to my actual project.
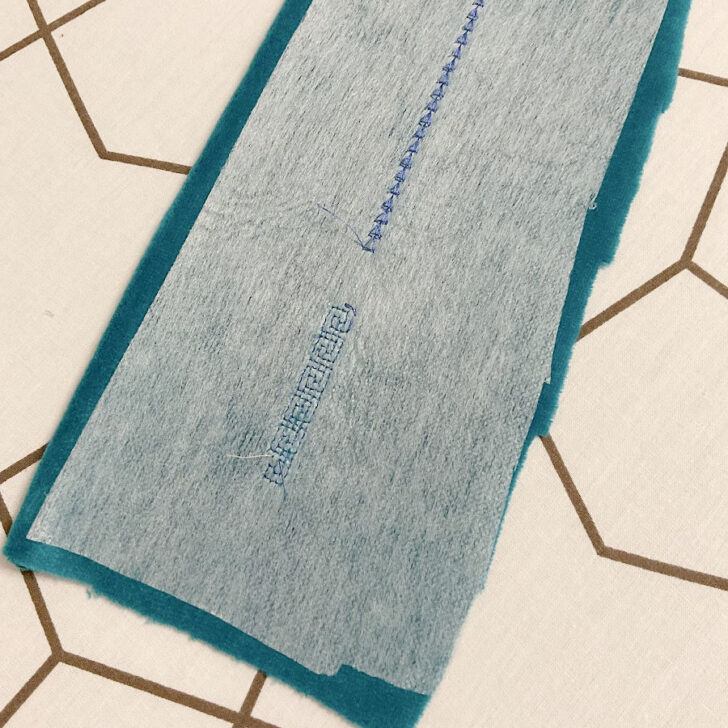
I used this scrap piece to test a few different decorative stitches and my embroidery thread. Everything stitched smoothly on the first try, so I didn’t even need to make any adjustments. I decided to use two of the decorative stitches from my test sample for the final design.
- Work from the center line outward (left or right, doesn’t matter). This prevents fabric shifting.
- Use an open-toe presser foot. It gives better visibility, makes it easier to guide the fabric along the lines and keep stitches straight.
You can learn more about this presser foot in my tutorial Presser Foot Guide: How To Use An Open Toe Presser Foot.


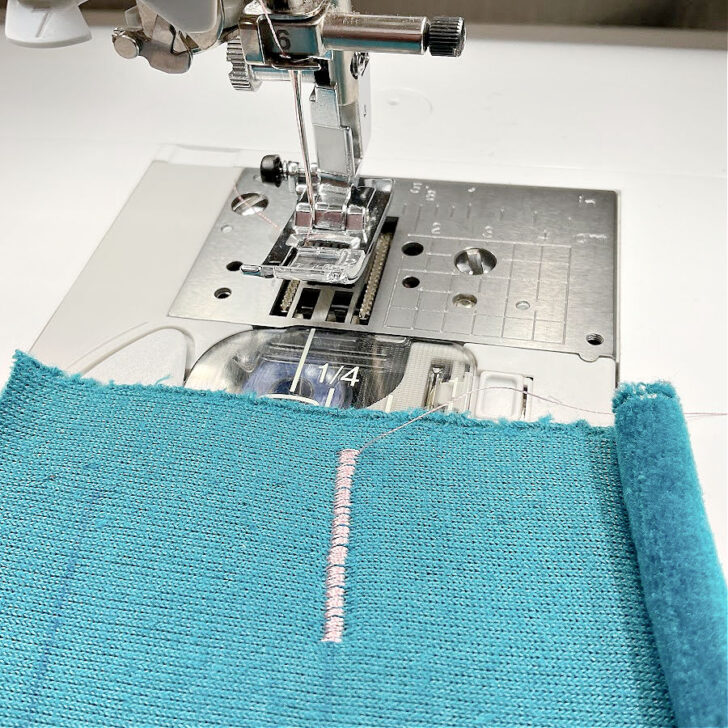
- Sew along each marked line inside the heart, keeping the fabric stable.
- Switch thread colors for variation. Changing thread colors between rows makes the design more vibrant. Embroidery threads work best since they have a slight sheen.
- Vary stitch types and sizes. Adjust the width and length of stitches for variety. A mix of wide, bold stitches and narrow, delicate ones will give the design more depth.
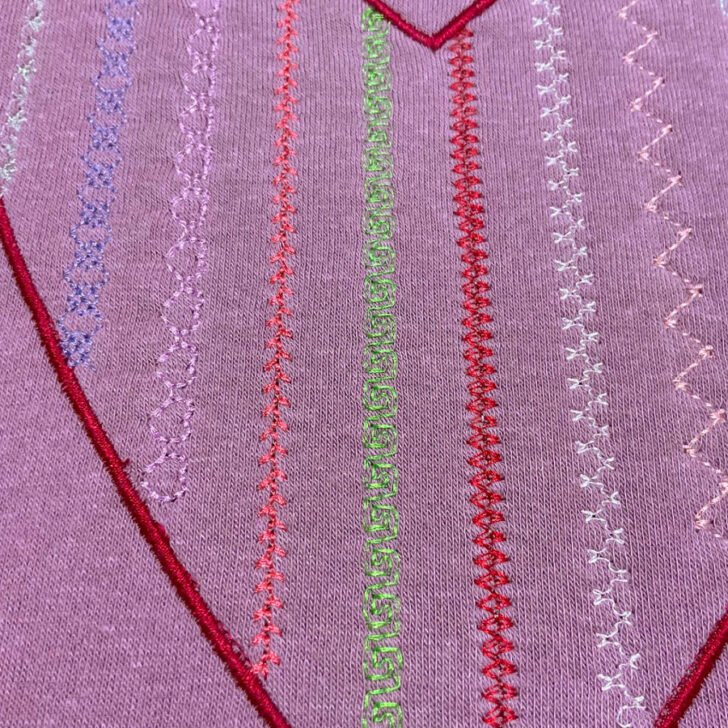
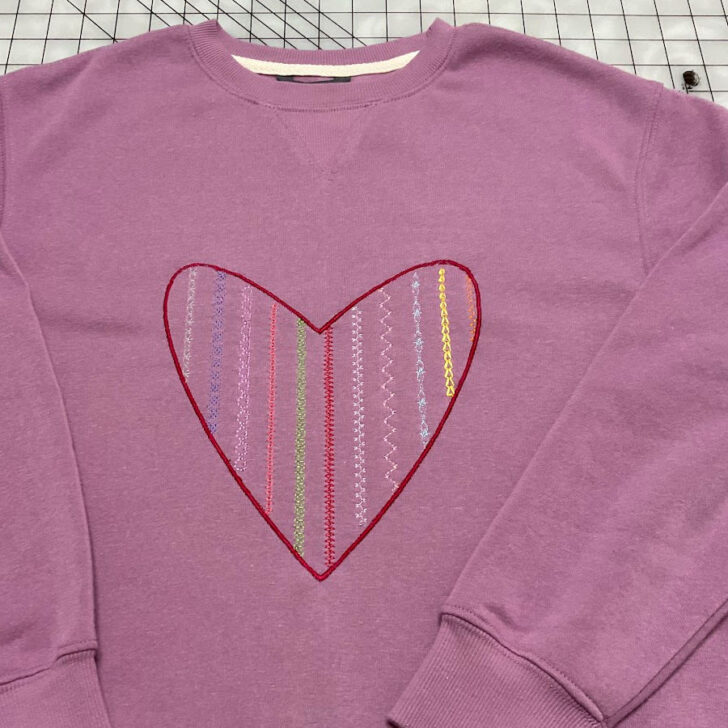
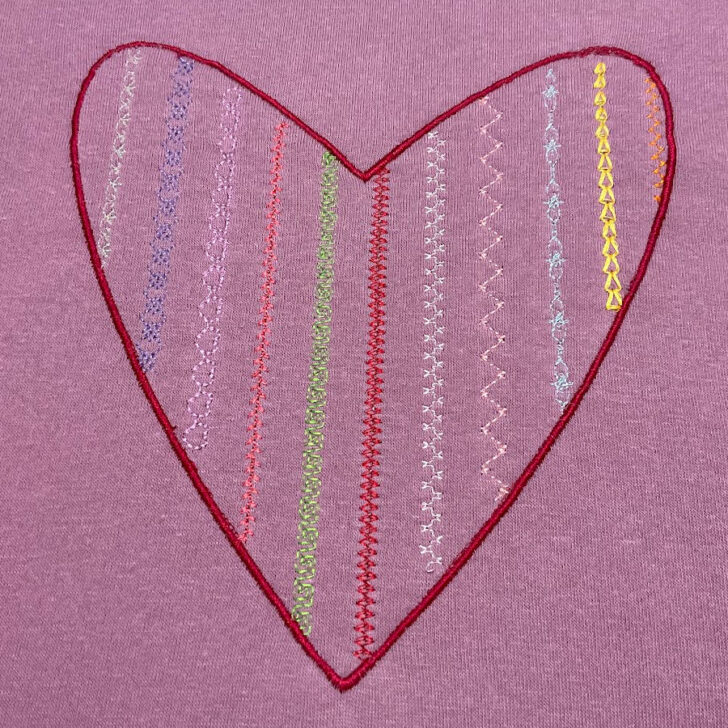
The image shows also the outline stitch around the heart shape; I will talk about that stitch in the next paragraphs.
- Secure the ends of stitches. Pull thread tails to the back and tie a small knot to prevent unraveling.
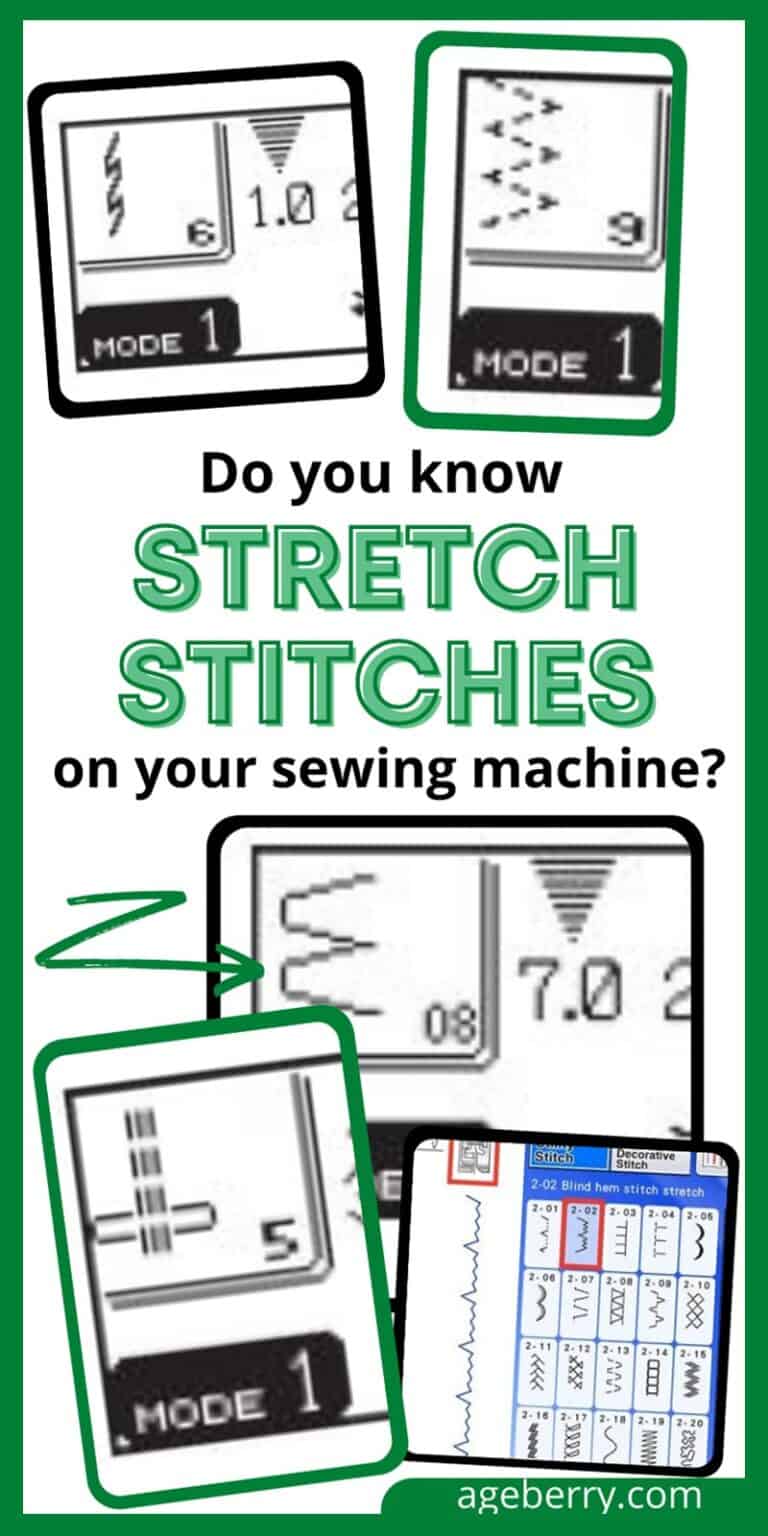
By experimenting with different stitch combinations, colors, and settings, you can create a one-of-a-kind design that looks nice. The images below show the settings for two of the decorative stitches I selected for use.
Step 4. Outlining the Heart
Once all the decorative stitches inside the heart are complete, it’s time to give the design a finished look by stitching around the outline. A satin stitch works best for this because it creates a smooth, dense border that defines the shape and prevents fraying.
What is a Satin Stitch?
A satin stitch is a tight, closely spaced zigzag stitch that fills in an area with thread. In this case, it will create a bold outline around the heart, making the design stand out. The key to a good satin stitch is adjusting the stitch width and length to create a smooth, even finish without fabric puckering.
How to Sew a Satin Stitch Around the Heart
- Set your sewing machine to a zigzag stitch and adjust the width to about 3-5 mm, depending on how thick you want the outline. The stitch length should be very short (0.3-0.5 mm) to create a dense, satin-like effect.
My settings were these – a zigzag stitch length of 0.3 mm and a width of 3.5 mm. However, I recommend increasing the width to 4 or 5 mm. A wider stitch will provide better coverage over the decorative stitches, creating a smoother and more defined outline.

- Before stitching directly on the sweatshirt, test the satin stitch on a scrap piece of similar fabric with fusible interfacing. Adjust the width and length as needed to get a dense but smooth stitch.
I tested a satin stitch on the same piece of fabric I used to test the decorative stitches.
- Begin stitching in a less visible area of the heart, such as near the bottom point or along the side. This will make it easier to blend the start and end of the stitching.
- Sew at a slow, even pace to keep the stitches consistent. Let the machine feed the fabric while gently guiding it along the heart outline. Avoid pulling or pushing, as this can distort the shape.
- For the rounded top sections of the heart, stop sewing with the needle down on the outer edge of the curve. Lift the presser foot, pivot slightly, then continue stitching. Repeat this process as needed to keep the curve smooth.
- When reaching the end, overlap the starting stitches slightly to create a seamless transition.
- Once finished, gently pull the thread tails to the back of the fabric and tie a small knot to secure them. This prevents unraveling.
- Lightly press the heart outline with an iron on low heat, using a pressing cloth to protect the embroidery threads. This helps flatten the stitches and set them in place.
A well-executed satin stitch will create a border that makes the heart design pop.
If your sewing machine does not have many decorative stitches, I recommend the Brother Innov-ís Pacesetter PS500. This is a very good machine, it has 100 built-in stitches to create detailed designs.

Step 5. Finishing Touches
- Trim any loose threads from the front and back of the sweatshirt.
- Press the design with an iron to flatten the stitches. Use a pressing cloth to protect the embroidery threads.
Tips for Success
- Use an open-toe presser foot to get a clear view of your stitching.
- Try different stitch patterns to add interest. A mix of zigzags, scallops, and geometric stitches works well.
- Stabilize the fabric well to prevent distortion, especially on stretchy sweatshirts.
- Experiment with metallic or variegated embroidery threads for a more eye-catching effect.
This method is a simple way to add embroidery-style designs to your garments using only a standard sewing machine. You can create flowers, geometric shapes, or even letters and words using the same technique.
latest posts
- What Do You Call a Person Who Sews? I Asked My Readers and Got 1,408 Opinions
- DIY Round Purse: PDF Sewing Pattern and Detailed Instructions
- Mini Wonder Clips By Clover: Useful Sewing Tool Or Just Another Notion?
- Non-Slip Grips For Quilting Rulers: A Small Notion With A Useful Job
- Fabric Eraser for Sewing: What It Removes and When to Use It
- What Is The Best Thread For Sewing Machine Projects? Let’s Find Out!
- Butterfly Quilt Block Tutorial – Foundation Paper Piecing
- How To Sew Quilt Squares So The Corners Match
- Sewing With Fork Pins: How They Help With Pattern Matching, Slippery Fabric, And Seams