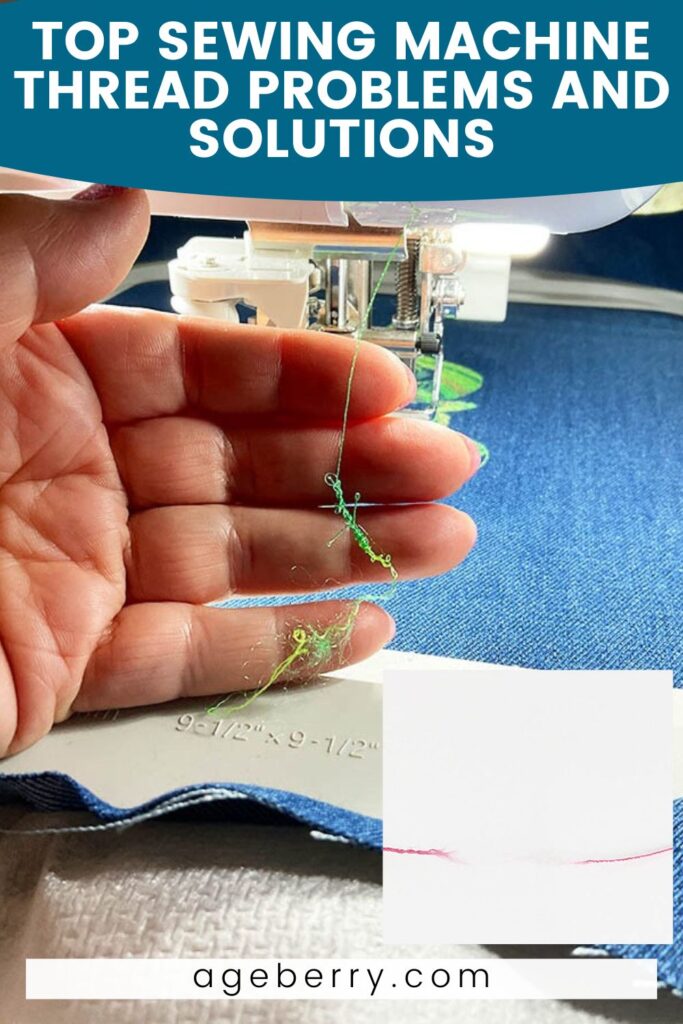
Common Sewing Machine Thread Problems and How to Fix Them
We love sewing but sometimes we are plagued by frustrating thread problems. Issues like thread bunching, breakage, looping, or jamming are almost inevitable for sewists of all levels. These problems disrupt your workflow and affect the quality of your projects, regardless of the type of machine you use or the nature of your sewing project.
Why do these thread problems happen? Let’s find out what might be causing your sewing machine thread woes and how to fix them.
Thread Tension Problems in Sewing Machines

Thread tension is a critical aspect of sewing that can significantly impact the quality and appearance of your stitches.
Thread tension refers to the balance between the upper thread and the bobbin thread in a sewing machine. Proper tension ensures that the stitches are even and secure on both sides of the fabric. When the tension is not correctly adjusted, it can lead to various sewing problems like puckering, looping, or uneven stitches.
What Happens if Thread Tension is Too Tight?
If the thread tension is too tight, the upper thread pulls the bobbin thread up to the top of the fabric. This can cause several issues.
- Puckering: The fabric may gather or pucker, making the seam look unattractive and uneven.
- Thread breakage: Excessive tension can cause the thread to break frequently, interrupting your sewing process.
- Fabric damage: In extreme cases, too tight tension can damage delicate fabrics by creating small holes or tears.
What Happens if Thread Tension is Too Loose?
Conversely, if the thread tension is too loose, the bobbin thread pulls the upper thread to the underside of the fabric. This can result in:
- Looping: Loose tension often causes loops of thread to form on the underside of the fabric, leading to messy and weak seams.
- Skipped stitches: The stitches may not hold properly, skip or become uneven.
- Weak seams: Loose tension can result in seams that are not secure, making them prone to coming apart.
How to Fix Thread Tension Problems
Fixing thread tension issues involves a few troubleshooting steps.
- Check the needle and thread: Ensure you are using the correct needle and thread for your fabric. A mismatched needle or thread can affect tension.
- Re-thread the machine: Sometimes, simply re-threading both the upper thread and the bobbin can resolve tension issues. Make sure the thread is properly seated in all guides and tension discs.
- Adjust the tension settings: Most sewing machines have tension dials, knobs or buttons for the upper thread. If the tension is too tight, slightly loosen the tension. If it is too loose, tighten it incrementally until the stitches are balanced.
- Clean the machine: Dust and lint can accumulate in the tension discs and bobbin area, affecting tension. Regularly clean your machine to ensure smooth operation.
- Test on scrap fabric: Always test your adjustments on a piece of scrap fabric before continuing with your project. This allows you to fine-tune the tension without risking your main fabric.
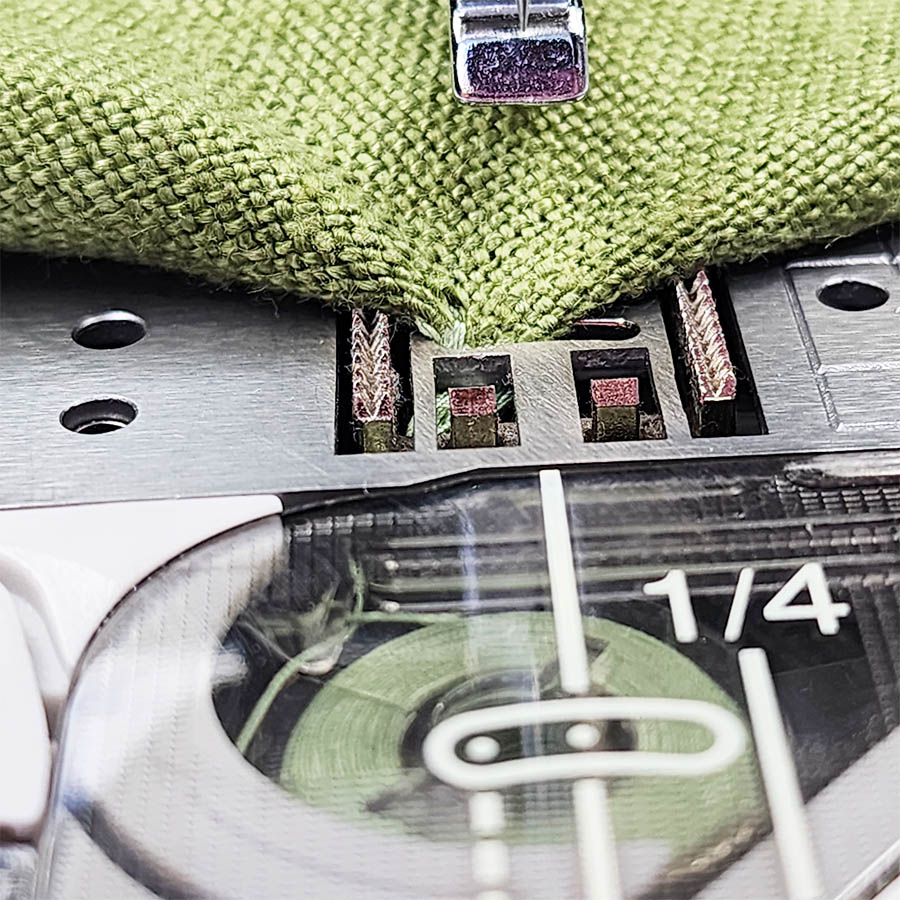
When threading your machine, make sure that the thread goes between the tension discs. If the thread stays outside the discs, it won’t be properly tensioned, leading to various stitching problems. This can happen, for example, if you thread your machine with the presser foot lowered or simply miss the discs due to inattention.
Ensuring the thread is correctly positioned between the tension discs is vital for maintaining the right thread tension.
For more detailed guidance on fixing thread tension issues, you can refer to my guides:
Sewing Machine Thread Bunching Under Fabric
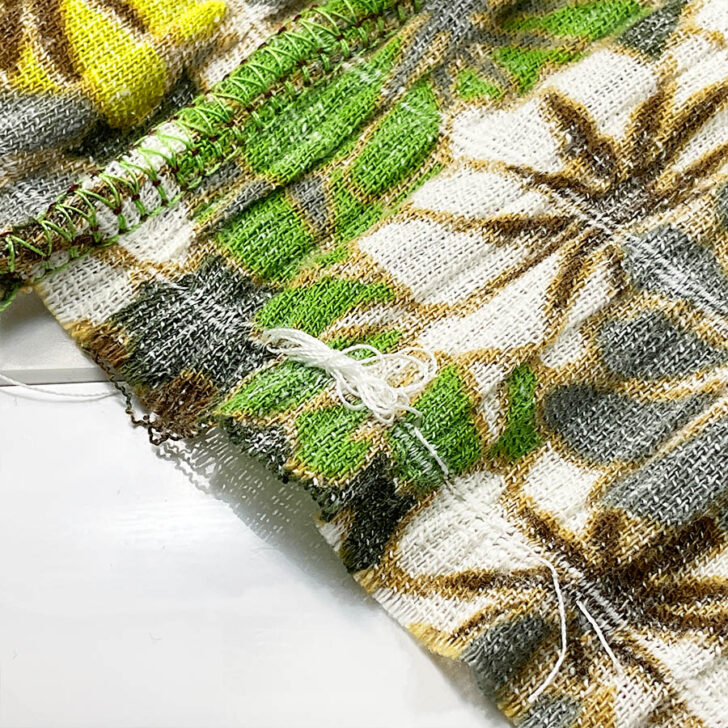
Thread bunching, also known as “bird nesting,” is a common issue that can disrupt your sewing projects.
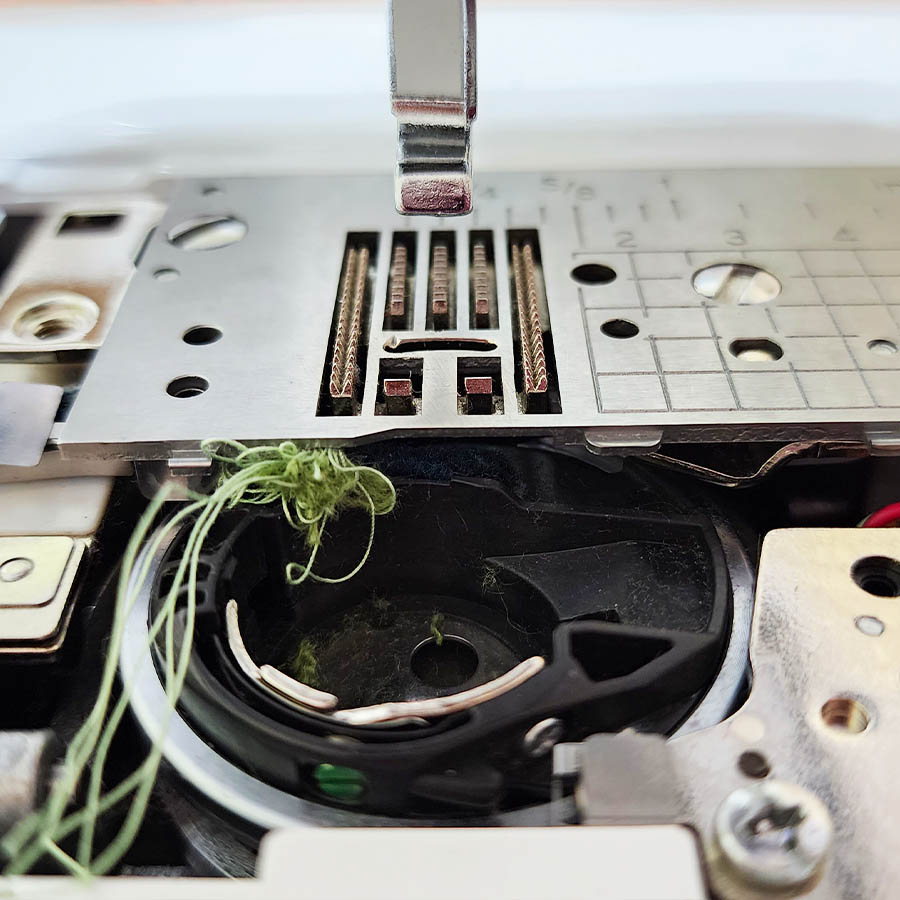
Thread bunching happens when excess thread accumulates under the fabric, creating tangled loops and knots. This issue not only affects the appearance of your stitches but can also cause the fabric to get stuck in the sewing machine, leading to further complications.
What Causes Thread Bunching
Several factors can contribute to thread bunching.
- Incorrect threading: I think the most common cause of thread bunching is improper threading of the sewing machine. If the upper thread is not threaded correctly, it can lead to tension issues and thread accumulation under the fabric.
- Tension problems: Incorrect tension settings can cause the thread to bunch up. If the upper thread tension is too loose or the bobbin tension is too tight, the threads won’t interlock properly, leading to bunching.
- Bobbin issues: Incorrectly wound or improperly placed bobbins can also cause thread bunching. The thread should be evenly wound on the bobbin and placed correctly in the bobbin case.
- Dirty machine: Dust, lint, and debris can accumulate in the machine, particularly in the bobbin area and tension discs, causing the thread to catch and bunch.
- Needle problems: Using the wrong type or size of needle for your fabric, or a dull or bent needle, can affect stitch formation and lead to bunching.
How to Fix Thread Bunching
To address thread bunching, follow these steps:
- Re-thread the machine: Start by re-threading both the upper thread and the bobbin. Ensure the thread is correctly seated in all guides, tension discs, and the needle.
- Check the tension settings: Verify that the upper thread and bobbin tensions are correctly set. Adjust the upper thread tension if necessary. For bobbin tension, consult your machine’s manual for proper adjustment instructions.
- Inspect the bobbin: Ensure the bobbin is wound evenly and inserted correctly in the bobbin case. The thread should unwind smoothly without resistance.
- Clean the machine: Regularly clean your sewing machine to remove dust and lint. Pay special attention to the bobbin area and tension discs. Refer to your machine’s manual for cleaning instructions.
- Use the right needle: Make sure you are using the appropriate needle for your fabric type and weight. Replace dull or bent needles with new ones.
- Test on scrap fabric: After making adjustments, test your machine on a piece of scrap fabric to ensure the issue is resolved before continuing with your project.
For more detailed solutions, you can refer to my tutorial Sewing machine thread bunching: Top 10 reasons (+ How to fix it)
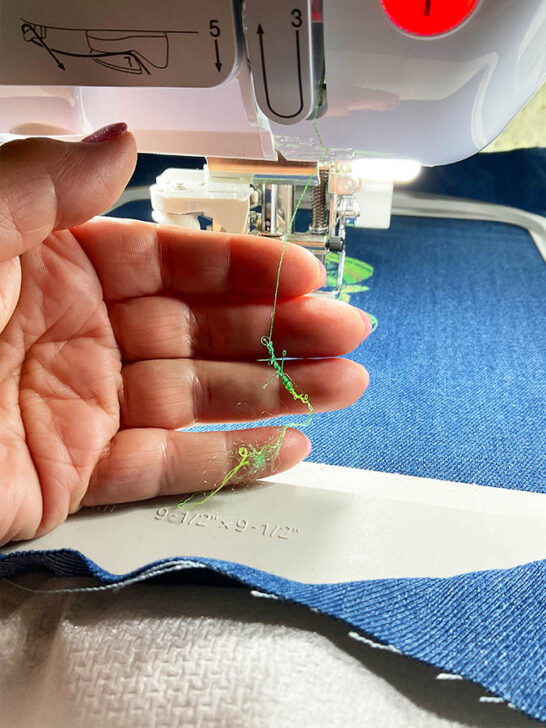
Thread Jams in Sewing Machines
Thread jams are a frustrating issue that can halt your sewing projects and potentially damage your machine if not addressed properly. Understanding what causes thread jams and how to fix them can help you get back to sewing smoothly.
A thread jam occurs when the thread gets tangled or caught in the sewing machine, preventing the needle from moving and causing the fabric to become stuck. This can happen in the bobbin area, around the needle, or even within the tension discs.
What Causes Thread Jams?
Several factors can contribute to thread jams:
- Incorrect threading: Improper threading of the upper thread or bobbin can lead to tangles and jams. Ensuring the thread is correctly seated in all guides and tension discs is crucial.
- Tension issues: Incorrect tension settings can cause the thread to bunch up and jam. Both the upper thread and bobbin tension need to be balanced for smooth sewing.
- Dirty machine: Accumulated lint, dust, and debris in the bobbin area, feed dogs, or tension discs can cause the thread to snag and jam.
- Needle problems: A bent or dull needle can cause the thread to catch and jam. Using the wrong needle for your fabric can also contribute to this issue.
- Bobbin issues: An improperly wound or incorrectly inserted bobbin can lead to thread jams. The bobbin thread should unwind smoothly without resistance.
How to Remove Jammed Fabric from the Machine
If your fabric is jammed in the machine, follow these steps to safely remove it.
- Turn off the machine: Ensure the machine is turned off to avoid injury.
- Raise the needle and presser foot: Manually lift the needle to its highest position using the handwheel. Raise the presser foot to release the fabric.
- Cut the threads: Use a small pair of scissors to carefully cut the threads around the jammed area. This may help release the fabric.
- Remove the needle plate: If the fabric is still stuck, remove the needle plate (throat plate) to access the jammed fabric. This may require a screwdriver depending on your machine model.
- Gently pull the fabric: Once the needle plate is removed, gently pull the fabric out. Avoid using excessive force to prevent damage to the fabric and machine.
- Clean the area: After removing the fabric, clean the bobbin area and feed dogs to remove any remaining thread or debris.
Sewing Machine Thread Keeps Breaking
Thread breakage is a common issue that can disrupt your sewing projects and lead to frustration.
Thread breakage occurs when the thread snaps during sewing, leading to incomplete stitches and interruptions in your work. This issue can be caused by various factors related to the machine, the thread, or the needle.
What Causes Thread Breakage?
Several factors can contribute to thread breakage
- Incorrect threading: Improper threading of the sewing machine can cause tension issues and lead to thread breakage. Ensure the thread is correctly seated in all guides and tension discs.
- Tension issues: Incorrect tension settings can place too much stress on the thread, causing it to break. Both the upper thread and bobbin tension need to be balanced.
- Needle problems: Using the wrong type or size of needle for your fabric, or a dull or bent needle, can cause the thread to break. The needle eye may be too small for the thread, causing friction.
- Poor-quality thread: Low-quality or old thread can be weak and prone to breaking. Using high-quality thread can reduce breakage.
- Dirty machine: Accumulated lint, dust, and debris in the tension discs, needle area, or bobbin case can cause the thread to catch and break.
- Incorrect needle position: If the needle is not properly aligned or inserted correctly, it can cause the thread to break.
- Thread path obstructions: Any obstructions or rough spots in the thread path, including burrs on the needle plate or in the bobbin area, can cause the thread to snag and break.
How to Fix Thread Breakage
To address thread breakage, follow these steps.
- Re-thread the machine: Remove the upper thread and bobbin, then re-thread both correctly. Ensure the thread passes through all guides and tension discs properly.
- Check the tension settings: Verify that the upper thread and bobbin tensions are correctly set. Adjust the tension if necessary to ensure smooth thread flow.
- Inspect the needle: Replace any bent or dull needles with new ones. Ensure you are using the correct needle size and type for your fabric and thread.
- Use high-quality thread: Invest in good-quality thread that is appropriate for your project. Avoid using old or weak thread that may be prone to breaking.
- Clean the machine: Regularly clean your sewing machine to remove lint, dust, and debris from the needle area, tension discs, and bobbin case. Use a small brush or vacuum attachment for thorough cleaning.
- Check the needle position: Ensure the needle is properly aligned and securely inserted in the needle clamp. Refer to your machine’s manual for correct needle installation.
- Inspect for obstructions: Check for any rough spots or burrs along the thread path, including the needle plate and bobbin area.
✅ Related tutorial: 20+ Reasons Your Sewing Machine Thread Keeps Breaking (+ Solutions)
Thread Shredding in Sewing Machines
Thread shredding is a frustrating issue that can disrupt your sewing projects and affect the quality of your stitches.
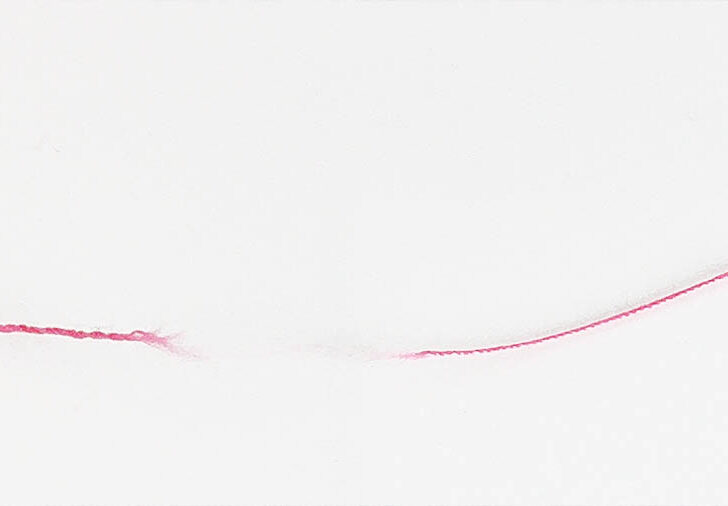
Thread shredding happens when the thread frays and breaks apart as it passes through the needle, leading to incomplete stitches and frequent interruptions. This issue can result in visible fraying on the thread and can be particularly problematic with certain types of threads and fabrics.
What Causes Thread Shredding?
Several factors can contribute to thread shredding:
- Incorrect threading: Improper threading of the sewing machine can cause tension issues that lead to thread shredding. Ensure the thread is correctly seated in all guides and tension discs.
- Needle issues: Using the wrong type or size of needle for your fabric, or a dull or bent needle, can cause the thread to fray and shred. The needle eye may be too small for the thread, creating excessive friction.
- Tension problems: Incorrect tension settings can place too much stress on the thread, causing it to fray and break apart. Both the upper thread and bobbin tension need to be balanced.
- Poor-quality thread: Low-quality or old thread can be prone to fraying and shredding. Using high-quality thread can reduce this issue.
- Dirty machine: Accumulated lint, dust, and debris in the tension discs, needle area, or bobbin case can cause the thread to catch and shred.
- Thread path obstructions: Any obstructions or rough spots in the thread path, including burrs on the needle plate or in the bobbin area, can cause the thread to snag and shred.
What is Thread Caterpillar?
Thread caterpillar refers to the appearance of small, fuzzy fibers that accumulate along the length of the thread as it shreds. This fuzzy buildup resembles a caterpillar and is a clear sign that the thread is fraying and breaking apart. Thread caterpillar can lead to weakened seams and a messy finish on your sewing projects.
How to Fix Thread Shredding
To address thread shredding, follow these steps:
- Re-thread the machine: Remove the upper thread and bobbin, then re-thread both correctly. Ensure the thread passes through all guides and tension discs properly.
- Check the tension settings: Verify that the upper thread and bobbin tensions are correctly set. Adjust the tension if necessary to ensure smooth thread flow.
- Inspect the needle: Replace any bent or dull needles with new ones. Ensure you are using the correct needle size and type for your fabric and thread. A larger eye needle, such as a topstitch or embroidery needle, can reduce friction and prevent shredding.
- Use high-quality thread: Invest in good-quality thread that is appropriate for your project. Avoid using old or weak thread that may be prone to fraying.
- Clean the machine: Regularly clean your sewing machine to remove lint, dust, and debris from the needle area, tension discs, and bobbin case. Use a small brush or mini vacuum for thorough cleaning.
- Inspect for obstructions: Check for any rough spots or burrs along the thread path, including the needle plate and bobbin area. Replace damaged parts.
The Importance of a Quality Sewing Machine
Investing in a high-quality sewing machine can significantly reduce the frequency and severity of thread problems. Modern quality machines are designed to be resilient to common threading errors and other issues. These machines often feature advanced tension control and threading systems that help mitigate problems, making them more forgiving and user-friendly.
For example, with my Janome 6600P and Brother Luminaire, I rarely encounter thread problems. These machines handle my occasional mistakes with ease most of the time. While no machine is entirely immune to thread issues, using a well-made, reliable model can greatly enhance your sewing experience and minimize disruptions.
There are other sewing machine thread problems that can arise. To help you navigate these challenges, I’ve created a YouTube video titled “Thread Secrets.” In the video, I cover various thread-related issues and offer practical solutions. If you’re interested in learning more and preventing these common problems, be sure to check it out.

Did you find this guide helpful? If you did, make sure to save this pin on your sewing board so that you can easily access the article later whenever you need this information on sewing machine thread problems. Also, don’t forget to follow me on Pinterest for more tips, tutorials, and inspiration.
latest posts
- Butterfly Quilt Block Tutorial – Foundation Paper Piecing
- How To Sew Quilt Squares So The Corners Match
- Sewing With Fork Pins: How They Help With Pattern Matching, Slippery Fabric, And Seams
- How Much Fabric Do I Need? 21 Helpful Tips For Calculating Fabric Yardage
- Easy Simple Sewing Project: Fabric Jar Opener
- DIY Oven Mitts: Step-by-Step Sewing Tutorial
- Easy DIY Potholder: New Design
- Tailor’s Clapper: What It Does, Why It Works, And How To Use It Right
- Heat Resistant Batting for Sewing: What It Is, How It Works, and What Makes a Difference