
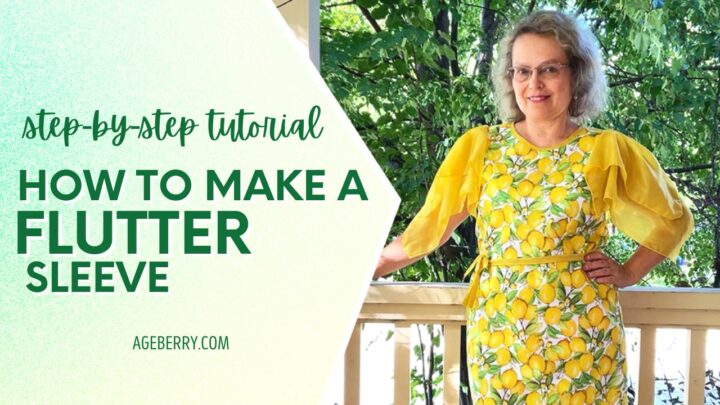
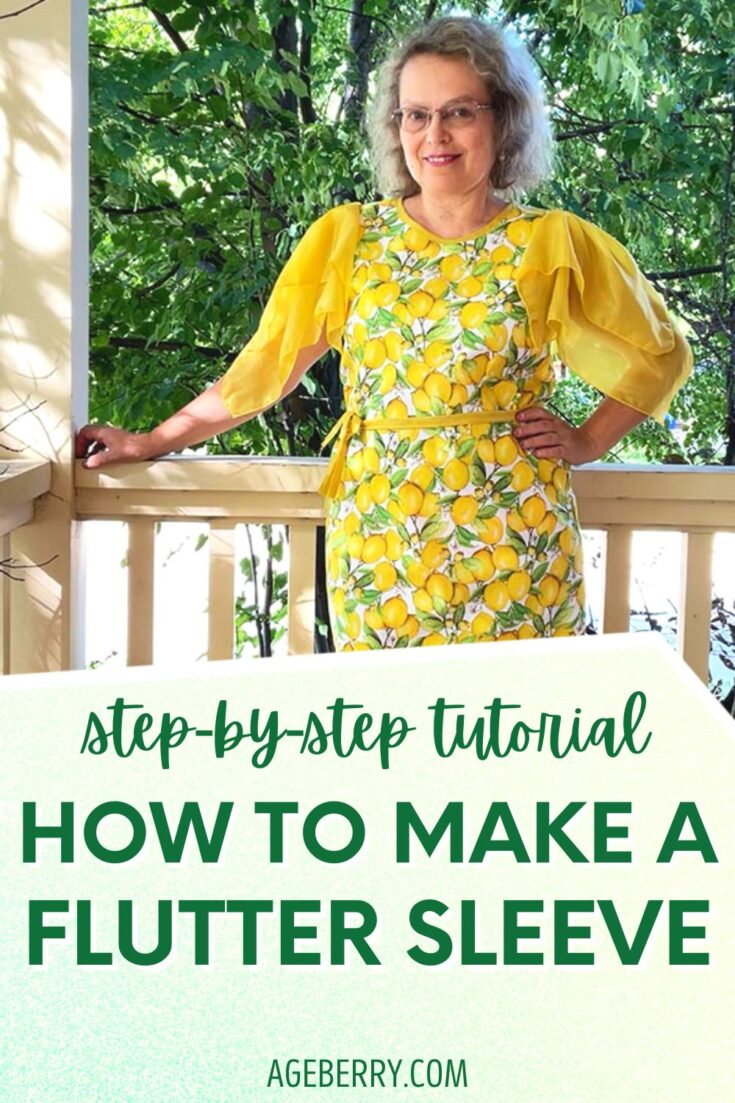
How To Make A Flutter Sleeve
This article is a step-by-step guide on how to make a flutter sleeve. If all other sleeve patterns seem too tedious for you, why don’t you try the flutter sleeve version for a simple dress?
There are no challenges sewing flutter sleeves – no intricate cutting and you don’t even need any pattern. You will need to cut two identical squares and sew them together in such a way that they form the flutter sleeve. The following are step-by-step instructions on how to do this.
What Is A Flutter Sleeve?
As the name suggests, a flutter sleeve is quite literally a fluttering piece of fabric that hangs off your arm. No, this is not a sleeve that will protect you from the elements! But this is another trick in our arsenal to use for enhancing the body appearance and de-emphasizing the less desirable features.
✅ Related tutorial: How to choose clothes and patterns to hide a big tummy
✅ Related tutorial: How to dress well: flattering clothes that hide figure flaws
These flowy loose sleeves are perfect for summer tops and dresses. They’re easy to make and flattering on many body types! A pear body shape is best suited for this type of sleeve because they give volume to the upper part of the body and its width balances the figure. If you’re looking to add a feminine touch to your simple dress, then flutter sleeves are just what you need!
Attention! If you like the video format, at the bottom of this post, look for a YouTube video version where there is a step-by-step tutorial on how to make a flutter sleeve. For a more complete picture, I recommend exploring both versions.
The purpose of this article is not to confuse you with terms like “gusset” and “raglan”, but just to help you turn a simple square-shaped piece of fabric into a flutter sleeve.
Flutter sleeves will not look good on all body types though.
Sometimes you may find it awkward to have extra fabric hanging off your arms because a flutter sleeve tends to draw attention away from other important parts of the dress.
It’s worth noting that this sleeve style is not ideal for someone with a heavy upper body or wide shoulders–like the inverted triangle body shape.
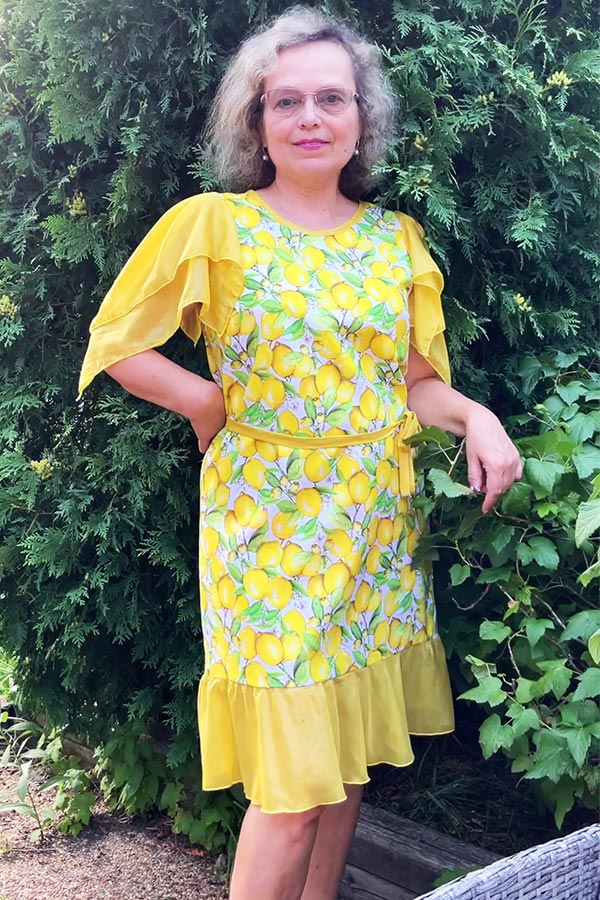
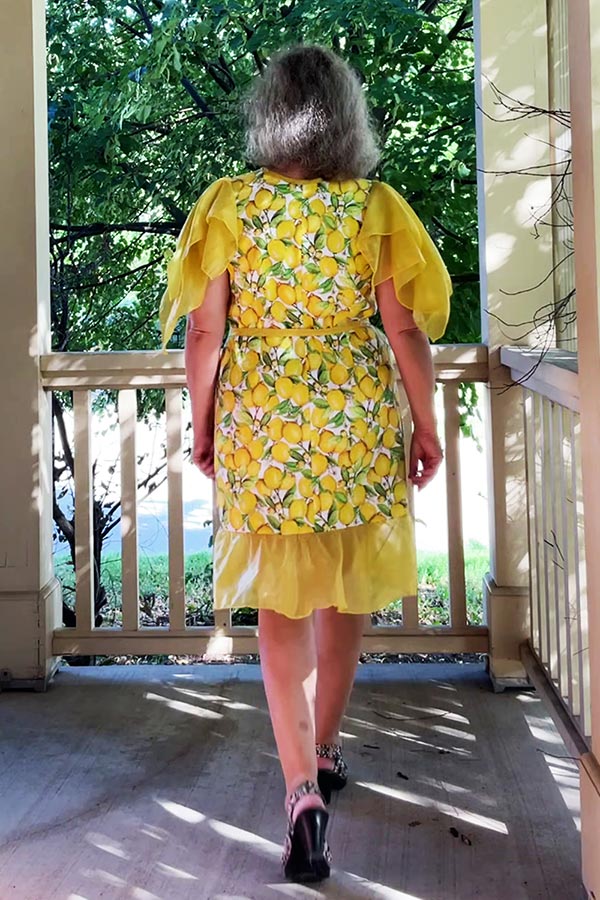
Recently I published a tutorial on how to make this summer dress and draft an easy pattern for it. But the dress looked really simple so I decided to embellish it with flutter sleeves and a flounce.
What You’ll Need To Make Your Flutter Sleeves
What are the necessary materials?
- Fabric (see below)
- Serger (optional)
- Sewing machine
- Coordinating thread
- Regular sewing notions
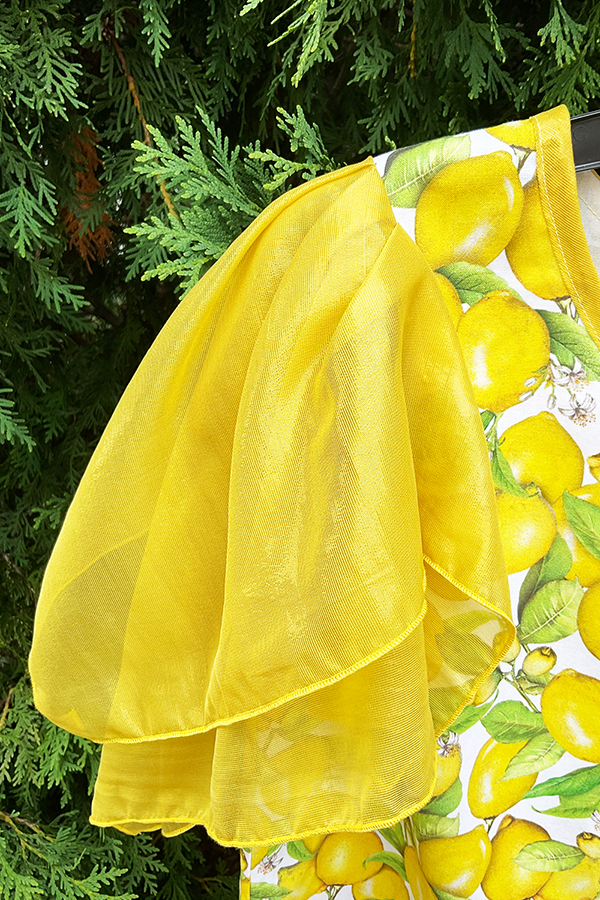
What Fabric Is Good For Flutter Sleeves
Properly chosen fabric is the key to a good flutter sleeve. You want something drapey and lightweight like this natural silk chiffon I used here. And of course the same color as the dress, or a color that works well with it. If the dress is from a lightweight material you can use the same for the sleeves but in my case, the dress material was too heavy for the sleeves.
Polyester chiffon, rayon challis, cotton voile, and lightweight novelty knits are some other options you can try. Quilting cotton, cotton twill, satin, and other thicker fabrics with lots of body will not work well for flutter sleeves so they don’t stick out awkwardly on the arms. So avoid those fabrics when making your flutter sleeves.
I personally prefer to use natural fibers especially if the material touches the body.
Cutting The Fabric For These Flutter Sleeves
You will not need to make any paper pattern for these flutter sleeves, we will make all necessary lines right on the fabric.
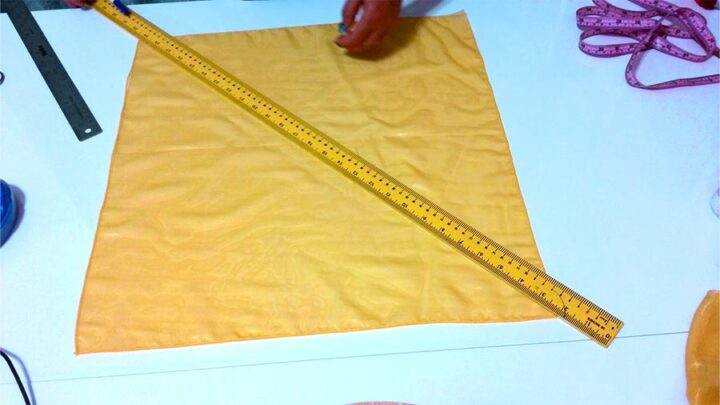
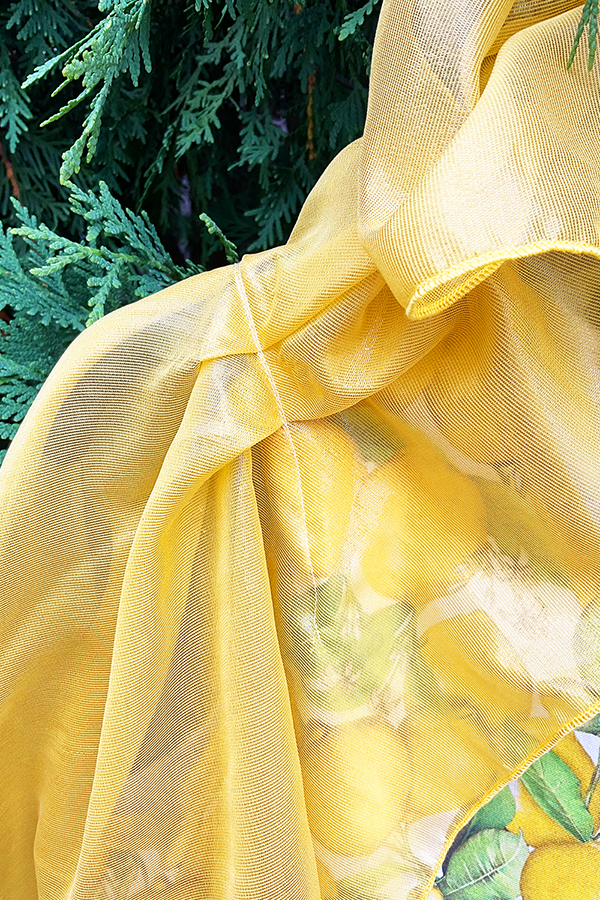
First, cut two square pieces from your fabric. I made 20×20 inch squares out of natural silk chiffon. Iron the pieces. The dimensions may vary a little based on personal preference and your size but for my example, I used these dimensions.
Note: Some of the links on this page are affiliate links. This means I will receive a commission if you order a product through one of my links. I only recommend products I believe in and use myself.
Cutting the fabric squares is easy if you use good fabric scissors. Recently I bought these scissors and now I am sure these are the best fabric scissors I have ever had.
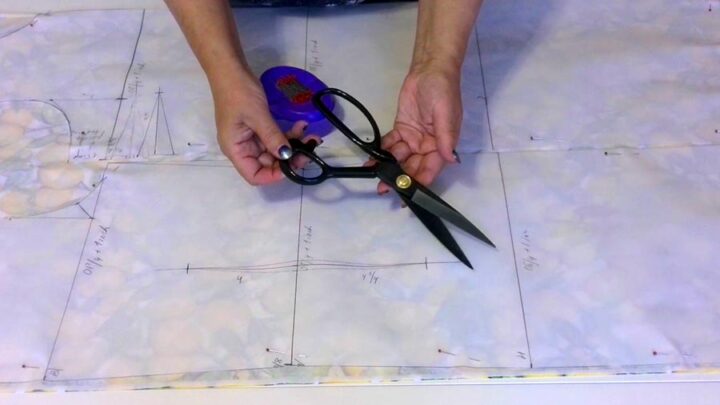
These aren’t just any fabric scissors. These are the heavy-duty fabric shears you won’t want to be without. It’s written PROSHEAR on them. They are black because they are made of high carbon steel, a stronger metal than stainless steel. They make clean cuts through multiple layers of fabric–they’re sharper than anything else out there!
And they are not expensive! So go to this link on Amazon and see for yourself – it’s well worth investing in this product with all its benefits! They have almost 5000 5-star reviews!
Sewing A Rolled Hem On These Square Pieces Of Fabric Using A Serger
The next step is to finish the fabric edges with a rolled hem using a serger (outside North America, this is called overlock) as illustrated in this image: a very nice stitch – 3-thread rolled hem for finishing hems on lightweight fabrics.
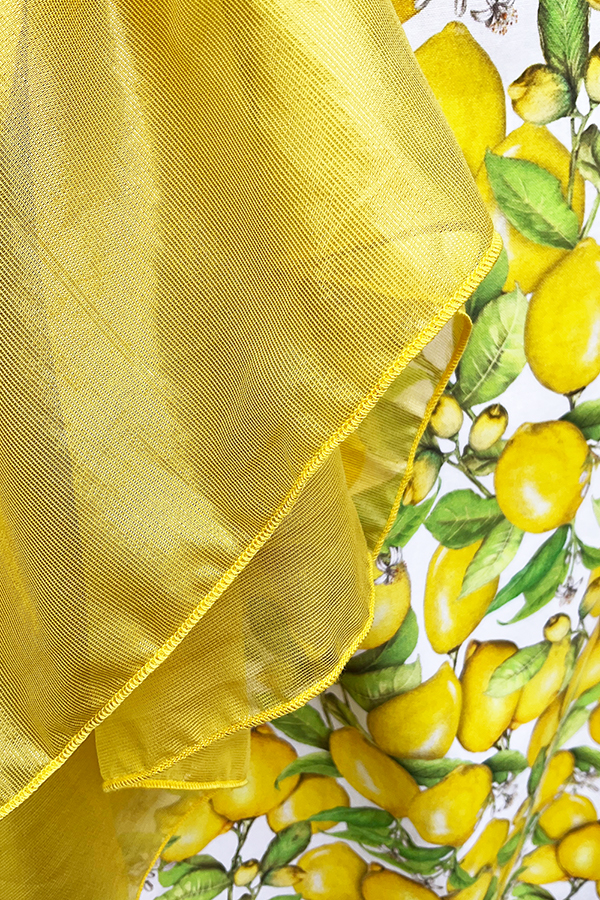
This is the most common rolled edge, available on practically all models of sergers. A rolled hem is one of my favorite serger stitches and I think it’s a very attractive finish. It’s called rolled hem because the serger usually rolls the fabric edge to the wrong side where it’s hidden under stitching. The stitch is formed by the right needle and both loopers.
Settings for a rolled hem are not difficult but you need to change the stitch width, stitch length, and tension. You need to use a short stitch length (put it to 1) so the thread completely covers the edge. Make the stitch width very narrow too.
For the rolled hem we will need to tighten the tension of the lower looper almost completely (I put it on 6). When the lower looper tension is tightened, the upper looper thread wraps around the edge to the underside of the fabric. And the fabric edge rolls to the underside as the stitches wrap around the edge.
Keep the needle and upper looper tensions at their normal settings.
How To Make A Flutter Sleeve Pattern Right On Your Fabric
The flutter sleeve design is so simple that all you have to do is make some pleats. Let me show you.
I am using my disappearing ink fabric marker for this. Below you can read a detailed description of the flutter sleeve pattern.
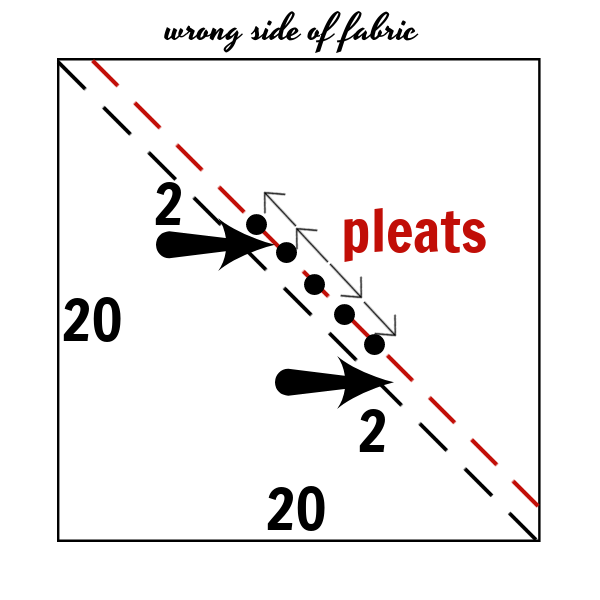
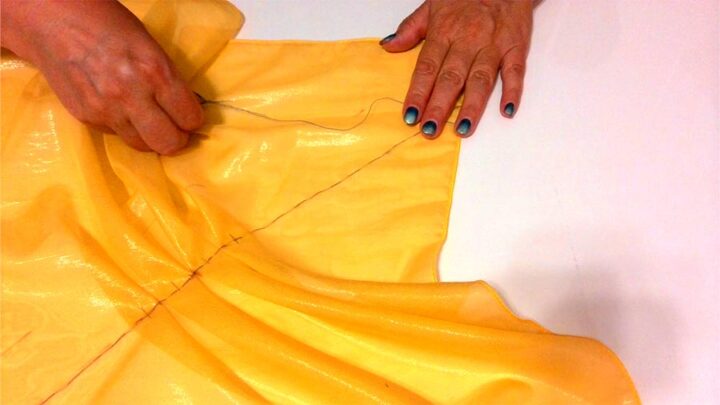
Draw a diagonal line on the fabric from corner to corner. Draw another line parallel to the first diagonal at the distance of 2 inches from the first. Mark a center point on the second line.
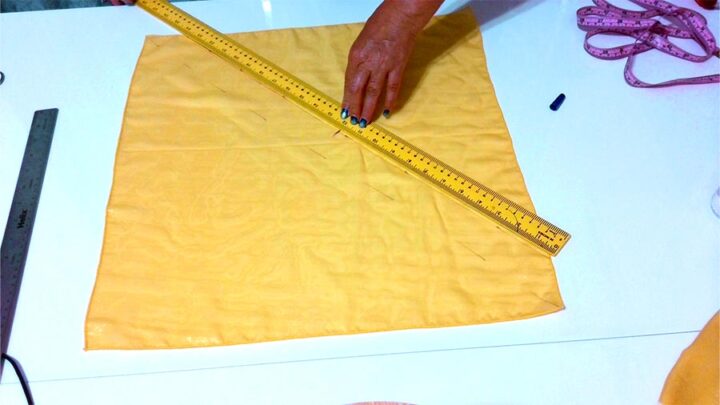
Next, mark two points at the same distance from the center point equal to 2 inches. Make 2 pleats and pin them. In the image below, you can see what it looks like on the wrong side of the fabric.
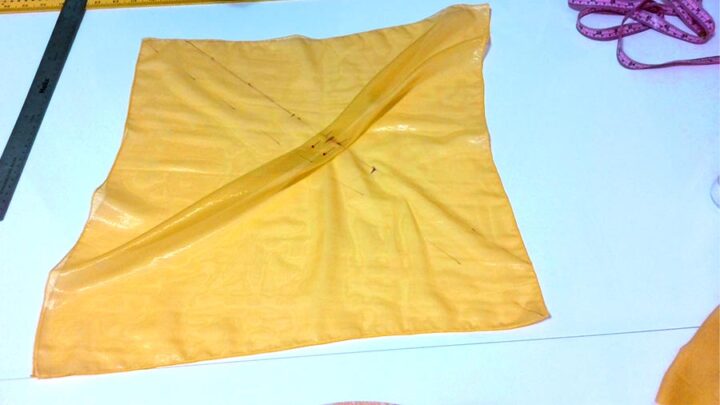
And this is the view on the right side.
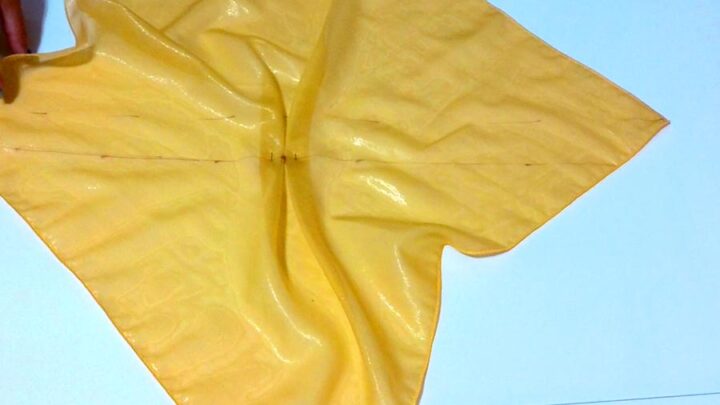
Mark the next two points from the folds – also at 2 inches from the folds. Make 2 pleats again and pin them.
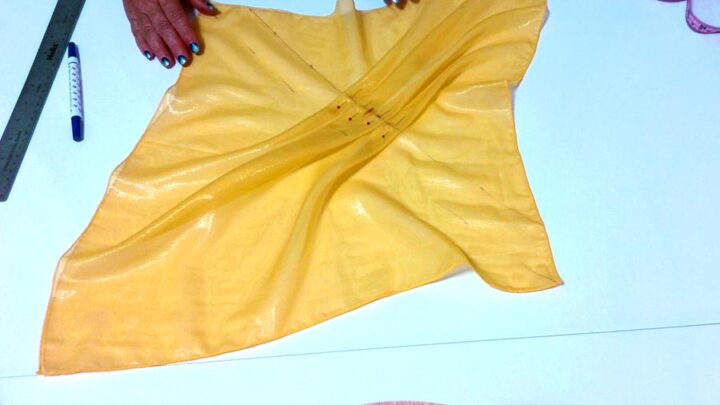
Make a hand-basting stitch along the second diagonal line. This line is a fold line for the flutter sleeve. Stitch only the pleats by sewing machine.
The flutter sleeve is ready to be attached.
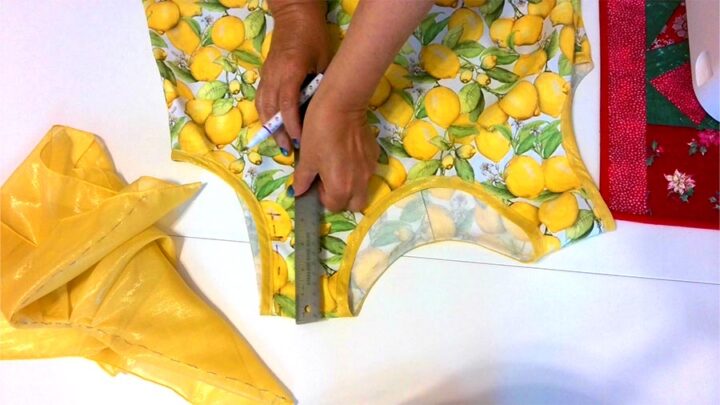
How To Add Flutter Sleeves To A Top Or Dress
From this point onwards, there is only one step left – attaching the sleeves to the dress.
I made this simple sleeveless summer dress and I have a step-by-step tutorial on how to make a pattern for this dress and how to sew the dress from start to finish. So I am going to attach the flutter sleeves to this dress.
Mark the stitching line on the dress as you see in the images below. The distance from the shoulder seam is 3 – 4 inches. I decided to go with 4 inches in the end.
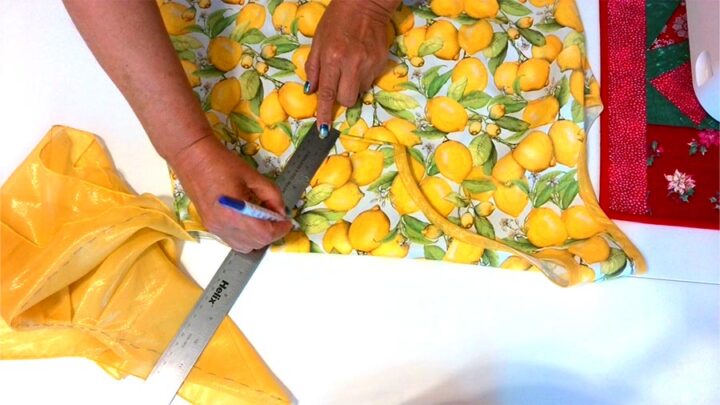
Pin the sleeve to the dress’s right sides together matching the first pleats with the shoulder seam. Stitch along the basting line.
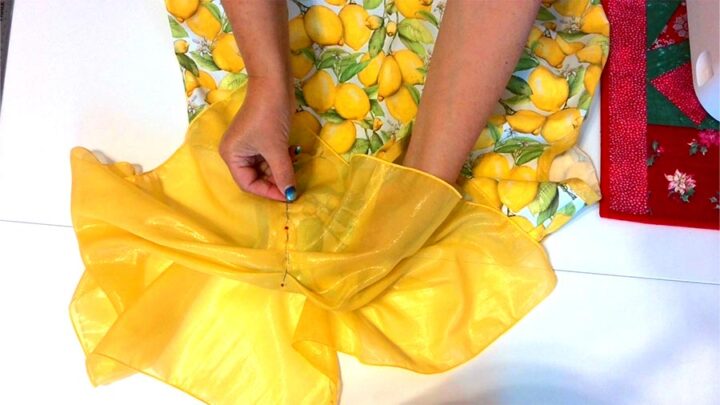
Remove the basting thread.
Our sleeves are finished!

If you want an easy sewing project that is straightforward and not too difficult to make, then I recommend giving these flutter sleeves a try!
So here is my YouTube video. Check this out if you like to see how to make a flutter sleeve instead of reading.

Did you find this tutorial helpful? If so, save this pin (see below) on your sewing board so you can come to this tutorial later when you are ready to make flutter sleeves, and follow me on Pinterest for more tips, tutorials, and inspiration!
latest posts
- What Do You Call a Person Who Sews? I Asked My Readers and Got 1,408 Opinions
- DIY Round Purse: PDF Sewing Pattern and Detailed Instructions
- Mini Wonder Clips By Clover: Useful Sewing Tool Or Just Another Notion?
- Non-Slip Grips For Quilting Rulers: A Small Notion With A Useful Job
- Fabric Eraser for Sewing: What It Removes and When to Use It
- What Is The Best Thread For Sewing Machine Projects? Let’s Find Out!
- Butterfly Quilt Block Tutorial – Foundation Paper Piecing
- How To Sew Quilt Squares So The Corners Match
- Sewing With Fork Pins: How They Help With Pattern Matching, Slippery Fabric, And Seams
This time I have to watch the video, because I really like how these sleeves look on your dresd. But this written tutorial was confusing. You didn’t explain the pleats very well, or how to attach to the dress. Was this on purpose so we would have to go to YT? You usually explain techniques extremely well, and the video is just using on the cake. Of course I am not experienced with pleats, so others may understand perfectly where the pleats are positioned. However, I do appreciate your time, talent and willingness to share both with us. Off to view YT.
@Jojo Sewist, that is supposed to be “dress”, & “icing” Google seems to believe it knows better than I, what I want to type.
Im curious. You said you can adjust the size of the squares for the flutter sleeve for preference. So, what happens to the size, formulaicly (is that a word??!!) as you decrease the square size. That might be helpful for people to know right off the bat if they want something a little bigger or smaller. I am thinking it is obvious, but an actual measurement ‘if you want shorter/smaller, flutters, each inch you decrease does…’ and what does that do for the coverage across the arm scythe…I’m just curious if you’ve already done the math for it…Thank you so much. I find your articles very helpful. And I have enjoyed making several of your great, practical patterns. I’m so glad you are doing this for us fellow sewists!!
I do not believe a difference of about 1 inch each way would make too much of a difference. Making the square smaller will obviously make the sleeve smaller and shorter, but I did not look into this. I simply made it of a size that to my eye looked good 😀! I suggest make the square from a scrap fabric (a cheap piece which you no longer intend to use) and see what happens, and if you don’t like the fit, make it progressively smaller until it fits best. Sorry, I don’t really have a formula.