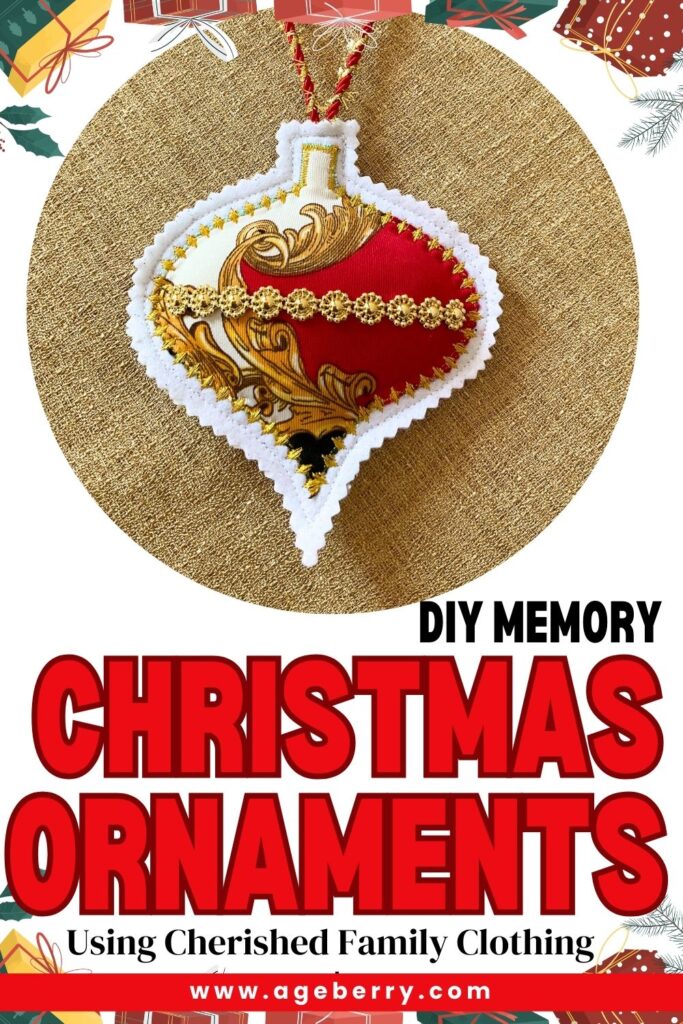
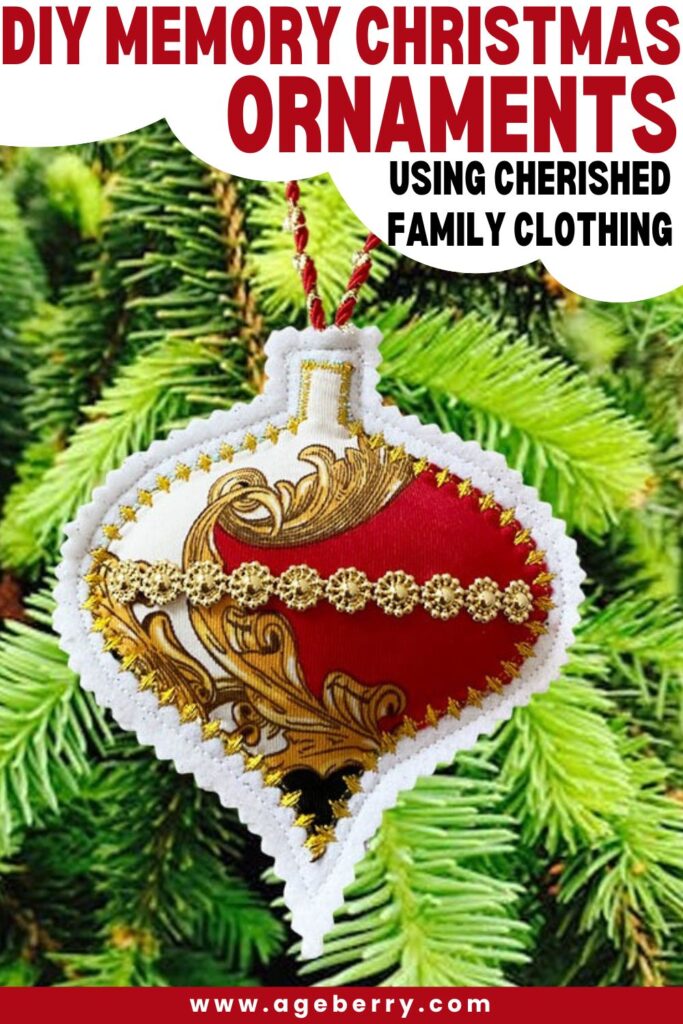
DIY Memory Christmas Ornaments Using Cherished Family Clothing
The holiday season often stirs memories of loved ones who are no longer with us. This sewing tutorial offers a meaningful way to honor those memories. We’ll create Christmas ornaments using clothing from special people in our lives who’ve passed on. This project transforms fabric into festive decorations that carry stories and significance. These ornaments are a beautiful way to blend memories with your festive decorations. I hope you’ll join me in creating these special keepsakes for your Christmas tree.
Now, let’s explore the deeper meaning behind these memory ornaments and why they’re so cherished.
Making Christmas ornaments from a loved one’s clothes is a heartwarming way to keep their memory alive during the holidays. It turns something ordinary into a treasured keepsake that can be enjoyed year after year.
These homemade ornaments are like little time capsules. Each one holds a story, a memory, or a special moment shared with the person who’s no longer here. When you hang them on the tree, it’s like having that person with you for the celebrations.
Creating these ornaments can be a family activity, bringing everyone together to remember and honor someone special. It’s a chance to talk about funny stories, share memories, and feel connected to the person you’ve lost.
For many people, these ornaments become a new holiday tradition. They’re a way to keep loved ones as part of the festivities, even when they can’t be there in person.
But you know what? You do not need to make them from the clothes of someone departed. You could, for example, make the ornaments from a piece of clothing worn at a special occasion by your child, this way that occasion will surely be remembered for as long as you have the ornament. Or, because they are indeed beautiful (and easy to make), you could simply make them just from regular fabric!
What you will need
Clothing item from loved one (blouse used in this tutorial)
Glittery felt for backing
Sewing machine
Ornament template (available in my shop)
Polyester fiberfill or cotton batting
Ribbon for hanging (sparkly red and gold used here)
Decorative ribbons for embellishment
Metallic thread (gold used in this tutorial)
Regular thread matching felt color
Fabric scissors
Pinking shears
Pins
Fabric pen or chalk
Fabric glue
Seam ripper
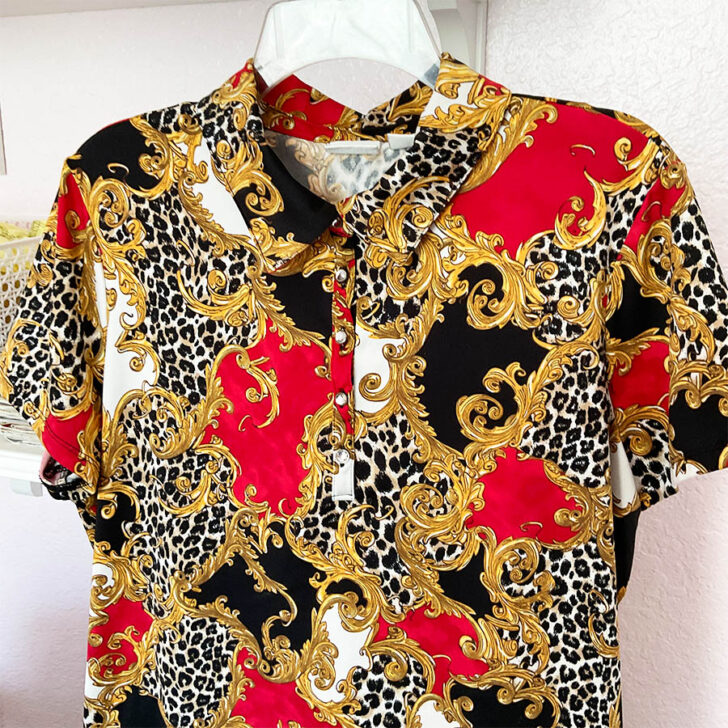
Step 1: Select the Clothing Item
For this project, I’m using a blouse that belonged to my mother-in-law. It’s a beautiful piece with an intricate pattern of gold swirls on a red, white and black background. When she passed away, I couldn’t bear to part with it.
Initially, I thought I might alter the blouse to fit me, as it’s a bit too large. But life got busy, and I never found the time to remake it. It’s been hanging in my closet, a beautiful reminder of her but unused.
Now, turning it into Christmas ornaments feels like the perfect way to honor her memory. The process is quicker than altering a whole garment, which means we can create multiple ornaments from this one cherished item.
This project is a wonderful way to give new purpose to clothing we’ve held onto for sentimental reasons. It doesn’t matter if the original item was festive or not – what’s important is the connection it holds to our loved ones. By transforming it into holiday decorations, we ensure that a part of my mother-in-law will be with us during the season when we miss her most.
Note: Some of the links on this page are affiliate links. This means I will receive a commission if you order a product through one of my links. I only recommend products I believe in and use myself.
Step 2. Select Your Ornament Shape
For this tutorial, I’ve chosen a finial ornament shape. This classic design, also known as a “drop” ornament, resembles an inverted teardrop. It works beautifully with a variety of fabric patterns.
You’ll find the template for this shape, along with several others, in my shop. They’re available at no cost to my subscribers here: Templates for Christmas Ornaments Made from Clothes. I’ve provided two options for accessing the templates.
- Printable PDF files: Great for those who prefer hands-on tracing and cutting.
- SVG files: Ideal if you’re using a Cricut or similar cutting machine for precision. If you do not have a Cricut yet but want to get one, I recommend the Maker version. It is more expensive but it cuts larger shapes and is, in general, a more versatile tool. Check Amazon prices here.
If you do not have a printer in home, print shops will print the files for pennies; but I find that having a printer is useful for many purposes. I recommend a laser printer, they have come down in prices and unlike the (cheaper) inkjet printers, you don’t need to worry about ink drying and clogging the nozzles. Check current offers at Amazon.
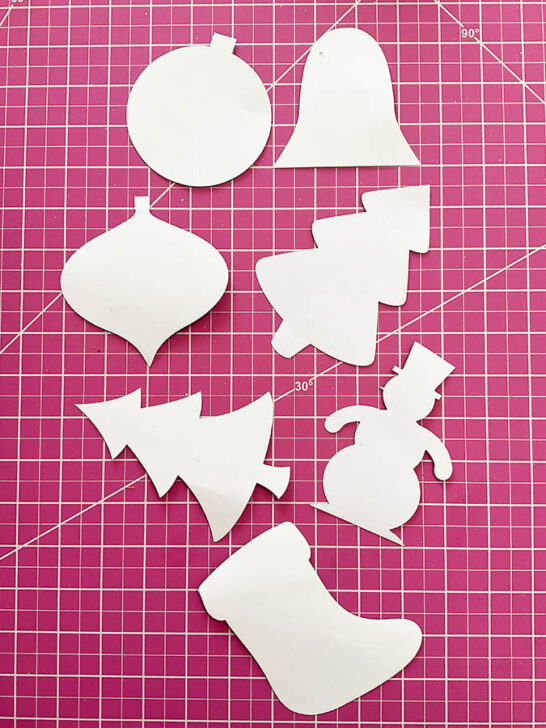
Don’t feel limited by my choice, though. The beauty of this project lies in its flexibility. Whether you fancy a traditional star, a whimsical dove, or an elegant angel, the shape you choose can reflect both your style and your memories. The key is picking a design that resonates with you and pays tribute to your loved one in a way that feels right.
These templates are just starting points. Feel free to modify them or even create your own unique shapes that hold special meaning for you and your family.
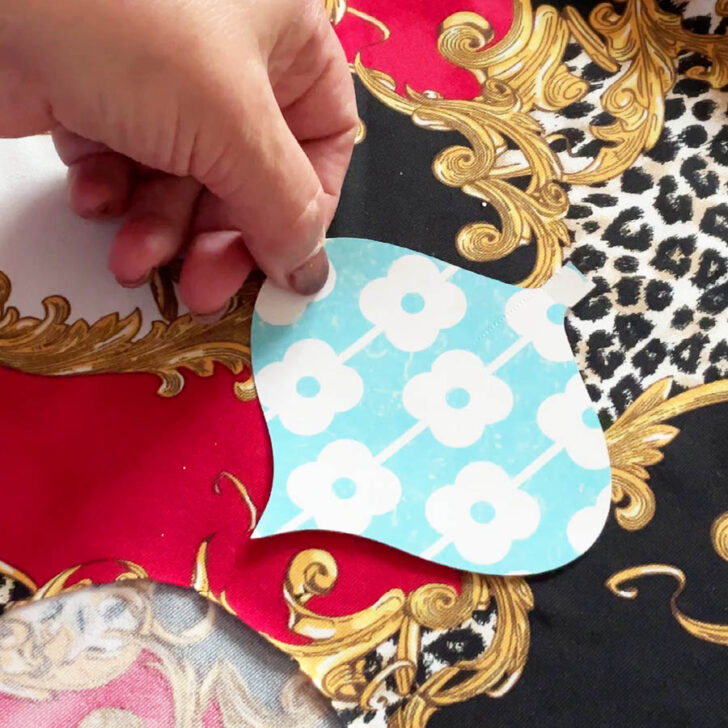
Step 3. Prepare Your Fabric Piece
Now it’s time to transform the fabric into your ornament shape. Look closely at your clothes and choose a section that showcases the most interesting colors or patterns. For my drop ornament, I selected an area of the blouse where the gold swirls on the red background were particularly eye-catching.
Place your template on the chosen spot and trace around it lightly with a fabric pen or chalk. If you’re using a cutting machine, follow the manufacturer’s instructions for cutting fabric.
Take your time as you cut. The fabric might be delicate, especially if the garment is old. Cut slowly and precisely along your traced line or let your cutting machine do its work.
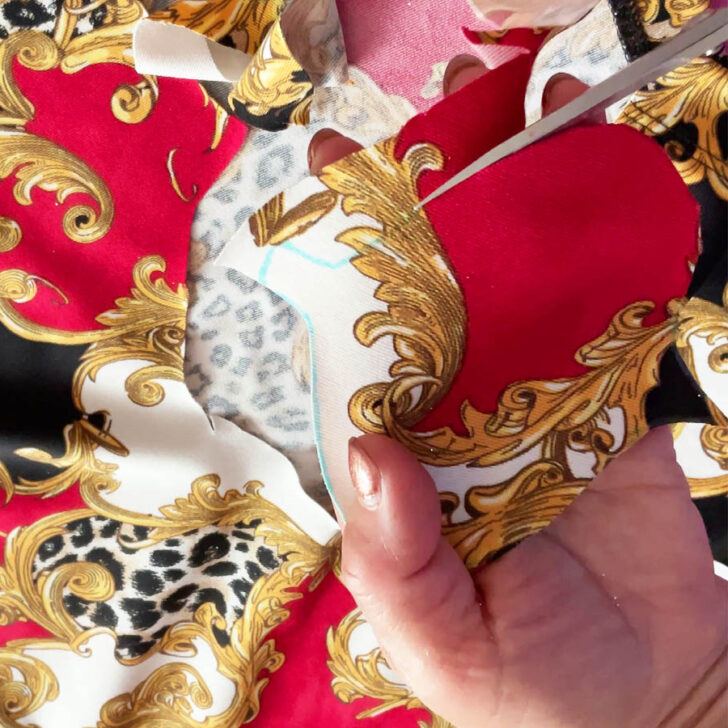
As you cut, you might find yourself recalling memories associated with this blouse. That’s part of what makes this project so special. You’re not just crafting an ornament; you’re preserving a piece of your family history.
I am using these scissors, I find them excellent and they already lasted for a number of years. They are cheaper than other brand names but not of lower quality.
I am using an air and water erasable Dritz pen for marking, I find it better quality than other brands. There are cheaper alternatives and multi-packs available, however I find the multi packs less useful because by the time I get to use them, they are already dry. And other brands have a much lower user satisfaction rating.
Step 4. Prepare the Backing
Now we’ll add some festive flair with a felt backing. I’ve chosen a shimmery felt to complement the ornament’s design, but regular felt works just as well. The key is selecting a color that enhances your memory fabric.
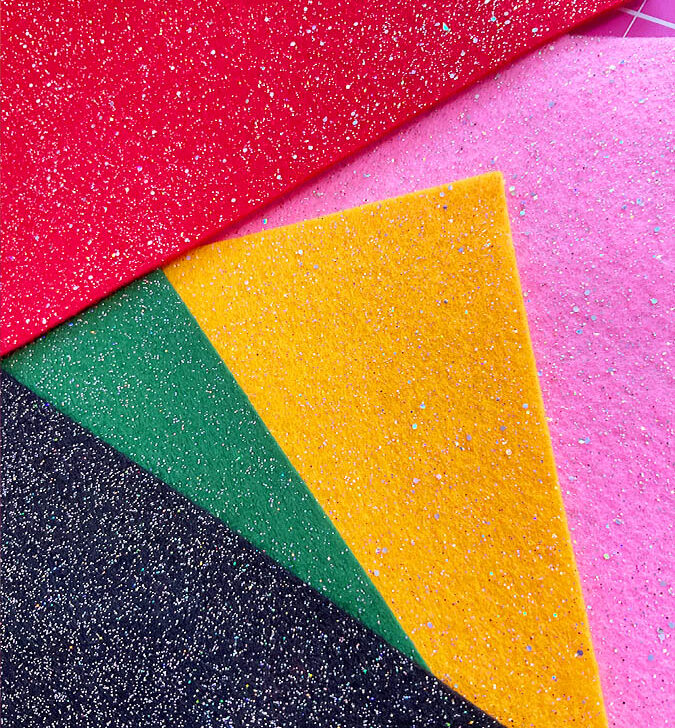
For my ornament crafted from the red and gold blouse, I used a white felt to accentuate the existing hues. Cut your felt slightly larger than your fabric shape for easier handling.
If using glittery felt, be mindful of potential mess. Wash your hands after handling to avoid irritation.
The felt serves dual purposes: it provides structure and creates a polished finish. While a touch of sparkle is nice, the real magic lies in the cherished memories woven into your chosen fabric.
Some glitter fabrics promise low shedding (or no shedding) but this has to be taken with a grain of salt in my opinion. If you’re sensitive to glitter or prefer not to work with it, regular felt is absolutely fine. The most important part of this project is the memory fabric, not the backing material.


Step 5. Prepare Felt for Filling
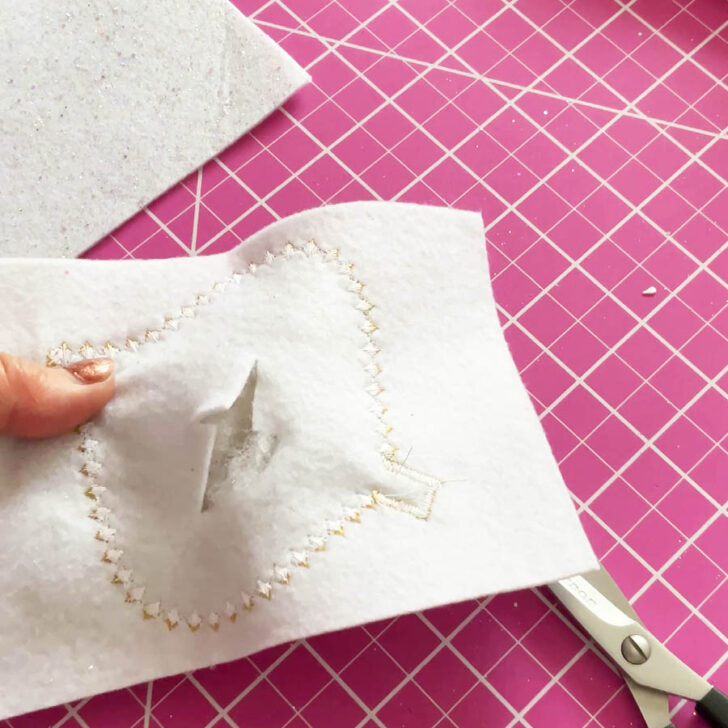
Now we need to create an opening for adding filling later to give your ornament a nice, three-dimensional appearance.
- Take your cut felt piece and locate its center.
- Using sharp scissors, carefully cut a small oval or circular opening in the middle of the felt, about 1-1.5 inches (2.5-4cm) in diameter.
- The size of the opening should be just large enough to allow for easy stuffing, but not so big that it compromises the ornament’s structure.
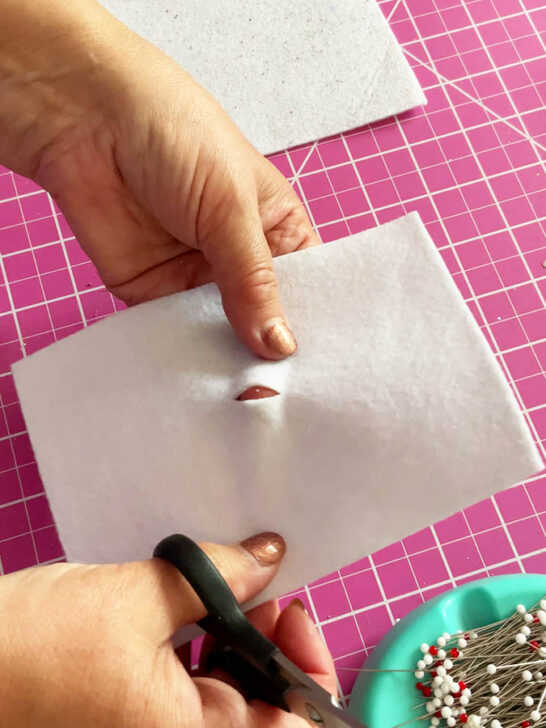
This opening will serve as our access point for adding dimension to your ornament. Don’t worry about closing it – we’ll cover it with another piece of felt in a later step, completely concealing it.
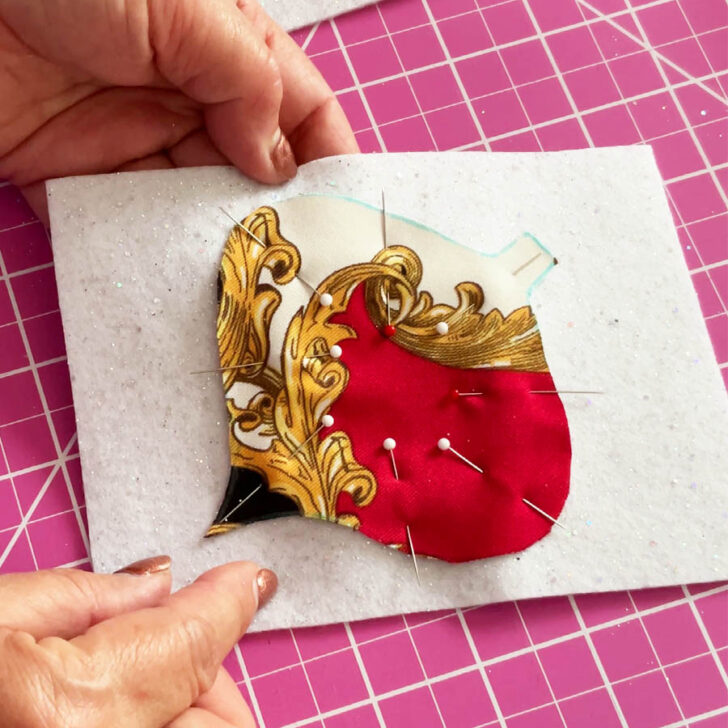
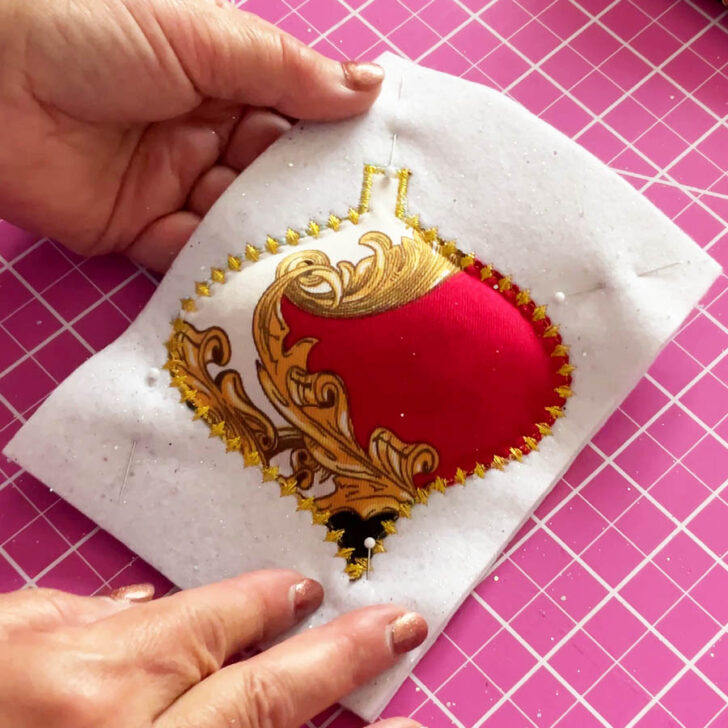
Step 6. Attach Fabric to Felt Backing
Begin by carefully pinning your cut fabric shape to the felt backing. These pins keeps everything perfectly aligned throughout the process.
For your sewing machine, choose a thread that will work for both attaching and decorating. I used a gold metallic thread to enhance my fabric’s pattern with a subtle shimmer. If you’re new to working with metallic thread, you might find my guide Mastering the Art of Sewing with Metallic Thread helpful.
Select a straight stitch on your machine and sew around the fabric’s edge, maintaining a 1 mm (less than 1/16″) distance. This close stitching technique ensures your fabric is firmly secured.
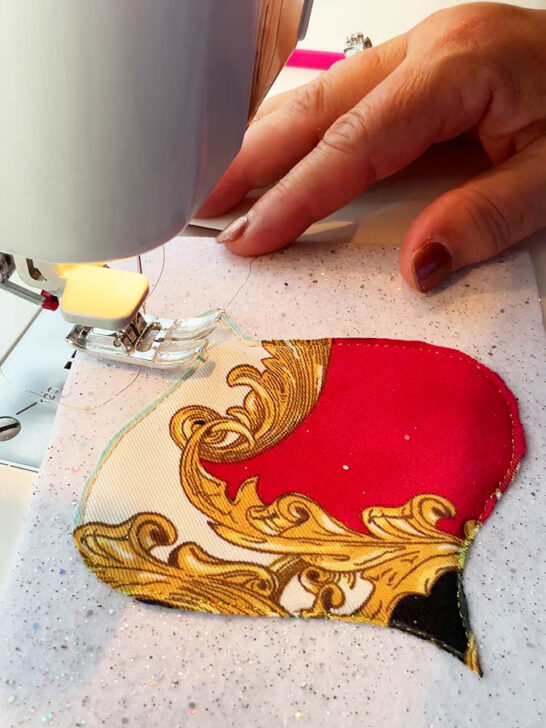
Sew slowly, particularly when navigating curves. You may need to pause occasionally, leaving the needle down, to readjust the fabric and maintain that precise 1 mm (1/16″ or less) edge distance.
This initial stitching serves primarily to join the fabric to the felt. We’ll add decorative stitches in the next step, so don’t stress if this line isn’t flawless. Your main goal here is to ensure the memory fabric is firmly attached to the backing, creating a stable foundation for the next steps.
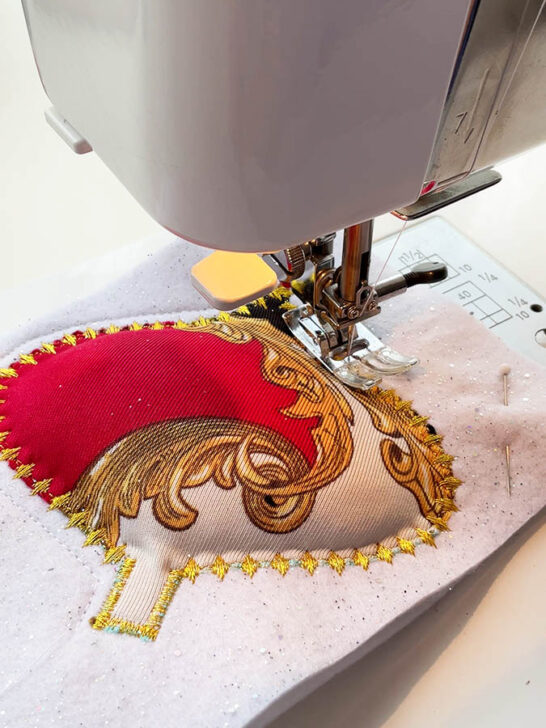
Step 7. Add Decorative Stitching
Now it’s time to enhance your ornament with some decorative stitches. This step not only adds visual interest but also reinforces the attachment of the fabric to the felt backing.
Select decorative stitches that have a dense pattern. These stitches should feature many threads close together, making them stand out on the fabric. Your sewing machine likely offers several options – look for stitches like scallops, waves, or intricate patterns.
Continue using the metallic thread for this step. The sheen of the metallic thread combined with dense decorative stitches will create a beautiful, sparkling effect that catches the light.
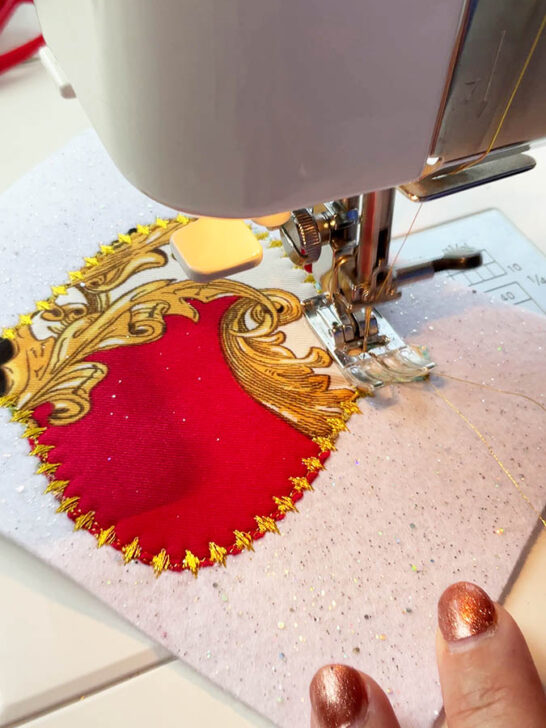
Sew around the shape of your drop ornament, about 3-4 mm (1/8″) from the edge. Take your time, especially around curves. You might need to adjust your fabric as you go to keep the stitching even.
✅ Related tutorial: Decorative Sewing Machine Stitches
Step 8. Add filling for a 3D effect
In this step, give your ornament some volume. Locate the opening in the felt backing and begin gently inserting polyester fiberfill. Use a pencil to guide the stuffing into the narrow bottom of the drop. Add filling gradually, ensuring you maintain the distinct teardrop shape.
Aim for a soft, pillowy feel that enhances the fabric’s drape without overpowering it. Smooth the ornament with your hands, paying special attention to the tapered end. This step transforms your flat piece into a three-dimensional ornament.
Step 9. Finish the Back of the Ornament
Take another piece of felt matching the size of your first one. Position this new felt against the back of your ornament, ensuring both outer sides face outward if using glittery felt. Secure the layers with pins for stability during sewing.
Thread your machine with a color complementing your felt, then stitch around the entire drop, staying about 3mm (1/8″) from the edge. This encloses all layers and provides a polished finish. Navigate curves carefully, removing pins as you progress to prevent needle damage.
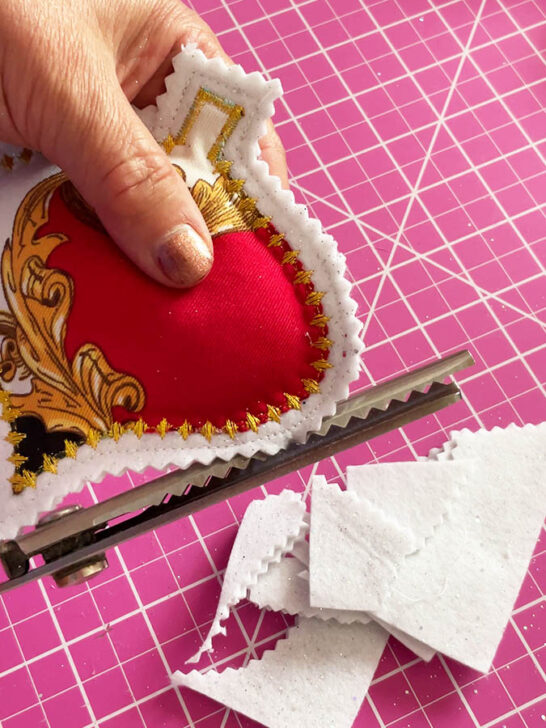
Step 10. Trim the Edges
It’s time to give your ornament a finished look. Grab your pinking shears for this step – these special scissors create a charming zigzag edge. Carefully trim the felt around your ornament, maintaining a consistent 3-4mm (1/8″) margin outside your stitching line. The pinked edge beautifully complements the teardrop shape.
If you’re in need of quality pinking shears, I’ve had great success with this pair from Amazon for projects like this.

Step 11. Adding a Hanging Loop

We have finished the ornament! But we need to hand it on the tree, and for this we will use also an ornamental cord (or ribbon). I used something I already had, but I found a very similar one on Amazon.
Find the top center of your ornament and carefully use a seam ripper to open about 3/4 inch (2cm) of stitching. Take your chosen ribbon (I’ve used a gold-threaded one to complement the ornament) and thread both ends through this opening. Push about 2 inches (5cm) of ribbon inside the ornament, ensuring it’s centered. Sew the opening closed, securing the ribbon. Stitch back and forth several times for durability.
This approach may appear unusual, but I’ve found it to be quite effective. If we had sewn the loop in place while stitching around the ornament’s shape, it would have been at risk when trimming the edges with pinking shears. By adding the loop after trimming, we ensure it remains intact. Opening a small section of stitching allows us to insert the ribbon precisely where we want it, without compromising the neatly pinked edges. This approach gives us a securely attached hanging loop and a beautifully finished ornament edge.
Step 12. Embellishing Your Drop Ornament
Every Christmas ornament deserves a bit of shimmer! For my drop ornament, I’ve chosen a single golden ribbon across the middle, but feel free to let your imagination guide you. After all, the most important sparkle comes from the love and memories this ornament represents. This is your chance to make the ornament truly yours.
When selecting embellishments choose ribbons or trims that enhance your memory fabric’s colors and patterns. If you are looking for a decorative ribbon, here is a selection from Amazon.
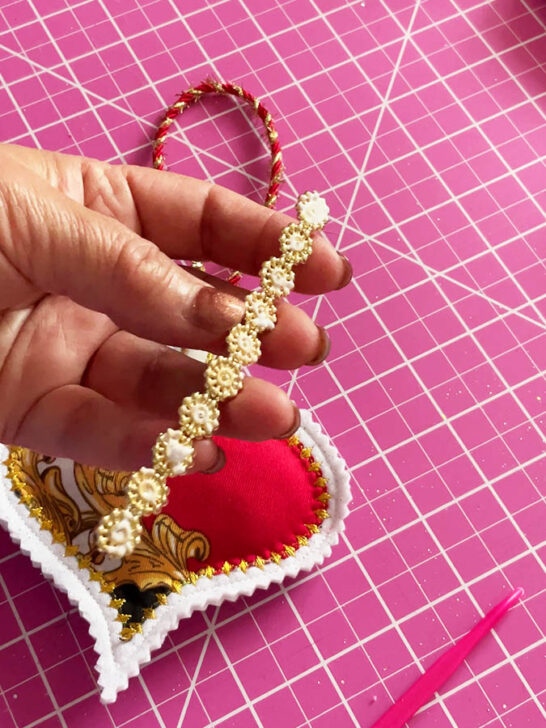
For this ornament, I used a piece of golden ribbon spanning from one side to the other. To attach it:
- Cut the ribbon to fit the ornament.
- Apply a thin line of fabric glue along the back of the ribbon.
- Carefully position it across the center of your ornament and press gently.
- Hold in place for a few seconds to ensure it adheres properly.
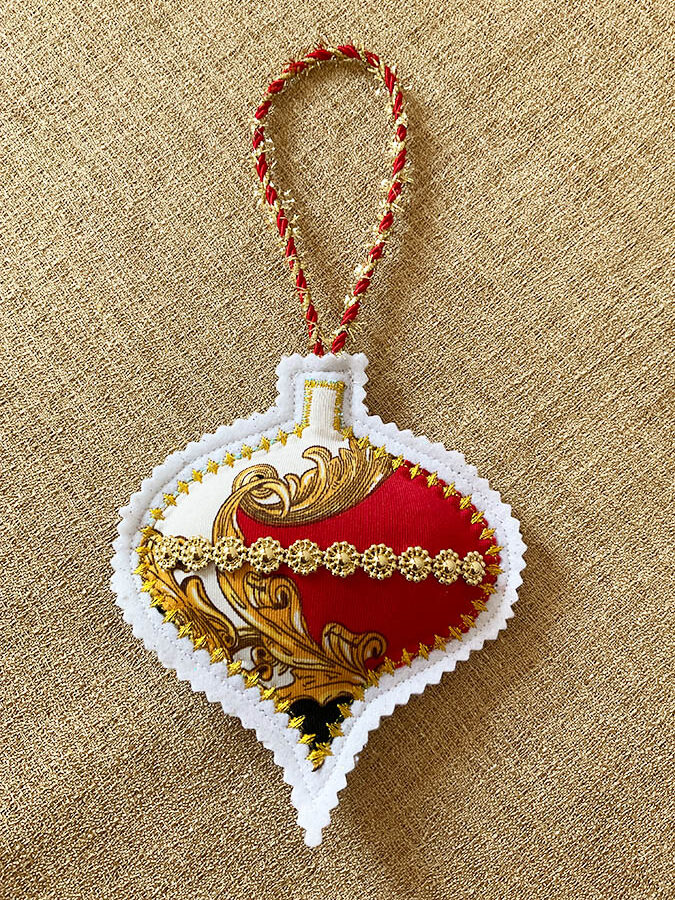
Here is the finished memory Christmas ornament, ready for display. Do you want to make it? It will capture the essence of your cherished memories, transformed into a festive decoration. The selected fabric, shaped and embellished, will tell a story unique to your family. With its subtle sparkle and thoughtful design, this ornament is more than just a decoration – it can become a piece of your history, ready to be hung with pride on your Christmas tree. Each time you see it, you’ll be reminded of the special moments and loved ones it represents, adding an extra layer of meaning to your holiday celebrations.
Liked this tutorial? Don’t forget to save this pin to your sewing Pinterest board for future reference. This way, you can easily return to this guide whenever you’re ready to sew memory Christmas ornaments. For more creative sewing tips, tutorials, and daily doses of inspiration, make sure to follow me on Pinterest.
latest posts
- What Do You Call a Person Who Sews? I Asked My Readers and Got 1,408 Opinions
- DIY Round Purse: PDF Sewing Pattern and Detailed Instructions
- Mini Wonder Clips By Clover: Useful Sewing Tool Or Just Another Notion?
- Non-Slip Grips For Quilting Rulers: A Small Notion With A Useful Job
- Fabric Eraser for Sewing: What It Removes and When to Use It
- What Is The Best Thread For Sewing Machine Projects? Let’s Find Out!
- Butterfly Quilt Block Tutorial – Foundation Paper Piecing
- How To Sew Quilt Squares So The Corners Match
- Sewing With Fork Pins: How They Help With Pattern Matching, Slippery Fabric, And Seams