Mending a Hole in Jeans: Step-by-Step Guide to Saving Your Favorite Denim
Mending clothes can feel a bit like detective work — figuring out what went wrong and then finding a clever way to make it right again. In my house, creative mending has become a bit of an art form.
This time, the case involved a massive hole in a pair of my daughter’s jeans.

But I had to ask — how does one even get such a hole? She was doing squats — yes, squats — in her jeans. The poor fabric wasn’t stretchy and didn’t stand a chance. Naturally, my daughter refused to throw them away. “You can fix it, Mom.” And she wasn’t wrong. I could, and I did.
There’s something satisfying about saving a favorite garment from the trash pile. So, if you’ve been wondering how to fix a rip in jeans, especially one that looks beyond repair, this tutorial will show you step by step how a little stitching and patience can bring even the most dramatic tear back to life.
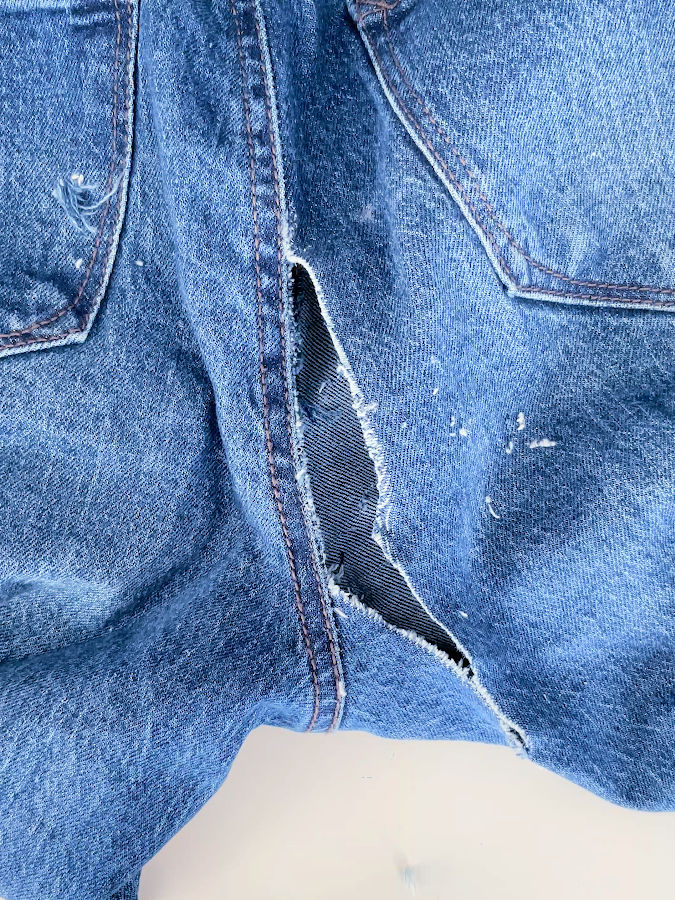
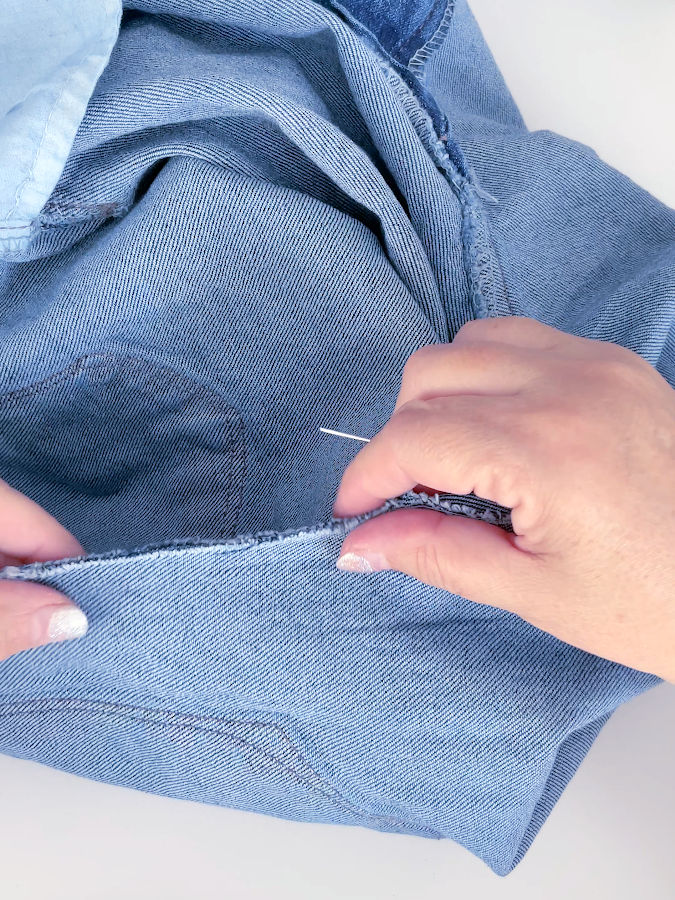
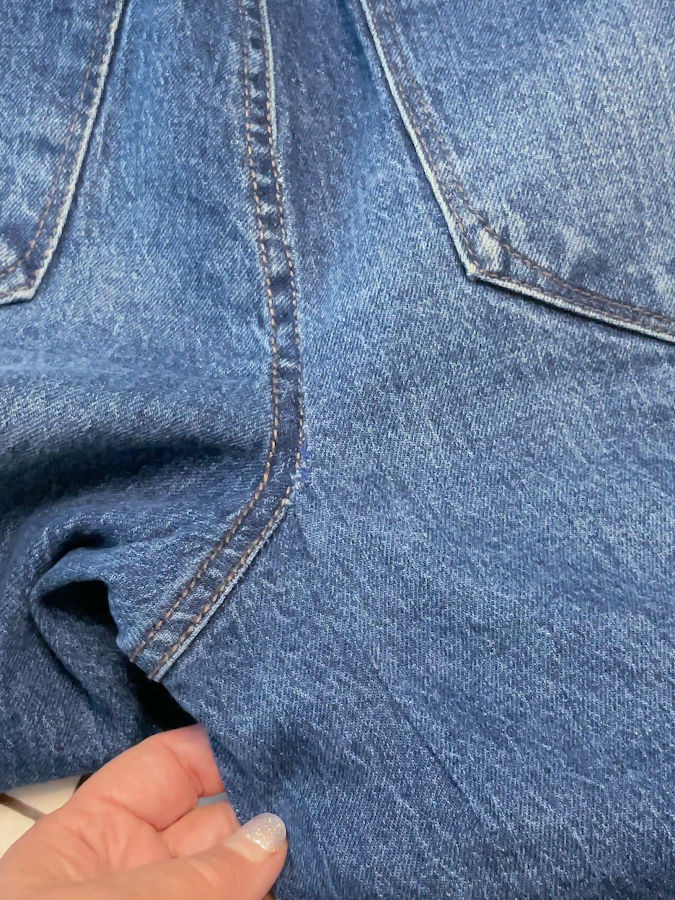
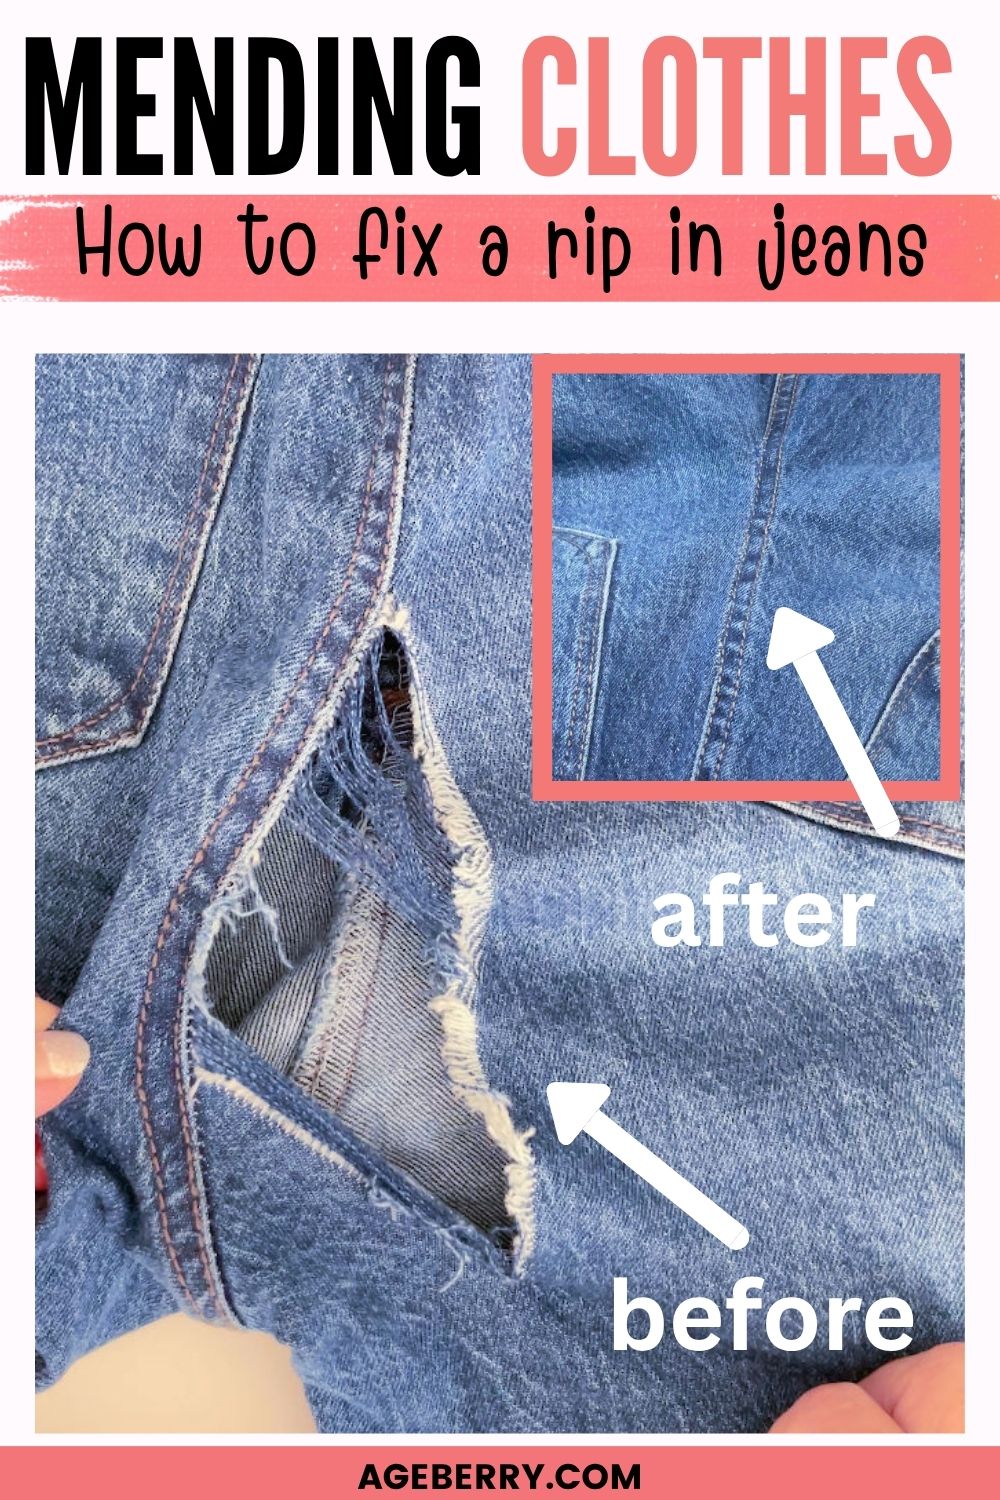
Here is the original rip: does not look like it can be repaired. Nevertheless, I will do it.
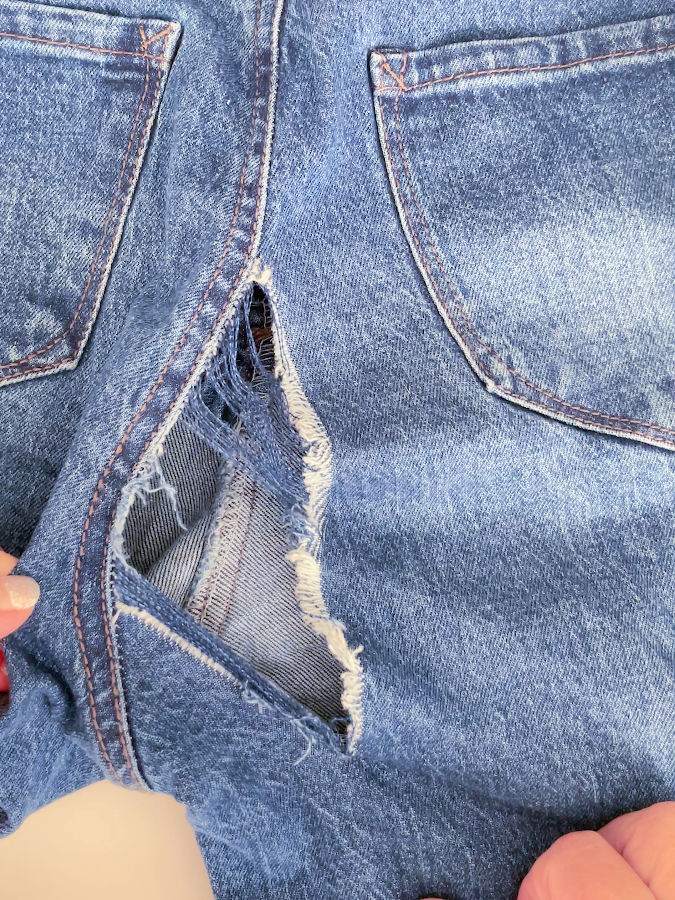
However, you have to assess the health of the garment outside of the rip. There are instances where you will need to work differently if the material is worn out or thin (more about this later). This was not the case here, the jeans were in good shape otherwise.
Note: Some of the links on this page are affiliate links. This means I will receive a commission if you order a product through one of my links. I only recommend products I believe in and use myself.
What You’ll Need
- Matching thread (a strong one, thicker than regular thread)
- Sewing machine
- Hand sewing needle
- Thimble (optional but helpful)
- Needle threader (optional but helpful)
- Determination — the unlisted sewing essential
Step 1. Trim the Hole
First things first — snip away all those loose threads. The blue ones, the white ones — all of them. You want a clean edge before you begin.

Now comes the big decision: how should we fix it? There are several ways, but not all are comfortable. I could use fusible interfacing to connect the ripped parts, but it would sit directly against the skin — not ideal.
A patch might work, but I don’t have one that matches this particular shade of denim. After searching my daughter’s jeans collection (and realizing she might own too many), nothing matched. So, plan B: fix it by hand.
If the material is worn out or thin from wear, you might not have a choice and would probably have to use a patch. But this is a different technique and in this article I will deal with mending it by hand.
Step 2. Hand-Stitch the First Repair
I started by connecting the ripped edges by hand sewing.
Turn the jeans inside out. Place the torn edges together, right sides facing each other, and use a simple overcasting stitch.
Here’s a quick look at the simple overcast stitch I used for joining the torn edges. It’s one of the easiest hand stitches for mending clothes, perfect for connecting ripped fabric edges without adding bulk. The thread loops neatly over the edge, holding everything securely together.
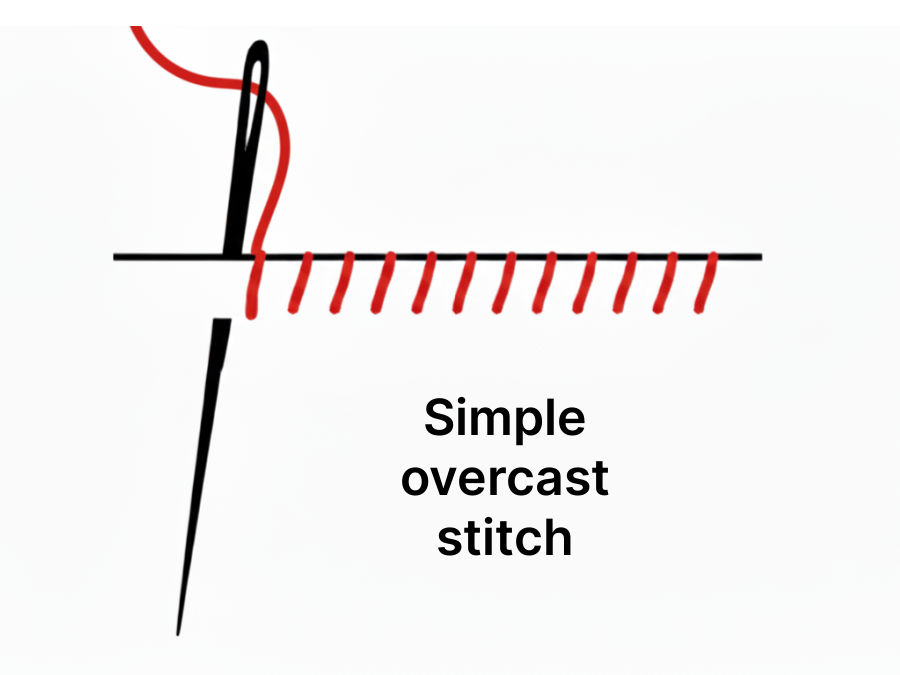
Insert the needle close to the cut edges, but not too close — we don’t want to unravel them further. Pull the thread firmly between stitches to bring the edges together.
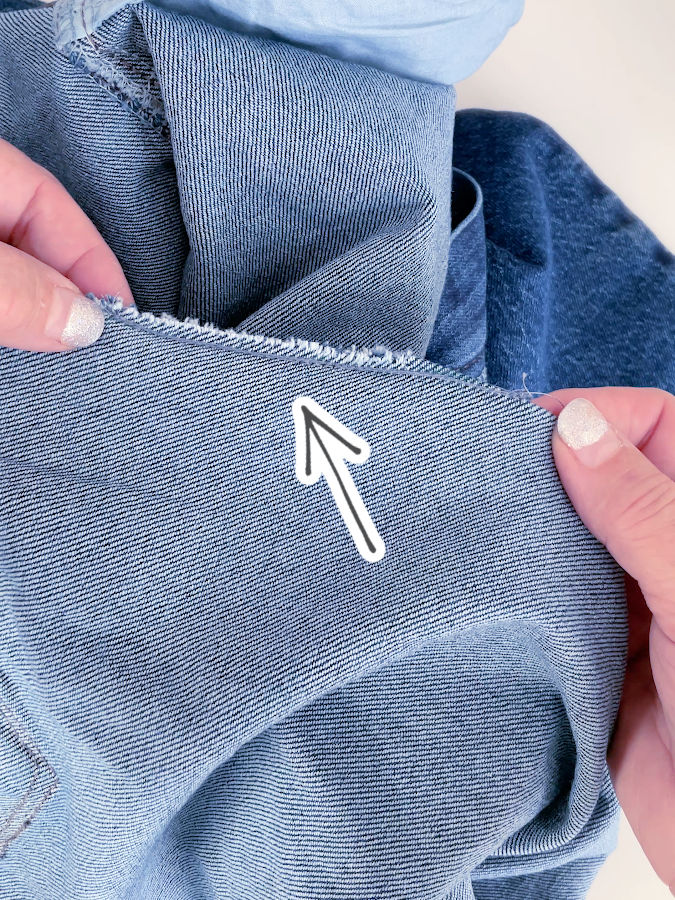
Then, turn the jeans right side out and take a look.
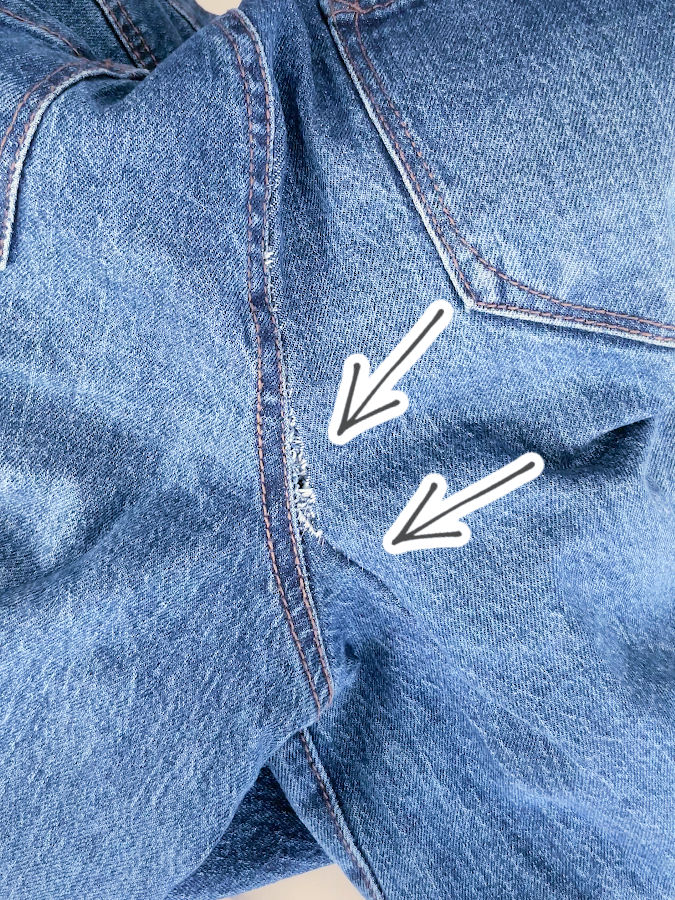
One section held nicely, but the rip near the flat-felled seam (that thick topstitched area on the back) didn’t close well. The threads there were too damaged.
So, I decided to use two different methods:
- Hand stitching for part of the tear
- Machine stitching for the other
For the bottom section of the rip, I threaded my machine with strong matching thread and stitched it like a tiny dart. I even marked the area with a Frixion pen.
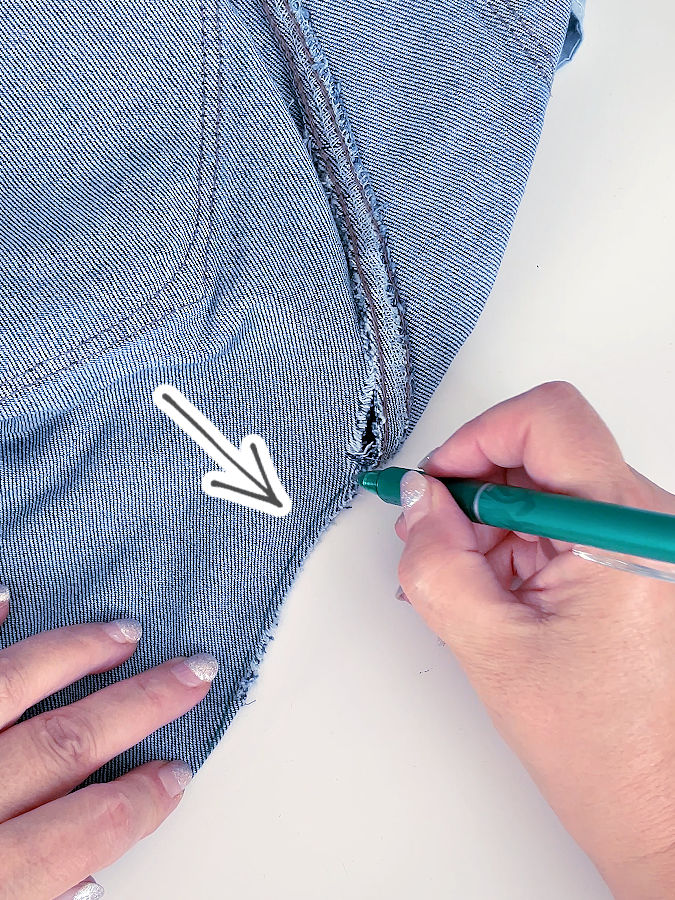


Start slightly away from the tear, and taper to almost nothing (about half a millimeter) at the end. Sew over the mark two or three times to reinforce it.
And there it is — nearly invisible. We are, of course, far from being finished!
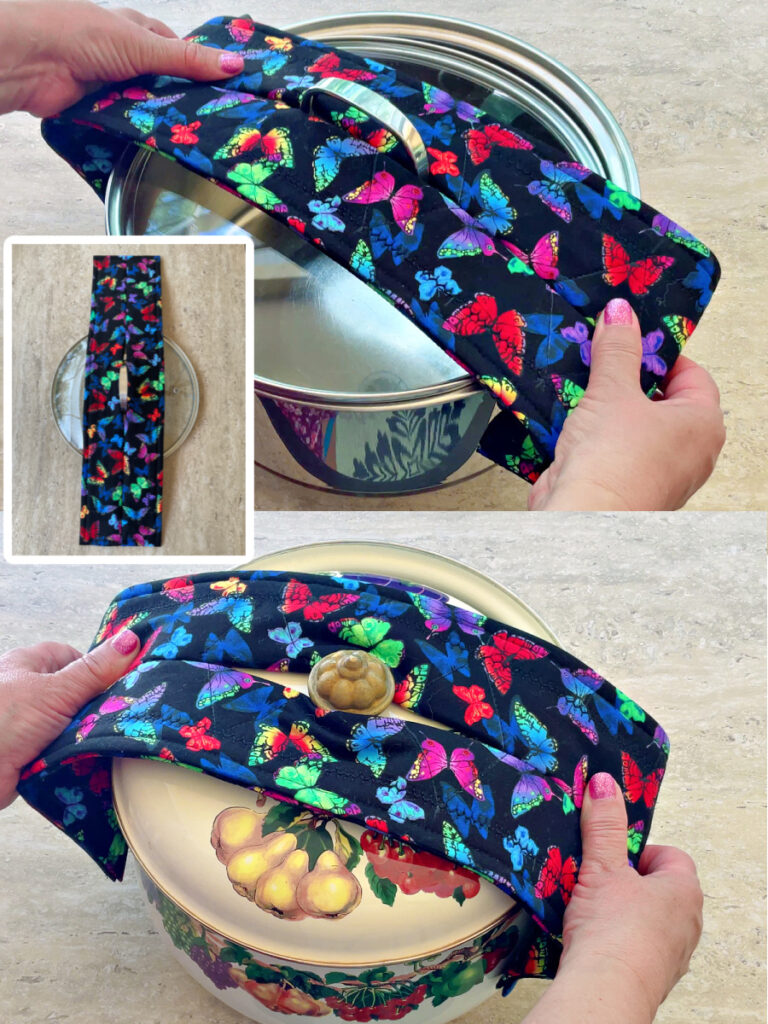
By the way, if you like quick, practical sewing projects, I recently made a potholder that works very differently from the usual ones. It wraps around the handle and stays in place, so you can lift pots or drain hot water safely. It’s quick to sew and makes a really nice handmade gift. I made a detailed PDF tutorial with all the steps – take a look here.
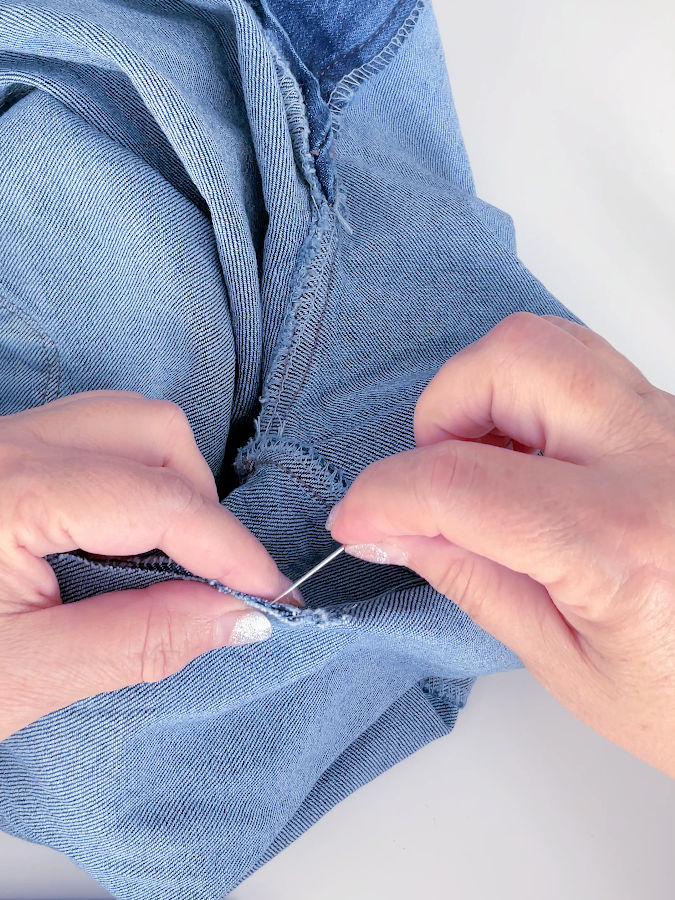
Step 3. The Invisible Hand Stitch (a.k.a. Ladder Stitch)
For the section near the topstitching, I switched to hand sewing again — this time using the ladder stitch, also called the invisible stitch.
Start by inserting the needle into the upper piece of fabric, just inside the good fabric (about 2–3 mm from the edge).
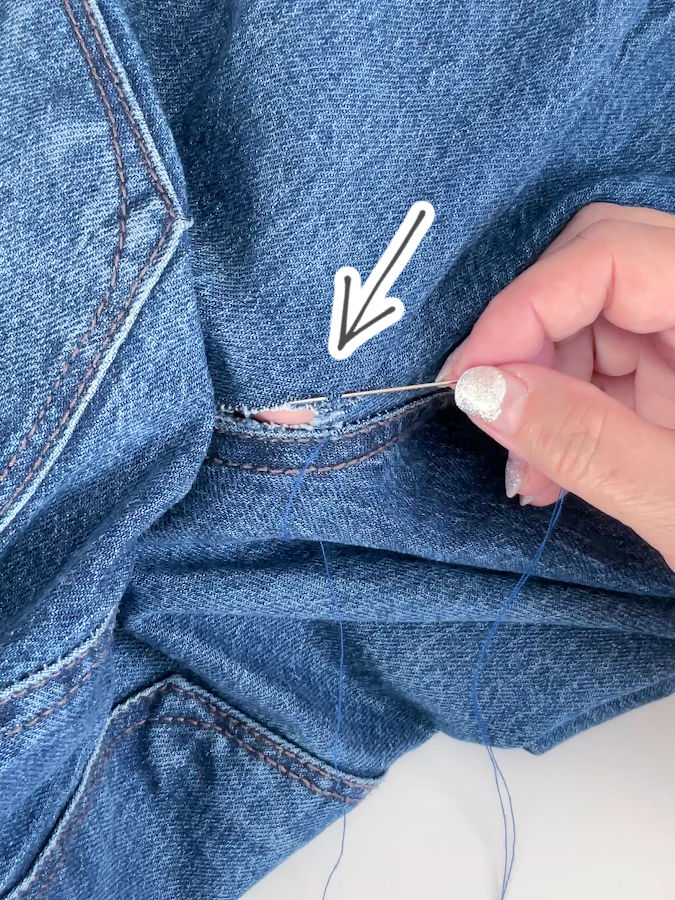
Then insert the needle into the lower part — that narrow strip of fabric just near the topstitching that isn’t torn.
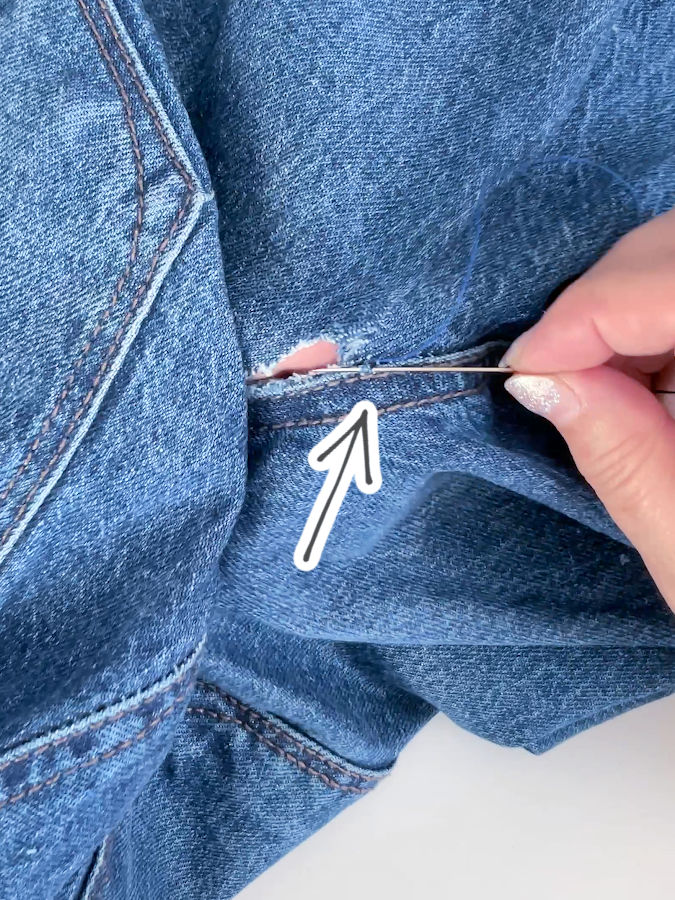
Go back and forth like a tiny bridge: one stitch up, one down, one up, one down.
After a few stitches, gently pull the thread — and the hole begins to close.
You can see a full tutorial for this stitch here: Invisible Stitch Tutorial: How To Fix A Tear (+ Sewing “Blind” Hems)
Continue until the entire hole disappears.
Tip: use strong, color-matching thread. There’s special blue denim thread available, but I didn’t have it — I was at my daughter’s house, after all.


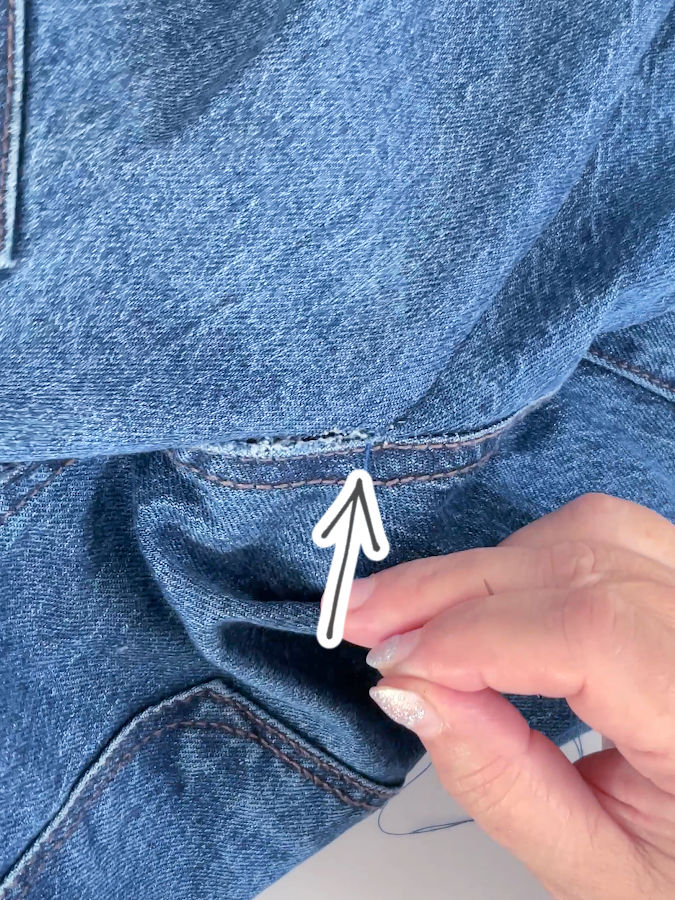
Step 4. Reinforce the Repair
After finishing the first round of ladder stitching, I had to stop for a quick reality check — and a thimble. My fingertip was starting to feel every single push of the needle. Denim doesn’t forgive easily! That’s when a good thimble becomes essential.
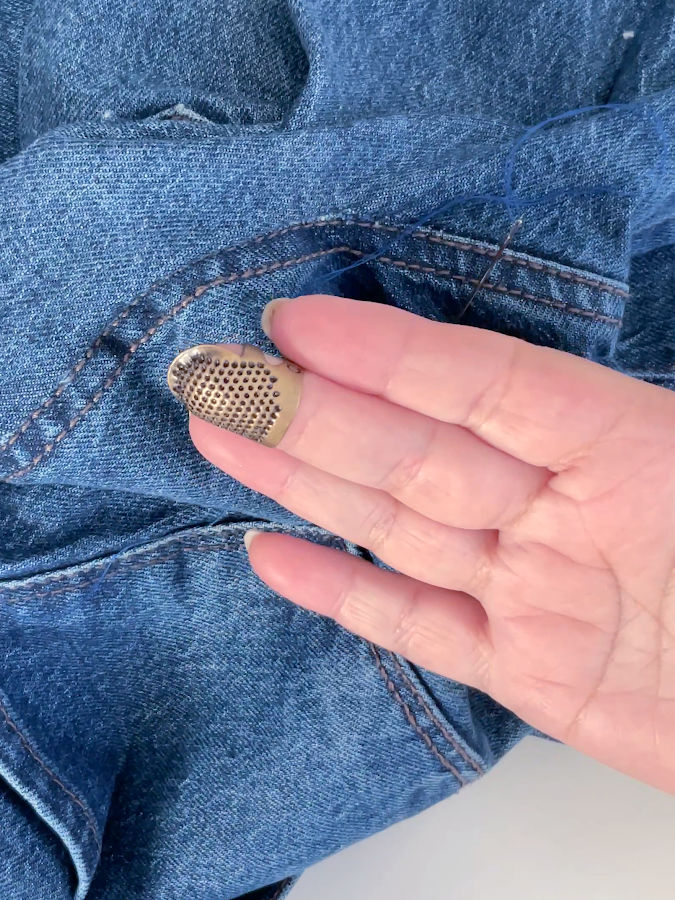
Modern thimbles are much more comfortable than the old metal ones that used to pinch and slide off. Some are made of soft silicone, others have flexible sides or even tiny grip pads. They fit better, stay put, and make hand sewing on thick fabrics far less painful.
If you’ve never found one that feels right, take a look at my guide — How to Use a Thimble: The Ultimate Guide. It covers different types and how to choose one that actually helps instead of getting in the way.

Once I had my thimble in place, it was time for reinforcement. One pass of stitching isn’t enough for denim. Go back over the same area again with the same ladder stitch, this time in the opposite direction. The second layer secures the seam beautifully and keeps the repair from giving way again.
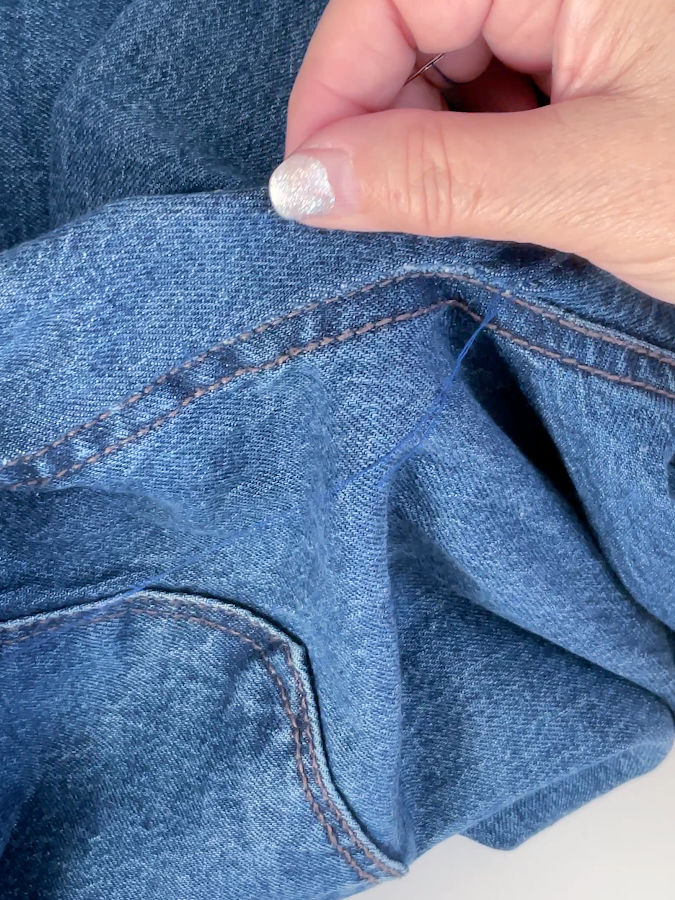
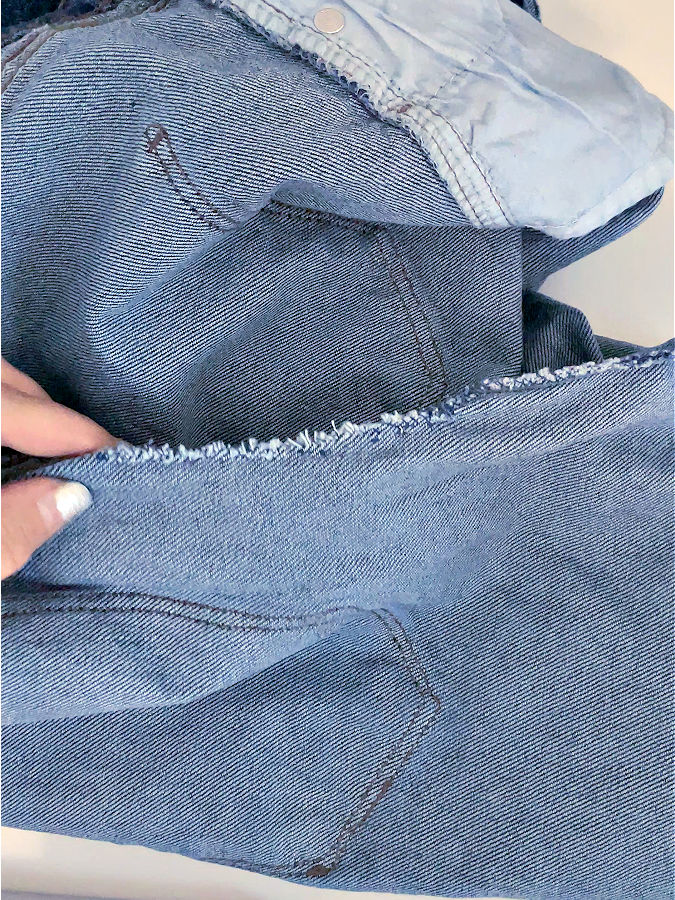
Step 5. Finish the Inside
The outside now looks great, but let’s check the inside. There will be a few threads showing, and we don’t want them catching or fraying later.
And it’s not only a matter of aesthetics, the unfinished seam can cause a rash if it touches and rubs repeatedly the skin. We can not avoid this completely but we can minimize the effect.
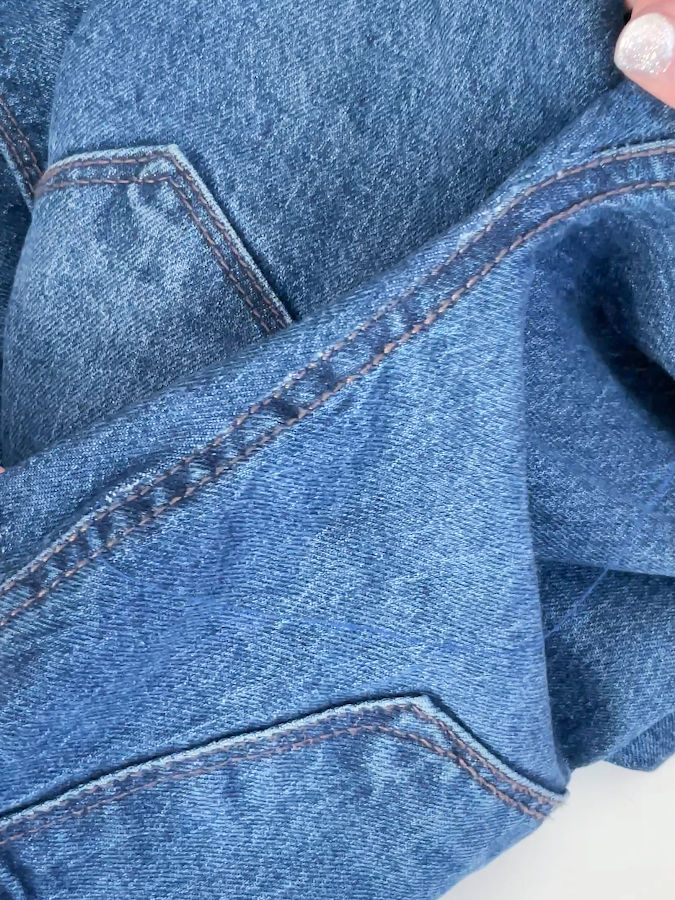
Step 6. The Final Press
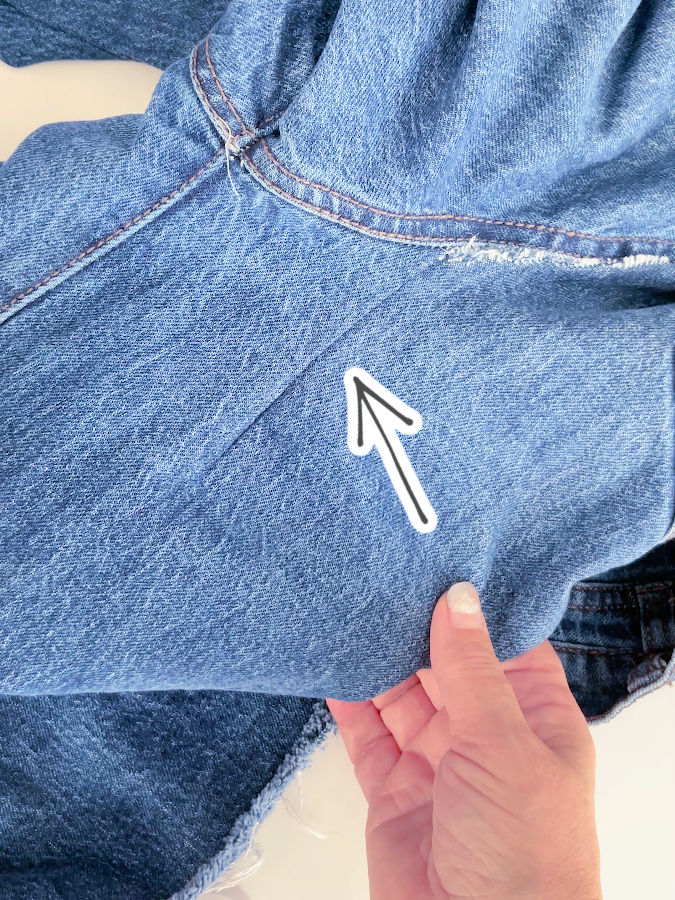
Now take your repaired jeans to the ironing board. Press the seam firmly. Pressing is crucial — it flattens the stitches and blends the repair into the fabric.
And just like that, the giant hole is gone. Unless someone studies your jeans with a magnifying glass, no one will ever know what happened there.
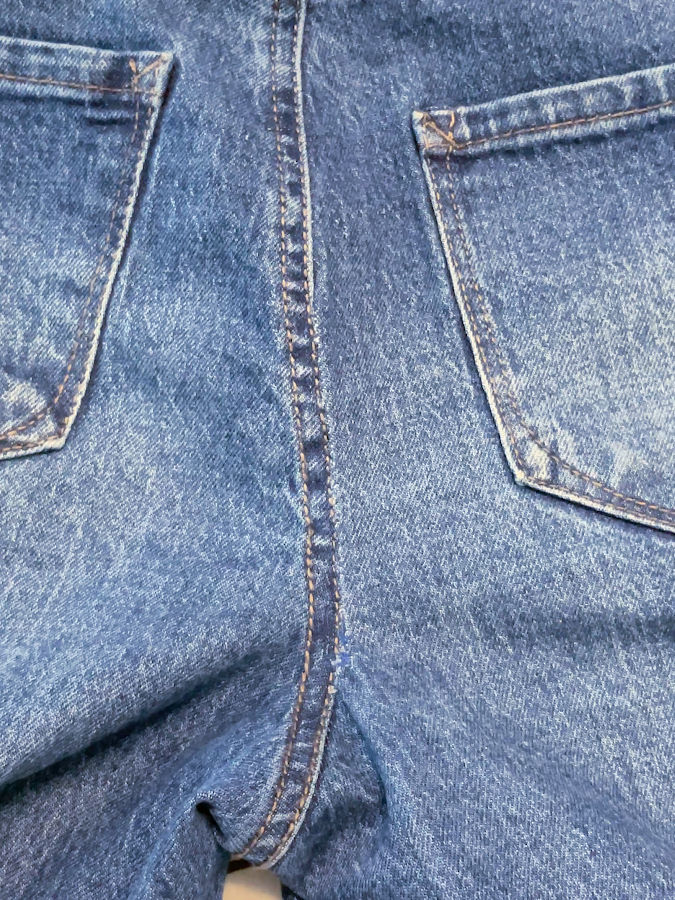
The repair turned out almost invisible — you really have to know where to look to spot it. The stitches blended beautifully into the denim, and even up close, it just looks like part of the original fabric. Not bad for what started as a dramatic tear.
Final Thoughts
So, the jeans are saved, my daughter is happy, and I’ve once again proven that moms are basically fabric magicians. And next time she wants to do squats, I’ll suggest yoga pants.


Did you find this tutorial helpful? Save this pin to your sewing Pinterest board so you can easily find it when you’re ready to mend your own jeans. And don’t forget to follow me on Pinterest for more sewing tips, creative mending ideas, and step-by-step tutorials.
latest posts
- What Do You Call a Person Who Sews? I Asked My Readers and Got 1,408 Opinions
- DIY Round Purse: PDF Sewing Pattern and Detailed Instructions
- Mini Wonder Clips By Clover: Useful Sewing Tool Or Just Another Notion?
- Non-Slip Grips For Quilting Rulers: A Small Notion With A Useful Job
- Fabric Eraser for Sewing: What It Removes and When to Use It
- What Is The Best Thread For Sewing Machine Projects? Let’s Find Out!
- Butterfly Quilt Block Tutorial – Foundation Paper Piecing
- How To Sew Quilt Squares So The Corners Match
- Sewing With Fork Pins: How They Help With Pattern Matching, Slippery Fabric, And Seams