Easy Christmas Sewing Project for Making Fabric Gift Bags in Different Sizes
In this tutorial I will show you how to sew a Christmas gift bag with fabric handles, a pretty lining and a flat bottom. The bag starts with four rectangles, and I’ll show you how to fold the bottom corners before you sew the side seams. I made several of these bags, and for the tutorial I’m using the one with the poinsettia print and the sparkly green lining.
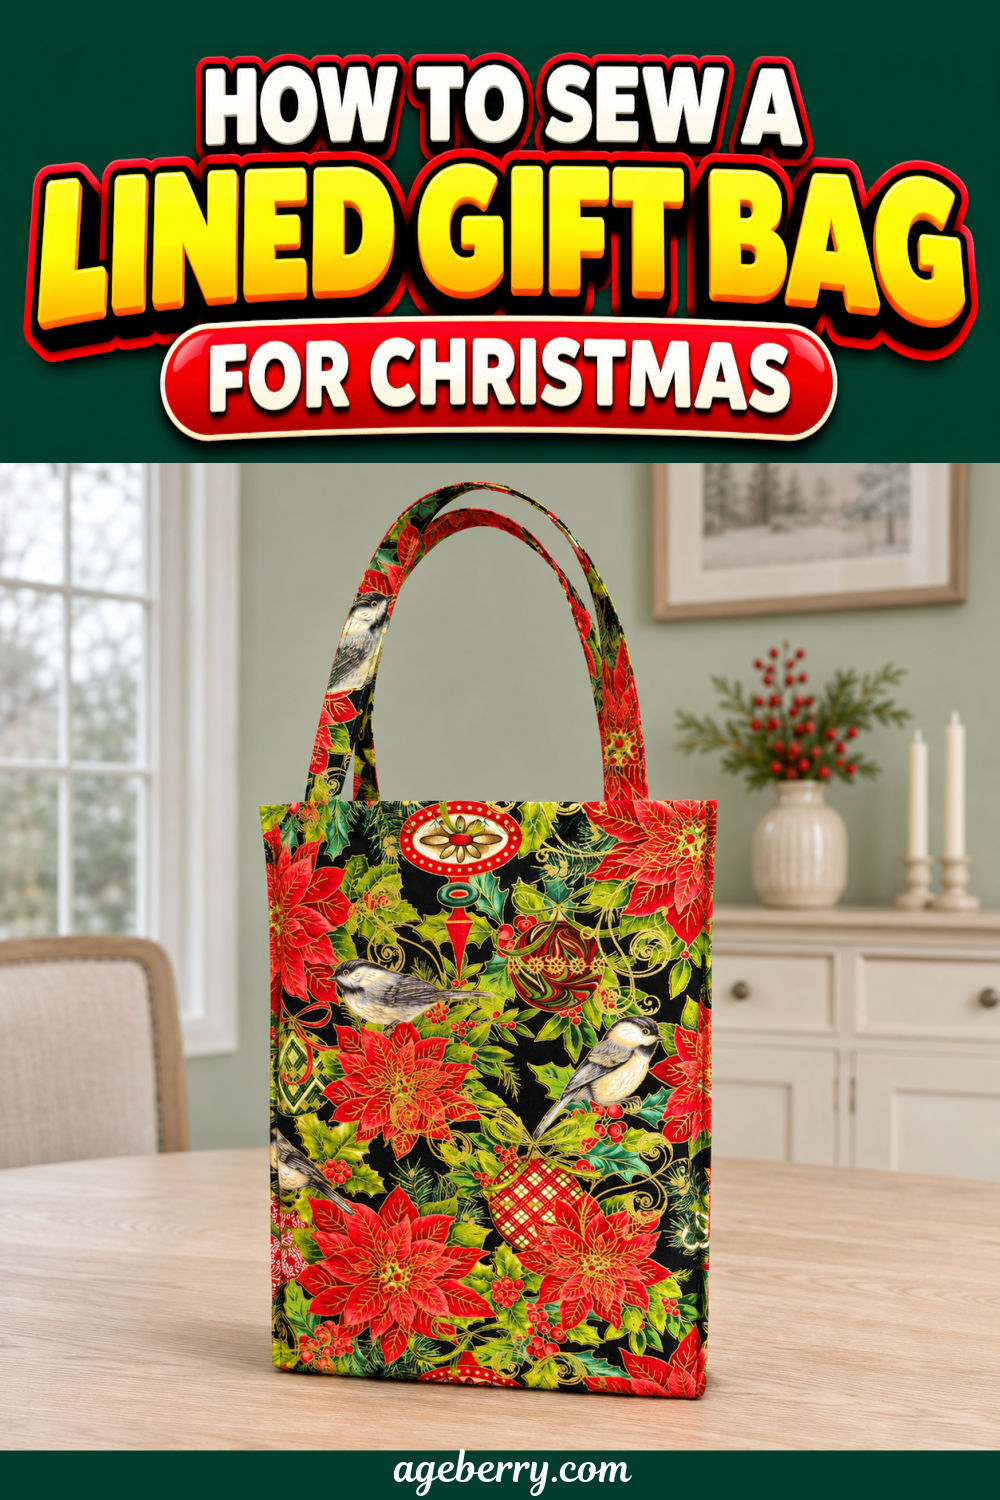
I had three reasons for making fabric gift bags this year. Not that I needed any reason to make a new bag!
Prefer to read without ads?
I created a PDF version of this guide for anyone who likes to keep sewing guides saved, printed, or easy to read without ads. It includes the same helpful information in a simple format you can download and use whenever you need it.
The PDF is available in my shop for a small fee. It’s a nice option if you want to support my work and keep this tutorial close to your sewing machine.
First, I have a lot of Christmas fabric. I bought that poinsettia print about ten years ago. I loved the little birds and all the gold detail, and somehow I went through ten Christmases without cutting into it. I have a feeling I’m in good company here.
Second, these bags are easy to sew. For me, sewing one was probably easier than wrapping a gift in paper. Once the bag is made, I can just slip the gift inside and skip the folding and taping. There are so many beautiful Christmas prints that I can pick a different one for each person. And after they’ve opened their gift, they can use the bag too.
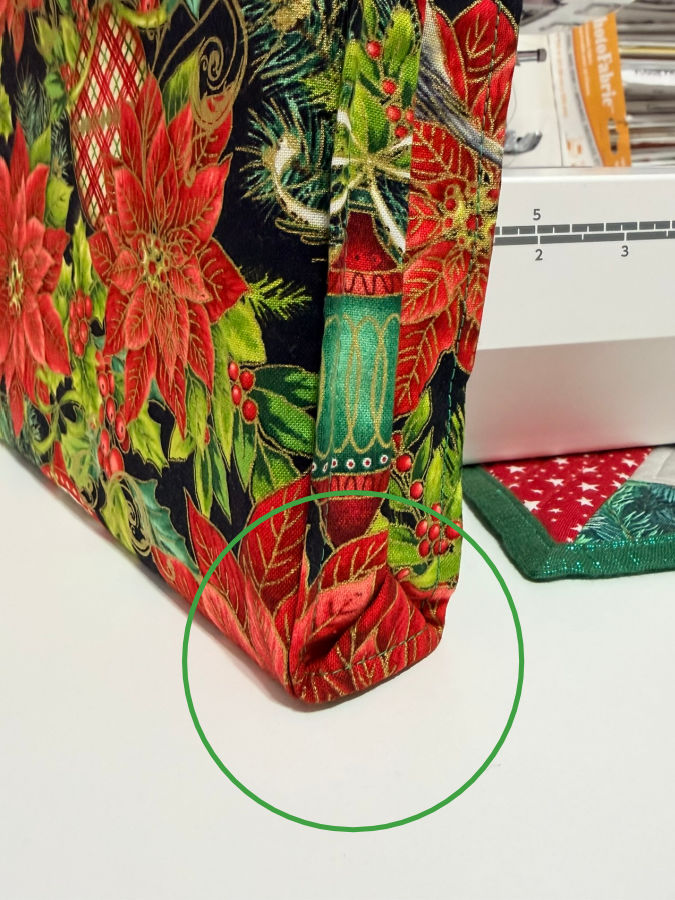
Third, I wanted to try a new way to sew bag corners. You make a fold at the bottom and catch it in the two side seams. When you turn the bag right side out, that fold opens into a flat base. I liked how neatly the corners turned out, so let’s use that little folding trick here.
Note: Some of the links on this page are affiliate links. This means I will receive a commission if you order a product through one of my links. I only recommend products I believe in and use myself.
Choose and cut the fabric
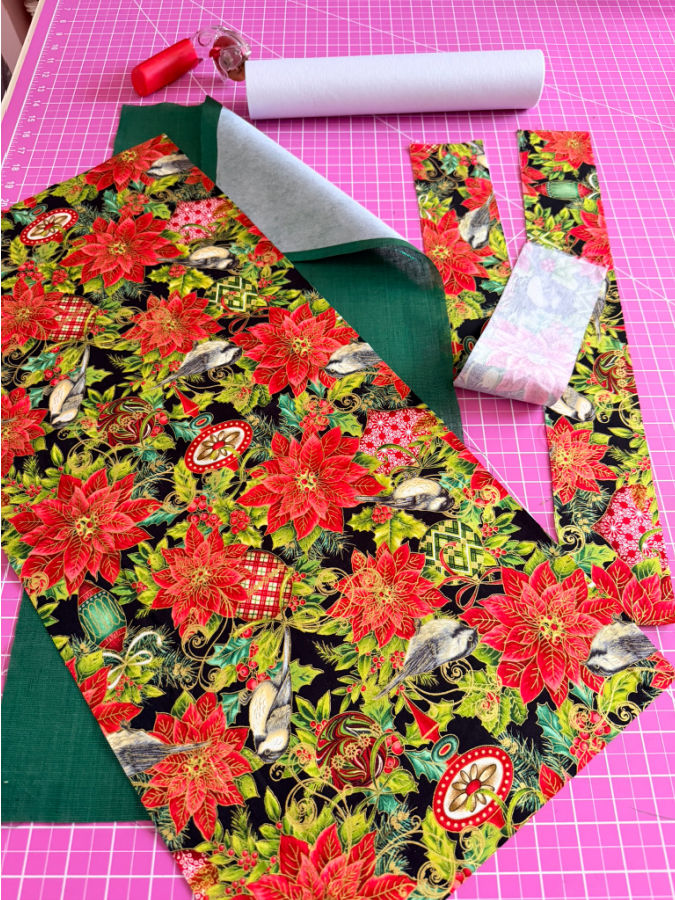
I used Christmas cotton for the outside and the handles, and a sparkly green fabric for the lining. I wanted the inside to look pretty, too. You see quite a bit of it when you open the bag.
- Outer fabric — 1 rectangle, 12¾ × 27 in (324 × 686 mm)
- Lining fabric — 1 rectangle, 12¾ × 27 in (324 × 686 mm), before trimming in Step 3
- Handle fabric — 2 rectangles, 3 × 15 in (76 × 381 mm) each
- Fusible interfacing for the handles (optional) — 2 rectangles, 3 × 15 in (76 × 381 mm) each
- Fusible interfacing for the lining (optional) — 1 rectangle, 11¾ × 26 in (298 × 660 mm)
I used fabric I already had, but I could not stop looking for something new. More fabric is always better!
✅ Related tutorial: Confessions of a Fabric Collector: Why I Keep Buying Fabric (and How I Stopped Feeling Guilty)


You’ll also need matching thread and your usual sewing notions. Fusible interfacing is optional, and a tube turner can make it easier to turn the handles right side out.


My fabric was fairly lightweight, so I fused interfacing to the wrong side of the green lining and both handle strips.
I cut the interfacing for the handles the full size of the strips. For the lining, I cut it ½ in (13 mm) in from each edge of the original rectangle. My roll was narrower than the fabric, and cutting the interfacing smaller also kept bulk out of the perimeter seam.
Center it on the lining and fuse according to the interfacing instructions.
Step 1. Sew the handles
Fold each handle strip in half lengthwise with right sides together. Sew along the long raw edges.
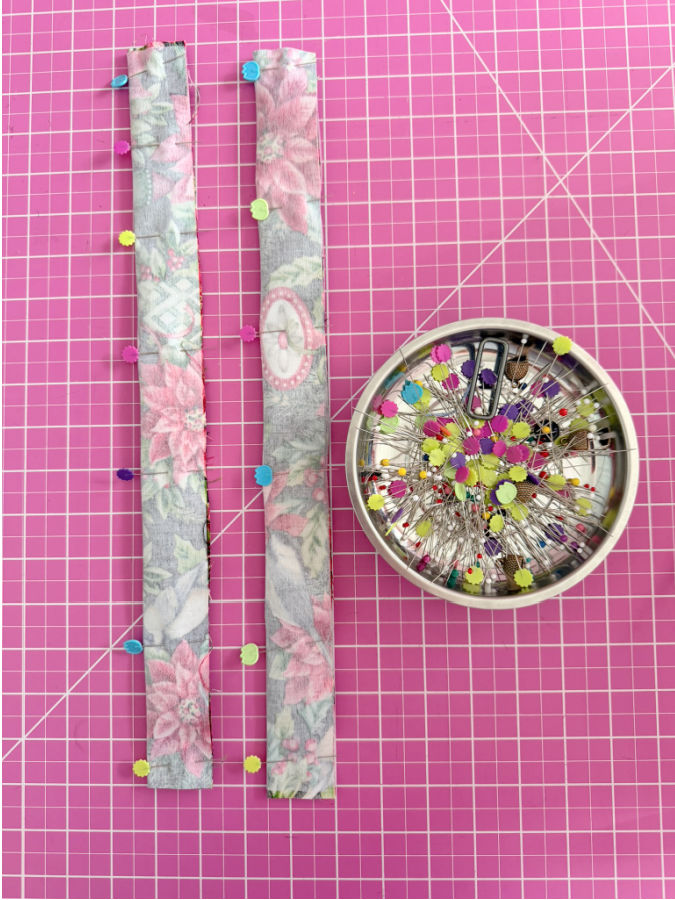
A ¼ in (6 mm) or ½ in (13 mm) seam allowance works if you want wider handles that are easier to turn. I folded my strips to 1½ in (38 mm) and stitched with a ⅝ in (15 mm) seam allowance. That gave me a narrow handle, and the extra fabric inside made it firmer. It took a little more patience to turn though.
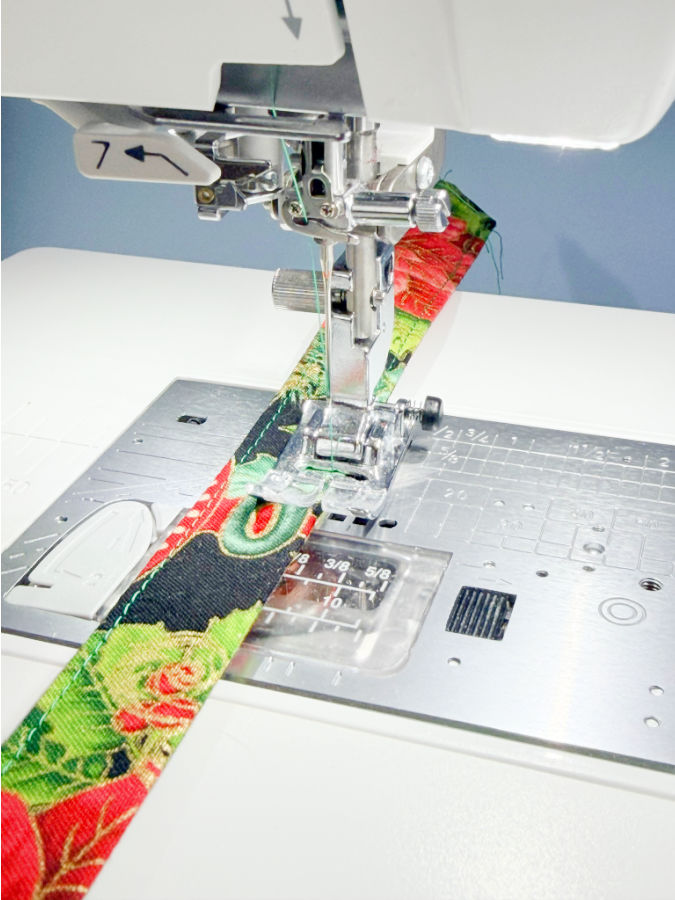
Turn both tubes right side out, press them flat and topstitch along both long edges.
✅ Related tutorial: How To Topstitch | 17 Topstitching Tips Every Beginner Should Know
Step 2. Pin the handles to the outer fabric
Lay the outer rectangle right side up. Pin one handle to each short end of the rectangle. Center each loop and use the same spacing between the two handle ends on both sides of the bag.
Line up the raw ends of each handle with the raw edge of the rectangle. The loops should point toward the middle of the fabric. Check that neither handle is twisted.
You can baste the ends within the seam allowance to hold them in place.
Step 3. Sew the outer fabric and lining together
Trim a little less than ⅛ in (3 mm) from each of the four edges of the green lining. That tiny difference gives the outer fabric enough room to wrap slightly around the edge when you turn and press the panel. The seam rolls toward the inside, so the green lining stays just behind the edge of the Christmas print.
Place the rectangles right sides together, with the handles tucked between them. The right side of the lining (with interfacing) is covering the handles completely so they are not visible in the images. Match and pin the corners first, then the middle of each edge. Add pins between those points to spread the slight extra fullness of the outer fabric evenly.
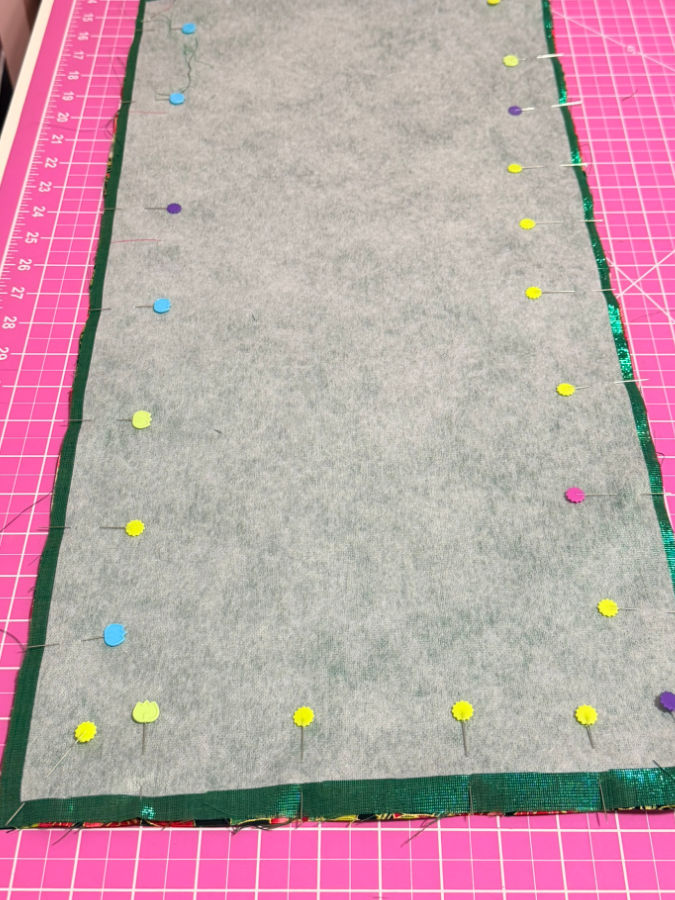
Sew around the rectangle with the green lining on top. The feed dogs grip the larger bottom layer directly, while the presser foot puts a little drag on the top layer. That slight difference in how the layers feed helps ease the extra fabric into the seam. Guide the layers gently and check that the outer fabric stays smooth between pins without any pleats.
You can use a ⅜ in (10 mm) seam allowance measured from the green edge. Leave an opening along one long side, away from the corners and the midpoint, for turning. Backstitch at both ends of the opening. Trim the four corners diagonally, taking care to leave the stitches intact.
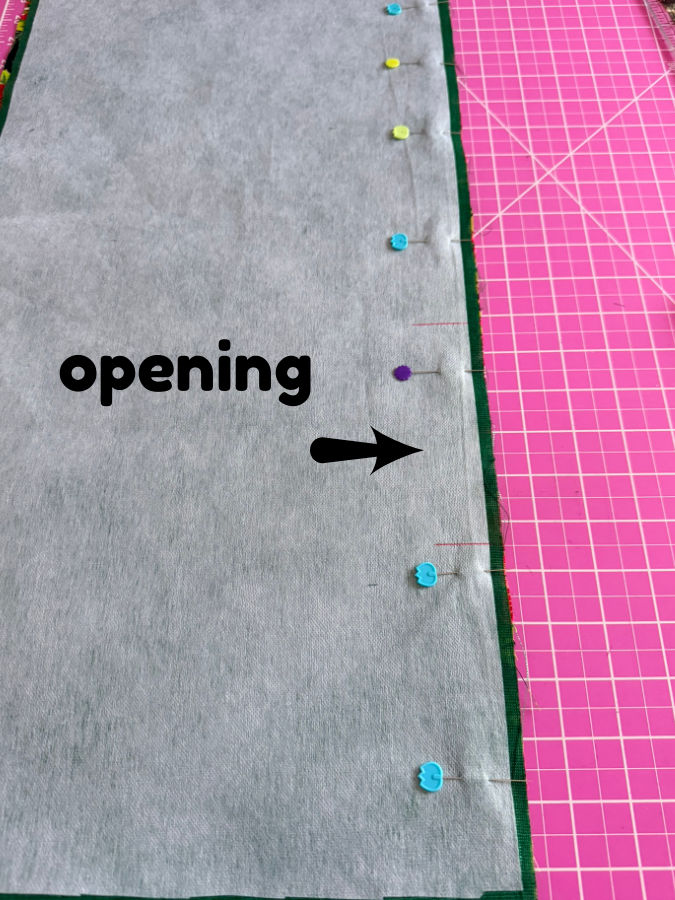
The image here is taken before the seam is stitched on that side. It does not matter what side you leave the opening.
✅ Related tutorial: Basic sewing techniques: How to sew corners and curved seams
Step 4. Turn and press the panel
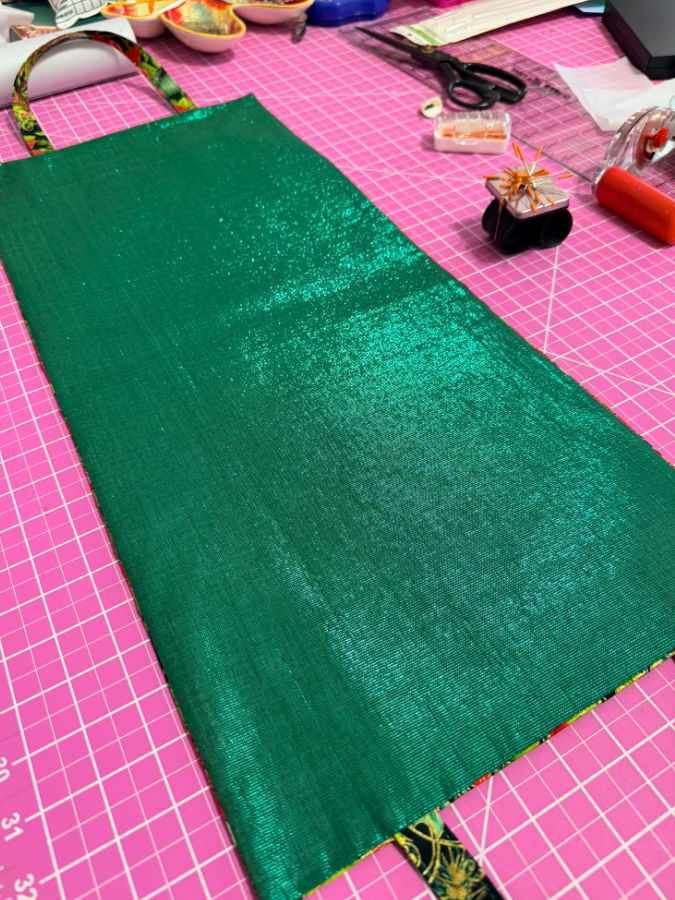
Pull the panel right side out through the opening. Gently push out the corners, pull out the handles and press the panel flat. Roll the perimeter seam slightly toward the green side as you press. Tuck the seam allowances at the opening inside so the edge follows the rest of the seam.
You can close the opening now with a ladder stitch. If the final side seam will catch both folded lips, you can leave it for that seam to secure.
✅ Related tutorial: Pressing Matters: 15 Common Ironing Mistakes to Avoid


Step 5. Sew a tuck along each long side
With the Christmas print facing up, mark a line 1 in (25 mm) in from each long edge.
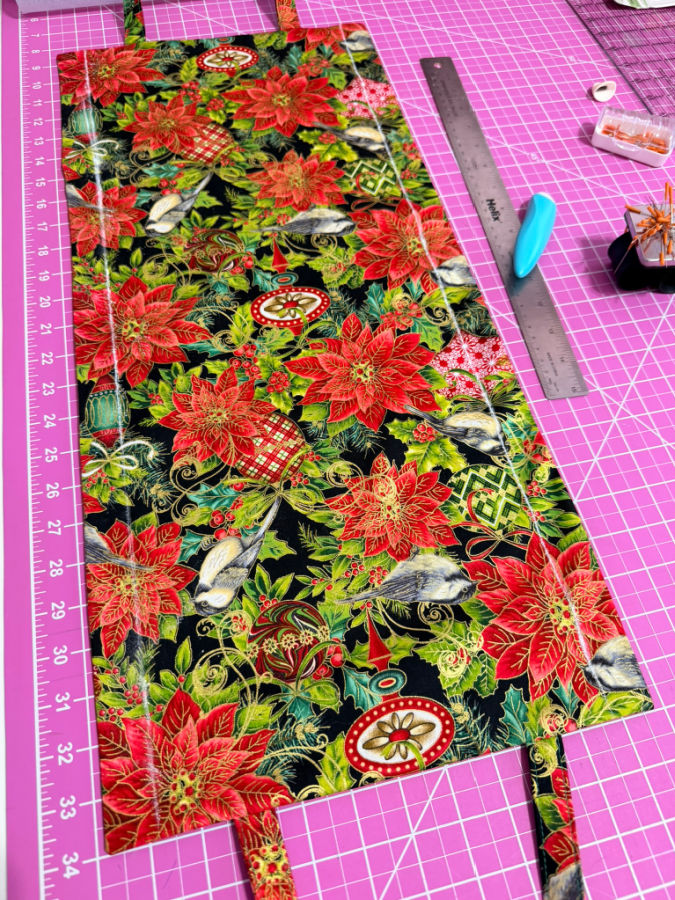
✅ Related tutorial: 15 Creative Ways to Mark Fabric for Sewing Projects
Then turn the panel green side up. Fold one long edge toward the middle along its marked line. You’ll see a strip of Christmas print on top of the green lining.
Stitch close to the folded edge (⅛”, 3mm in my case), all the way from one short end to the other.
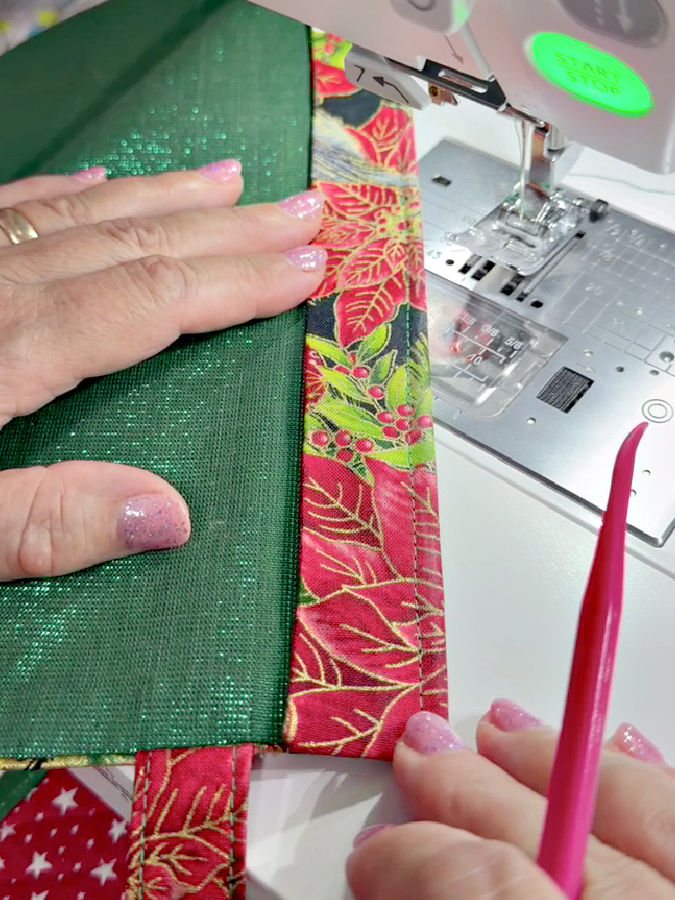
Open the panel out flat again, leaving the narrow stitched tuck in place. Repeat on the other side. These two tucks define where the front and back turn into the sides when the bag opens.
Step 6. Fold the bottom and sew the sides
- Lay the panel flat with the green side up. Find the midpoint between the two handle ends of the panel and mark a line across the width. Mark two more lines across the width, one ½ in (13 mm) on each side of the center line.
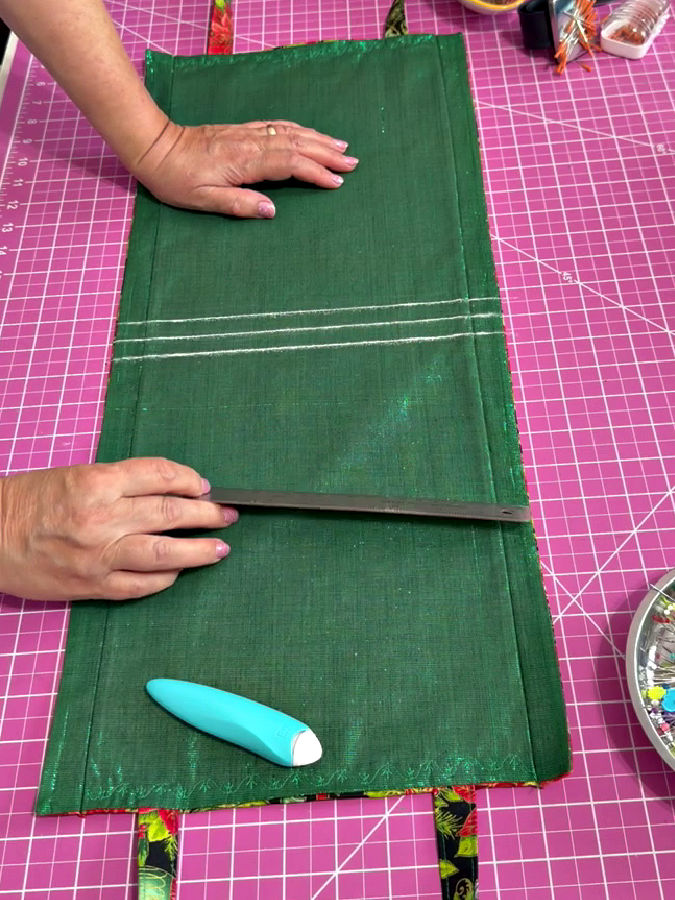
- Bring the two short ends together with the printed sides together and the green lining on the outside. The handles should both be at the top.
- Push the center crease up between the two halves, toward the handles. Bring the two outer marked lines together at the bottom. Viewed from the side, the fabric makes a W. Pin or clip through all the layers at both ends of the bottom fold to keep it even.
- Match the finished top edges exactly at each side and pin close to the opening so the edges stay flush. Pin down each long side, keeping the finished edges aligned and the bottom fold tucked in.
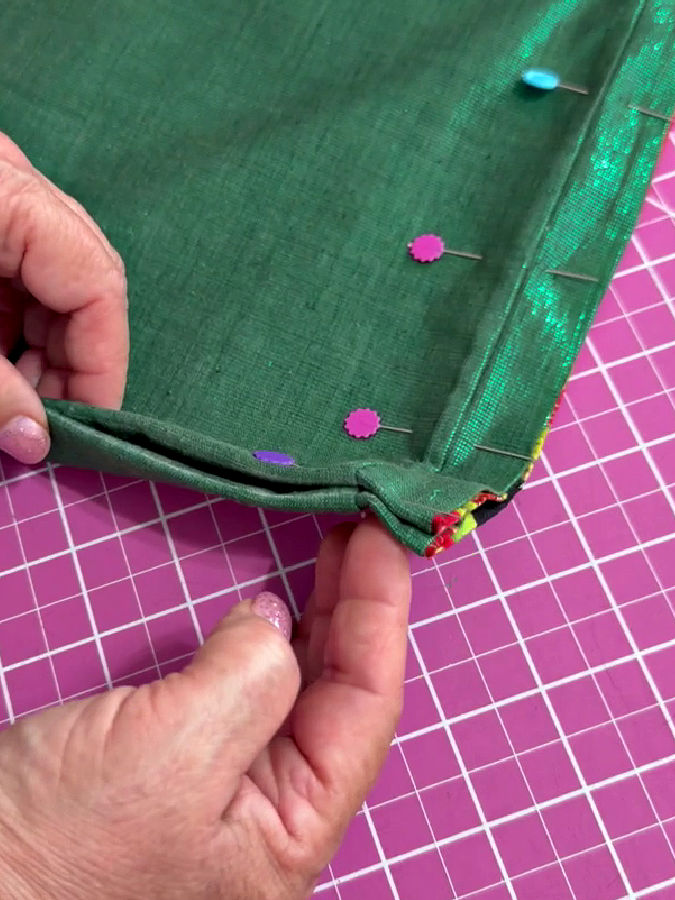
- Sew each side ¼ in (6 mm) from the finished side edge, starting at the top of the bag. That first bit of stitching gets pulled each time the bag opens, so check that it catches both layers right up to the top. Sew through all the layers of the bottom fold and backstitch at the end.
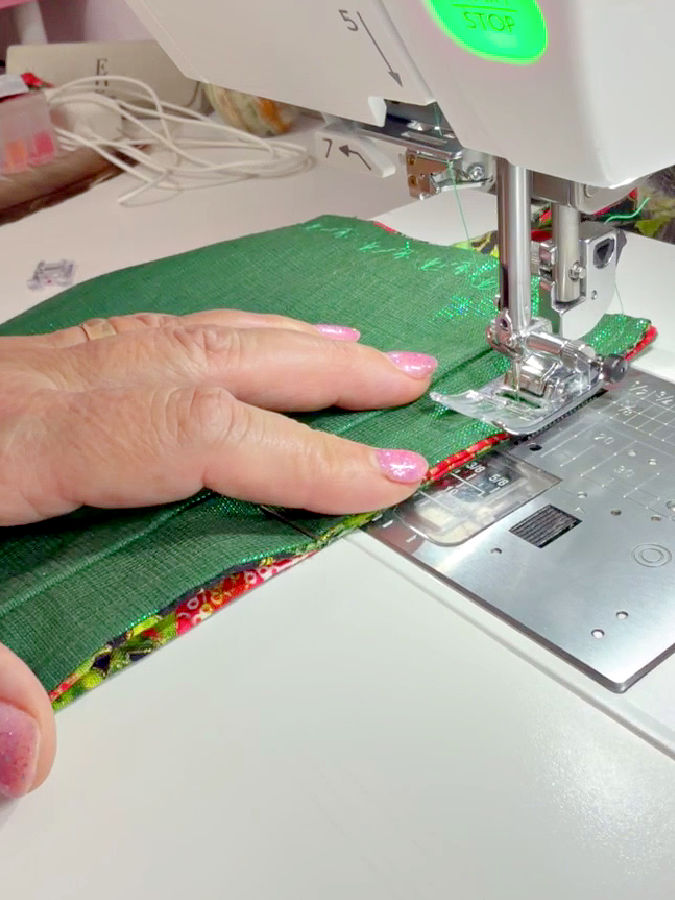
The side seams go through edges that were already turned and finished, so there are no exposed raw edges inside the bag.
How to Keep the Top Edges Even When Sewing the Side Seams
I seem to reach for my seam ripper at least once on every new sewing project. On the first gift bag, it was the second side seam. Once I figured out how to sew that seam, the rest of the bags went much faster.
I started the first side seam at the top. I wanted those two finished edges to line up exactly. Even a millimeter shows there.
But the layers were relatively thick so that the needle started to stitch in the same spot without the fabric moving forward which was not good. A scrap of fabric as a leader can help, but the two edges can shift as you sew from the scrap onto the bag.
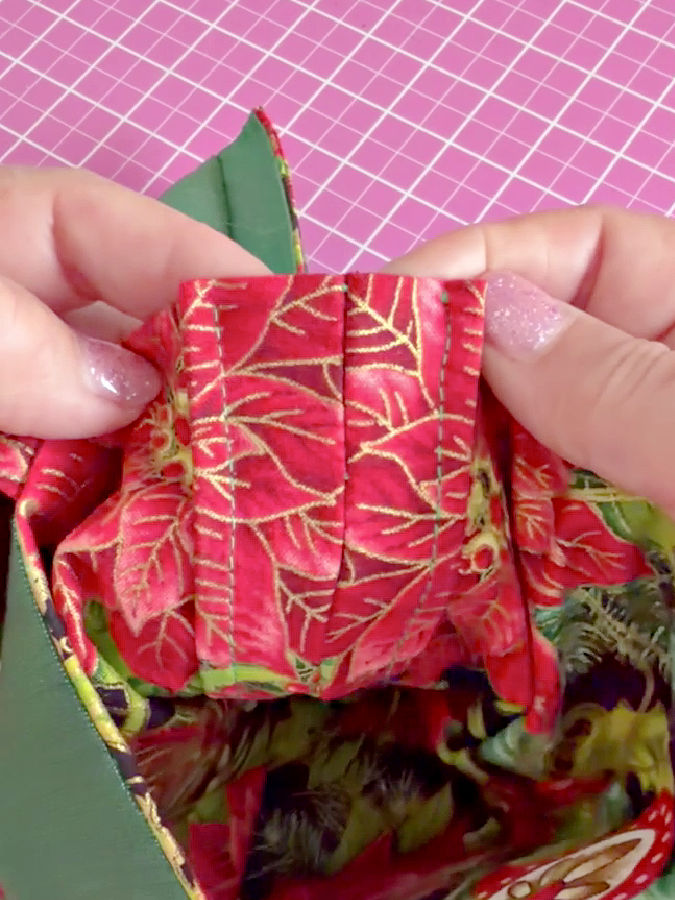
What worked for me was lining up the edges, lowering the needle by hand just inside the top edge so it caught both layers, and turning the handwheel manually for the first couple of stitches. A slightly longer straight stitch can also help once the fabric starts feeding.
That first side came out fine.
✅ Related tutorial: Why Does Your Seam Ripper Have a Red Ball? Discover Its Purpose!
On the second side, I tried sewing from the bottom fold up. By the time I got to the top, the lower layer came up a little short and the edges were uneven.
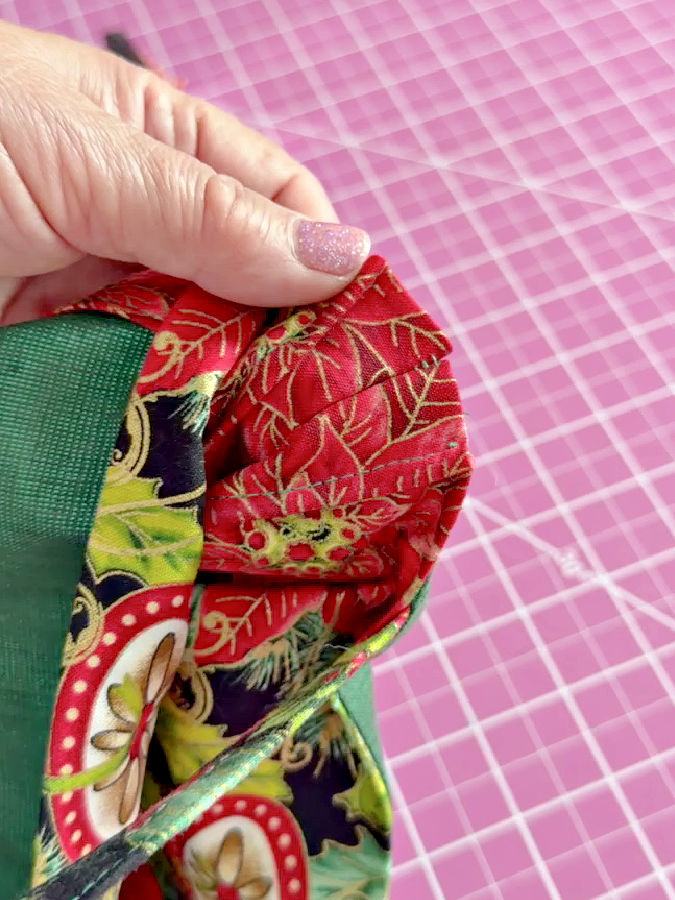
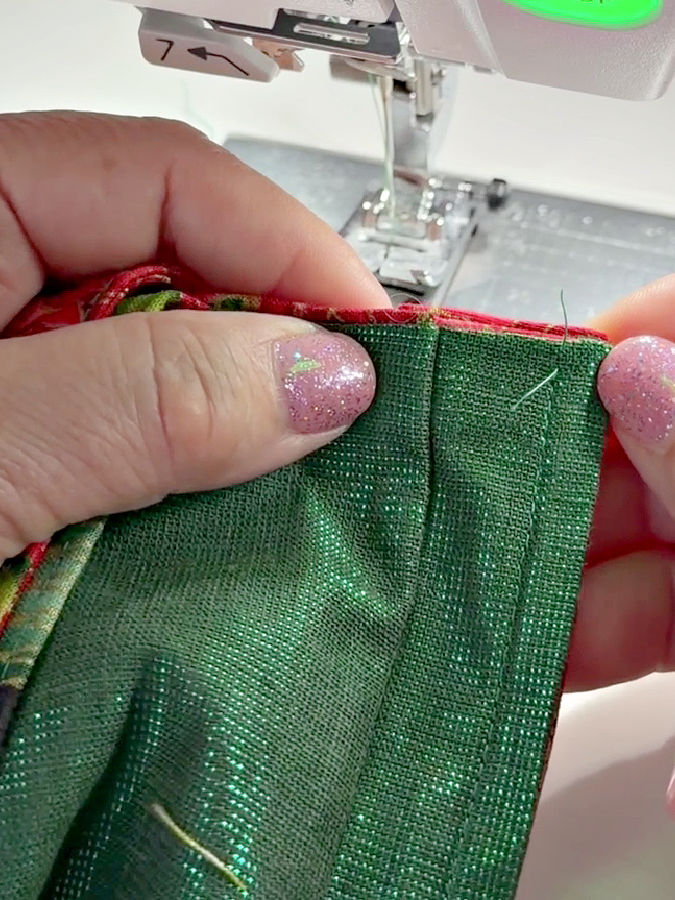
That’s where the seam ripper came in. I resewed that side from the top down, too.
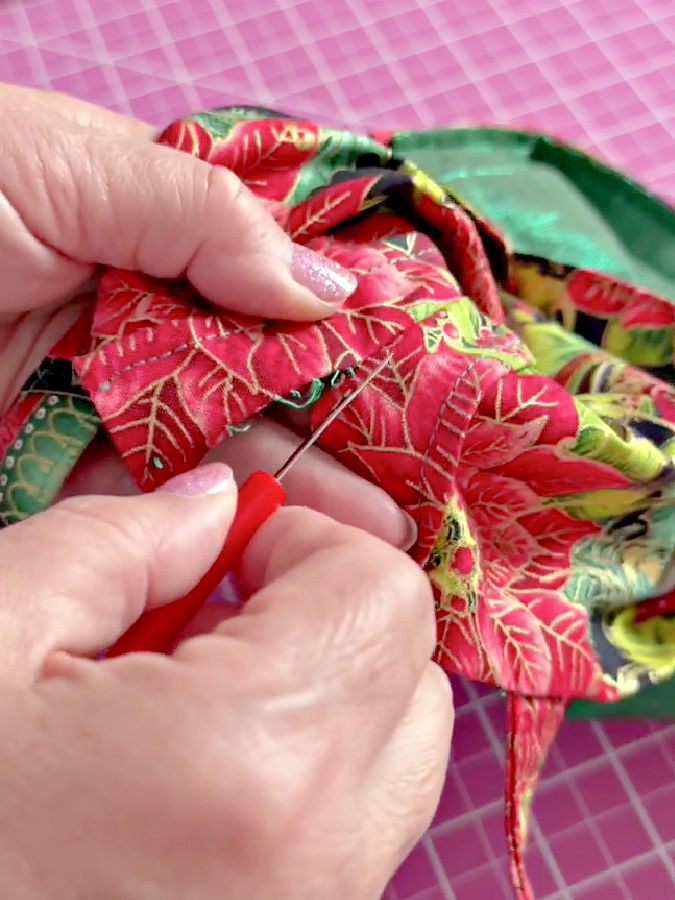
I save the reinforcing stitches for after I’ve checked the alignment. Backstitching right at that bulky edge can shift the layers, so once I’m happy with how the edges meet, I sew a short, narrow zigzag over the first few stitches to reinforce the opening.
Step 7. Turn the bag right side out
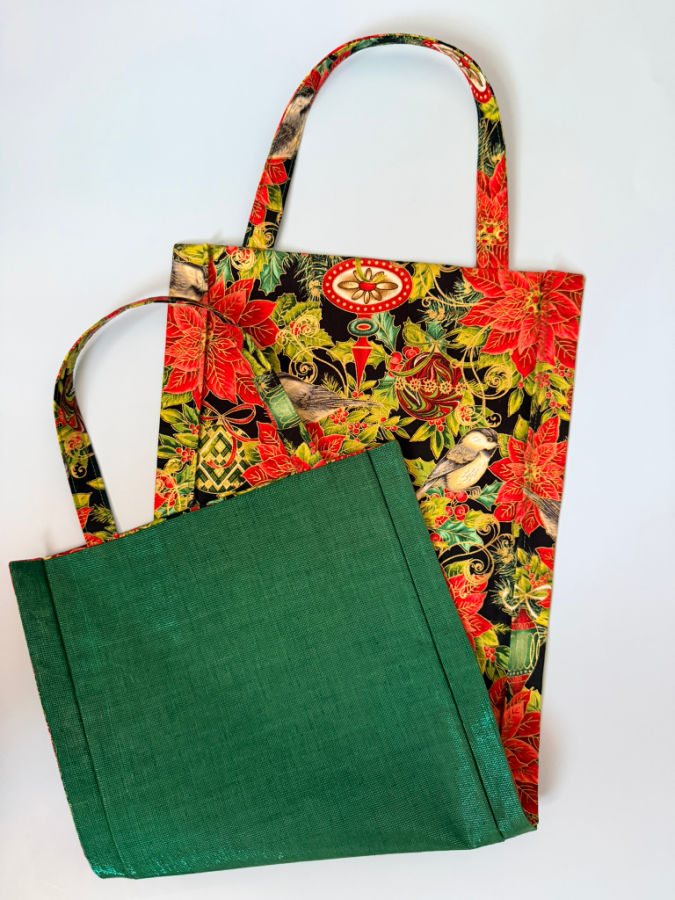
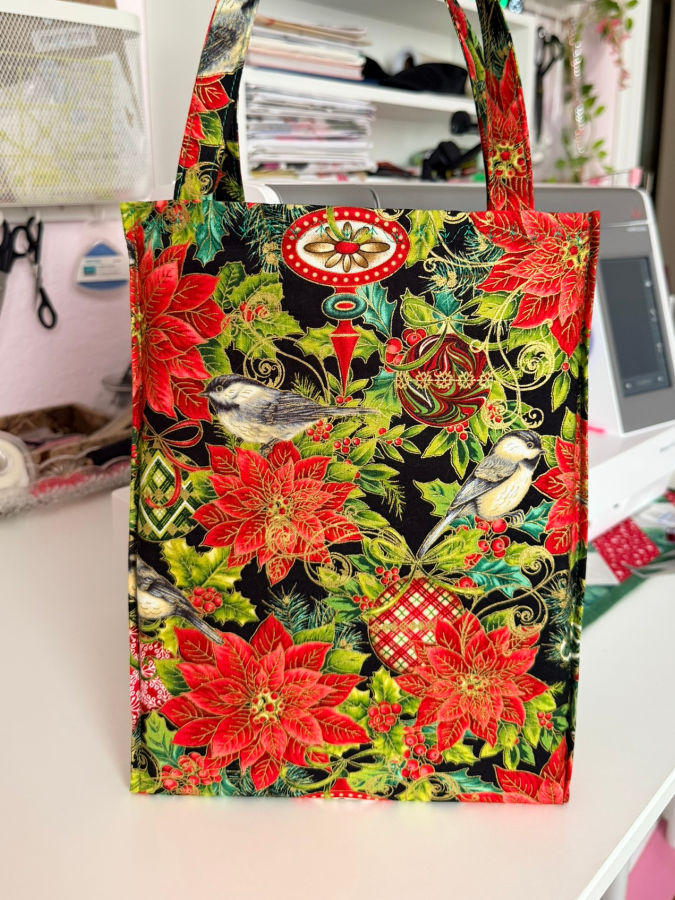
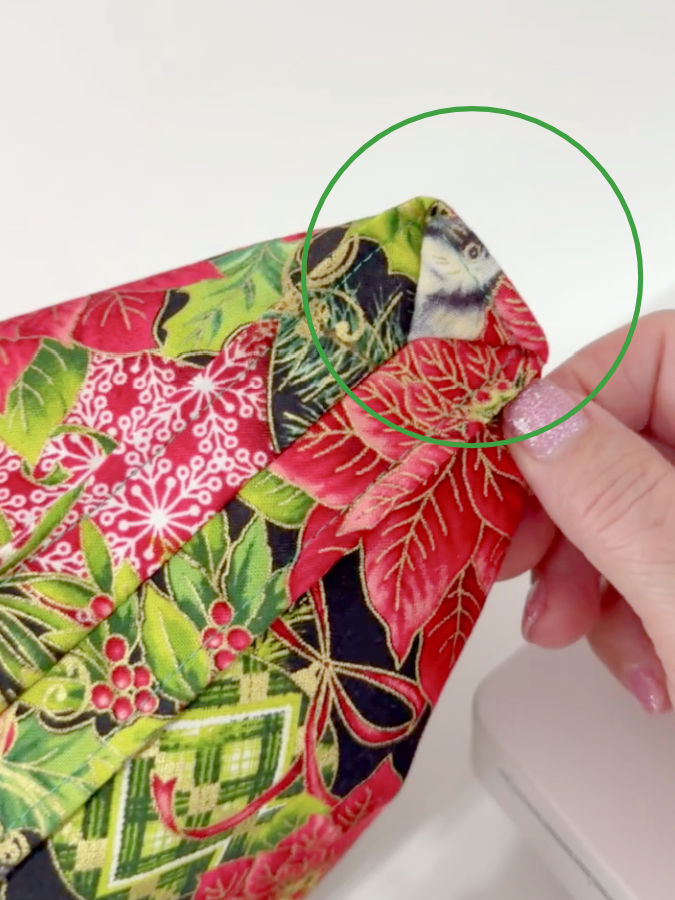
Turn the bag right side out through the top and reach inside to push out both bottom corners. Look at the bag from the side and you’ll see how the fold opens into a flat base. Those corners came from the fold you caught in the side seams.

Resizing the bag
My final bag dimensions (fully finished) are as 12″ height, 9″ width, 1¼” wide and the straps are 14″ from one end to another. If you need a bag of a different size you need to alter the dimensions accordingly.
This is a soft bag and the fabric will actually take the shape of whatever is inside, so these dimensions are approximate. I could for example fit very well inside a book 1½ thick.
- For a taller (deeper) bag: add to the length of the fabric 2 times the added height. If you want it 3″ taller (7.5cm), add 6″ (15cm) to the original length (27″/686mm in my case).
- For a wider bag: add to the width of the fabric 2 times the added width. If you want it 3″ wider (7.5cm), add 6″ (15cm) to the original width (12¾”/324mm in my case).
- For longer handles: add the desired length to the handle length. Same for width, if you want the handles wider.
For all these alteration, all steps mentioned above remain the same.
- For a wider bottom: add to the width of the fabric 2 times the desired width. For example if you want your bag 2″ (5cm) wider than mine you need to add a total of 4″ to the original width (12¾”/324mm in my case). You will also need to modify steps 5 and 6.1 adding half the desired amount (1″) to the 1″ (step 5) and ½” (step 6.1) respectively.
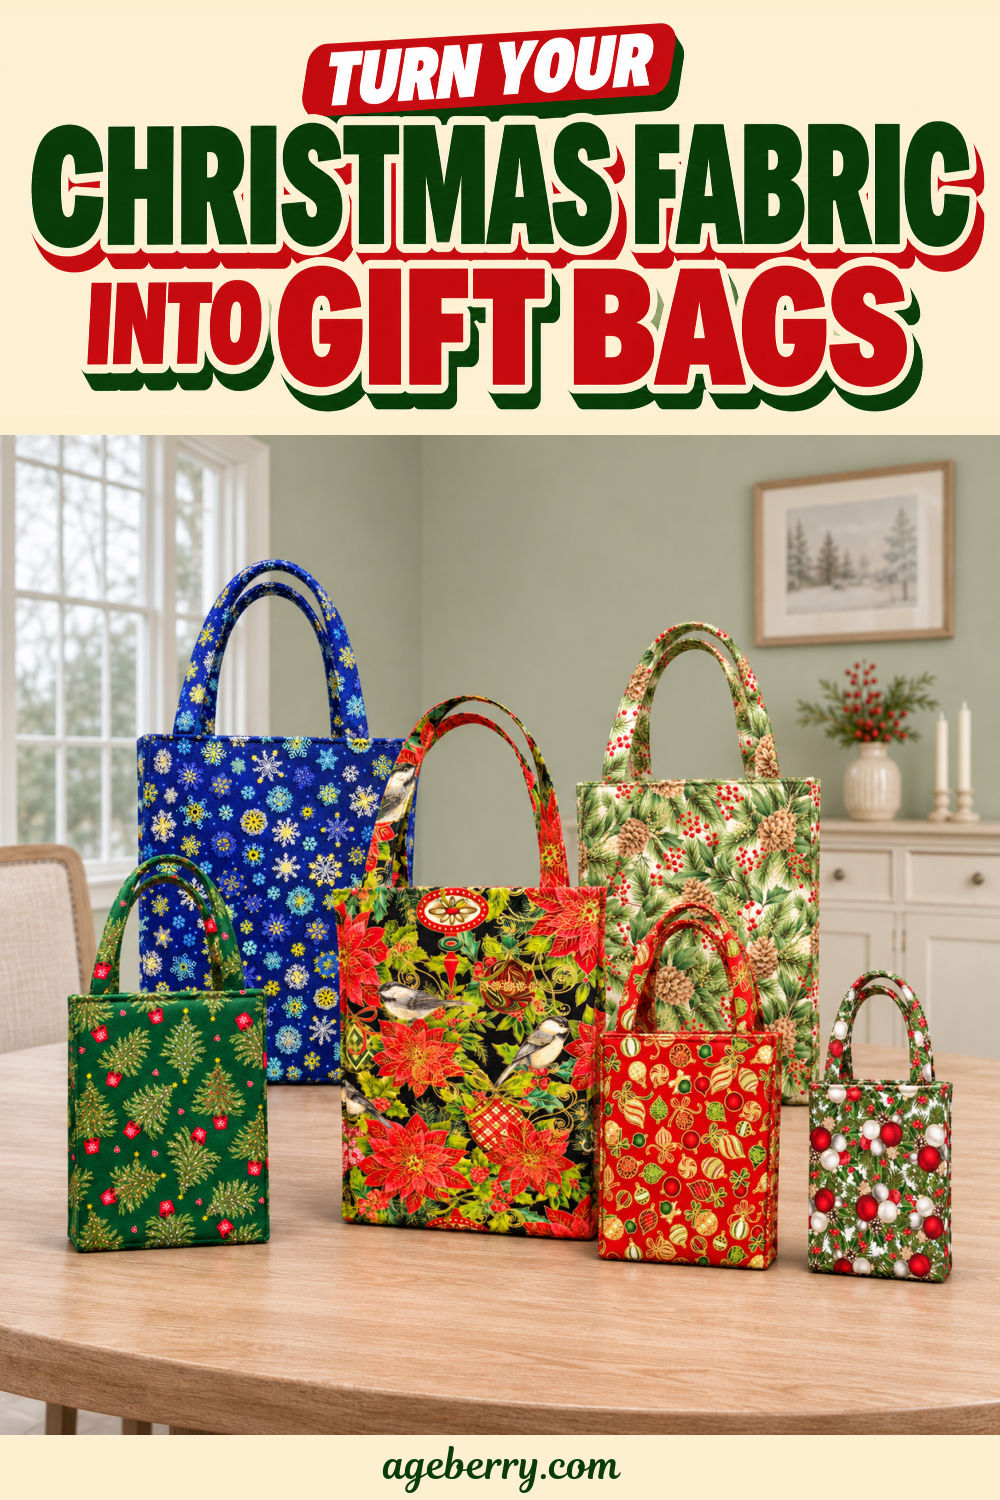
I made these gift bags in a few different sizes (depending on what I plan to give).
If you want some gift ideas, take a look at my guide to Christmas gifts you can sew. I made every project in the guide and wrote a detailed tutorial for each one. You’ll also find patterns and templates, most of them free.
Save the pin below to your Christmas sewing board so you can find the cutting measurements and folding steps when you’re ready to make your gift bags. For more sewing tutorials, project ideas, and tips, follow me on Pinterest.

latest posts
- Easy Christmas Sewing Project for Making Fabric Gift Bags in Different Sizes
- Secrets to Sewing with Difficult Fabrics: Tips for Perfect Results
- How to Add a Fabric Insert to a Hemmed Edge: The Wrap-and-Turn Trick
- The Little Triangle Trick for Clean Hem Corners
- 25 Little Sewing Habits That Make Your Work Look Better
- How to Sew a Pointed Fabric Zipper End Tab
- 15 Sewing Machine Parts You See All the Time — But Probably Ignore
- Adjustable No Buckle Elastic Belt DIY: Sewing Tutorial
- 23 Useful Things to Watch for on Amazon Prime Day