Knit Presser Foot: How It Works, How to Use It, and My Sewing Tests
Sewing knit fabric on a regular sewing machine can be tricky. The fabric stretches as you sew, seams turn wavy, and sometimes the machine skips stitches or pulls the fabric into the needle plate. There are different ways to deal with these problems, from choosing the right needle and stitch to adjusting the presser foot pressure or using a walking foot. But there is another option I wanted to try: a knit presser foot, also called a tricot foot.
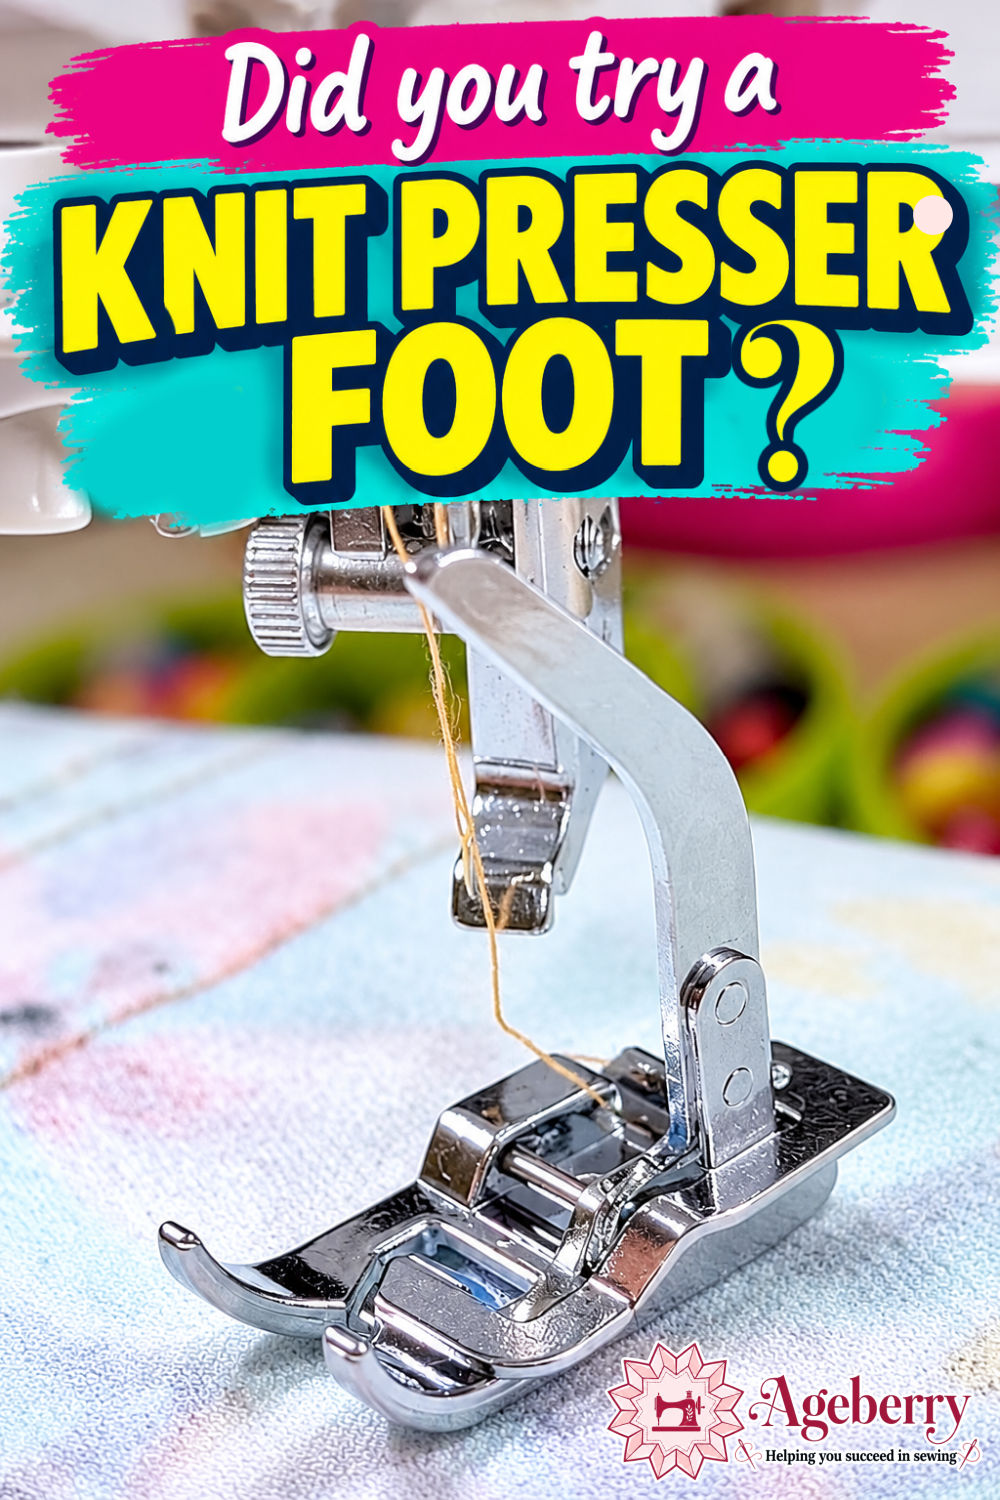
I bought one to see whether it could make sewing knits without a serger easier. In this article, I’ll show you what this foot is, how it works, and how to use it. I’ll also test it on different knit fabrics and compare the results. Does it really help with stretching, bunching, and skipped stitches? Let’s find out.
Prefer to read without ads?
I created a PDF version of this guide for anyone who likes to keep sewing guides saved, printed, or easy to read without ads. It includes the same helpful information in a simple format you can download and use whenever you need it.
The PDF is available in my shop for a small fee. It’s a nice option if you want to support my work and keep this tutorial close to your sewing machine. But that is not all! You will also receive as a bonus the printable PDF for my article Types Of Sewing Machine Feet And Their Uses!
What Is a Knit Presser Foot?
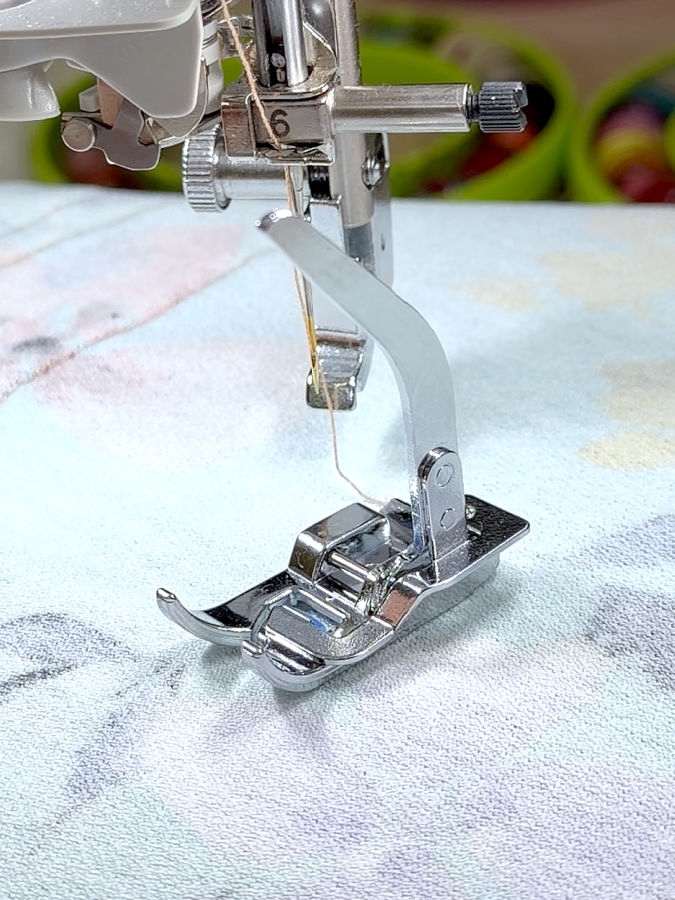
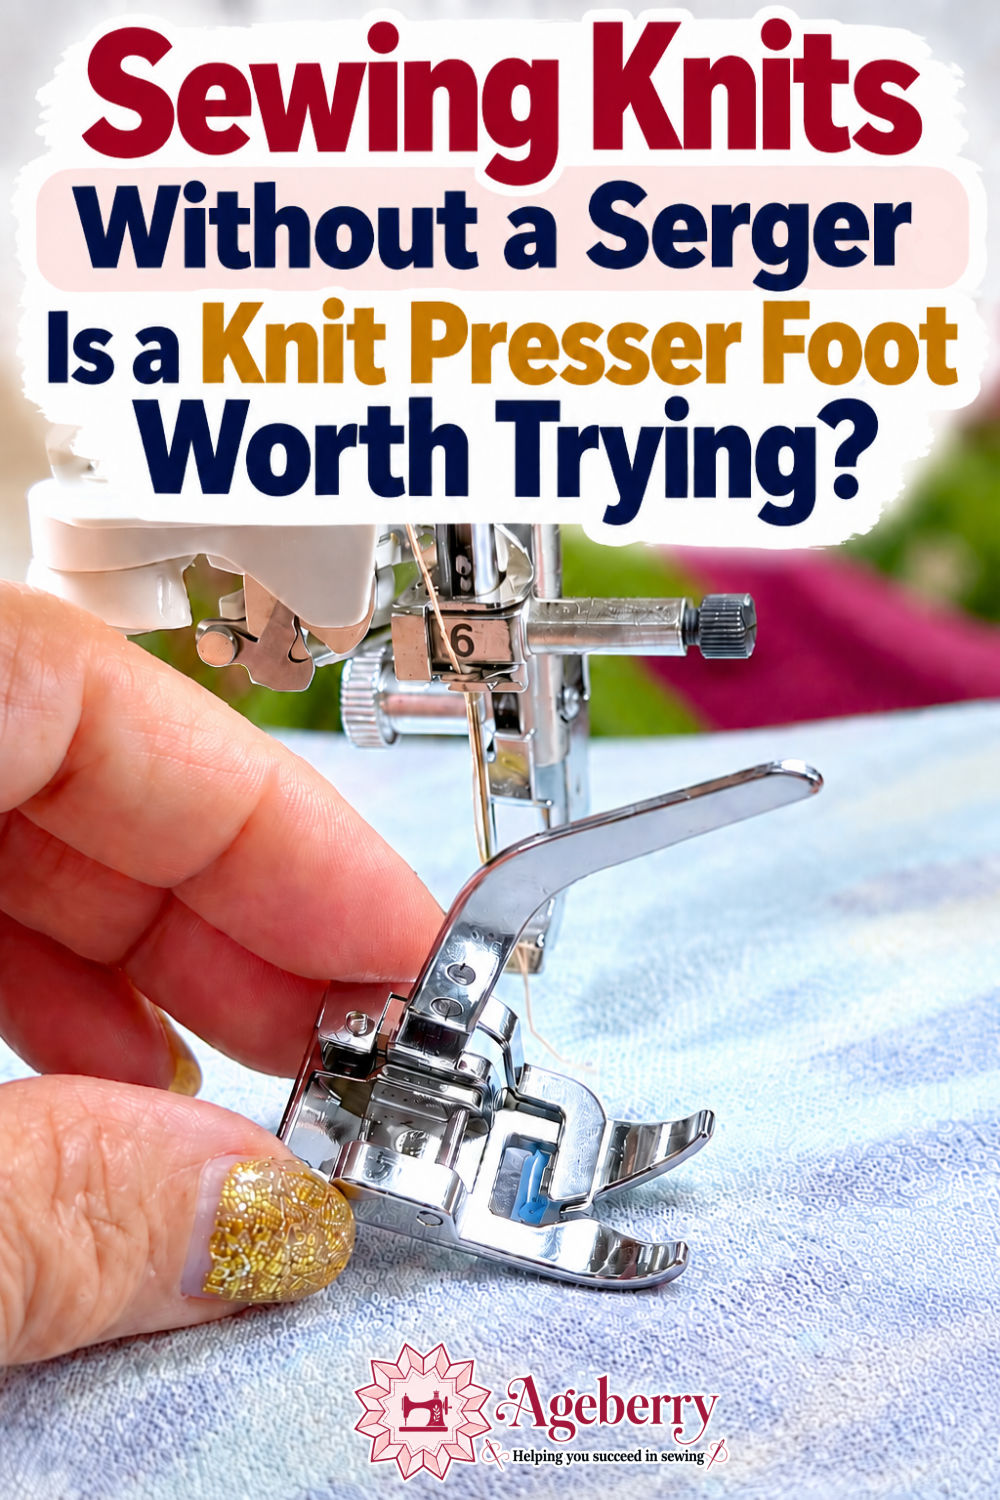
A knit presser foot is a special sewing machine foot made to help when sewing knit fabric.
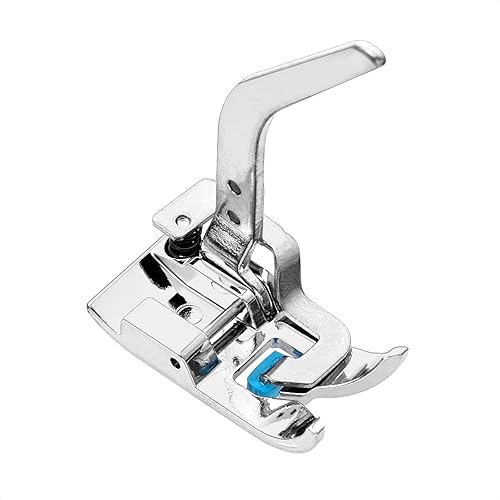
At first glance, this foot look a little odd, especially if you are used to basic snap-on feet. It has a tall metal arm, a spring-loaded section, and an extra fork-like piece at the front. There is also a small blue plastic part near the needle opening. Altogether, it looks more complicated than an ordinary foot.
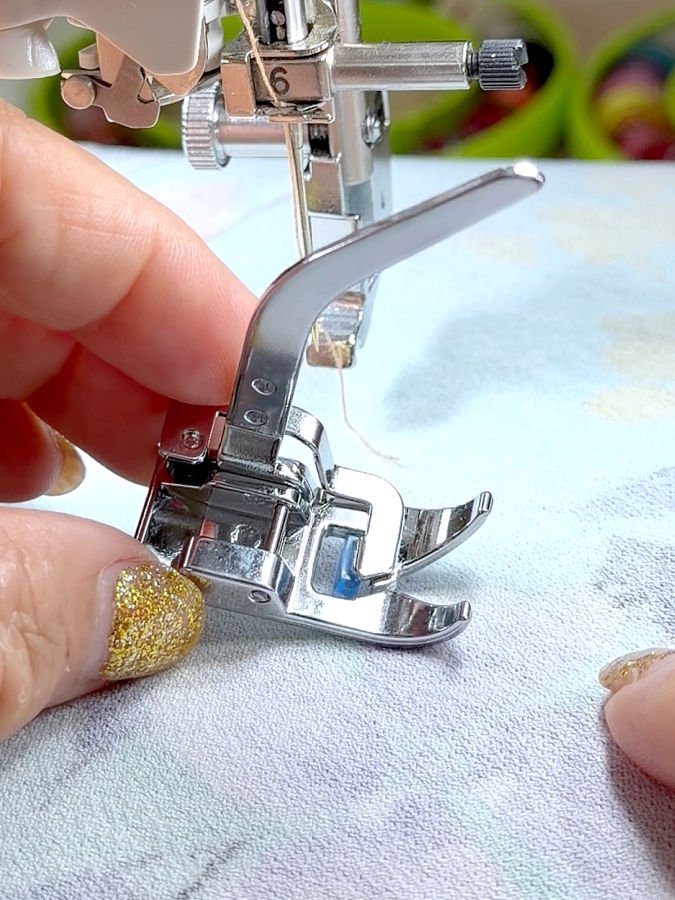
That unusual design is the whole point. The moving parts are there to help control the fabric as it feeds through the machine.
Note: Some of the links on this page are affiliate links. This means I will receive a commission if you order a product through one of my links. I only recommend products I believe in and use myself.
This foot is sometimes called a tricot foot because it is intended for sewing knit and stretch fabrics, including lightweight knits such as tricot.
I bought a DREAMSTITCH knit presser foot, but there are many similar knit presser feet available. They look much the same and are designed for the same purpose, so the information in this article may also be useful if you have a different brand.


How Does a Knit Presser Foot Work?
The knit presser foot works by holding the fabric while the needle makes a stitch, then releasing it so the feed dogs can move it forward. That is the main difference from a regular presser foot, which applies more constant pressure as the fabric feeds through the machine.
The tall metal arm is connected to the needle-clamp mechanism. As the needle moves up and down, the arm operates the spring-loaded part of the foot. The small blue plastic grip underneath moves with this mechanism, so its pressure on the fabric changes during each stitch.
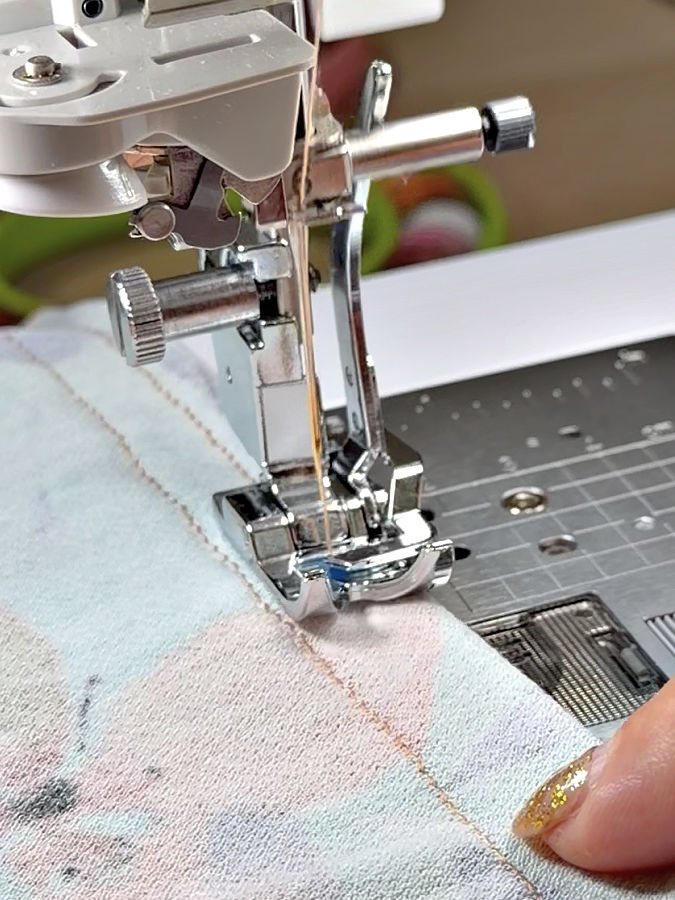
When the needle comes down, the grip holds the knit fabric in place. As the needle rises, the pressure is released, allowing the feed dogs to carry the fabric forward for the next stitch.
This is intended to reduce the slipping and stretching that can happen when sewing knit fabric. Holding the fabric more securely while the needle penetrates it may also help reduce skipped stitches.
However, the foot cannot correct every cause of skipped stitches, and it does not replace the need for the correct needle, stitch, and machine settings.
How to Use a Knit Presser Foot
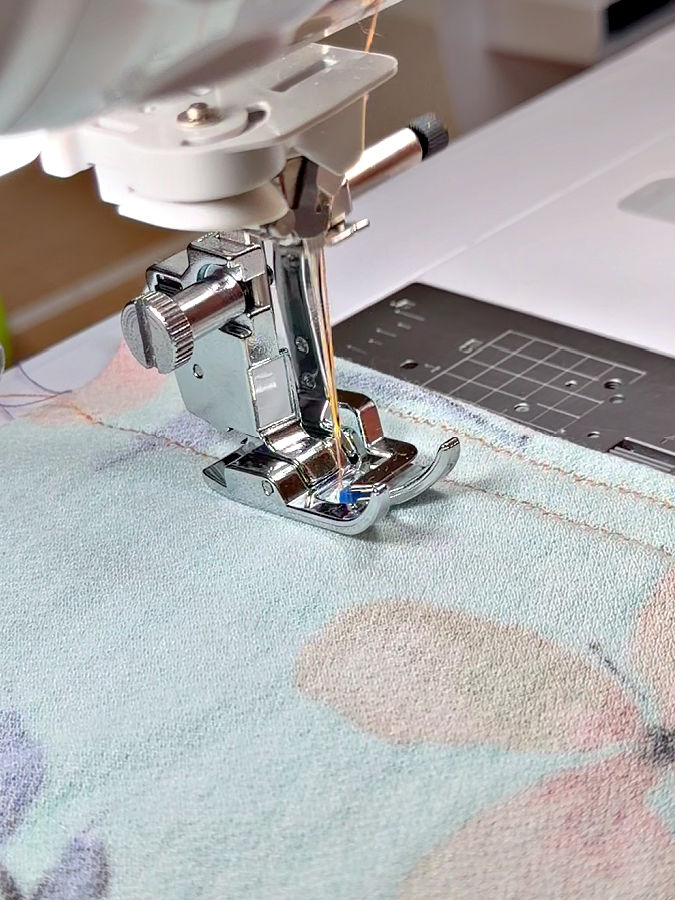
A knit presser foot can help with feeding, but it does not replace the need for the correct needle, stitch, and machine settings. When sewing knit fabric, I still use the same basic precautions I would use with a regular presser foot.
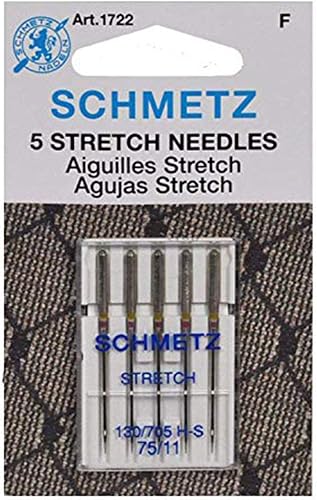
Choose the right needle. Use a ballpoint/jersey needle in a size appropriate for your fabric. A stretch needle may be a better choice for some very stretchy or synthetic knits, especially if you are getting skipped stitches.
✅ Related tutorial: The Ultimate Guide to Stretch Needles

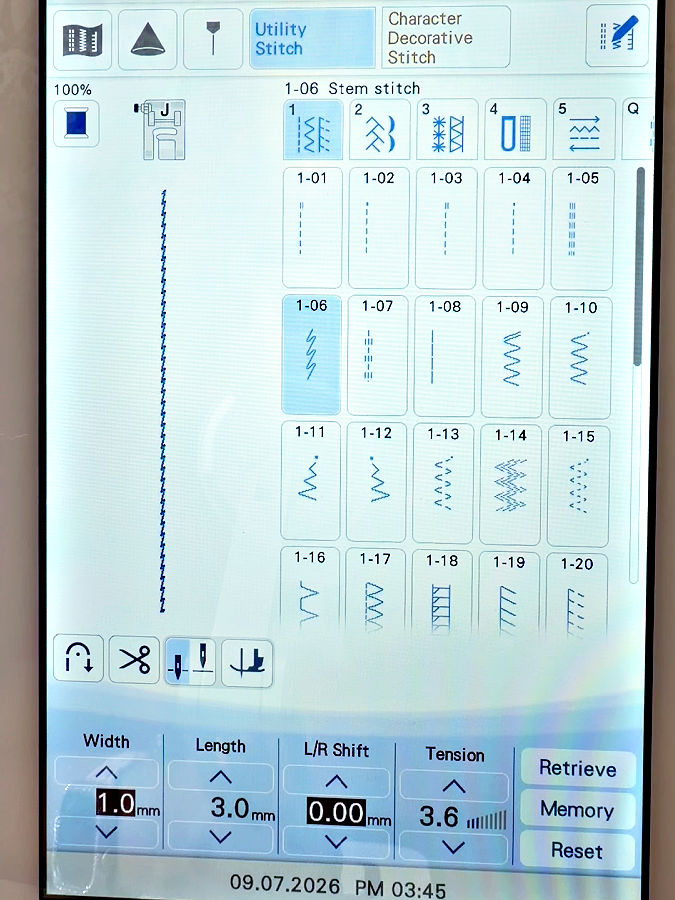
Use a stitch that can stretch. A narrow zigzag or another suitable stretch stitch is usually a better choice for knit seams than a regular straight stitch. Choose the stitch according to the fabric and the seam you are sewing.
✅ Related tutorial: Types Of Stretch Stitches On A Sewing Machine And When To Use Them
I used the stitch my machine calls a stem stitch, which is also known as a lightning stitch. It is a narrow stretch stitch that works well for sewing knit seams because it allows the fabric to stretch without breaking the thread.
Choose appropriate thread. Use a good-quality thread suitable for sewing knits. Regular polyester thread works for many knit projects, while stretch thread can be useful when you need additional stretch in the seam.
✅ Related tutorial: Stretch Thread for Sewing
Attach the foot correctly. Make sure the upright metal arm is positioned behind the needle-clamp screw and that the foot is securely attached. Before sewing, turn the handwheel slowly by hand to check that the needle clears the foot throughout the selected stitch.
Adjust the presser foot pressure. If your machine allows it, try lowering the pressure when sewing knits. Too much pressure can contribute to stretching as the fabric feeds. Make small adjustments and check the results rather than assuming the lowest setting is best.
Avoid pulling the fabric while sewing. Let the feed dogs move the fabric. Pulling it from behind the presser foot can stretch the seam and interfere with even feeding.
Test on a scrap. Use a scrap of the same fabric, preferably with the same number of layers as your project. Test the stitch length and tension, and check the stitching, feeding, and stretch of the seam before sewing the actual garment.
The presser foot is only one part of successful knit sewing. If the fabric still stretches or the machine skips stitches, I would check the needle, stitch, thread, pressure, and other settings before deciding that the foot is not helping.
My Tests: Sewing Knit Fabric With the Tricot Foot
I wanted to see how this foot would work on fabrics I had already used for real sewing projects, so I started with remnants from two dresses.
Medium-Weight Cotton Jersey
My first test was on medium-weight cotton jersey. I had used this fabric to make a wrap dress, and you can see the finished project in my article – DIY Wrap Dress | Step-by-step Sewing Tutorial. I didn’t have the knit presser foot when I made the dress, but I still had some fabric left, so it was perfect for testing.
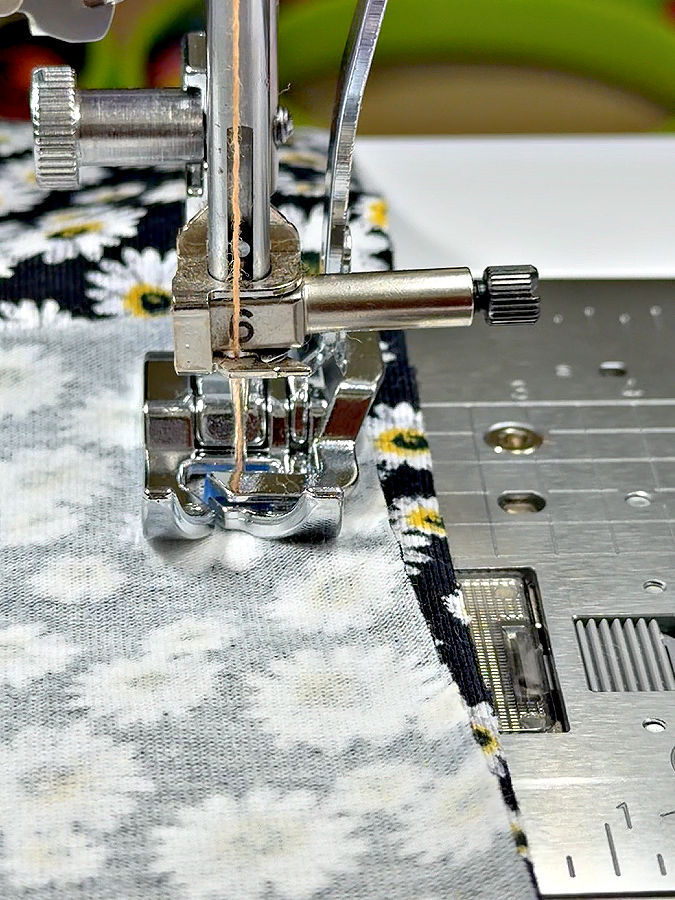
I used a ballpoint needle, a lightning stitch, and regular polyester thread in both the needle and bobbin. The foot fed the fabric well, and the stitching looked pretty good. More importantly, the seam still had stretch.
Lightweight Rayon Knit
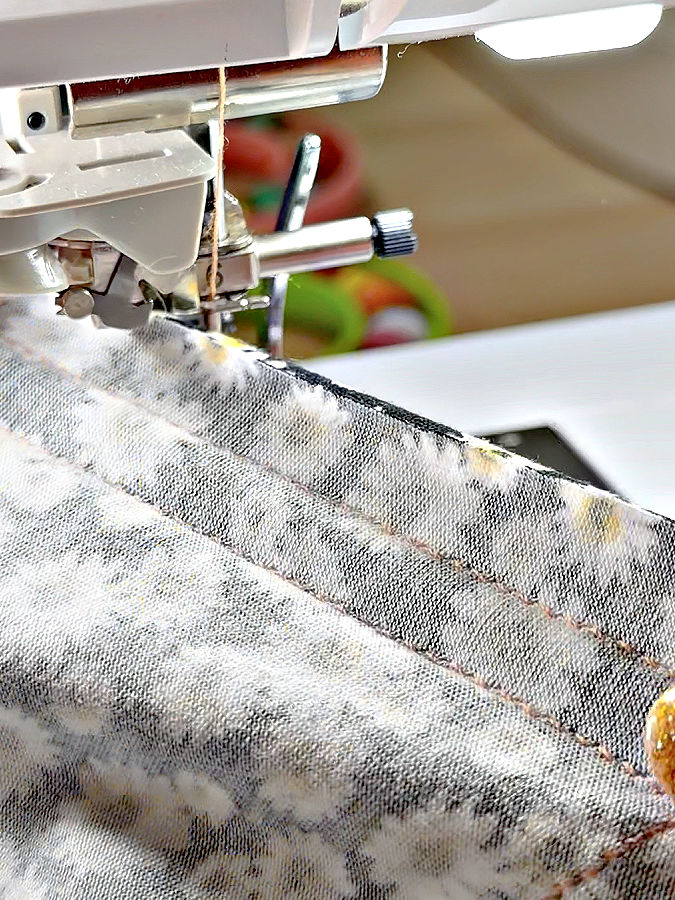
Next, I tried a lightweight rayon knit. I have a dress made from this fabric too, so I know how it behaves when sewing. This is the kind of fabric where I was particularly interested in seeing whether the foot would help.
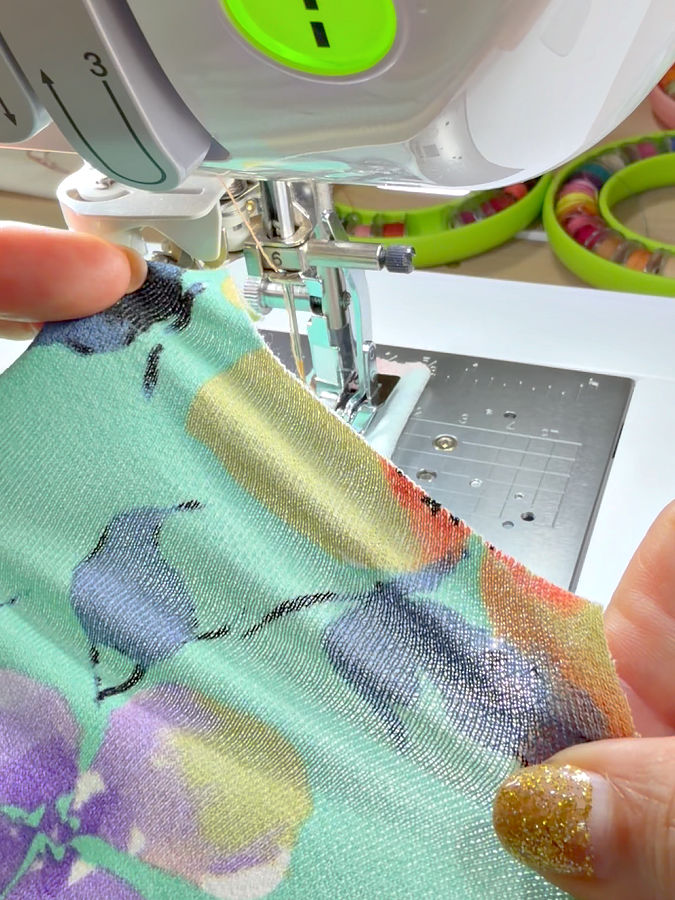
And it did. The foot helped the fabric feed more evenly, and the result reminded me of using a walking foot. The mechanisms are different, but both can help when a knit fabric is difficult to feed with a regular presser foot.
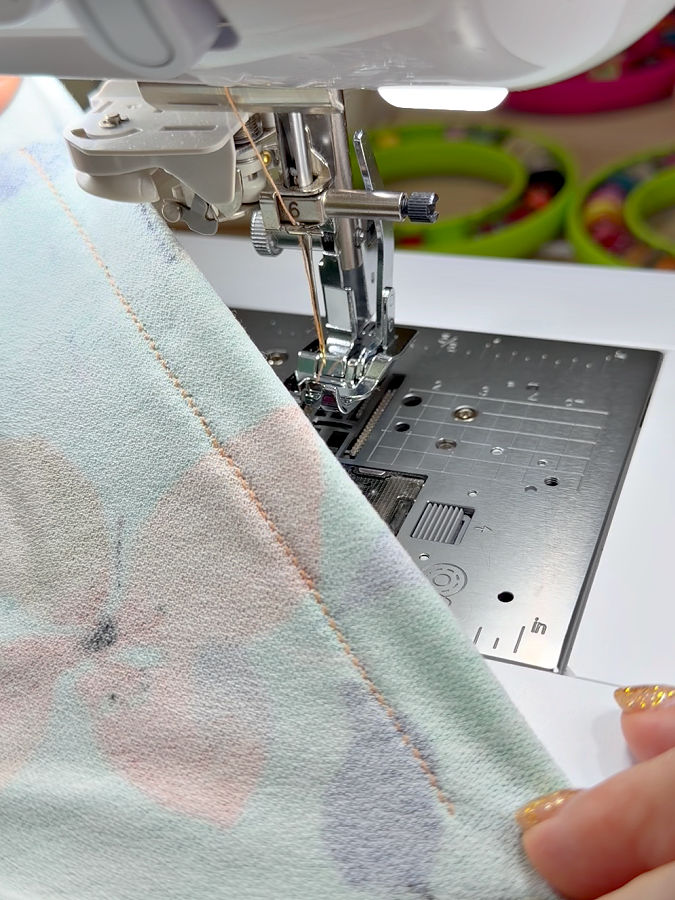
That agrees with several of the Amazon reviews I read before buying it. Some buyers reported less bunching, less stretching, and better stitching on difficult knits, and a few said they preferred this foot to a walking foot for certain fabrics. My experience with these two fabrics was positive too.
Of course, that doesn’t mean the foot will work equally well on every knit: the foot can help, but the fabric and machine settings still matter.
What I Noticed
I did sew slowly at first, partly because I was still a little afraid the needle might hit the foot. But the needle opening is quite large, and after checking the clearance, I realized I didn’t need to be so cautious.
Another useful result was that the foot prevented the lightweight rayon from being pulled down into the throat plate. I had this exact problem with this fabric before (with a regular presser foot), and I even have a video of it on my Facebook page – you can check it here: https://facebook.com/reel/1595972991974378/
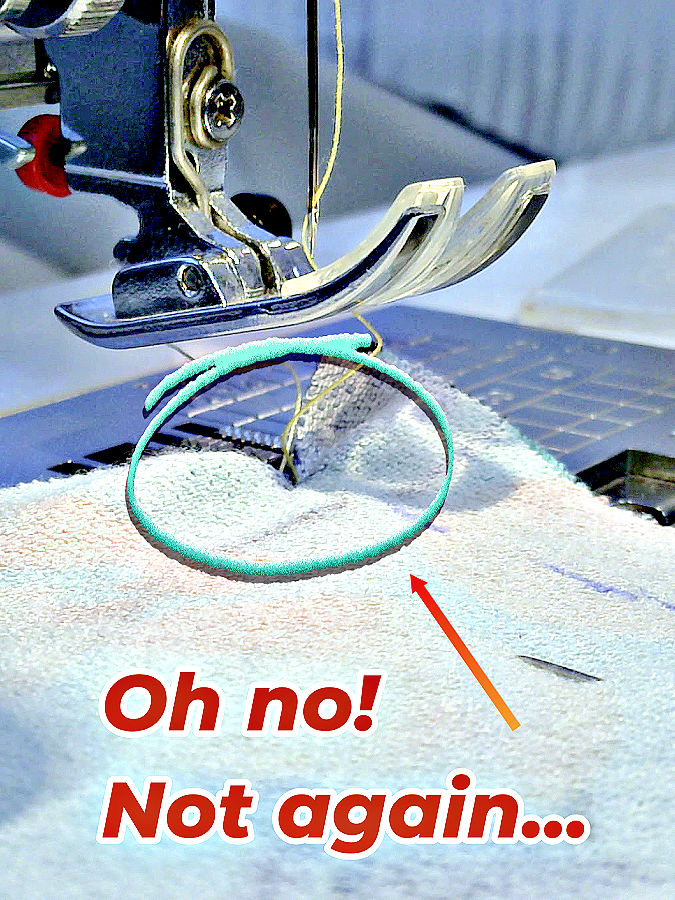
I tested the foot by starting a seam right at the edge of the fabric. This was especially interesting because I had trouble with this exact lightweight rayon knit being pulled down into the throat plate. This time, with the knit presser foot, the fabric fed under the needle without getting caught.
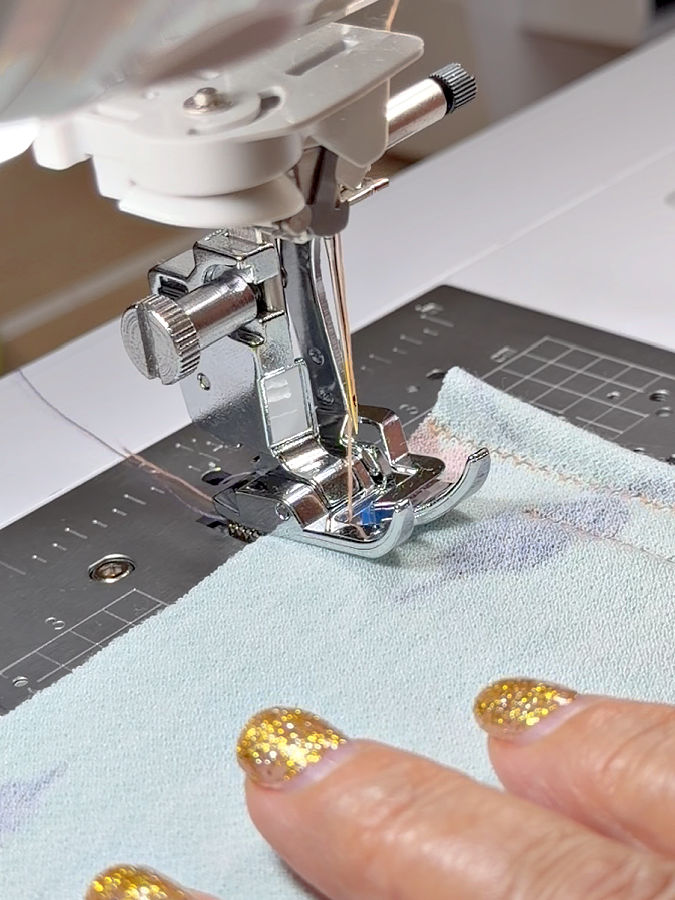
The seams did not stretch out of shape while I was sewing. At the same time, the stitches still had the stretch I wanted: I could stretch the fabric afterward without breaking the thread. That was especially important for the knit seams I was testing.
I didn’t have any skipped stitches during these tests. Of course, I was also using the appropriate needle, stitch, and thread, so I can’t say the foot alone was responsible. But I was pleased with the results.
I also didn’t notice a significant difference between the two fabrics. The foot worked well on both the medium-weight cotton jersey and the lightweight rayon knit. I would need to test more fabrics before saying which types of knits it works best on.
Is It Compatible With Your Machine?
The knit presser foot I bought is a low-shank snap-on foot, the type used by many home sewing machines, including many Brother, Singer, and other models. But the brand name alone is not enough to guarantee a fit. Check your exact machine model before buying, especially if you have a high-shank machine or a different presser-foot system.
I tried it on my Janome 6600, but it didn’t fit. That machine has the built-in AcuFeed system, and it is a high-shank model. So even though it uses snap-on presser feet (through an adapter), that does not mean this particular foot will work with it.
Be careful with similar-looking versions, too. Slant-shank, high-shank, and screw-on are not interchangeable descriptions. A slant-shank foot is not the same as a standard low-shank foot, and a screw-on foot may require a different attachment.

Pros & Things to Watch Out For
After trying the knit presser foot on my cotton jersey and lightweight rayon knit, I can see why it has so many positive reviews. It is a small, affordable accessory that can make sewing knits on a regular sewing machine easier. But there are a few things worth checking before you buy one.
What I liked: The foot snaps on in seconds, and I didn’t need a screwdriver to attach it to my machine. That makes it easy to try, even if you are new to using specialty presser feet. It also gave me good results on both fabrics I tested: the seams did not stretch out of shape, the stitches remained stretchy, and I had no skipped stitches.
What to watch out for: Compatibility is the biggest consideration. As I mentioned above, this foot did not fit my Janome 6600, and some Amazon reviewers also reported fit problems with certain machine models. Check your machine’s shank type and the exact compatibility information before ordering.
You may also need to adjust the presser foot pressure, stitch length, tension, or other settings to get the best results. The foot can help control the fabric, but it cannot compensate for an unsuitable needle, stitch, or thread.
I would also check the spring and moving parts when the foot arrives. One Amazon reviewer reported that the spring broke after about 30 minutes of use. That is only one customer report, so I wouldn’t call it a common problem, but it is worth keeping in mind.
I had a little spring-related incident myself, although mine didn’t break. I was inspecting the foot a bit too closely, and somehow the spring came out of place. I was lucky to find it on the floor—it is very small! Putting it back took some effort. I can imagine something similar happening if the foot were dropped on a hard surface, so I would handle it carefully and keep an eye on that little spring.
Overall, I think this is a useful foot to try if you sew knits on a regular sewing machine. It is easy to attach, doesn’t take up much space, and may help with some of the feeding problems that make knit sewing frustrating. Just make sure you buy the correct version for your machine.
Thinking of trying a knit presser foot? Save this pin to your sewing board so you can find the tutorial when you’re ready to test it, and follow me on Pinterest for more sewing tips, tutorials, and inspiration!

latest posts
- The Little Triangle Trick for Clean Hem Corners
- 25 Little Sewing Habits That Make Your Work Look Better
- How to Sew a Pointed Fabric Zipper End Tab
- 15 Sewing Machine Parts You See All the Time — But Probably Ignore
- Adjustable No Buckle Elastic Belt DIY: Sewing Tutorial
- 23 Useful Things to Watch for on Amazon Prime Day
- Sewing Thread Secrets: 8 Tiny Details You Probably Never Noticed — But Should
- Bias Tape Tutorial: How to Make Bias Tape With a Bias Tape Maker
- 10 Easy-to-Miss Features on Sewing Supplies You Should Be Using