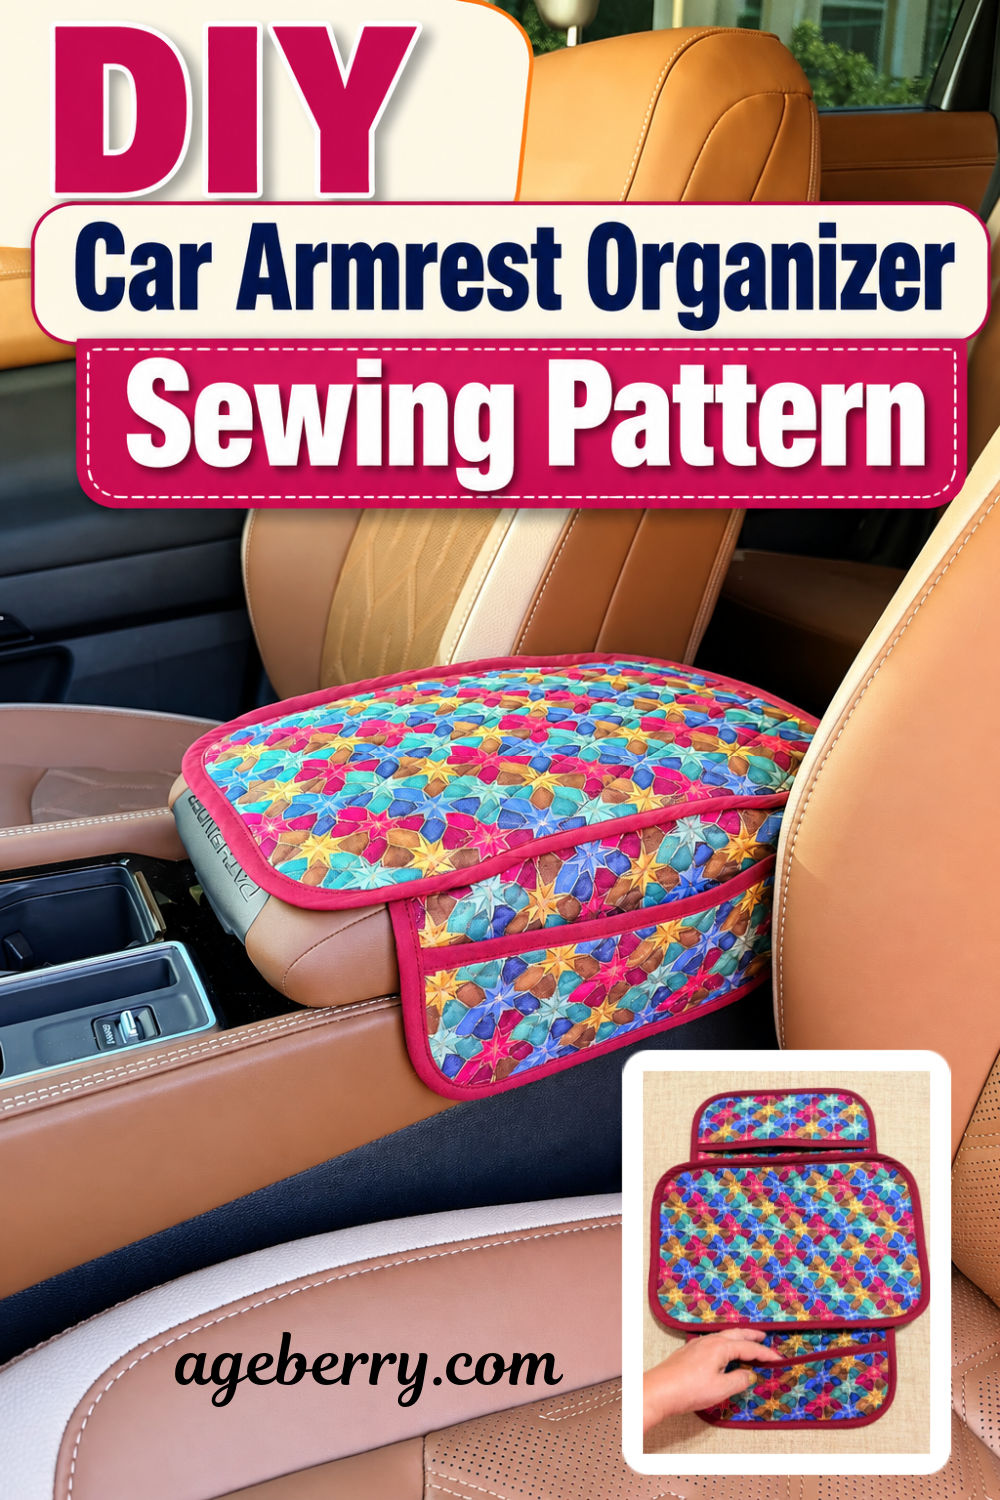
DIY Car Armrest Organizer: Sewing Tutorial
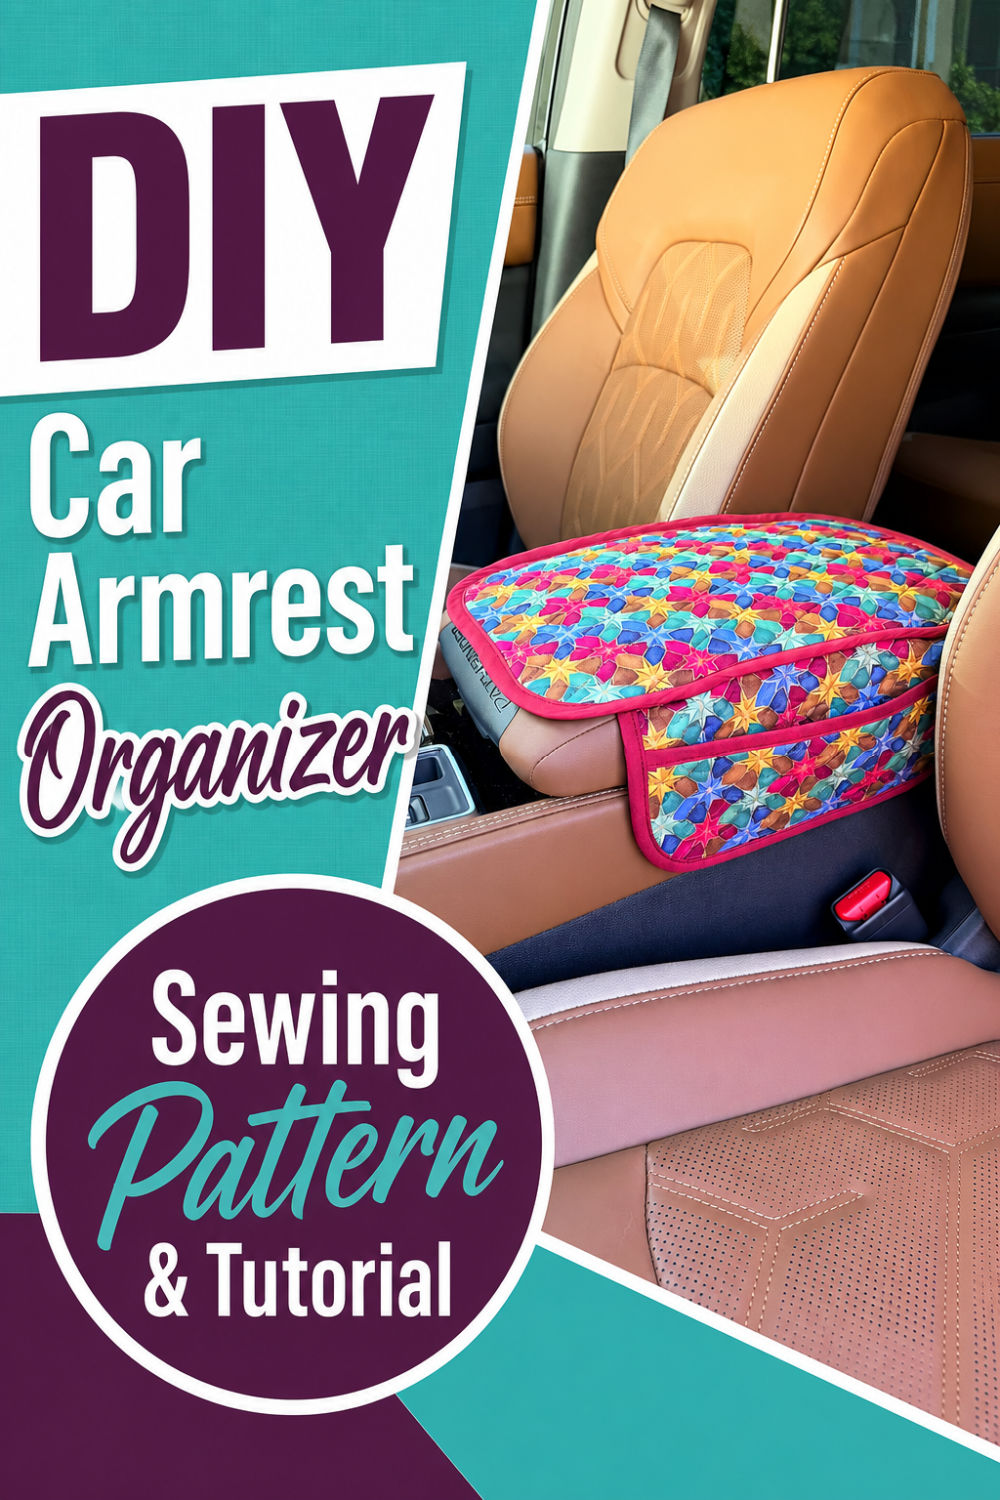
In this sewing tutorial, I’ll show you how to make a padded car armrest organizer with pockets on both sides. It slips over the center armrest, stays in place with elastic straps underneath, and gives you extra storage without taking up any more room in the car.
The side pockets are useful for all those small things that never seem to have a proper place — tissues, glasses, charging cables, pens, lip balm, receipts you fully intend to throw away someday, and whatever else normally ends up in the cup holders or between the seats.
Prefer to read without ads?
I created a PDF version of this guide for anyone who likes to keep sewing guides saved, printed, or easy to read without ads. It includes the same helpful information in a simple format you can download and use whenever you need it. In addition it includes a printablke pattern for my organizer (9×14 inches) and instruction to size for your custom size.
The PDF is available in my shop for a small fee. It’s a nice option if you want to support my work and keep this tutorial close to your sewing machine.
But I wanted this organizer for another reason too: the armrest itself. In summer, bare elbows are constantly resting on it. You get into a hot car after being outside, your skin may be a little sweaty, or you come back from the beach with sunscreen still on your arms. All of that eventually ends up on the armrest upholstery.
With this organizer, your elbow rests on a soft, quilted cotton surface instead. And when the organizer needs cleaning, you can take it off and wash it rather than trying to clean sunscreen out of the car upholstery.
So this project does two jobs at once: it gives you some very useful storage and helps protect the armrest underneath. Plus, because you are sewing it yourself, you can make it in a fabric that looks much nicer than the usual black plastic car organizer.
Mine was made to fit the center armrest in my Nissan Pathfinder, but I’ll also show you how to adjust the pattern for a different armrest size. Cars may not agree on the size of anything, so a little measuring comes first.
What You’ll Need
The exact amount of fabric will depend on the size of your armrest, especially if you are adapting my pattern to fit a different car.
- Quilting cotton for the right side of the organizer
- Coordinating quilting cotton for the back
- Fabric for the binding
- Fusible foam stabilizer (the type commonly used for bags)
- Fusible batting
- Wide elastic for attaching the organizer to the armrest (1 inch wide)
- Freezer paper for making reusable pattern pieces (optional)
- Fabric glue stick (optional)
- Sewing clips (optional)
- Pins (optional)
- Fabric marking pen or pencil
- Rotary cutter
- Cutting mat
- Acrylic quilting ruler
- 25 mm bias tape maker
- Open-toe presser foot for topstitching (optional)
- Walking foot or another foot that handles thick layers well
You may also need my printable pattern, and you can use it as a starting point for the project.
I’ve put it in my shop as a PDF, together with the full detailed tutorial. You can absolutely make the pattern yourself using your own measurements, or you can purchase the PDF and simply adjust the included pattern to fit your own car armrest.
Step 1. Choose the Fabric
I used quilting cotton for my organizer.
You could certainly make something similar from vinyl, faux leather, canvas, or another sturdy fabric, but remember where this organizer is going. Your arm will be resting on the top of it.
Quilting cotton feels much nicer against bare skin, especially in warm weather. Vinyl may be practical, but on a hot summer day your elbow may have a different opinion.
Choose a print you enjoy and, if possible, one that works with the colors inside your car. I chose this colorful print because it coordinates nicely with my car interior.
For the back, I used a plain coordinating cotton.
The organizer is going to be quilted, so regular quilting cotton becomes much more substantial once the layers are put together.
Step 2. Adjust the Pattern to Fit Your Armrest
Before cutting fabric, measure your car’s center armrest.
My pattern was made for a Nissan Pathfinder, so unless you happen to own the same model, check the measurements before using it as-is.
Measure:
- the width of the armrest; 9″ for me
- the length of the armrest; 14″ for me
- the length you want the pockets to hang down on each side
Compare those measurements with the pattern.
To change the width
Cut the main pattern piece vertically through the center.
To make it wider, separate the two pieces and add the amount you need between them.
To make it narrower, overlap the two sections.
Tape everything back together.
To change the length
Cut the pattern horizontally through the center.
Spread the pieces apart to make the organizer longer, or overlap them to make it shorter.
Then make the corresponding adjustments to the side pocket pattern pieces.
You don’t need complicated pattern drafting here. We are fitting an armrest, not preparing it for Paris Fashion Week.
Before going any farther, place the paper pattern over the armrest and make sure you like the size.
It is much easier to alter paper now than quilted fabric later.
Step 3. Make the Quilted Fabric Sandwich
I didn’t want the organizer to be just a layer of fabric hanging over the armrest. It needed some body and padding.
For each section, I made a three-layer sandwich:
- Top fabric — the colorful printed quilting cotton
- Middle layer — fusible foam stabilizer (for the main piece) and fusible batting (for side pockets)
- Backing fabric — coordinating plain cotton
Fuse the foam according to the manufacturer’s instructions.
Smooth the layers carefully so you don’t trap folds or puckers inside.
Now quilt the layers together.
I quilted mine with my embroidery machine and used different quilting designs for the main organizer panel and the side pocket pieces.
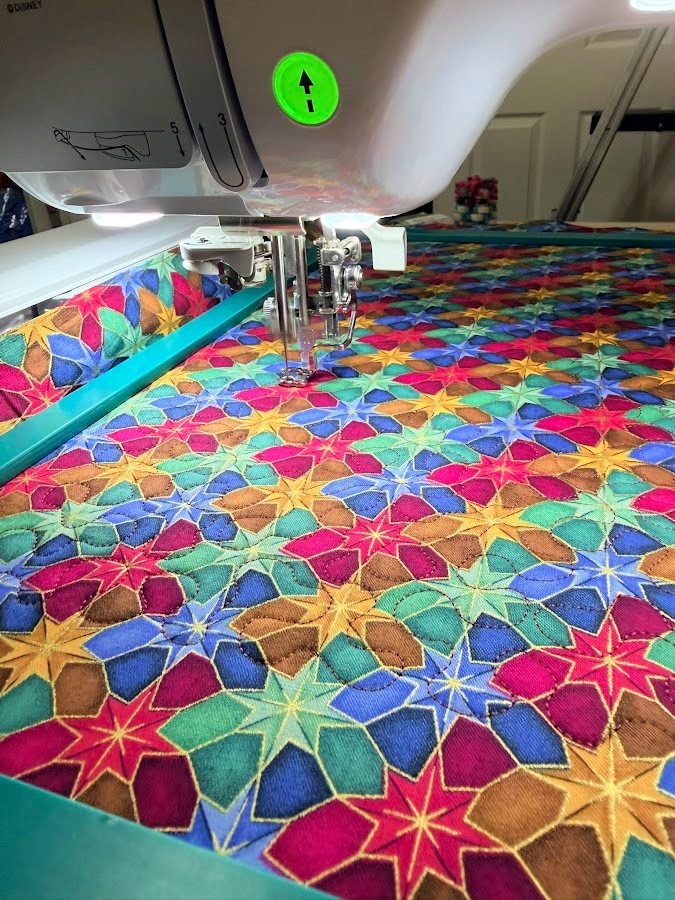
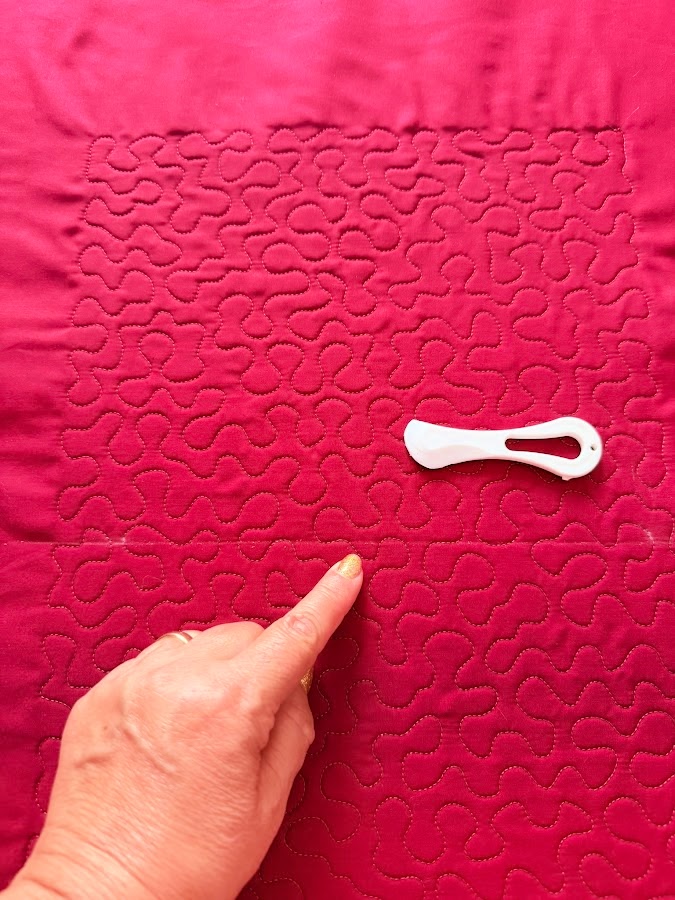
I love using my embroidery machine for quilting because I can start it and watch beautiful, evenly spaced stitches appear.
But an embroidery machine is not absolutely necessary.
You could use:
- straight-line quilting
- diagonal quilting
- a grid
- crosshatch quilting
- free-motion quilting
- decorative machine stitches
Straight-line quilting would be especially easy for this project.
✅ Related tutorial: The Basics of Straight Line Quilting
Quilt a large enough area for all your pattern pieces before cutting them out.
Step 4. Use Freezer Paper to Cut the Pattern Pieces
For this project I tried using freezer paper for my pattern pieces, and I really liked it.
Freezer paper has two sides:
- a regular paper side
- a slightly shiny coated side
Trace the pattern pieces onto the paper side and cut them out.
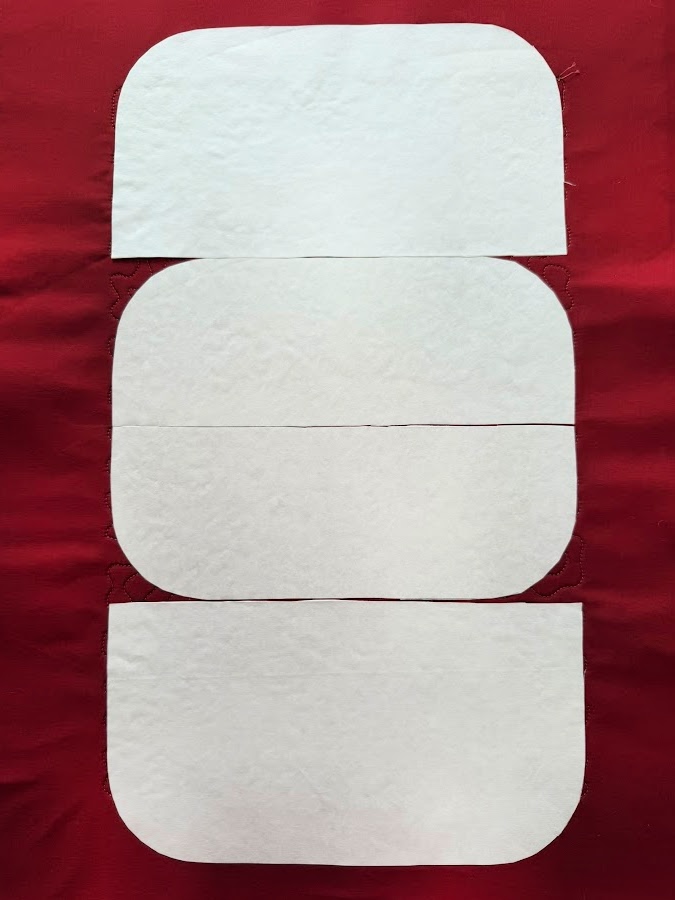
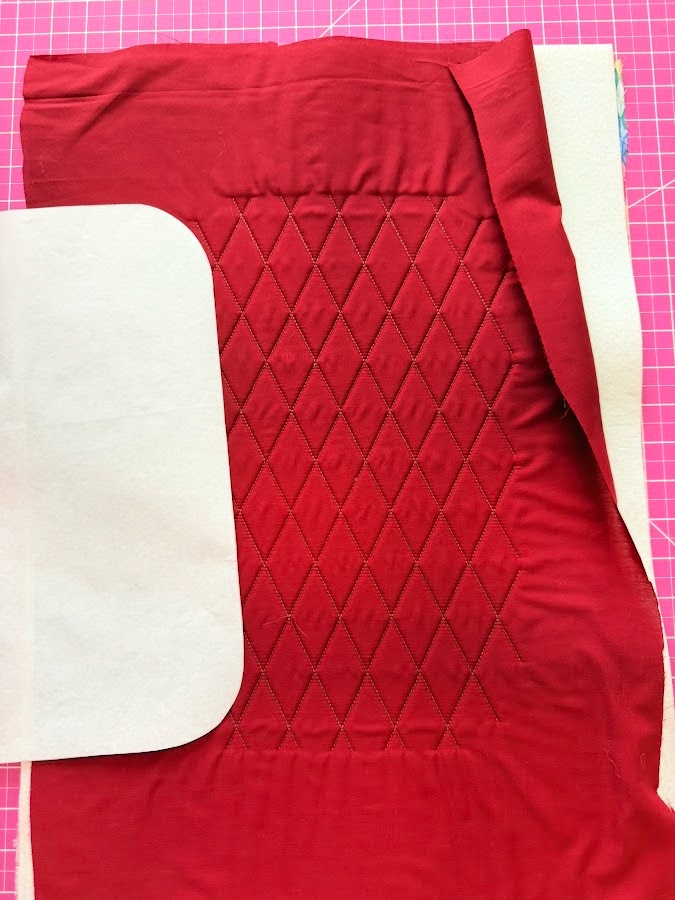
Place the freezer paper pattern shiny side down on the back of your quilted fabric.
Press briefly with a dry iron.
The coating temporarily sticks to the fabric, holding the pattern flat while you cut.
No pins. No pattern weights sliding around.
Cut around the freezer paper pattern.
Then simply peel the paper away.
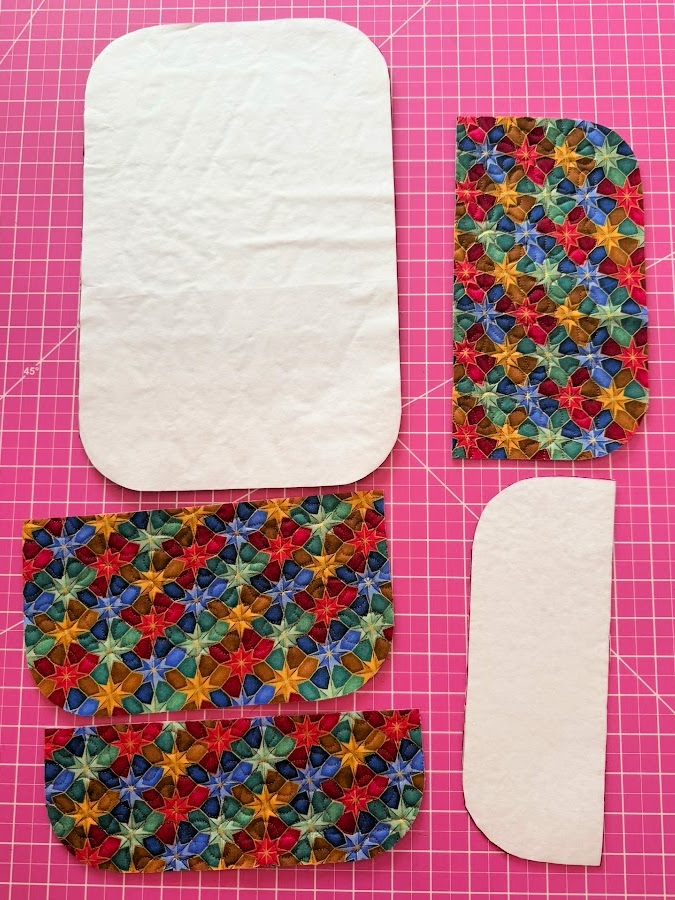
The same freezer paper pattern can usually be pressed onto fabric and used several times, so don’t throw it away immediately.
Cut:
- the main organizer panel
- two side pocket panels
- two smaller pocket pieces
Make sure you have a complete mirrored set for the two sides of the organizer.
Step 5. Cut the Binding Strips
Next comes the binding.
I cut mine on the bias, although for much of this project I think straight-grain binding would also work.
Bias binding does have one big advantage: it stretches slightly and goes around rounded corners more easily.
How to cut bias strips
Start with one straight edge of your fabric. I used the selvage.
Place that straight edge along a grid line on your cutting mat.
Find the 45-degree line on the mat or ruler.
Cut along that line.
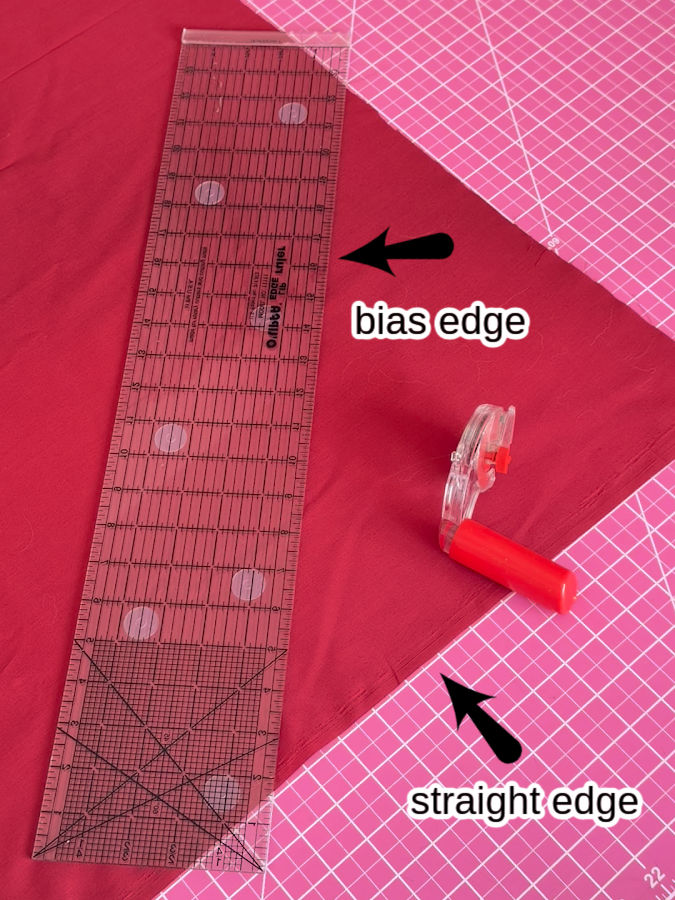
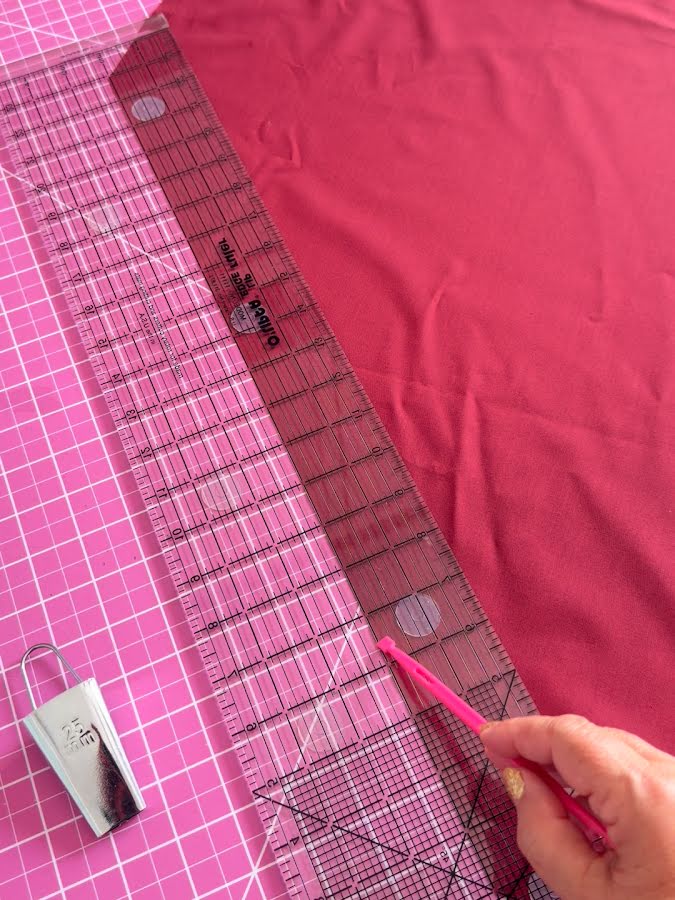
You now have a bias edge.
From this new edge, cut parallel strips.
I cut my strips 2 inches wide (5 cm) because I planned to use a 25 mm bias tape maker.
The important rule with these little bias tape tools is that the number printed on the tool is not necessarily the width of fabric you cut.
Mine says 25 mm, but the strip going into it needs to be about twice that width — approximately 50 mm, or 2 inches.
You will need approximately:
- one long binding strip of about 50 inches for the main organizer
- two shorter strips of about 30 inches each for the side pocket sections and for the upper edges of the smaller pockets
- Join strips if necessary to get the required lengths.
Step 6. Make the Binding With a Bias Tape Maker
Feed one end of the 2-inch fabric strip into the wide end of the bias tape maker.
If the fabric doesn’t want to come through, use a pin or awl in the slot on top of the tool to help pull the fabric toward the narrow end.
Once the fabric appears at the other end, pull a few inches through.
The sides of the strip will automatically fold toward the center.
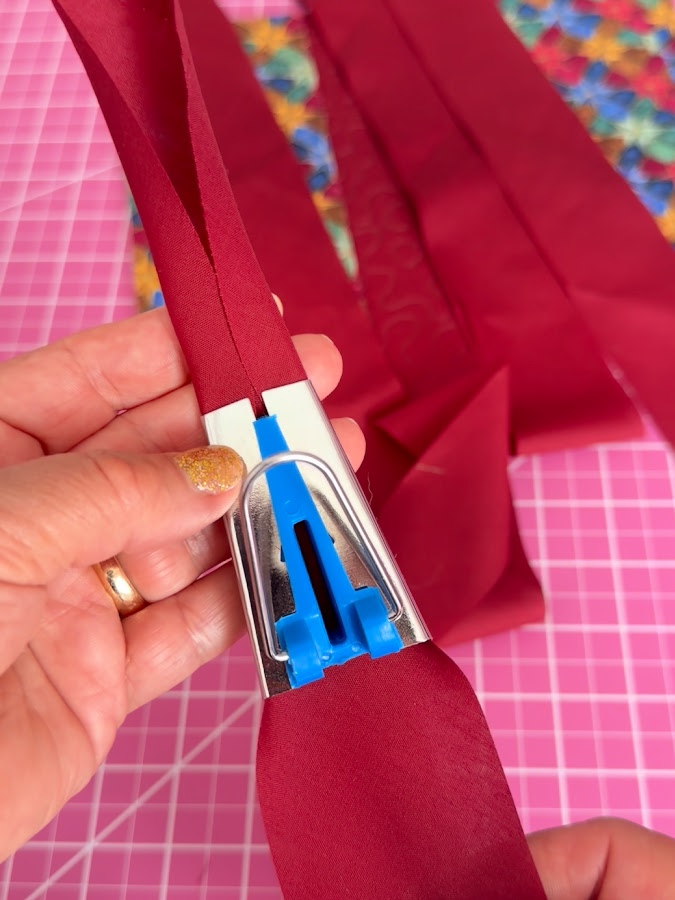
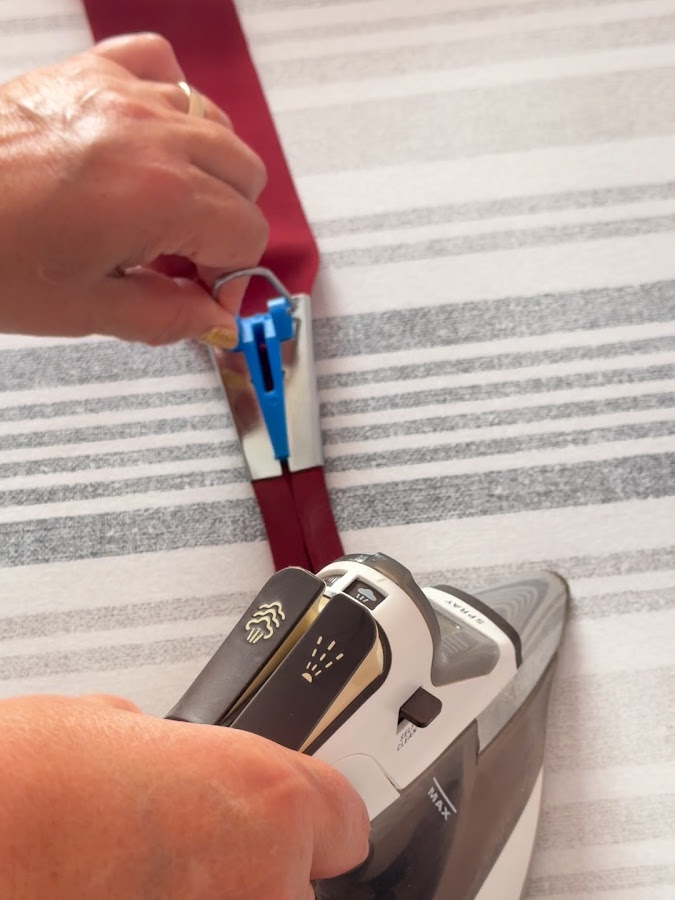
Press those folds with the iron as the fabric comes out of the tool.
Work slowly:
- Pull the tool forward a few inches.
- Press the newly folded section.
- Move forward again.
- Press again.
Continue until the entire strip is folded.
The tool does most of the work. Your main job is to keep feeding it fabric and not iron your fingers, which I consider a reasonable division of labor.
Prepare all the binding strips before you begin attaching them.
Step 7. Bind the Straight Edge of the Small Pocket Pieces
Start with the smaller pocket pieces.
The upper edge is short and straight, so this is the easiest binding on the entire project. Enjoy it. The curves are waiting.
Place the binding over the straight edge.
Professional sewing videos sometimes show people attaching binding perfectly in one pass without a single pin, clip, swear word, or visible sign of fear.
That is lovely for them.
For home sewing, I am very happy to baste first.
For these straight edges, I used a fabric glue stick.
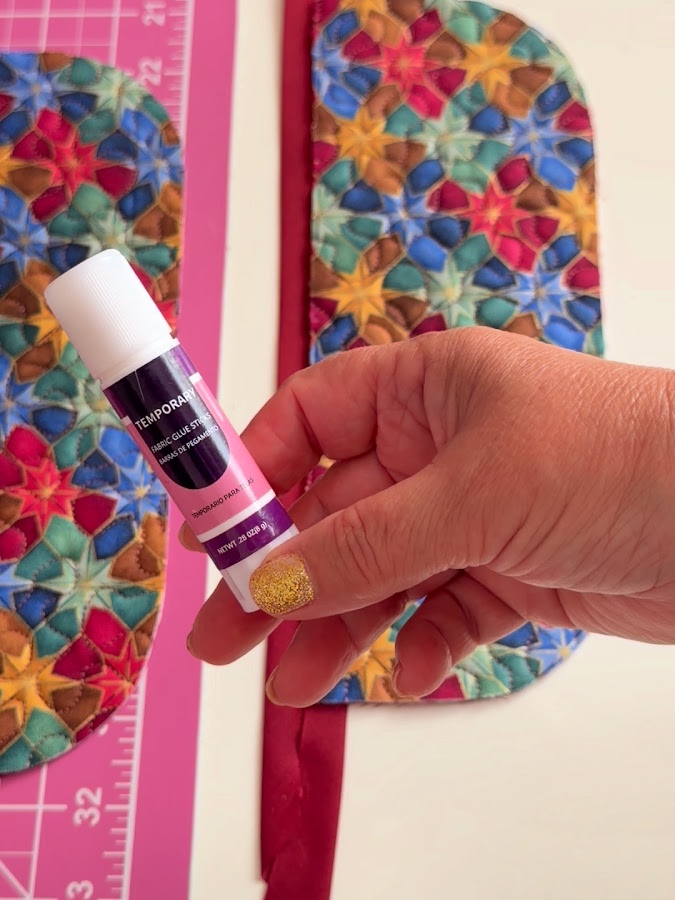
Run a small amount of glue inside the binding and press it around the edge of the quilted pocket piece.
A washable fabric glue stick holds the layers in place temporarily and normally doesn’t gum up the sewing machine needle.
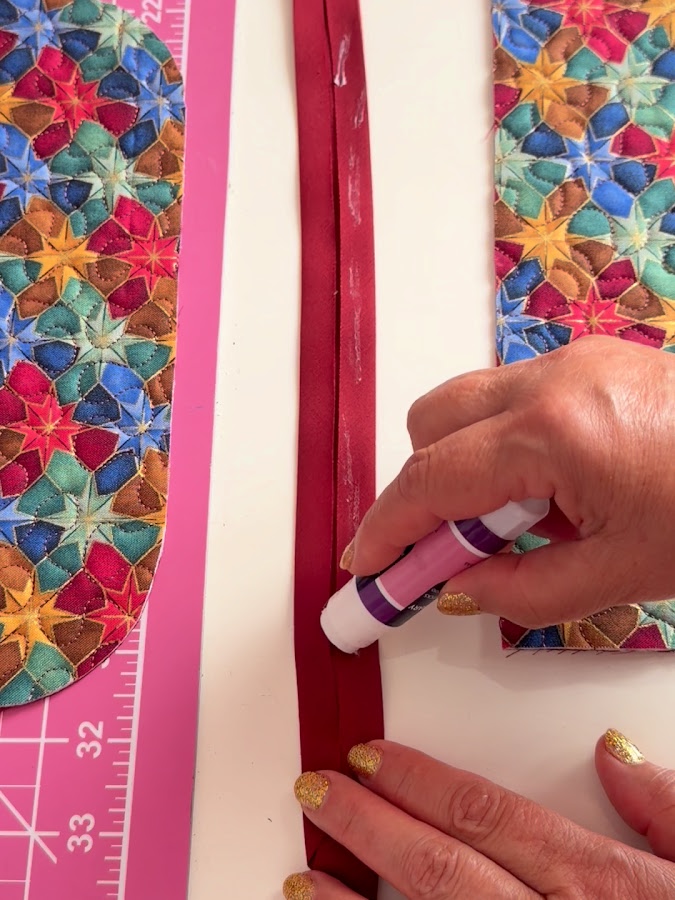
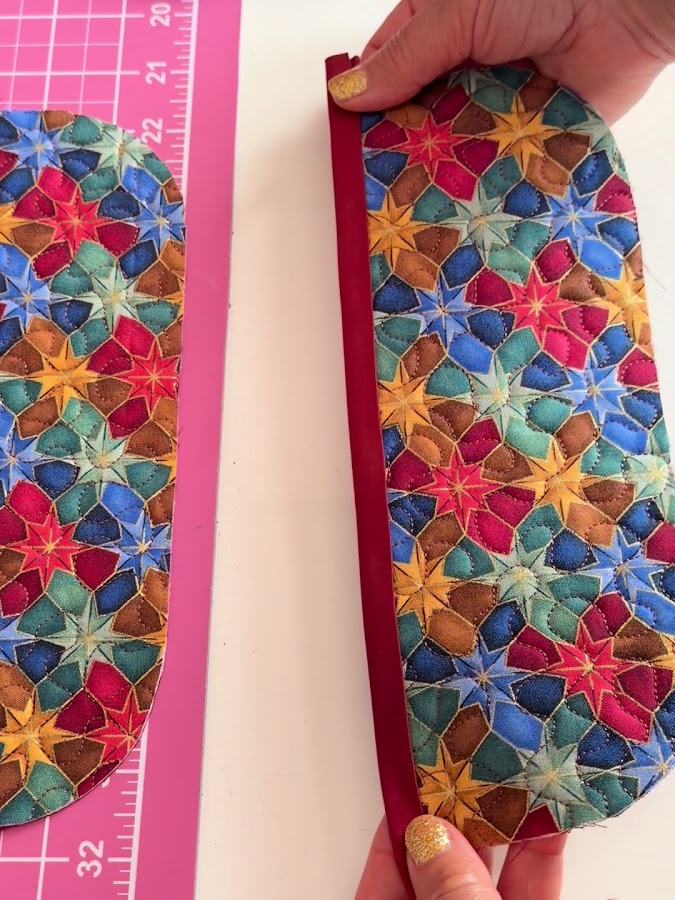
Let it set for a moment.
Then topstitch the binding in place.
I used a 3 mm stitch length for the topstitching.
Repeat for the second pocket piece.
Step 8. Use an Open-Toe Foot for Neat Topstitching
For topstitching narrow binding, I like an open-toe presser foot.
The open front gives me a very clear view of the edge of the binding.
I use the center mark on the presser foot as my guide, then move the needle slightly to the right until the stitching lands exactly where I want it.
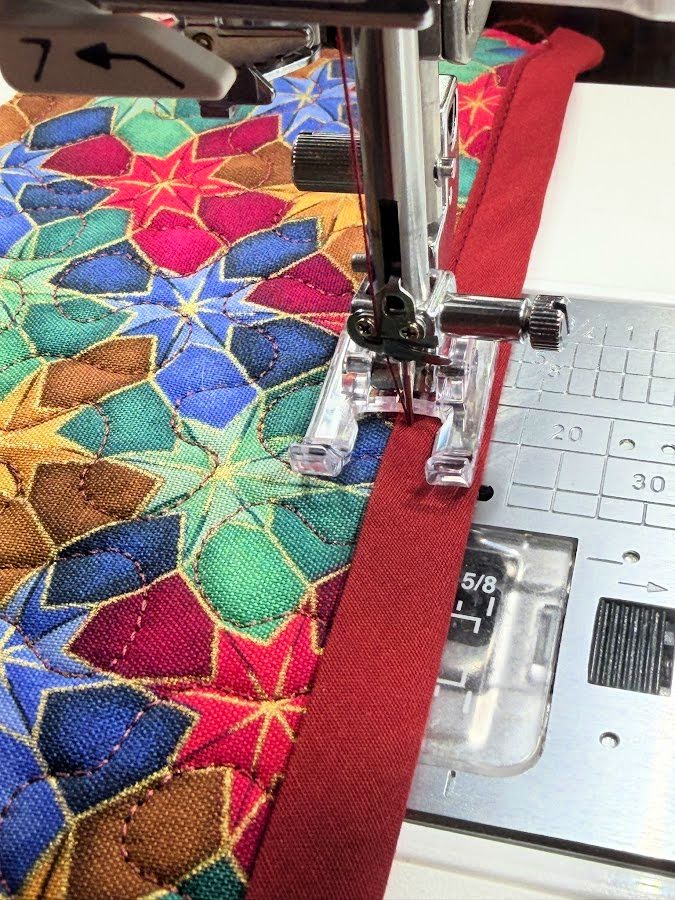
Once the position is set, I can keep the edge aligned with the same mark on the foot.
This makes it much easier to keep the stitching the same distance from the binding edge all the way across.
✅ Related tutorial: Presser Foot Guide: How To Use An Open Toe Presser Foot
Step 9. Attach the Small Pocket to the Side Pocket Panel
Now place one finished small pocket piece on top of one side pocket panel.
Align the lower and rounded outer edges.
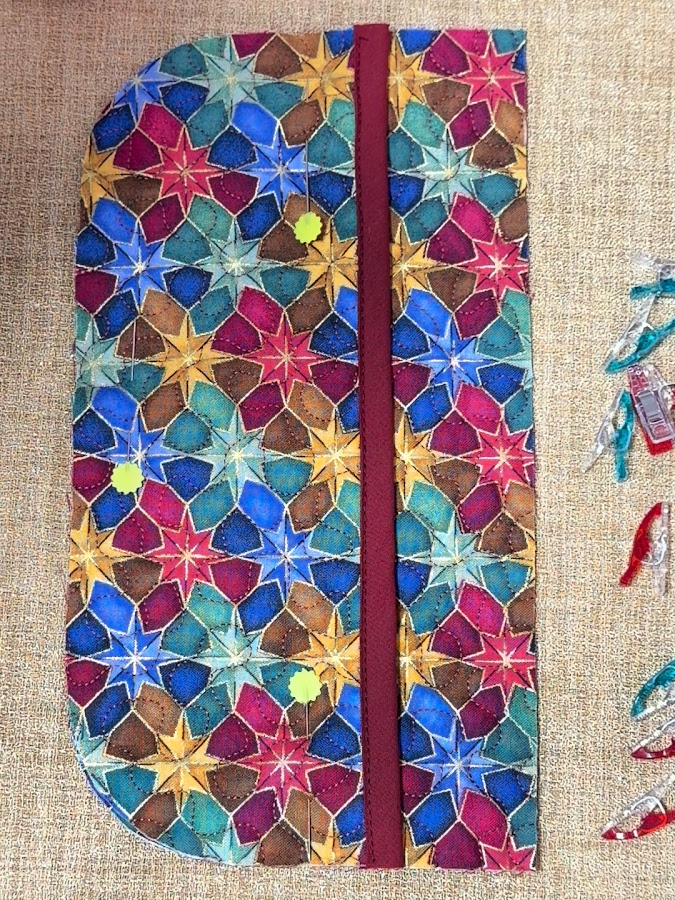
Clip or pin the layers together.
The bound straight edge of the small pocket remains open — this becomes the pocket opening.
Make sure everything lies flat and that both layers match properly around the curves.
Repeat for the second side.
Step 10. Bind the Curved Edges of Each Side Pocket Assembly
Now bind the rounded edge of each assembled side pocket.
This is different from the little straight pocket edge, so I didn’t use the glue stick here.
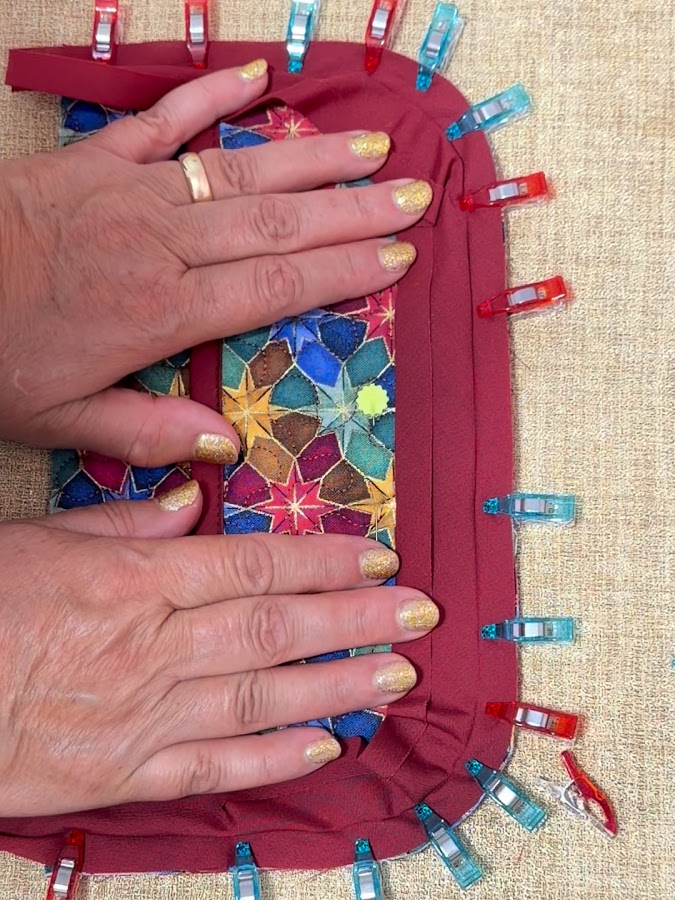
Open one folded edge of the binding strip.
Place that opened edge against the raw edge of the pocket assembly.
Use clips to hold it in place.
I have some newer sewing clips with narrower tips, and I found them very useful here because they grip narrow binding without taking over the entire sewing project.
✅ Related tutorial: Mini Wonder Clips By Clover: Useful Sewing Tool Or Just Another Notion?
Because I cut the binding on the bias, it stretches enough to follow the curves.
The first time, I tried easing it around the rounded corners without clipping or notching the seam allowance, and it worked.
Later, when I attached binding to the larger main piece, I made several small clips around the tight curves.
That was easier.
Stitch the binding to the pocket, sewing directly in the fold line.
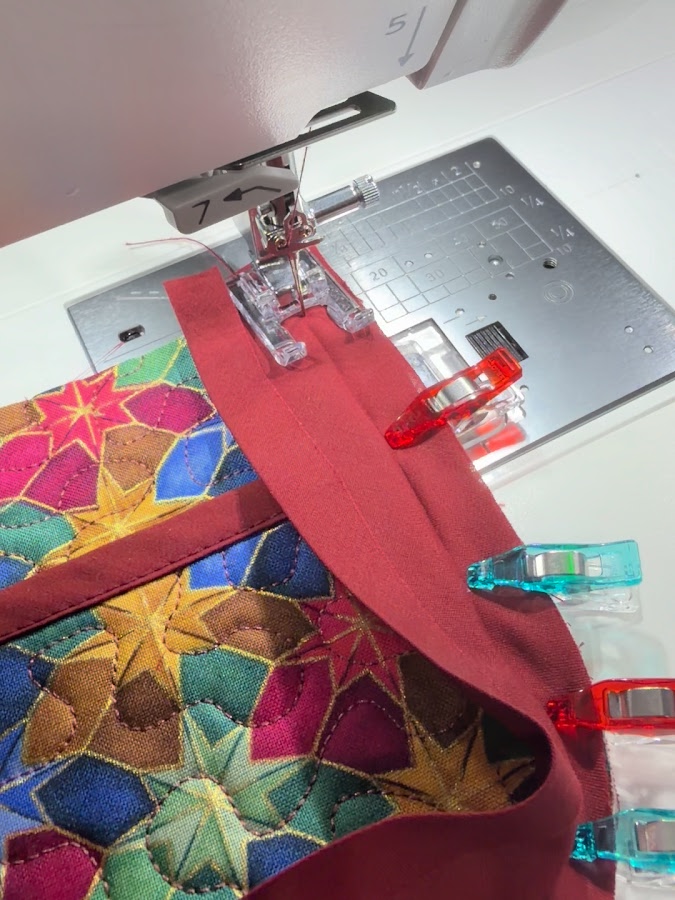
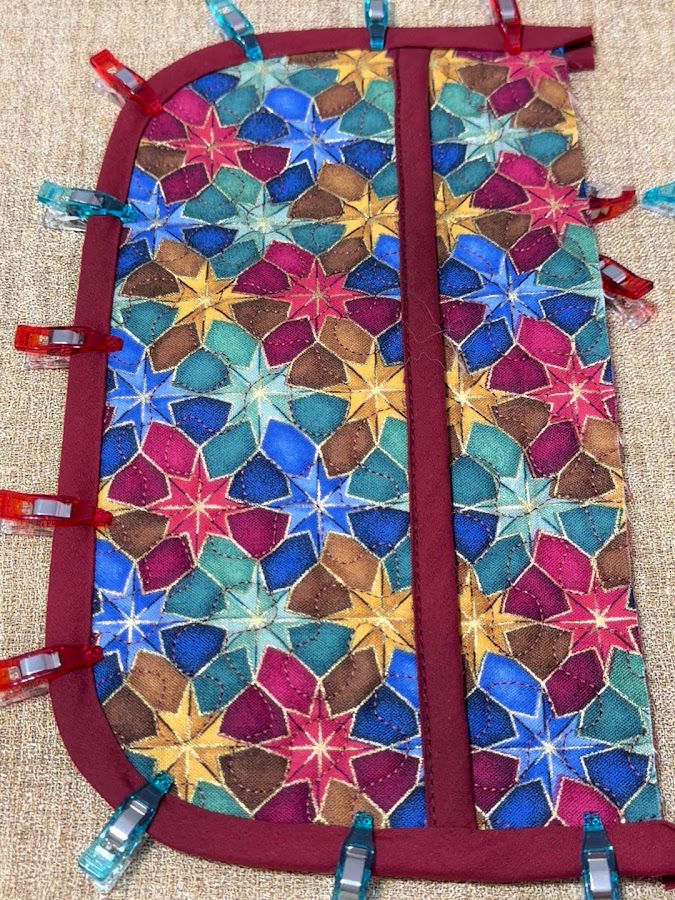
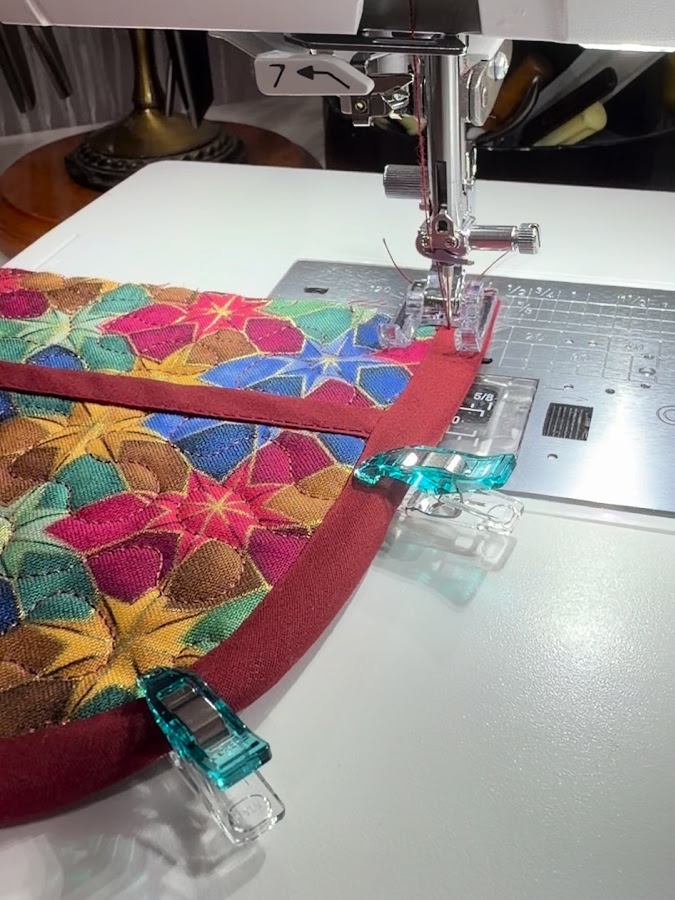
Then wrap the binding around the raw edge toward the other side.
Smooth it into place and topstitch from the right side.
Repeat with the second side pocket assembly.
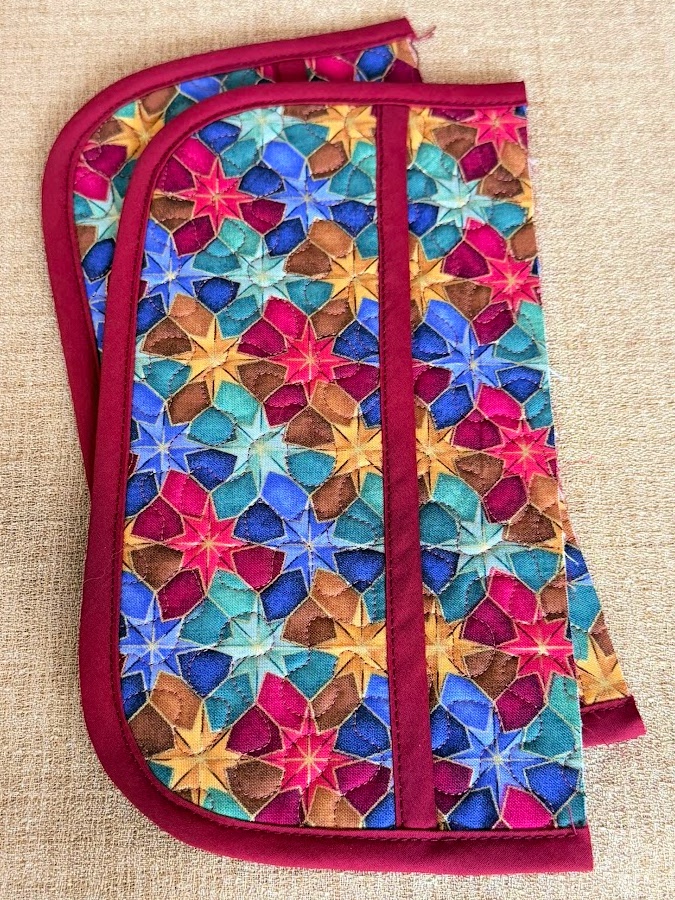
Step 11. Make Both Side Pocket Assemblies
Complete the second pocket exactly the same way as the first.
When finished, you should have two side pocket sections with:
- a padded quilted base
- a smaller pocket on top
- a bound pocket opening
- binding around the curved outer edges
Place the two beside each other and check that they match before attaching them to the main organizer.
Step 12. Add Elastic Straps to the Back
The organizer needs something to hold it securely around the car armrest.
I added two elastic straps across the wrong side of the main panel.
Cut each elastic strip approximately the same width as the main pattern piece, allowing enough length at the ends for attaching it securely.
The elastic will stretch every time the organizer is installed or removed, so don’t attach it with one delicate little line of stitching and hope for the best.
Secure each end firmly.
I used:
- one row of straight stitching
- one row of narrow zigzag stitching
Repeat at both ends of both elastic strips.
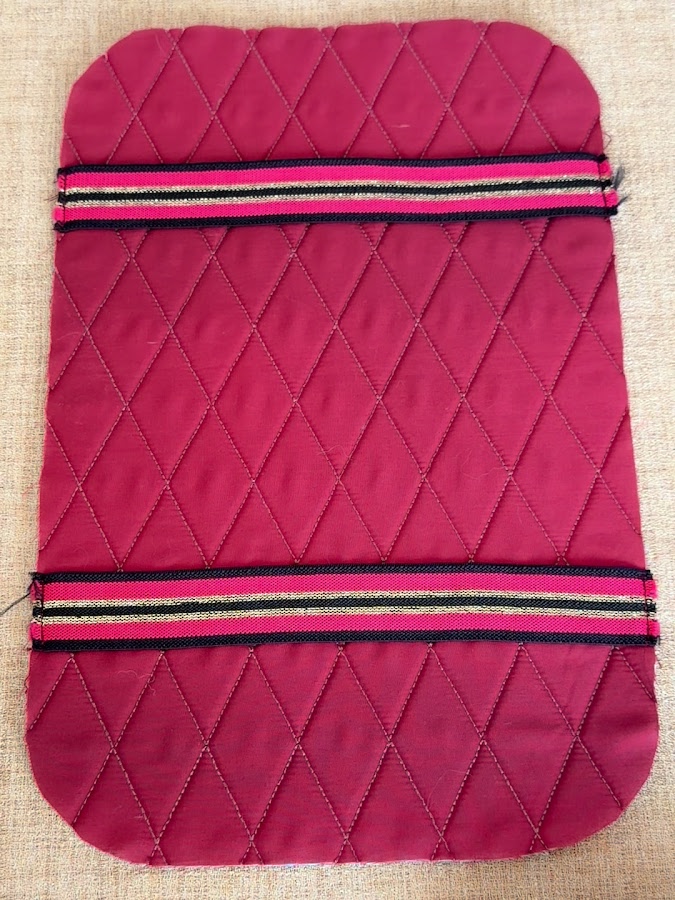
Give the elastic a gentle pull afterward to make sure the stitching is secure.
Better for you to test it now than for the armrest to conduct the test later.
Step 13. Position the Finished Side Pockets on the Main Organizer
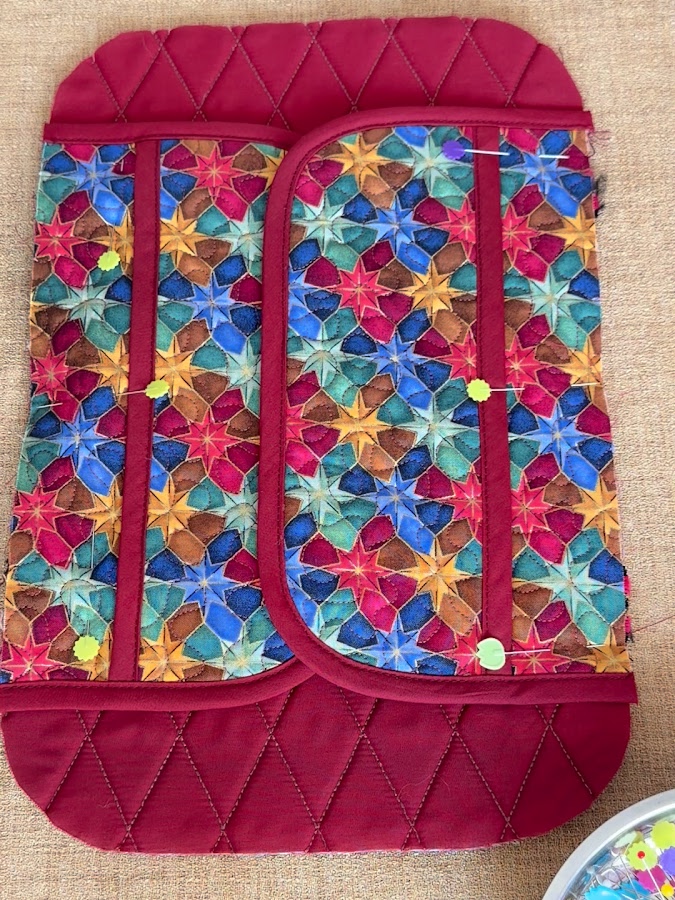
Place both completed side pocket sections onto the right side of the main organizer panel in their proper positions.
Match the raw edges carefully.
Pin to keep all the layers together.
At this point there are quite a few layers involved:
- quilted main panel
- quilted side panel
- foam
- backing fabrics
- binding
Your sewing machine is about to become very aware that this is not a pillowcase.
Check the arrangement before sewing.
Make sure both pockets face the correct direction and that the openings will be upright when the organizer is installed on the armrest.
Step 14. Attach the Binding Around the Entire Organizer
Now bind the outside edge of the whole organizer.
For this final binding, I attached the strip first to the wrong side of the organizer.
There is a reason for doing it this way.
After the first edge is sewn, the binding can wrap over the raw edge and fold onto the right side.
This lets me see the final folded edge while topstitching.
It also helps me make sure:
- the binding width looks even on the right side
- the second folded edge is definitely caught by the stitching
Open one folded side of the binding.
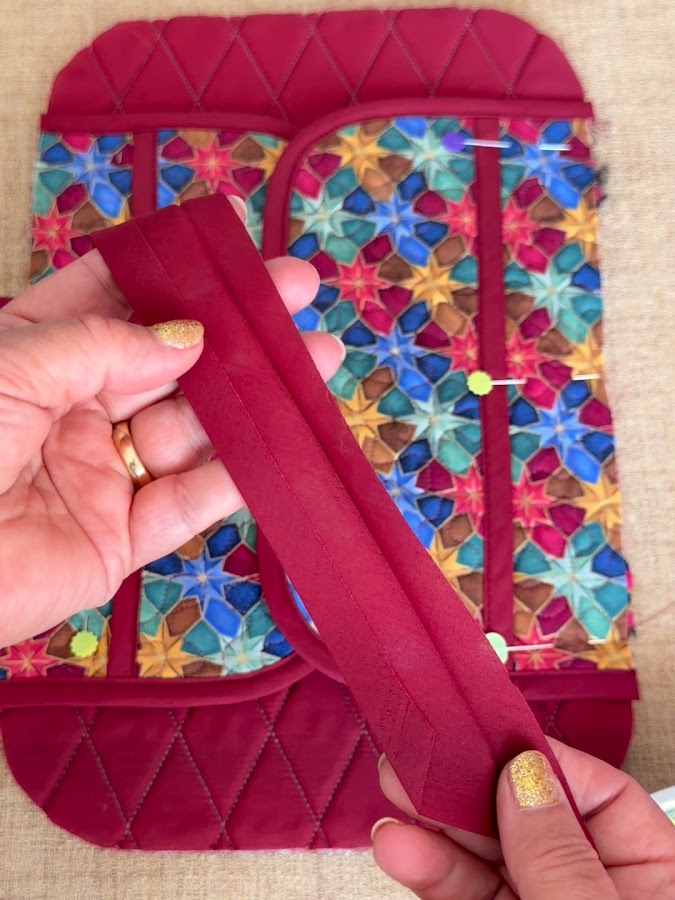
Match the raw edge of the strip with the raw edge of the organizer.
Clip generously.
Around the rounded corners, make several small clips/notches in the binding seam allowance so it can spread around the curve.
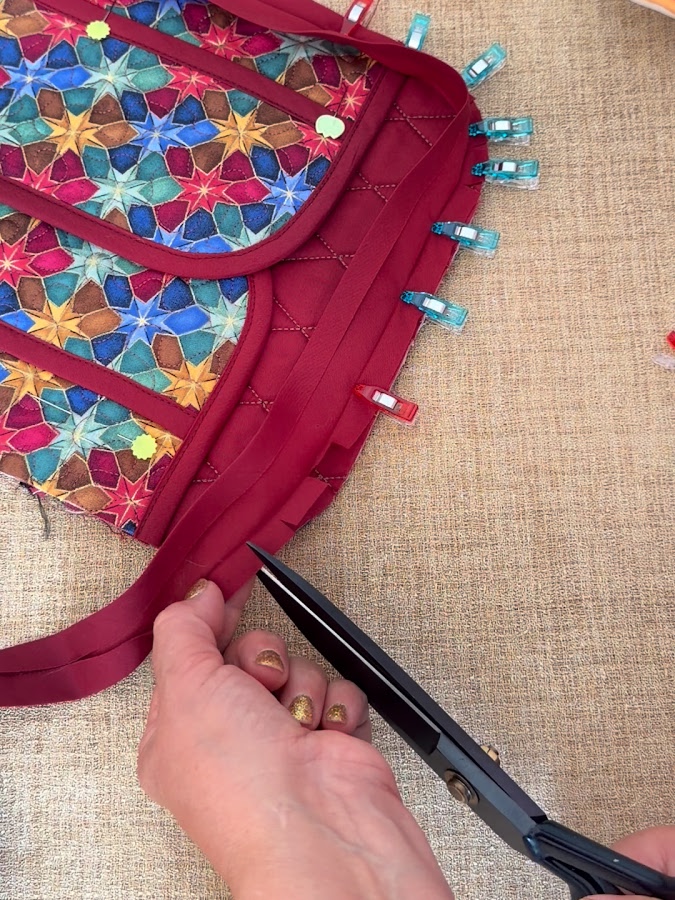
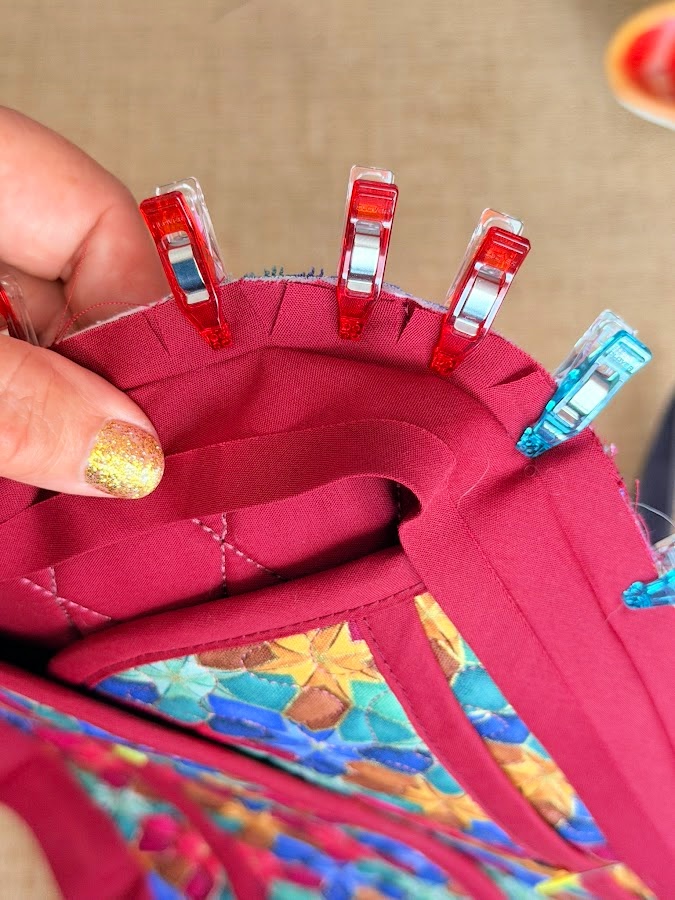
Do not cut through the future stitching line.
Four or so small clips around a tight curve can make a big difference.
Without them, the binding may bunch.
Fabric does not enjoy turning corners just because we asked nicely.
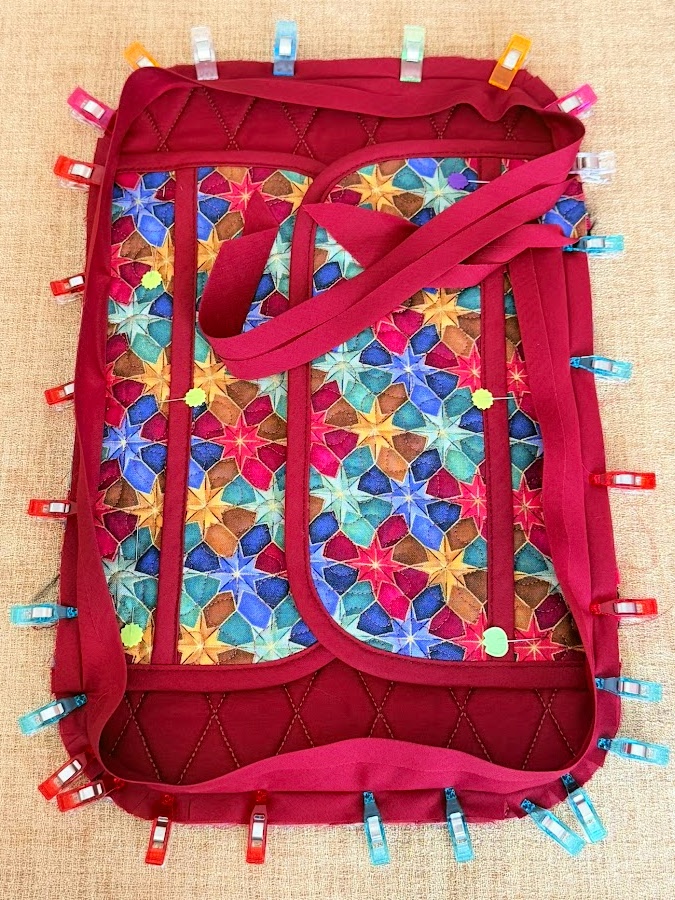
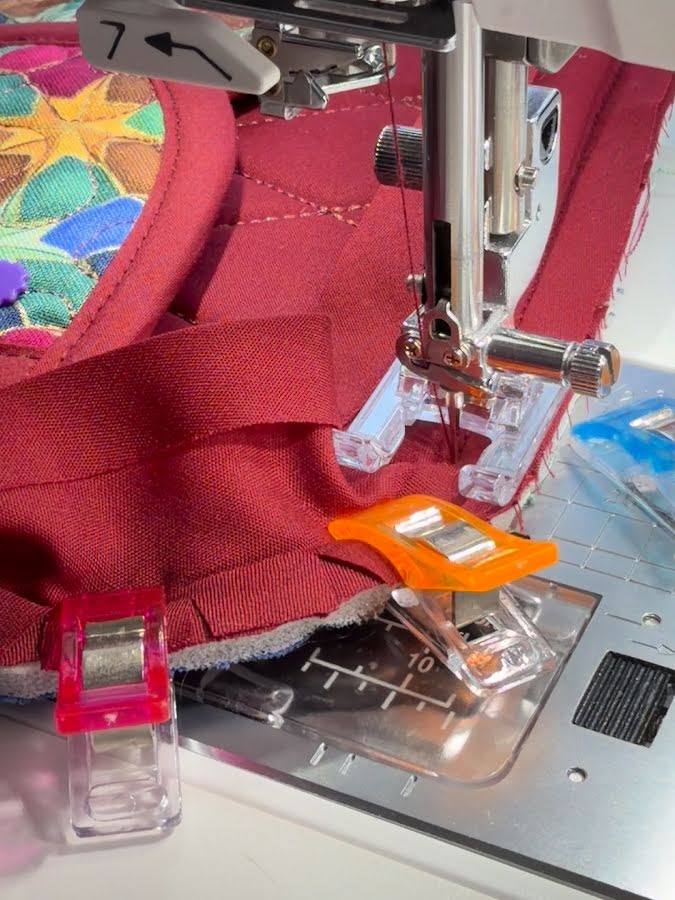
Sew the binding in place, stitching directly along the fold line.
Step 15. Join the Binding Ends
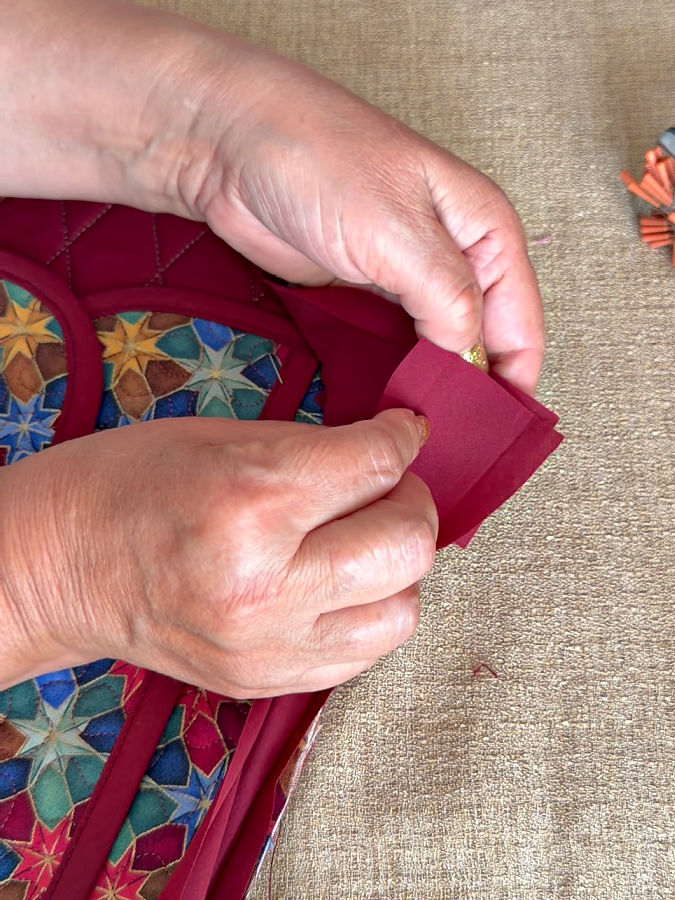
As you sew the binding around the organizer, stop when you are about 9–10 inches from where you started. Leave both binding ends loose.
Now we need to join them so the binding looks like one continuous strip.
Lay the two loose binding ends over each other. If you have a lot of extra fabric, trim some away first — but don’t get too enthusiastic with the scissors yet.
Arrange the binding so the beginning end is underneath and the finishing end lies on top.
Measure from the end of the bottom strip by the same amount as the width of your original binding strip. My binding was 2 inches wide, so I measured 2 inches and made a mark.
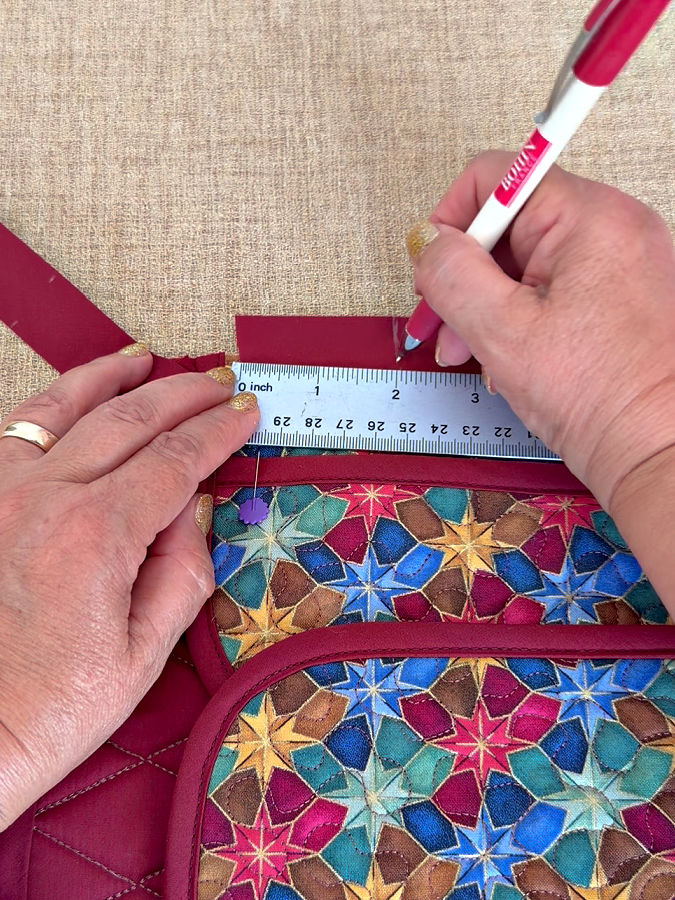
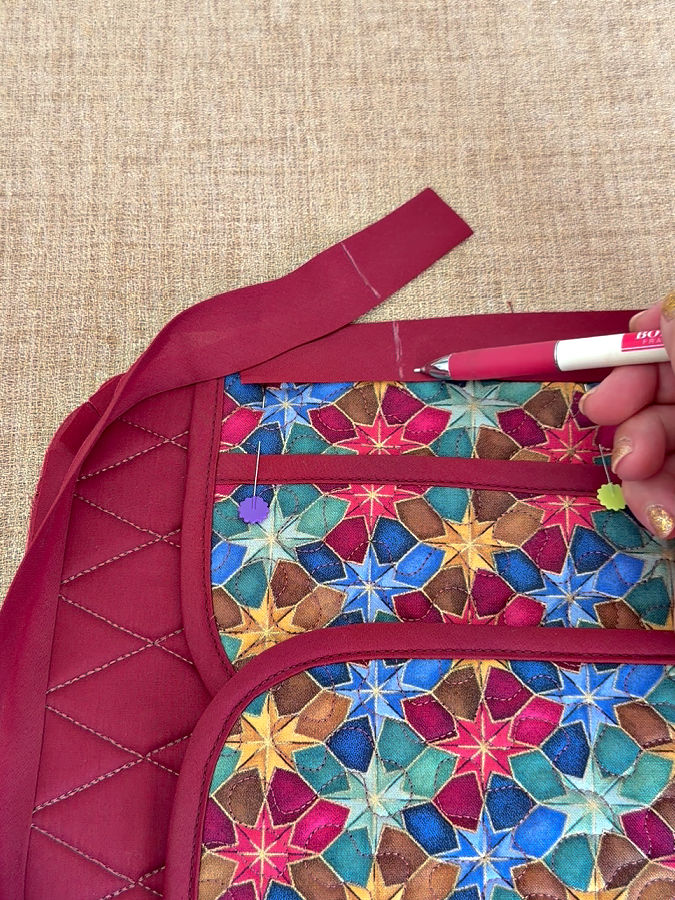
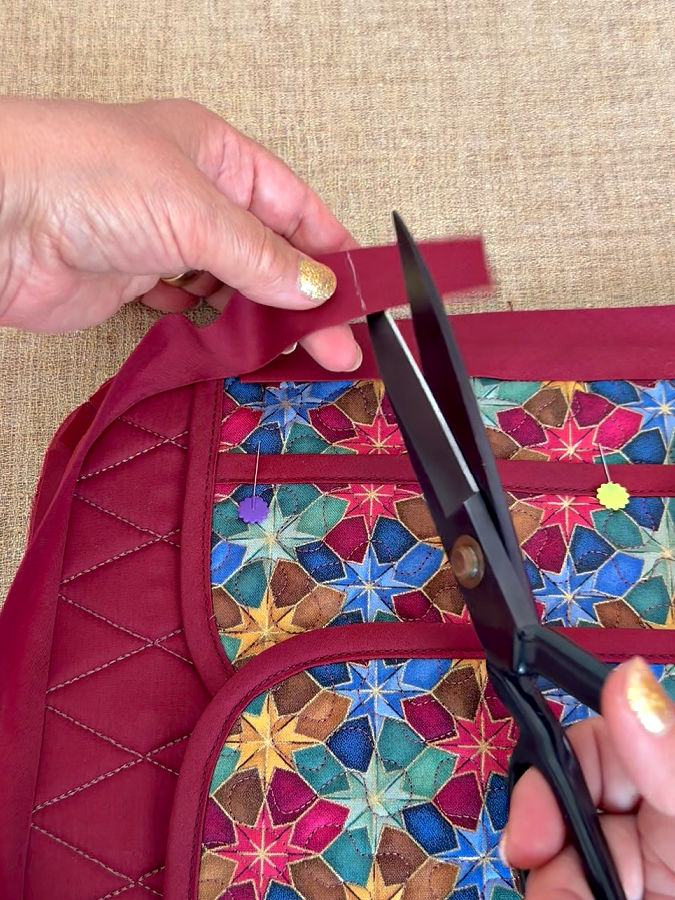
Lay the upper binding strip smoothly over the lower strip and transfer that mark onto the upper strip.
Cut the upper strip at the transferred mark.
This gives you the correct amount of overlap for joining the two ends.
Open the binding ends (maybe press them so they are not folding) and place them right sides together, crossing them at a 90-degree angle. Sew diagonally across the overlap at a 45-degree angle.
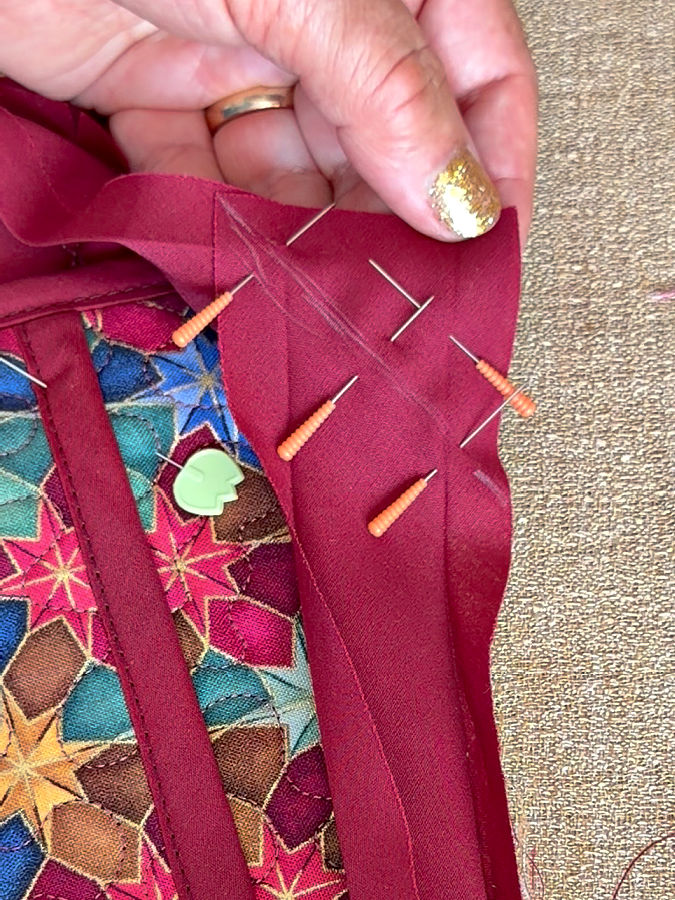
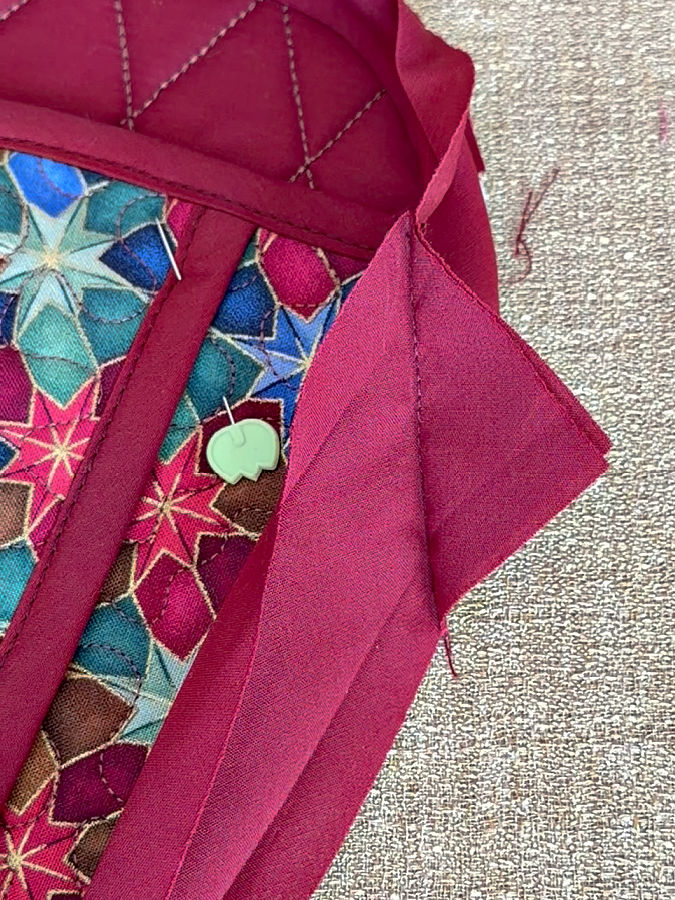
Before trimming anything, straighten the binding and check that the joined strip fits nicely around the organizer. This is an excellent time to check. After cutting away the extra fabric is a much less excellent time.
Once you know the length is correct, trim the excess fabric close to the diagonal seam, leaving a small seam allowance.
Finger-press the seam allowance open to reduce bulk.
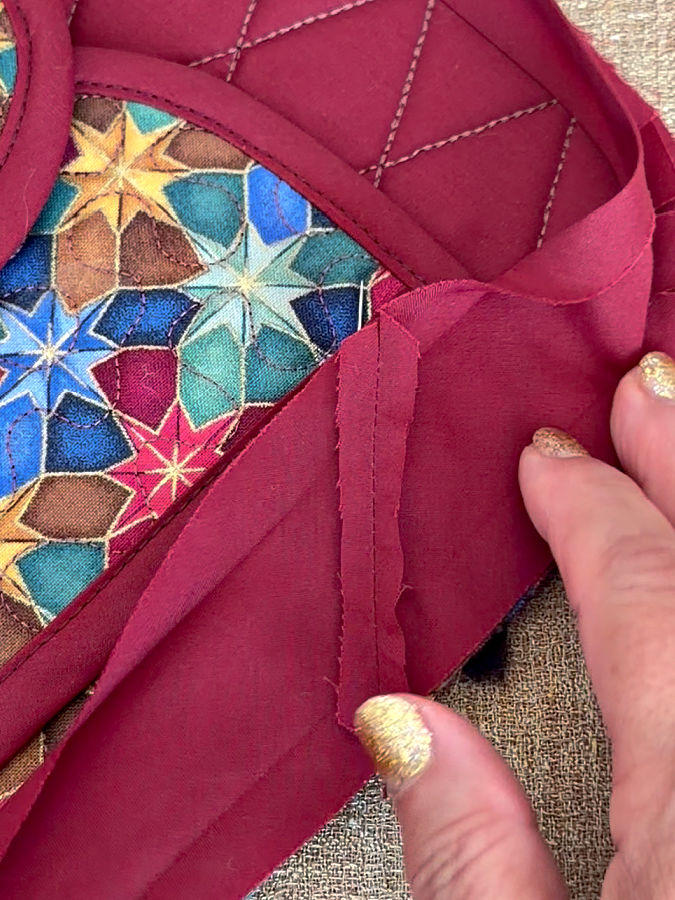
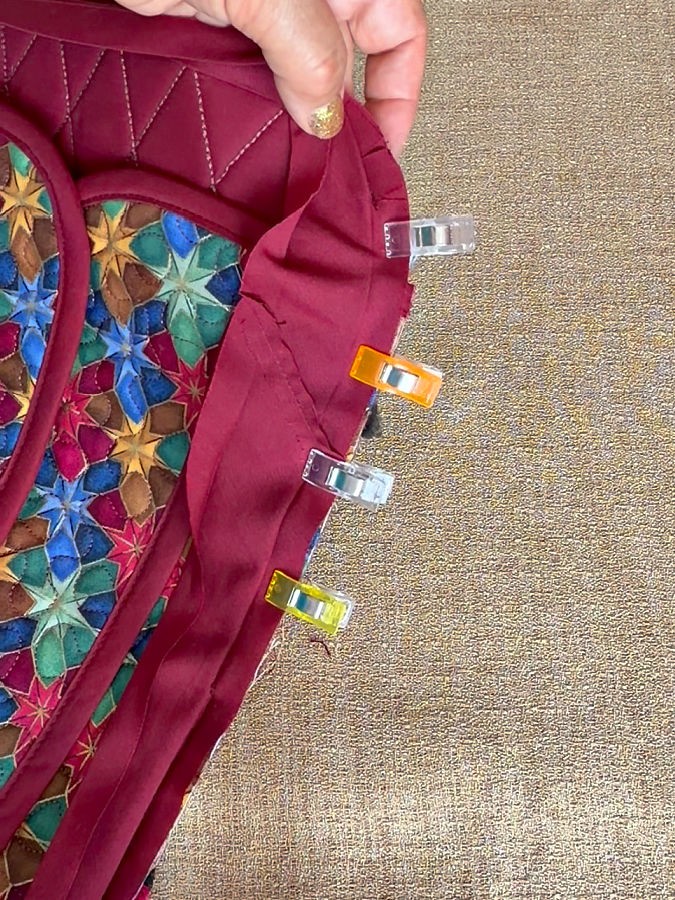
Fold the binding back into its original shape and lay it along the remaining raw edge of the organizer.
The join should now lie flat and look like part of one continuous binding strip.
Finish sewing that last section of binding to the organizer.
And there we are — no bulky overlap, no obvious beginning or end, and hopefully no evidence that two separate pieces of fabric were ever involved.
Step 16. Fold the Binding to the Right Side
After the first side is sewn, fold the binding over the raw edge toward the right side of the organizer.
The remaining folded edge should cover the previous stitching line.
Work around the organizer gradually.
Smooth the binding.
Clip it in place every few inches and use extra clips around the rounded corners.
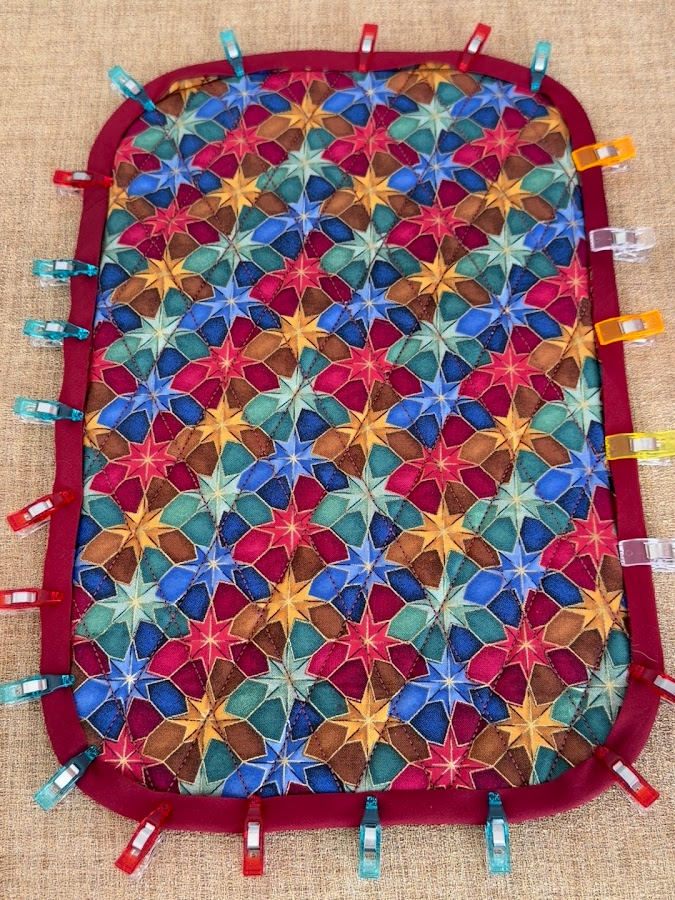
Check the back occasionally to make sure the binding is wrapping around the edge properly.
Don’t rush the curves.
A rounded corner requires persuasion, not speed.
I used clips all the way around the organizer to hold the folded binding in place before topstitching.
But I noticed something I didn’t like. Because this was bias binding, I was getting a few small ripples and tiny tucks along the folded edge.
The clips were holding everything, but they couldn’t guarantee that one of those little folds wouldn’t turn into a permanent pucker the moment I stitched over it.
And after doing all this work, I wasn’t interested in sewing a wrinkle permanently into the most visible part of the organizer.
So I decided to hand-baste the binding before topstitching it by machine.
A thimble really helps here
Hand-basting this organizer was not quite the same as basting two layers of quilting cotton.
At this point I was pushing the needle through binding, quilted cotton, foam, backing, pocket layers, and sometimes even more layers where everything overlapped.
In some places I could barely push a regular hand-sewing needle through.
I tried thicker and longer needles too, but they didn’t solve the problem. Some were even harder to push through, and the thicker ones left holes in the binding that I didn’t like.
The simple solution was a thimble.
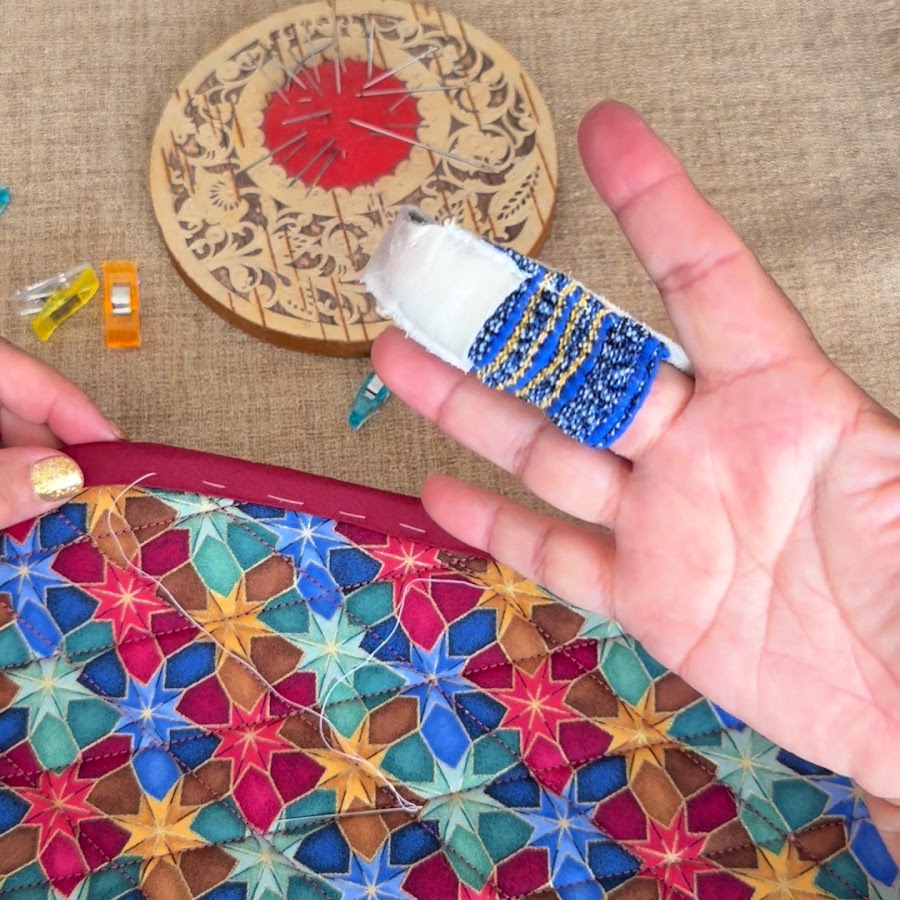
I prefer a leather thimble for this kind of sewing. It gives me enough grip and protection to push the needle through those thick layers without the back of the needle digging into my finger.
And when you are pushing hard on a needle, protecting your finger suddenly stops feeling like an old-fashioned sewing tradition and starts feeling like a very good idea.
Once the binding was basted securely and the little ripples around the curves were smoothed out, I was ready to topstitch.
Step 17. Topstitch the Final Binding — and Deal With Skipped Stitches
I started topstitching the final binding with my open-toe foot because it had worked beautifully on the smaller pieces.
Then I started getting skipped stitches.
A lot of them.
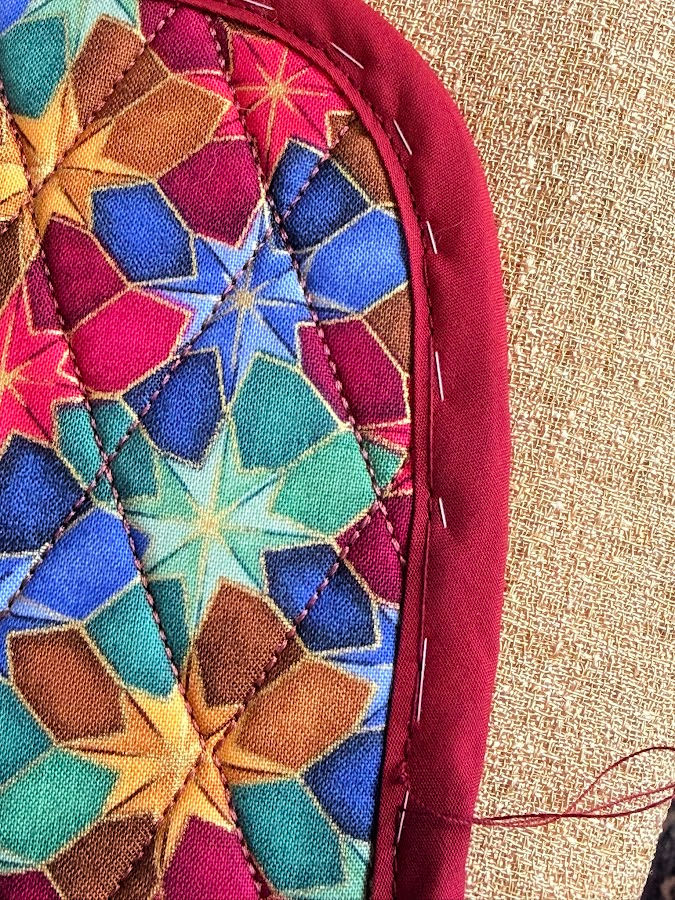
At this point the machine was sewing through several layers of cotton, fusible foam, quilted sections, pockets, and binding. Quite thick.
So I started troubleshooting.
First, I changed the needle to a bigger size – 90/14.
Still skipped stitches.
Next, I increased the presser-foot pressure.
Better.
But I was still getting occasional skipped stitches.
Finally, I changed the presser foot.
I switched to the slim walking-style foot on my Janome Horizon 9450QVP — the Professional Grade Foot HP.
That made the difference.
It handled the bulky layers beautifully and the topstitching became consistent again.
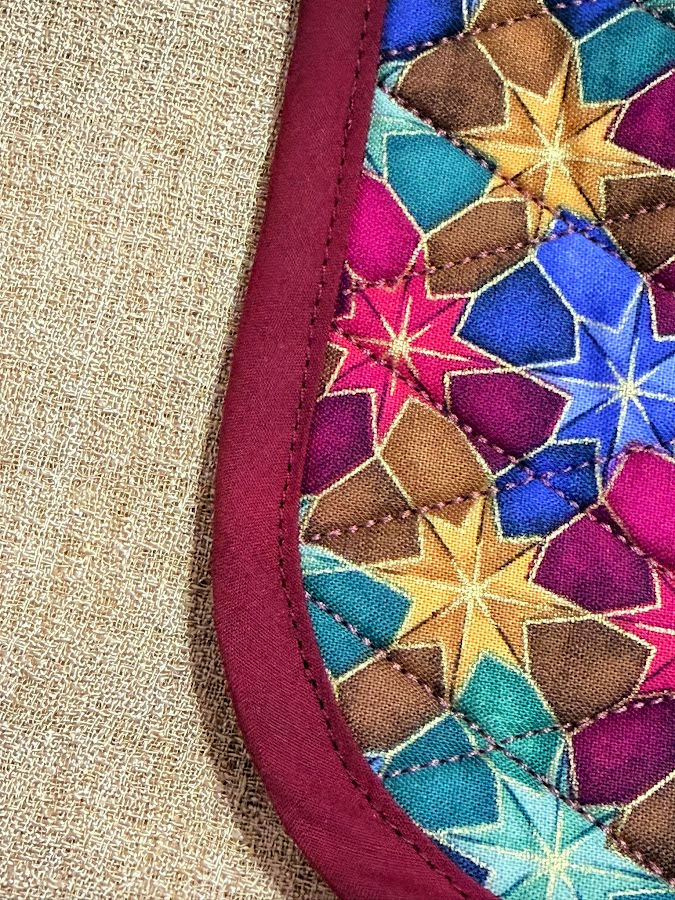
If your machine struggles here, try:
- a fresh needle suitable for thick layers
- adjusting presser-foot pressure if your machine allows it
- a walking foot
- a dual-feed foot
- slowing down
- turning the handwheel manually over especially bulky areas
This was a good reminder that skipped stitches aren’t always solved by changing the needle.
Step 18. Finish and Install the Organizer
Once the final binding is topstitched, inspect the entire organizer.
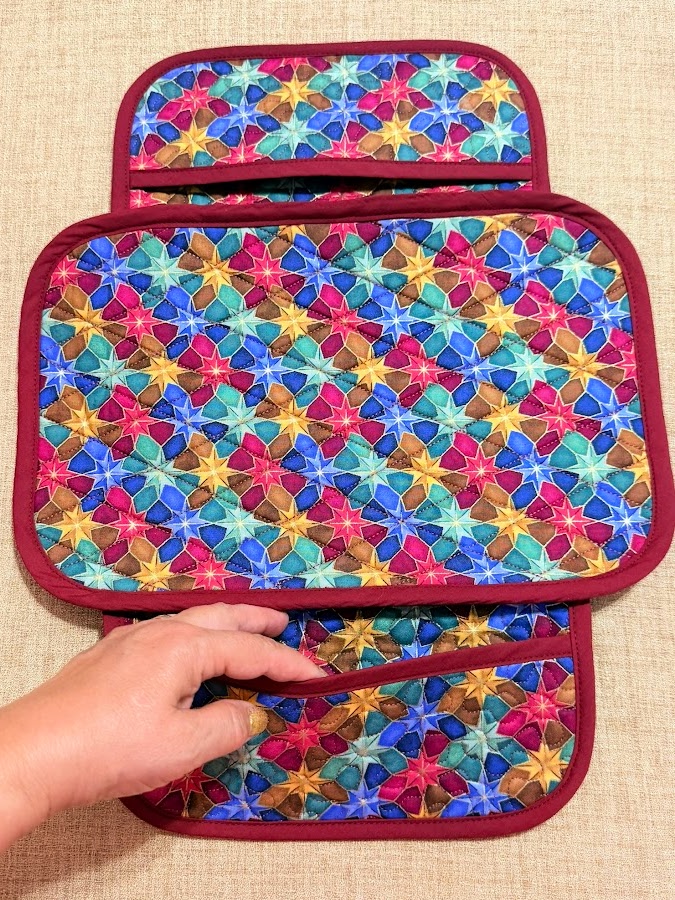
Trim loose threads.
Check the pocket openings.
Check the elastic stitching.
Make sure all the binding has been caught securely on both sides.
Then take it to the car.
Slide the elastic straps around the center armrest and position the padded main section on top.
The two pocket sections should hang down on either side.
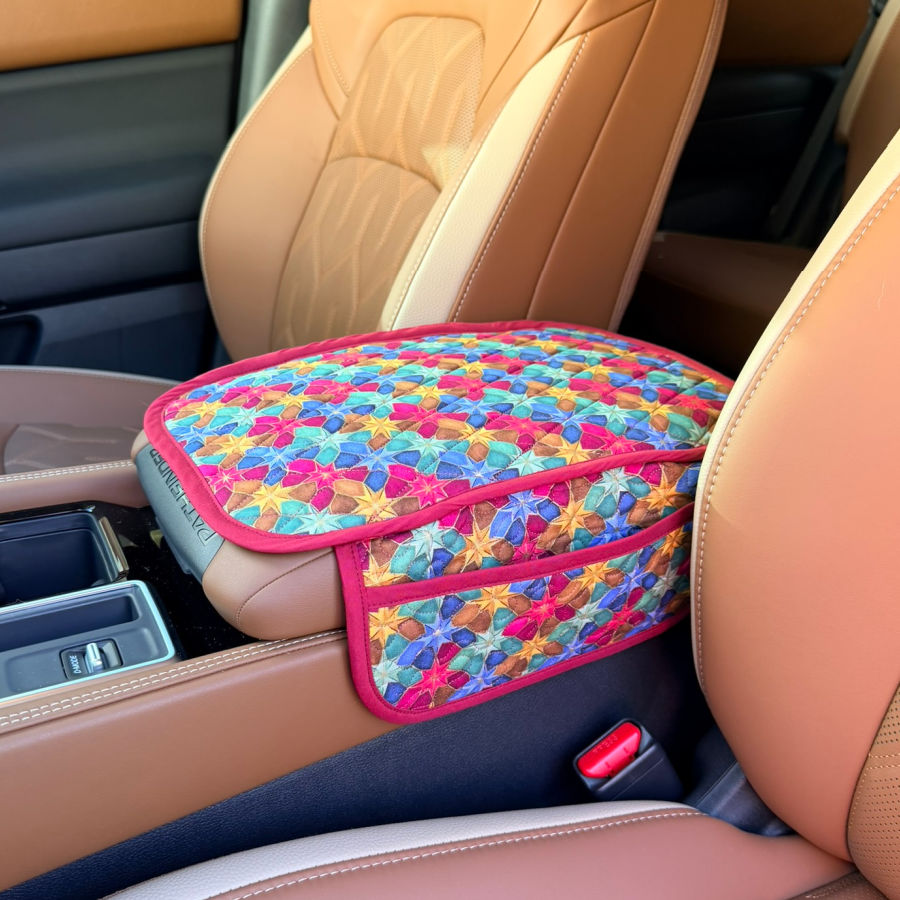
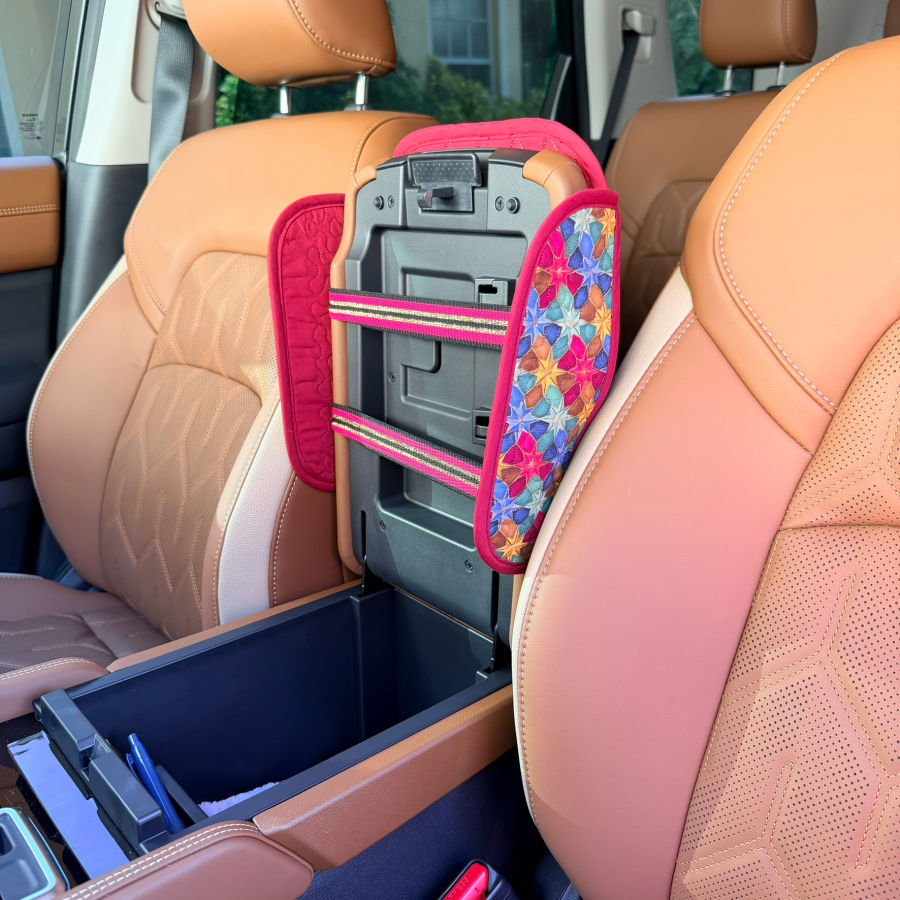
Now you have:
- a padded cover for the armrest
- pockets on both sides
- a little more storage
- something made to coordinate with your car
- and one fewer excuse for not knowing where you put that pen
The organizer is finished!
Do you think this organizer earned a place in the car? If you’d like to make one too, save this pin (see below) to your sewing board so you can find the tutorial later, and follow me on Pinterest for more sewing tips, projects, and ideas.

latest posts
- 15 Sewing Machine Parts You See All the Time — But Probably Ignore
- Adjustable No Buckle Elastic Belt DIY: Sewing Tutorial
- 23 Useful Things to Watch for on Amazon Prime Day
- Sewing Thread Secrets: 8 Tiny Details You Probably Never Noticed — But Should
- Bias Tape Tutorial: How to Make Bias Tape With a Bias Tape Maker
- 10 Easy-to-Miss Features on Sewing Supplies You Should Be Using
- Twin Needle Sewing: My First Try Was a Mess, But Here’s What Worked
- 10 Rules That Made Me a Better Sewist
- How to Make a Lightweight Summer Neck Scarf with a Lettuce Hem