Create Your Own Yo-yo Christmas Tree: Step-by-step Tutorial
Creating a fabric yo-yo Christmas tree can be a fun holiday project. It involves layering fabric yo-yos of various sizes to mimic the tiers of a traditional Christmas tree. Yo-Yo Christmas trees offer a unique twist on holiday decor, blending traditional craft with festive creativity.
Here’s a step-by-step tutorial.

What You’ll Need to Make Yo-Yo Christmas Tree
- Fabric in various colors or patterns (preferably Christmas themed). You can always use the scrap pieces you have around!
- Thread
- Hand sewing needle
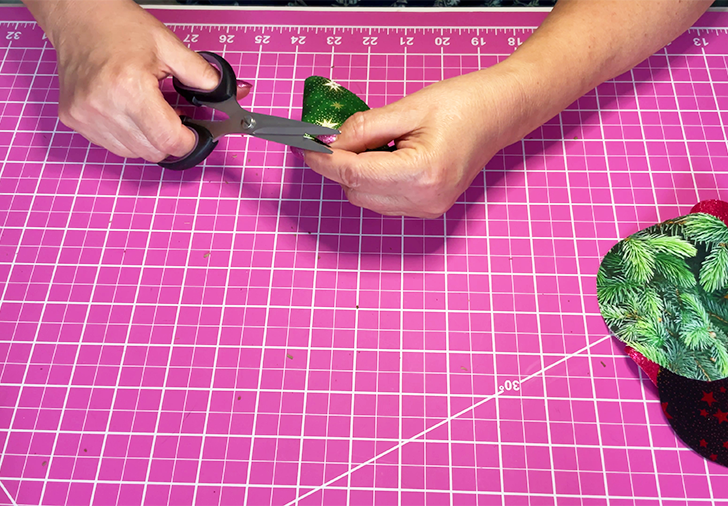
- Fabric Scissors
- Collection of circular templates in 12 different sizes
- Fabric marker
- Star for the top of the tree (you can make it yourself)
- Wood dowel about 10” long
- Container that will serve as the base of your tree. I used a stone candle holder.
- Small piece of Styrofoam
- A piece of foam interfacing
Optional things
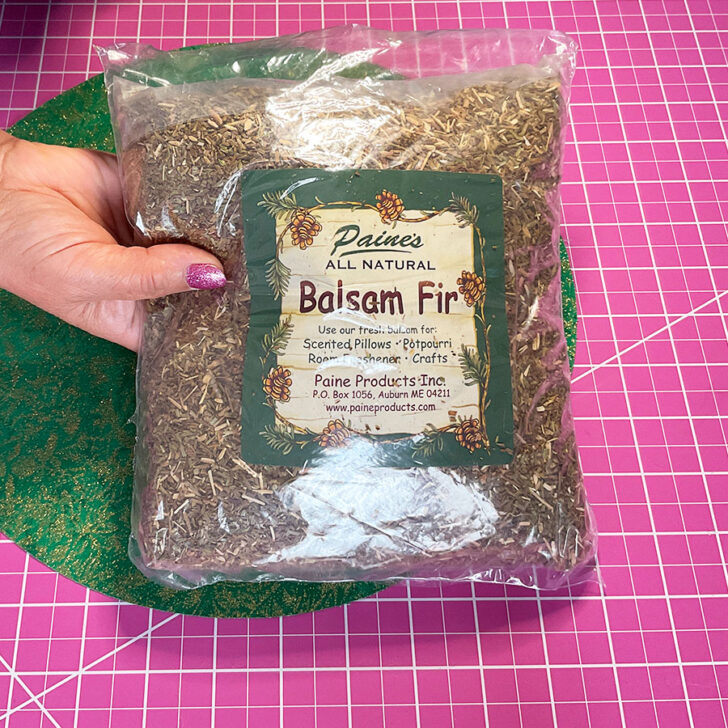
- A bag of Balsam Fir Sachet Filling
- LED string lights
- Small (6mm, 1/4″) pom poms
- Universal glue (Crafter’s Pick)
A full list of all of these items is here: shopping list for the yo-yo Christmas tree.
If drawing the circles isn’t your thing, I’ve made it easier for you. All the circle templates you’ll need are available in my Resource Library, and you can download them at no cost if you are a subscriber to my newsletter.
If you are not a subscriber click the link below to subscribe and download your FREE templates from my Resource Library.
Step-by-step Instructions
#1. Choose the Fabric for Your Tree
You can start by selecting fabrics that match your Christmas palette or repurpose old clothing and linens for an eco-friendly approach. I also used some pieces of fabric scrap.
Question: if I use the pieces, can they still be called “scrap” 😀?
Note: Some of the links on this page are affiliate links. This means I will receive a commission if you order a product through one of my links. I only recommend products I believe in and use myself.
Traditional colors like reds, greens, and golds are always a good choice, but don’t shy away from non-traditional hues such as metallics. I found a very nice selection of metallic fabrics on Amazon.
Incorporating different shades and tints within your chosen color range can add depth and interest to the overall design. For instance, a variety of greens ranging from olive to emerald can mimic the natural variations found in a real tree. And you can add a few pops of contrasting colors to represent the colorful ornaments.
You can also use a mix of fabrics with different textures for example, satin, velvet, corduroy, and lace to give each yo-yo a distinct feel and appearance.
Instead of traditional Christmas fabrics, you can use materials with unexpected prints like vintage fabrics, children’s character prints, or even upcycled materials from old clothing.
Upcycling fabric from old clothing, linens, or other fabric scraps is an environmentally friendly option. And I also think that it infuses the tree with a sense of history and sentimentality. Patterns from a worn-out quilt or the texture from an old flannel shirt can contribute to the tree’s unique story.
Repurposing materials aligns with the sustainable spirit of the season and can inspire conversations about the origins of the fabrics and the memories they hold. This way, each yo-yo in your tree can become a patchwork of past experiences.
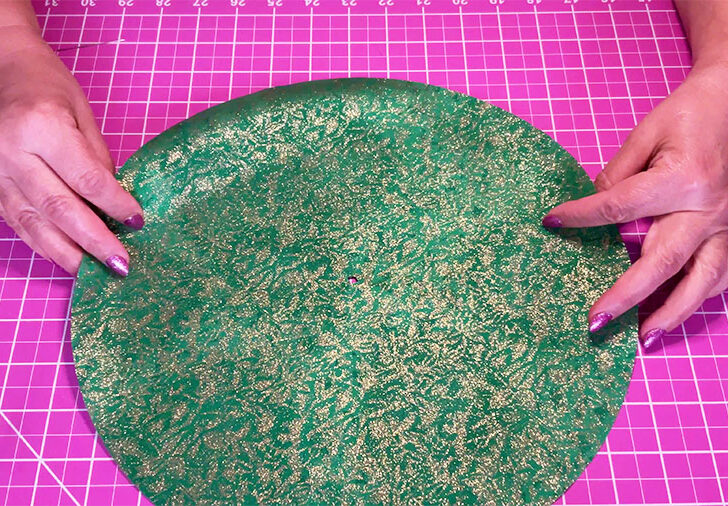
#2. Prepare Your Fabric Circles
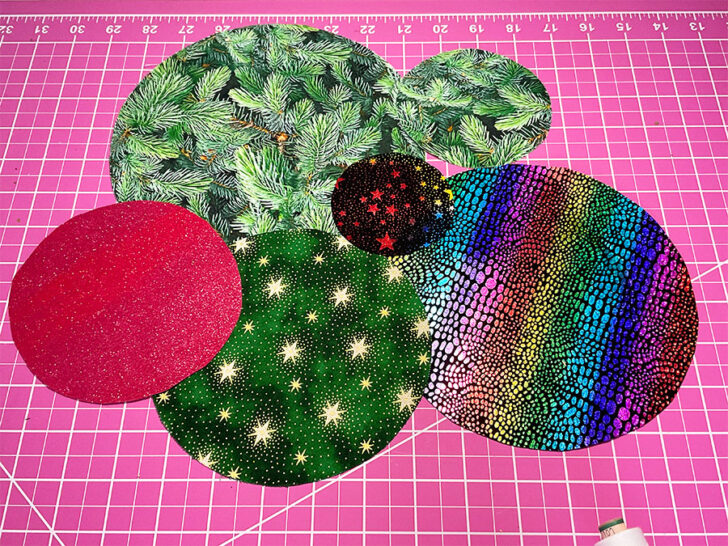
Using the provided circular templates, cut out fabric circles. You’ll need 12 circles ranging in size from 13 inches to 3 inches, mostly in 1 inch increments.
For cutting some of my circles, I used a unique circle ruler that made the process quite efficient. To use this ruler, I first folded a square piece of fabric into quarters, creating a smaller, layered square.
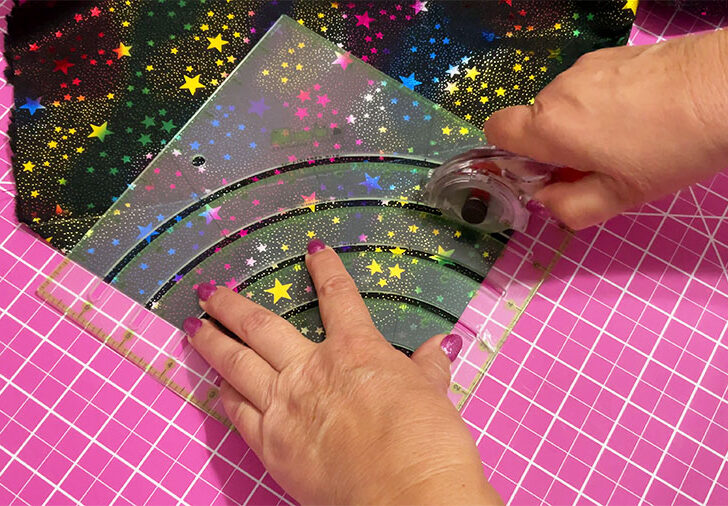
I then positioned the center of the circle ruler at the center of the folded fabric. This ruler has an opening that forms a quarter circle, which allowed me to cut through the fabric layers with my rotary cutter, creating perfect circles. I cut various sizes of circles with diameters of 12, 10, 8, 6, and 4 inches, which helped me achieve the graduated sizes needed for the yo-yo Christmas tree. On the ruler I marked the radius of course, half of that so I used the 6, 5, 4 inches marks.
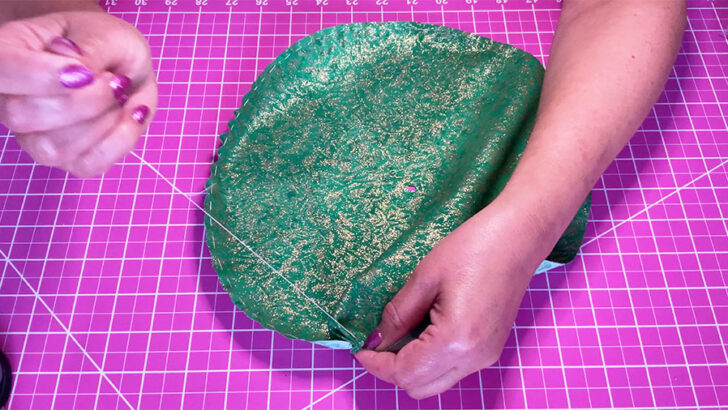
#3. Make the Yo-Yos
To start your yoyo Christmas tree, you’ll first need to know how to make the yoyos themselves. If you’re not familiar with the process, visit my complete tutorial on how to make fabric yoyos where I walk you through each step with detailed instructions and photos.
First, fold each fabric circle in half, and then fold it in half again, creating a quarter circle shape. At the tip of the folded corner – the center point of the original circle – snip a small cut. This cut should be just big enough to allow the wood dowel to pass through but not so large that the fabric doesn’t sit snugly against the dowel.
This small cut in the center of the fabric circle will serve as the opening through which the dowel can be inserted later on, once all the yo-yos are sewn and ready to be stacked to form the tree.
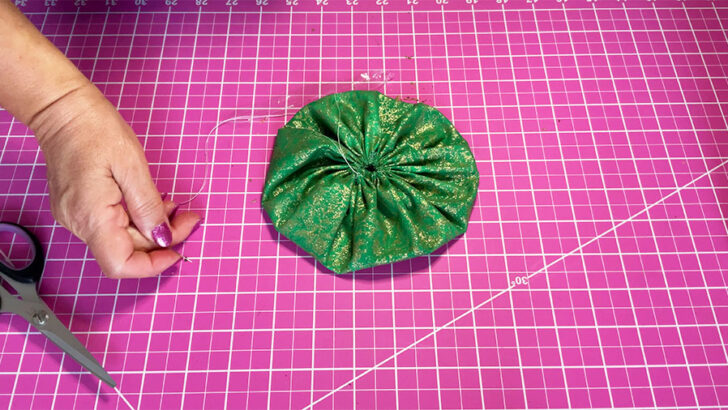
Thread your needle and knot the end. Sew a running stitch around the edge of each fabric circle.
Once you’ve stitched all the way around, pull the thread to gather the fabric and form a yo-yo. Secure by stitching across the gathered section and knotting the thread.
Flatten the yo-yo with the gathered side being the back and press if necessary.
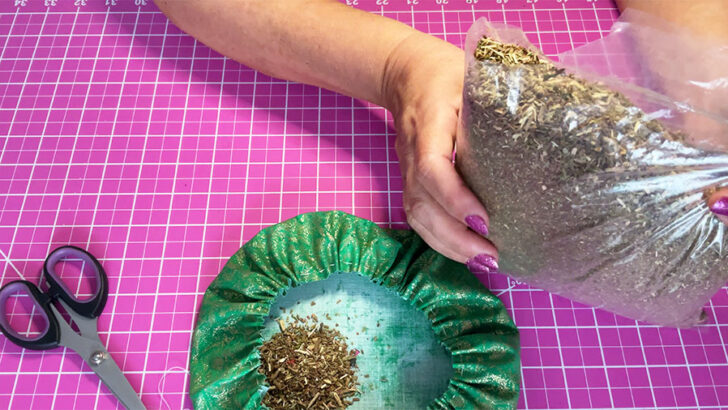
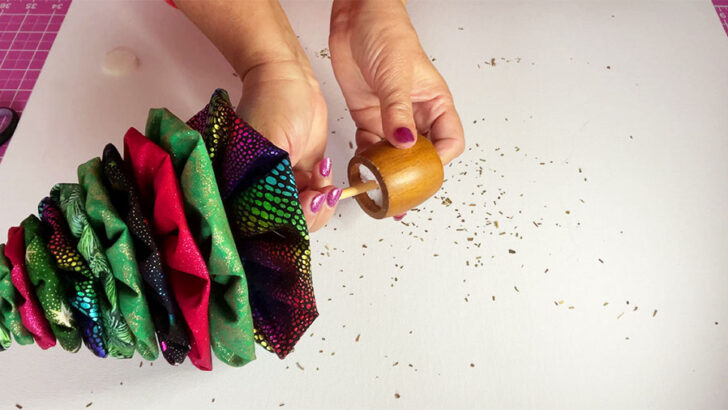
To add a unique twist to my fabric yo-yo Christmas tree, I decided to fill each yoyo with Balsam Fir Sachet Filling. Now, my tree smells just like a real Christmas tree! It’s such a cozy, woodsy scent that makes the whole room feel like the holidays. It’s great because even though my tree is made of fabric, it has the wonderful, natural smell that you get from a live tree.
You have probably noticed my sewing mat; what can I say, I like pink!

36″ x 48″ PINK/BLUE Professional Self Healing Double Sided Cutting Mat
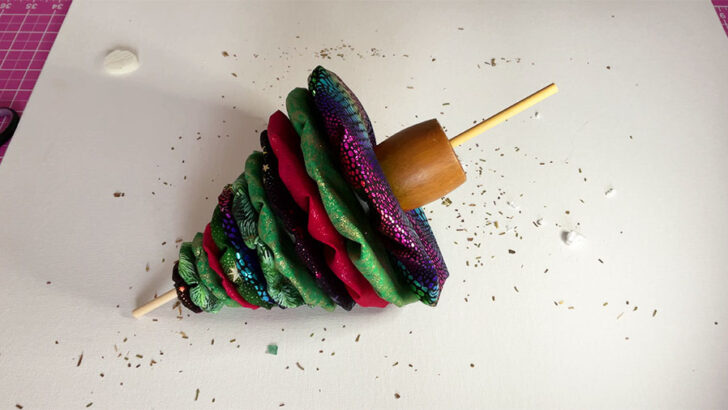
#4. Assemble the Tree
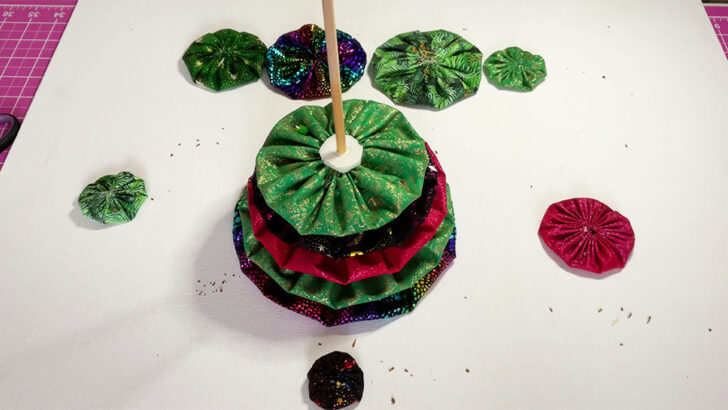
When I started stacking the yo-yos on the wooden dowel for my Christmas tree, I noticed they were too close together, and the tree looked squished and smaller than I wanted. To fix this, I came up with the idea to cut small circles from foam interfacing to place between each yo-yo.
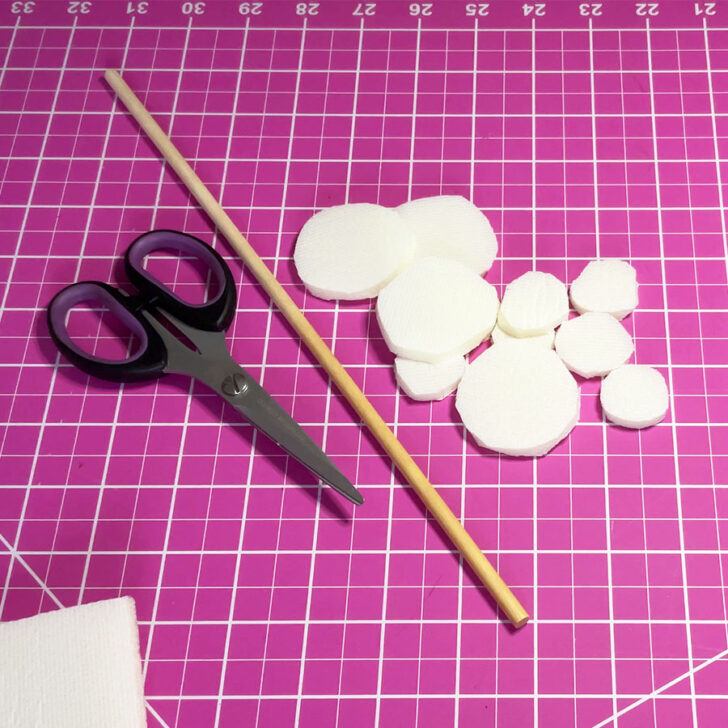
I made sure the circles were just the right size to fit around the dowel without being seen from the outside. This little trick gave each yo-yo more space and made the tree look fuller. It worked out great and really improved the overall appearance of my project.
Start assembling with the largest yo-yo at the bottom. Slide it down the dowel so that it sits on the base. If the hole is a little snug, gently twist the yo-yo as you push it down to avoid tearing the fabric.
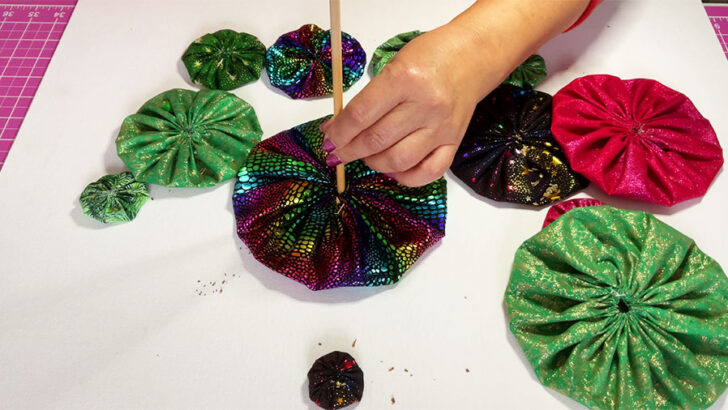
Next, I placed a circle of foam interfacing onto the dowel, right on top of the yo-yo. The foam circle acted as a spacer, giving the yo-yos some separation.
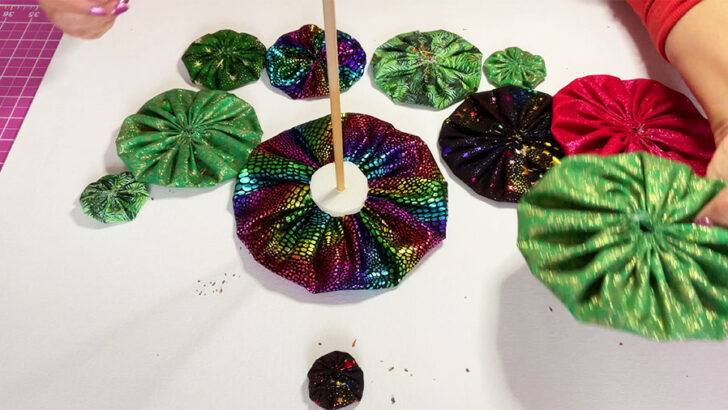
Then, I added another yo-yo, followed by another foam circle, and repeated this pattern. Each yo-yo was followed by a foam circle, all the way up the dowel. This method created even gaps between the yo-yos, giving my tree a more spacious and structured look.
#5. Add the Tree Trunk
For the tree trunk, I found a brown wood piece in my craft box; I’m not sure of its original purpose, I suspect it was a napkin ring initially (here is a link to similar items on Amazon) but it was perfect for what I needed. You do not really need this piece; you can simply fill the base container (a stone candle holder in my case) with Styrofoam and directly insert the dowel, You would need to pre-trim the dowel to the correct length before in this case, if the container is not open at both ends.
I filled the inside of this wooden piece with Styrofoam to give it stability and then inserted the dowel with the yo-yo tree into it. The fit was snug and secure but the dowel was a bit too long, so I asked my husband to cut it down for me. After trimming, the final size of the dowel was about 10 inches, which was just the right height to fit my yo-yo tree.
After attaching the dowel to the wooden piece, I realized that the tree was a bit too large for the “trunk” I had created. To remedy this, I found a small container, which I believe was a candle holder, and it turned out to be a perfect fit. You can avoid this by choosing from the beginning a larger container as base. This will give the tree stability.
I inserted the dowel with the tree into this container, and it provided the right proportion and support for my yo-yo Christmas tree.
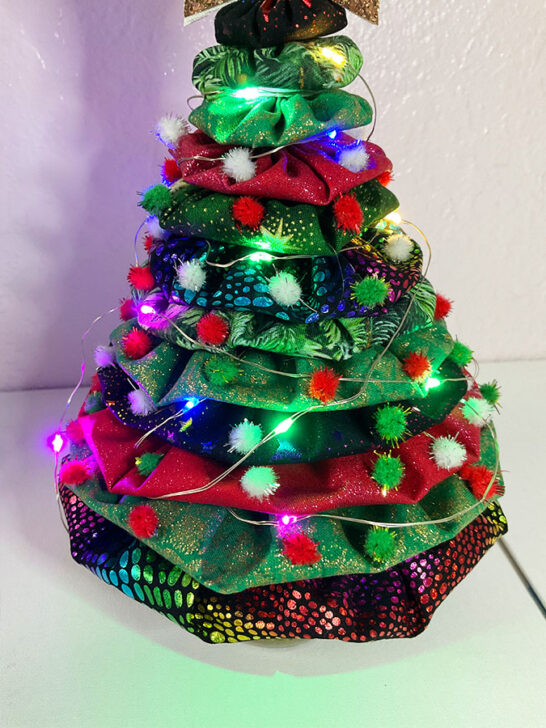
#6. Finish with a Star on top
After stacking the yo-yos and foam interfacing circles, I finished off my tree by adding a star on top that I made from shimmering gold vinyl. It added just the right amount of shine and festive flair to the tree. If you’re interested in making a similar star, I’ve got the template available in my Resource library of files, printables, and patterns for you to use. The star is the same I made for my Tulle Christmas Tree, so if you need a template, just print that page.
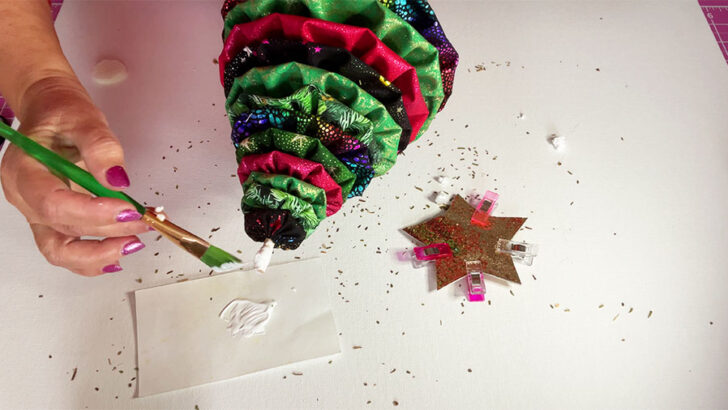
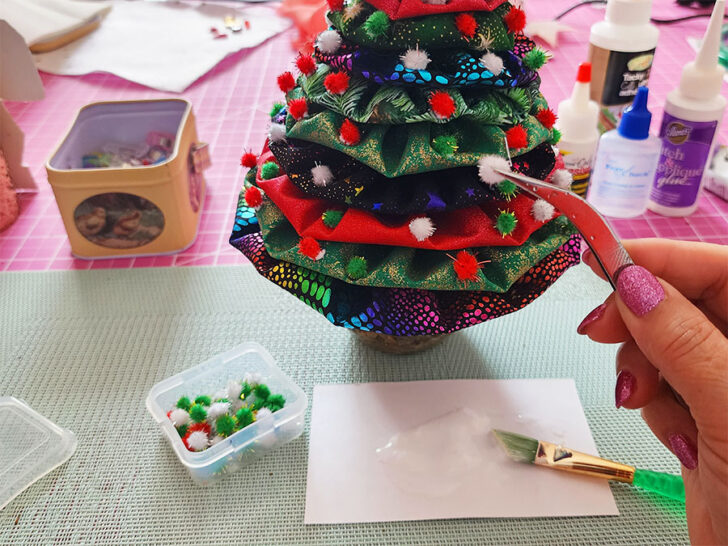
#7. Optional – Decorate the tree
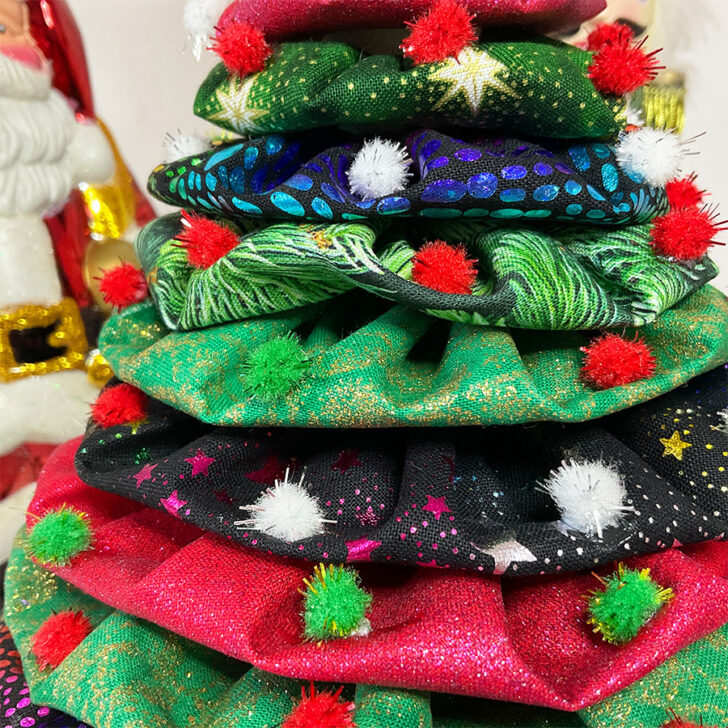
You can further decorate your yo-yo Christmas tree by sewing small beads, sequins, or other embellishments onto the yo-yos to resemble Christmas ornaments.
To decorate my tree, I chose to use small puffy balls in red, green, and white – the classic Christmas colors. I glued them onto the yo-yos, dotting them around to mimic the look of festive ornaments. The puffy balls added a fun and playful touch to the tree, enhancing its holiday charm.
✅ Related article: The Best Fabric Glue Options For All Your Sewing Projects
I also added a sprinkle of balsam fir potpourri as a final touch.
")


I also wanted to add more sparkle to my tree, so I used LED string lights that are very small and battery-operated. These tiny lights are perfect for winding around the yo-yo tree without overwhelming it. The battery operation made it easy to hide the power source. The lights brought a warm, inviting glow that really made the tree come alive.
Circle Sizes for the Whole Tree
The sizes of the circles will determine the size of the yo-yos, which will in turn determine the size of the finished tree. Here are the sizes you might use for each yo-yo starting from the bottom of the tree to the top:
- Bottom Layer: 13 inches diameter circle
- Second Layer:12” diameter circle
- Third Layer: 11” diameter circle
- Fourth Layer: 10” diameter circle
- Fifth Layer: 9” diameter circle
- Sixth Layer: 8” diameter circle
- Seventh Layer: 7” diameter circle
- Eighth Layer: 6” diameter circle
- Ninth Layer: 5” diameter circle
- Tenth Layer: 4.5” diameter circle
- Eleventh Layer: 4” diameter circle
- Twelfth Layer: 3” diameter circle
These sizes are just a guide, and you can adjust the number and size of the yo-yos according to how large you want your Christmas tree to be. Each yo-yo will be roughly half the diameter of the circle you cut out, so plan your sizes accordingly.
Whether displayed on a mantel, as a table centerpiece, or given as a gift, a yo-yo Christmas tree brings warmth and craftiness to the season.
")
And one final item: I needed after I finished, my room had a very nice balsam fir smell! Unfortunately this was because I spilled some of the potpourri on the table, so the last operation was to use my handheld vacuum for a quick sweep of the table.
Enjoy your festive handmade decoration!
✅ Related article: How To Make A Fabric Christmas Tree: 31 Sewing Tutorials
If this tutorial was useful, don’t forget to pin the image below to your sewing board on Pinterest. This way, you can easily revisit these DIY yoyo Christmas tree instructions whenever necessary. Also, consider following me on Pinterest to get more sewing tips, tutorials, and a dose of daily inspiration!

latest posts
- What Do You Call a Person Who Sews? I Asked My Readers and Got 1,408 Opinions
- DIY Round Purse: PDF Sewing Pattern and Detailed Instructions
- Mini Wonder Clips By Clover: Useful Sewing Tool Or Just Another Notion?
- Non-Slip Grips For Quilting Rulers: A Small Notion With A Useful Job
- Fabric Eraser for Sewing: What It Removes and When to Use It
- What Is The Best Thread For Sewing Machine Projects? Let’s Find Out!
- Butterfly Quilt Block Tutorial – Foundation Paper Piecing
- How To Sew Quilt Squares So The Corners Match
- Sewing With Fork Pins: How They Help With Pattern Matching, Slippery Fabric, And Seams