
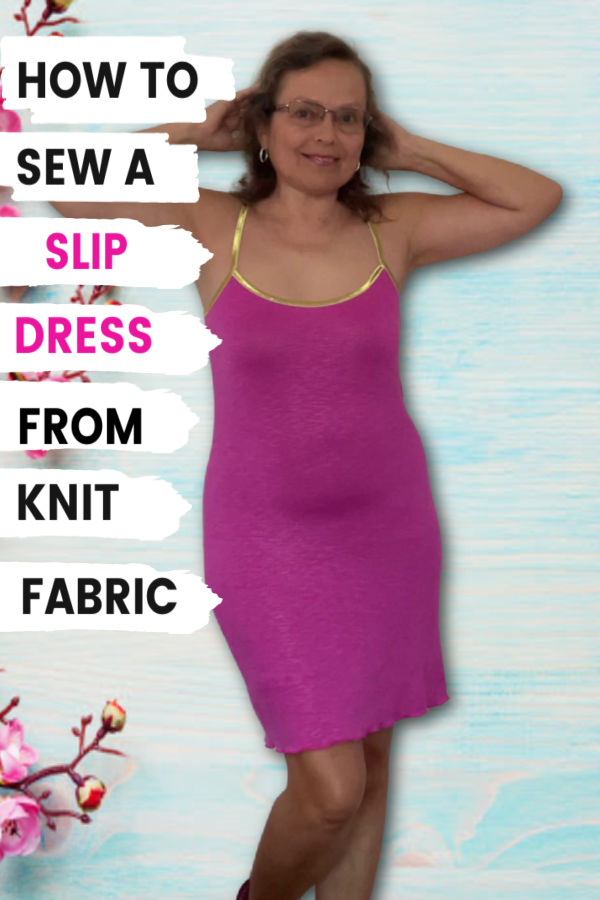
How to make a slip dress from knit fabric
In this sewing tutorial, I will show you how to sew a slip dress from knit fabric. A slip is a piece of clothing that can be worn under a dress or blouse. Slip dresses are the most important basics of our wardrobe. A knit slip is tight-fitting, very plain but comfortable. It’s quick and easy to sew and made from lovely soft knit fabric.
Actually, I made two slip dresses a few days ago: one is made from 100% rayon knit, and another one is from a natural silk jersey.
Ok, this is me wearing slip-dresses. Well, I am not a model but I want to show you how the slip dress looks on me. At least you can see how it fits the real body of a 50+ years old woman. Lol.
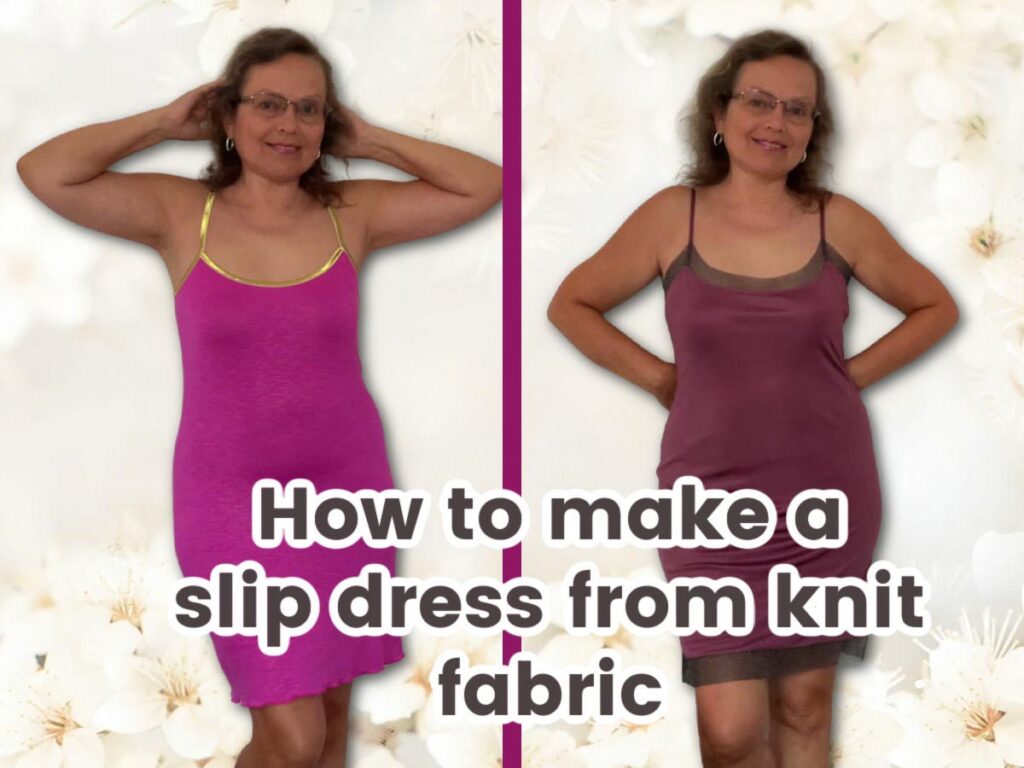
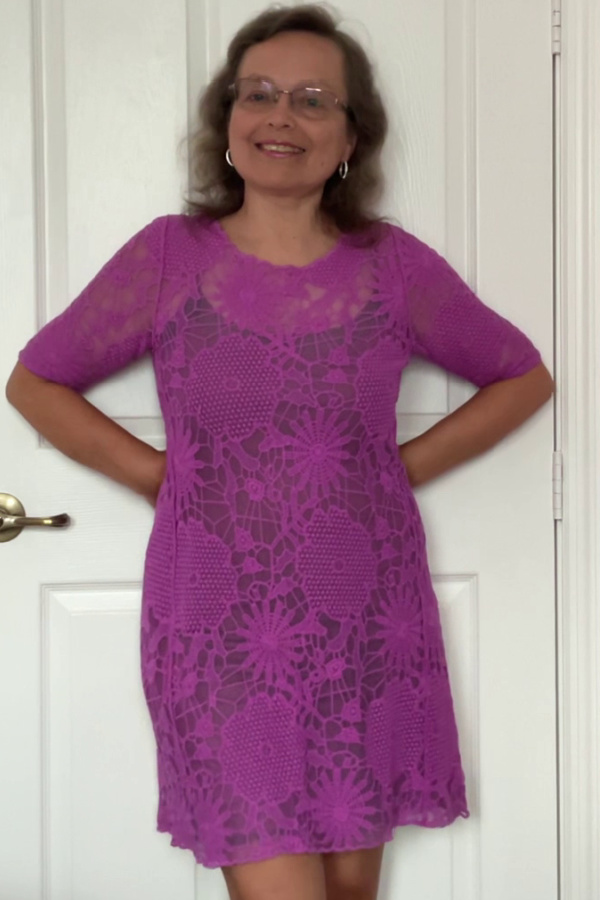
I made the silk slip dress (the one to the right in the image above) to wear under a pretty lace dress. I bought this lace dress because it’s my favorite color and it came together with a slip made from polyester. But I never wear polyester so I really needed to make something I can wear. And the silk jersey fabric is just awesome for the slip.
✅ Related tutorial: The chemicals we wear everywhere
So, promise me that you are going to follow this tutorial and make one or two slip dresses for you too.
What you’ll need to make a slip dress
- Knit fabric (1 yard)
- Paper to make a slip dress pattern
- Fold over elastic (2 yards)
- Serger and sewing machine
- Large cutting mat
- Martelli rotary cutter
- Regular sewing notions
Note: Some of the links on this page are affiliate links. This means I will receive a commission if you order a product through one of my links. I only recommend products I believe in and use myself.
You can check my special Ageberry’s Amazon page where I collected all items suitable for this project.
How to make a slip dress pattern
The pattern is very simple, the slip has only 2 side seams. The fewer seams you have for knit fabric the easier it is to sew.
To make the pattern for the slip dress you will need to take some body measurements.
- Bust
- Waist
- Hips
- Desired length of the slip
Write the numbers on a piece of paper. If you are not sure how to take your body measurements – check out my tutorial on How to take body measurements for sewing.
Take a piece of paper to make a pattern.
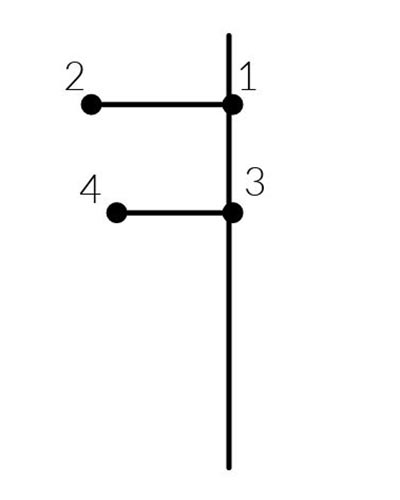
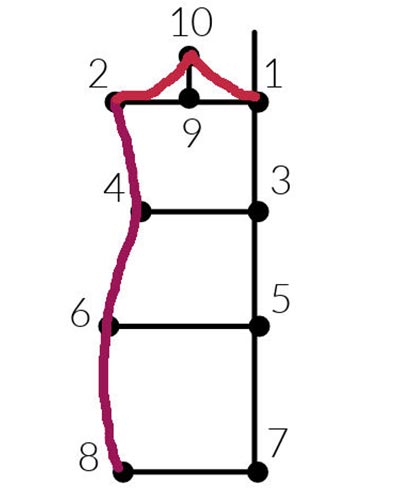
Draw a vertical line somewhere in the middle of your paper. It will be the center front line and mark point 1 on this line. Make a line perpendicular to that vertical line in point 1 and mark point 2. The distance between points one and two is equal to your bust measurement divided by four minus 1 inch.
BUST/4 MINUS 1

Let’s talk about why I subtract 1 inch for this pattern.
To sew knit fabric successfully you need to understand the stretch percentage of knit fabrics, in other words, you need to see how stretchy your knit fabric is. Because knit fabrics are usually stretchy, patterns for sewing knits have negative ease added to the body measurements: it means that the garments you make from knit fabrics are smaller than your actual body measurements.
But if you don’t consider this negative ease the garment made from knit fabric will not fit nicely and will be essentially too big for you.
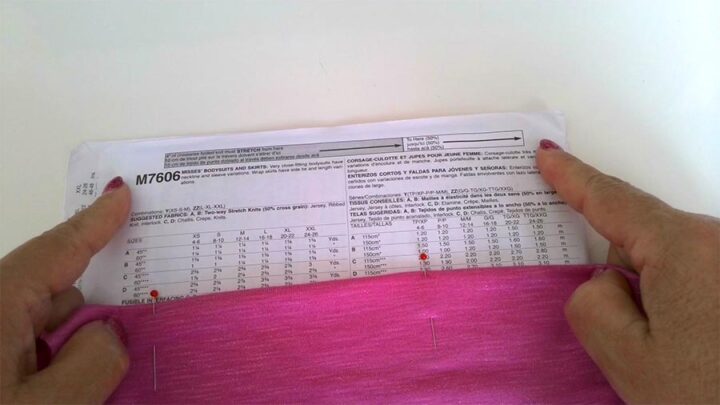
You can find stretch percentage charts on pattern envelopes. For example, every McCall’s pattern envelope has this chart if the recommended fabric is some kind of knit.
I made my own chart and you can download it as a PDF file from my Resource Library if you are a subscriber. The chart looks like this:
I subtract 1 inch for this pattern because I am using very stretchy jersey fabric with a stretch factor of more than 75%.
If your fabric has less stretch percentage you can subtract less than 1 inch (½ in for example) but for the slip dress, it’s better to have a very stretchy knit fabric.
✅ Related tutorial: Bias cut slip dress pattern
Ok, let’s continue with the slip dress pattern.
From the point, one goes down on this vertical line and marks point 3. The distance between point 1 and point 3 is equal to the distance between your underarm and your waistline. Draw a perpendicular line. This is a waistline. The distance between points 1 and 3 is about 6-8 inches for all sizes. I put 8 inches for my pattern. On this line perpendicular to the vertical line mark point 4. The distance between three and four is equal to your waist measurement divided by 4 minus 1 inch.
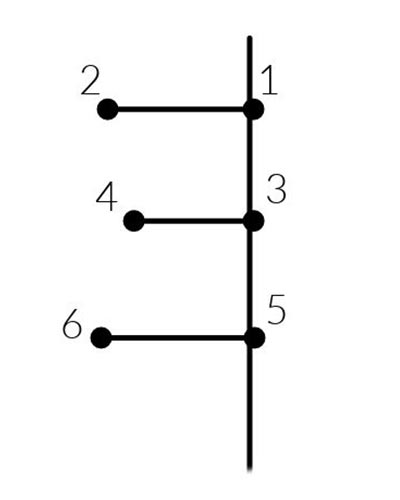
From point 3 go down and mark point 5 and make a line perpendicular to the vertical line. The distance between these points is about 7-9 inches. For tall people it’s 9 inches, for shorter people it’s about 7 inches, for the pattern I put 8 inches. This is about the same for all sizes – 7-9 inches. So mark point 6 on this line, the distance between point 5 and point 6 is equal to your hips measurement divided by 4 minus 1 inch.
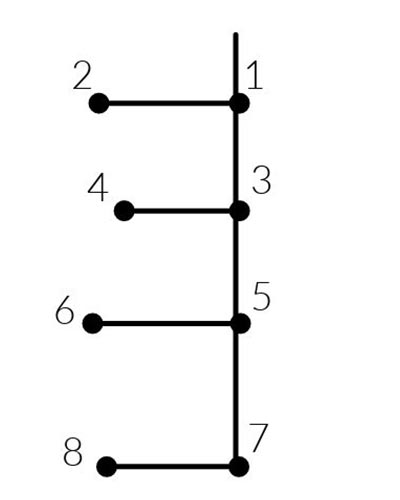
From point 5 go down and put point 7, the distance between five and seven is about 9-16 inches. It depends on how long you want your slip dress to be. I put 9 inches and this is the hemline. On this line mark point 8, the distance between points seven and eight is your hips measurement divided by 4 minus 1 1/2 inch.
Now connect points 8-6-4 and 2 and our pattern is almost ready.
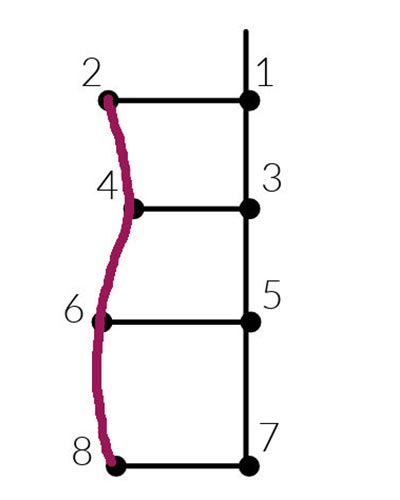
Now divide the distance between points 1 and 2 in half and mark point 9. From this point make a perpendicular line and mark point 10. The distance between 9 and 10 is 1 1/2 inches for all sizes. Draw two curved lines.
That’s all for the pattern now.
I usually don’t cut knit fabric on the fold, I prefer to cut in a single layer of fabric. So I made a full pattern for my slip dress, not half front and half back.
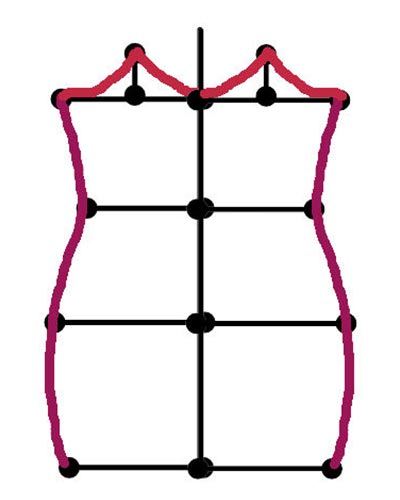
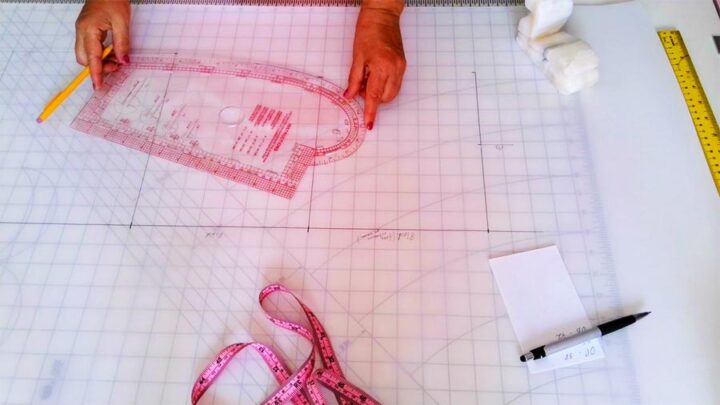
Let me show you now the real pattern and how I draw curved lines.
I like to use a special ruler. It’s called a French curve ruler. Very easy to use and the lines are really smooth and nice.
So now I have the front and back pattern for my knit slip dress.
Cutting the fabric for the knit slip dress
The next step is cutting the fabric for the slip dress from knit fabric.
I hope you have a large enough cutting table because it’s important that there are no fabric ends hanging off the table. You should avoid that because if some fabric ends are not on the table, they will stretch the fabric out of alignment and you will have problems with how your slip dress will hang on your body.
I use my large cutting board because I like to cut knits with a rotary cutter.
I fold the fabric’s right sides together, align selvages, and try to fold the fabric along a grainline.
Grainlines for knits are different from grainlines for woven fabrics.
See these little stripes on the right side of this jersey fabric? They are parallel to the selvages. And if you follow one of these vertical stripes you will find the grainline of the fabric.
It’s not really easy to do exactly. You can use a magnifying glass but don’t stress much if you can’t get the fabric exactly lined up with everything perfectly on grain. Knits are forgiving fabric and as long as you are close enough to the grainline, your final garment will be fine.
I cut the selvages because they are pulling the fabric out of a flat shape.
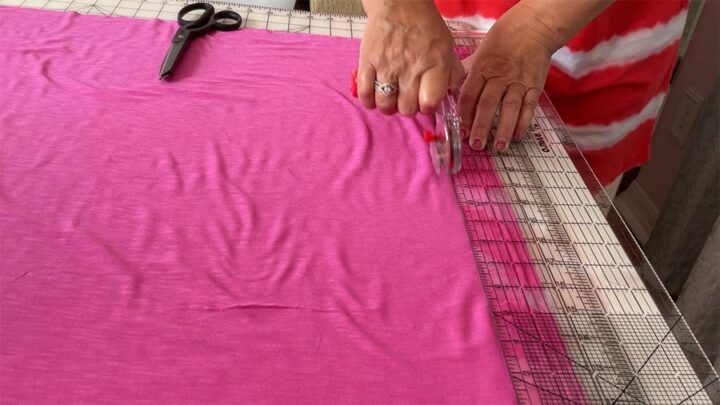
I smooth the fabric on the cutting board so it’s completely flat and there are no “bubbles”.
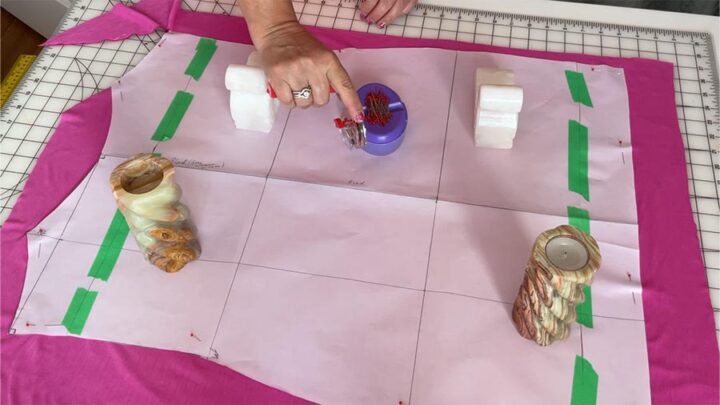
Place the paper pattern and pin it to the fabric. I also use my heavy stone figurines as pattern weights.

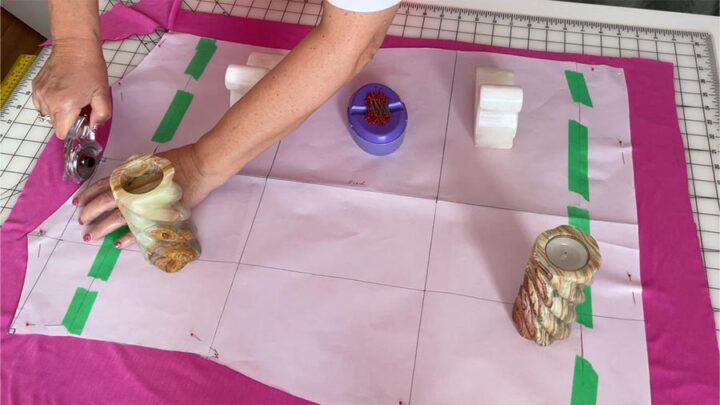
I don’t trace the pattern with a fabric marker. I just cut it with my Martelli Rotary cutter.
I suppose to hold this Rotary cutter like this, with one finger on the wheel.
But this position is not comfortable for me, I control the rotary cutter much better when I hold it like this.
However, if you don’t own a rotary cutter, you can cut your knit fabric with scissors. Simply cut around the pattern edges, just take care not to lift your fabric too much when cutting as this can cause the fabric to stretch.
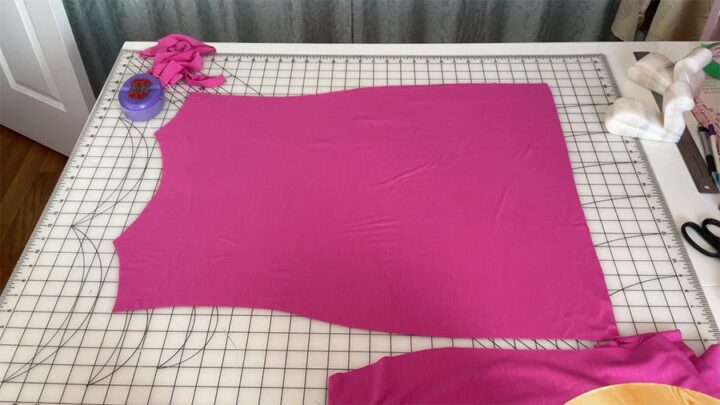
Ok, here I have the front and back of my knit slip dress.
Sewing side seams of the slip dress from knit fabric
The next step is sewing the side seams of the knit slip dress.
I use my serger for this and I advise you to do the same.
I use a 4 thread 2 needles serger stitch.
You can use your regular sewing machine but then you need to use special stretch stitches and a special stretch needle. You can read more about them in my tutorials.
Just make sure the stitching is not tight. The side seams should be able to stretch.
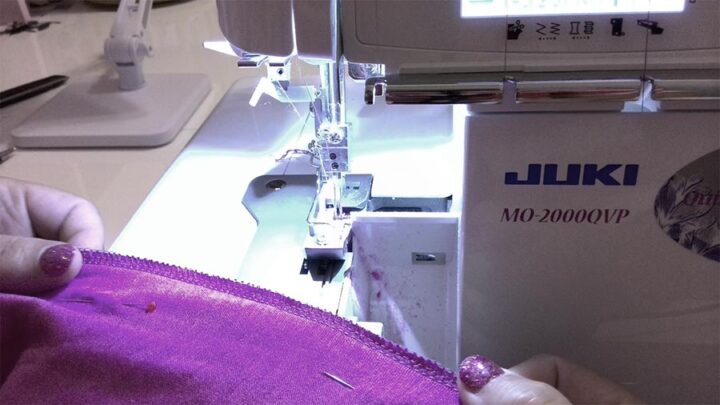
How to sew fold-over elastic
The next step – attaching fold-over elastic to the slip dress from knit fabric.
This is the easiest way to finish the slip dress.
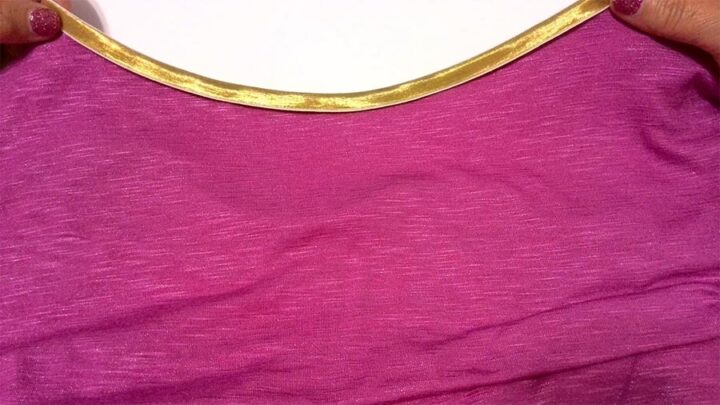
First I will sew elastic at the front and back and after that, I will use the elastic to finish armholes and make straps for the slip.
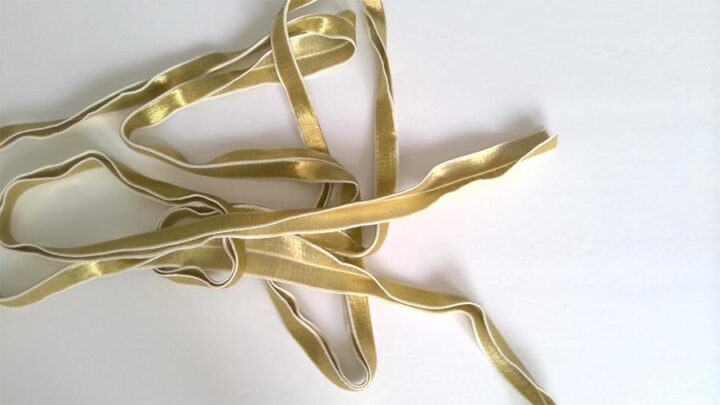
The edges of this fold-over elastic are already finished, it has an indentation down the middle for evenly folding the elastic in half and binding the fabric. There are so many colors of fold-over elastic available. You should be able to choose the elastic exactly the color of your fabric. But I decided to use a contrasting color.
Before using this fold-over elastic on your slip dress, test it on a scrap piece of the same fabric that you make your slip from. You will need to choose your thread, and needle, and adjust your sewing machine settings. Try it first and see how you can get the best stitch for the elastic.
You will need special stretch needles to sew this elastic.
✅ Related tutorial: The Ultimate Guide to Stretch Sewing Machine Needles
The elastic should be cut a bit smaller than the piece of fabric you are putting it on. But not much smaller, just half an inch otherwise you might get wavy and stretched fabric.
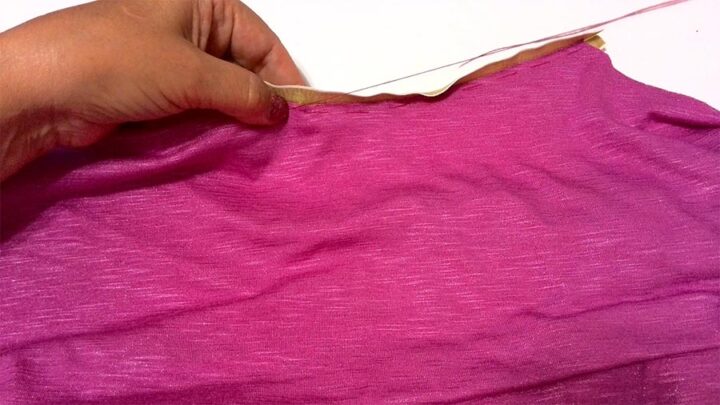
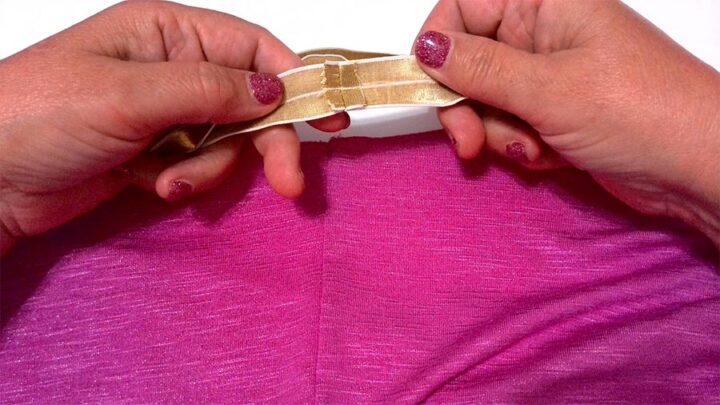
The first step is to baste one side of the elastic.
You put the fabric edge near the center of the elastic. The wrong side of the fabric is going on the wrong side of the elastic.
After that go to your sewing machine, fold elastic and stitch. Use a straight stitch or zigzag stitch. For this project, you don’t need these edges to stretch, so you can use a straight stitch. That’s exactly what I did. Make the stitch length 4. Sew about 1 mm from the edge.
To start sewing you will need to pull the thread tails behind the presser foot.
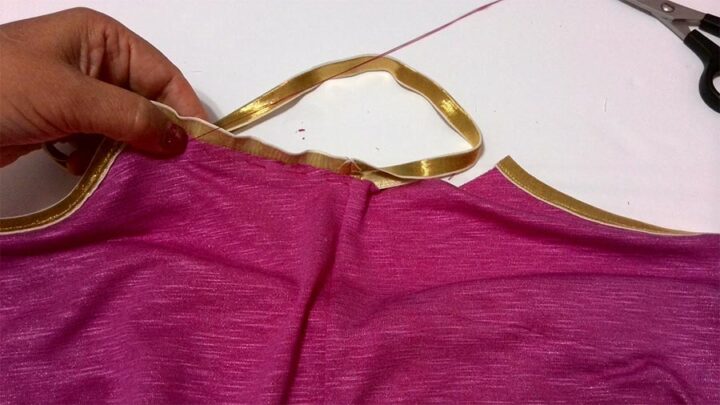
To finish armholes you will need to sew the edges of the fold-over elastic together. Cut the four corners of the seam allowances so the edges of the elastic will not be visible on the finished slip.
If you are not yet a very experienced seamstress, you should not sew fast, it’s better to go slower.
How to hem the slip dress
And the last step – hemming the slip dress.
There are many ways to do it. I prefer to use a rolled hem stitch of my serger. It’s a fast, easy and clean finish.
But if you don’t have a serger I can show you a very pretty finish you can make with a regular sewing machine.
✅Related tutorial: Types of Sewing Machine Stitches: Unraveling the Mysteries of the Straight Stitch
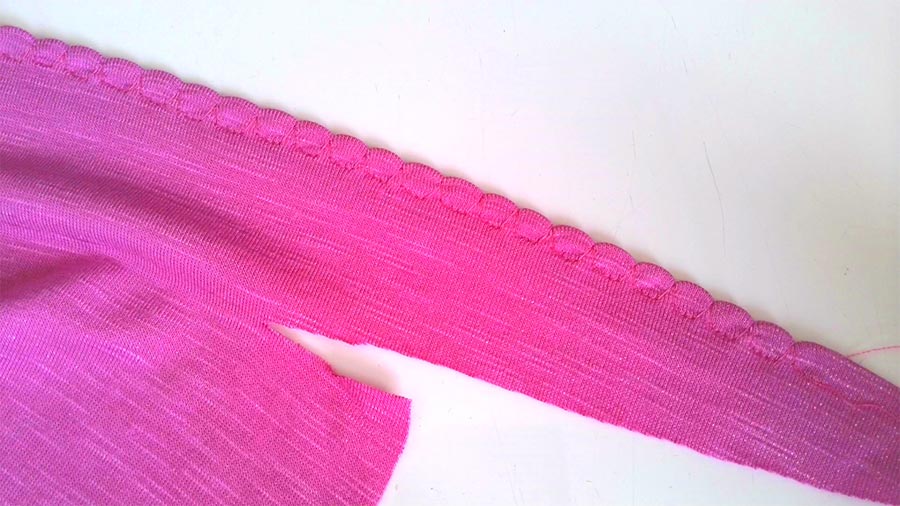
It’s called “picot hem” sometimes.
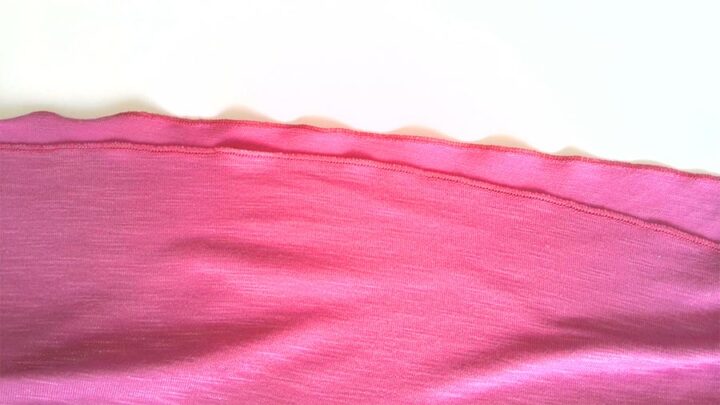
This is a very interesting finish for lightweight knit fabrics. It provides a small scalloped edge on the fabric. On my Janome 6600, it’s called “shell tuck”. This stitch has to be sewn on the edge of the fold. It’s perfect for hems and armholes on knit garments.
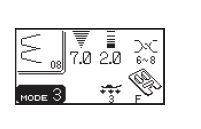
Fold the seam allowances under, then stitch along the fold so that the “straight” part of the stitch sews within the hem, and the “point” sews almost off the edge of the fold. You can adjust the stitch length and the stitch width.
This is how it looks on a piece of scrap fabric.
Did you find this tutorial helpful? If so, save this pin (see below) on your sewing board so you can come to this tutorial later when you are ready to make a slip dress from knit fabric, and follow me on Pinterest for more tips, tutorials, and inspiration!
latest posts
- What Do You Call a Person Who Sews? I Asked My Readers and Got 1,408 Opinions
- DIY Round Purse: PDF Sewing Pattern and Detailed Instructions
- Mini Wonder Clips By Clover: Useful Sewing Tool Or Just Another Notion?
- Non-Slip Grips For Quilting Rulers: A Small Notion With A Useful Job
- Fabric Eraser for Sewing: What It Removes and When to Use It
- What Is The Best Thread For Sewing Machine Projects? Let’s Find Out!
- Butterfly Quilt Block Tutorial – Foundation Paper Piecing
- How To Sew Quilt Squares So The Corners Match
- Sewing With Fork Pins: How They Help With Pattern Matching, Slippery Fabric, And Seams

Excellent easy to understand the instructions.
Thank you!
I’ve been sewing for over 20 years and I’ve still not ventured into pattern drafting, letalone making clothes to fit me. I thought I’d start by using some of my satin jersey to make some slip dresses and stumbled across this tutorial. I’m in absolute awe!! I love the way you explain things, it’s so simple and easy to understand. You’ve just made my first pattern drafting experience a dream. I hope the practical aspect turns out as good as the theory! 😂 wish me luck 🙏
We are curious (at least I am 😀). Did it work out?