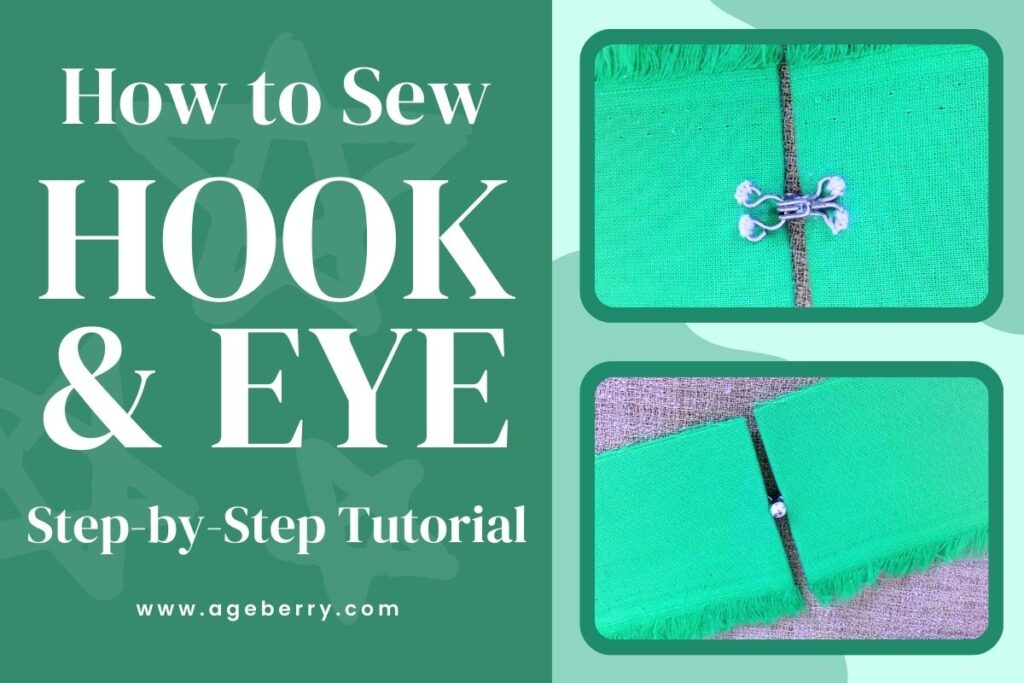
A Gem of a Closure: How to Sew a Rhinestone Hook and Eye
Today, I am going to talk about the age-old art of sewing a hook and eye, but with a twist. That’s right, I’m not just dealing with the standard variety here – I’m talking about a hook and eye closure with a rhinestone that turns a functional item into a fashion statement.
This tiny duo can make or break the look of a garment. Anyone who’s ever tried to sew these little critters on knows it’s like trying to thread a needle in a moving car. It’s a skill that requires the patience of a saint and maybe the dexterity of a brain surgeon.
My first attempts to sew hook and eye closures were not successful (well, it was more than 30 years ago though). Those hooks and eyes wiggled and jiggled, refusing to stay put. And the mess? Threads everywhere, a tangle of knots and loops.
But practice makes perfect, so now, here I am, ready to pass on knowledge and share all that hard-earned wisdom with you.
Choosing the Right Hook and Eye
Hook and eye closures come in various sizes and styles. The choice depends on the weight and type of fabric, as well as the garment’s design.
Think about the garment you are working on. Is it a heavy coat or a light blouse? The weight and use of the garment will influence the size and strength needed for the hook and eye.
Choose a hook and eye that complements the color and texture of the fabric. For delicate fabrics, a smaller, lighter hook and eye would be appropriate to prevent damage.
Also, buy an extra set or two of the chosen hook and eye. Having spares is useful in case of loss or damage, and it ensures that you can replace it with an exact match.
Since closures also serve a decorative function, I looked for something unique. I bought a very interesting hook and eye with a shiny crystal embedded in the hook. It’s not only functional but also adds a beautiful decorative element to the garment. It makes the closure part of the overall design rather than just a functional element.
Attention! If you’re someone who likes to see things in action, you might enjoy the video version of this tutorial on my YouTube channel. You’ll find the link at the bottom of this post. Watching the video along with reading this article can help you get a fuller picture, so I definitely recommend checking out both!
What You’ll Need to Sew a Hook and Eye
Choose a hand-sewing needle that’s sturdy enough not to bend. I like to use a self-threading needle.
Use a strong thread that matches the color of your garment. If the fabric is heavy, consider using a thicker thread.
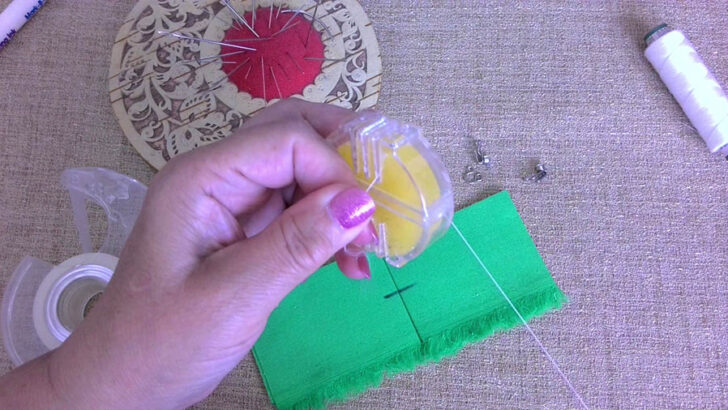
You can also apply some beeswax to your thread. Simply draw the thread across a piece of beeswax a few times, then press it between your fingers to warm and embed the wax into the thread fibers. Running thread through beeswax helps to smooth out any kinks and prevent tangles and knots.
The waxed thread glides through the fabric more easily.
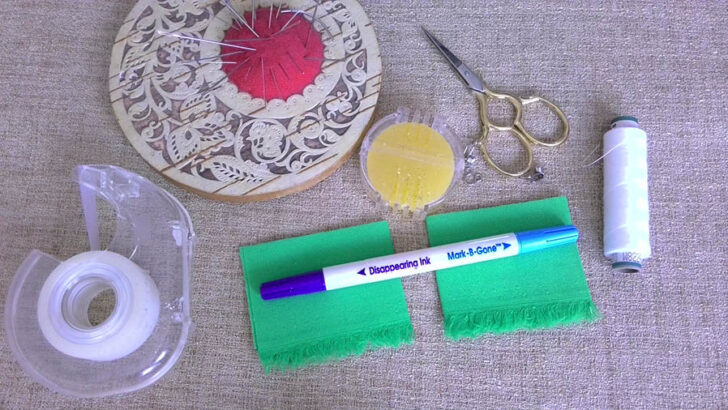
Ensure you have a pair of sharp scissors for cutting the thread and a fabric marker or chalk.
Consider a thimble, it’s optional but recommended, especially if you’re working with a thicker fabric. It will protect your finger when pushing the needle through multiple layers or dense material.
Hook closures come with eyes and bars. The choice between using eyes or bars depends on how the fabric is designed to come together. Eyes are the go-to when you have a garment where the edges meet edge-to-edge, sitting flush against each other in a neat abutment. This is often seen in the closures at the top of a zipper, where a clean line is desired. On the flip side, bars are used for situations where the fabric edges overlap.
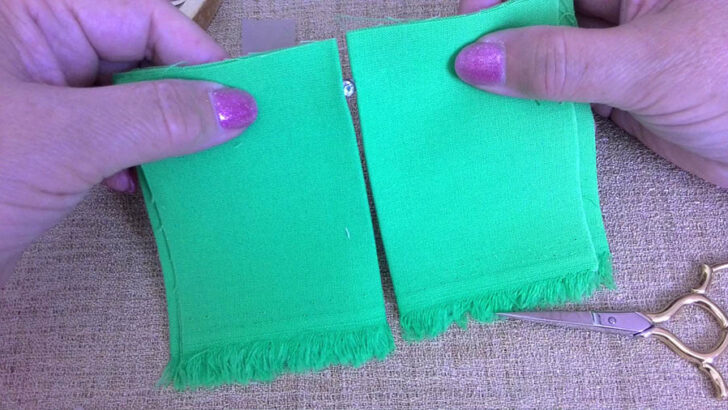
For this demonstration, I’ll be skipping the use of an actual garment. Hooks and eyes are tiny, and when you sew them onto a garment with matching thread, they become almost invisible.
Instead, I’ll be using plain pieces of fabric and thread in a contrasting color. This way, you’ll be able to see each stitch clearly and understand exactly where and how the needle moves.
Positioning the Hook and Eye
Close the garment and identify where the edges meet. The standard hook and eye should be positioned so that they keep these edges together without gaps or overlaps.
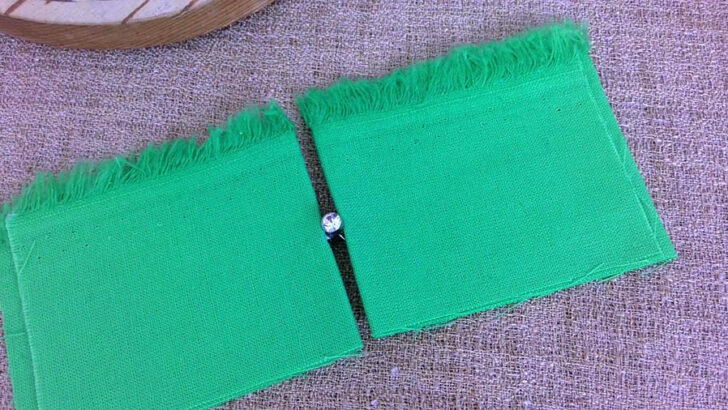
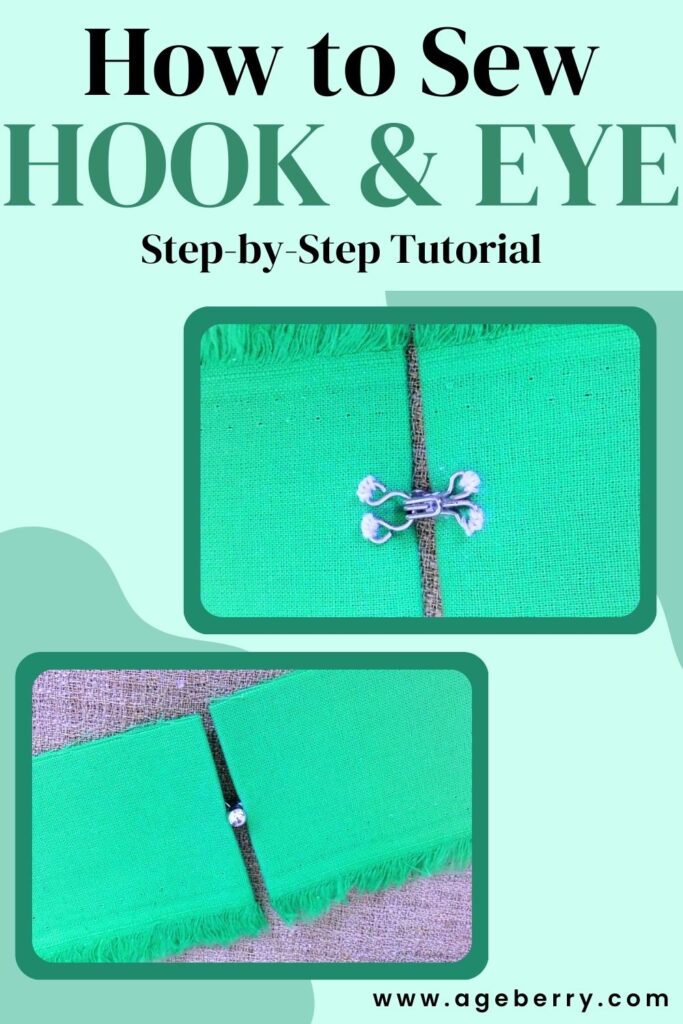
But in my case, the rhinestone should be visible.
The hook should be placed horizontally and close to the edge. Place it so that the rhinestone remains visible when the garment is worn.
The eye must be positioned to allow the hook to close neatly and securely without straining the fabric or creating tension.
Use a fabric marker or tailor’s chalk to lightly mark on the fabric where the center of the hook and eye will go. For the hook, mark the spot on one side where the hook’s base will sit. For the eye, mark the corresponding position on the other side where the eye will be sewn in place to catch the hook.

Sewing the Hook
I like to start sewing without a knot. This technique is often used to provide a cleaner finish without the bulk of a knot.
Here’s how to do it.
Threading the Needle
Cut a length of thread suitable for the task – typically around 18 – 20 inches to avoid tangling.
Run the thread across a piece of beeswax a few times. Conditioning the thread this way helps and prevents thread fraying and tangling. Your closures will probably last longer if you condition the thread, remember this is an area where force may be applied and fraying is really not good.
Fold the thread in half to create a loop at the folded end and two free ends on the other side.
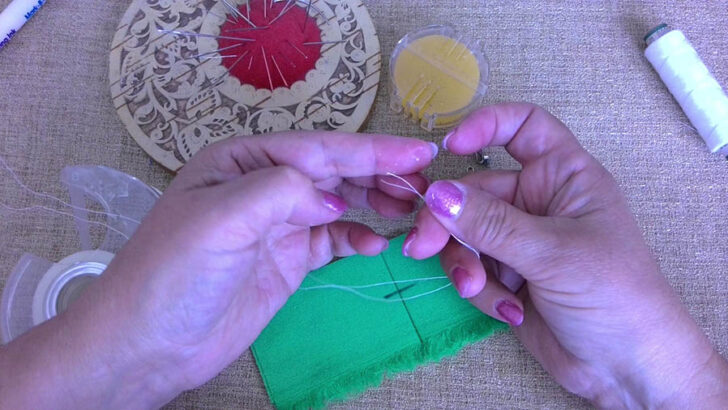
Use a self-threading needle, which has a notch at the top of the eye, and slip the cut ends of the thread through this notch.
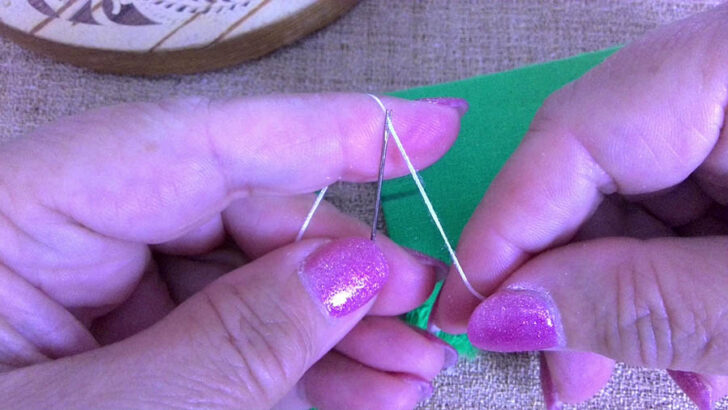
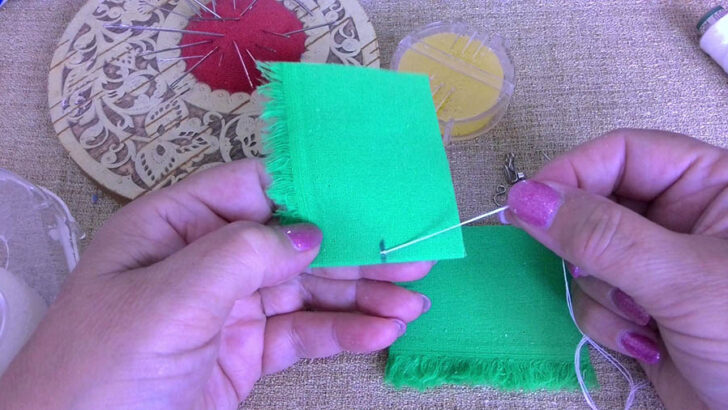
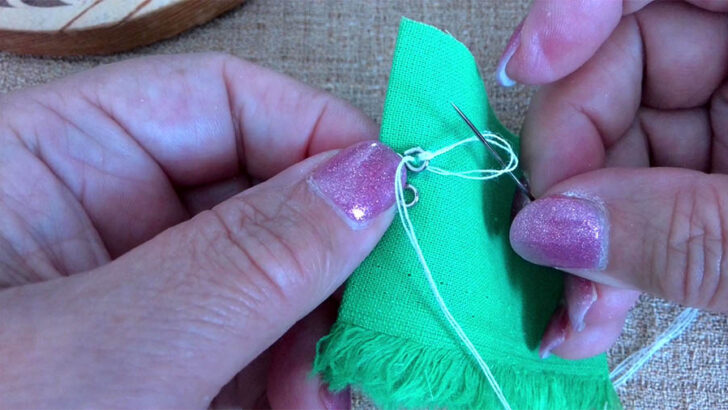
Starting the Stitch
Insert the needle into the wrong side of the fabric where you want to start sewing the hook, close to the hook’s base.
When you sew, only catch a small amount of fabric with the needle. This prevents the needle from going all the way through to the right side of the garment.
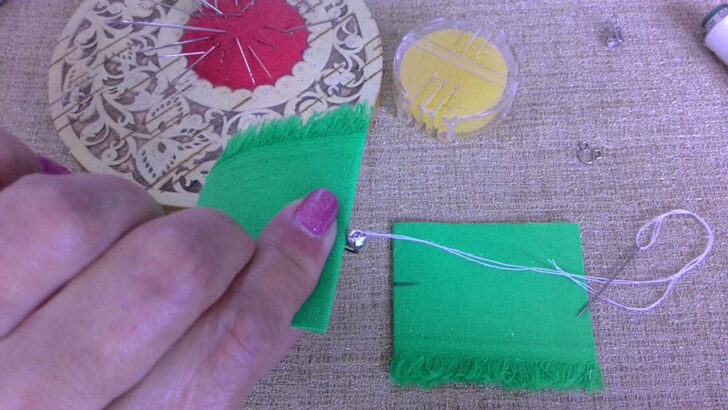
Pull the needle and thread through the fabric until the loop end is a small distance from the fabric surface.
Before tightening the thread, pass the needle through the loop.
Now, pull the thread until it’s tight against the fabric. This creates an anchor for your thread without a traditional knot.
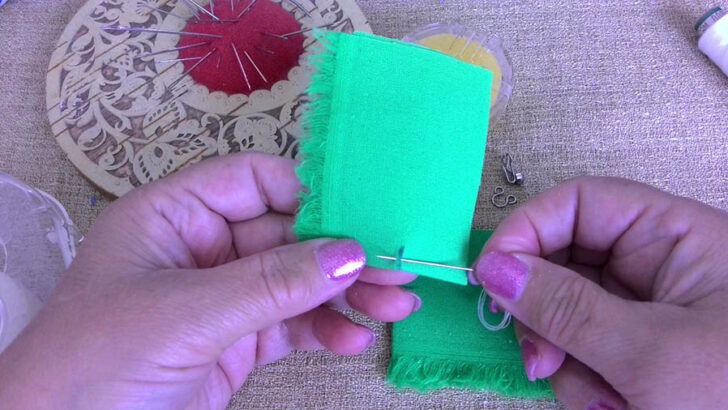
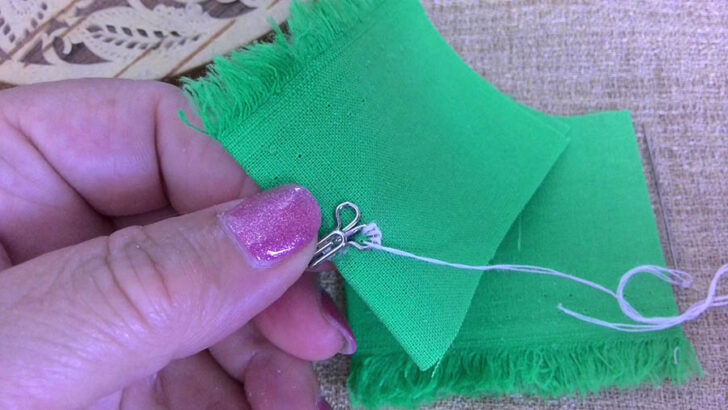
Securing the hook in the middle
Place the hook onto the fabric at the marked position. Make sure that the curved part of the hook where it will catch the eye is facing the correct direction.
Sew a few small stitches right in the center of the hook’s base – around the part where the actual hook protrudes. Make sure these middle stitches are tight and secure. You may also pass the thread through the base of the hook a couple of times and then secure the hook with stitches so that the hook is firmly attached and won’t pivot.
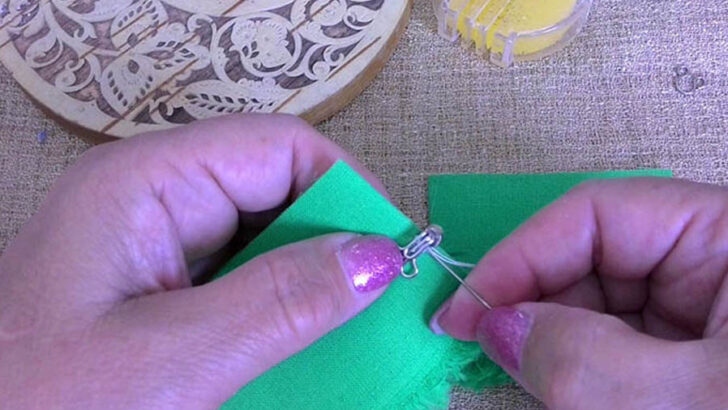
Once the middle is secured, proceed to sew around the loops at each end of the hook’s base.
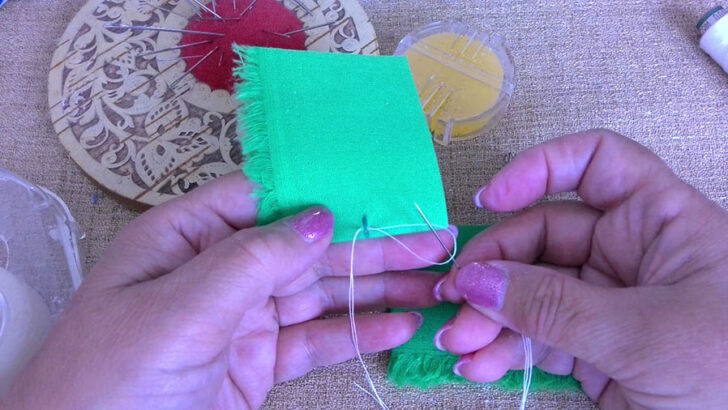
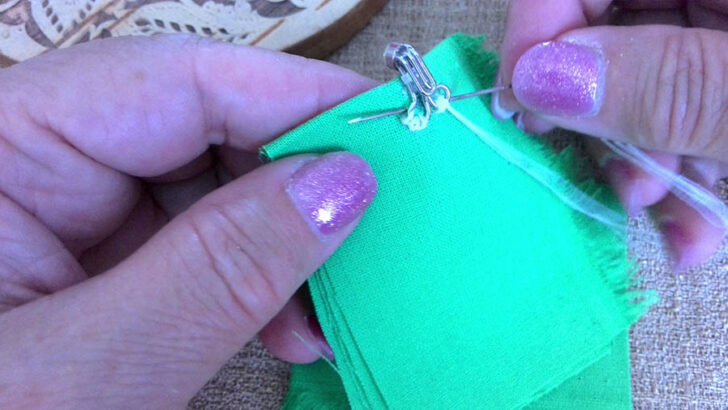
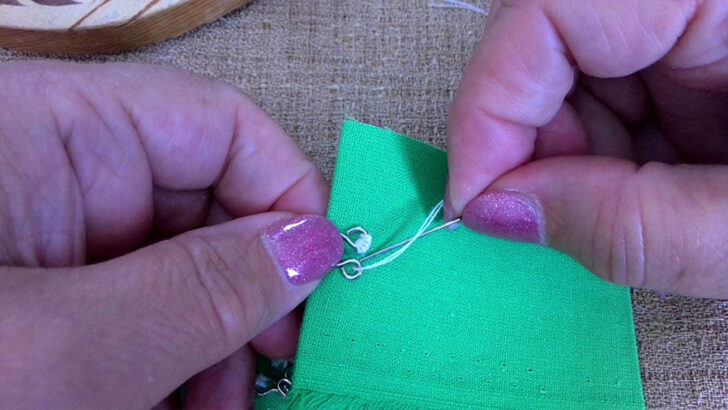
Sewing Around the Loops
The loops of the hook are what will take most of the tension when the garment is worn, so they need to be sewn securely.
Do not cut the thread; instead, you will continue using this thread to sew the loops. Slide the needle under the fabric from the last base stitch towards the first loop of the hook. Keep the needle between the layers of fabric so that this traveling stitch is not visible on the right side of the garment.
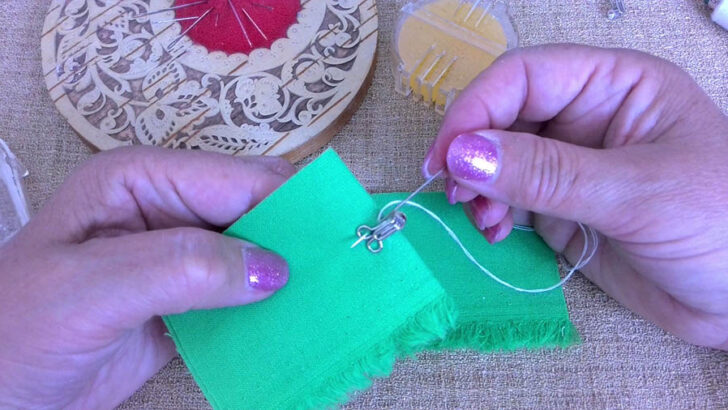
Carefully bring the needle out just at the point where the first loop is attached to the fabric. The goal is to have the thread emerge without being seen from the right side. Begin sewing around the loop.
Use buttonhole stitches around the loops for added strength.
Make sure your stitches are evenly spaced and that you’re catching enough fabric with each stitch to hold the hook securely.
Finishing with a Knot
When you have completed sewing the hook and are ready to finish off your thread, it’s important to tie off in a way that keeps the knot hidden.
Take a small stitch in the same place to prepare for the final knot.
Make a loop with your thread, pass the needle through it, and pull tight to create a knot.
Use the needle to tuck the thread tail into the fabric under the stitches surrounding the hook.
Cut the thread.
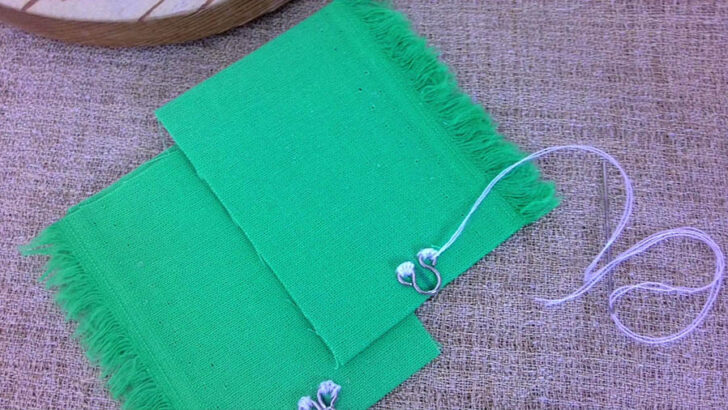
Sewing the Eye
Positioning the Eye for a Perfect Closure
The correct placement of the eye is very important for a seamless closure. It should align with the hook so that when fastened, there are no gaps and the fabric lies flat.
Positioning the eye for a hook and eye closure is not really a one-size-fits-all situation – it can vary based on the fabric you’re working with and the specific hook and eye set. In my experience, I had to align the edge of the eye precisely at the edge of my fabric to ensure a clean closure. However, this may not be the case for every project.
The fabric’s thickness, the garment’s design, and the type of hook and eye can all influence the best placement for the eye. For instance, if the fabric is very thick, you might need to adjust the eye slightly inward to account for the fabric’s bulk when the garment is closed.
That’s why practicing on scrap fabric is so valuable. It allows you to experiment with placement without the risk of ruining your actual garment. You can try out different positions, see how the hook and eye function when fastened, and make adjustments as needed.
When preparing for this tutorial, I practiced beforehand, and it’s a good thing I did. My first go at sewing this unique hook and eye closure didn’t quite hit the mark. Take a look at this image – the rhinestone, which should have been the star of the show, wasn’t fully visible. I positioned the eye too far from the fabric’s edge, which not only obscured the rhinestone but also resulted in a closure that was too tight.
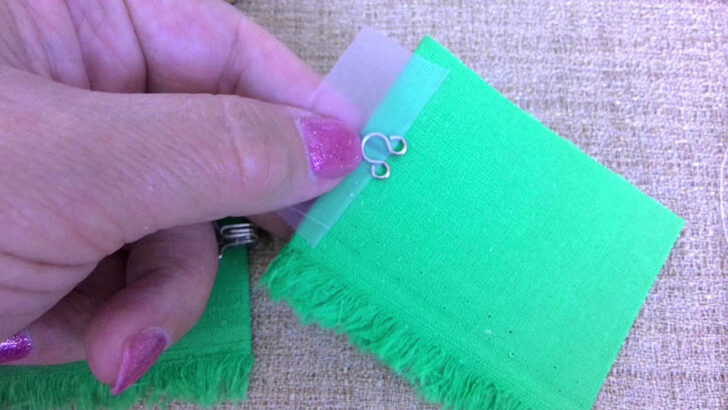
You can use a small piece of scotch tape to hold the eye in place while you position it. This can be particularly helpful if the fabric is slippery or if you need both hands free to sew.
Before sewing, you can try to close the hook and eye to ensure they meet without straining the fabric. Adjust the position of the eye as needed to ensure a perfect fit.
Sewing Around the Loops
Once you have the eye in the right position, it’s time to sew it in place.
For a strong and durable finish, use buttonhole stitches around the loops of the eye.
Make sure each stitch is evenly spaced and maintains consistent tension to ensure the eye is attached securely and lies flat against the fabric.
After the loops are stitched, make sure the eye is secured to withstand the wear and tear of regular use.
Finish with a knot the same way as the hook.
After sewing both the hook and eye, practice opening and closing the closure. Check for ease of use, proper alignment, and secure attachment.
Mastering the technique of sewing hooks and eyes neatly and securely can take some practice. Working with scrap fabric is an excellent way to practice before moving on to your final garment.

Common Uses of Hook and Eye Closures in Garments
Hook and eye closures are versatile and can be found in various parts of garments, serving both functional and aesthetic purposes. Here are some common places where you might find them
- Waistbands: They are often used on the waistbands of skirts and pants to provide a secure closure at the top of a zipper.
- Necklines: On blouses and dresses, a hook and eye can discreetly secure a neckline or the back of a collar, preventing gaps.
- Bra Closures: Many bras use multiple hook and eye closures to allow for adjustments in band size for a comfortable fit.
- Lingerie: Besides bras, other lingerie items like bustiers and corsets may use hook and eye closures for a snug fit.
- Fur Coats and High-End Garments: They can be used as closures for fur coats or other high-end outerwear, often as a hidden closure to not detract from the garment’s design.
- Bridal Wear: Wedding and evening gowns sometimes have hook and eye closures to discreetly fasten the dress while providing a smooth silhouette.
- Performance Costumes: In costumes for dance or theater, hook and eye closures allow for quick changes and secure fastening.
Hook and eye closures are popular because they’re reliable and give a neat look, which is why they’re used in both everyday clothing and special occasion wear.
Note: Some of the links on this page are affiliate links. This means I will receive a commission if you order a product through one of my links. I only recommend products I believe in and use myself.
Hook and Eye closures on Amazon
This hook & eye closure is a little unusual because of the rhinestone included. Usually these closures are hidden (are supposed to be so) but this does not mean that they are completely invisible. If there is a chance that your closure might be visible, using one of these could add some pizazz.

VILLCASE Sewing Hooks and Eyes Closure
Or, if silver is not the color you want, there are golden colored closures too:

What about colorful closures? A closure the same color of the garment might work better than a simple silver one, and hide the closure better.

Same for this gold colored closures; they are certainly not pure copper (copper gets a greenish blue patina in time), they are probably an alloy of golden color.

Copper Sewing Hooks and Eyes Closure
The item below will not only give you black and silver colors, it will also give you 3 different sizes of each. If you like this closure and use it often, it might be worth considering.
")
Maosifang 60 Pairs Sewing Hooks and Eyes Closure
You could use any kind of needle of course but I find this self threading needle more convenient; probably it has something to do with the fact that the eyes of my needles seem to have gotten smaller lately? I am not sure 😀!
")
AIEX 48pcs Self Threading Needles
If you need beeswax to condition your thread, here is a good option. This will probably last you for many, many years. Any wax will do of course but this has a convenient holder and it is easy to use.

So here is my YouTube video. Check this out if you like to see a helpful video on how to sew a hook and eye closure (instead of reading).

Did you find this guide on sewing a hook and eye closure useful? If yes, why not save this pin to your Pinterest board? That way, you can easily return to the article whenever you need a refresher on this process. And for an ongoing stream of handy tips, tutorials, and all sorts of creative inspiration, make sure to follow me on Pinterest.
latest posts
- What Do You Call a Person Who Sews? I Asked My Readers and Got 1,408 Opinions
- DIY Round Purse: PDF Sewing Pattern and Detailed Instructions
- Mini Wonder Clips By Clover: Useful Sewing Tool Or Just Another Notion?
- Non-Slip Grips For Quilting Rulers: A Small Notion With A Useful Job
- Fabric Eraser for Sewing: What It Removes and When to Use It
- What Is The Best Thread For Sewing Machine Projects? Let’s Find Out!
- Butterfly Quilt Block Tutorial – Foundation Paper Piecing
- How To Sew Quilt Squares So The Corners Match
- Sewing With Fork Pins: How They Help With Pattern Matching, Slippery Fabric, And Seams