Fixing Sewing Mistakes: Repair an Accidental Cut in Fabric
So there I was, mid-dress, feeling pretty good about my progress… right up until my scissors had other plans. Of course it wasn’t my fault. One wrong snip later, and I was staring at a 1½-inch straight cut in a spot it had absolutely no business being in.
Was it time to cry, order a pizza, and pretend this dress never existed? Tempting. But no — I decided to fight back instead. Lucky for me, the busy print was doing its best to hide the crime scene, but “hidden” wasn’t good enough. I didn’t want a repair that screamed “patched up in a panic” — I wanted it to vanish. Like it never happened. Like my scissors never betrayed me.
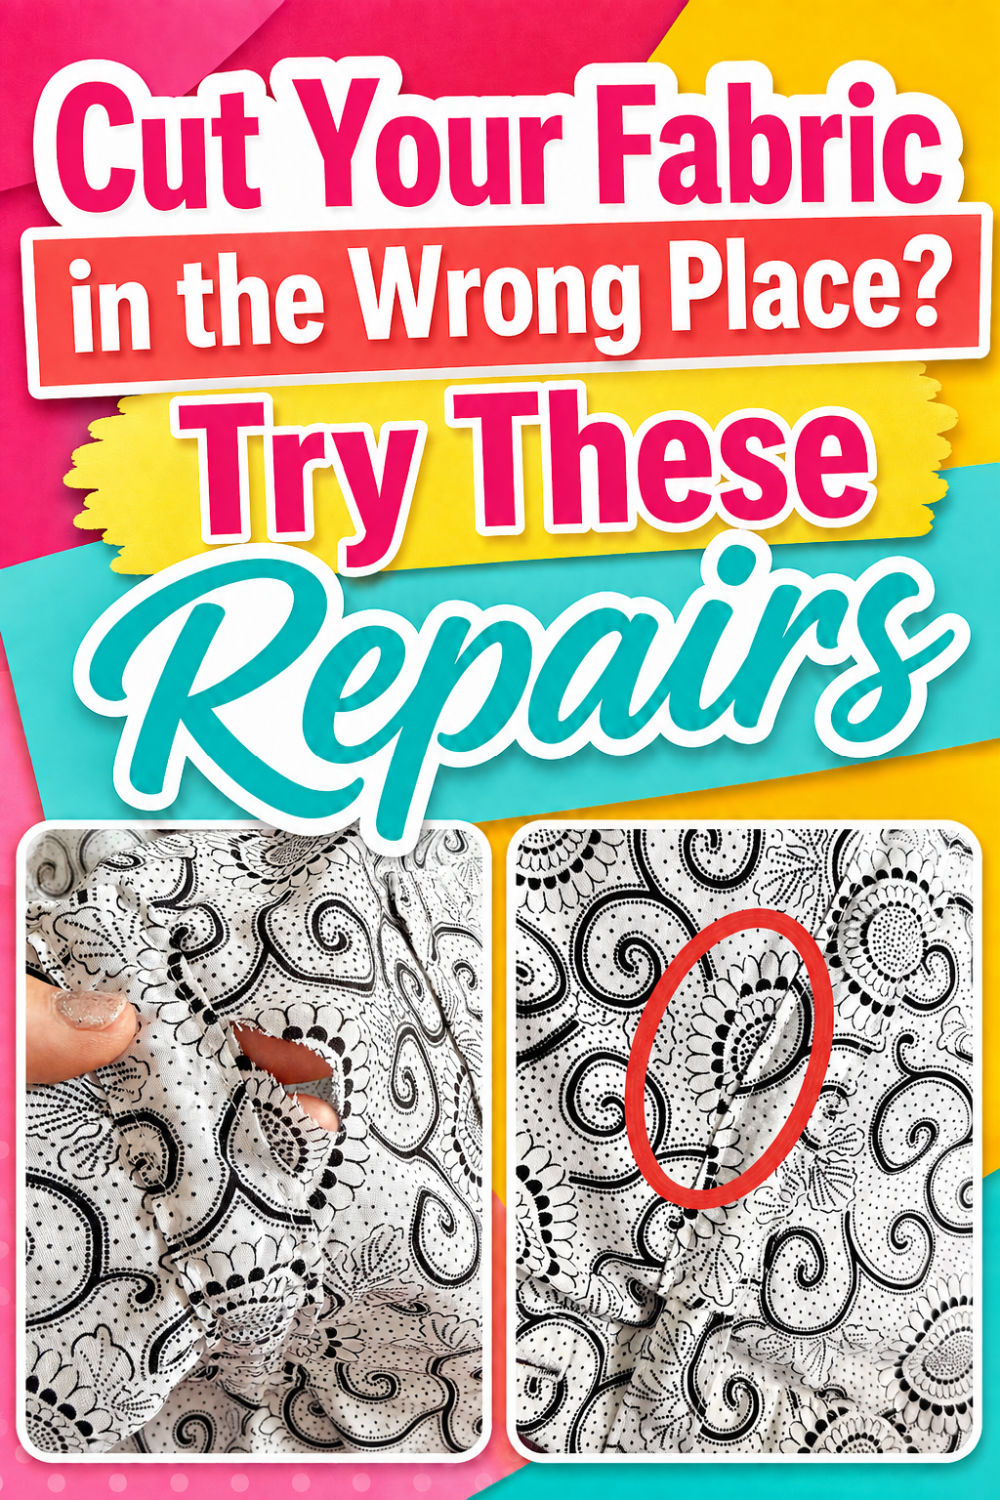
So in this tutorial, I’m taking you step by step through exactly how I rescued this fabric from the reject pile and made that accidental cut disappear from the right side — no visible scars, no obvious patch job, just a quiet little secret between me and the dress. I’ll also tell you when this fix is actually the right call (and when you should maybe just start over and pour yourself a coffee).
Because, you know — every sewist has “that moment.” Here’s how to survive yours.
Prefer to read without ads?
I created a PDF version of this guide for anyone who likes to keep sewing guides saved, printed, or easy to read without ads. It includes the same helpful information in a simple format you can download and use whenever you need it.
The PDF is available in my shop for a small fee. It’s a nice option if you want to support my work and keep this tutorial close to your sewing machine.
Can an accidental cut in fabric really be repaired?
A clean, straight cut is often easier to repair than an irregular hole. The original fabric is still there, and the two cut edges can usually be brought back together.
This method works best when:
- The cut is fairly straight.
- No fabric is missing.
- The damaged edges can still meet.
- The fabric is woven and can tolerate a very narrow tuck.
- The repair is not in a tightly fitted or highly stressed area.
- Taking up a tiny amount of fabric will not affect the fit.
The finished repair looks like a very narrow seam or tuck. On a patterned fabric like mine, it blends into the print so well that it is difficult to spot unless you know where to look.
On solid fabric, stripes, checks, or very smooth fabric, the repair may be more noticeable.
Step 1: Examine the accidental cut
First, look closely at the damage.
My cut was approximately 1½ inches long and quite straight. The fabric had started to fray slightly along the cut edges, but no large section was missing.
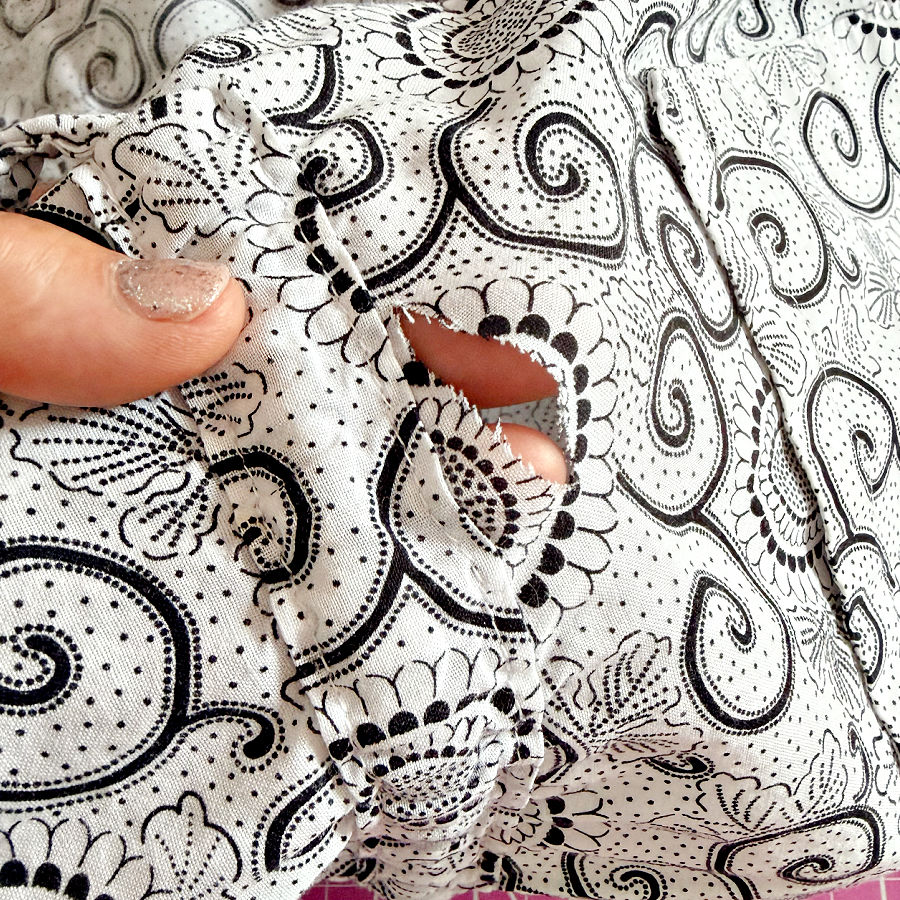
Do not pull on the cut or continue handling the area more than necessary. The more the fabric frays, the harder it becomes to line up the edges neatly.
Trim only completely loose threads. Do not trim the fabric edges themselves because you need to preserve as much fabric as possible.
Note: Some of the links on this page are affiliate links. This means I will receive a commission if you order a product through one of my links. I only recommend products I believe in and use myself.
Step 2: Cut a piece of lightweight fusible interfacing
Cut a piece of lightweight fusible interfacing large enough to reinforce the full length of the cut.
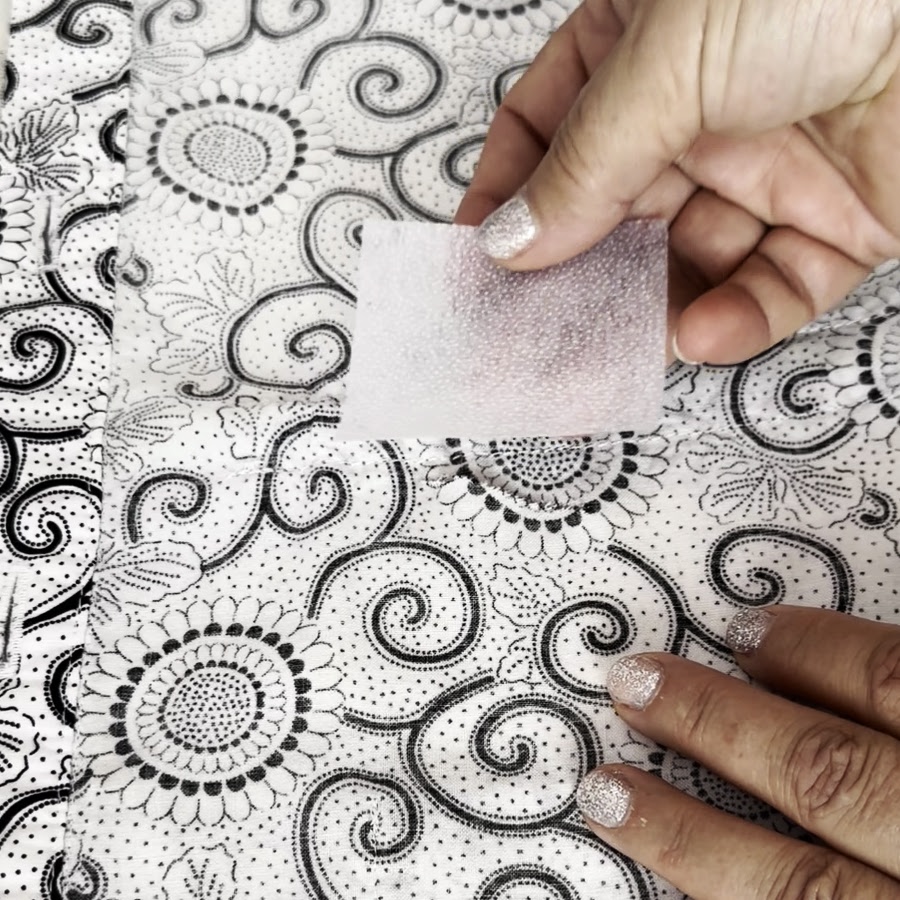
Choose the lightest interfacing that will still stabilize the fabric. Heavy interfacing can make the repaired area stiff and may create a visible outline on the right side.
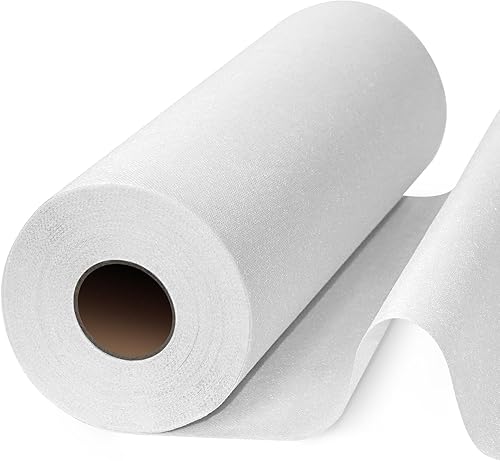

✅ Related tutorial: Essential Sewing Tips: How to Apply Fusible Interfacing Correctly
The interfacing should extend beyond both ends of the cut and cover the fabric on both sides. I allowed extra space around the damaged area so the ends of the cut would also be supported.
Do not make the piece much larger than necessary. A large patch may change the drape of lightweight fabric and could be visible from the right side.
Step 3: Position the cut edges
Place the fabric wrong side up.
Carefully bring the cut edges back into their original position. The edges should meet without overlapping.
Do not stretch or pull the fabric while positioning it. Stretching can create a ripple around the finished repair.
Place the fusible interfacing over the damaged area on the wrong side.
Step 4: Fuse the interfacing
Follow the instructions supplied with your interfacing. Use the correct iron temperature for both the interfacing and your fabric.
Lower the iron onto the area and hold it in place. Lift and reposition the iron rather than sliding it back and forth. Sliding may shift the cut edges before the adhesive has bonded.
Allow the fabric to cool completely before moving it. Fusible adhesive continues to set as it cools.
The interfacing stabilizes the cut, controls fraying, and makes it much easier to sew a narrow, accurate repair.
Step 5: Mark the stitching line
The next step is to turn the accidental cut into a very narrow seam.
Fold the fabric so the right sides are together and the cut edges are aligned.
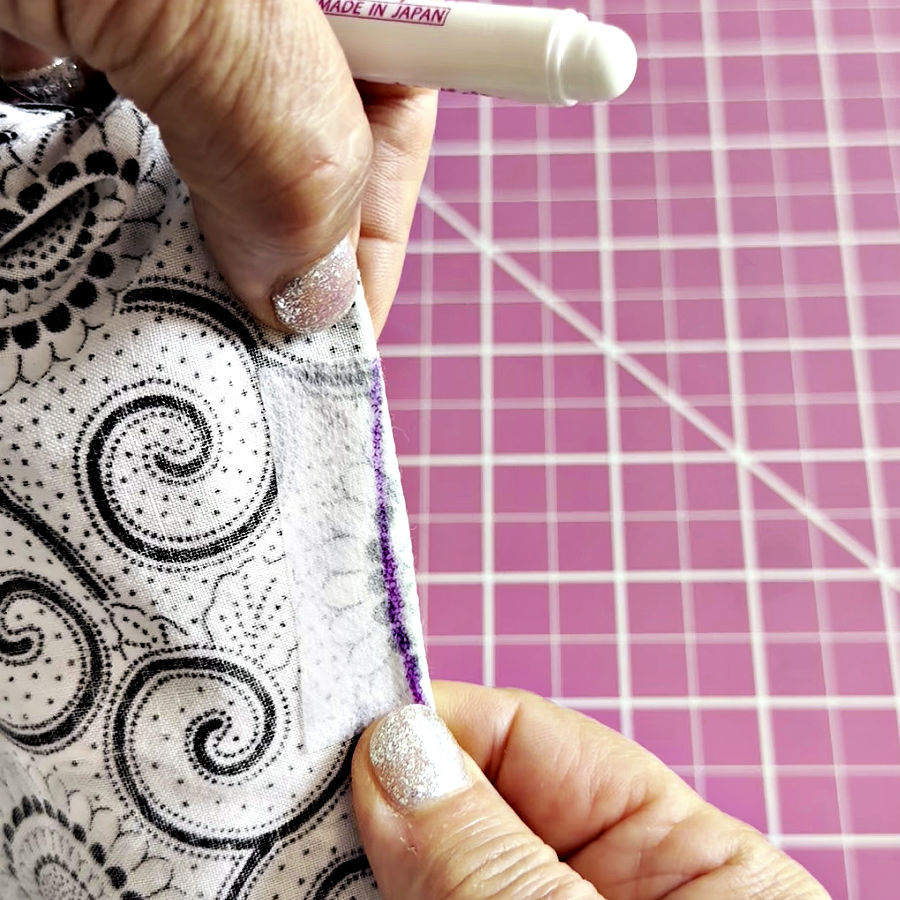
Mark a stitching line beside the cut with a removable fabric marker. Extend the line slightly beyond both ends of the damaged area.
✅ Related tutorial: Your Guide For Choosing The Best Quilt Marking Pens For Every Project

The line should taper gradually at each end, much like the point of a dart. This is important. If you sew the same width from beginning to end and stop suddenly, the repair may form little bumps or puckers at the ends.
Keep the stitching line as close to the cut as you safely can. The wider the seam, the more fabric the repair will take up and the more noticeable the tuck may become.
I used a purple removable fabric marker so I could see the stitching line clearly against the interfacing.
Always test the marker before using it on the garment. Make sure the marks can be removed.
The damaged area will now resemble a very narrow dart or seam. Pin it carefully, making sure the two sides remain even.
If the fabric shifts easily, hand-baste the fold before taking it to the sewing machine.
✅ Related tutorial: How to Cover Stains on a Shirt with Visible Mending
Step 6: Sew the repair
Thread the machine with a color that blends into the main background of the fabric. I used white thread because the background of my fabric is white.
Set the machine for a short straight stitch. A stitch length of approximately 1.5–2 mm gives you good control and helps secure the small frayed edges.
✅ Related tutorial: What is the stitch length and how to adjust it for different fabrics
Begin slightly before the cut. Start close to the folded edge, gradually sew toward your marked seam line, and continue parallel to the cut.
Use the narrowest seam allowance that will completely catch both damaged edges. Mine was a scant ¼ inch, and part of it was narrower.
As you approach the other end of the cut, gradually taper the stitching back toward the fold. The beginning and end should form narrow points rather than blunt stops.
Sew slowly. Secure the stitching with a few very small stitches. Another option is to leave thread tails and tie them by hand. Heavy backstitching directly at the tapered points may create extra bulk.
After sewing, turn the fabric to the right side and inspect the repair carefully.
In my case, I could still see a few frayed threads from the cut, which meant my stitching line was not quite deep enough. I returned to the sewing machine and stitched a second line slightly farther from the fold, making sure it enclosed the entire cut and caught all the damaged edges.
That is why you can see two rows of stitching in the photo. After the second row was sewn, no loose threads were visible from the right side, and the cut was completely closed.
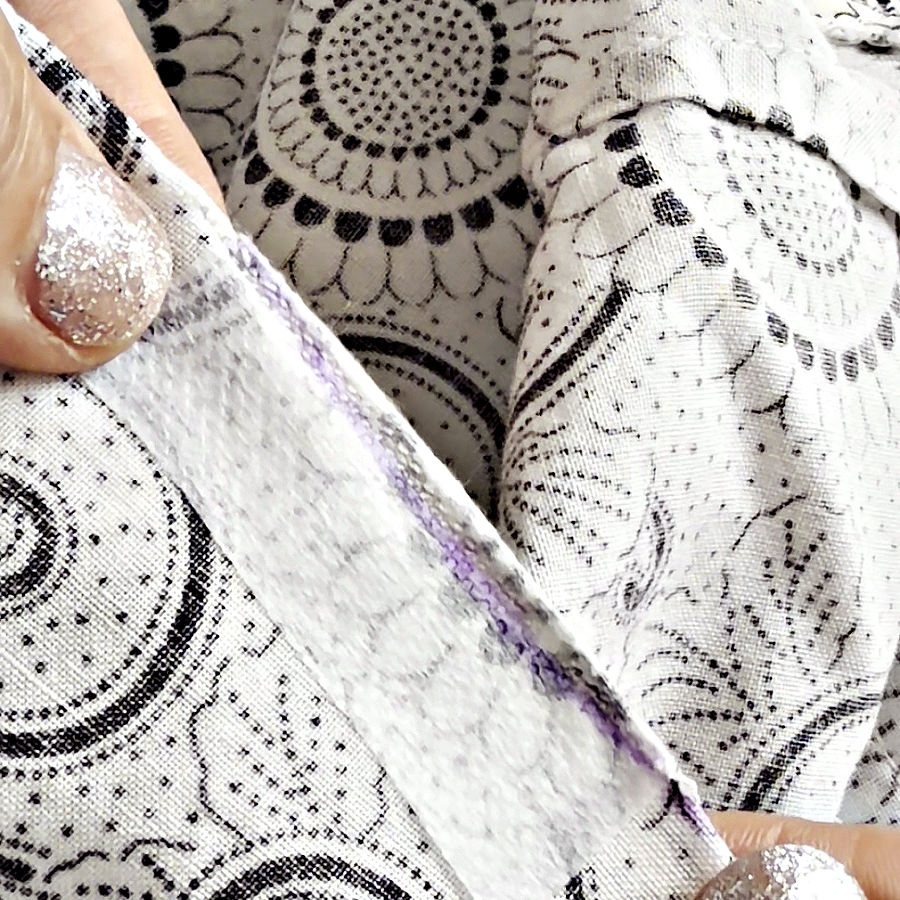
Step 7: Finish the raw edges
After sewing the straight seam, inspect the raw edges on the wrong side.
If the fabric unravels easily, finish the edges with a narrow zigzag or overcast stitch. Keep the finish light. A wide, dense zigzag may make the repaired strip stiff.
The fusible interfacing already gives the area some protection, so the purpose of this stitching is simply to keep the remaining raw threads under control.
This is different from zigzagging directly over the original cut on the right side. The zigzag is now hidden inside the repair.
✅ Related tutorial: How to Stop Fabric from Fraying: 21 Reliable Techniques to Try Today
Step 8: Press the repaired area
Press the small seam as it was sewn first. This helps settle the stitches.
Next, press the narrow repaired strip to one side. Use the tip of the iron and avoid flattening a much larger area than necessary.
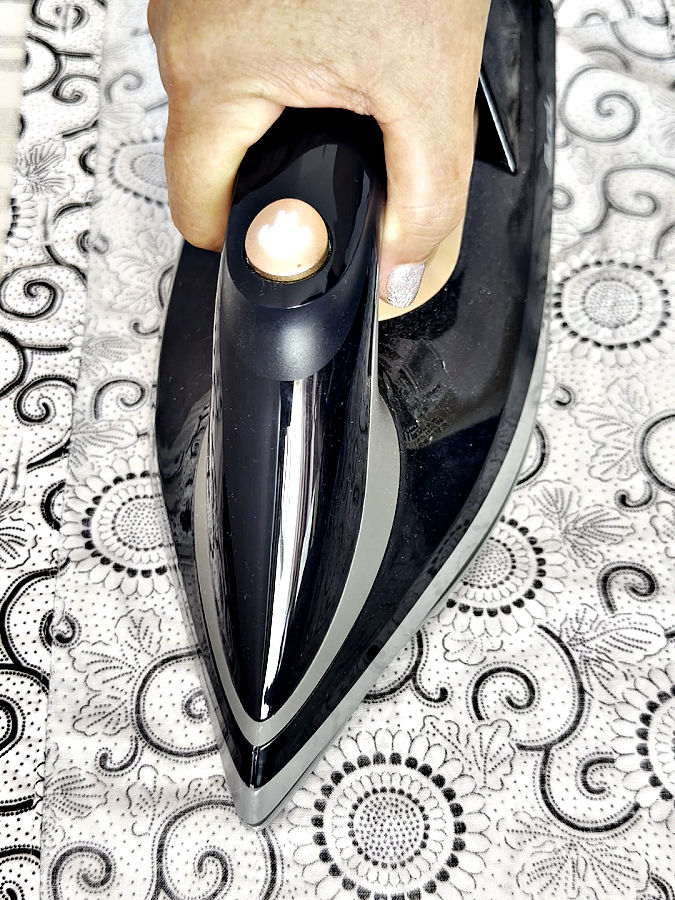
Turn the fabric right side up and press again with a pressing cloth if the fabric requires one.
Do not move the iron back and forth over the repair. Press, lift, and reposition it.
Allow the area to cool on the pressing surface before examining it.
✅ Related tutorial: Sundu Pro Steam Station with Ceramic Soleplate: Iron-y Good?
The finished repair
From the wrong side, you can see the narrow reinforced strip created by the interfacing and stitching.
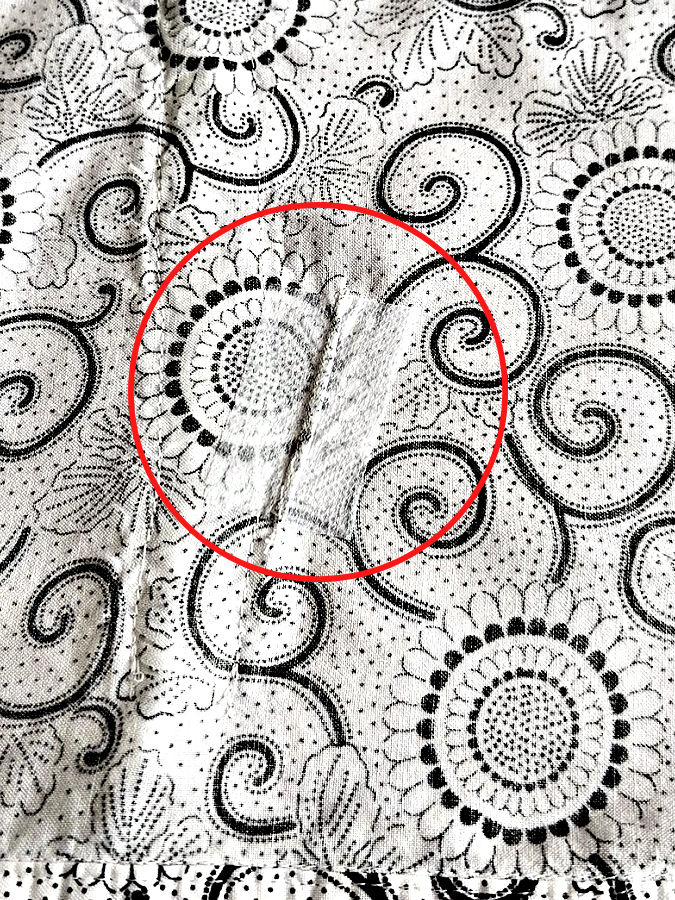
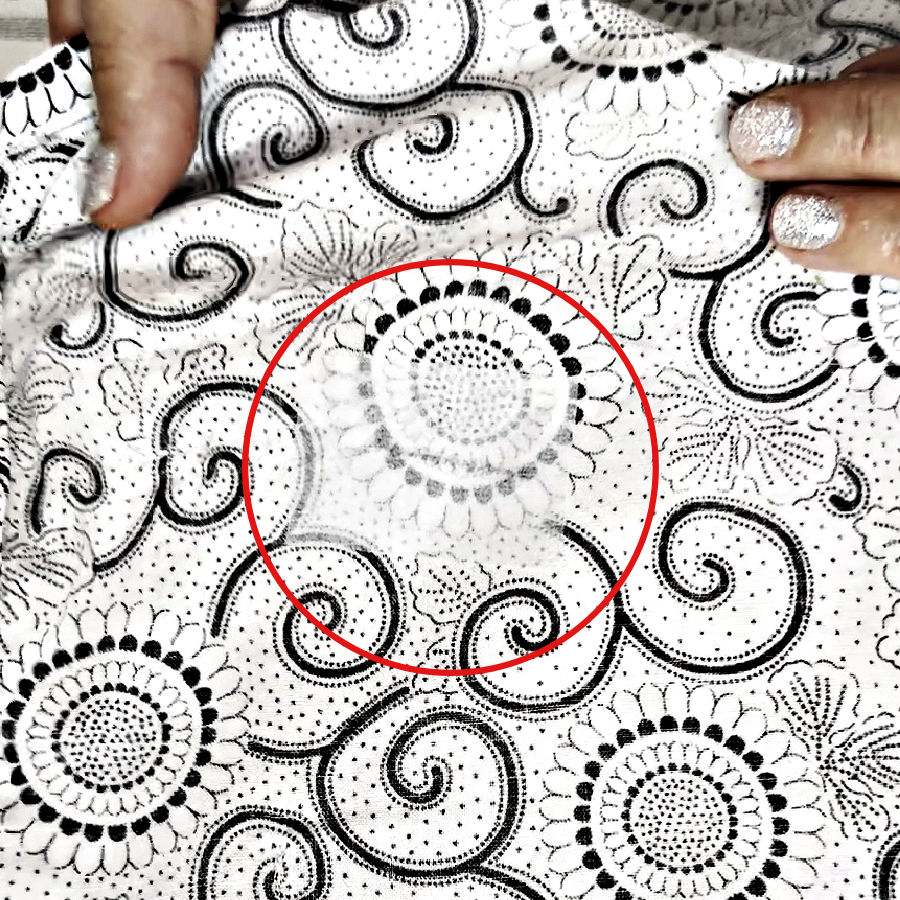
From the right side, the repair looks like a tiny tuck. On this particular fabric, the black floral and scroll print breaks up the line and makes it very difficult to see.
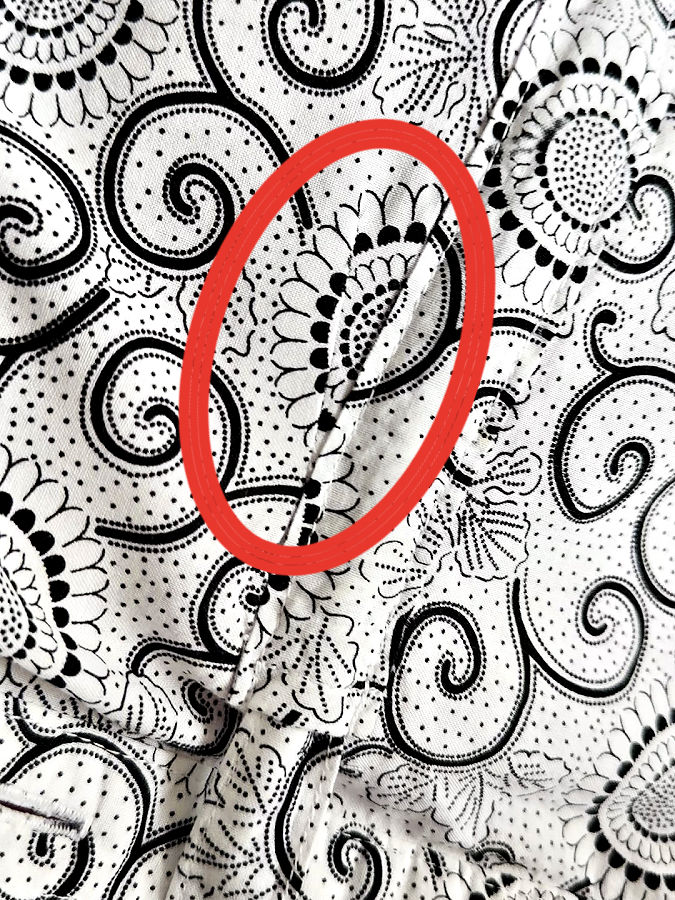
The cut has not simply been covered. Its edges are enclosed, reinforced, stitched, and protected from further fraying.
Here is a magnified image of the repair; it is actually quite difficult to see it if you don’t know it is there!
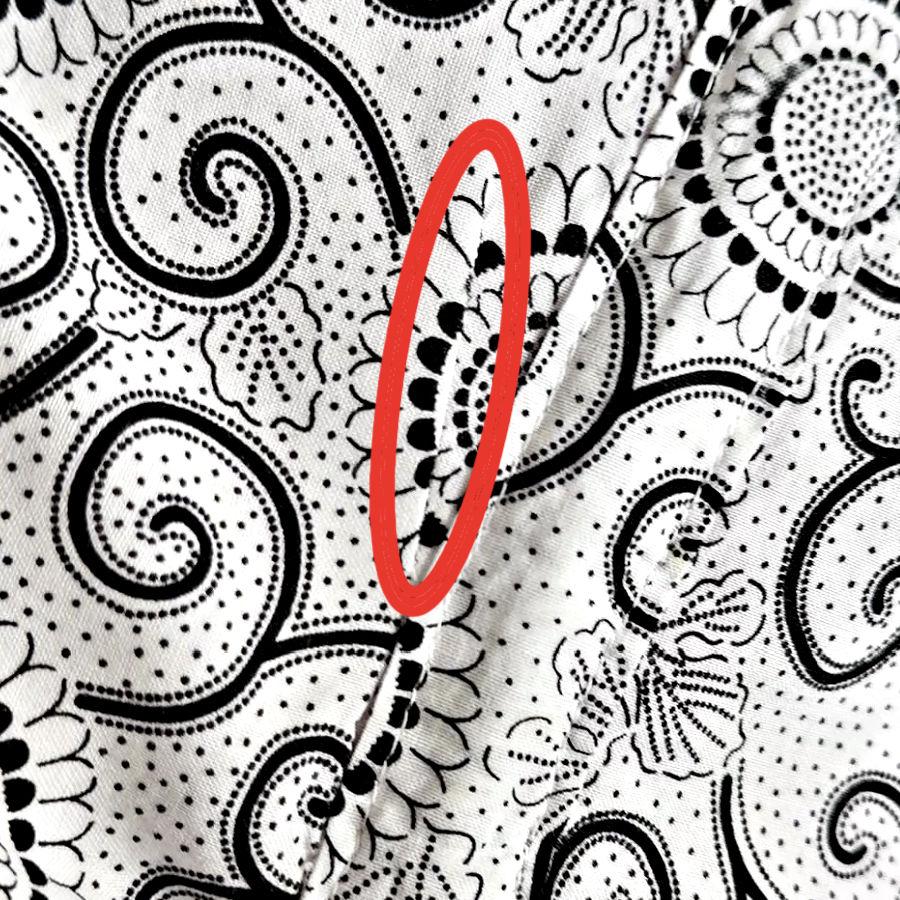
I was happy with the result. The repair is not magically erased, but it is almost invisible when the dress is worn.
Why not simply zigzag over the cut?
A zigzag stitch can be a perfectly reasonable repair in some situations.
I could have used one here because the fabric print would have hidden much of the stitching. It would also have been faster.
However, stitching directly across an open cut may:
- Leave a visible bar of dense stitching
- Pull the edges out of alignment
- Create puckering
- Leave frayed threads visible
- Feel rougher than a narrow enclosed repair
A direct zigzag repair is useful for costume pieces, household projects, busy prints, or areas that will not receive close attention. Use matching thread, bring the edges together first, and place lightweight stabilizer behind the cut.
For a garment I planned to wear, I preferred the narrow-seam method.
When this repair may not be the best choice
This repair takes up a small amount of fabric. That usually does not matter in a loose garment, but it could affect a fitted section.
Be cautious when the cut is:
- Across the bust, waist, hips, or another fitted area
- Close to a zipper
- On a fitted sleeve
- In very sheer fabric
- In stretch fabric
- Along a stripe or check that must stay perfectly aligned
- In an area that receives a lot of pulling
- Irregular or missing part of the fabric
A different mending method may work better in those situations.
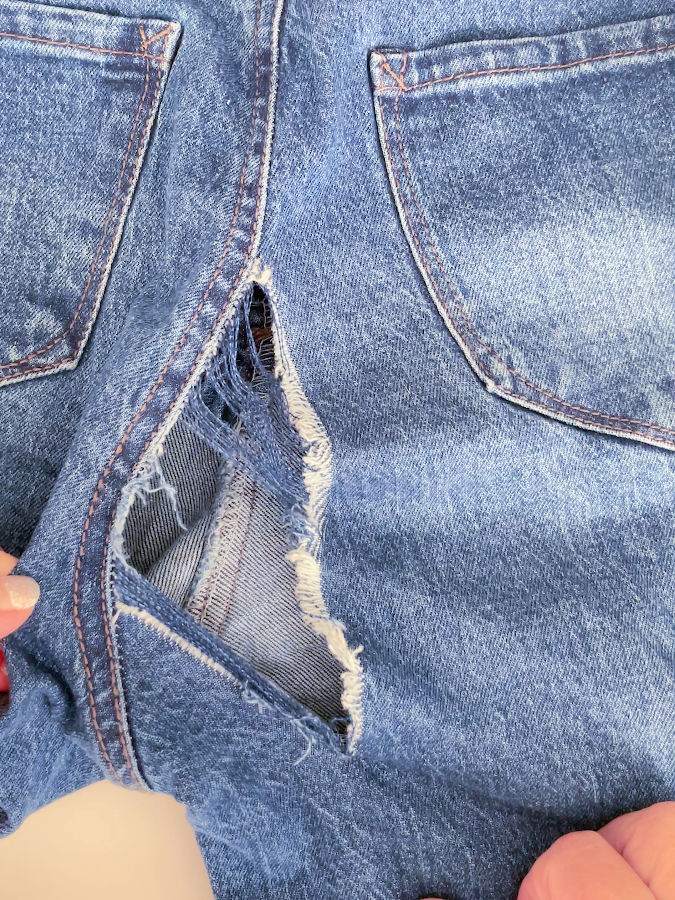
Do you want to see how I repaired a much larger rip hole in jeans? My article Mending a Hole in Jeans: Step-by-Step Guide to Saving Your Favorite Denim explains the process step by step!
Other ways to repair fabric cut in the wrong place
Use fusible interfacing and small zigzag stitches
Place lightweight interfacing behind the cut, align the edges, and sew across the damage with a narrow zigzag.
This is faster than making a tuck, although the stitches will usually be more visible.
Darn across the damaged area
A small hole or irregular cut can be stabilized from behind and covered with rows of straight stitching.
Sew back and forth across the damage, following the direction of the fabric threads. This creates a strong repair but is rarely invisible.
Cover it with an appliqué
A decorative appliqué can hide a cut that is too large or irregular for a subtle repair.
The appliqué can be repeated elsewhere on the garment so it looks like part of the original design rather than an emergency patch.
Add embroidery or visible mending
Sometimes hiding the accident is not the best option.
Decorative hand embroidery, sashiko-style stitching, machine embroidery, or a contrasting patch can turn the damaged area into a focal point. This works especially well when the fabric is solid and any subtle repair would still show.
Create an intentional tuck
If the accidental cut is in a suitable location, repair it as a narrow tuck and add one or more matching tucks elsewhere.
A second, mirror-image tuck can make the first one look like a planned design detail. Just check that the additional tucks will not make the garment too small.
Replace or recut the pattern piece
When the mistake happens early and you still have enough fabric, recutting the damaged pattern piece may be the cleanest solution.
Save the damaged piece for testing stitches, interfacing, buttonholes, or machine settings.
A few tips that make this repair less noticeable
Match the thread to the background color rather than the darkest part of the print.
Use very lightweight interfacing so the patch does not create a stiff rectangle.
Make the seam as narrow as possible while still catching the damaged edges securely.
Taper both ends gradually.
Press carefully and avoid stretching the fabric.
Check the right side frequently while working. It is much easier to correct the alignment before the final stitching is complete.
A sewing accident does not always ruin the project
Cutting fabric in the wrong place can feel like a disaster, especially when the garment is already partly sewn.
But a clean cut does not necessarily mean the project is lost.
My accidental cut was about 1½ inches long. After reinforcing it, folding it into a narrow seam, stitching it, and pressing it carefully, the repair became almost impossible to notice in the printed fabric.
It took more time than sewing a quick zigzag over the area, but the finished result was worth the extra work.
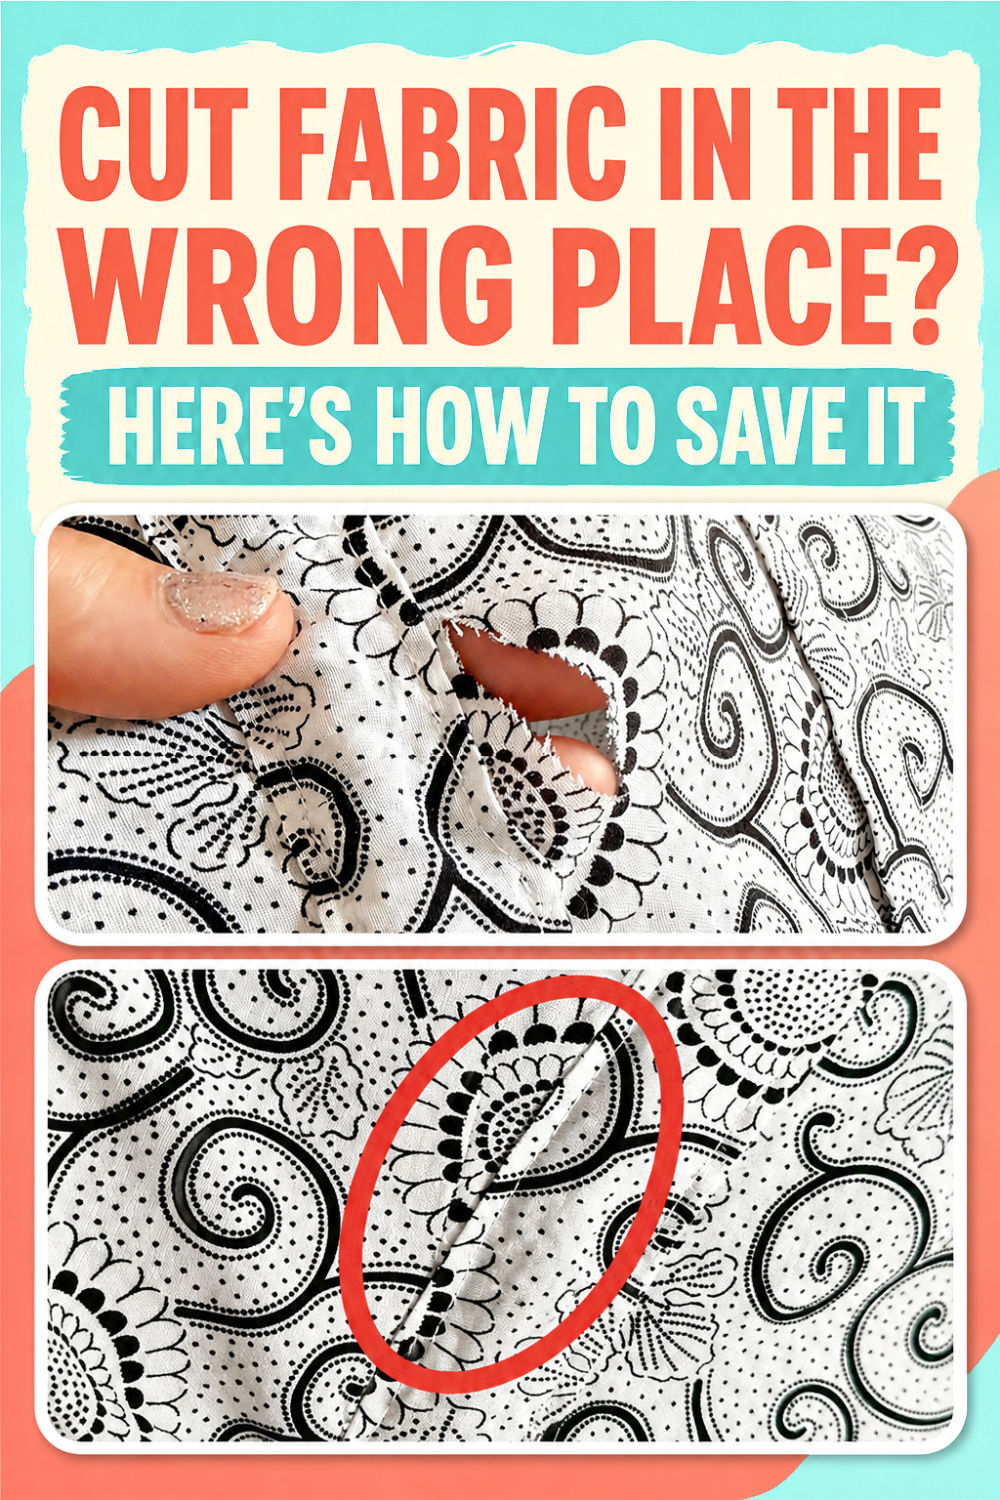
Did you find this tutorial helpful? Save the pin below to your sewing board so you can easily find the tutorial again when you need it. And follow me on Pinterest for more sewing tips, tutorials, and ideas.

latest posts
- 10 Easy-to-Miss Features on Sewing Supplies You Should Be Using
- Twin Needle Sewing: My First Try Was a Mess, But Here’s What Worked
- 10 Rules That Made Me a Better Sewist
- How to Make a Lightweight Summer Neck Scarf with a Lettuce Hem
- What Sewists Hate About Sewing: Common Complaints and Practical Fixes
- Knit Presser Foot: How It Works, How to Use It, and My Sewing Tests
- How to Sew Neat Mitered Corners at Acute Angles
- Sewing Machine Needle Organization: A Clever System I Tried
- DIY Car Armrest Organizer: Sewing Tutorial