
How are you going to prepare for the 4th of July celebration this year? Here are a few tank top hacks on how to refashion t-shirts/tank tops for the 4th of July holiday. All these cute DIY projects are pretty simple with minimal sewing so they are good for beginners and kids. Celebrate the 4th of July season in style with these free easy refashioning projects. Learn fabric manipulation techniques like “reverse applique” and “faux chenille”.
I made these 3 projects a month before July 4 so I decided to embellish them with Independence Day fabric – I really like these patriotic designs with red, white, and blue elements.
In July it’s usually very hot all over the USA, so why not wear these tops for 4th of July fireworks, holiday picnics, and parties?
Note: Some of the links on this page are affiliate links. This means I will receive a commission if you order a product through one of my links. I only recommend products I believe in and use myself.
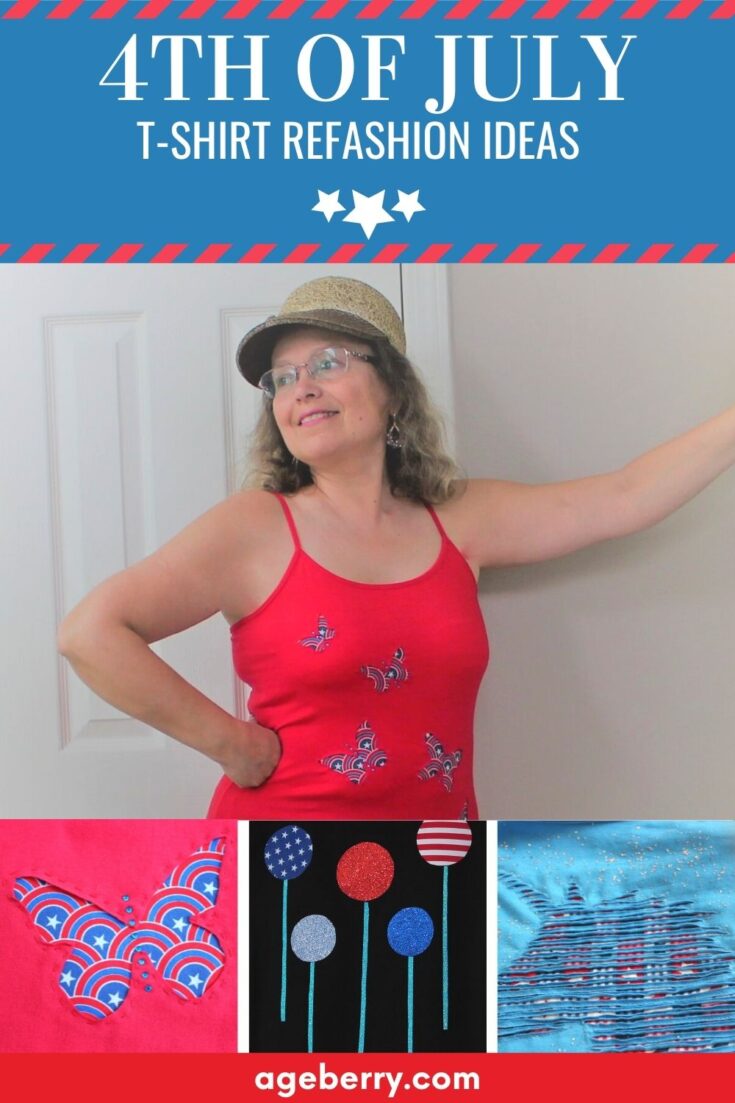
Red top
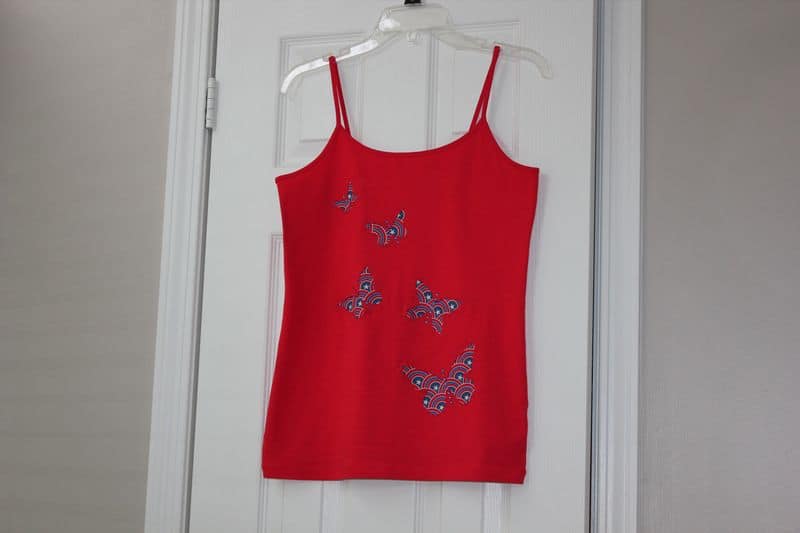
For this top, I used a reverse applique technique. And it’s as easy as threading a needle because you don’t need a sewing machine for this project.
You will need
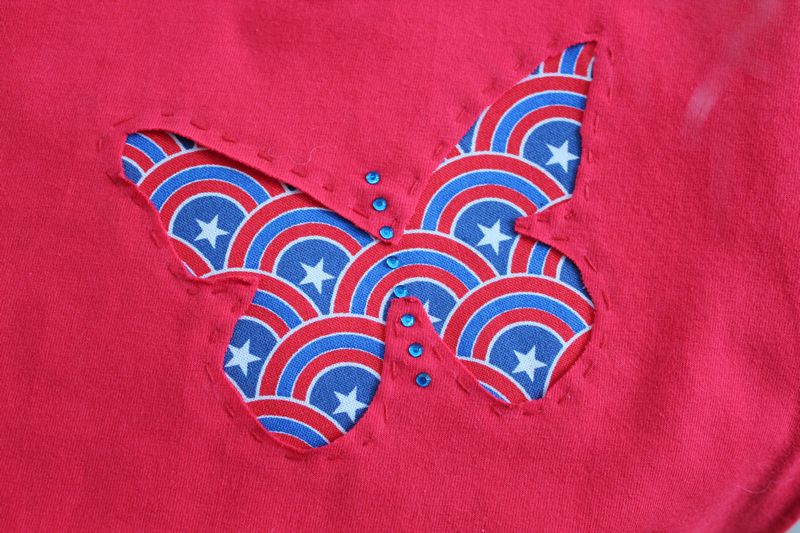
- Some scrap fabric – I used 4th of July fat quarters
- Thread the same color as your top
- Hand sewing needle
- Scissors – small ones to cut small pieces of fabric
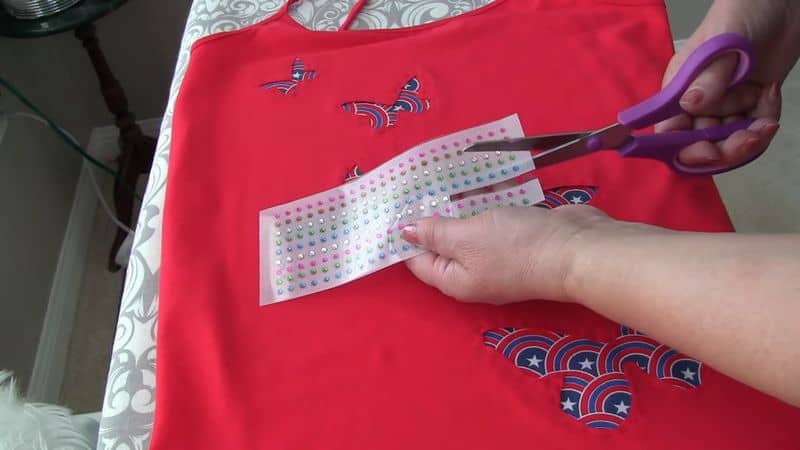
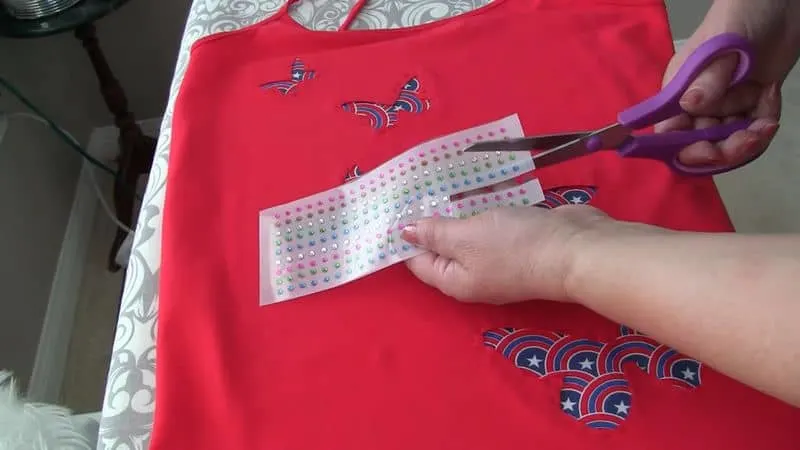
- Iron-on rhinestones (optional)
- Marking tools to transfer lines onto fabric
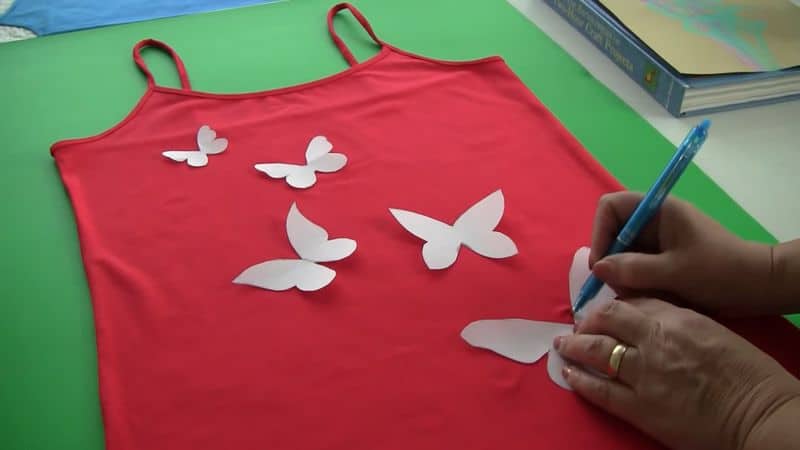
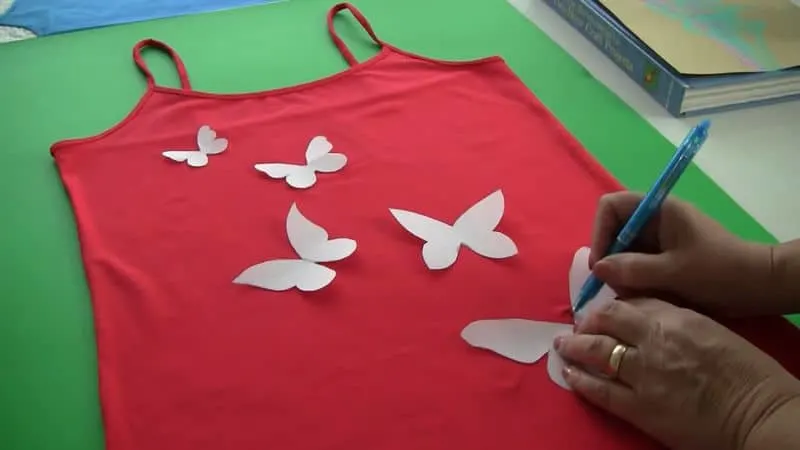
- Stencil or cut templates (I used butterflies but it can be anything)
Start with transferring your designs onto fabric. I had 5 butterflies, of different sizes.
This time I used a Frixion pen – it’s a magical pen: lines disappear with heat! You can read about it here. People say it’s not made for fabric, it’s a writing tool, not a marking fabric tool. But I only had a good experience with it. Check the video below to see how I used it. Pure magic! I had only one small problem with it – I didn’t know how to open this retractable pen but in the end, I figured it out.

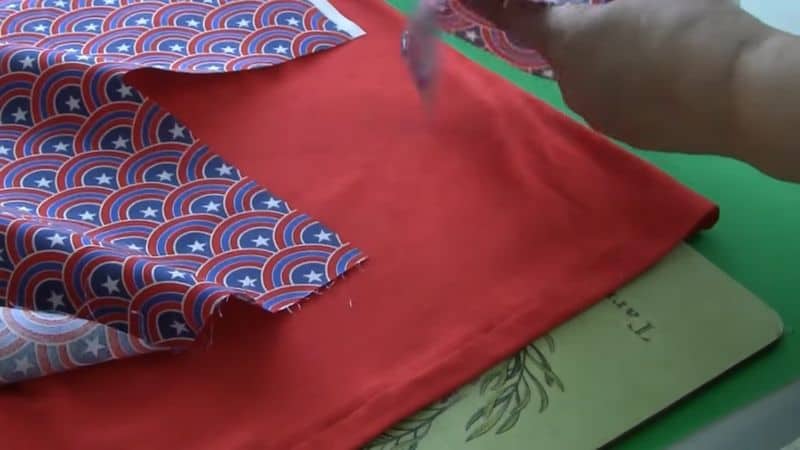
Cut 5 pieces of 4th of July fabric so each piece covers a butterfly completely.
Place a piece of plastic or some cutting board between fabric layers to prevent sewing through. Pin both pieces of fabric together so you can sew them together: place them like this – the wrong side of the plain top fabric together with the right side of the printed fabric.
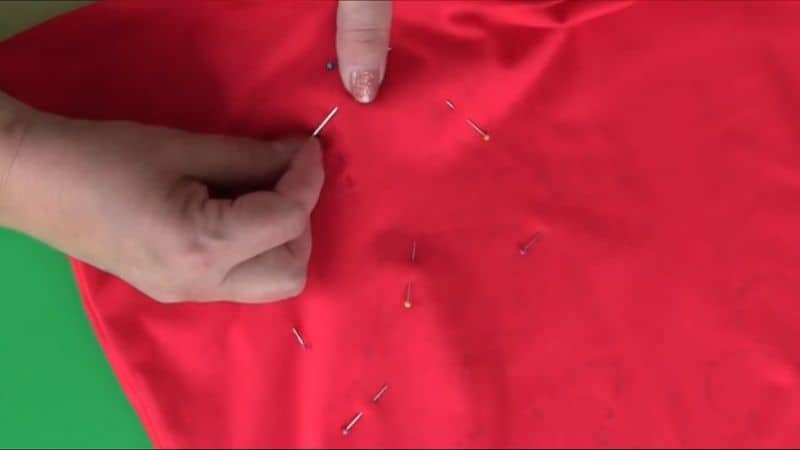
Thread a sewing needle with coordinating thread and hand sew pieces together.
For this kind of sewing, I used double thread in the needle, and I want to show you how to start sewing without a knot (and it will be no thread tail also!).

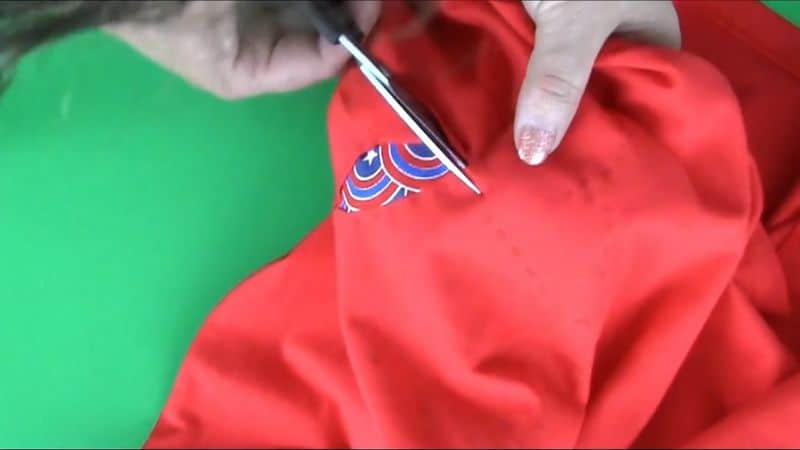
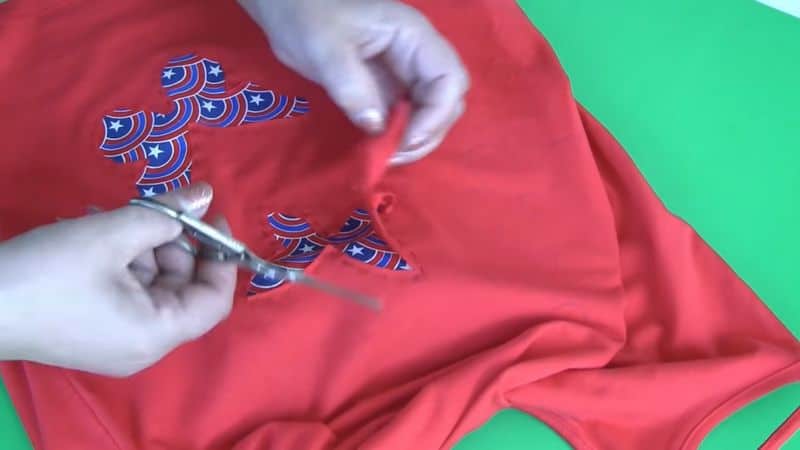
Using small embroidery scissors cut the plain top fabric inside the sewn lines uncovering the applique fabric under it and removing excess fabric. I cut pretty close to the stitches – maybe ⅛ in. But be careful not to cut your printed fabric underneath.
After all pieces are in place use an iron to transfer rhinestones.
And now you can see how I am doing it in real-time from the beginning to the end.

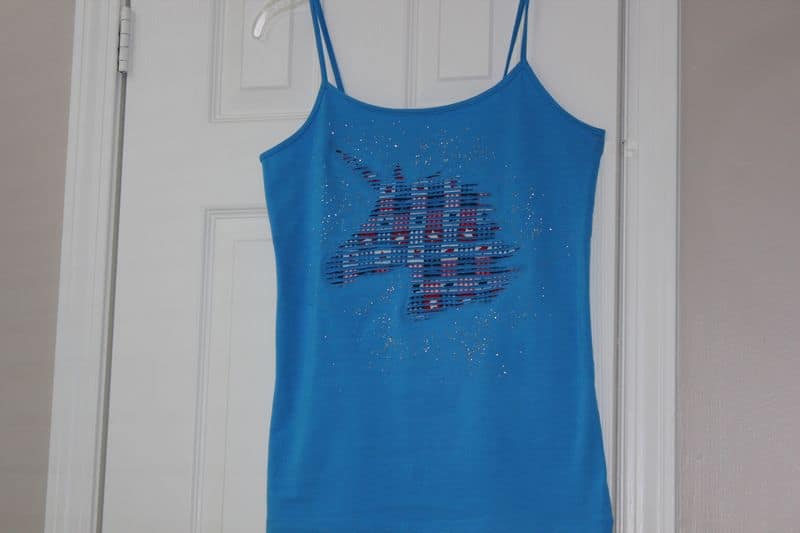
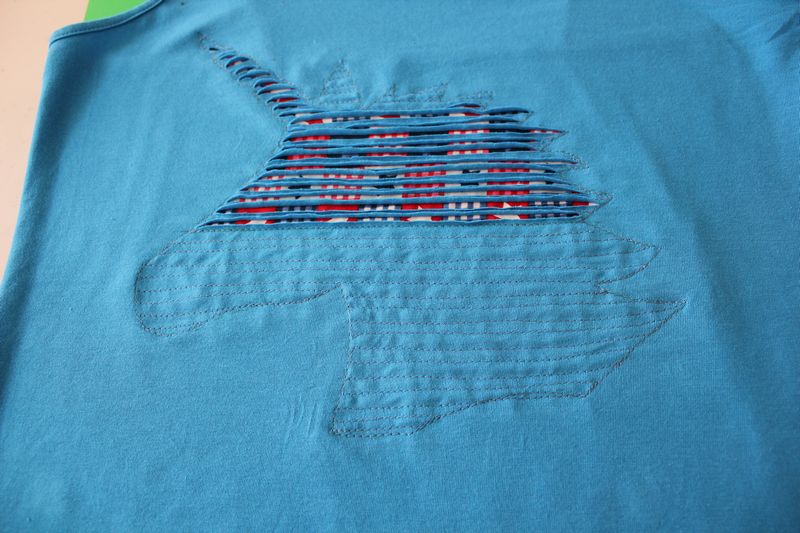
Blue top
For this top, I used a fabric manipulation technique called “faux chenille” (or a stitch and slash method). You can successfully use it on t-shirts, dresses, pillowcases, etc. It’s not the fastest project but I think the result is worth the effort.
You will need
- Some scrap fabric – I used 4th of July fat quarters
- Scissors – small ones to cut small pieces of fabric
- Marking tools to transfer lines onto fabric – I used the Frixion pen
- Unicorn template – you can get the SVG cutting file in my RESOURCE LIBRARY
- Sewing machine
- Coordinating thread
- Glitter – the secret to creating beautiful craft projects
- Temporary hold spray
Start with transferring the design onto fabric. I used a Frixion pen (see the video above) again as my marking tool – it’s still a magical pen: lines disappear with heat, and I was happy to use it again.
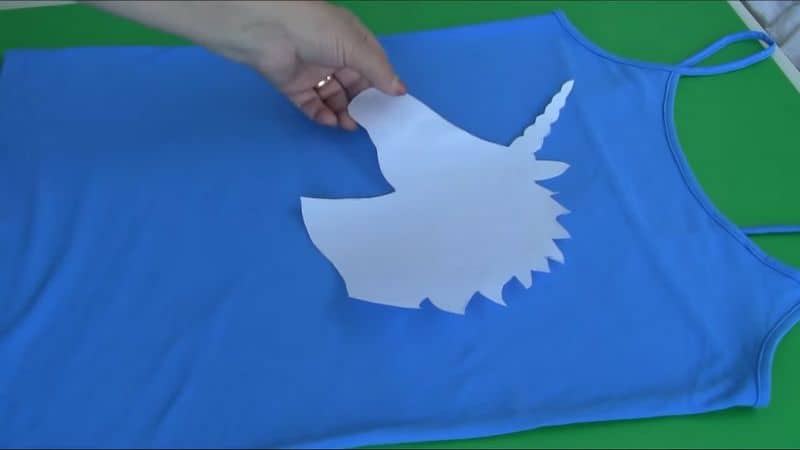
Now place a piece of plastic or some cutting board between fabric layers to prevent sewing through. Cut a piece of fabric to cover the design completely. I used the 4th of July fabric (just a fat quarter).
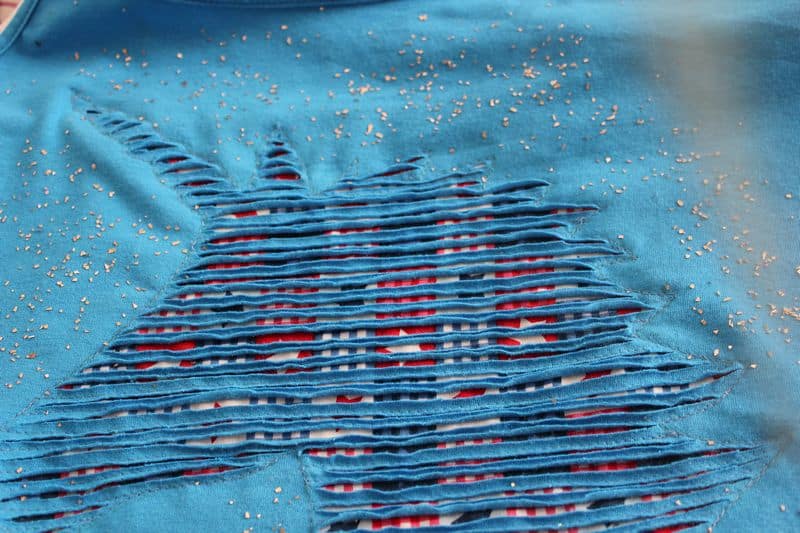
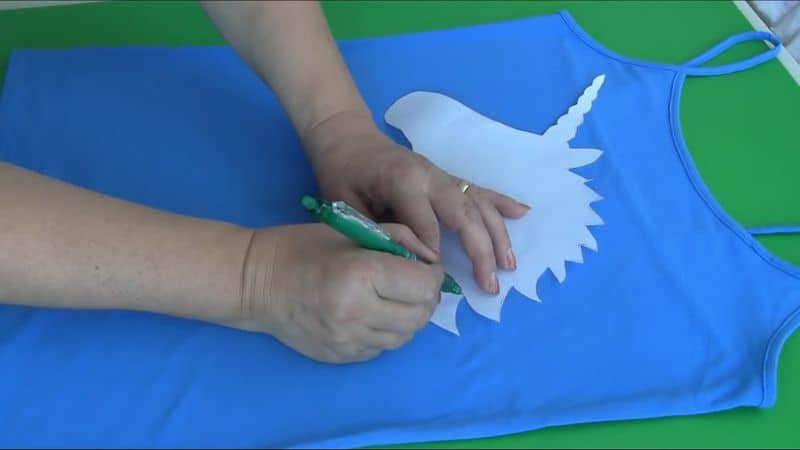
Pin both pieces of fabric together so you can sew them together. Stitch over marking lines following the outline of your design (the Unicorn image in my case). Use a straight stitch of your sewing machine.
Now you have to sew parallel lines using a ¼-inch distance between them. I started in the middle of the design with the longest line first. Try to keep an equal distance between the lines. I stitched on the wrong side (on the cotton piece) to prevent puckering.
After stitching is done, trim all threads that stick out.


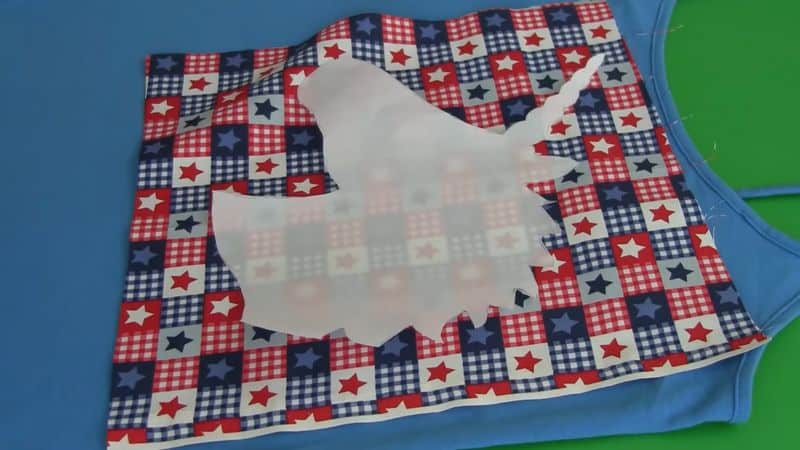
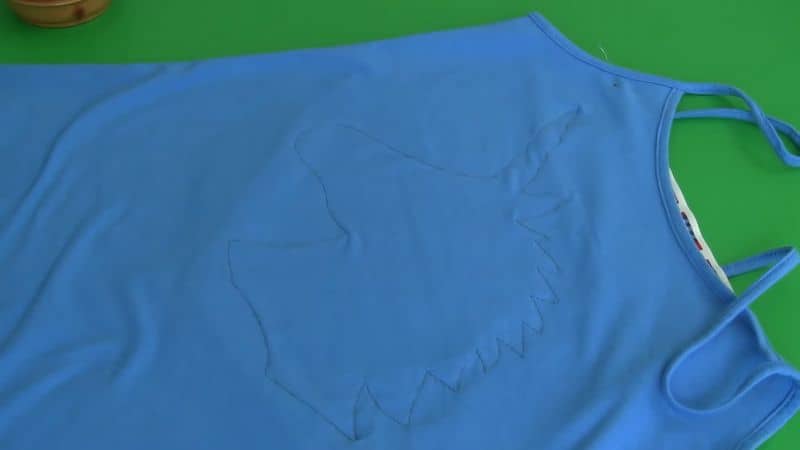
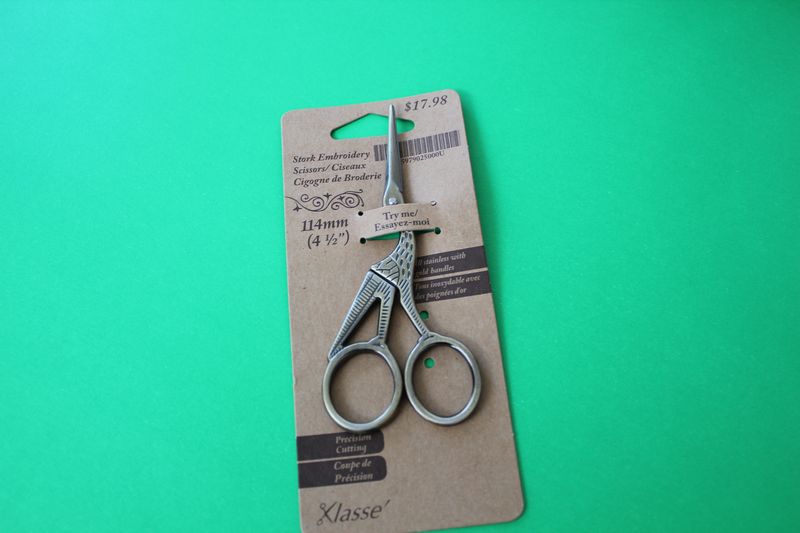
Slash the lines on the right side of the top. Be careful not to cut the applique fabric and sew stitches. I used very nice embroidery scissors with fine points made in the shape of a stork.
After that add some glitter around the Unicorn. For this, spray the top with Temporary hold spray and place the glitter around the applique. Make sure the glitter is properly glued to the fabric. I just used a piece of paper to press the glitter. As you can see in the video below, the paper after I took it from the top didn’t even have any glitter on it – all glitter stayed on the fabric.
You can see how it’s done in real-time in the video below.

Blacktop
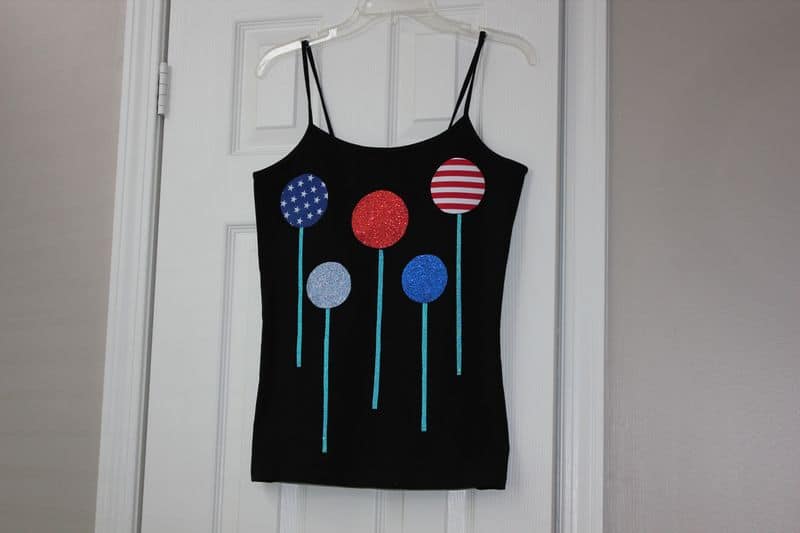
You will need
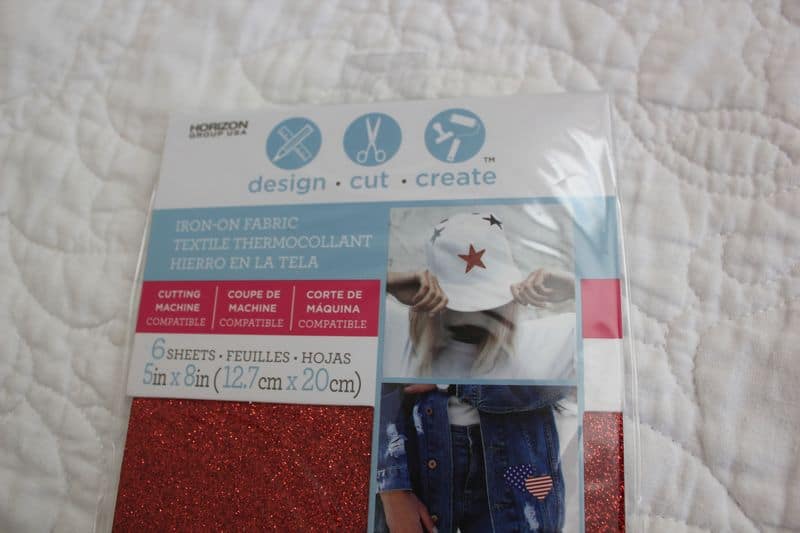
- Iron-on applique fabric
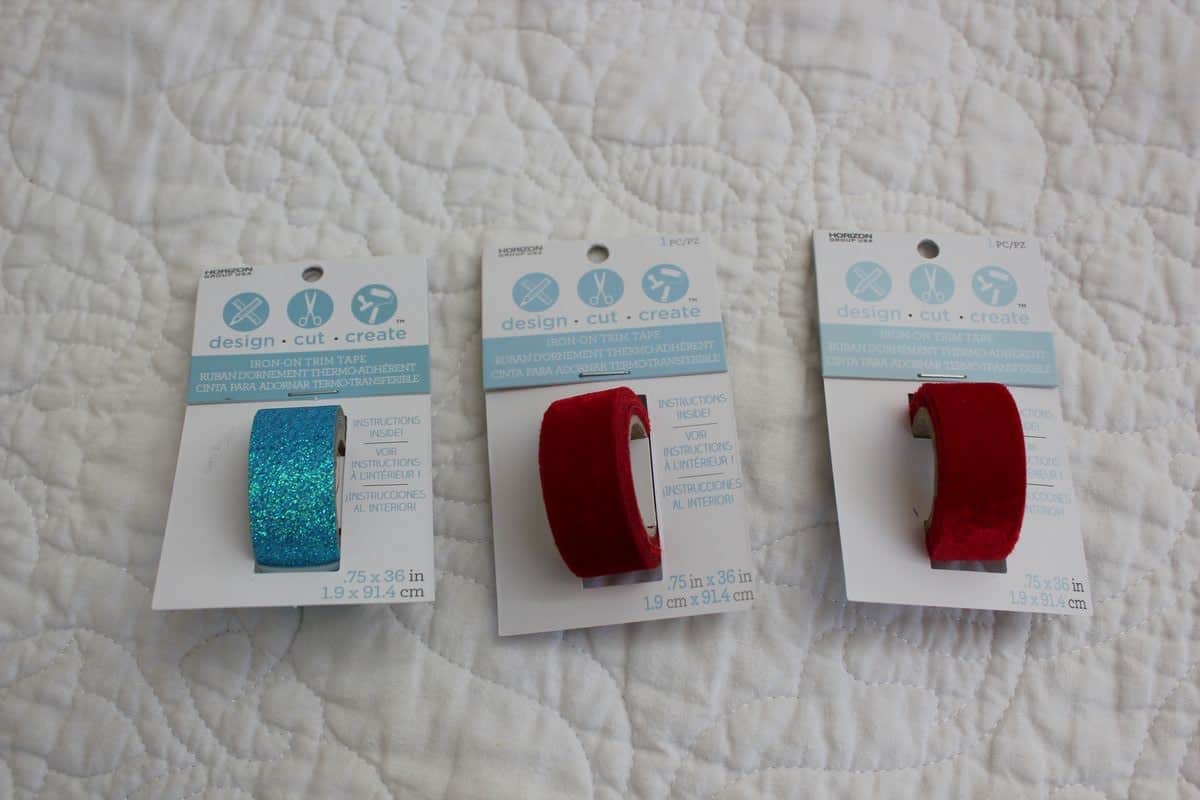
- Iron-on trims
- Piece of paper
- Iron
- Scissors – small ones to cut small pieces of fabric
Maybe this design is not the nicest but I would like to show you something very interesting here.
I found it in Michael’s store and I didn’t even know it exists. What am I talking about?
It’s an iron-on applique fabric, precut and pre-glued. All you need to do is cut the design and attach it to the fabric with an iron. You don’t even need to sew the fabric or finish the edges. And these sheets are different from iron-on heat transfer vinyl sheets – they are softer and made of real fabric (not vinyl).
Also, there are even trims like that!
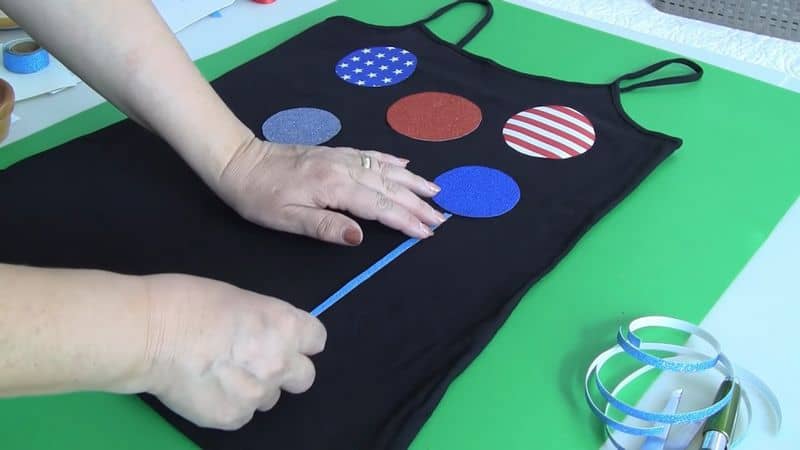
So, I cut the designs – balloons of different sizes, and I cut what is supposed to be strings from the trims.
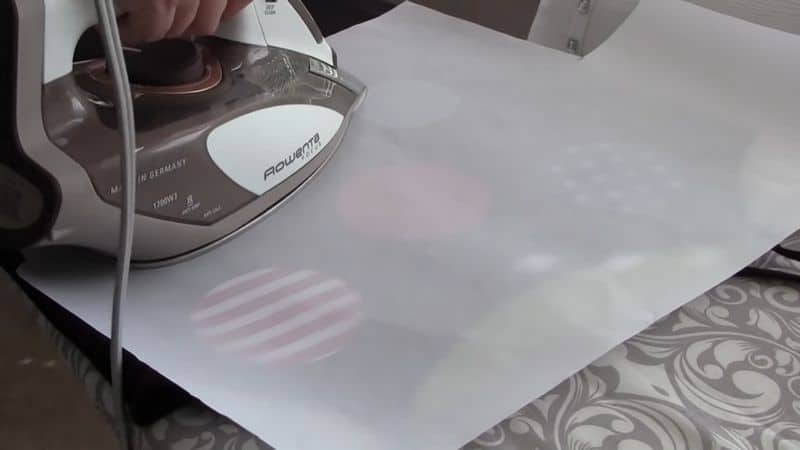
Place the design however you like and press through a piece of paper to finish the appliques.
Below you can see the video about making the black top.

So, these are a few inspirational ideas for transforming tank tops/t-shirts. As you could see all projects were pretty simple with almost no sewing and a little work will allow you to stand out while wearing a unique top.
Ready to try refashioning and make something truly unique? Let me know what you think about these projects in the comments below. I would love to see what you can come up with!
Did you find this tutorial helpful? If so, save this pin (see below) on your sewing board so you can come to this tutorial later when you want to refashion something, and follow me on Pinterest for more tips, tutorials, and inspiration!

latest posts
- Adorable DIY Needle Book | Easy Tutorial for Beginners
- Master the Seam Ripper: Your Ultimate Guide to Precision Stitch Removal
- Think You Know Zippers? This Installation Guide Might Surprise You
- Why Does Your Seam Ripper Have a Red Ball? Discover Its Purpose!
- Topstitching Troubles? This Simple Trick Will Turn It Around Instantly!
- How to Sew Shirring: A Step-by-Step Guide to Elastic Thread Gathering
- Are Self-Threading Needles Really Useful?
- Amazon Spring Sale: Best Choices
- Elevate Your Prom Look: A Guide to 10 Neckline Choices (2024)
