
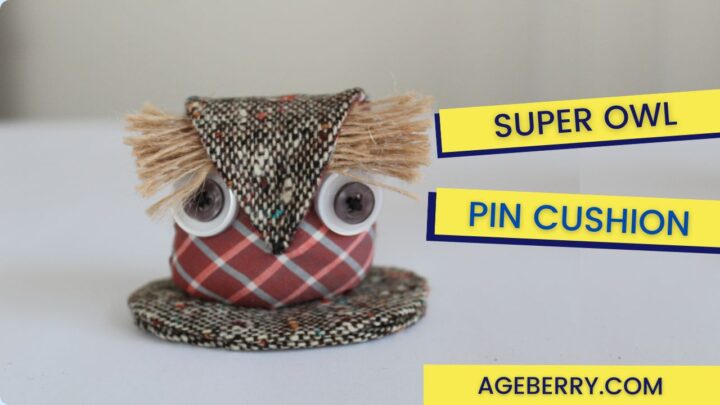
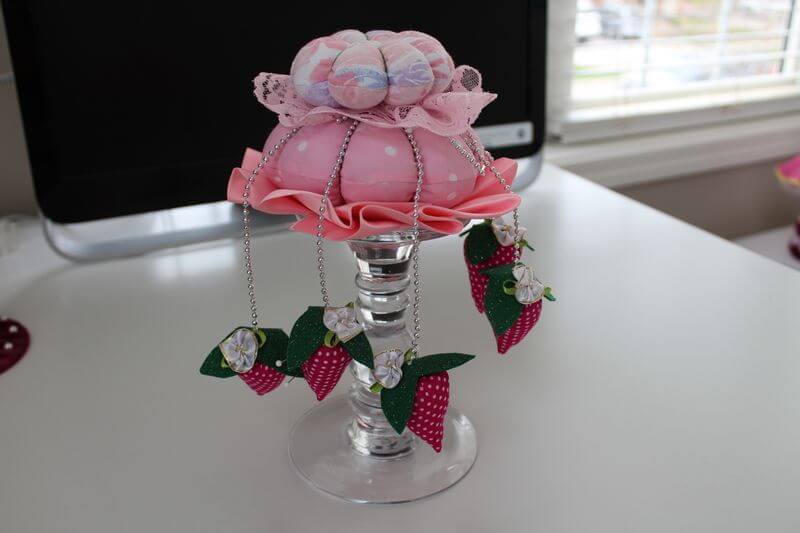
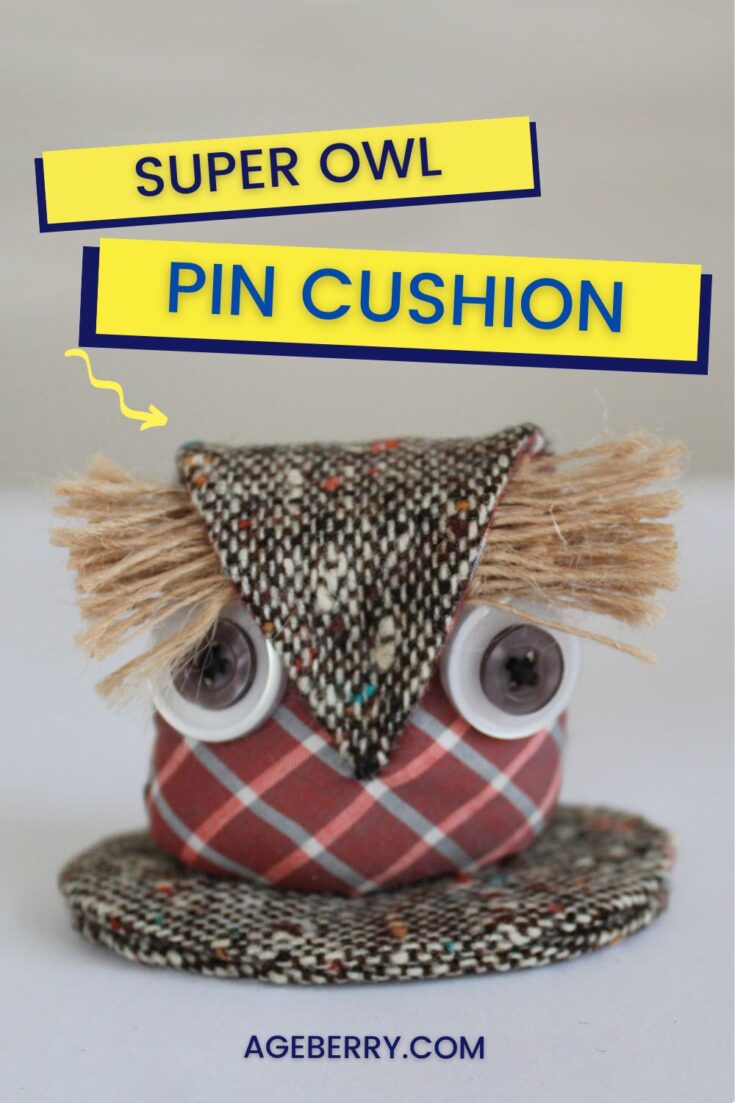
How to make an owl pincushion: a sewing tutorial plus a free pattern
This is a sewing tutorial on making a super-owl pincushion. But first, let me tell you a story.
When I was a kid, I wanted to learn sewing because I hoped to sew beautiful outfits for my dolls. So, my grandmother allowed me to use her needles (with a pincushion, of course). But she told me that I have to be very careful not to lose any needle because if I accidentally sit or lay down on it the needle can enter my body in such a way that I will even not notice it. Well, I was scared… who wants needles in their body?
So I counted the needles in the pincushion numerous times before sewing and after; there were always 5 needles there which looked pretty much the same. But this early lesson, which I now remember fondly, did give results: I am almost ashamed to tell you that I believed in it till I was maybe 20 years old. And I still count my needles in the pincushion!
Of course my pincushions were becoming bigger and bigger because I had so many different sewing needles: thinner and thicker, shorter and longer, with a big eye and a small eye, special needle for leather, plus all kinds of sewing machine needles which were slightly used for a project (I don’t want to throw away needles that are still good, right?) , plus pins… So it was almost impossible to count my needles – they were too many. Nevertheless, I still feel the need to do it. What do you think I did then?
I made lots of different pincushions, and now I have a separate pincushion for every kind of needle.
When I was making the pincushion, I didn’t plan to make a tutorial out of it because I thought nobody will be interested but I took images, just in case. And to my surprise, I got lots of questions about how to make it. My readers saw the owl pincushion in my very popular YouTube video on sewing a narrow hem and asked to share the pattern. So here is the tutorial.
What you will need for the project
It seems that even if the project is really simple – beginner level – you still need lots of stuff.
- 2 different scrap pieces of fabric
- A pattern
- Sewing shears for cutting fabric
- Scissors to cut threads
- Scissors to cut the paper pattern
- Hand sewing needles
- A sewing machine (plus a sewing machine needle and a bobbin)
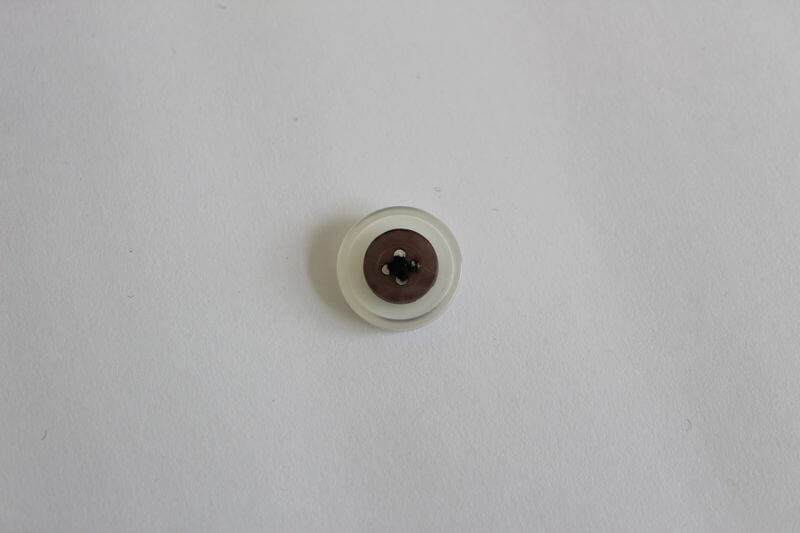
- 4 buttons
- Fabric glue
- Piece of carton or plastic (I used plastic from an old file folder)
- Some trims
- Piece of batting
Did I forget anything? Seems not. In the image, you don’t see EVERYTHING needed but you can see a pincushion I use for my hand sewing needles – isn’t it nice? I didn’t make it though, I bought it.
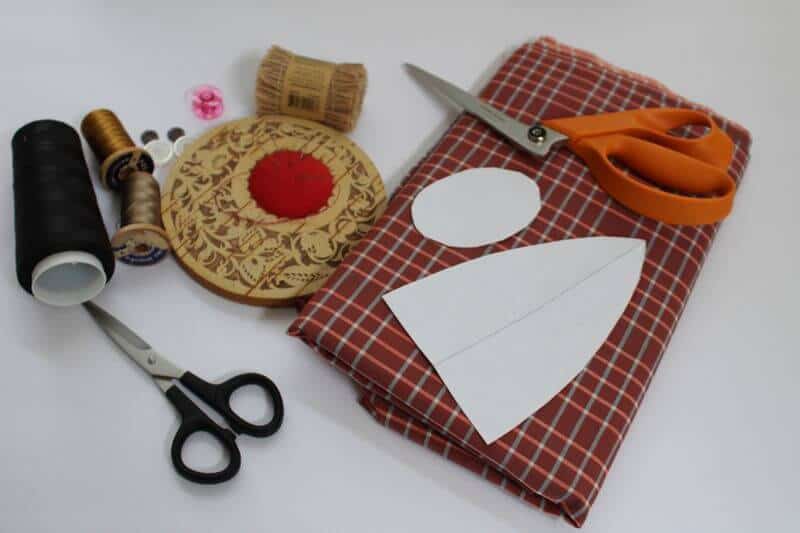
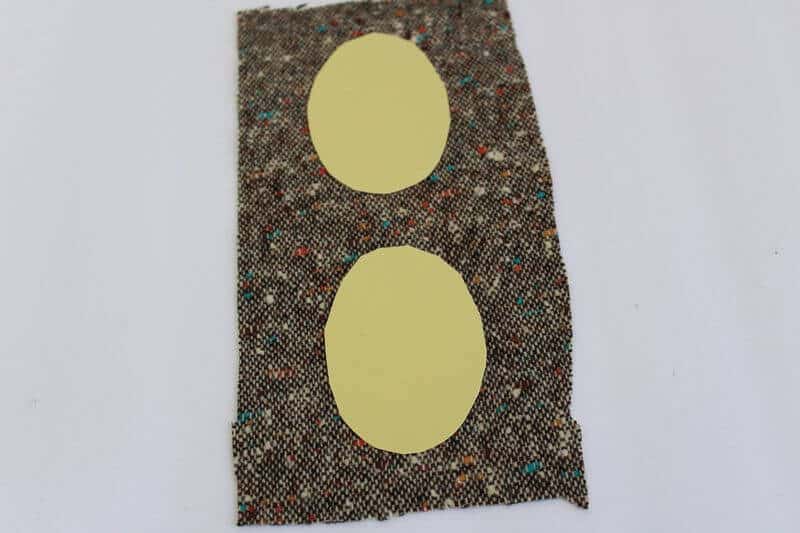
1. Print and cut out the pattern. By the way, it’s funny how I made the pattern – I just outlined a soleplate of my iron and made it smaller. Then I delegated the task of generating a pdf file to my husband. If you want, you can download the printable PDF pattern from my RESOURCE LIBRARY.
If you are a subscriber you can find the password to enter the Library in my weekly emails. If you are not a subscriber you can sign up in the form below and I will send you the password for the Library right away by email.
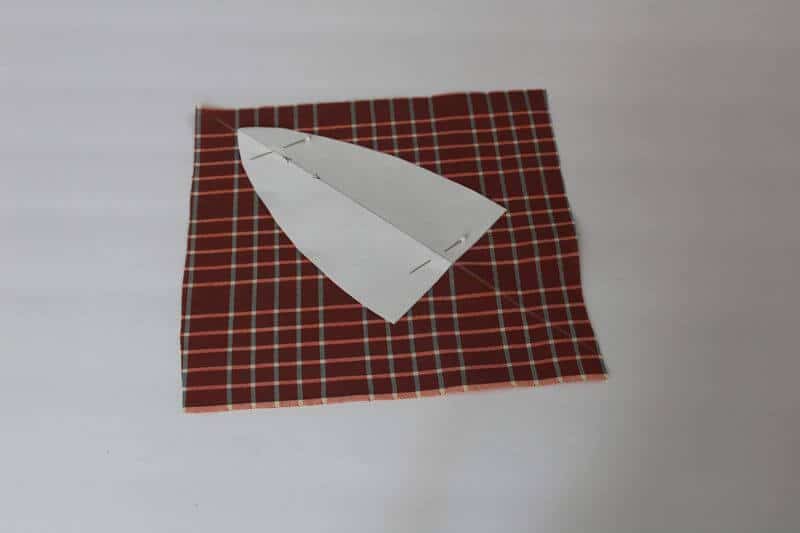
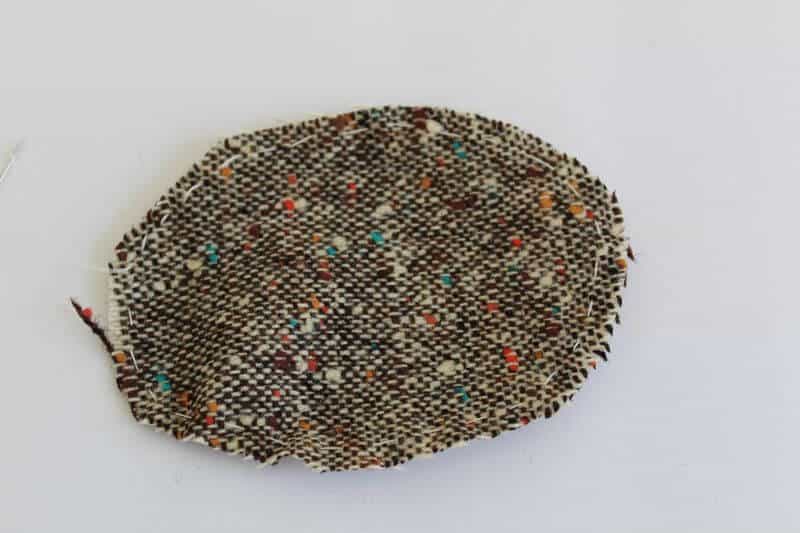
2. Cut two pieces from different fabrics for the owl’s body. Stitch using ⅜ in (or 1 cm) seam allowances. Cut seam allowances (leave half a cm) and turn that piece right side out.

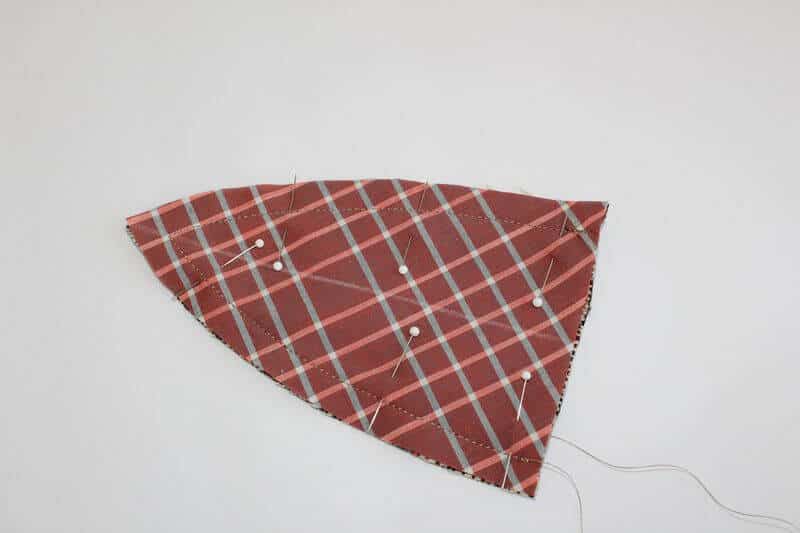

Press this piece. But before pressing I decided to baste it so my seams look nice.

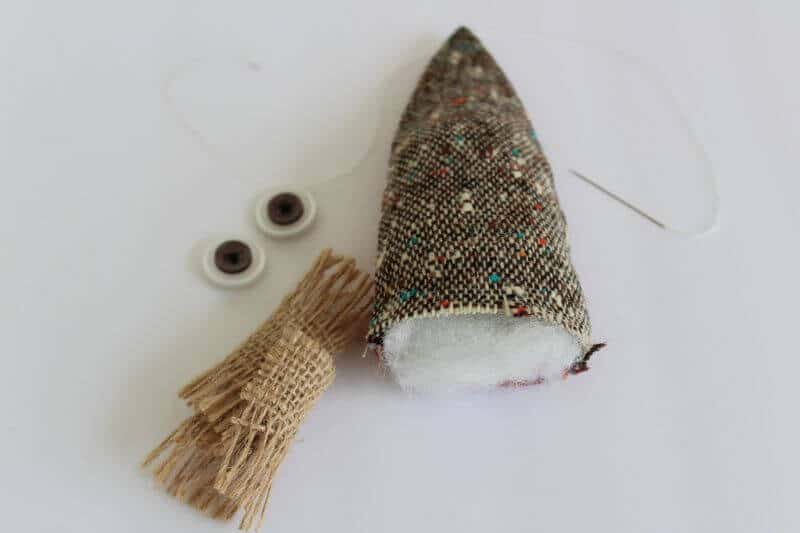
Fill the bottom part of the body with batting (or some other filling material) leaving the top without it (for the owl’s face)
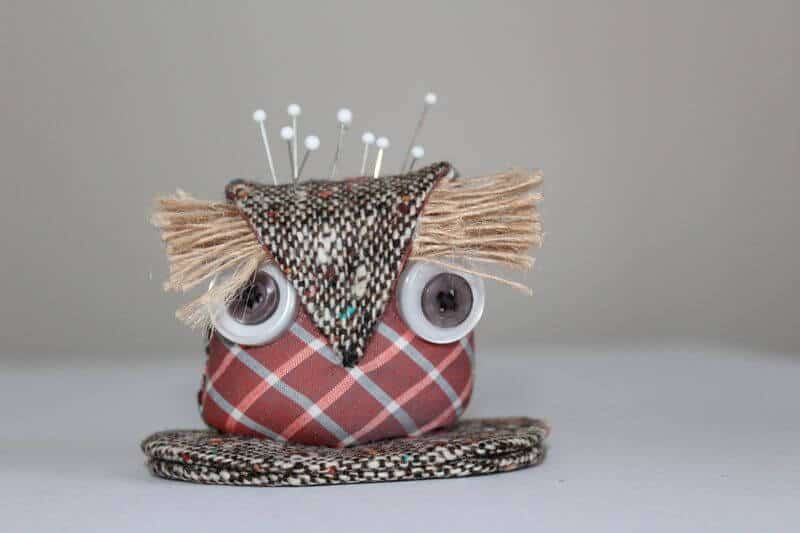
Sew two buttons together. It’s not comfortable to sew the buttons to the stuffed owl’s body so I just put them with fabric glue – it holds them perfectly.
Fray both edges of trims – I bought mine in a dollar store. Buy something that can be frayed easily.
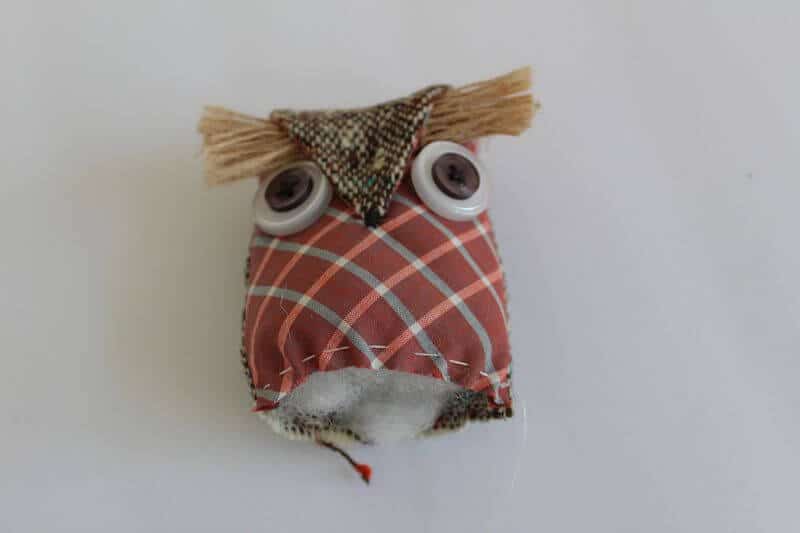
Make an owl’s face and stitch by hand the end – it will be the owl’s beak.
Gather fabric at the bottom and make a knot.
Now let’s make a stand
Cut two pieces from plastic or carton (using the pattern).
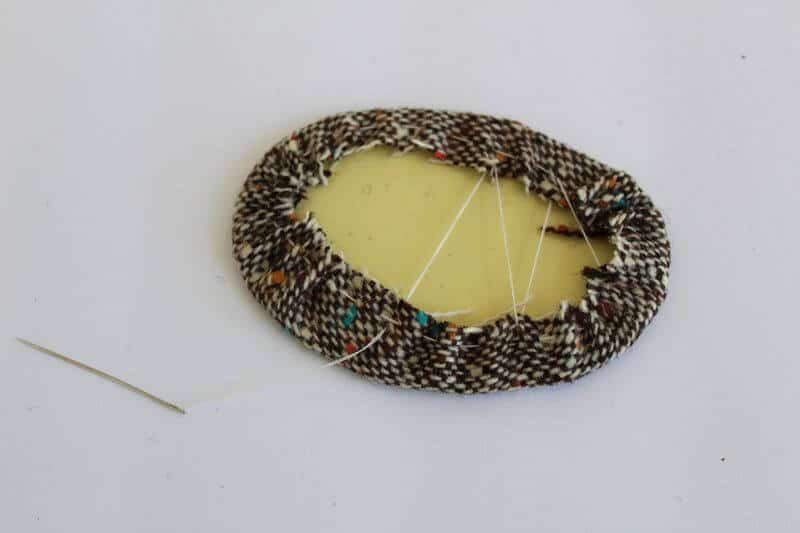
Cut two pieces from fabric – but this time cut with seam allowances around 2 cm (¾ in)
Place the plastic piece on the fabric and gather the fabric all around edges on both pieces. Glue them wrong sides together.
Glue the owl to the stand with fabric glue.
Perhaps, you will be interested in my other tutorial on making a wrist pincushion.
Related post: How to make a cute and very useful wrist pin cushion
Did you find this tutorial helpful? If so, save this pin (see below) on your sewing board so you can come to this tutorial later when you want to make an owl pincushion, and follow me on Pinterest for more tips, tutorials, and inspiration!
Ready to take the next step in your sewing journey? Check out more step-by-step tutorials from my blog and don’t forget to share!


latest posts
- Butterfly Quilt Block Tutorial – Foundation Paper Piecing
- How To Sew Quilt Squares So The Corners Match
- Sewing With Fork Pins: How They Help With Pattern Matching, Slippery Fabric, And Seams
- How Much Fabric Do I Need? 21 Helpful Tips For Calculating Fabric Yardage
- Easy Simple Sewing Project: Fabric Jar Opener
- DIY Oven Mitts: Step-by-Step Sewing Tutorial
- Easy DIY Potholder: New Design
- Tailor’s Clapper: What It Does, Why It Works, And How To Use It Right
- Heat Resistant Batting for Sewing: What It Is, How It Works, and What Makes a Difference

Love the owl
Thank you, Jackie!
Thank you for this idea.
Thank you for your feedback!
@Olga Balasa, A joke for you:
What’s the opposite of irony?
…wrinkley
Inside sewing joke, right? Thanks!
This is just so cute. I can’t wait to find the right fabric to make one. Thank you!
Thank you! Send me an image please by email if you make it, [email protected].
I would love to make one, very cute
If you make one, send me an image please!