How to Add a Fabric Insert to a Hemmed Edge: The Wrap-and-Turn Trick
Some sewing techniques are worth trying on scraps just to see how they work. You might have no immediate use for them, then a project comes along and you remember that little sample. This is one I would keep, especially if you like altering things or combining fabrics.
Adding a strip of fabric can give a project extra length, extra width, or a little color. But then you reach the existing hem. How do you finish the end of the new strip so it lines up neatly?
Prefer to read without ads?
I created a PDF version of this guide for anyone who likes to keep sewing guides saved, printed, or easy to read without ads. It includes the same helpful information in a simple format you can download and use whenever you need it. But wait! As a bonus, you will also receive a printable version of my article Are These ‘Magic’ and ‘Wonder’ Tools the Secret to Sewing Perfection?.
The PDF is available in my shop for a small fee. It’s a nice option if you want to support my work and keep this tutorial close to your sewing machine.
You could unpick the hem, sew in the strip, and hem everything again. That is quite a bit of unpicking for one small insert.
Here’s another way. Wrap the end of the insert around the existing hem before sewing the joining seam. After you turn it right side out, the insert has a folded hem that lines up with the original.
The fold is the part worth looking at closely. The sewing itself is just a straight seam.
What You’ll Need
- Your hemmed project, or scraps for a practice sample
- Fabric for the insert
- Regular sewing tools and notions
For a first try, use two contrasting fabrics, as I did here. It’s much easier to see which piece goes where.
The step-by-step photos come first. If you’d rather see it all in motion, scroll to the end of the tutorial for a quick video of the whole process.
Step 1: Prepare the Pieces
Decide where you want to add the insert. If you’re working with a finished item, mark the cutting line and check its position before cutting.
Cut the fabric on the line marked. That will become later the center of the insert.
Finish the two cut edges of the main fabric with a serger or a zigzag stitch. Finish both long edges of the insert too.
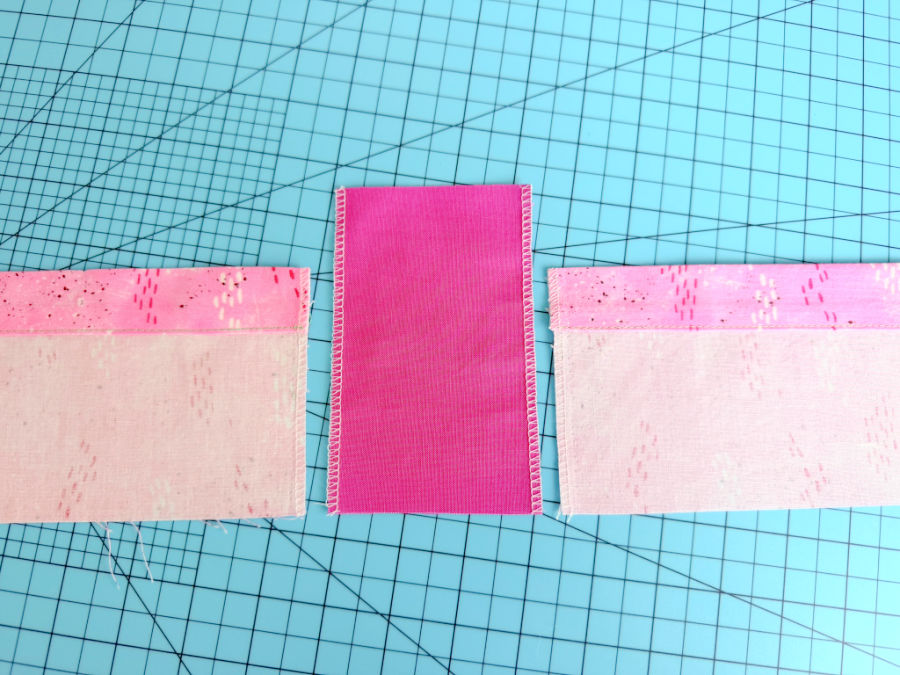
There are two measurements to consider when cutting the insert:
- The width of the band: Add a seam allowance to each side of the width you want to show in the finished project.
- The length across the project: Add enough fabric to extend beyond each hemmed edge by the depth of that hem plus seam allowance.
For example, if the existing hem is 1 inch deep, the insert needs to extend 1 1/4 inch or 1 ½ inch beyond that finished edge. This extra fabric will fold around the edge and become the insert’s hem.
If the insert crosses two hemmed edges (at each end), add the appropriate hem depth at both ends.
One more detail: if you need to increase the project by an exact amount, remember that the joining seams take up fabric from the original pieces too, one seam allowance each side. The finished band’s width and the amount added to the whole project won’t be quite the same.
Before sewing anything, check that the insert extends far enough beyond the hemmed edge. You will need to be able to fold the insert back and cover the existing hem. Mark the points where the insert aligns with the hemmed edges on each side.
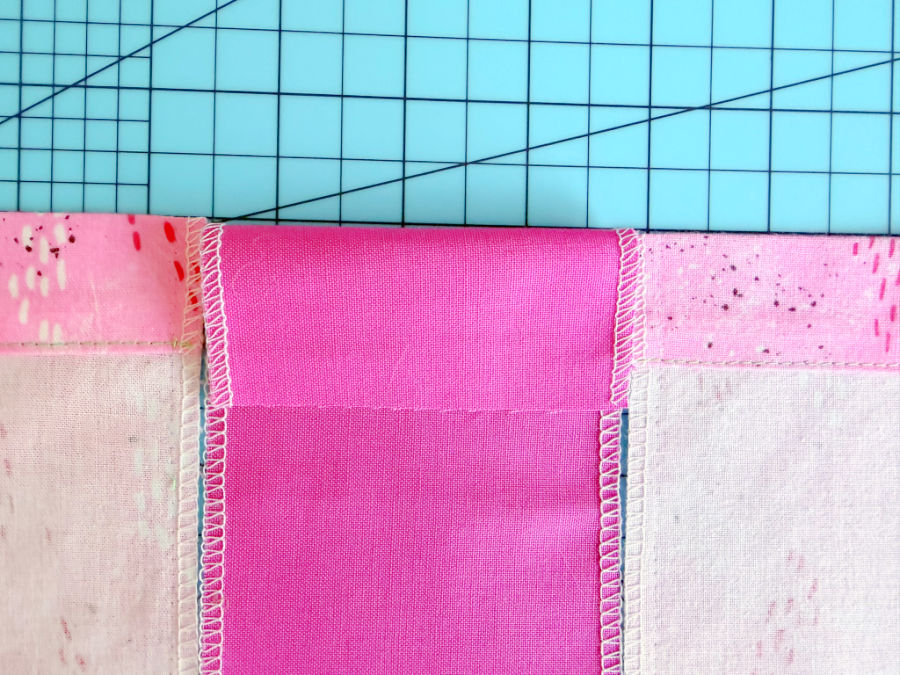
Place one long edge of the insert against the cut edge of the first main piece, right sides together. Align using the marks from the previous step. Sew the joining seam. Repeat with the other long edge of the insert and the second main piece.
Lay the pieces out wrong side up. In my sample, the pink print is the main fabric, and the solid fabric is the insert. The narrow folded bands along the edge are the existing hem.
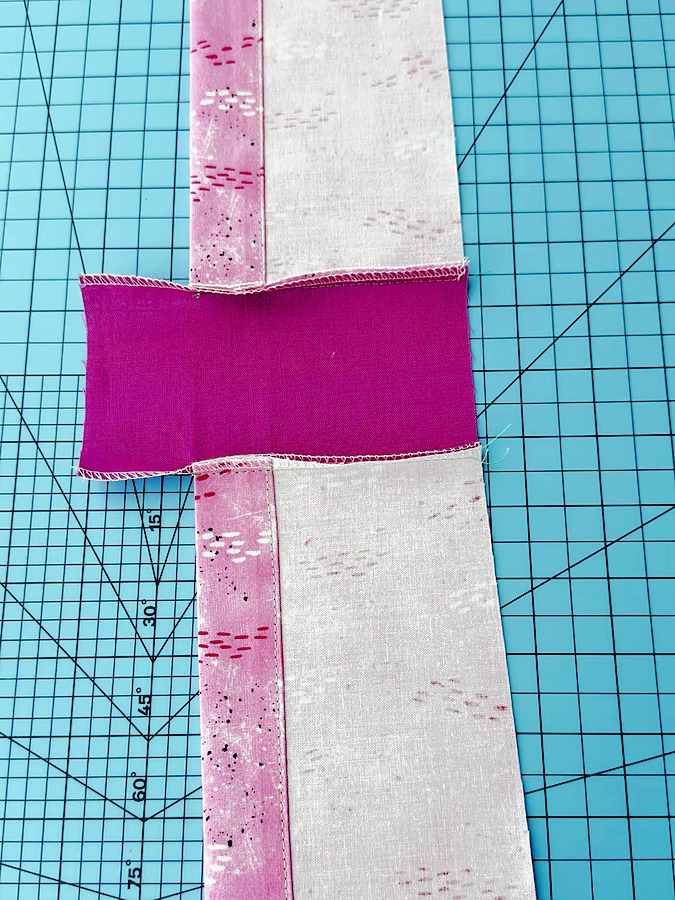
Step 2: Check the Extra Length
It doesn’t hurt to check again that the insert extends far enough beyond the hemmed edge. The only reason it would not is if we made an error in the previous step.
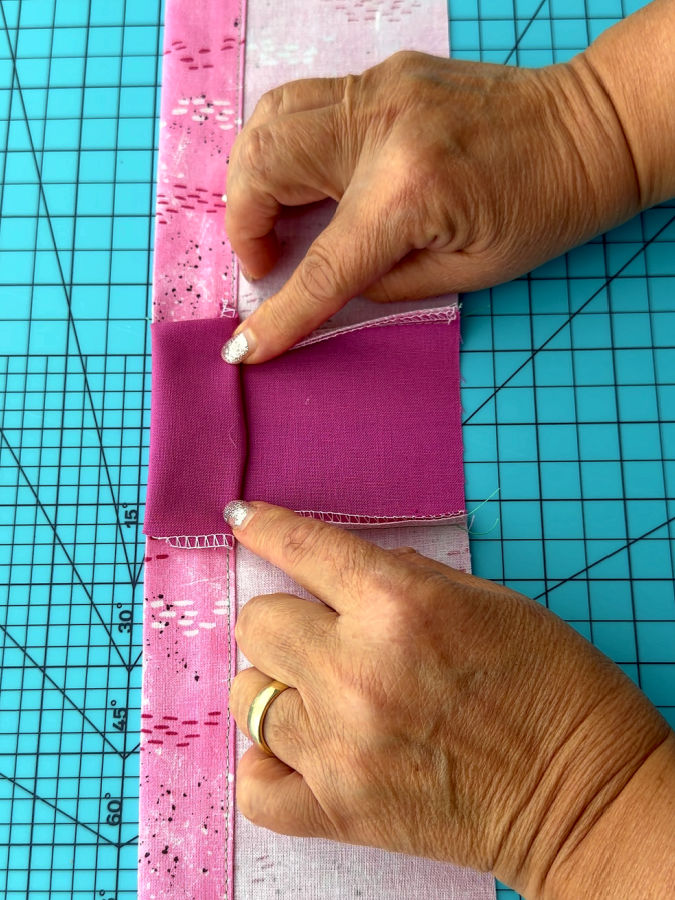
Fold the projecting end back at the point where it meets the finished edge of the main fabric. The folded section should reach across the full depth of the existing hem.
If it falls short, the insert will have a narrower hem than the fabric beside it. This is the time to correct that—while everything is still flat on the cutting mat. If this happens, the seam ripper will be very tired after.
Unfold the end again.
Step 3: Place the First Piece
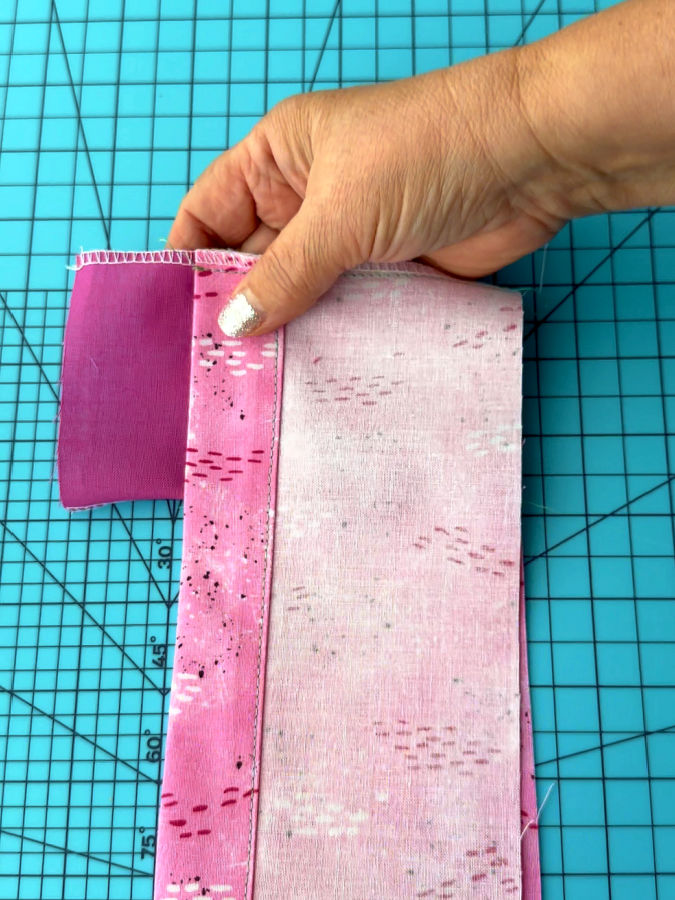
Place the first main piece on the insert, right sides together.
Align the edges you’re going to sew. Keep the extra length of the insert extending beyond the hemmed edge.
Check that you have the right sides together before going any further. With solid fabric, it’s surprisingly easy to lose track. In the image below you see the wrong side of the already finished piece and the right side of the insert piece.
Step 4: Wrap the Insert Around the Hem
Now for the fold that makes this work.
Take the projecting end of the insert and fold it around the finished edge of the main piece. Bring it over onto the wrong side, so it lies on top of the existing hem.
The hemmed edge of the main fabric is now between the two layers of the insert.
Keep the fold snug against the edge without pulling it tight. The layers should lie flat.
Step 5: Pin the Layers
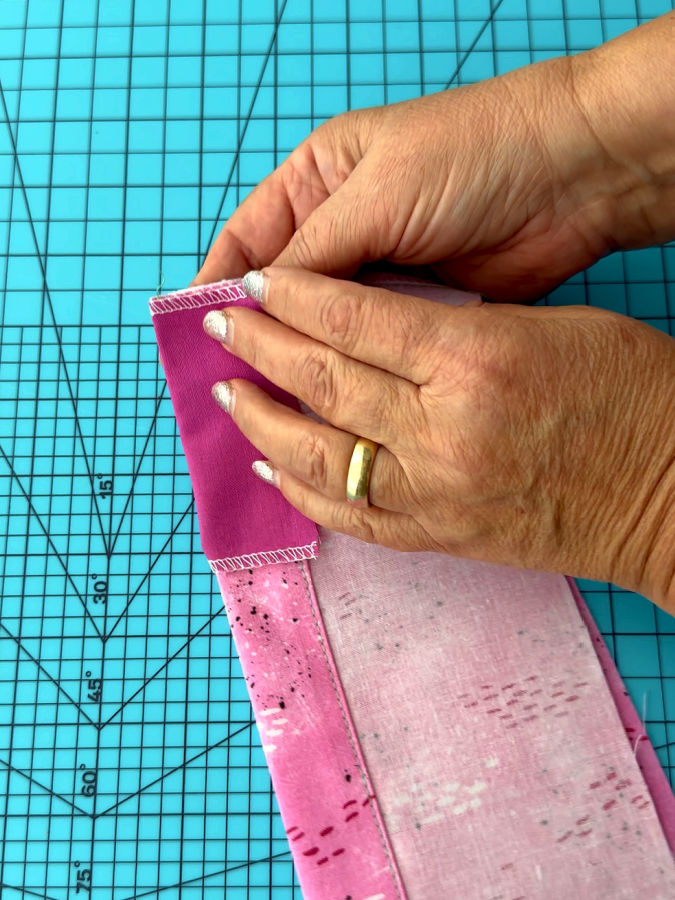
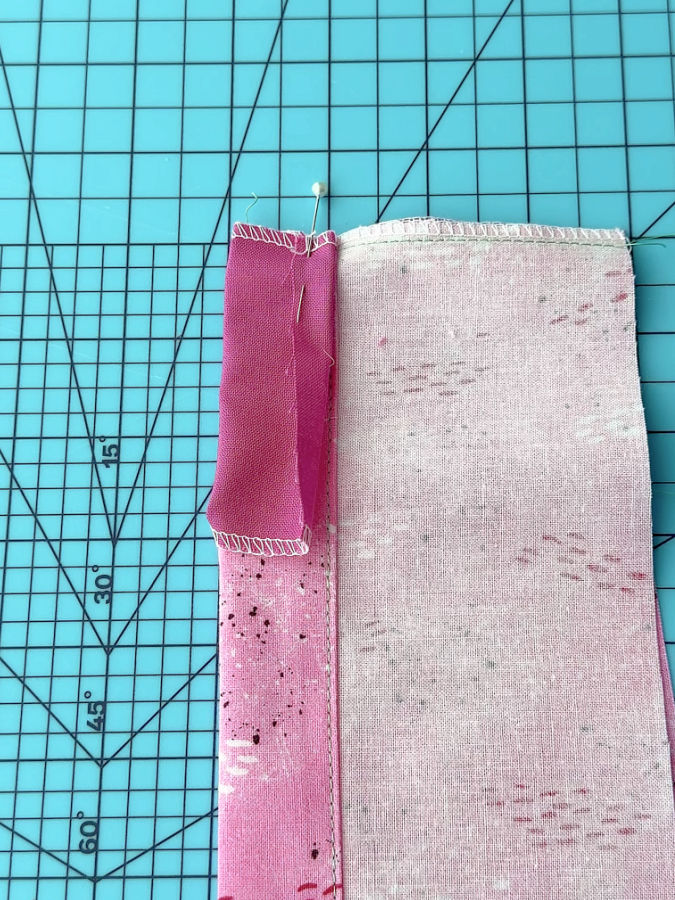
Fold the short raw end of the insert over, like in the image below.
Adjust this small fold so the insert’s folded edge lines up with the inner edge of the original hem. Keep the fabric flat.
Pin the wrapped section through all the layers, including the small fold you just made. Then pin along the rest of the joining edge, keeping the edges aligned.
Before taking it to the machine, check that the hemmed edge sits right inside the fold. A small gap here can leave the insert’s edge sticking out after turning.
Step 6: Sew the Seam
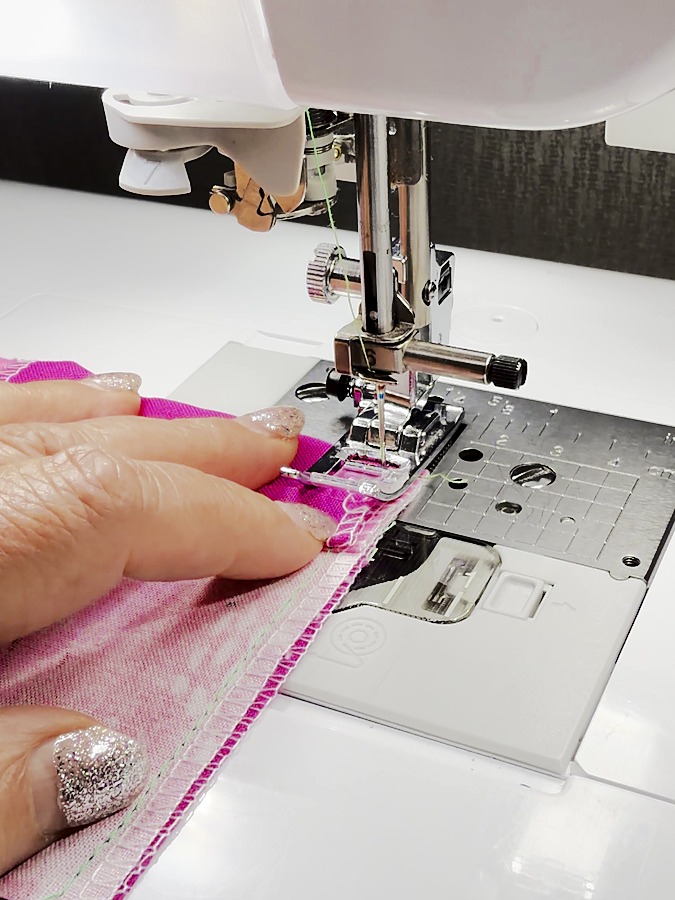
Starting at the wrapped end, sew the joining seam with the seam allowance you allowed when cutting. You only need to sew the length of the hem and if you can, over the previous seam binding the insert to the original piece.
Stitch through all the layers of the wrapped section, then continue along the rest of the seam. Secure the beginning and end of the stitching.
Sew slowly over the thicker area and keep the layers flat. Remove the pins before the needle reaches them.
Step 7: Fold and Sew the Other End
Leave the first sewn end unturned for now. We will now turn the fabric and look at the other side of the insert.
Fold the second main fabric piece back along its joining seam, right sides together with the insert. Repeat the wrapping fold around its hemmed edge, folding the insert’s short raw edge up as before.
Hold the layers in place and stitch through the wrapped section along the original seam line. Secure the stitching at both ends.
The following short video shows the folding process.
Step 8: Turn and Press
With both ends sewn, turn the wrapped section right side out. Gently work both corners into shape with your fingers.
Smooth the insert’s hem and check that its folded inner edge lines up with the original hems on both sides.
Press the seam allowances toward the insert and press the folded hem flat.
The Finished Insert
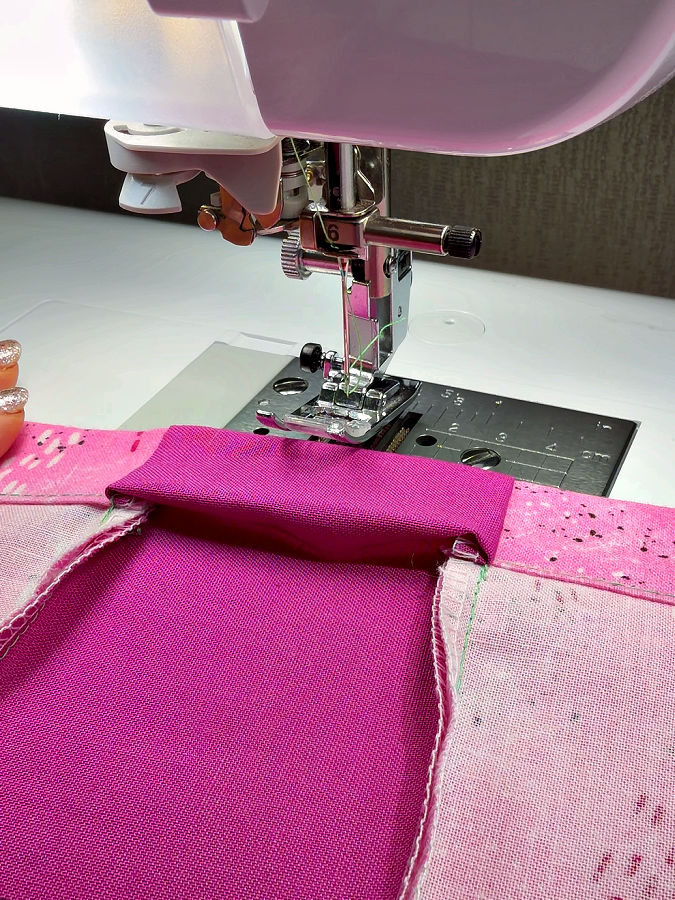
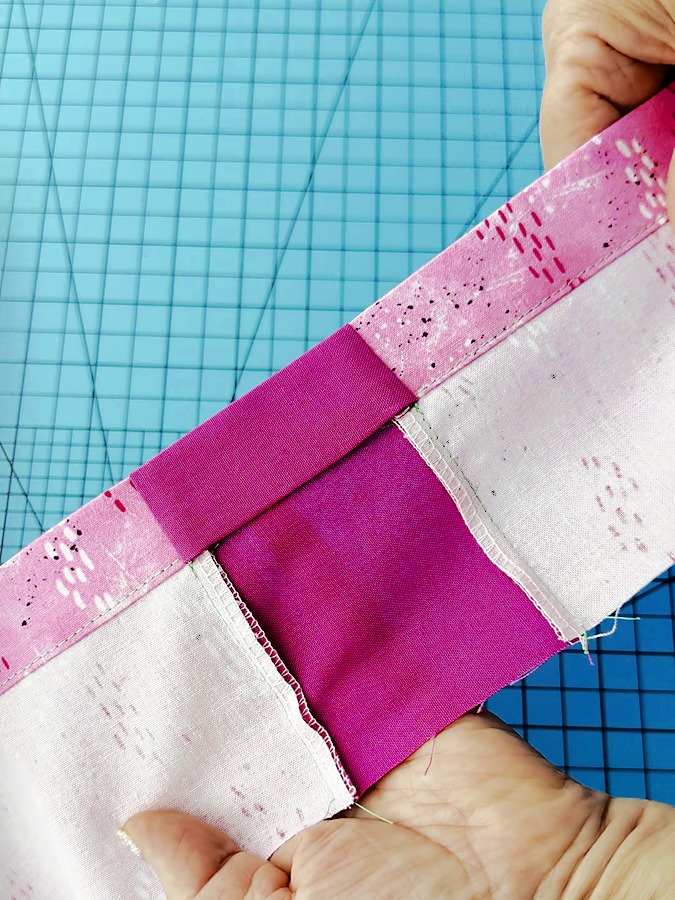
Here is the wrong side. The folded hem continues from the printed fabric, across the insert, and onto the printed fabric again.
That matching hem depth is what makes the finish look neat.
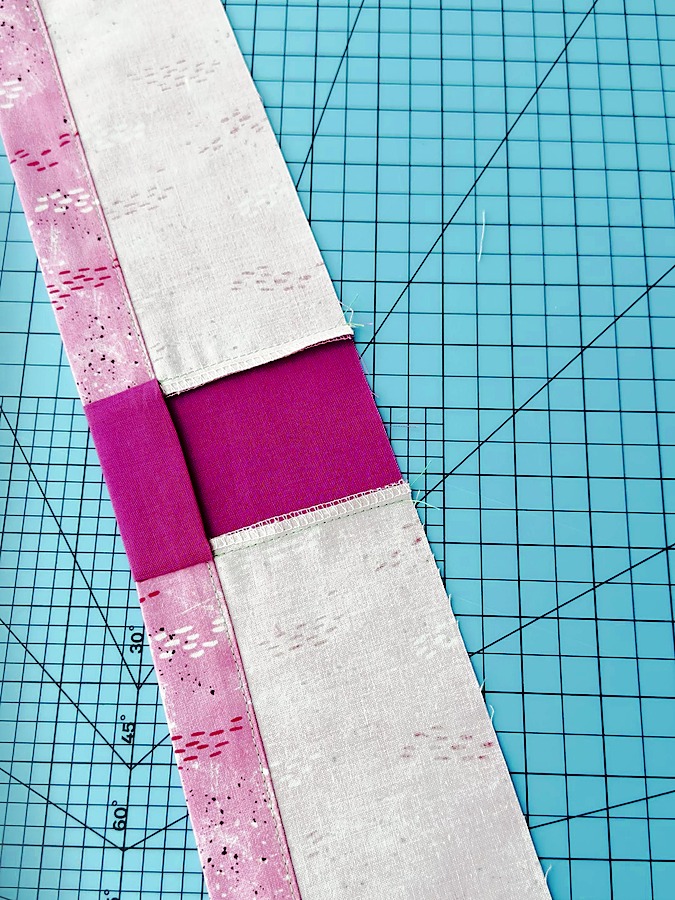
Look closely at the two corners. The seam allowances are tucked inside the turned ends where the joining seams meet the hem.
The amount of bulk will depend on your fabric. A lightweight cotton is much easier to fold here than a heavy upholstery fabric, so try a sample first if you’re working with something thick.
And here is the right side. The hemmed edge runs straight across all three pieces, with the contrasting insert between them.
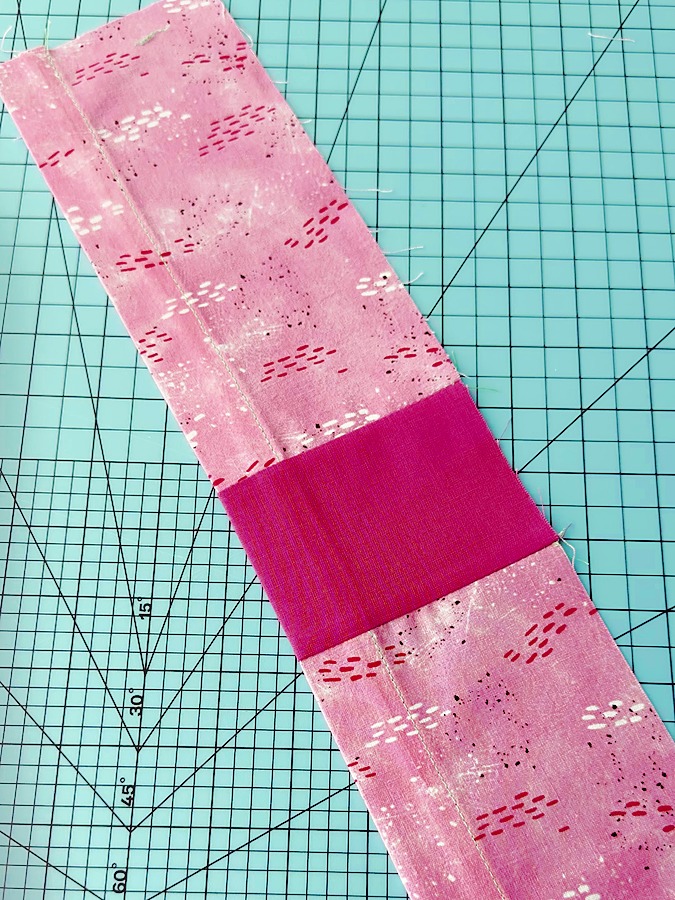
The joining seams secure the ends of the folded hem. To secure its free inner edge as well, stitch across the insert in line with the existing hem stitching.
Where You Can Use This Technique
I have these curtains in my sewing room, and I like them very much. After washing, though, they shrank a little. Not a dramatic amount, but enough for me to notice—and once I noticed, it kept bothering me.
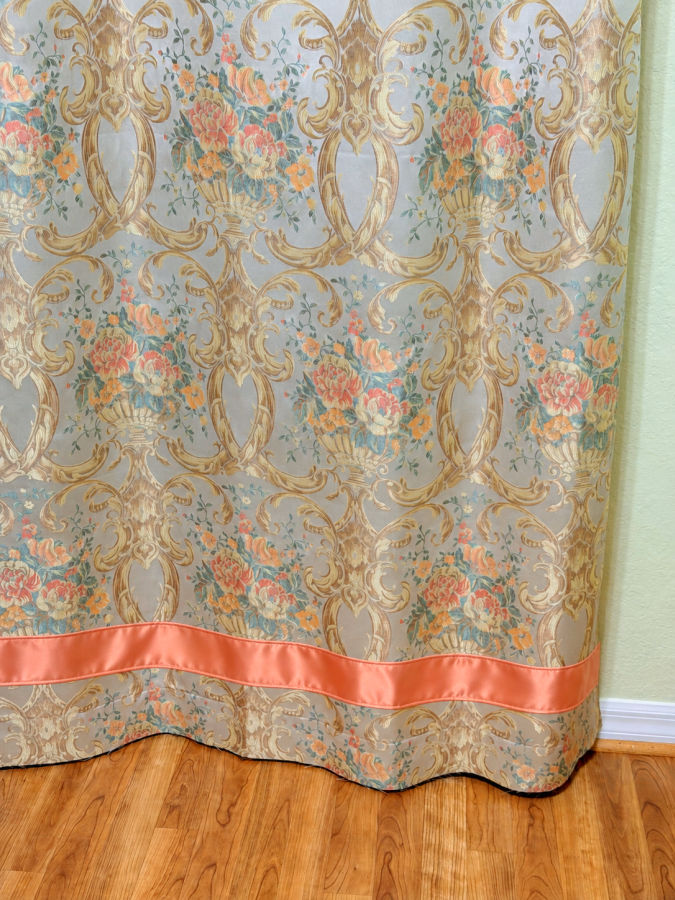
So I added a narrow strip of coral satin a few inches above the bottom hem, using the method I’ve shown here. The coral picks up the color of the flowers, and the satin adds a little shine.
This method is useful wherever an insert meets an existing hemmed edge. The direction of the insert determines whether you add length or width.
- Curtains that need more length. Add a horizontal band across the panel, wrapping the insert around the existing side hems.
- Curtains that need more width. Add a vertical strip, using the fold where it meets the bottom hem. Treat the top separately if it has a rod pocket, heading tape, or another structured finish.
- Table runners and tablecloths. Add a contrasting band to increase the size while continuing the hems along the edges.
- Aprons. Add a horizontal band for extra length, using the wrapped finish where it meets the hemmed sides.
- Scarves and wraps. Insert a contrasting section, matching the folded ends to the existing hems.
- Kitchen towels and napkins. Add a decorative band without unpicking the hems along the edges the band crosses.
- Envelope pillow backs. Add an insert to a hemmed back panel when you need more overlap, using the fold where the insert crosses its hemmed opening edge.
- Garments with open, hemmed edges. A lengthening band on an open-front robe or a garment with side slits may give you a place to use this finish. Check the construction first; a continuous hem around a closed skirt or trouser leg needs a different approach.
- Repairs and cutting mistakes. Replace a damaged section or add fabric to a piece that came out too small, provided the insert meets a suitable hemmed edge.
- Color blocking. Use a contrasting insert simply because you like the combination. There doesn’t have to be a cutting mistake involved.
Try the fold on scraps before cutting into a finished project. Once you turn that first corner, it’s much easier to see how the pieces fit.
To see every step come together, watch this quick video. It goes from start to finish in one go and ends with a real project, a pair of curtains that got a little longer.
Did you find this tutorial helpful? If so, save this pin (see below) on your sewing board so you can come to this tutorial later when you are ready, and follow me on Pinterest for more tips, tutorials, and inspiration!

latest posts
- How to Add a Fabric Insert to a Hemmed Edge: The Wrap-and-Turn Trick
- The Little Triangle Trick for Clean Hem Corners
- 25 Little Sewing Habits That Make Your Work Look Better
- How to Sew a Pointed Fabric Zipper End Tab
- 15 Sewing Machine Parts You See All the Time — But Probably Ignore
- Adjustable No Buckle Elastic Belt DIY: Sewing Tutorial
- 23 Useful Things to Watch for on Amazon Prime Day
- Sewing Thread Secrets: 8 Tiny Details You Probably Never Noticed — But Should
- Bias Tape Tutorial: How to Make Bias Tape With a Bias Tape Maker