10 Easy-to-Miss Features on Sewing Supplies You Should Be Using
Sewing supplies are full of little marks, holes, grooves, buttons, colored bands, and odd-looking parts. We see them so often that after a while, we barely notice them.
It’s easy to assume they’re simply part of the design. But many of those small details were put there for a reason — we’re supposed to use them. Some help us choose the right tool, some make sewing easier, and some solve problems we may have been working around for years.
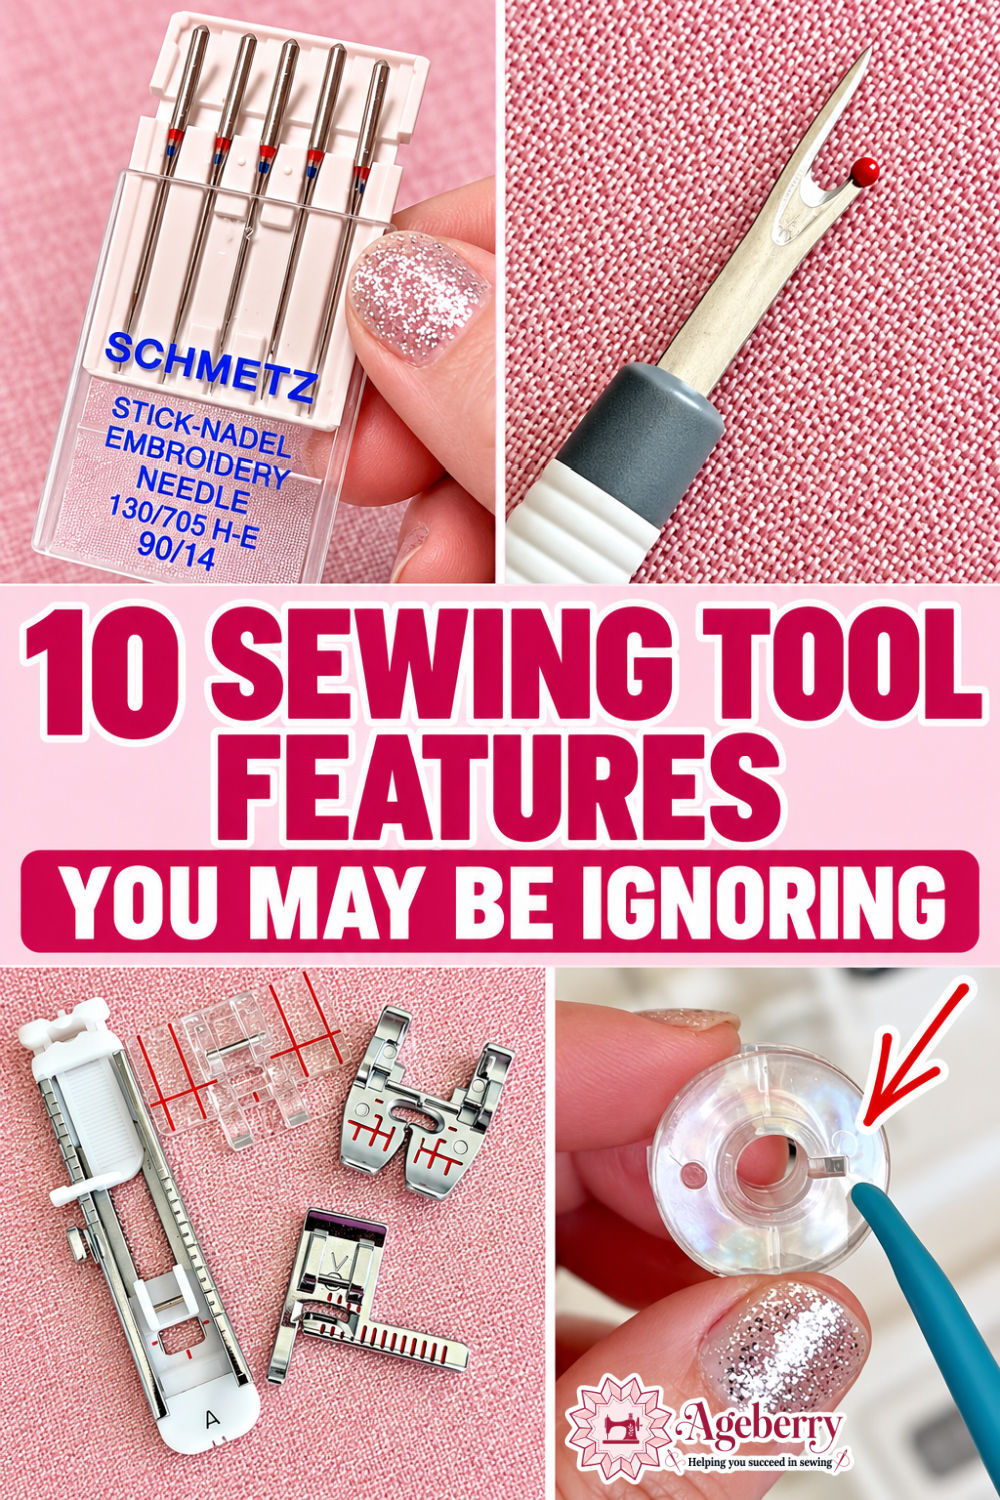
Apparently, sewing manufacturers have been leaving us little clues all over our sewing rooms. We just have to notice them.
Prefer to read without ads?
I created a PDF version of this guide for anyone who likes to keep sewing guides saved, printed, or easy to read without ads. It includes the same helpful information in a simple format you can download and use whenever you need it.
The PDF is available in my shop for a small fee. It’s a nice option if you want to support my work and keep this tutorial close to your sewing machine.
Note: Some of the links on this page are affiliate links. This means I will receive a commission if you order a product through one of my links. I only recommend products I believe in and use myself.
Those Colored Bands on Your Sewing Machine Needles
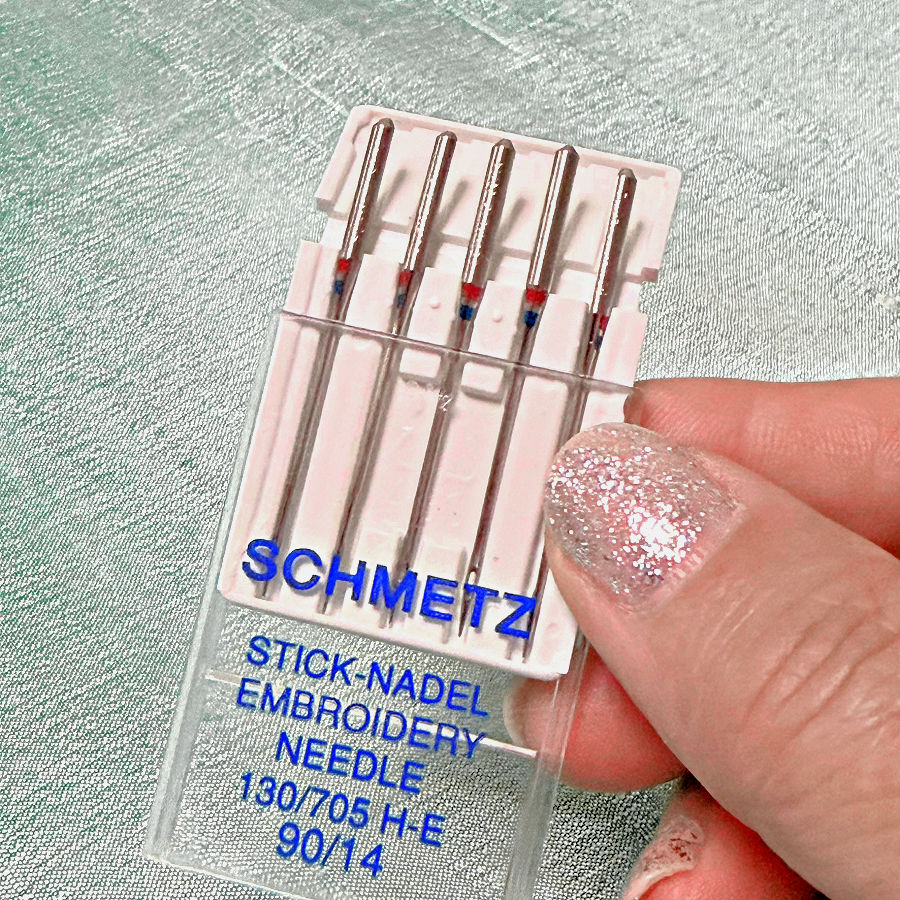
Those little colored bands or colored areas on sewing machine needles are a good example. They aren’t decoration. They’re there so you can identify the needle without trying to read the almost microscopic markings stamped into the metal.
And color coding is no longer just something we associate with SCHMETZ needles. SINGER uses color coding too, and ORGAN sells color-coded needle assortments as well. The systems are not identical, though, so a color that means one thing on one brand may mean something different on another. Maybe someday all the needle manufacturers will sit down together and agree on one system. For now, we still need the chart for the brand we use.
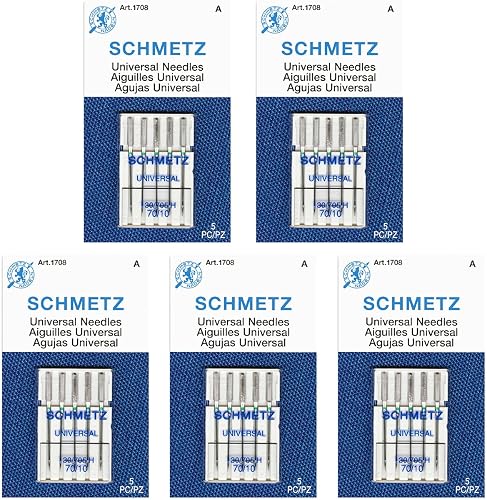
With SCHMETZ household needles, most needle types use two color bands: the upper band identifies the needle type, and the lower band identifies the needle size. For example, a Microtex 80/12 needle has a purple upper band for Microtex and an orange lower band for size 80/12. Universal needles are one exception: SCHMETZ Universal needles use only the size color band, so a Universal 70/10 needle has a single green band.

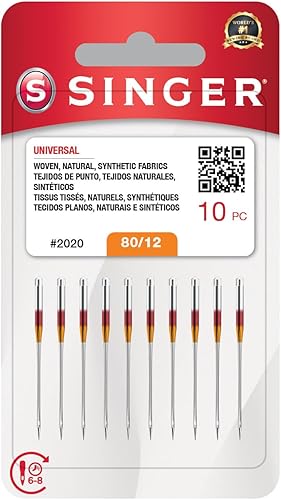
SINGER uses its own color system. In the SINGER Universal 80/12 needles shown below, for example, red identifies the Universal needle type, while orange identifies size 80/12. SINGER’s current assorted packs use color-coded needles as well.

ORGAN also has color-coded assortments now. That’s worth mentioning because some older ORGAN needles—and even some older information about them—can leave you thinking you have to keep every needle in its original slot or you’ll never know what it is again. Their color-coded combination sets use colored shanks to help distinguish different needle types and sizes.

And this is exactly why the colors matter. You take a needle out of your machine because you want to switch to another one, set it down, and a few days later think:
Was this the stretch needle? The Universal? What size was it?
Instead of guessing, check the color bands.
The important part is not to memorize one manufacturer’s colors and assume they apply to every needle you own. Check the color chart for the brand you’re using.
You can see the SCHMETZ color code chart here and the SINGER needle guide here.
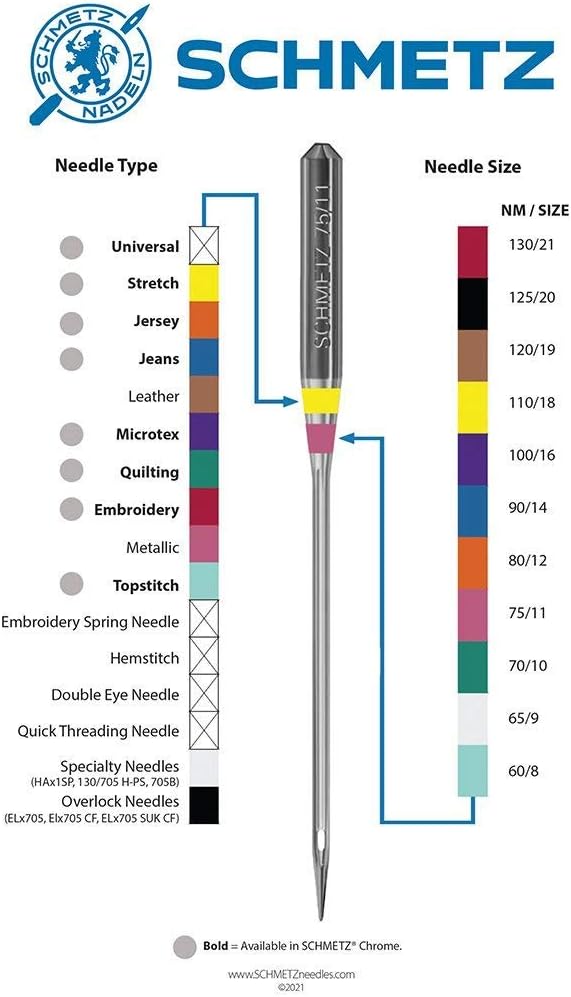
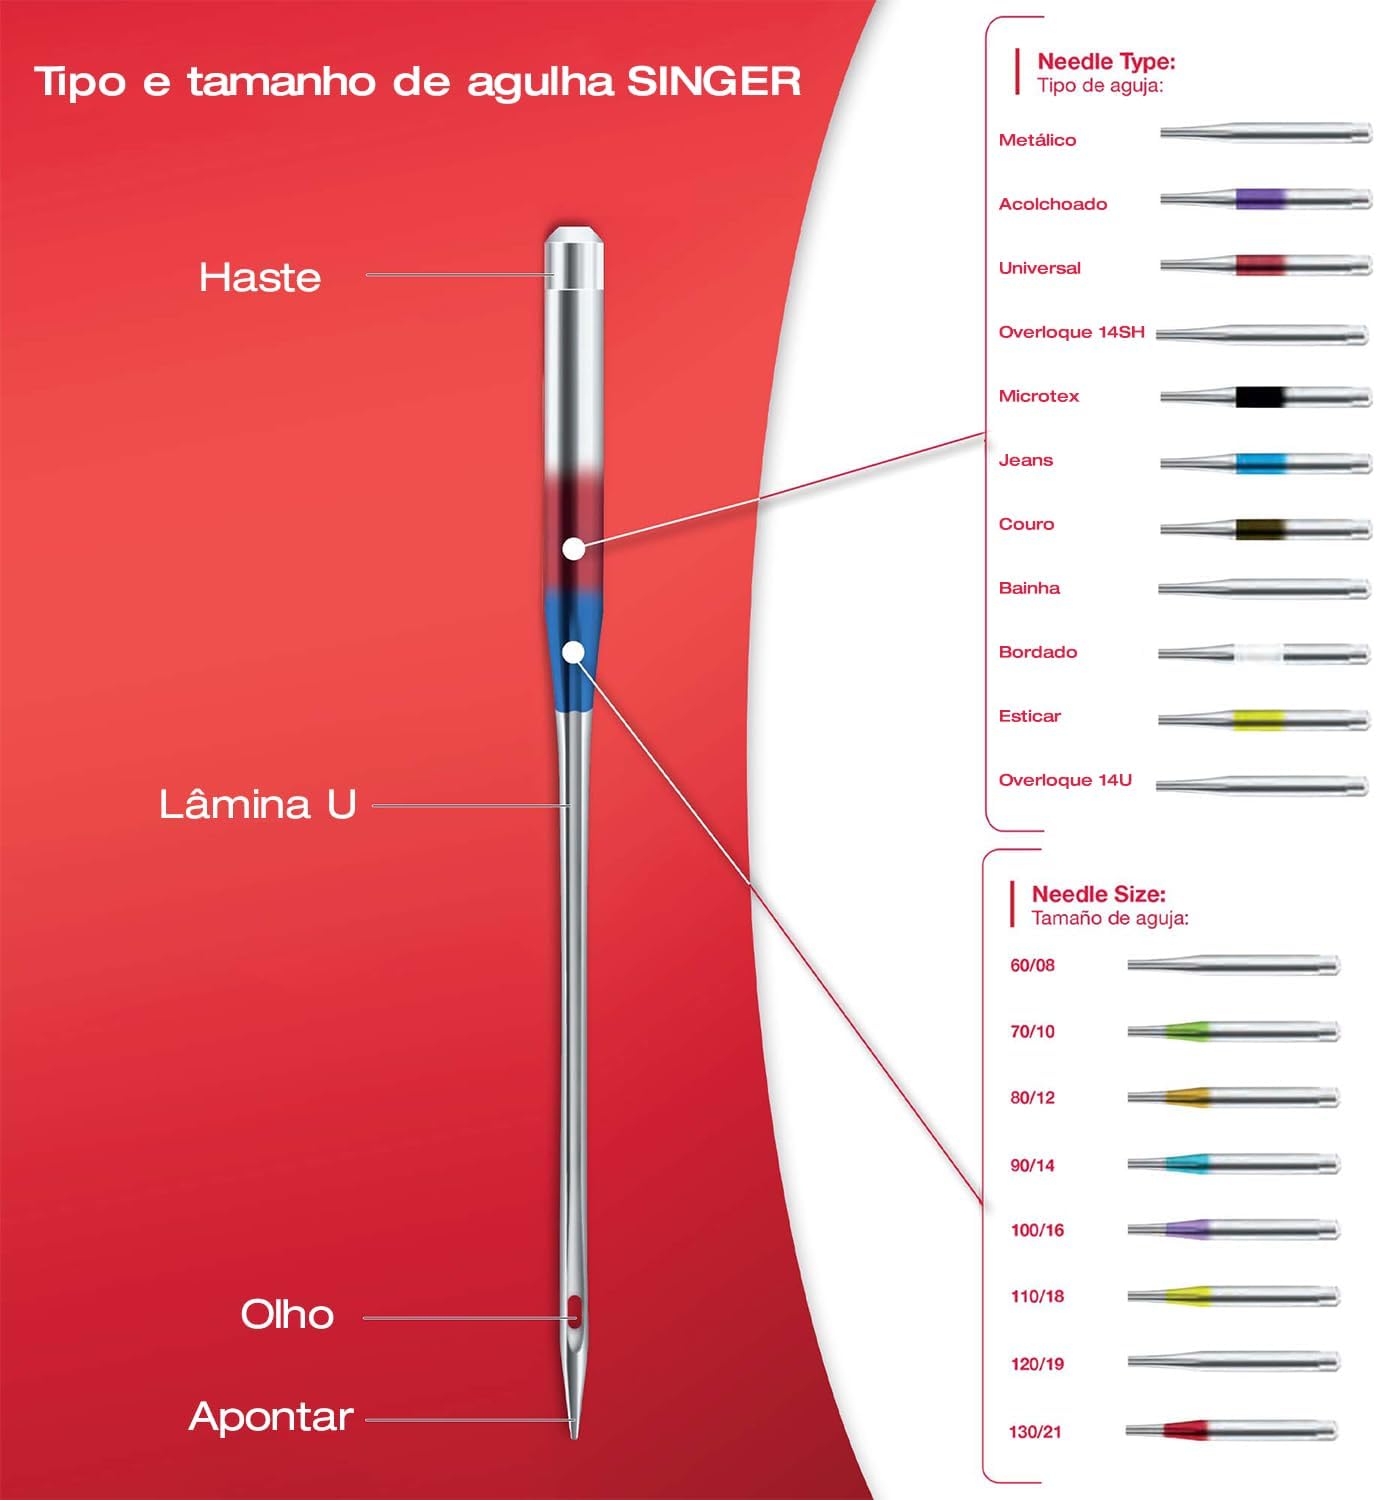
I also have a separate guide explaining the SCHMETZ sewing machine needle color codes and how to read them.
2. The Notches and Holes in Your Bobbin
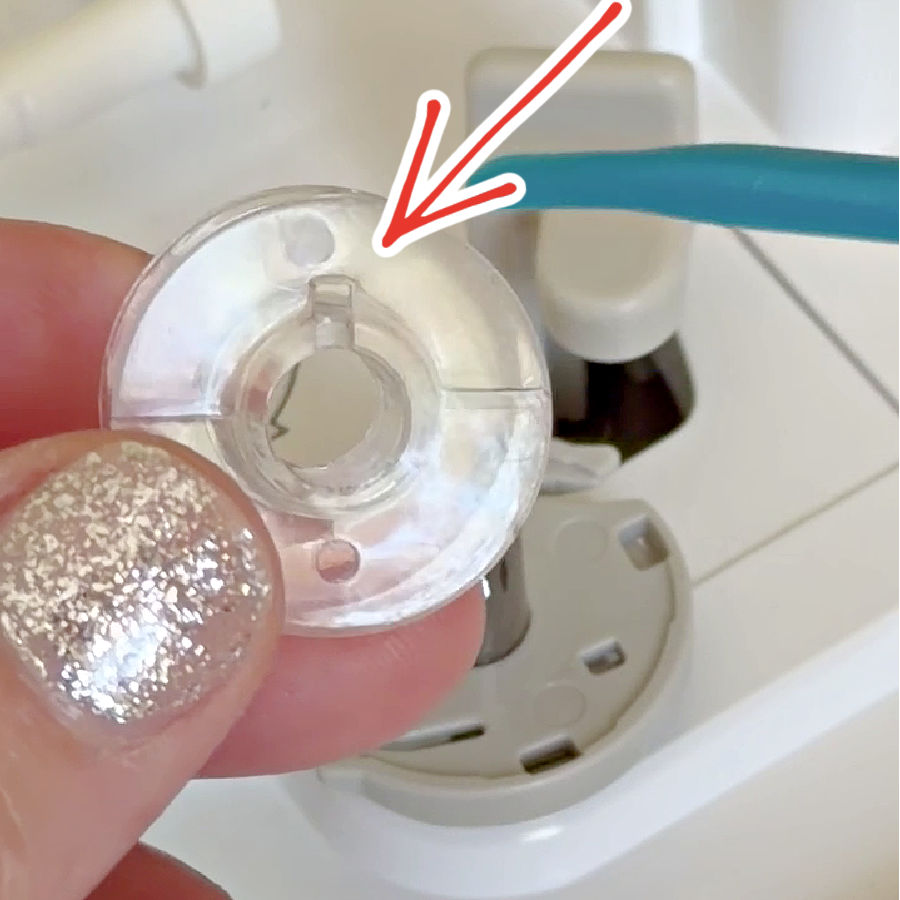
Take a close look at your bobbin and you may notice a small notch inside the center opening along with several holes around the sides. Those details aren’t random.
Let’s start with the notch, because this is one I used for years without paying much attention to it.
On many bobbins, there is a tiny rectangular notch inside the center opening. When you place the bobbin on the bobbin-winder shaft, that notch is meant to line up with a small spring or projection on the shaft. Press the bobbin down and turn it slightly until the two connect. This helps the shaft grip the bobbin securely so it turns while the thread winds.
I admit, I wound plenty of bobbins without deliberately lining this up. They still wound. Most likely the bobbin found its proper position on its own, or friction was enough to keep it turning. But once you know that notch has a purpose, it makes sense to use it.
I wrote more about this little feature in my guide to sewing machine bobbin features.
Then there are the holes in the sides of the bobbin.
On machines that use the traditional bobbin-winding method, one of those holes gives you a convenient way to hold the thread when you start winding. Pass the thread tail through the hole as directed by your machine manual, place the bobbin on the winder, and hold the tail while the first few wraps form. Once the thread is secure, you can trim the excess tail and continue winding.
The hole saves you from trying to wrap loose thread around an empty bobbin by hand and hoping it stays there long enough for the winding to begin.
But this is another case where it pays to look at your own machine. Not every bobbin winder uses the holes. My Brother Luminaire, for example, has markings beside the bobbin winder showing a different method: wrap the thread around the bobbin, use the built-in thread cutter, and then start winding. I had used the holes for years before I finally noticed that my machine had been showing me another method all along.
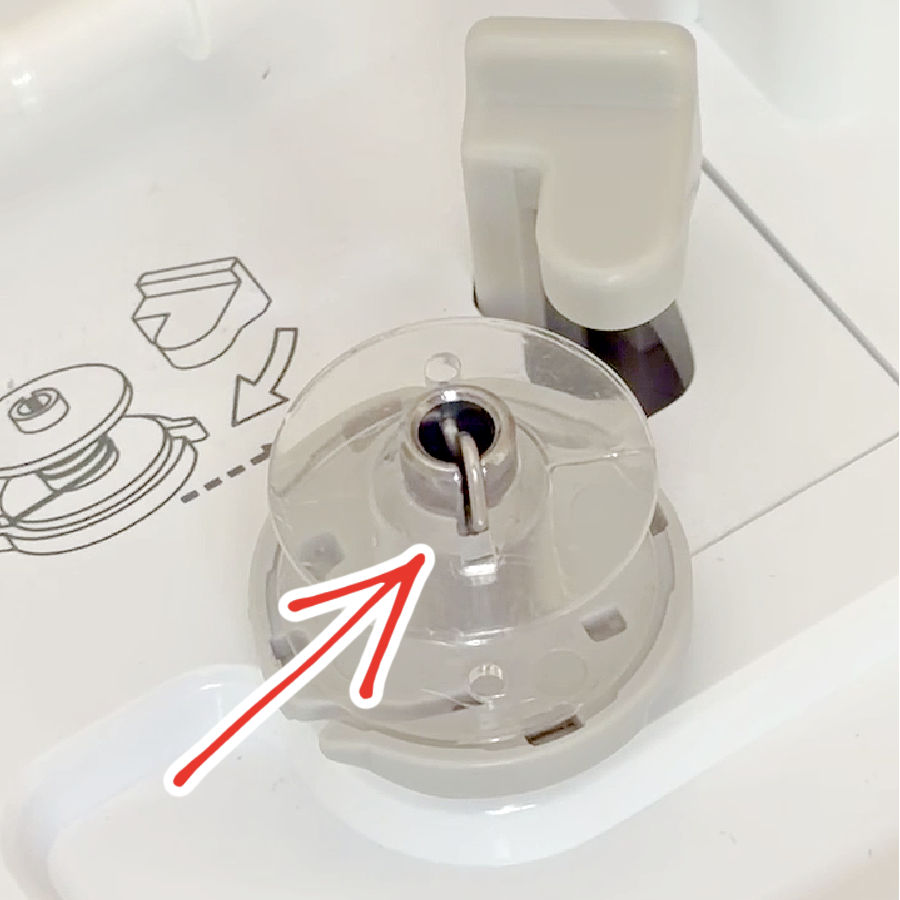
So before automatically threading one of those little holes, take a look at the diagram beside your bobbin winder or check the manual. The holes are there to be used—but only if that is how your machine is designed to start winding the bobbin.
3. The Little Lines and Marks on Your Presser Feet
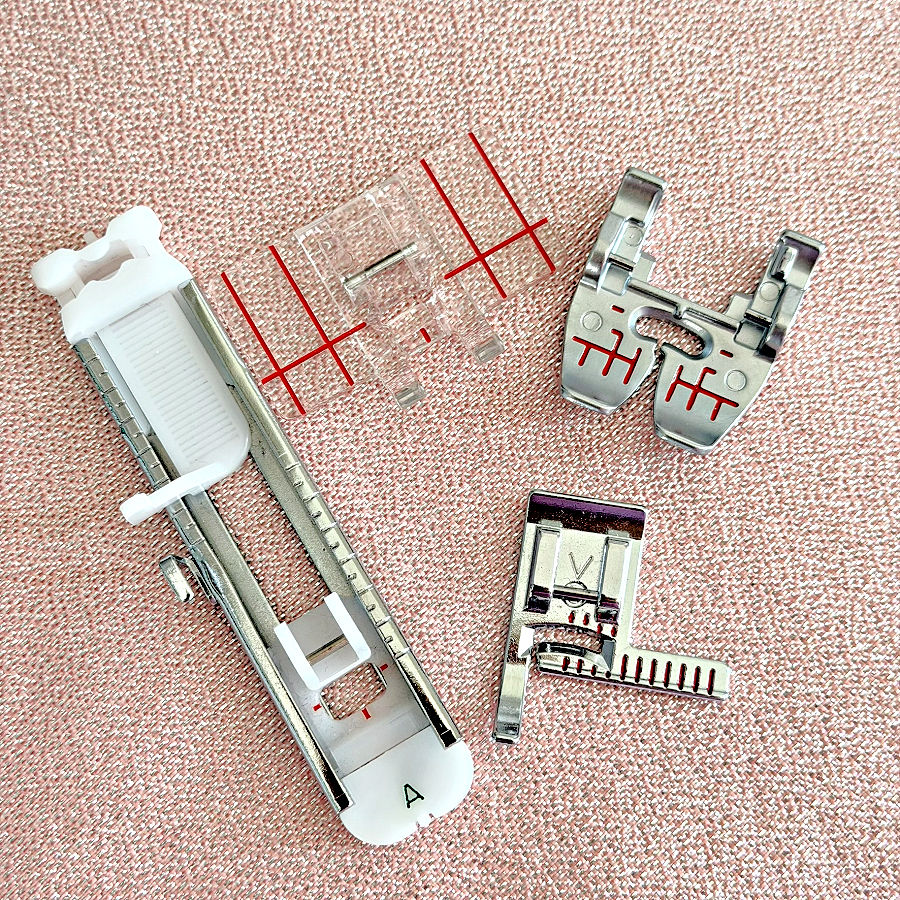
Take a close look at some of your presser feet and you’ll probably see a tiny mark somewhere near the front or center. It’s easy to overlook because it looks like such a small part of the foot.
But that mark is often there to give you a visual reference for where the needle or stitching will be.
This can be very useful when you need to sew along a drawn line. Instead of staring directly at the needle as it moves up and down, line up the mark on the presser foot with your fabric marking and keep the two aligned as you sew.
Depending on the foot, these little reference marks can help with:
- following a marked sewing line
- sewing toward a corner or intersection
- lining up seams
- keeping decorative stitches centered
- guiding rows of topstitching
Try drawing a straight line on a fabric scrap and see where the center mark on your foot falls in relation to the needle. Once you know exactly what that mark represents, you can start using it as a guide instead of ignoring it.
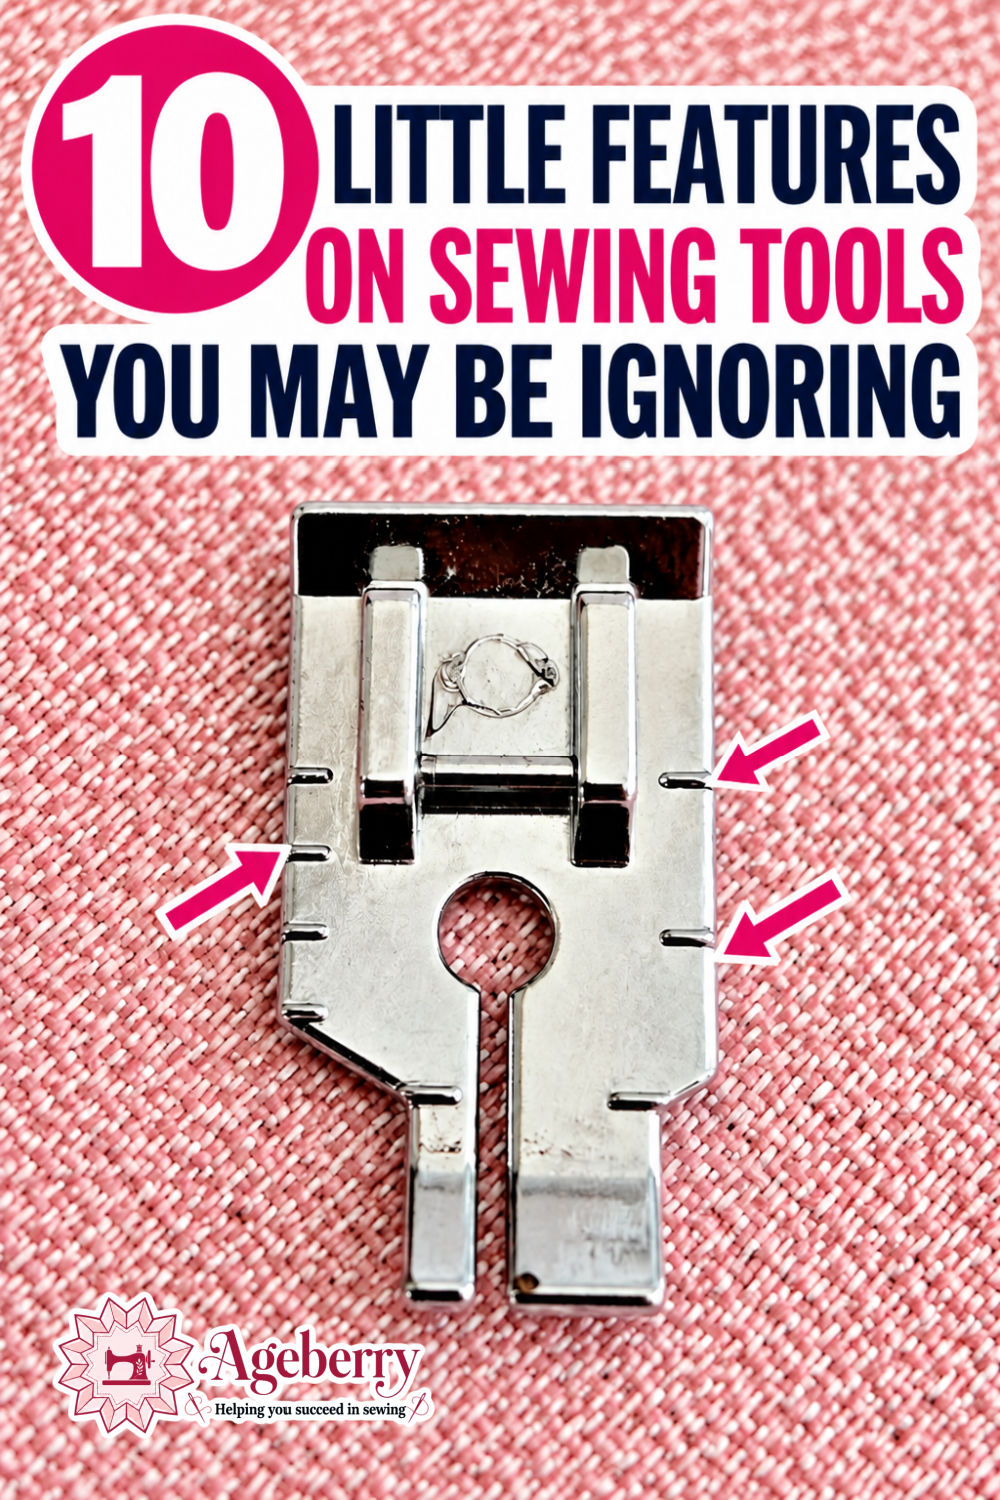
Another example is a 1/4-inch patchwork foot.
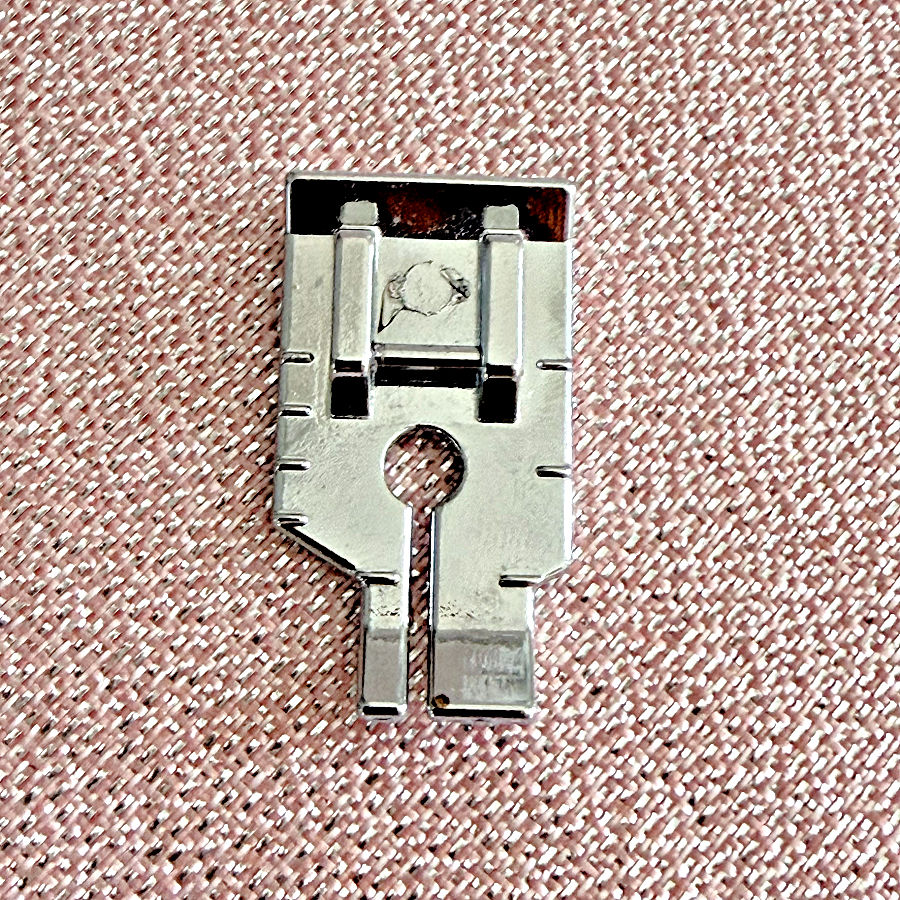
There are three notches along the right edge of the foot. The center notch lines up with the point where the needle enters the fabric, while the other two notches are positioned 1/4 inch in front of and 1/4 inch behind the needle.
And you can see even more little marks along the left side. But once you know that these marks are reference points for the needle position and specific distances from it, they’re much easier to figure out.
Why does that matter? Because sometimes you don’t want to sew all the way to the edge.
If a patchwork seam needs to begin or end exactly 1/4 inch from the fabric edge, those little notches show you when to start or stop sewing. You can watch the edge of the fabric approach the front notch and stop when the notch reaches the edge.
That is much easier than trying to judge the distance from the needle itself.
This is one of those features where you need to look at the particular foot you’re using. Presser feet can have several lines or notches, and they don’t necessarily mean the same thing from one foot to another.
Some indicate the center needle position. Others may show where a stitch begins or ends, where to pivot, or another alignment point specific to that foot.
So if your presser foot has mysterious little lines on it, don’t assume they’re decoration. Check the foot instructions or your sewing machine manual and find out what they’re telling you. Once you know, those tiny marks become much more useful.
4. Those Little Dimples on Thimbles
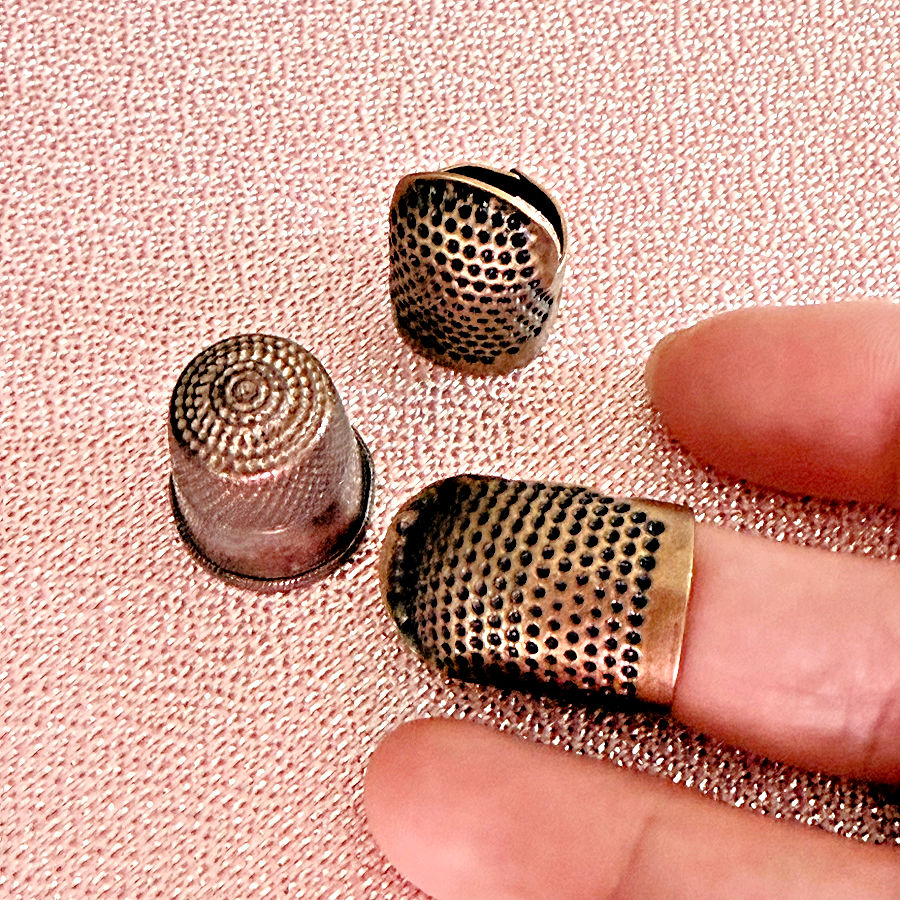
A metal thimble is covered with tiny indentations across the top and often down the sides. They may look like simple texture, but they have a very practical job.
When you push a hand-sewing needle through fabric, the end of the needle needs something to grip. On a completely smooth metal surface, it could easily slide away. The dimples give the needle end a small place to catch so you can push with more control.
To use them, place the back end of the needle into one of those little indentations and push with the thimble. This is especially helpful when the needle has to go through several fabric layers, denim, quilt layers, or tightly woven fabric.
And no, those dents aren’t from years of sewing. They were there when you bought it.


5. The Flat Side on a Sewing Machine Needle
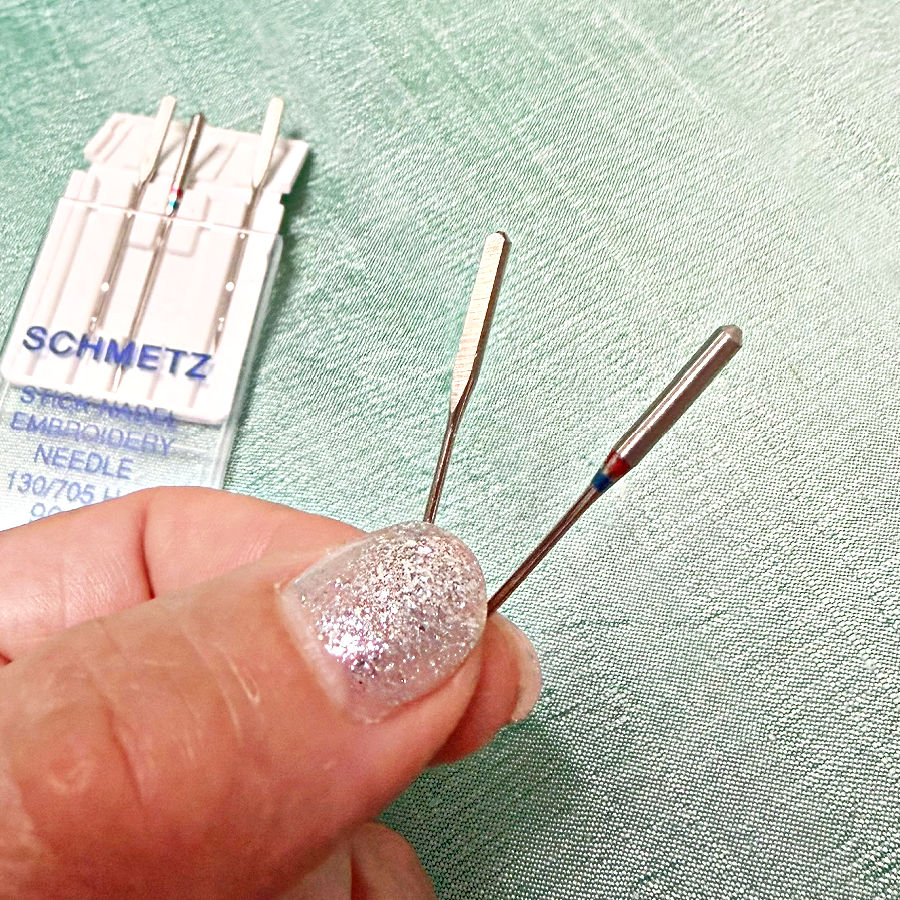
The upper part of a household sewing machine needle isn’t completely round. One side of the shank is flat, and that flat side helps you insert the needle in the correct position.
On most household sewing machines, the flat side faces the back, but not on every machine. Vintage machines and some specialty machines may use a different orientation, so it’s always worth checking the manual.
That little flat area matters more than it looks. If the needle is turned the wrong way, the machine may skip stitches, have trouble forming stitches, or the needle may even hit something it shouldn’t.
So when you change a needle, don’t just push it up into the needle clamp and tighten the screw. Use the flat side as your guide and make sure the needle is facing the correct direction for your machine.
6. That Little Black Button on Some Presser Feet
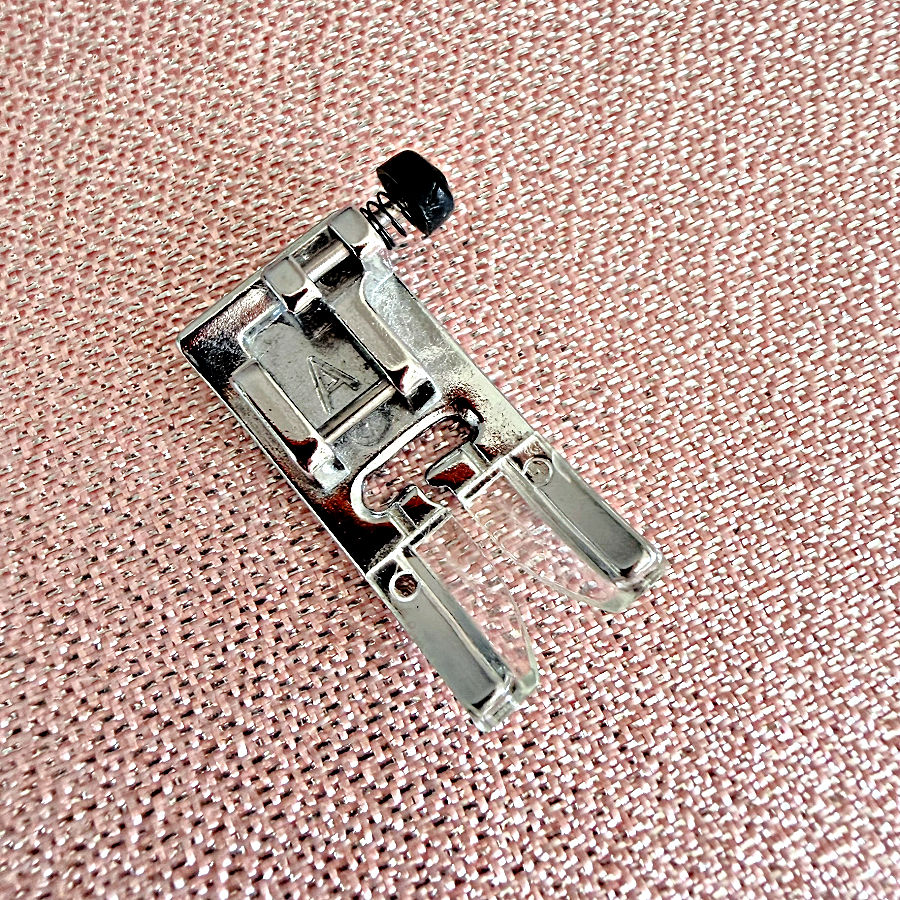
You may have had this little black button on your presser foot for years without ever touching it. On some all-purpose or zigzag feet, it’s a leveling button, and it’s there to help the foot get over bulky seams and uneven layers.
When the front of the presser foot reaches something thick — a jeans hem, a bulky bag seam, several folded layers, or a thick quilt intersection — the foot can tip upward. Then the fabric may stop feeding as smoothly, and the machine can struggle over that raised area.
How to Use the Button
When the front of the foot reaches the bulky section, stop with the needle down and raise the presser foot. Press the black button while lowering the foot again. The button holds the back of the foot higher so the foot sits more level with the thick fabric in front of it.
Then continue sewing. Once the foot moves past the bulky area, the button releases and the foot returns to its normal position.
The exact location can vary. On my Janome 6600P, the button is on the right side of the foot, while on my Brother Luminaire it’s on the left. And not every presser foot has one.
I show the whole process with denim in my article about hidden sewing machine features.
7. Lines on Your Needle Plate
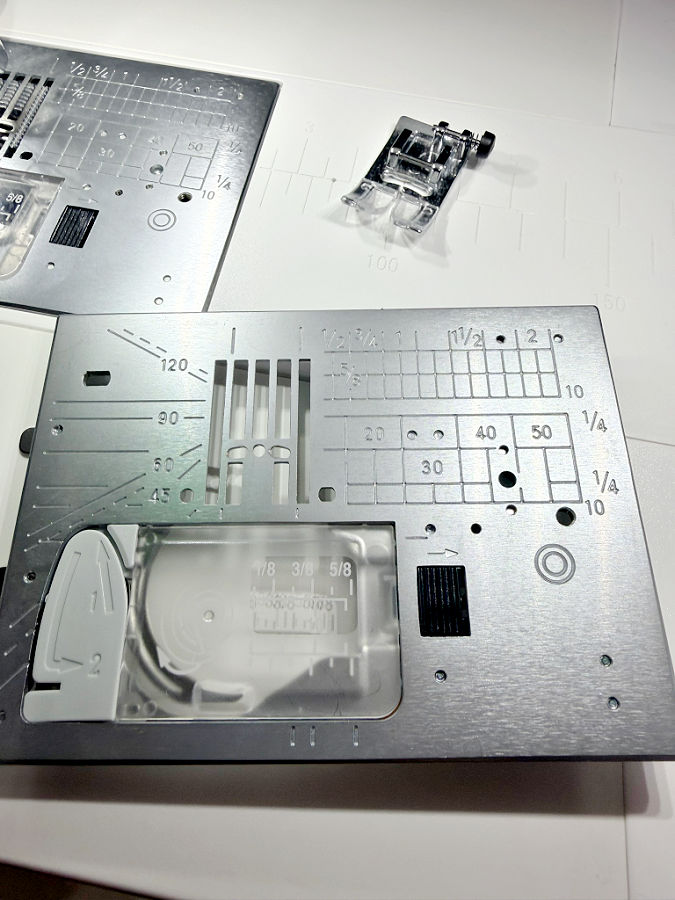
Those lines on the needle plate are easy to overlook because we see them every time we sew. But they’re there to help you keep a consistent seam allowance without measuring from the presser foot itself.
Depending on the machine, the needle plate may have markings in inches, millimeters, or both. You may also see longer guide lines and shorter crosswise marks.
If you need a 5/8-inch seam, for example, line up the raw edge of the fabric with the 5/8-inch guide on the needle plate and keep that edge following the line as you sew.
Try not to watch the needle the whole time. Your stitching will usually be more consistent if you watch the fabric edge and the guide line instead.
There is one small detail to remember: on machines with adjustable needle positions, those measurements are usually based on a particular needle position, often the center position.
So if you move the needle left or right, don’t automatically assume the printed seam allowance is still measuring exactly what you think it is. Check your machine manual or measure the distance yourself once, especially if you rely on the markings for precise sewing.
Once you know which line corresponds to which seam allowance on your machine, those markings become much more useful than they first appear.
8. The Red Ball on Your Seam Ripper
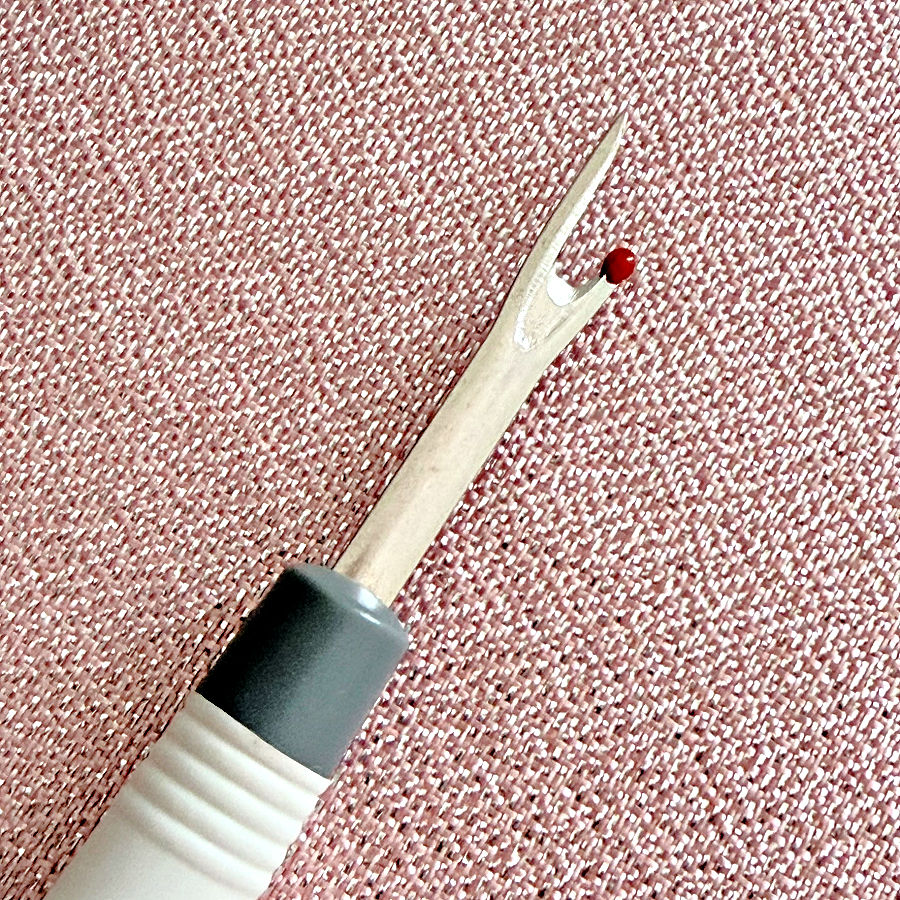
That little red ball on a seam ripper looks almost decorative. It isn’t. You may also think it is there to protect your finger from the sharp tip. That is not it either. The ball has a very important functional purpose.
On a standard seam ripper, one side has a sharp point and the other has a small rounded ball. In one common seam-ripping method, the ball rides against the fabric while the cutting blade slips through the stitches. The rounded side helps keep the sharp point from digging directly into the fabric as you move along the seam.
Turn the seam ripper so the red ball is against the fabric and the sharp point is above the seam. Slip the blade between the layers and move it carefully along the stitching so the blade cuts the threads while the ball glides over the fabric.
This can make removing a long seam much faster than picking out every stitch one by one.
But it’s not foolproof. On delicate fabrics, loose weaves, knits, or anything that snags easily, I would still go slowly and remove stitches more carefully.
I show the technique in more detail in my article Why Does Your Seam Ripper Have a Red Ball? Discover Its Purpose!.
9. Sliding Marker on a Seam Gauge
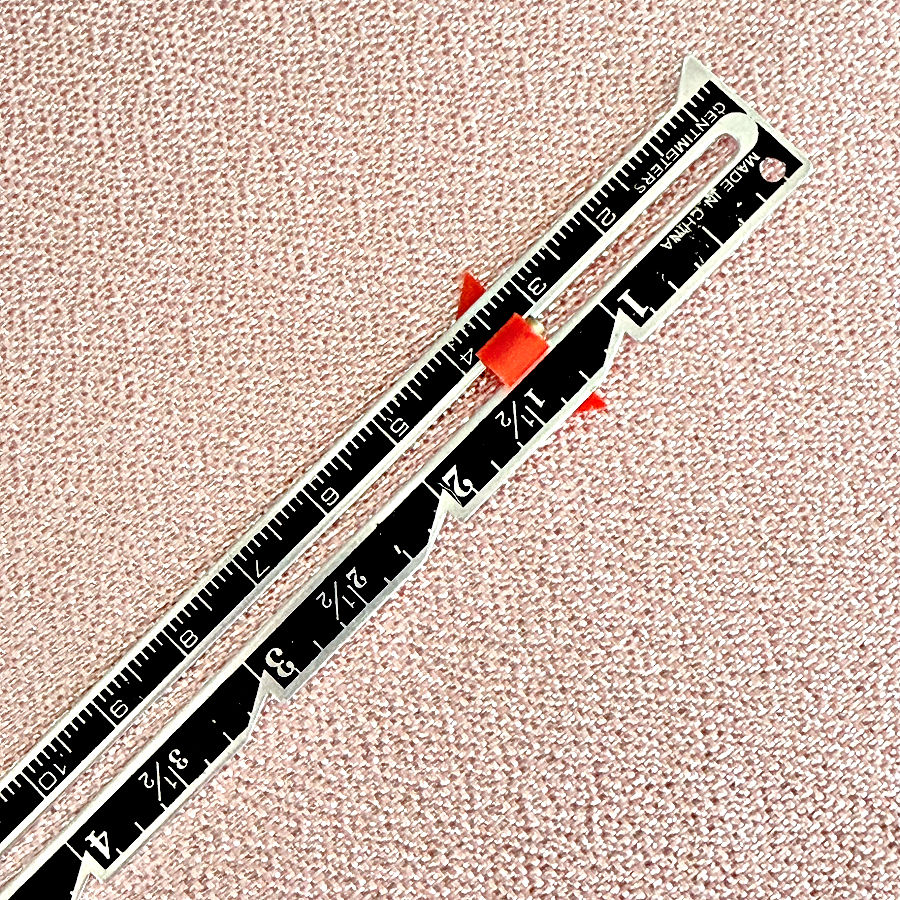
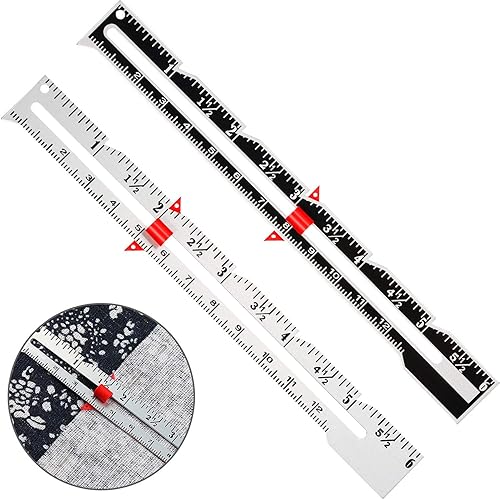
That little slider on a seam gauge is easy to move without giving it much thought, but it’s a useful part of the tool.
Its job is simple: set the measurement once and keep it there.
If you’re turning up a 1-inch hem, for example, move the slider to the 1-inch mark. Place the end of the seam gauge at the fabric edge, fold the fabric until it reaches the slider, then move farther along the hem and repeat.
You don’t have to keep finding the 1-inch mark every few inches. The slider remembers it for you.
It’s useful any time you need to check the same measurement again and again, such as:
- hems
- seam allowances
- button placement
- pleats
- tucks
- elastic casings
- spacing between rows of stitching

10. What Is That Little Wheel on a Chalk Marker For?
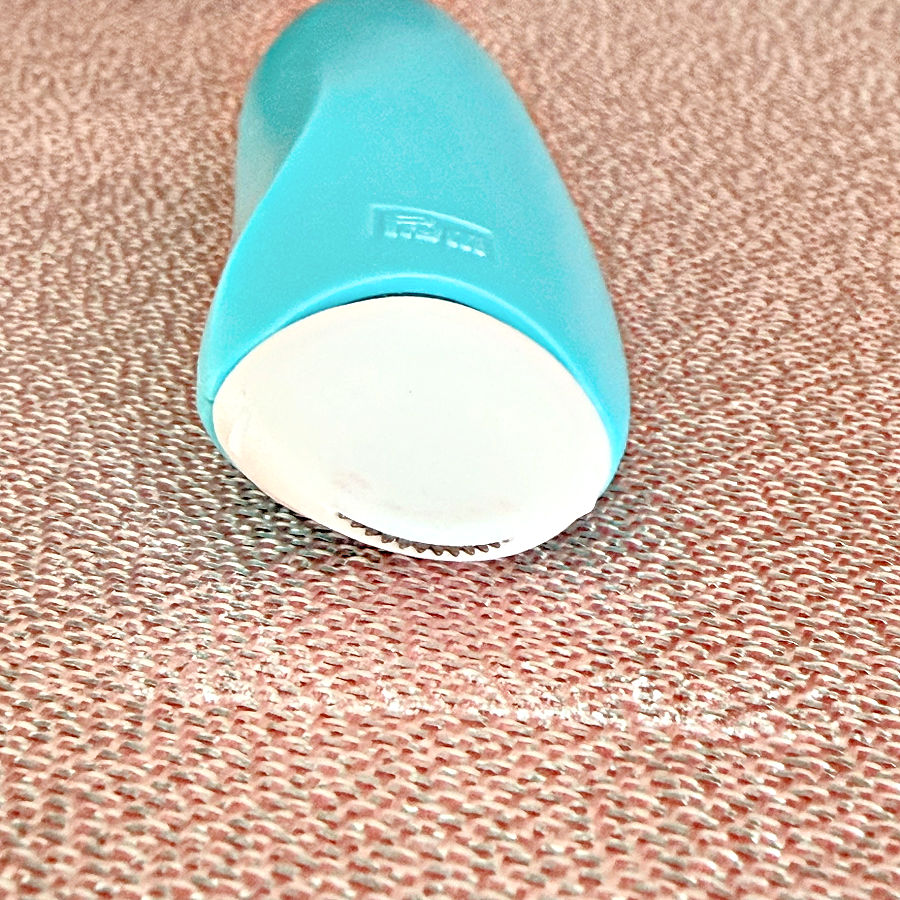
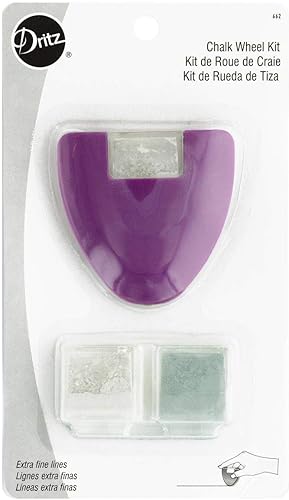
Some fabric marking tools have a tiny wheel at the tip instead of a solid piece of chalk. That wheel is what helps create the mark.
As you roll the tool across the fabric, the wheel picks up or releases chalk and leaves a narrow line behind it. On refillable chalk markers, the wheel works with the powdered chalk inside the reservoir.
You don’t need to press hard and drag it across the fabric like ordinary tailor’s chalk. Let the wheel roll.
That rolling action can give you:
- a finer chalk line
- better control along a ruler
- easier marking of long straight lines
- less shifting of the fabric while you mark
It’s especially handy when you want a clean, narrow line instead of a wide chalk mark.
And because the wheel does the work, pressing harder usually doesn’t help. A light, steady rolling motion is generally enough.


Once you start looking closely at sewing supplies, you notice these little design choices everywhere.
The hole, groove, notch, bump, color, line, or strangely shaped piece that seemed insignificant may have been put there for a very specific reason.
What tiny detail on a sewing tool have you always wondered about?
Were you aware of all these small (but useful) features of our sewing tools? Did you find this article interesting? If so, save this pin (see below) on your sewing board so you don’t lose this information, and follow me on Pinterest for more tips, tutorials, and inspiration!
latest posts
- 10 Easy-to-Miss Features on Sewing Supplies You Should Be Using
- Twin Needle Sewing: My First Try Was a Mess, But Here’s What Worked
- 10 Rules That Made Me a Better Sewist
- How to Make a Lightweight Summer Neck Scarf with a Lettuce Hem
- What Sewists Hate About Sewing: Common Complaints and Practical Fixes
- Knit Presser Foot: How It Works, How to Use It, and My Sewing Tests
- How to Sew Neat Mitered Corners at Acute Angles
- Sewing Machine Needle Organization: A Clever System I Tried
- DIY Car Armrest Organizer: Sewing Tutorial