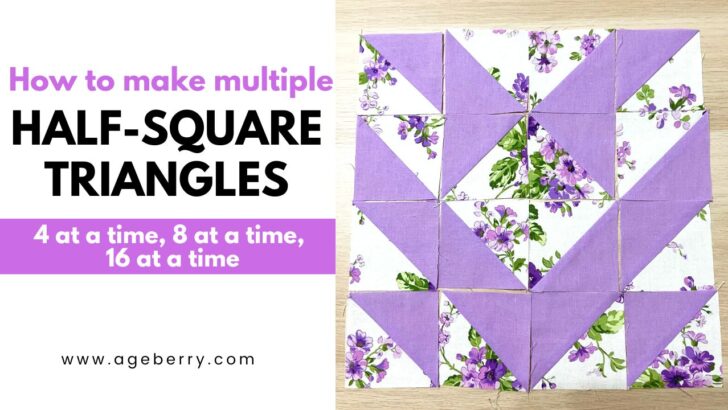
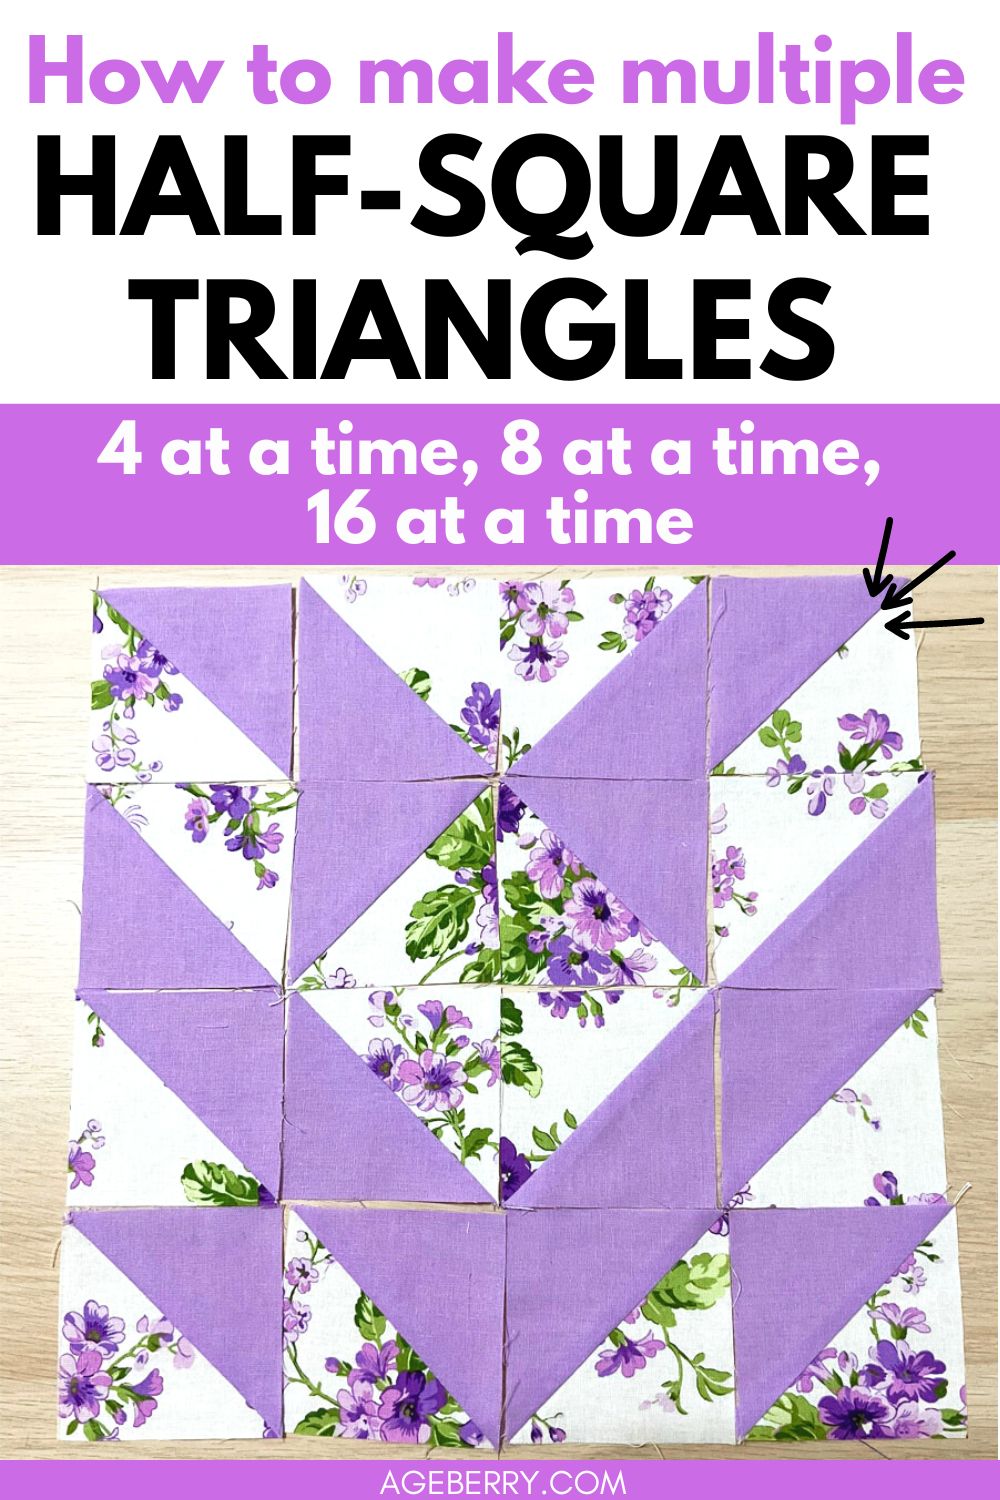
7 Easy Ways To Make Multiple Half Square Triangles
Let’s be honest. Most quilters love seeing a project come together piece by piece. What many of us don’t like is all the prep work. Washing, ironing, and cutting hundreds of little pieces takes almost as much time as putting your masterpiece together.
I love watching my project slowly take shape, but I want to skip all the prep and get right to the putting-together stage. However, skipping the prep work is always guaranteed to cause problems later. If this is your first time making a quilt, take a few minutes to learn why I recommend you prewash fabric before cutting.
Today’s tutorial will include 7 quick and easy ways to construct multiple half square triangles (HST).
Half square triangles 2 at a time
Let’s look at the basic 2-at-a-time half square triangles first.
Depending on how you sew your squares together, you can design hundreds of different patterns, from waves to modified pinwheels and geometric and 3D projects. The method is perfect for someone making a 1000 pyramid quilt that doesn’t repeat color combinations more than once.
Here is a diagram that is showing you how to make HST 2 at a time.
Step One: Cutting Squares From Fabric
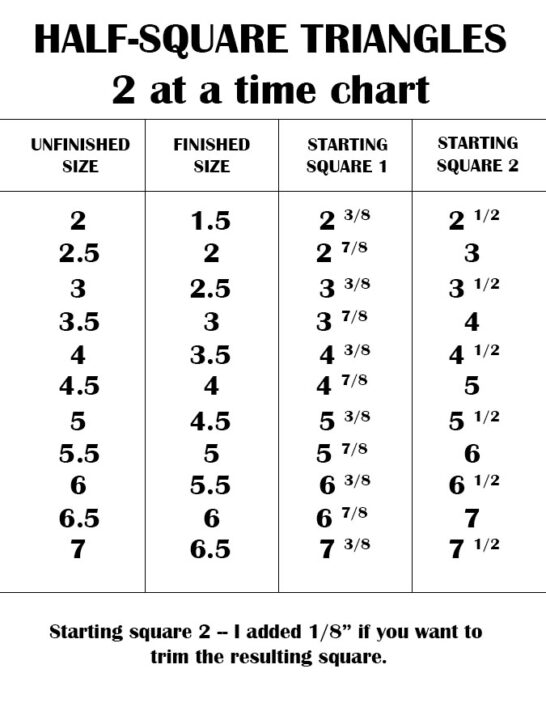
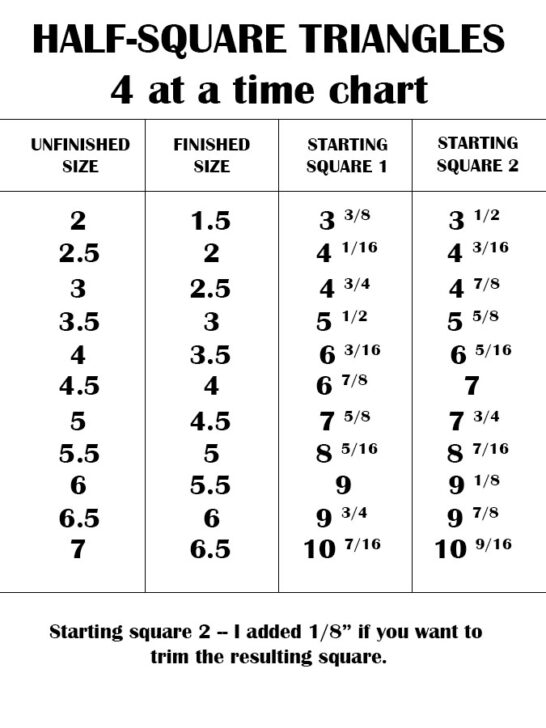
Decide what size you want your finished block to be. (Use the chart below for a guide.)
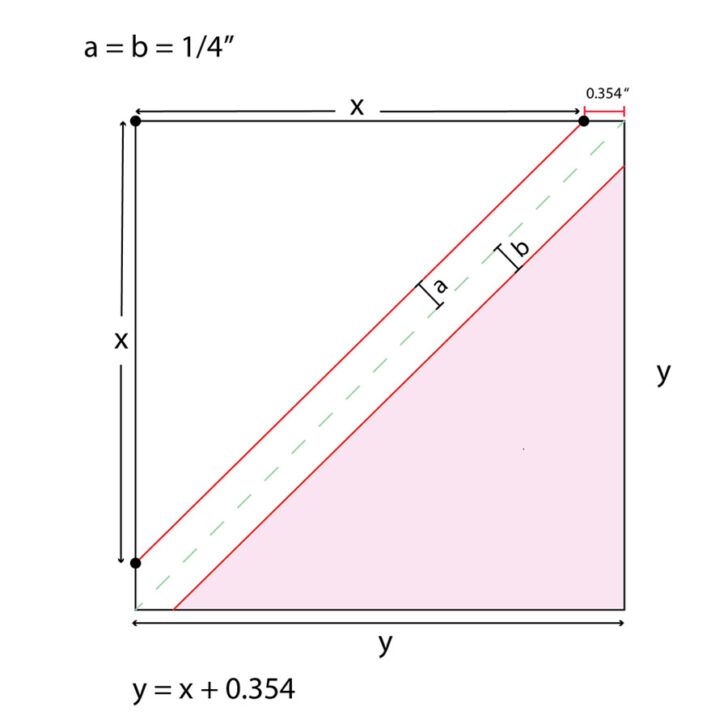
The unfinished size of a square block is the size of the fabric square after it has been cut but before it has been sewn into the quilt top. The finished size of a quilt square block is the size of the block after it has been sewn into the quilt top.
The difference between the unfinished square and the finished square is ½” (half an inch) though the finished size may be slightly smaller or bigger depending on the accuracy of ¼” seam allowances.
Therefore, if are sure that you can be very precise and sew exactly ¼” seam allowances you can choose starting square #1, but if you have doubts about your ability to sew precise seam allowances you can choose starting square #2 and trim the resulting squares if necessary (it might even be not necessary).
Half square triangles 2 at a time chart
Choose two different fabrics. Most people choose a solid and a print, but you can use two solids, two prints, or two different shades of the same color. Your fabric combination should be based on your quilt pattern or personal design.
If using scraps or fat quarters, you can use a marking pencil and ruler to outline your squares before cutting them. You can also pin paper templates to the fabric – remember to lay them out with the straight grain of your fabric. I prefer to skip drawing or pinning templates in place.
Place your two fabrics right sides together and finger press or iron them to ensure the fabrics are wrinkle-free.
Note: Some of the links on this page are affiliate links. This means I will receive a commission if you order a product through one of my links. I only recommend products I believe in and use myself.
I use a Martelli rotary cutter and mat. The unique shape of the rotary handle reduces hand and arm strain and the blade is sharp enough to cut through multiple layers with ease. I find that cutting four, six, or even eight squares at a time makes the overall process easier and faster, too!
Step two: Sewing
Now that your squares are cut to the correct size, let’s get to the sewing part.
Draw a diagonal line across the wrong side of the lightest colored fabric.
Next, draw stitching lines on each side of the diagonal a quarter inch away from the center line.
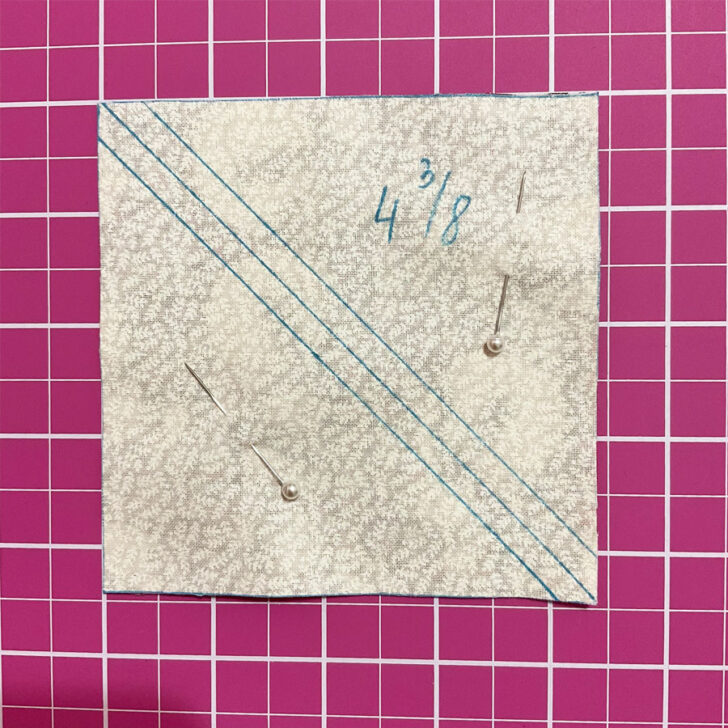
Pin the two pieces of fabric together and sew on the two stitching lines.
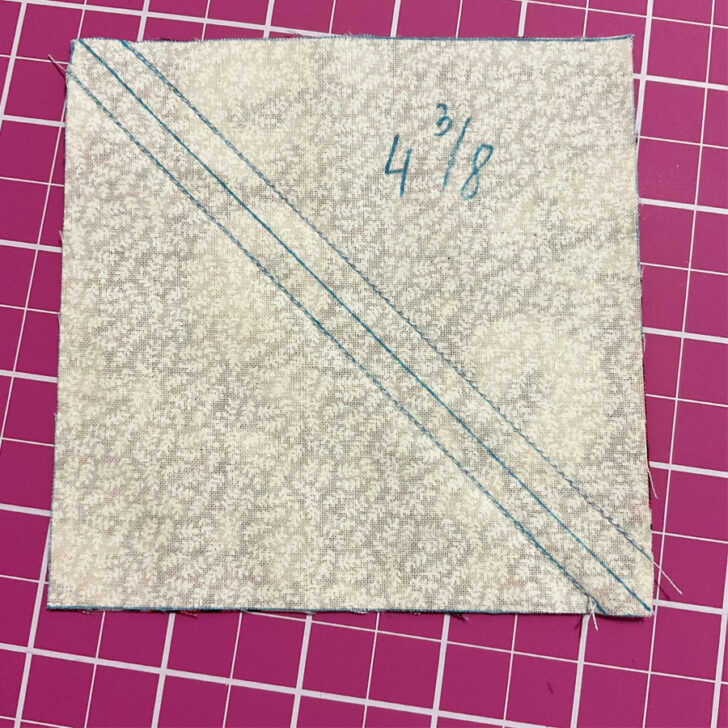
Step three: Make 2 half square triangles
Cut along the center diagonal line to separate the two new squares.
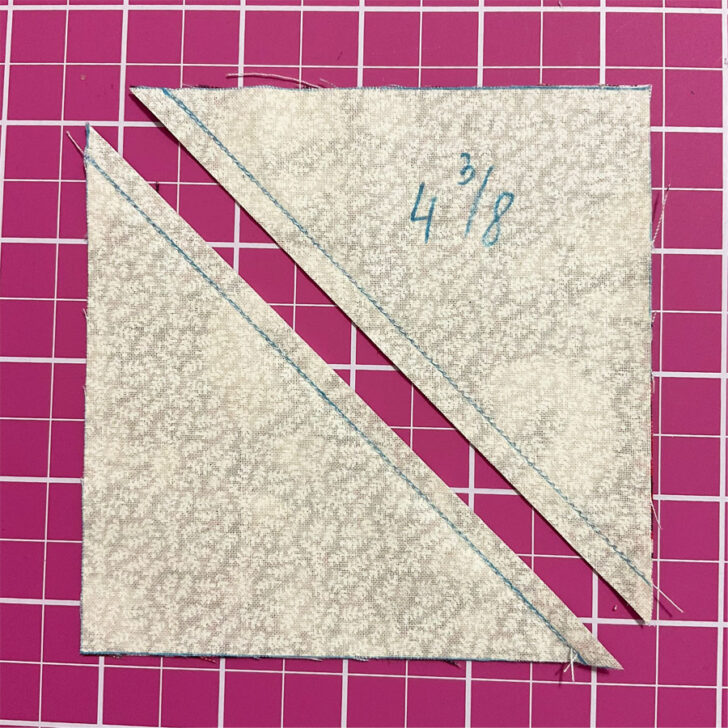
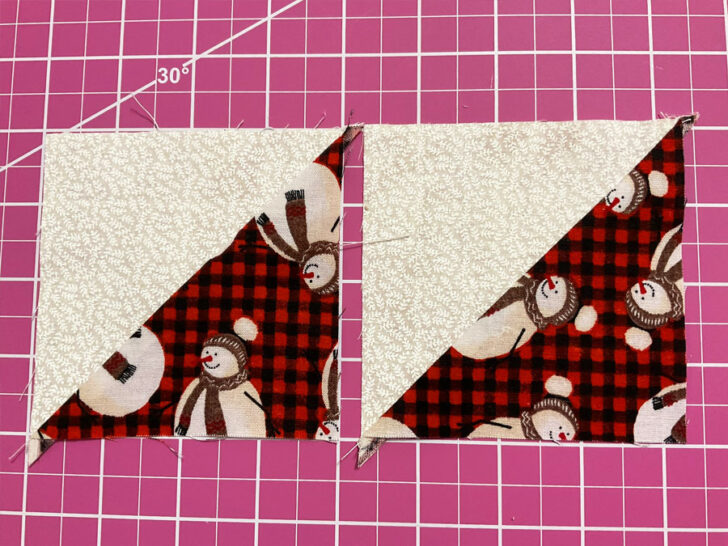
Press the seams toward the darkest fabric and trim away the little dog ears on the corners. And voila! You now have two HST blocks.
Before moving on to the 4-at -a-time half square triangles, I want to give you some tips that will save time and effort on all your projects.
If you don’t already have one, get a good rotary cutter that fits your hand and a self-healing mat. Self-healing mats come in a variety of sizes, you may want more than one. These mats keep your fabric in place and protect your furniture, too!
Two other essential accessories for every quilter are high-quality scissors and a variety of acrylic rulers. A four-inch wide straight-edge ruler is perfect for cutting squares and triangles. I’ve also found having a curved ruler comes in handy, especially one with slots cut to keep your rotary cutter perfectly aligned with the cutting edge.
Now let’s get back to HST.
Half square triangles 4 at a time
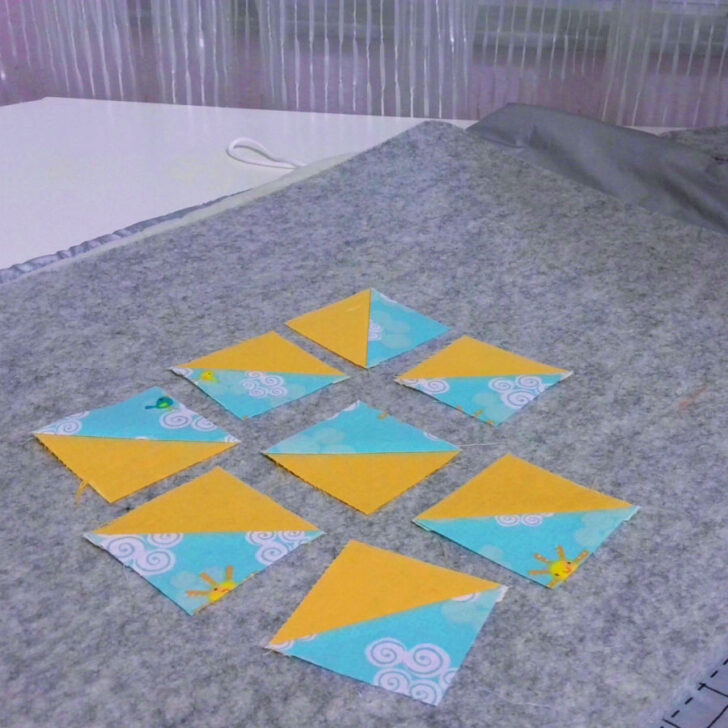
This method of making half square triangles is a great option for patterns that have a few repeats throughout the quilt top, such as a modified windmill.
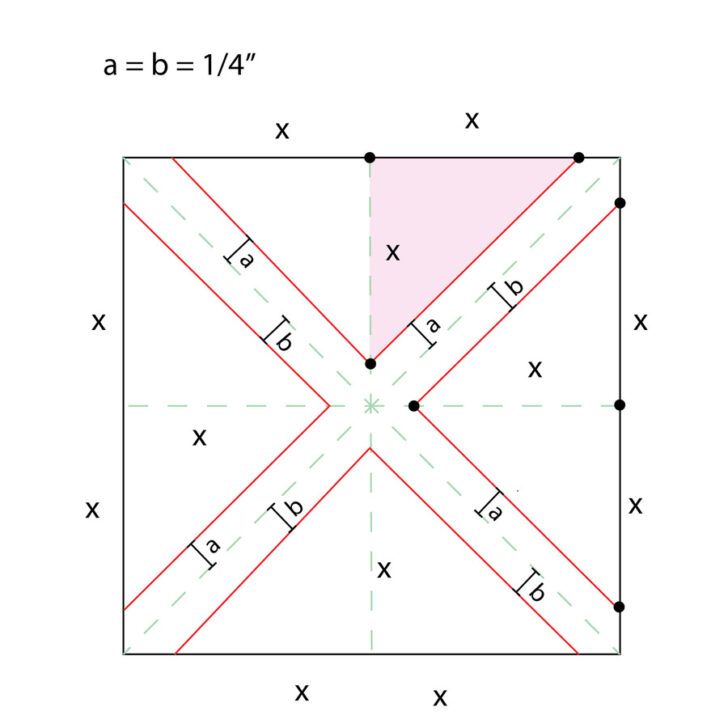
Here is a diagram that is showing you how to make HST 4 at a time.
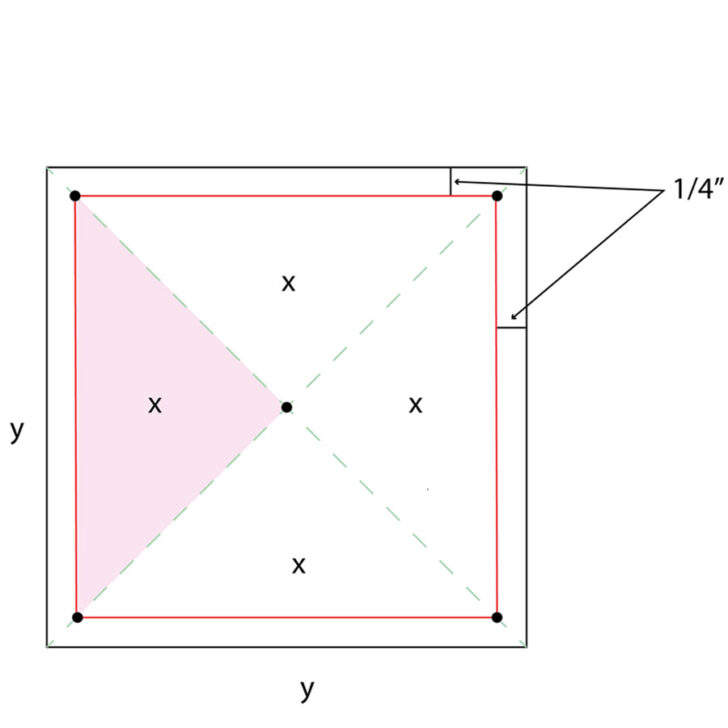
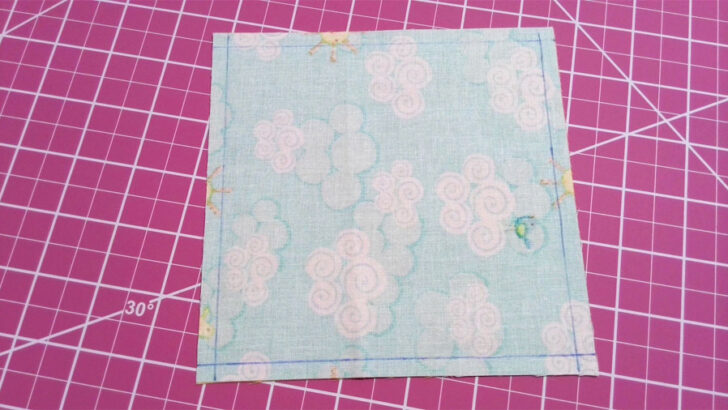
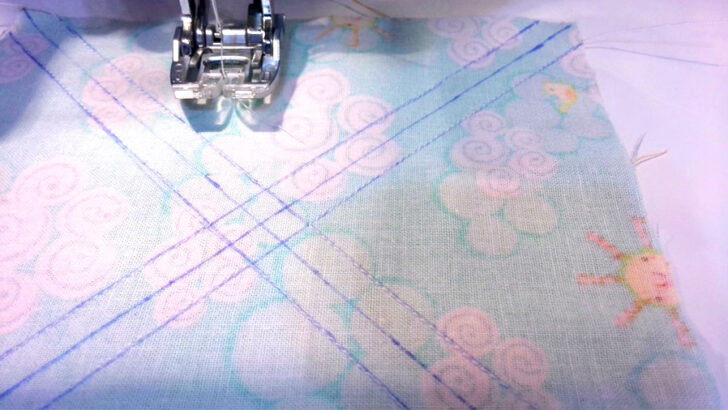
You start with two squares of fabric cut into the same size. Place fabrics right sides together before cutting. You can draw stitching lines at quarter-inch seam allowances, or you can just sew all around the edges using a quarter-inch presser foot.
Pin in place and sew one-quarter inch around all sides.
Place the double square on your cutting mat and cut two diagonal lines so that you have an X across the square. If you need to turn the project to cut, turn the mat rather than the fabric.
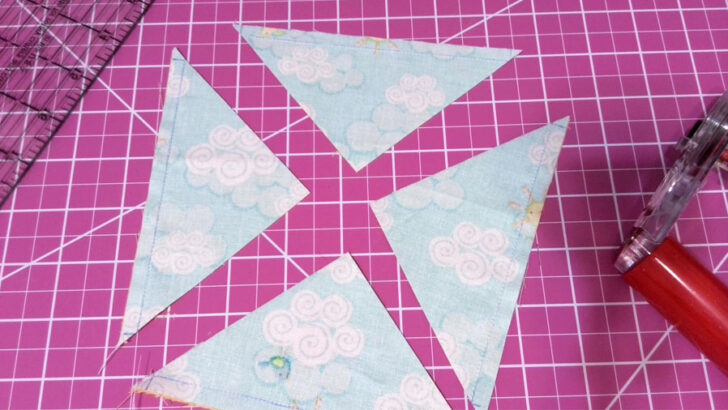
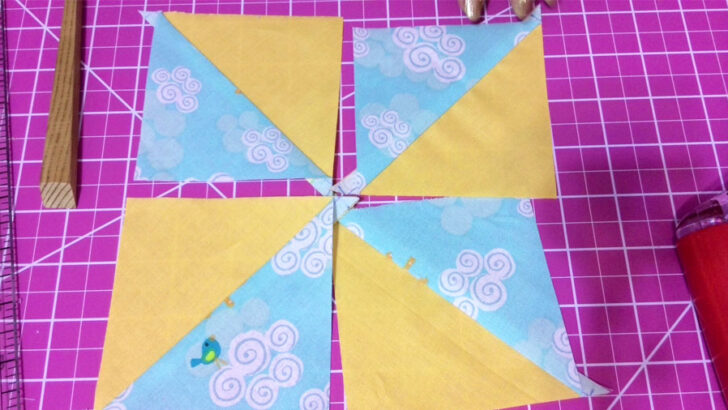
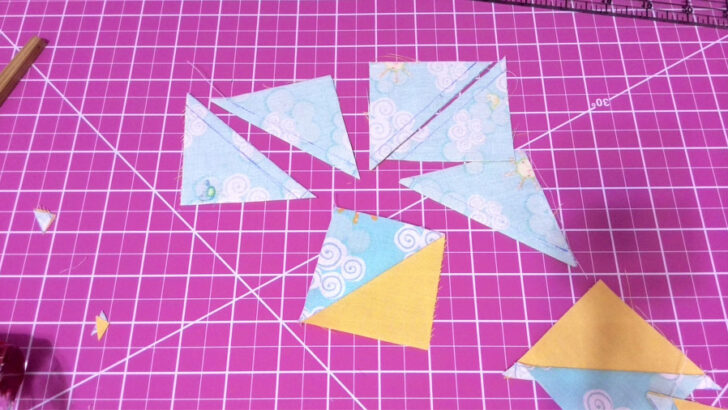
Open each triangle and press the seam toward the darker-colored fabric.
Remember to trim the little dog ears.
Half square triangles 4 at a time chart
Magic 8 half square triangles
If you are making a project with multiple color combination repeats, like the image below, you’ll love the Magic 8 Method.
Here we go!
Place two fabrics right sides together, with the lightest fabric facing you. Cut 2 squares the size you need.
Here is a diagram that is showing you how to make HST 8 at a time.
Using your ruler and marking pencil, draw two diagonal lines across the square, making a large X. If your machine has a quarter-inch presser foot, you can skip the markings and simply stitch your squares together by outlining the two diagonal lines.
Mark one-quarter-inch stitching lines along each side of the diagonal lines.
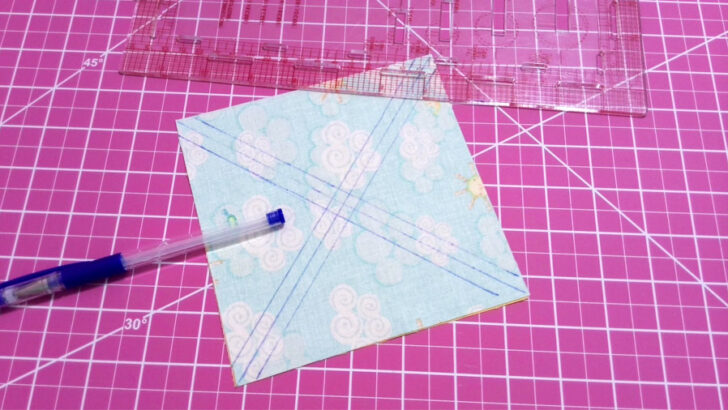
Pin the fabric in place and sew (check the diagram above – sew over the red lines only).
Cut across the center + from top to bottom and side to side. Now you will have four individual squares.
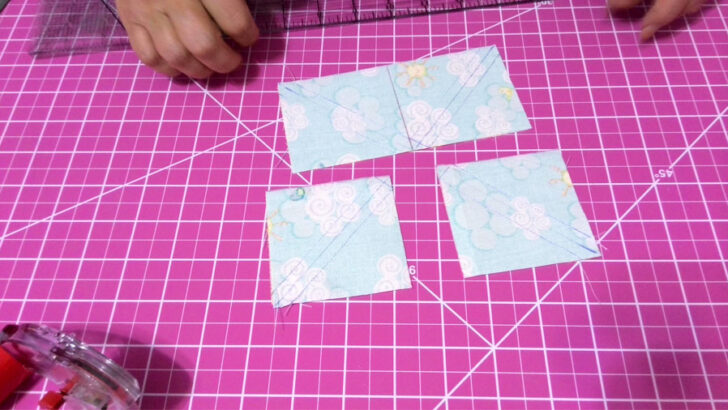
Cut along the center (diagonal line) of each square.
Trim and iron as recommended above.
That’s it. 8 squares in almost the same time it took to make four.
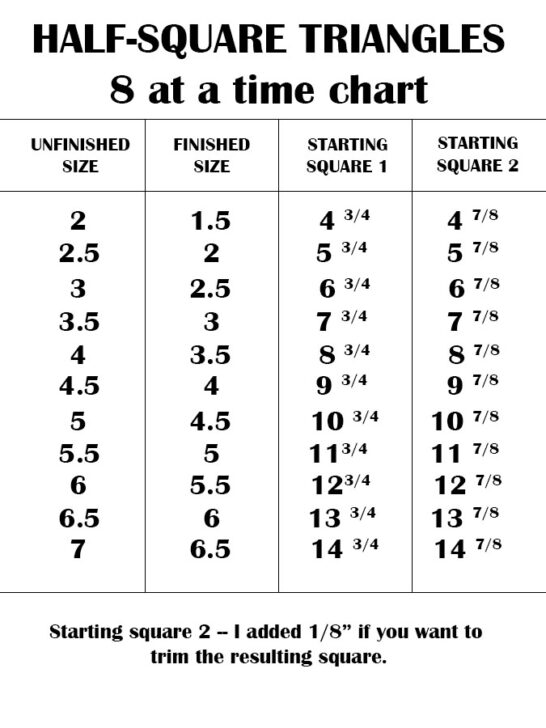
Half square triangles 8 at a time chart
Now, let’s look at the jelly roll or strip method of making HST.
How to make half square triangles from strips
Refer to your pattern for strip width and length.
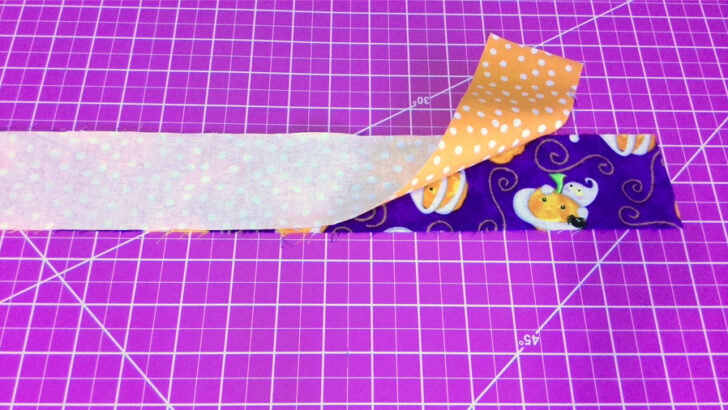
Cut two strips from different fabrics and put the pieces together with the right sides facing. Pin or baste the strips together to help keep the fabric in place.
Strip quilting methods are ideal for projects that have limited color combinations. They are also super fast, and once you get the hang of turning your fabric, this method is best for large quilts fabric artwork.
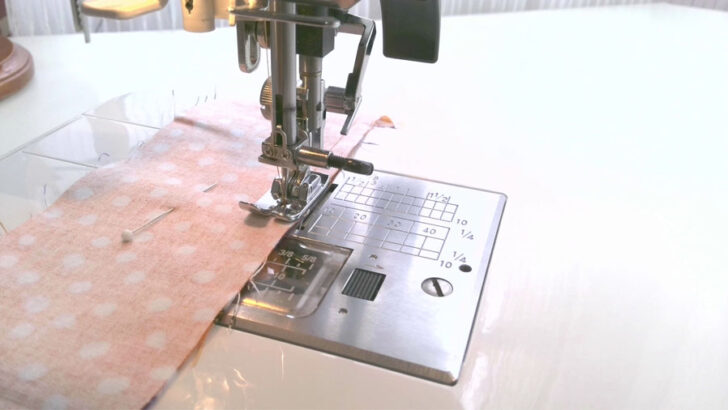
Join the two strips with quarter-inch seam allowances along both long sides of the fabric. You’ll have a long tube with open ends.
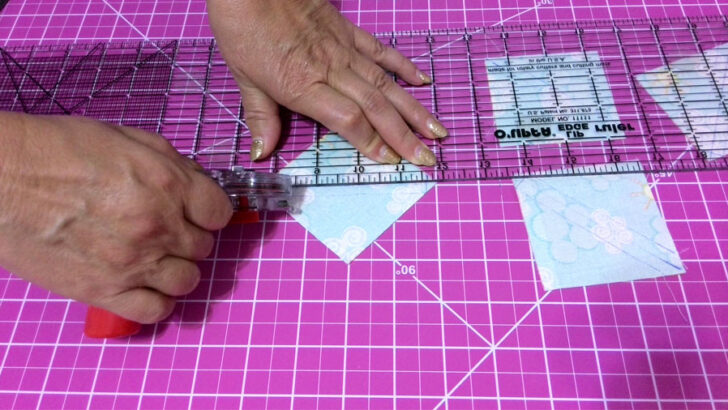
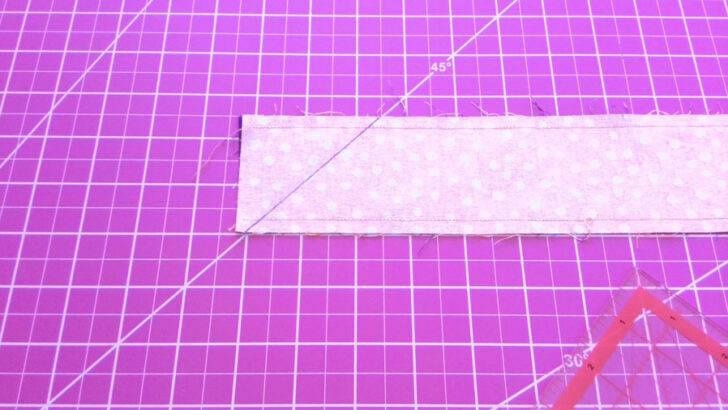
Use a quilting ruler, cutting mat, and rotary cutter to cut triangles using the size recommended by your pattern.
Position your ruler so that the ruler forms a triangle aligned with the correct width marker on the lower edge of your “tube.” The first cutting line is the most important.
Line your ruler up so you have an inverted triangle of equal height and width as your first one.
Repeat those two steps along the remainder of your strip.
There is a special very useful tool to make HST from strips of fabric. It’s called Strip Tube Ruler. With this great gadget, you can easily make accurate half square triangles from 1″ to 9.5″.

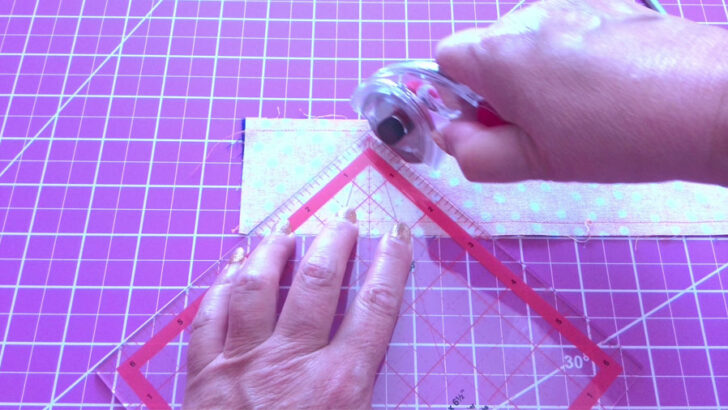
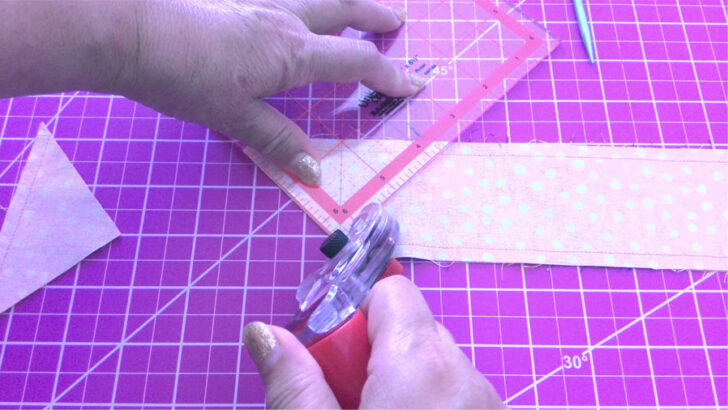
Half square triangles with embroidery machine (Brother Luminaire)
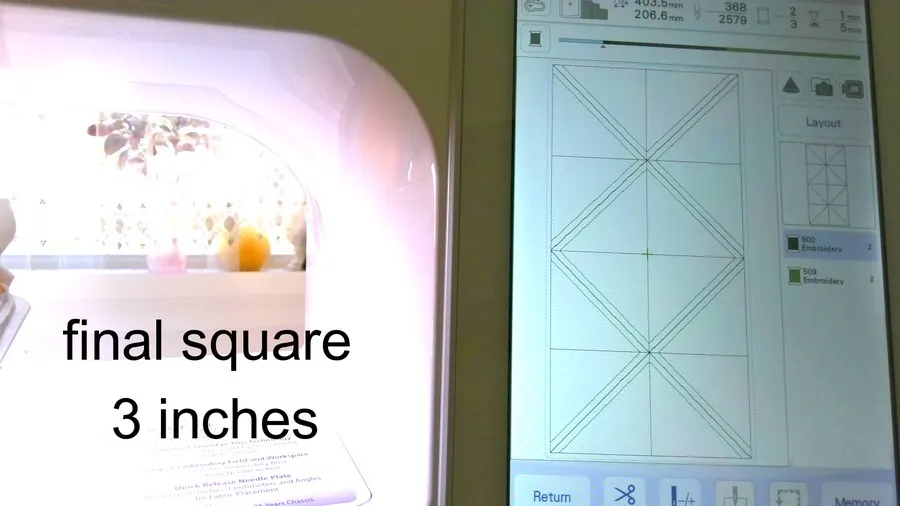
I also have a unique way of making HST with my Brother Luminaire embroidery machine that lets you make sixteen squares at the same time. The unique process is much like the basic half square triangle, except your precision-cut squares never need trimming or resizing – they are perfect, every time. The layout design is free to my readers who subscribe to my blog.
Gather your supplies and create your first 16 HST blocks following my video instructions. It’ll be like I’m right there with you, every step of the way.
You will need :
- Tear away embroidery stabilizer
- A large embroidery hoop (10.5 inches by 16 inches)
- Two contrasting pieces of quilting cotton fabric
- Removable fabric tape
- 100% cotton or polyester thread
- A rotary cutter and mat
- An iron and ironing board or a finger-presser tool
Making half square triangles with cutting machines: Cricut and AccuQuilt
There are several high-quality cutting machines on the market today. I own a Cricut Maker 3 and two different AccuQuilt fabric cutting machines and use them all the time now when making half square triangles.
Here is a brief description of each.
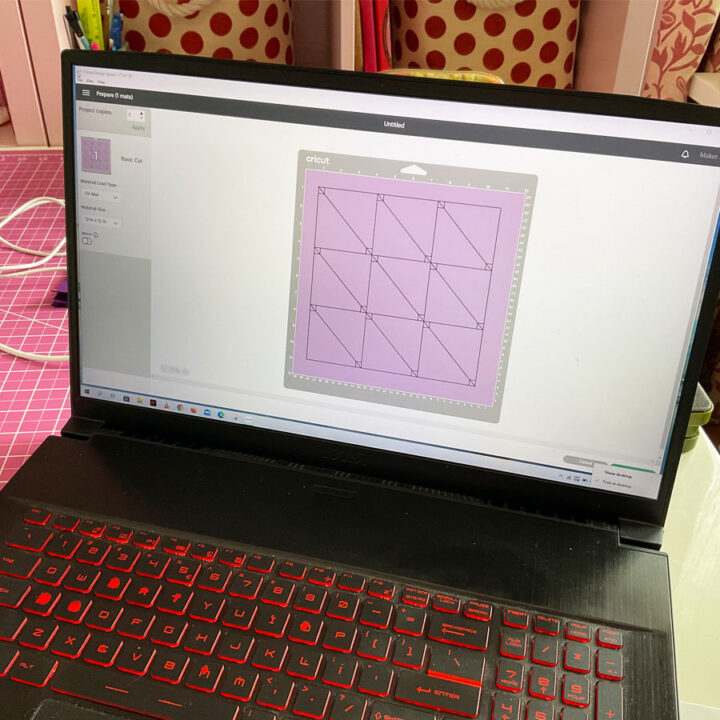
Cricut Maker 3
I like the Cricut Maker 3 for projects where I’ll need quite many few finished squares with the same two colors. The Cricut can cut many shapes and sizes. Also, the machine automatically lays out the shape you choose, so there is not a lot of lost fabric.
The cutting process is simple and only has 5 steps.
Place your fabric on the adhesive cutting mat. You can choose layouts for a single triangle, a few triangles, enough triangles to fill a 12” X 12” cutting mat, or enough triangles to fill a 12” X 24” mat.
Load the fabric and the cutting mat into the machine.
Select the size triangle you want and copy and paste it directly into the cutting area as many times as you need to. You can also use the pre-programmed option for triangles sized between one inch and 10.5 inches.
Click “Make it” on the screen.
Press the “start button” on the machine and watch it do its magic!
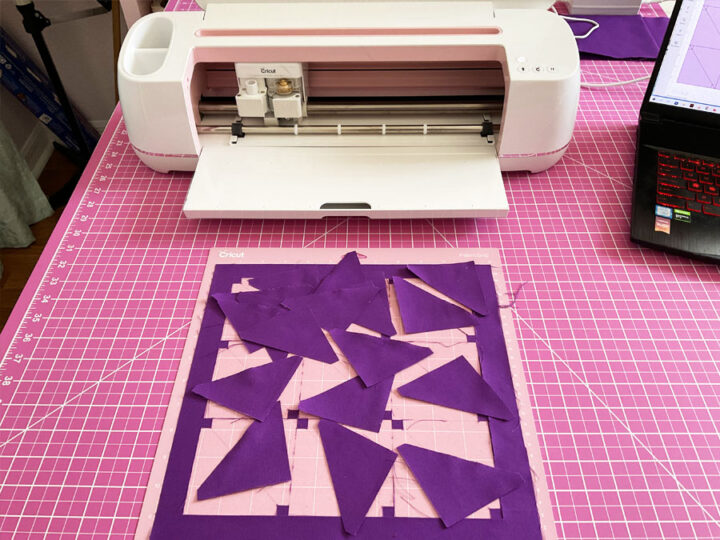
So fast and easy, right? And ALL dog ears are already CUT!
While the machine can cut about 300 different materials and both pre-defined and custom shapes, there are some issues. One thing I don’t like about this machine is that the mat is very sticky and it’s hard to get all the fabric threads off after each use.
AccuQuilt Fabric Cutter
The AccuQuilt uses die-cut technology to cut dozens of shapes, including squares and half square triangles.
Before I got the AccuQuilt Fabric cutter, I used the methods described above to make multiple half square triangles, which saved time, but the machines are way faster and more precise. Imagine my surprise when I cut out 24 small HST in about one minute!
The machines are so easy to use, if you ever get one – I have two, a large and a small one — you probably won’t go back to rotary cutters, except for trimming and super small projects.
The AccuQuilt Go! Me is a great fabric cutter for quilters of all levels. It is very affordable, and you can often find it on sale. For example, right now when I am writing this post the price is only $89.99 (after $80 off). The Go! Me is perfect for cutting fabric for quilts, as well as other sewing projects. It comes with two different dies, a cutting mat and a pattern book. You can also purchase additional dies separately. The AccuQuilt Go! Me is a great investment for any quilter, and it is sure to make your fabric cutting tasks much easier.
Here’s the process.
- Place your fabric on the die
- Cover the die and fabric with the special AccuQuilt mat (included with purchase)
- Run it through the machine.
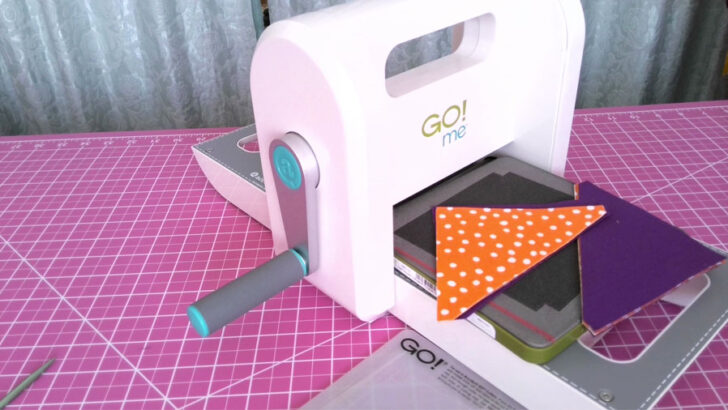
Really, it’s that easy.
Although I really like that you can cut multiple layers of fabric at the same time, buying peripheral pieces, like different dies, can really add up quickly. And, these machines take up a fair amount of floor or shelf space when not in use.
If you want more information about either of these time-saving machines, check out this article that covers each one more in-depth.
So What Do You Think?
Now that you know how easy it is to make half square triangles, what will you do first?
Did you find this tutorial helpful? If so, save this pin (see below) on your sewing board so you can come to this tutorial later when you need this information on multiple half square triangles, and follow me on Pinterest for more tips, tutorials, and inspiration!
latest posts
- Corset Pressing Board for Sewing: What It Does and How I Use It
- 7 Essential Tools and Settings for Sewing Denim on a Regular Sewing Machine
- That Purple Thang: 10 Smart Ways to Use This Weird Little Tool
- 20+ Reasons Your Sewing Machine Thread Keeps Breaking (+ Solutions)
- Dresden Plate Quilt Block: 4th of July Fireworks
- How To Sew Curves the Easy Way Using a Curve Master Presser Foot
- 30 Sewing Hacks That Turn Ordinary Items into Useful Sewing Tools
- Seam Allowances in Sewing Patterns: What They Are and How to Use Them
- What Do You Call a Person Who Sews? I Asked My Readers and Got 1,408 Opinions