
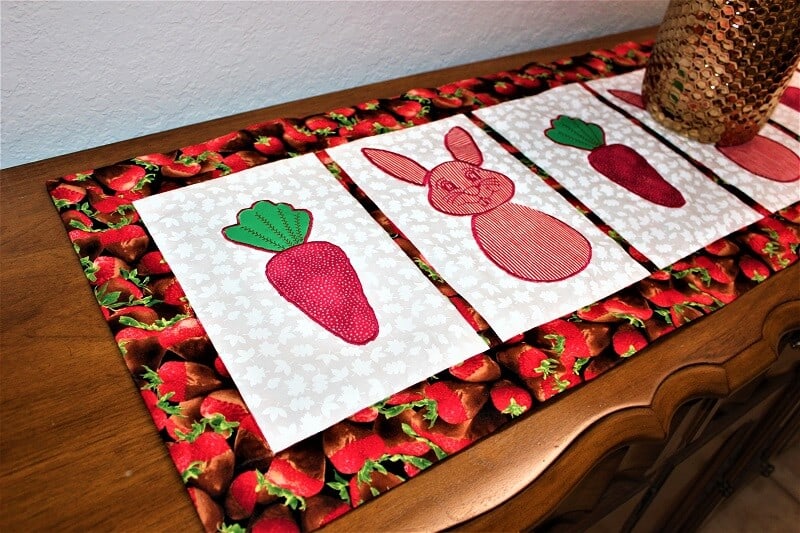
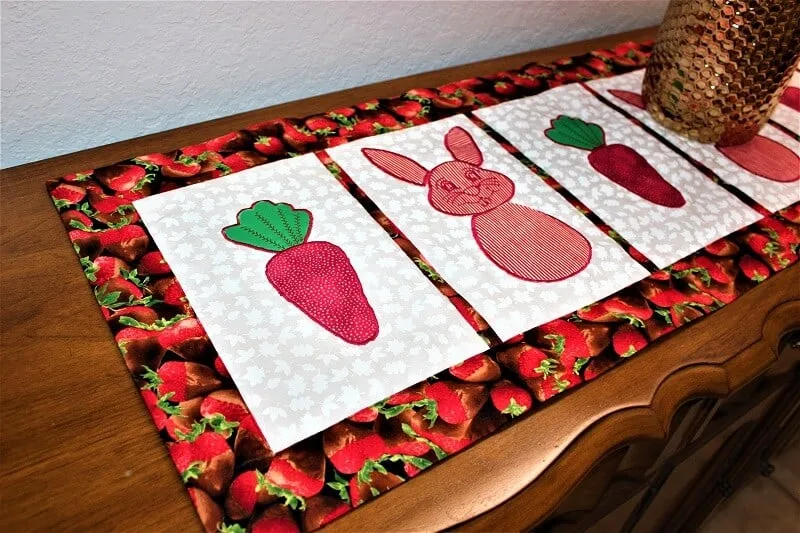
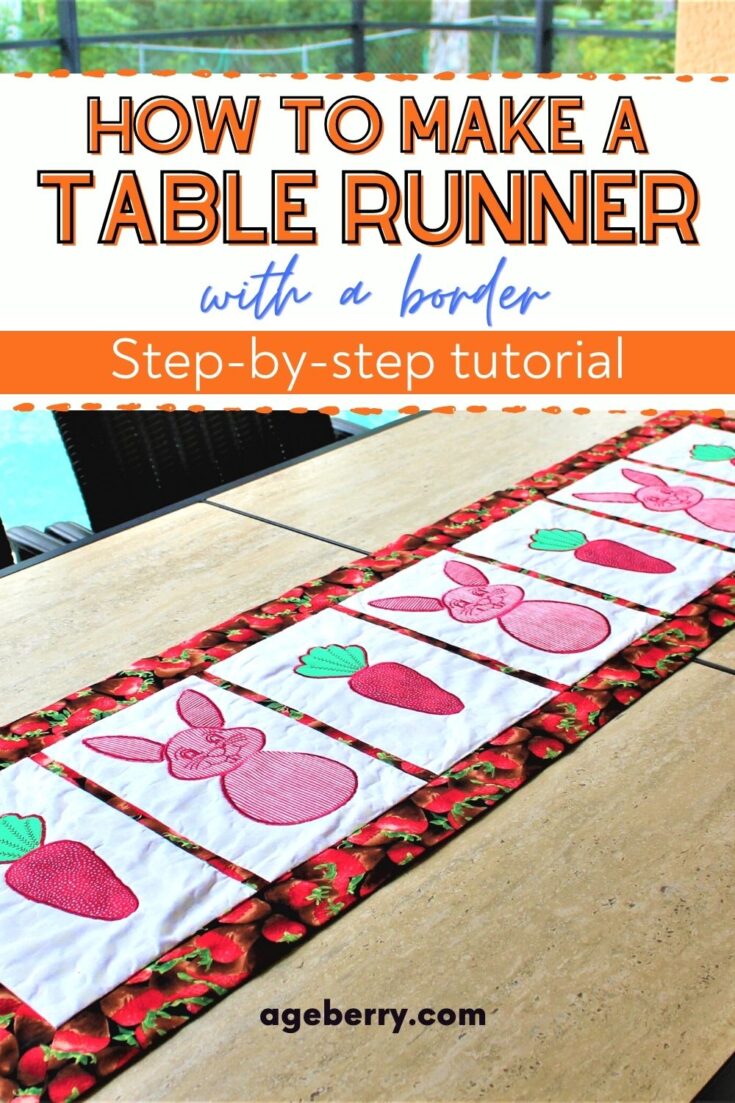
In this step-by-step sewing tutorial, I am showing how to make a table runner dress up and personalize your table, how to sew a table runner with a border, how to make it reversible, how to cut fabric with Brother ScanNCut cutting machine, how to applique, how to use self-binding method to finish the table runner.
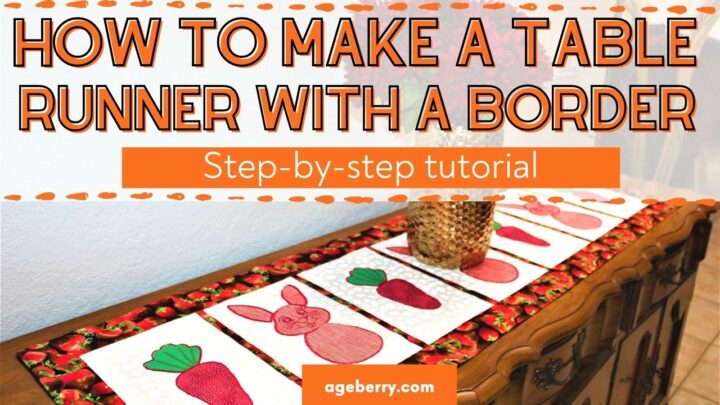

I made it for upcoming Easter but it is reversible and I can use the other side any time.
This table runner has 8 applique pieces – 3 of them are cute bunnies and 5 of them are carrots.
I cut appliques on my Brother Scanncut machine. And I will show you how to use the cutting machine to cut fabric.
I used my embroidery machine to sew around applique edges.
And I used a very simple self-binding method to finish the table runner. It’s a very easy and fast spring sewing project.
Now let me show you step-by-step how I made it.
If you prefer to watch the tutorial go to my YouTube channel here.

Step 1
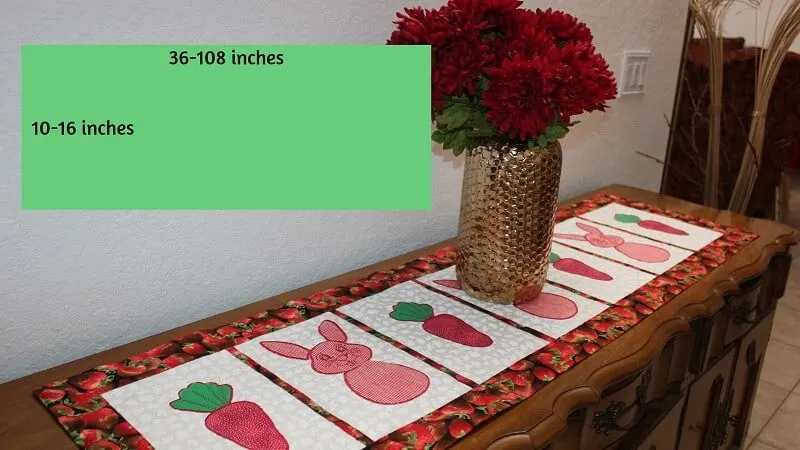
Decide what size of the table runner will be suitable for your table. I was wondering: how long do table runners need to be? Can a table runner be shorter than the table?
I found out that you can make any size table runner you want and there are no strict rules but they say that usually, a standard table runner has widths from 10 to 16 inches and a length from 36 to 108 inches. You can make a table runner that hangs over the sides of the table or your DIY table runner can be shorter than the length of the table. So just customize it to your liking.

Step 2
Best fabric for table runners
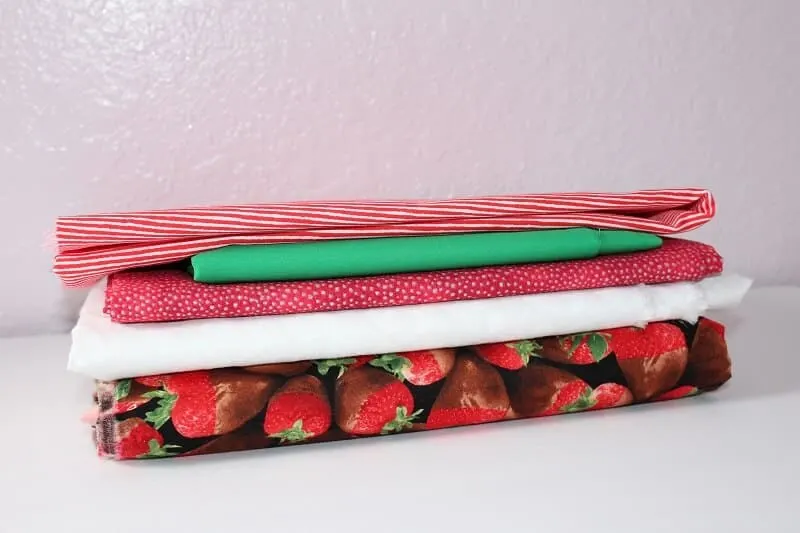
I think the best fabric for table runners is quilting cotton. It’s a medium-weight fabric that holds its shape which is important for this project. Because this is one of my spring sewing projects I chose a fabric with strawberries for the backing and the border and white fabric for the top of the runner so I can use it as a nice background for my appliques. And I used some scrap pieces of bright quilting cotton for my appliques.
Do you agree with my choice? I think colors blend together nicely. I planned to make my runner reversible so I picked a pretty fabric for the back also. But I think the runner will be charming in any color combination.
How much fabric do I need for my table runner? I used a piece of white quilting cotton 16 x 57 inches, a piece of cotton with strawberries 22 x 63 inches, and 4 scrap pieces of quilting cotton 12 x 12 inches.

Step 3
Pre-wash your fabric. I always pre-wash my fabrics for any sewing project because I don’t want any issues with shrinking after I wash my completed project.
Step 4
Cut your fabric. You have to cut your fabric straight. I have a popular tutorial on my blog on how to cut fabric perfectly straight. So you may want to check it out.
I like just to rip my quilting cotton. Cut also the selvage, don’t use the selvage in your sewing projects.
I figured out that the width of my runner will be 16 inches and the length will be 57 inches. So I cut my white fabric using these numbers. And I also cut my batting about the same size.
For the backing I cut a bigger piece of fabric – I wanted to add 3 inches on each side of the runner so I made it 22 inches by 63 inches.
Step 5
Iron the fabric.
I decided to place my white fabric on top of the batting and iron them together on a cotton setting to get rid of wrinkles. This also helps to prepare them for applique as pressing with a hot iron keeps them together.


Step 6
Now I will show you how to use scan and cut for applique. I am not an expert on cutting machines but I have Brother ScannCut and I’m trying to learn more about my ScannCut. There are excellent tutorials by Alanda Craft’s blog “The Big List of Brother ScanNCut Tutorials, How-to Videos, Projects, Tips & Hints”, I recommend you to check them out if you are interested in this machine.
So, prepare the fabric for applique. I cut 4 pieces of fusible web, 4 squares, 12 by 12 inches – the size of my cutting mat. And I apply this fusible web to the back of my applique fabric with a hot iron. Don’t remove the backing paper from the fusible web.

Step 7
Prepare your applique shapes. I use Brother CanvasWorkspace to make my appliques and after that, I transfer them to the machine with a USB drive.

Step 8
Now, how do you cut fabric for applique?
Prepare Brother ScannCut for cutting fabric. Set the blade depth to 4 and make a test cut. If the test cut is good then keep it at 4. But I had to set the blade to 5. I also increased the cutting pressure a little bit so the blade could cut easier through all those threads.
Place the fabric with fusible web backing onto the cutting mat. Eliminate any bubbles, and make sure that the fabric is firmly attached to the mat. Feed the mat into the machine. And cut.
Remove cut pieces from the mat using a spatula.

Step 9
Figure out how you want to place your appliques on your table runner and arrange your applique pieces on your fabric. For this peel off the backing paper from each applique piece. The fusible web will hold the applique pieces in place very well.

Step 10
Now we have to stitch every applique in place.
You can do it with a regular sewing machine using zigzag stitches but I like to do it with my embroidery machine. It’s much more accurate.

Step 11
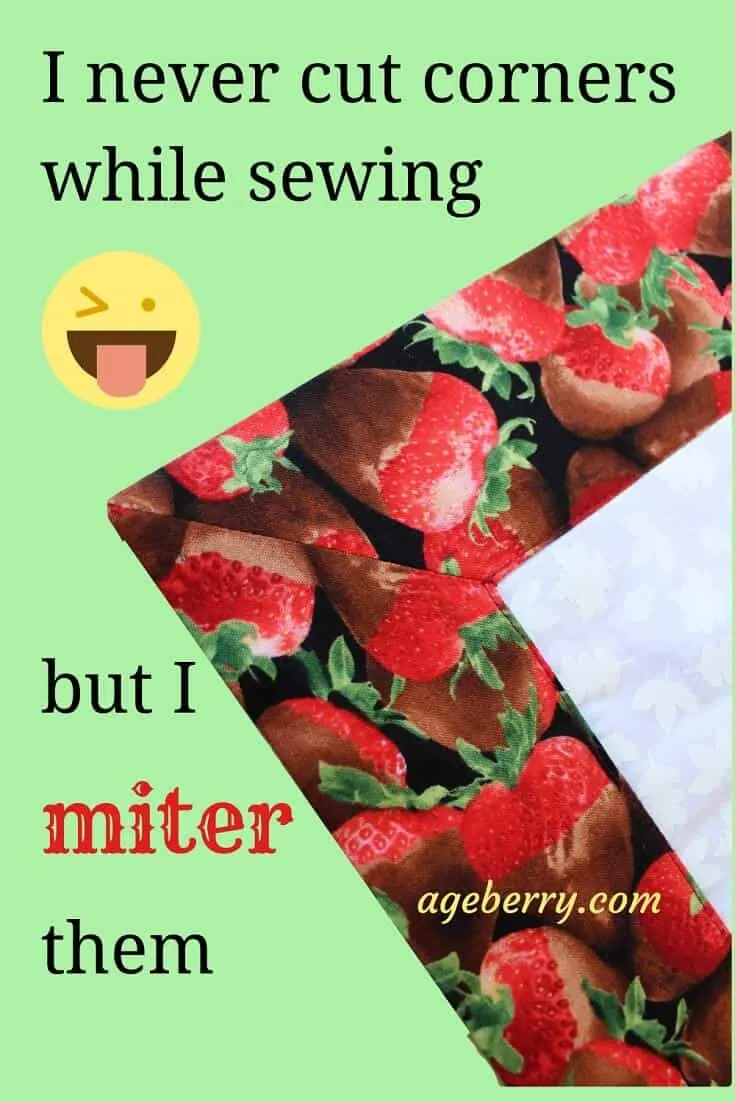
Now it’s time to sew the back fabric to the top and make a border. The main problem with it is how to sew mitered corners fast and beautifully without too much fuss. I have a separate tutorial because this one is getting too long already. Perhaps you should watch or read it also because I sew mitered corners differently than everybody else.


Step 12
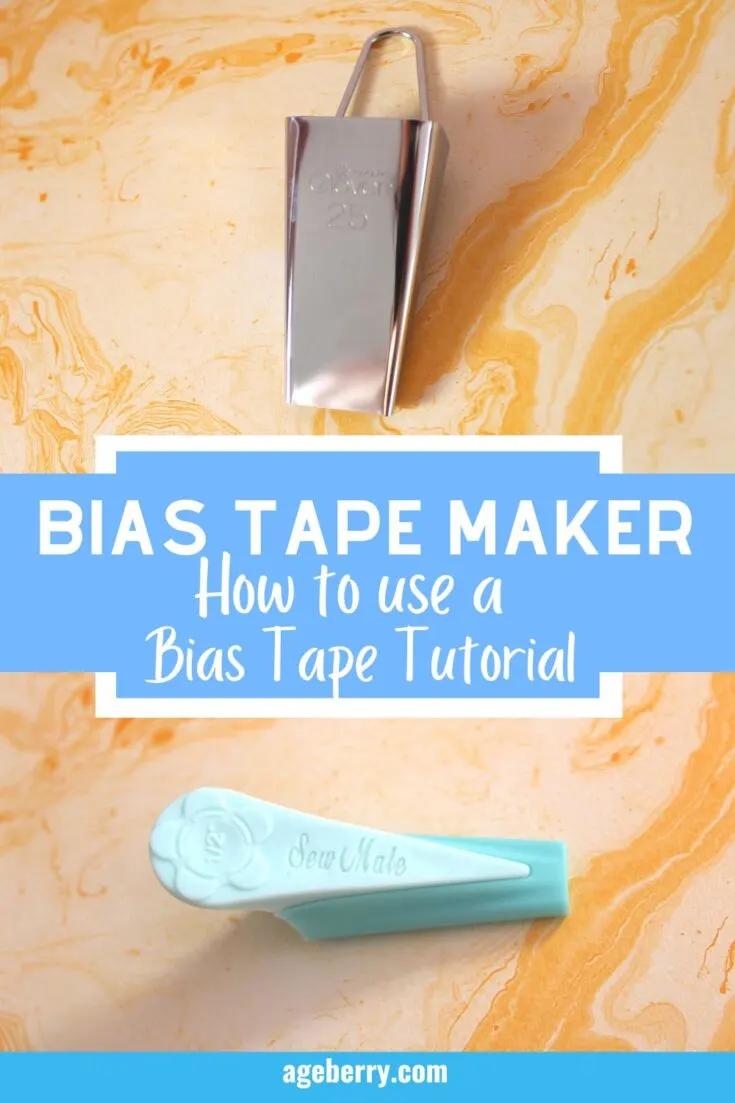
I decided to add small fabric strips from my fabric with strawberries all around the top of the runner. I made them very fast using this small tool – a bias tape maker. How to use this tool?
I have a separate video tutorial on it. Check it out.


Step 13
And the final step – topstitch around all 4 sides of the table runner. Try to get the stitch as close to the edge as you can. Press the table runner on both sides with a steam iron and iron out any wrinkles.
And this runner is reversible – I can use one side for Easter table decor, and the back side with strawberries – any other time to add a great burst of color to my table setting. I think this table runner is cute and it’s a good alternative to tablecloths. It can be used for purely decorative purposes or as a long placemat.
Did you find this tutorial helpful? If so, save this pin (see below) on your sewing board so you can come to this tutorial later when you need to make a table runner, and follow me on Pinterest for more tips, tutorials, and inspiration!

latest posts
- Knot a Problem: Easy Ways to Secure Short Thread Ends
- Ever Tried This on Your Serger? This Differential Feed Feature Will Amaze You
- Ditch My Sewing Machine? Not in This Lifetime!
- Adorable DIY Needle Book | Easy Tutorial for Beginners
- Master the Seam Ripper: Your Ultimate Guide to Precision Stitch Removal
- Think You Know Zippers? This Installation Guide Might Surprise You
- Why Does Your Seam Ripper Have a Red Ball? Discover Its Purpose!
- Topstitching Troubles? This Simple Trick Will Turn It Around Instantly!
- How to Sew Shirring: A Step-by-Step Guide to Elastic Thread Gathering