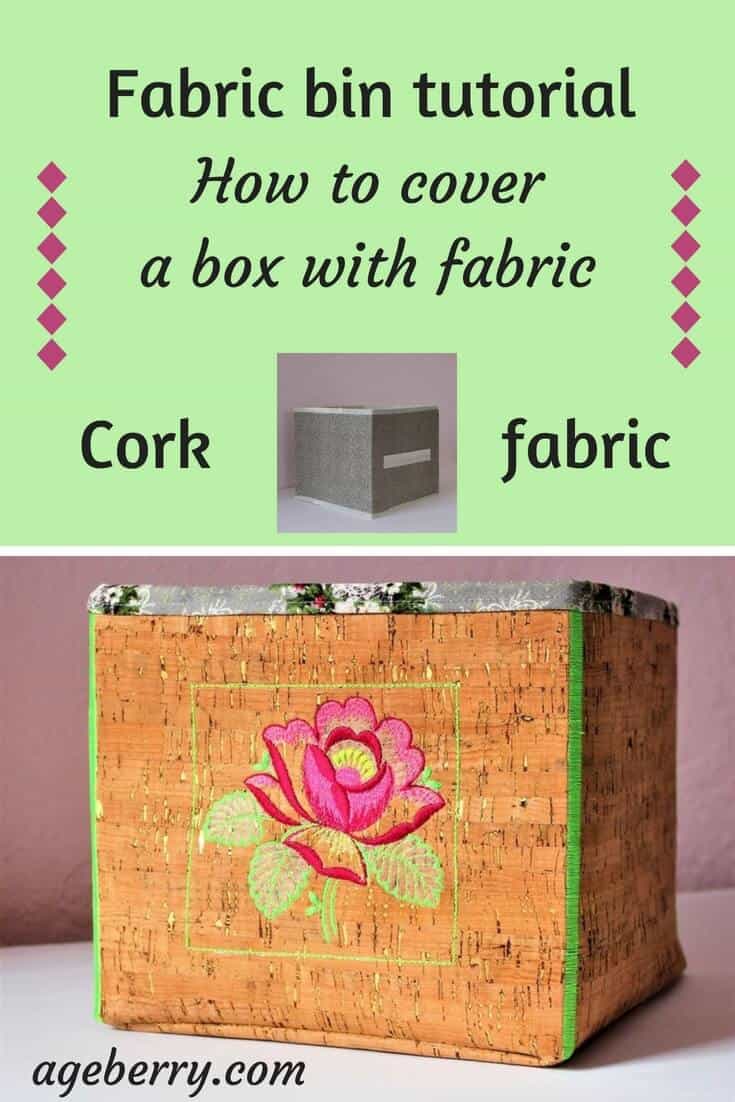
How to cover a box with fabric
In this tutorial, I will show you how to cover a box with fabric and make a very useful and pretty fabric bin.
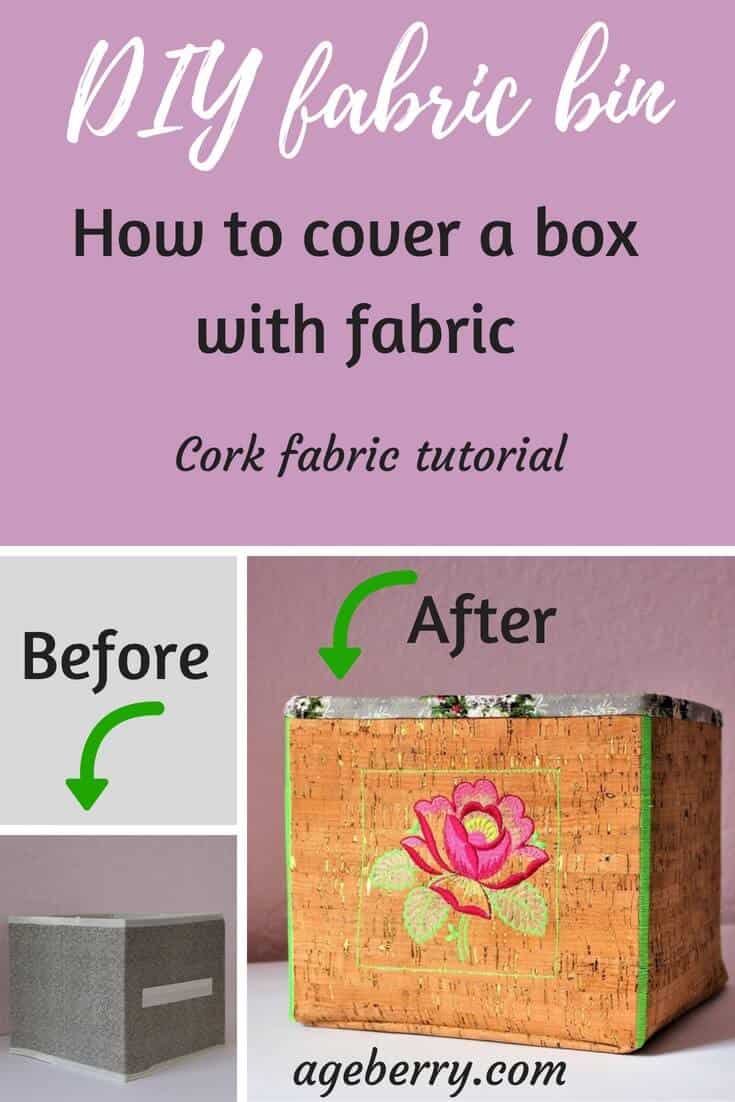
Shops offer a wide selection of decorative boxes of various sizes, colors, and styles. However, the prices for fabric storage bins are not always budget-friendly. With a little effort and imagination, everyone can make a fabric storage box by themselves especially if you want to use it not only for storing various things but also for easy home decor.
If you prefer a video tutorial, here is the link to my YouTube video.

Let’s see how we can turn a regular box from a dollar store into a cute fabric bin.
Note: Some of the links on this page are affiliate links. This means I will receive a commission if you order a product through one of my links. I only recommend products I believe in and use myself.
You will need:
- a square or rectangular box (I bought mine in a dollar store but any suitable cardboard box can be used)
- fabric for the outside of the box. I used cork fabric but you can choose the fabric that matches the color scheme of your interior. Don’t use too thick fabric because it will be badly draped at the corners or bristles on the folds. If the fabric is too thin, make sure that there are no translucent images or inscriptions on the boxes.
- fabric for the inside of the box ( I like to use quilting cotton for this)
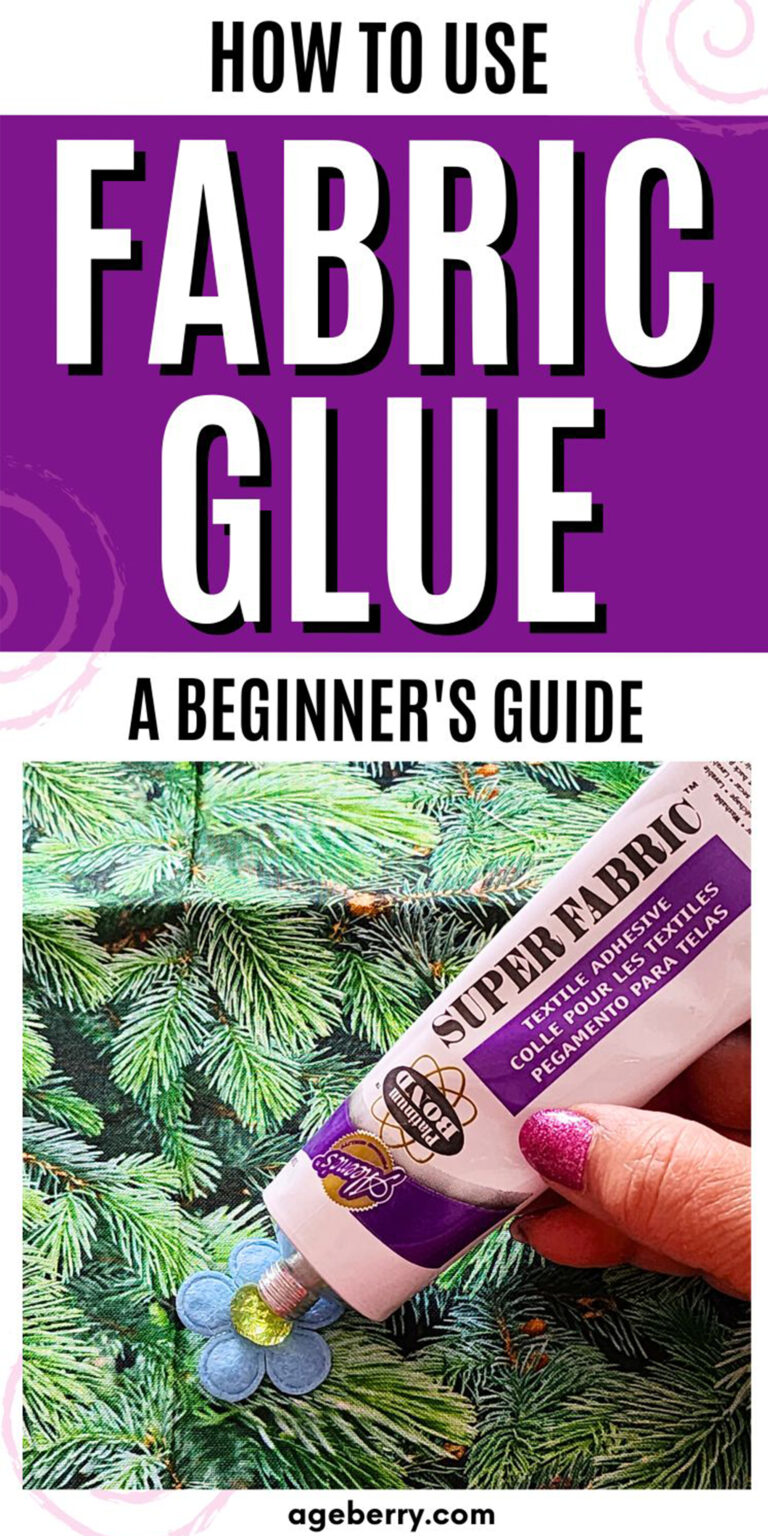
- fabric glue
- adhesive spray (I use this one June Tailor Pattern Stick Temporary Adhesive Spray)
- an embroidery machine (optional)
I will use a special fabric for this which is not very common, cork fabric. It is the first time I used this material and I wanted to make an easy project to see how it behaves.
What is “cork fabric”? A very thin layer of cork is fused into a solid layer of fabric. The fusing agent is polyurethane. In my case, it’s painted gold which gives the fabric a very nice sparkly look since cork has natural cracks and small holes which allow the gold layer to show.
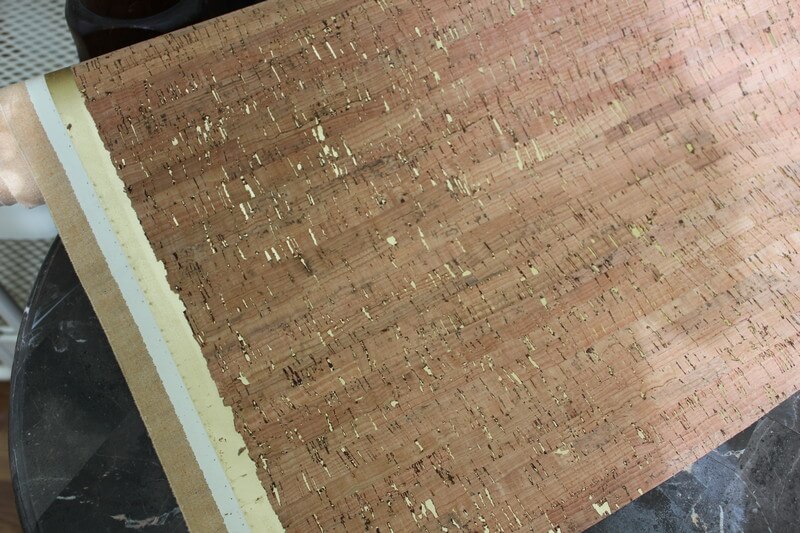
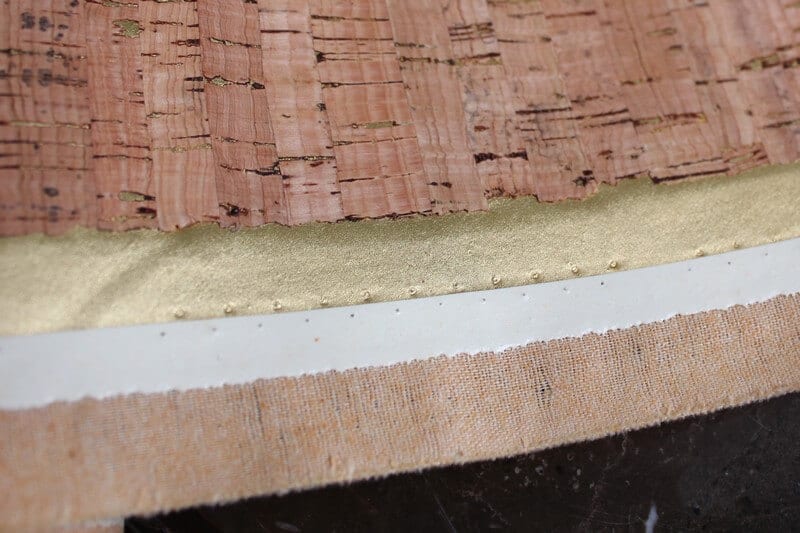
I am using the cork fabric not to sew clothes but to cover a box, therefore, I am not very interested in the actual material of the underlying fabric but in my case this is cotton. I have seen cork fabric that does not have the underlying layer of fabric ( fabric.com sells something like this ). But the one I bought has which is better in my opinion since it gives the material resistance and prevents tearing.
In my case the original box is almost a cube, the height is slightly smaller than the width but the width/length are equal, so the bottom is a square. This makes the process slightly easier since we will have four equal panels for the sides.
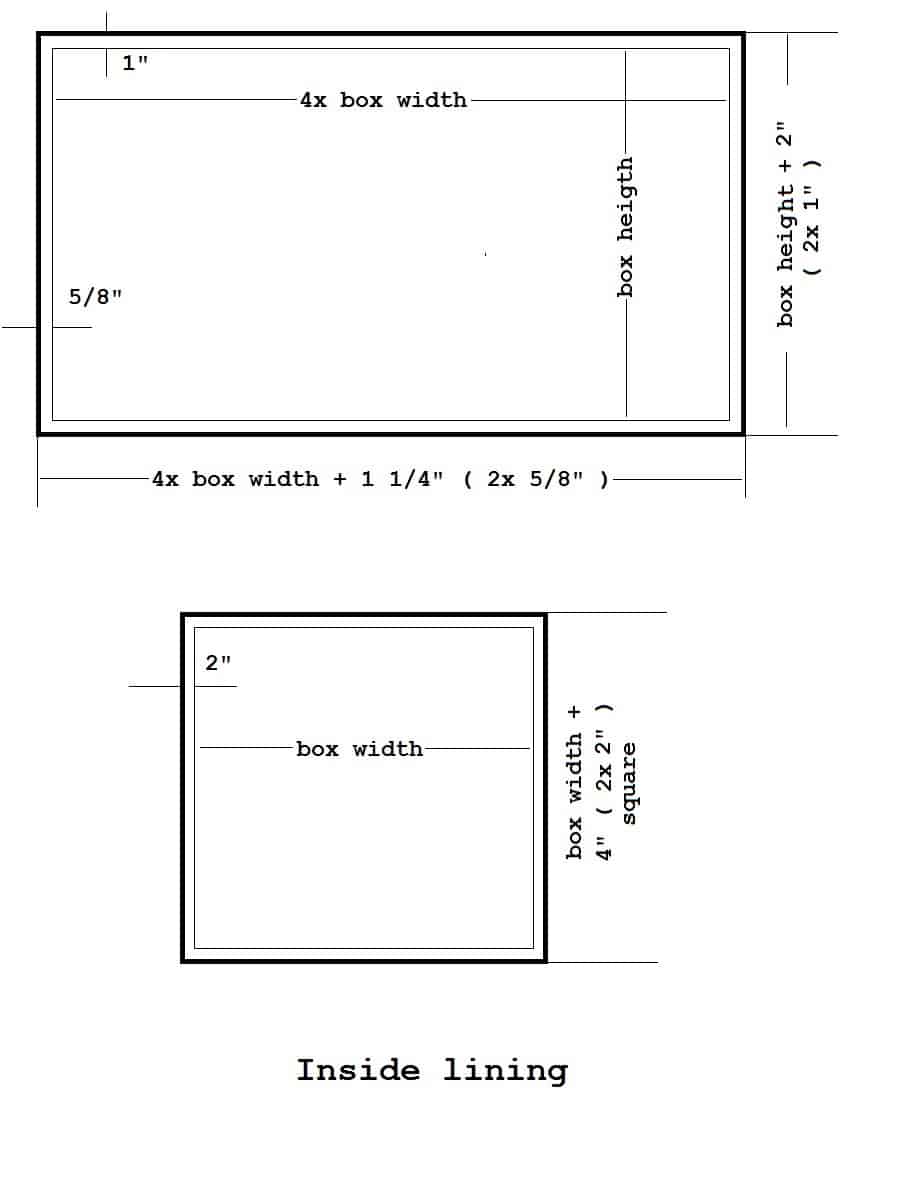
Below you can see how you need to cut your fabric for the outside of the storage box.
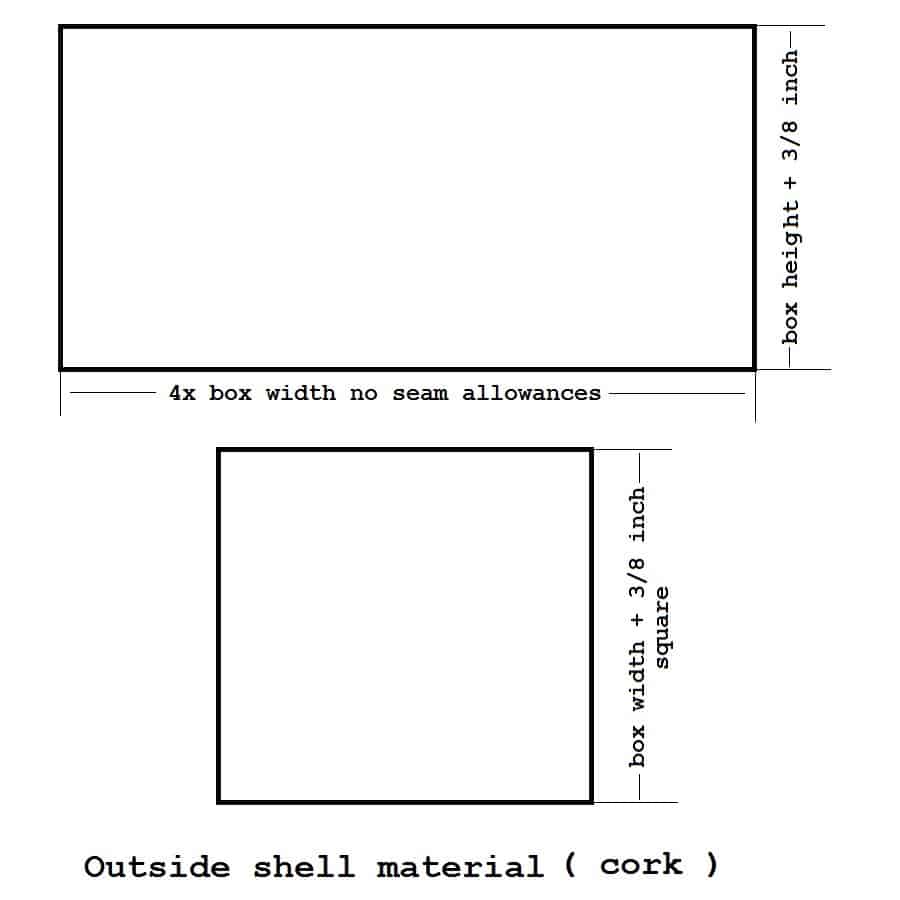
The length of this long panel (to cover all sides of my box) is equal to 4 times the width of the box. In my case, the width of the box was 9 in so times 4 will be 36 in. I didn’t need to add any seam allowances to this number. Later in the tutorial, I will show you why.
In my case, the height of the box was 8 inches so I added ⅜ in seam allowances. The cork fabric doesn’t fray so ⅜ in seam allowances will be good.
I also cut one square piece for the bottom of the box. The bottom of the box from a dollar store was 9 x 9 inches so I had to add ⅜ in seam allowances to that because I will need to sew the bottom to the box, therefore I had to cut a square with the length of 9 ⅜ in.
I wanted to embellish the cork fabric with some beautiful embroidery. This will certainly add a nice touch to the finished box but I also wanted to see how this cork fabric behaves when embroidered.
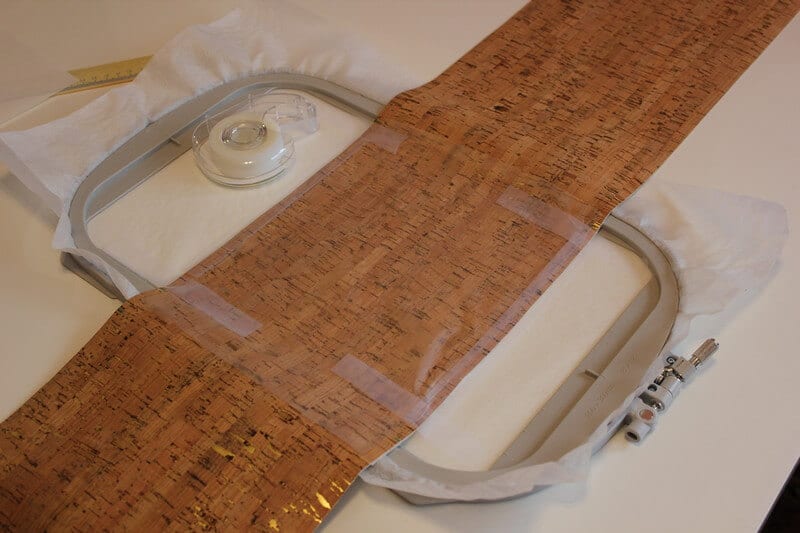
The design I wanted to use is large so I needed a large hoop. I have carefully placed the fabric in the embroidery hoop making sure the panel that will have the embroidery is centered in the hoop.
I placed a layer of stabilizer in the hoop under the fabric and also put a sticky back stabilizer on the wrong side of the cork fabric. Since the cork fabric may be destroyed by hooping and my cut panel didn’t fit the hoop anyway I secured the material to the stabilizer using an invisible tape.
On top of the fabric, I put a layer of a water-soluble clear stabilizer so the embroidery stitches will not sink into the cork. This is very similar to the steps for embroidering leather, in fact, the material resembles leather very much. This film will be removed after the embroidery is done.
The design I chose to embroider is large and the fabric has a tendency of moving, therefore, a square was sewn before the actual embroidery using a basting stitch to prevent these movements. This stitch fixed the material to the stabilizer and my temporary tape was no longer important after this but I did not remove it until the end.
Coming back to the square basting stitch: normally, it should have been removed. However, for this cork fabric if I removed this stitch I would have had a row of holes there, clearly visible. The same would have been true for leather. Therefore I decided to sew a few rows of regular stitches over the basting stitch, framing the embroidery and avoiding the problem.
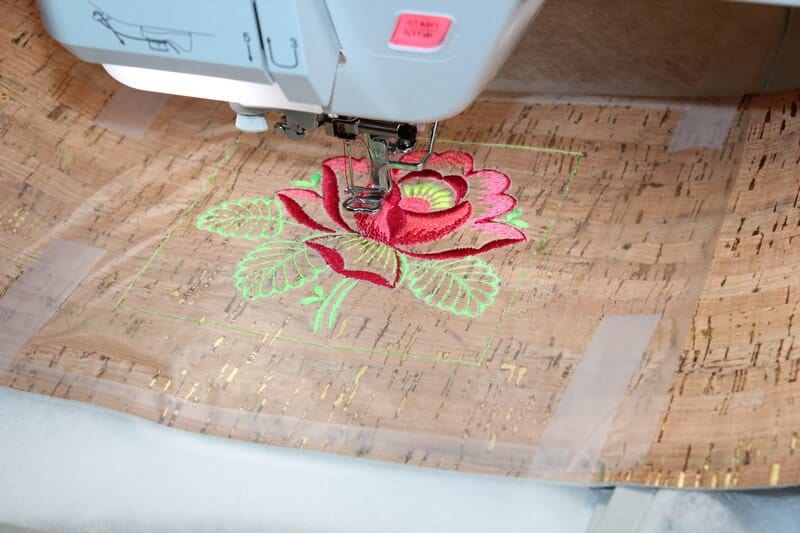
As expected, the embroidery process is similar to embroidering leather, nothing special here. After it was finished I took out the top film and removed the stabilizer.

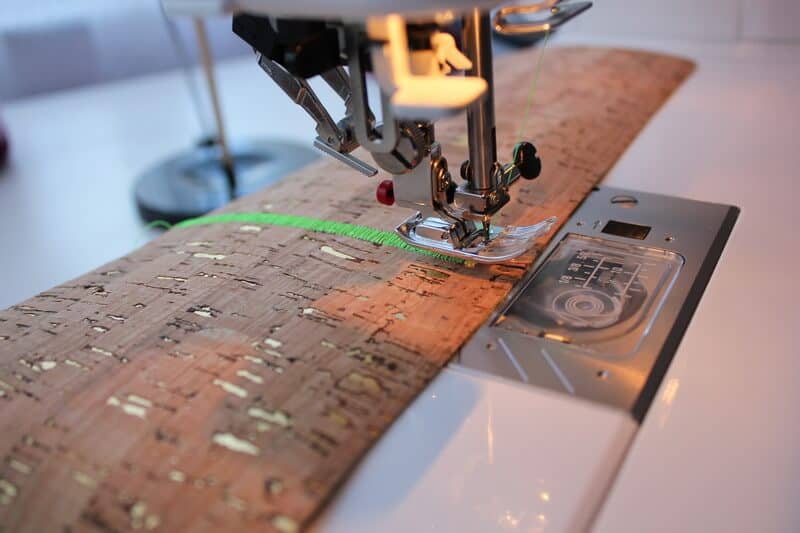
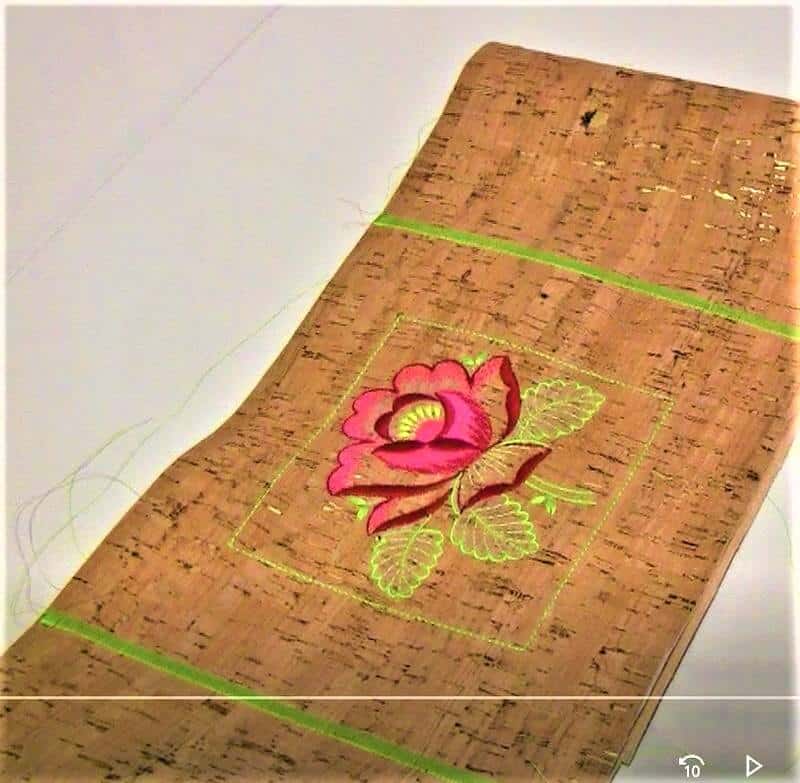
Since I cut the fabric in one large piece after I marked the panels I have decided not to cut them but instead just sew decorative stitches along which I will later fold the material. It will be the corners of the fabric bin. There are three such stitches – it’s a close zigzag stitch with 7 mm in length.
But when I made such stitches I didn’t sew them to the very end – I left ⅜ in unstitched because later I will have to cut along these lines to be able to attach the bottom of the box.
For the fourth edge, I have now only one line where the individual sides need to be sewn together and I will use the same decorative zigzag stitch used in the previous step. The two pieces of fabric need to be kept together but the fabric is quite thick and stiff, this now requires care but it is not really difficult.
I set the machine speed lower to allow better control of the fabric movement. But again finish sewing ⅜ in before the end.

We now have a tube with the four future corners clearly visible and the embroidery in the center of one of the panels.
I have noticed that the cork material and the polyurethane will make the needle a little dirty and I had to clean it from time to time.

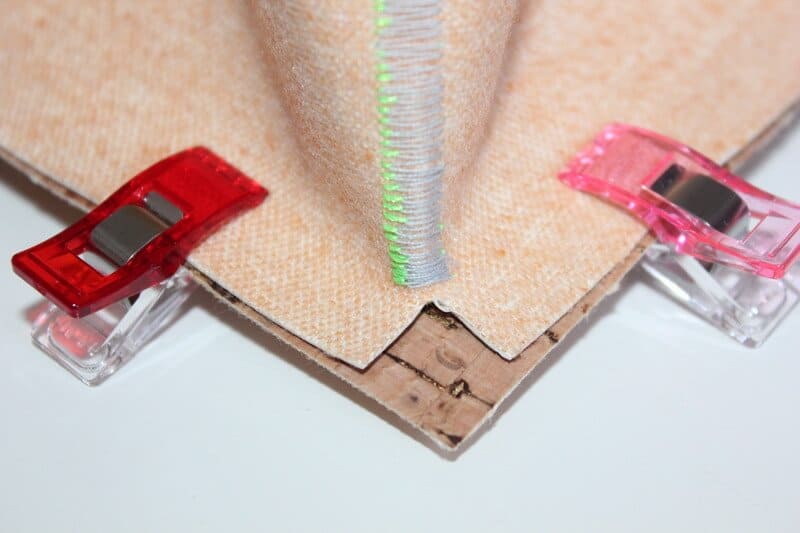
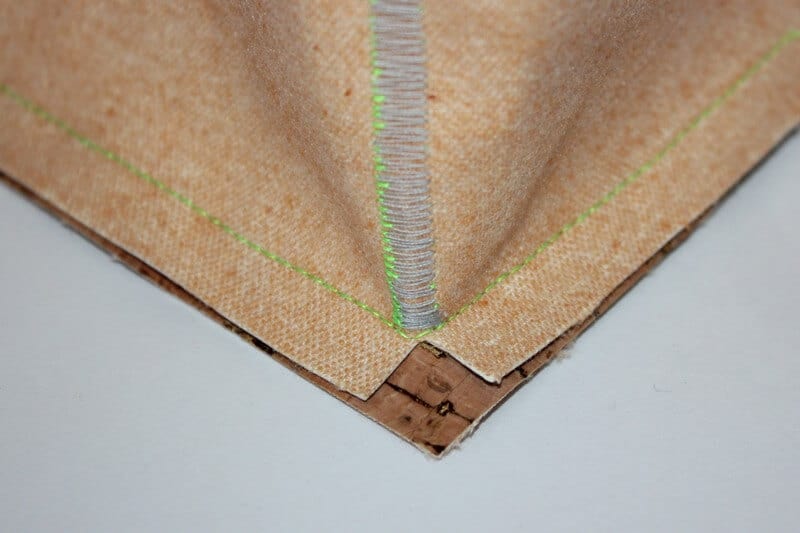
Let’s sew the bottom panel of the box. Baste the bottom and the side panel right sides together using wonder clips. In the corners, it has to look like in the image below. Don’t forget to match every corner with a decorative stitch.

The next step is to sew the bottom.
I have started sewing on a straight line and after I sewed all 4 corners in one long stitch I came to the same point where I started. It should look like this in all 4 corners.
With attention and patience, this does not really prove to be a hard task.

Now let’s prepare the lining for the inside of the box. There are also two pieces here, the bottom and the sides, and we will use the same technique cutting a long panel for the sides and one square for the bottom.
I will add seam allowances ⅝ into the lining width and 2 into the lining height. For the bottom, I will add an extra 2 inches on each side.

In my case, the box already had a bottom panel premade and I need to drape the lining around this. I will use this fabric glue.
Now I sew the sides of the lining together using a regular stitch and will end up with a continuous tube of the lining that will be attached to the inside of the box.
Then I press the lining creating the four inside corners ( one of them is the stitch ).

So I have the four elements of the storage box: the outside ( made of cork fabric ), the box itself as it came from the store, the bottom which we already draped and the lining tube. Let’s put them together, I hope I measured and cut well, yes, the pieces fit!

Let’s finish the top raw edge of the lining. This needs to be finished because it will be visible; the bottom edge will be hidden under the bottom carton and does not need to be finished.

Now I attach the box from a dollar store to the cover I made from cork fabric; I will use for this a spray-on glue June Tailor Pattern Stick Temporary Adhesive Spray. It’s very good for my purpose, which is to attach the outside layer to the inside of the box!
The next step is to place inside and arrange the lining making sure the binding at the top of the box has the same size.

I use fabric glue to glue the top of the lining to the box. The glue gives me a couple of seconds to work but I need to glue each side separately to avoid the glue drying.
After finishing with the top edge I glued the bottom making sure the lining has no creases and any excess is under the bottom.

The fabric bin is ready! As you can see, covering boxes with fabric is not a difficult sewing project. I will use it for storing my patterns. But I will need to make a few more boxes like this for my new sewing room.

Did you find this tutorial helpful? If you would like to keep it close to you at any time, just save this pin to your Pinterest sewing or DIY board.
Need some extra encouragement to help you reach your sewing goals? Here you go! Follow me on Pinterest for more tips, tutorials, and inspiration!
latest posts
- What Do You Call a Person Who Sews? I Asked My Readers and Got 1,408 Opinions
- DIY Round Purse: PDF Sewing Pattern and Detailed Instructions
- Mini Wonder Clips By Clover: Useful Sewing Tool Or Just Another Notion?
- Non-Slip Grips For Quilting Rulers: A Small Notion With A Useful Job
- Fabric Eraser for Sewing: What It Removes and When to Use It
- What Is The Best Thread For Sewing Machine Projects? Let’s Find Out!
- Butterfly Quilt Block Tutorial – Foundation Paper Piecing
- How To Sew Quilt Squares So The Corners Match
- Sewing With Fork Pins: How They Help With Pattern Matching, Slippery Fabric, And Seams