
In this sewing tutorial, I will show you how to start sewing by hand. A starting point in learning how to sew is mastering some basic hand-sewing stitches.
Sewing machines don’t cancel hand sewing. Some historical costumes, doll clothes, and even modern garments can be sewn entirely by hand. By the way, couture clothes are often constructed by hand. Big fashion houses usually have technicians working on garments by hand on tables with no sewing machines.
You can sew by hand in places where a sewing machine can’t reach, for example, when you sew an invisible zipper or small corners of pockets. And of course, basting is done mostly by hand. Some people even say that sewing by hand is much more relaxing than machine sewing.
Hand sewing is done by passing the needle and the attached thread all the way through the fabric, from one side to the other and back again, and the needle runs the thread in and out of the fabric. Nothing new here, right? Below are some hand sewing techniques you will need to know.
What you’ll need to complete the lesson
- – Hand sewing needle
- – Needle threader
- – Threads (any two colors)
- – Scissors for cutting threads
- – Sewing pins
- – Sewing markers
- – Thimble (give it a try)
- – 2 felt pieces (you can buy them in craft stores, even Walmart), they are pre-cut, and the fabric doesn’t fray at all
- – Piece of medium-weight cotton fabric, just solid color without any prints (patterns or designs), cut to size 11 x 9 in or 28 x 22 cm
- – Iron

Let’s start with learning how to thread a needle and how to make a knot to secure the thread.
Threading a needle
Hold the needle with the eye up in the air, pull the thread from the spool and slide it into the needle’s eye.
- Some useful tips you really need to know about threading the needle. You can use a special tool – a needle threader for hand sewing. In this case slide the loop into the eye of the needle, place the thread into the loop and pull the threader out of the needle.

- I usually lick the thread’s end before, it goes easier this way; not the best practice in the world. But you can use a little hairspray to make the end of the thread perfectly smooth.
- The thread’s ends have to be cut with sharp scissors at a 45-degree angle. Don’t break threads with your hands or with your teeth if you don’t want problems with threading the small needle eye. A messy edge will be hard to thread.
- For any hand sewing, the length of the thread has to be about 45-80 cm (18-32 in). A too-short thread is not good because you will have to change it often, a thread too long will be snagging or kinking.
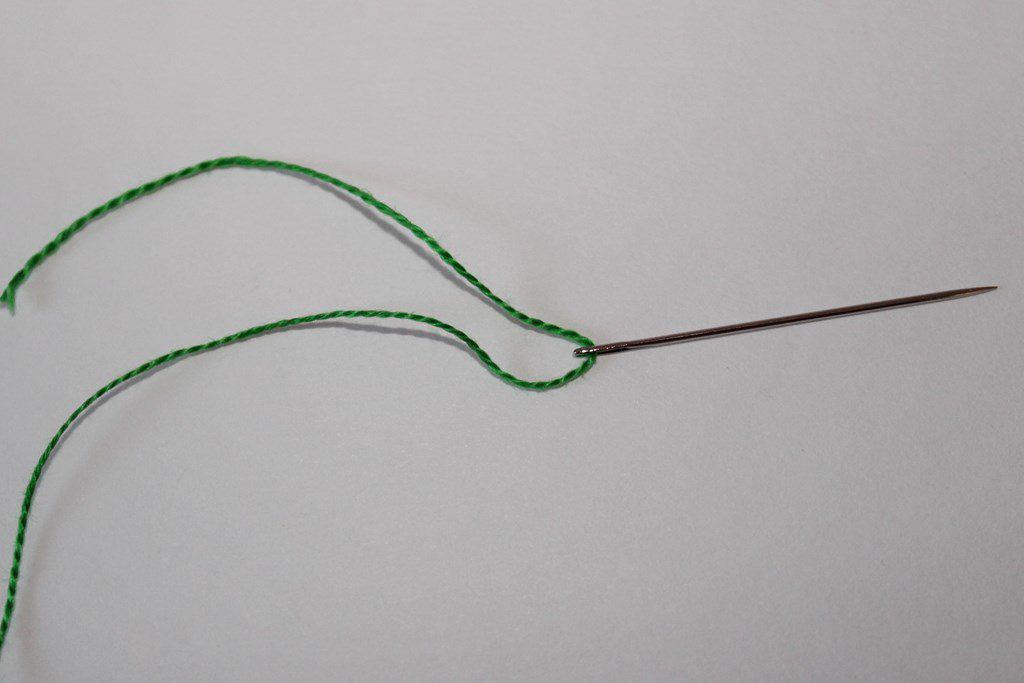
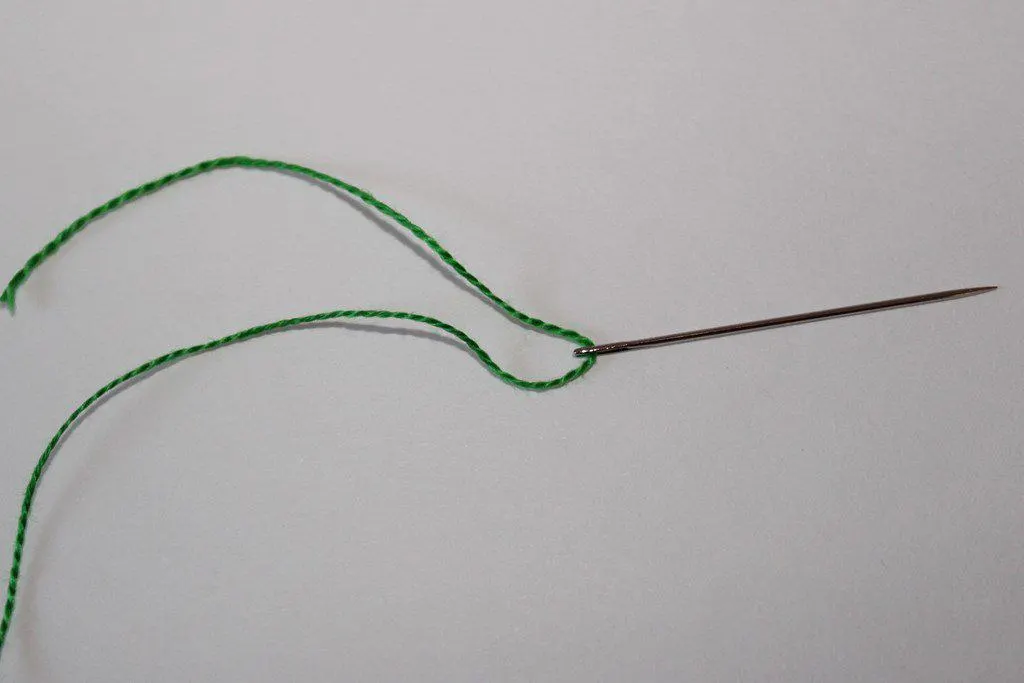
- To prevent snagging you should thread your needle with the thread end that comes off the spool and tie the knot on the end you cut. This way the twist of the thread will be working with you not against you.
- Threading can be done with single or double threads. In most cases, we use a single thread for sewing because a double thread kink is easier. But sometimes it is better to have it double, for example for putting buttons, because it will speed up your sewing.
- Some people use beeswax to smooth the thread so it slides through the fabric easier and doesn’t kink or knot. Just draw your thread through the edge of the wax and smooth it with your fingers a couple of times for even distribution. But I advise you not to use the wax for very light or fine fabric because sometimes wax can melt and stain the fabric.
- Some people recommend using dryer sheets instead of beeswax. Just rub your thread with it and tangling will not happen.
- Make sure your thread diameter and needle diameter match.
I have a detailed video tutorial on how to thread a needle for hand sewing. Check out my YouTube video too!

Making a knot
There are a few ways to do it.
The first way – is just to tie the end of the thread twice or even three times.

Another way – wrap the thread around your finger, roll the thread between your fingers and pull it tight.

In most cases, you will have to cut the thread that’s left after the knot and make the knot neat (it is not necessary for basting though because you will have to take the thread out anyway)
Or you can start sewing WITHOUT A KNOT. Check my YouTube video below.

How to end a stitch
Security stitch is used every time you are finished with your hand stitching or when your thread is almost finished and you have to change it (do it when you have about 10 cm (4 in) of thread left). You have to secure the end of a line of stitches to prevent the thread from unraveling.
For this make a small stitch right near your last stitch stopping when you have a little loop to insert your needle through. Bring the needle (still threaded of course) through this loop and pull the thread tight. It will form a knot close to the fabric. You can do it twice just to make sure your thread will not come undone. Cut the thread close to the knot.

By the way, you can use this stitch at the beginning of stitching also without making the knot.
6 common types of hand stitches every sewist should know and use
Hand stitches are very handy and have their benefits. Some of them we use regularly but some are almost forgotten. Our ancestors sewed by hand before sewing machine time and used tens of different stitches but you need to learn only a few types of hand stitches.
Try to keep the correct tension of the thread. If it is too tight, puckers and wrinkles will occur. If it is loose, the pieces of fabric will not stay together and the finishing will not be neat and unobtrusive.
Let me take you through some most useful hand stitches.
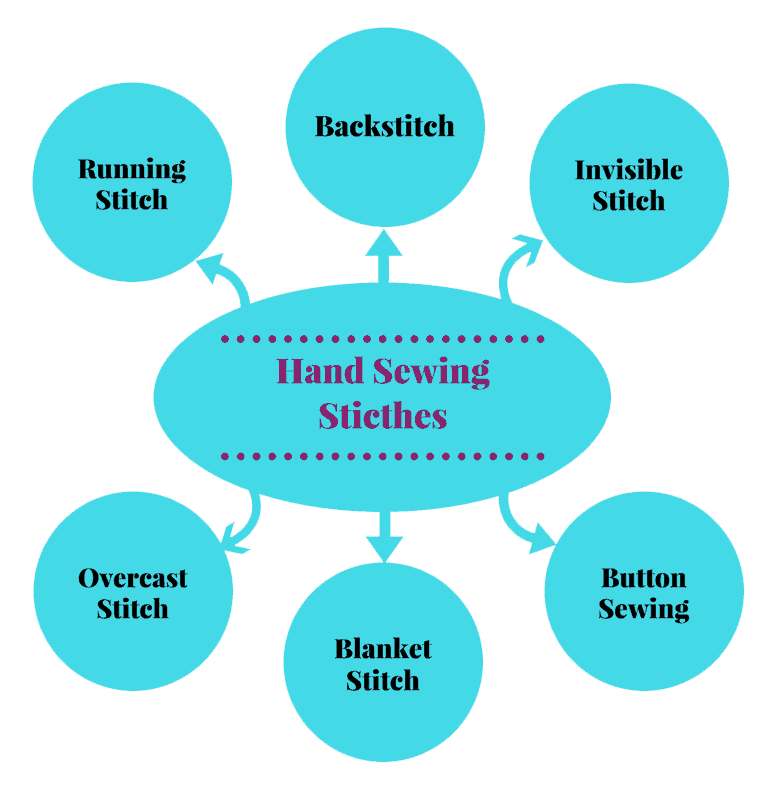
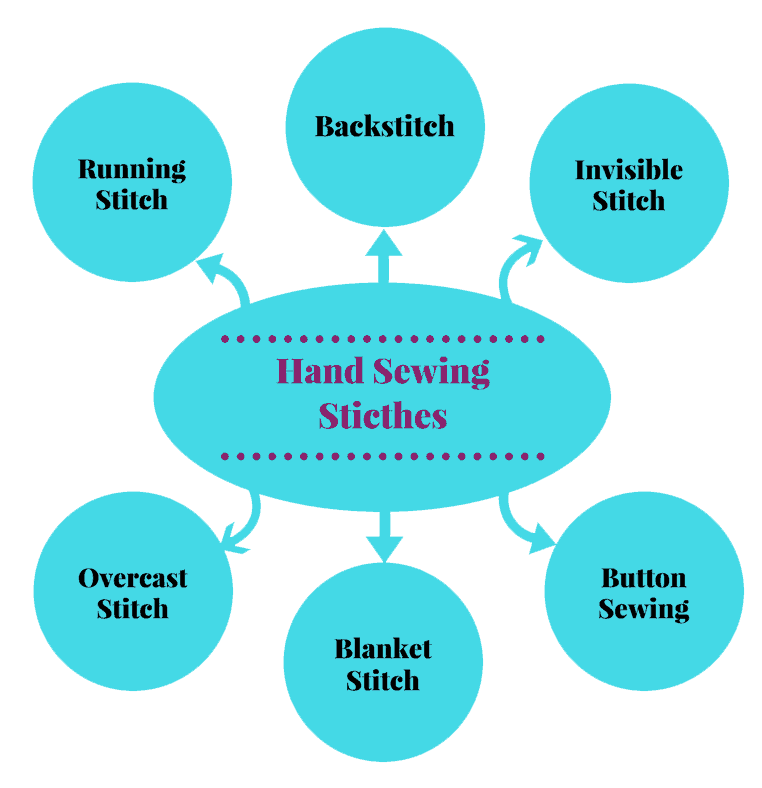
1. Running stitch
Running stitch (sometimes called basting stitch, straight stitch, or tacking) is the most common and most used hand stitch.
We use it for basting, temporary hemming, putting appliques, attaching zippers, and pockets, making pleats, gathering fabric, stay stitching a curved edge to prevent it from stretching. Of course, it is used a lot in hand embroidery and hand quilting. With running stitch, we can prepare muslin for the first fitting.
The length of the stitch depends on the fabric and purpose of your sewing and can be anywhere from 0.5 cm to 3 cm usually. Thread can be easily taken out, so no seam ripping is required. Just cut the knot and pull the thread.
The length of running stitches does not have to be even on both sides of the fabric.
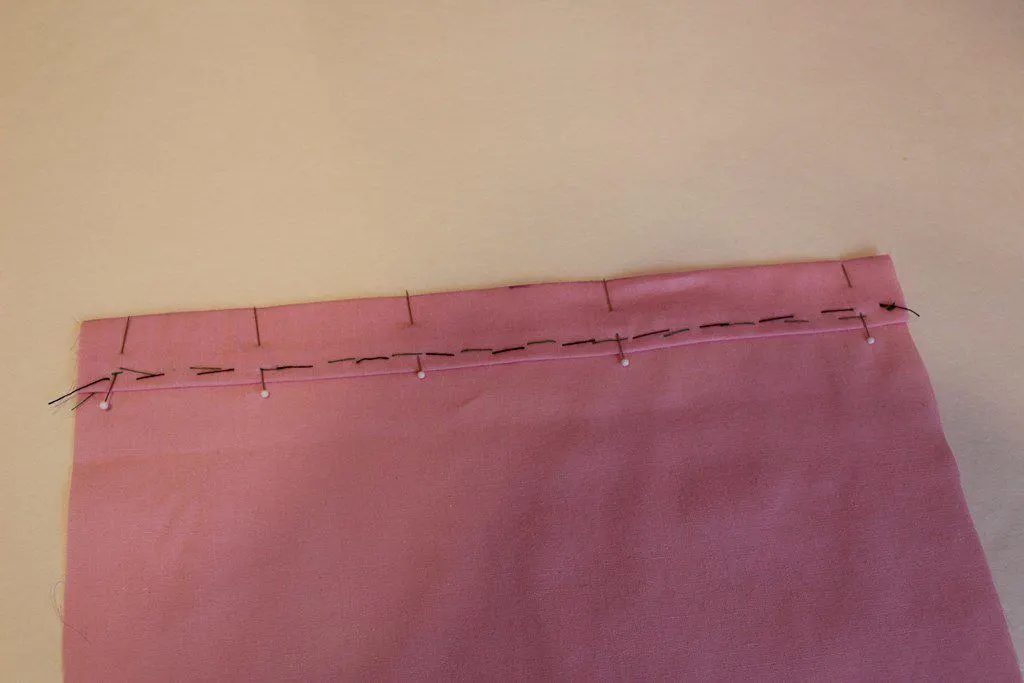
Let’s start sewing running stitch.
- thread the needle with a single thread
- make a knot at the end of the tread
- pin 2 pieces of felt together with sewing pins
- start making stitches by passing the needle in and out repeatedly. Work very carefully and try to make them equal on both sides of the fabric in this case. Try not to pull the thread very hard. And it is not necessary to pull the thread after each stitch, you can make it after 2 or 3 stitches.

Try to use a thimble for gripping and pulling the needle through the fabric.
How to use a thimble

A thimble is used to protect your fingers from needle pricking while hand sewing stiff, heavyweight fabric or fur and leather. We put it usually on the middle finger of the dominant hand and use it to push the needle through the fabric.
Learn to use it by pressing the needle with the side of the thimble, and not the bottom. In the beginning, everybody finds it quite awkward to use. You will feel that you can’t hold your needle correctly and your sewing is clumsy. But give it a try – and you will see the difference. A fingertip with a small bloody crater from the needle is not an option.
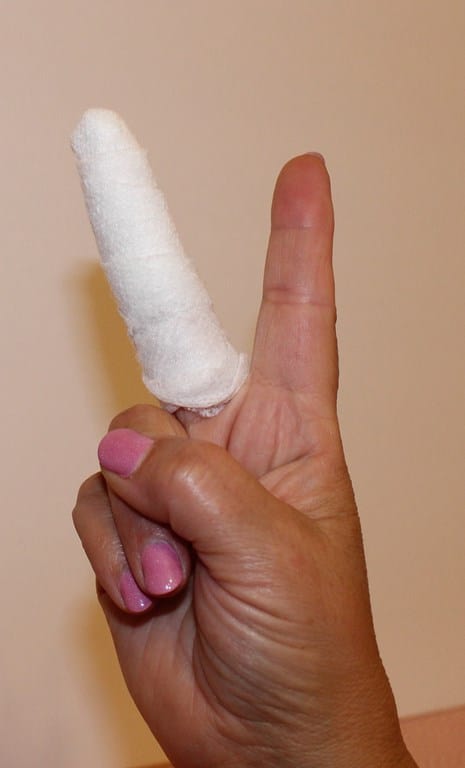

Look at this image – no, it is not a Vulcan salute; it is my finger after a “friendly” encounter with a needle.
2. Backstitch
Backstitch (sometimes called stem stitch, outline stitch, or split stitch) is used to permanently attach two pieces of fabric together. On one side it looks like a straight stitch sewn with a sewing machine, but the stitches overlap on the other side of the fabric. And of course, it usually doesn’t look as neat as machine stitches. Backstitch is regularly used by seamstresses to sew in places that are hard to rich with a sewing machine, for example when we put an invisible zipper on a dress or a skirt.
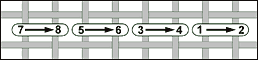
This stitch forms a solid line on both sides of the fabric. Each stitch overlaps back of the preceding one, the needle enters behind the thread at the end of the stitch already made and comes out in front of it. This diagram shows how to work backstitch.
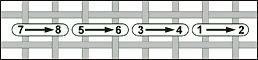
The backstitch is not long usually, it is about 3-4 mm. Now you are ready to practice with backstitch.

3. Invisible stitch
Invisible stitch (slip stitch, ladder stitch, or blind hem stitch) is a concealed stitch for sewing folded edges (especially hems). I often sew hems by hand, it seems they hang much better that way. But not only basic hemming can be done with these stitches. We use it to finish waistbands on skirts and pants, to sew pieces of a bodice lining to a bodice or a zipper, to finish sleeveless armholes, etc.
Let’s try to sew this stitch.
- Thread the needle. The needle for this stitch has to be thin and not long, more on the shorter side.
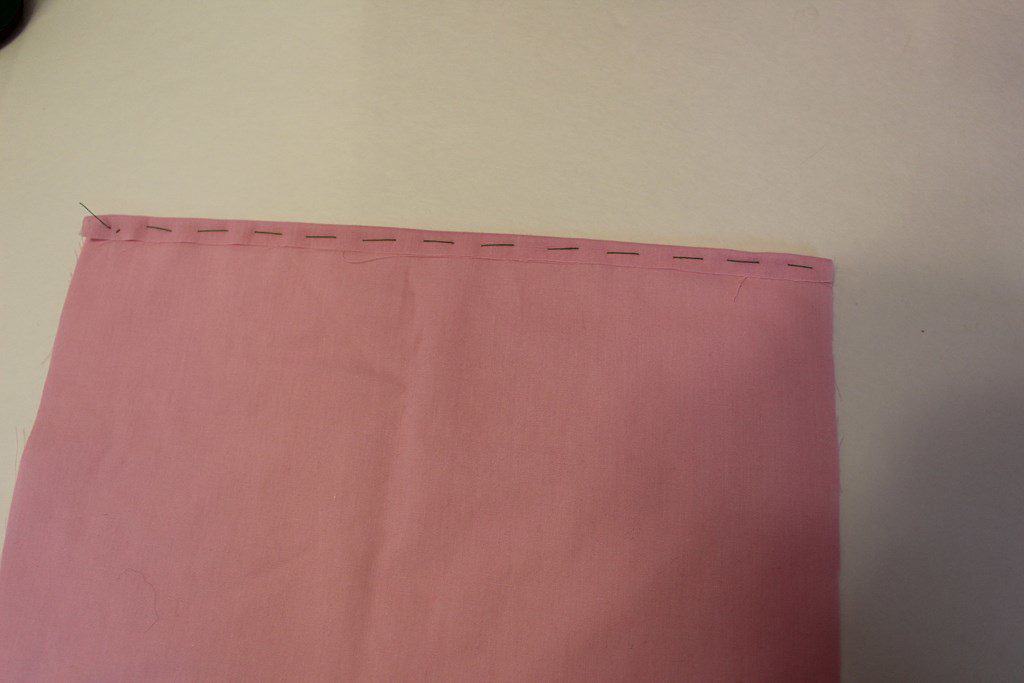
- Take 1 cotton piece, we prepared at the beginning of the lesson, draw a line with a sewing marker 1 cm from the edge of the fabric, fold the fabric with pins, sew a running stitch, and iron.
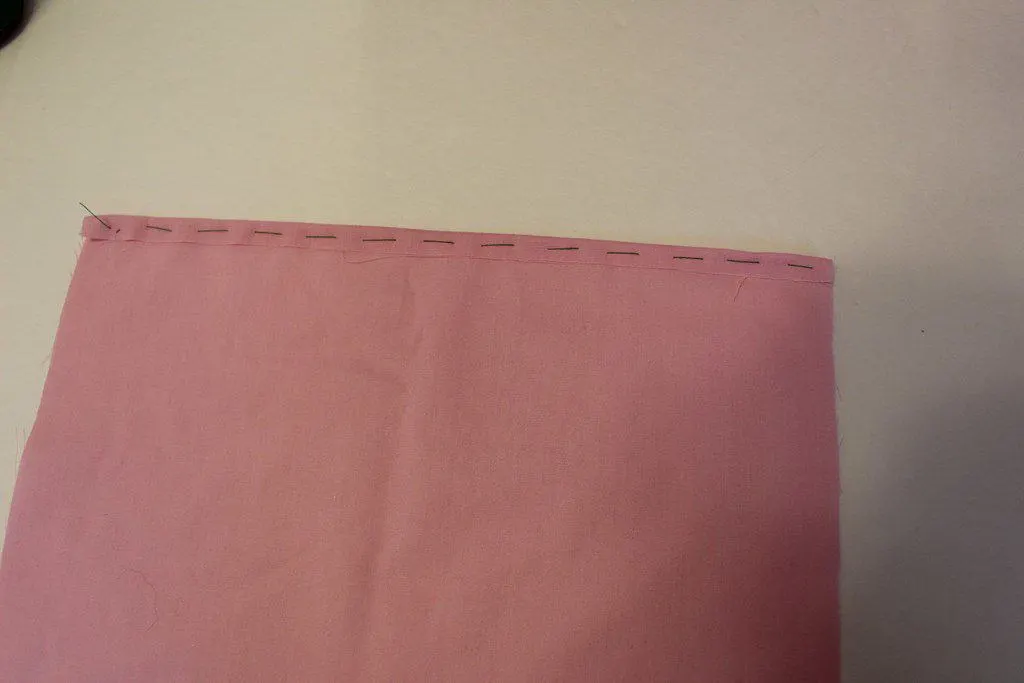
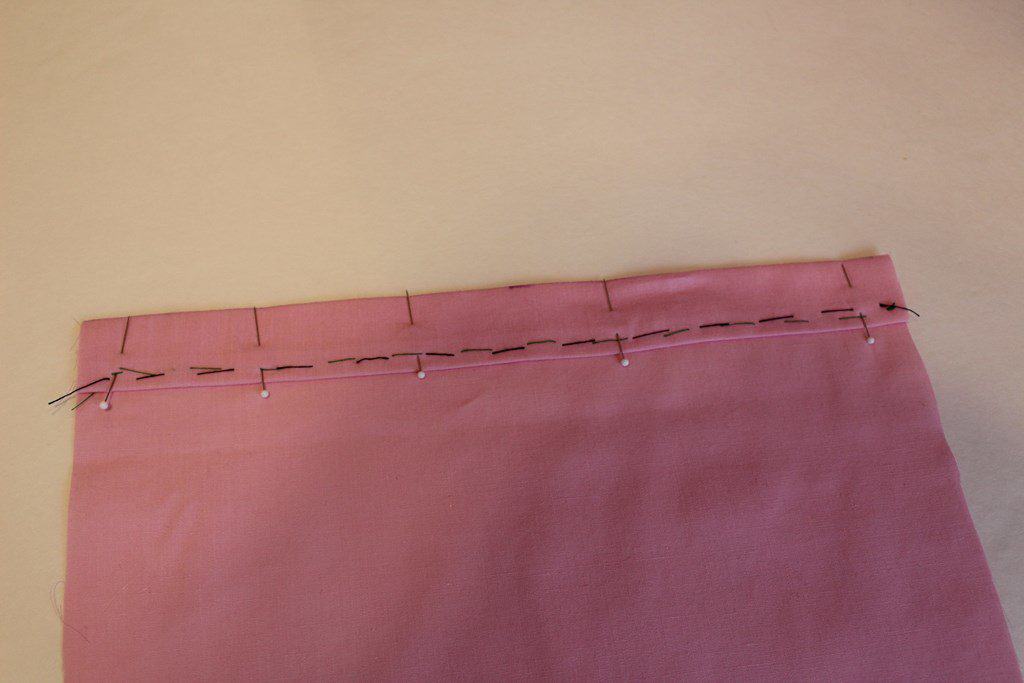
- Draw another line 3 cm from the edge, fold fabric inside again with pins, thread the needle with different color thread, sew a running stitch, and iron.
- Now you are ready to learn invisible stitches.
- Fold the fabric like this.
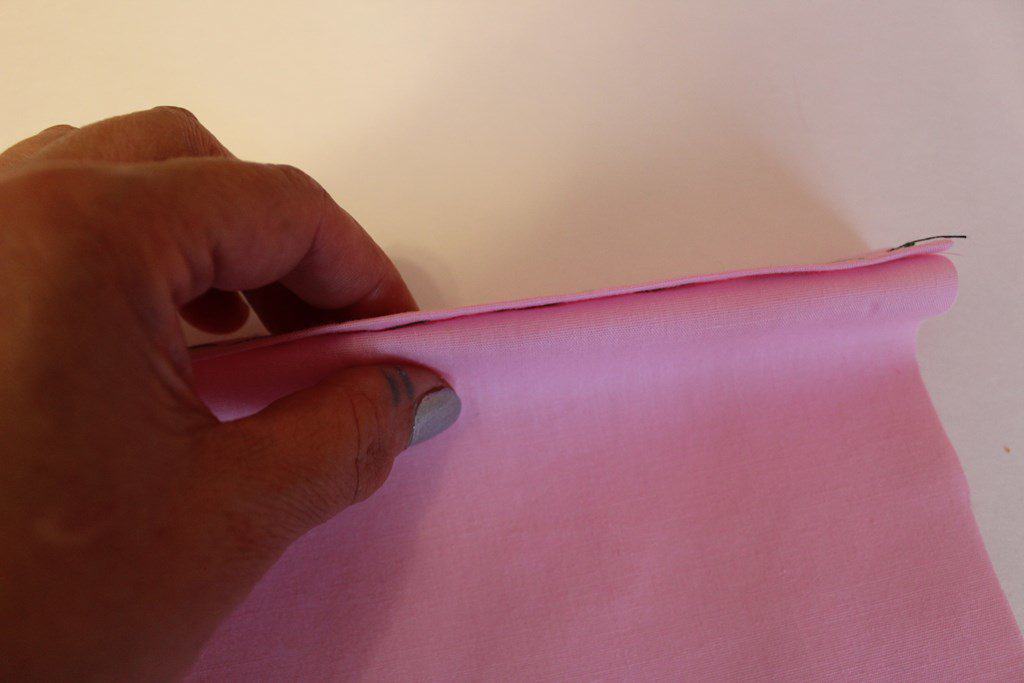

- Hide the knot of the thread inside the fold, run the needle into the fold, then draw up through the top crease.
- Get a few threads of the fabric just above the fold with the needle so on the outside of the fabric nothing (well, almost nothing) can be seen.
- Put the needle back into the fold, and keep the needle parallel to the fold. And on you go.
- The length of the stitch in the fold is 3-5 mm.
- Very important moment – don’t tighten the thread!

I also have a detailed tutorial on sewing invisible stitch by hand.
4. Overcast stitch
Overcast stitch (whipstitch or edge stitch) is used to protect the raw edges of the fabric so the fabric doesn’t fray. There are many different ways to protect unfinished seams – using a serger, zigzag stitching of your sewing machine, pinking shears, bias tape, etc. But today we learn hand stitches, and an overcast stitch is both practical and decorative. The only problem with it is that it takes forever to finish seams by hand and with a serger you can run up long seams in a few minutes.
For this stitch, it is easier to sew from left to right (if you are right-handed of course). So start on the left side of the edge you want to finish. Make a series of diagonal stitches that wrap around the edge of the fabric and try to aim all the stitches at the same angle. Make sure that stitches are equally spaced. Don’t tighten the thread because you can crimp the fabric; the edge should stay completely flat. Repeat this over and over until the entire edge of the fabric is wrapped in thread.

5. Blanket stitch
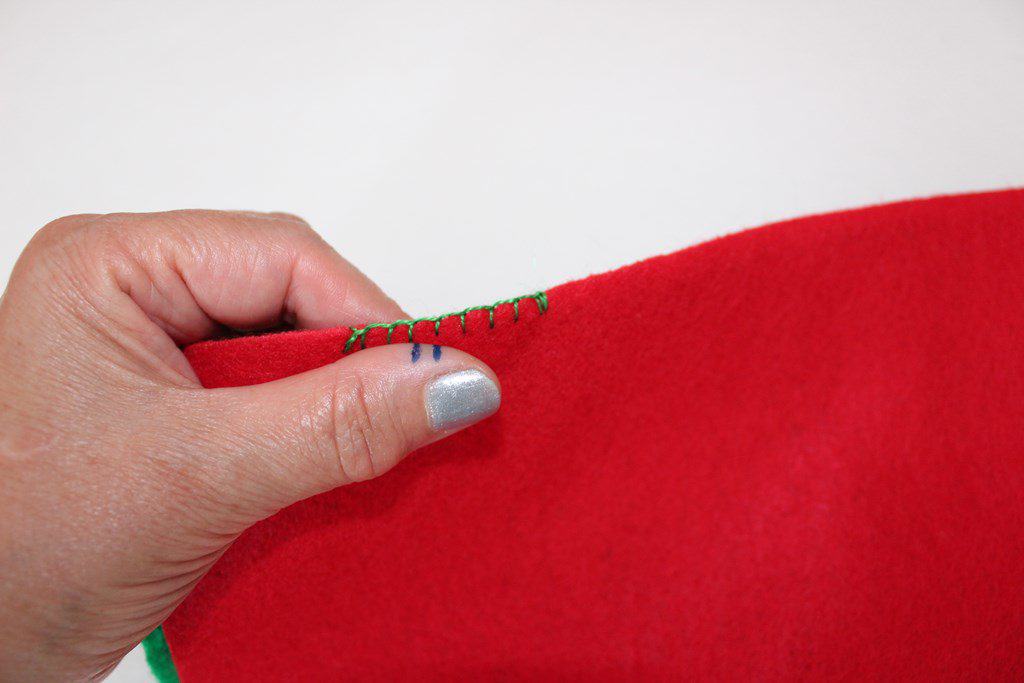
There is another stitch for finishing raw edges that I use more often. It is called a blanket stitch because initially it was used for blanket edging I guess. Blanket stitch is quite versatile and can be used for any seams that need finishing. It is also used as a decorative finish for edging appliques. Our special attention goes to the beginning and the end of these stitches. Start this stitch by making a loop around the edge of the fabric and poking the needle under the loop.
This stitch creates a straight line at the very edge of the fabric. Stitches should go perpendicular to the edge and be equally spaced. You have to catch your thread with every stitch you make and work with even tension.
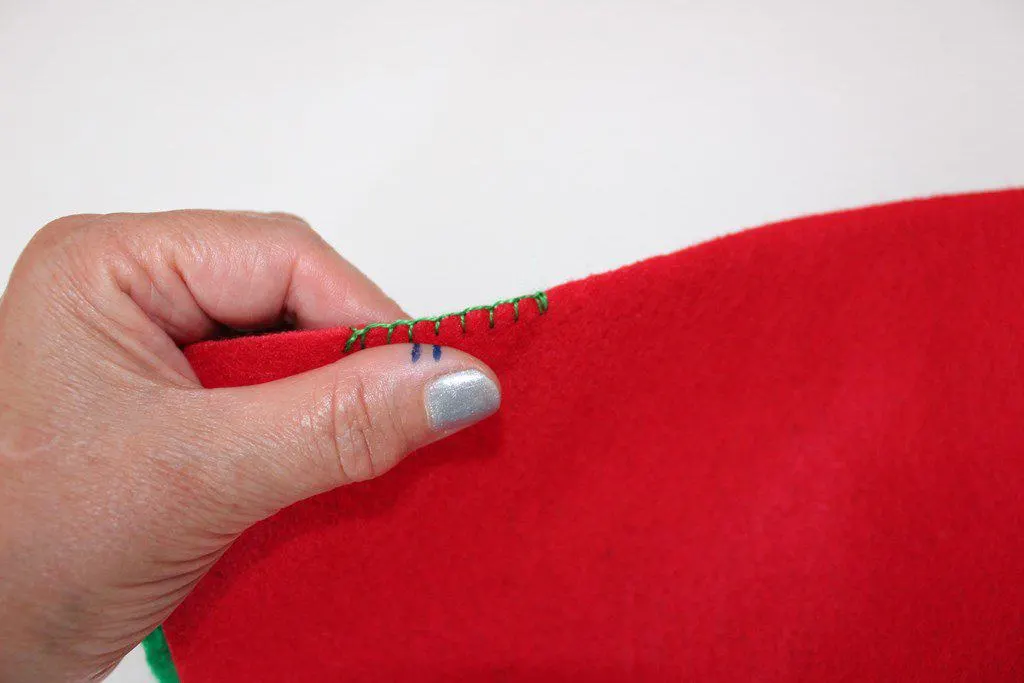
To end this stitch you will have to make a loop around the edge of the fabric again and this loop has to overlap your last stitch. Poke the needle under the loop – and you are done.

I know one useful trick for putting perfect overcast and blanket stitches. Keep that in mind although we didn’t go yet to our next step in learning to sew. So, sew a straight stitch with your sewing machine (put the stitch length about 4 – 5mm) parallel to the edge and about 5 mm from the edge. That way, when you will overcast the seams by hand your stitches will be spaced perfectly equal.
There is another useful trick to make stitches equal. Look at this image.
You make two small marks on your thumb having the stitch length between them. Now you have your own “ruler” handy and moving the thumb along with the stitch you can always keep stitch length constant. Again, be careful, your finger does NOT like being sewn!
I use this stitch (or a very similar one) to make buttonholes by hand.
6. Button sewing
Sewing on a button is one of the simplest hand sewing techniques. Everybody can learn it. And not necessarily only women, men can sew on a lost button also. It is really easy but there are some small tricks you should know so that your button stays strong and looks nice.
I decided to explain it in a news article because this one is getting too long. So, if you want to know how to sew on a button here is the link.
There are many other fancy hand stitches that you can learn later on but for a beginner sewer, it is pretty much enough to know the ones I mentioned before.
Please take time to practice hand stitches until you feel confident with your skill and remember: hand sewing should be an enjoyable and relaxing process.
It requires some practice to develop decent hand sewing skills. Don’t be afraid to make mistakes. We all do. And especially with hand stitches, a certain level of tolerance towards imperfections is needed. And if I remember well, also tolerance to pain is necessary, those needles are sharp!
Note: Some of the links on this page are affiliate links. This means I will receive a commission if you order a product through one of my links. I only recommend products I believe in and use myself.
Below are some good books on hand sewing; if you give the first one a try, please do NOT buy the eBook version, as many reviewers say it is very hard to read. But it is still a very good book, just buy the physical paper book.
The book below is also full of information on hand sewing but it focuses more on the decorative side of sewing; nevertheless a LOT of useful information in it. Also, my recommendation is to buy the paper book, the eBook is nice but eBook readers have usually small screens and are black. white screens are not really well suited for showing good photos.
Simple projects you can make by hand sewing
Now let’s look at some sparks of creativity and sew something beautiful turning these ideas into reality.
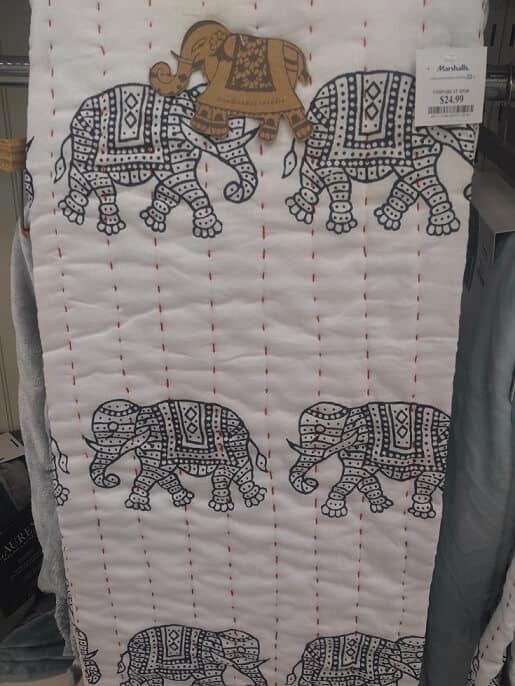
Look what I found in a store (Marshall, actually). This nice throw is decorated with just simple running stitches!
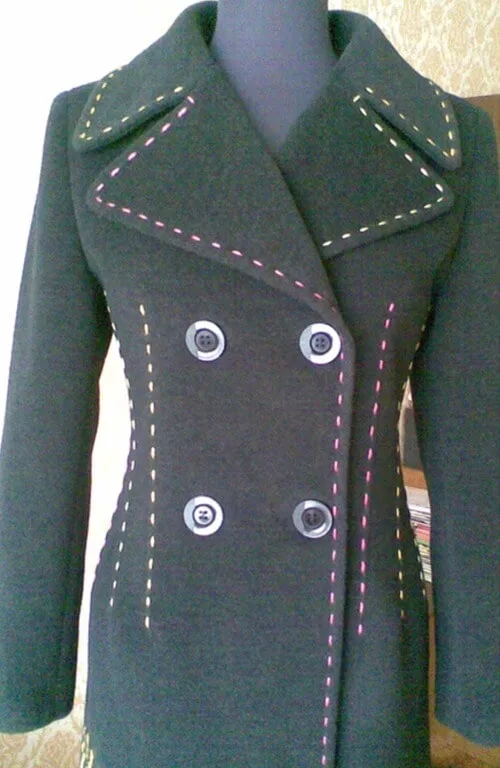
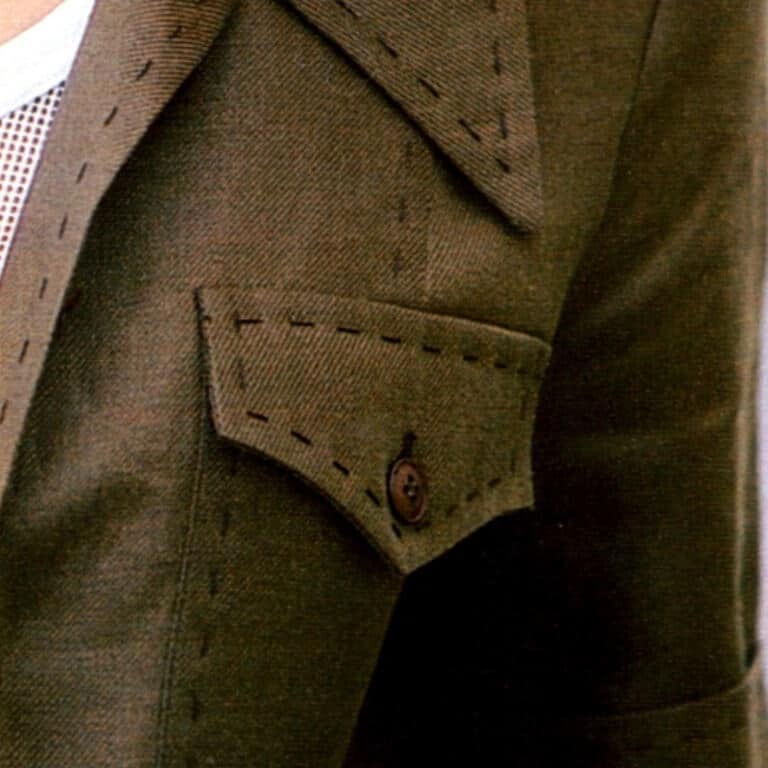
Running stitches are used to decorate these jackets.


I also found a popular YouTube video about sewing a circle skirt by hand (the author of this video doesn’t even have a sewing machine). The name of the video is DIY skater/circle skirt in 3 steps! (No zipper/no elastic band).
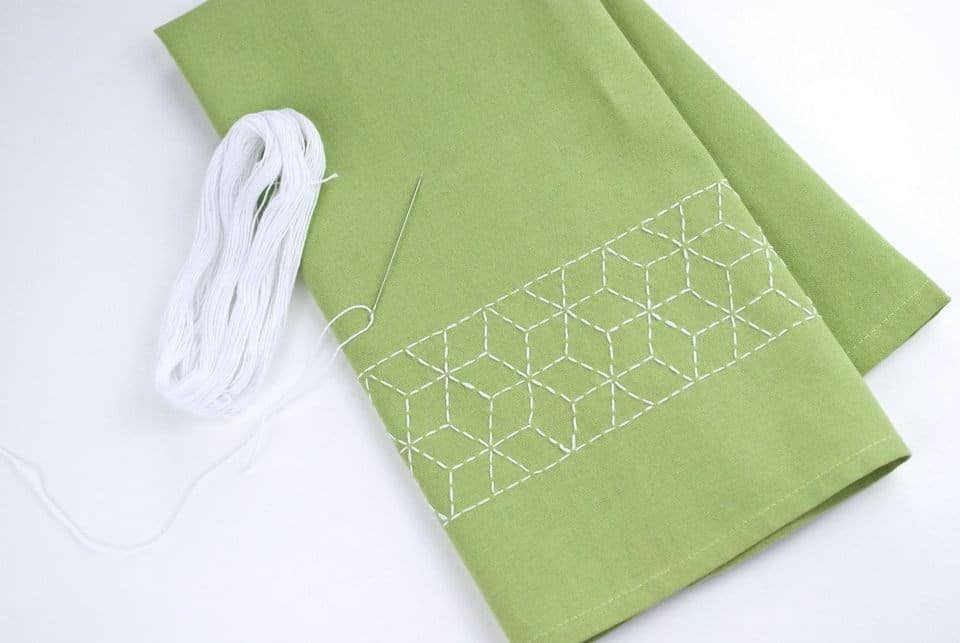
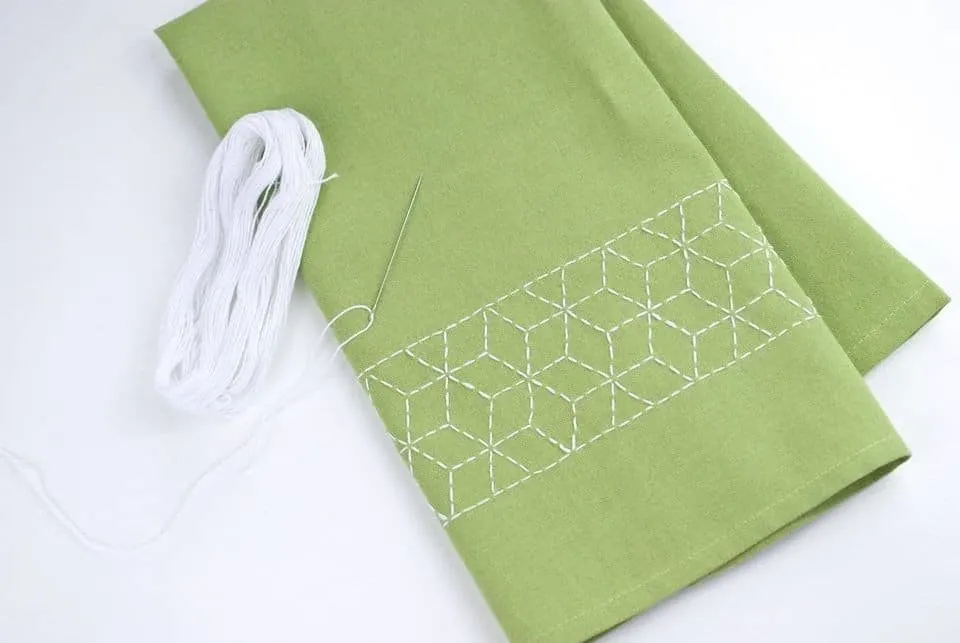
There is also a Japanese technique called Sashiko, which uses only basic running stitches to create amazing designs. Wikipedia describes Sashiko as “a form of decorative reinforcement stitching (or functional embroidery) from Japan. Traditionally used to reinforce points of wear or to repair worn places or tears with patches, this running stitch technique is often used for purely decorative purposes in quilting and embroidery. The white cotton thread on the traditional indigo blue cloth gives sashiko its distinctive appearance, though decorative items sometimes use red thread.
Sashiko embroidery was used to strengthen the homespun clothes of olden times. Worn-out clothes were pieced together to make new garments by using simple running stitches. These clothes increased their strength with this durable embroidery.
Mostly geometric patterns are used to make this work. The common motifs used are waves, mountains, bamboo, bishamon, key fret, double cypress fence, arrow feathers, seven treasures, pampas grass, overlapping diamonds, linked diamonds, lightning, linked hexagons, and persimmon flower. The embroidery uses special sashiko thread and needles. Modern-day sashiko stitching is not restricted to the traditional indigo-colored fabric but uses a variety of color combinations, and it is considered a beautiful surface embellishment for fabrics.”
Here is an image of a kitchen towel decorated with a beautiful Sashiko pattern. You can read more about how it was done here Easy Sashiko Kitchen Towel Project (by Mollie Johanson)
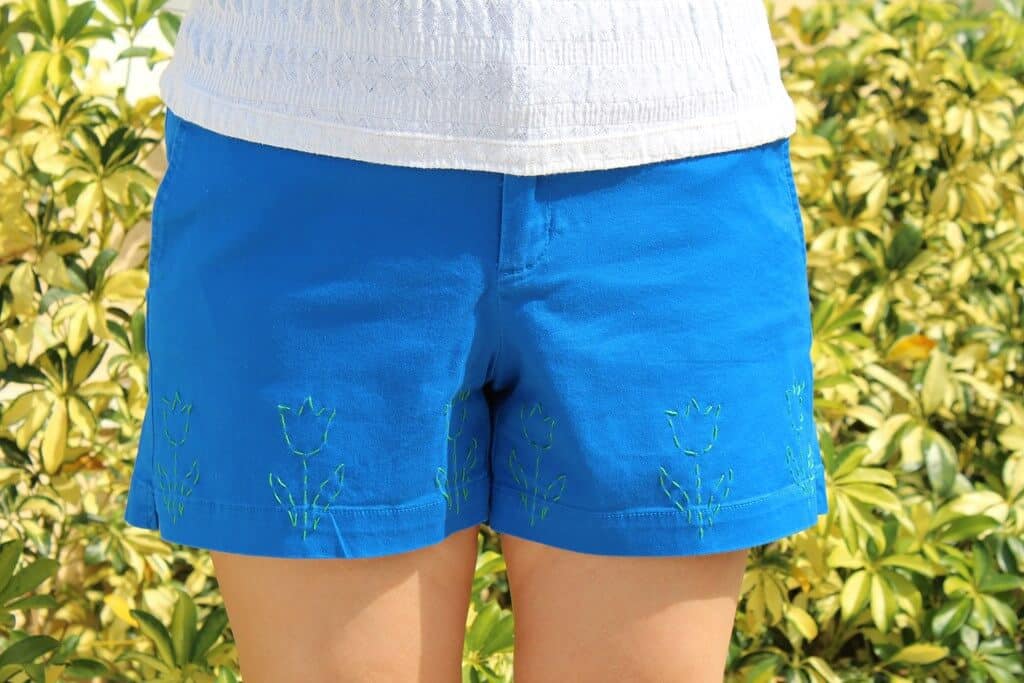
Once you get your hand in sewing I recommend one small and fast project for practice.
Take some plain shorts made from fabric without any print. Draw with a sewing marker a few flowers like this.

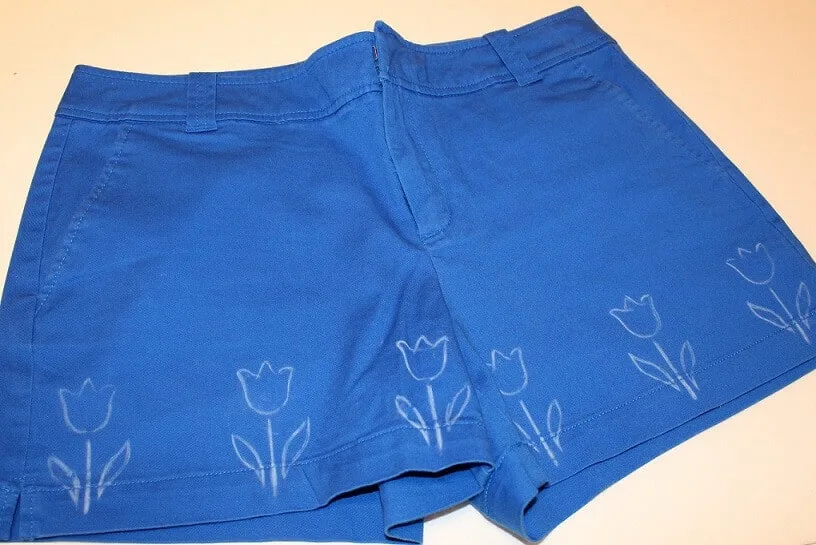
And now sew with a suitable thread using a running stitch. What is a suitable thread? It has to be a different color than the color of your garment and it has to be a little thicker than a regular thread. I used the Perle Cotton #8 thread. And don’t forget to weave your love into the things you are creating!


I hope I helped you to know hand sewing. Now please practice and I am sure you will conquer these techniques. In our high-speed everything world let’s savor some peaceful, relaxing, slow hand sewing!
Now you are ready to go to step 3 of the sequence of Sewing tutorials for beginners: Sewing Basics # 3: Learn how to use a sewing machine
Did you find this tutorial helpful? If so, save this pin (see below) on your sewing board so you can come to this tutorial later when you are ready to use a sewing machine, and follow me on Pinterest for more tips, tutorials, and inspiration!

Ready to take the next step in your sewing journey? Check out more step-by-step tutorials from my blog and don’t forget to share!


latest posts
- Ditch My Sewing Machine? Not in This Lifetime!
- Adorable DIY Needle Book | Easy Tutorial for Beginners
- Master the Seam Ripper: Your Ultimate Guide to Precision Stitch Removal
- Think You Know Zippers? This Installation Guide Might Surprise You
- Why Does Your Seam Ripper Have a Red Ball? Discover Its Purpose!
- Topstitching Troubles? This Simple Trick Will Turn It Around Instantly!
- How to Sew Shirring: A Step-by-Step Guide to Elastic Thread Gathering
- Are Self-Threading Needles Really Useful?
- Amazon Spring Sale: Best Choices
