
This is a tutorial on how to sew velvet: how to determine a fabric nap, what patterns to use for sewing velvet, how to cut velvet, how to press velvet, and sewing techniques to use with velvet.
It happened when I was maybe 12 years old. I was in a theater and I was allowed to go backstage because our neighbor was a seamstress and she was sewing costumes for actors. I don’t remember many things but I still have in my memory a very vivid image of a red velvet skirt that a girl was trying on in the seamstress’s room.
The skirt fascinated me and made such an impression that I remember it to this day: I had never seen until then such a beautiful skirt that close. It was designed to make an artistic statement: luxurious velvet fabric added so much depth and texture to a standard gored skirt design. It had a series of stitched sectional panels and was very well fitted at the waist and hips but the bottom area appeared full which added some instant glamour to the outfit. The soft drape and shimmering surface of velvet fabric made the skirt unforgettable for me.
Since then velvet has been my favorite fabric for creating a high-style look and I like to use all kinds of velvet for my sewing projects but it can be a little bit tricky sometimes. Below you can see 2 velvet dresses I made recently.


What is velvet, what is velvet made of and how is it different from other woven fabrics?
Velvet is, in fact, a very dense pile of fibers woven into the base fabric, nowadays usually polyester. The composition of the velvet, thanks to modern technology, may differ significantly. Velvet can be made from any kind of material, apart from polyester the most common velvet fiber content is silk or a mixture of silk and rayon. Modern velvet fabric may contain elastic fibers and is suitable for tight-fitting garments. Note that velvet (like any other napped fabrics) has the ability to increase the volume of the figure.
There are many different types of velvet and each of them needs to be handled differently. For example, if you are making a dress from silk velvet you have to use smaller size needles and threads than if you are making a couch cover from thick velvet upholstery fabric. By the way, super soft and luxurious velvet fabric is used not only for garment sewing, velvet is a popular material for the home ( for upholstering chairs and sofas, for curtains), also for auto interiors, store displays, etc.
But all types of velvet have something in common: any velvet is a three-dimensional material and the inclination of the pile gives the so-called “nap” of the fabric. Did you notice that when touching the velvet, it is softer and smoother in one direction and a little rougher in the opposite one? The first direction ( where the material is smoother to the touch ) is the direction of the nap and it is often called “with the nap”, as opposed to “against the nap” which is the direction where the material is rougher to the touch.
It is extremely important to correctly identify the direction of the nap, this will be essential while arranging the pattern and cutting. Just think: two adjacent pieces being assembled without regard to the nap will always look like they have a different color since velvet not only feels different, but it LOOKS differently when seen from one angle or another. By the way, this is also a good method to identify the nap direction, the material is always shinier and lighter when seen “with the nap”. Read more about fabric NAP here.
1. What patterns to use for sewing with velvet?
From my experience, simpler patterns work best. A winning solution for clothes made out of velvet is simple designs with a minimum number of darts and seams. Velvet is not only a beautiful material on its own, but it is also quite thick and smaller pieces tend to be difficult to work with.
Avoid patterns with buttonholes and pockets. Buttonholes will usually not look very good on velvet because they will crush the pile and will stand out on the fabric even if sewn with the exact same color threads. And they can distort the fabric. But you can use snaps and button-and-loop closures. Same about pockets: while possible, they will be useless because any use of the pocket will crush the pile and leave an ugly mark where the hand touches the material repeatedly.
Alternately, stitch the garment out of cheap fabric, making any fitting and length adjustments to the pattern, and only then begin to cut the velvet. However, it is difficult to imagine a sewist who would easily find time to do this. Maybe it’s easier just to use a proven pattern, which you already sewed before.
2. Do you need to preshrink velvet fabric before cutting?
Well, it depends. You have to consider the fiber content, fabric structure, and texture. Many types of velvet require dry cleaning. So I heard many times that you must dry clean your velvet fabric before cutting because it may shrink. But as for me, I always try to avoid dry cleaning if possible.
Recently I made a dress from silk velvet and I steamed the fabric before cutting it. Consider steaming the velvet fabric instead of dry-cleaning: hang it in a bathroom and fill the room with steam. Don’t touch the fabric while it’s damp, let the material dry thoroughly before work but pay attention to avoid crushing the pile ( it will leave marks ).
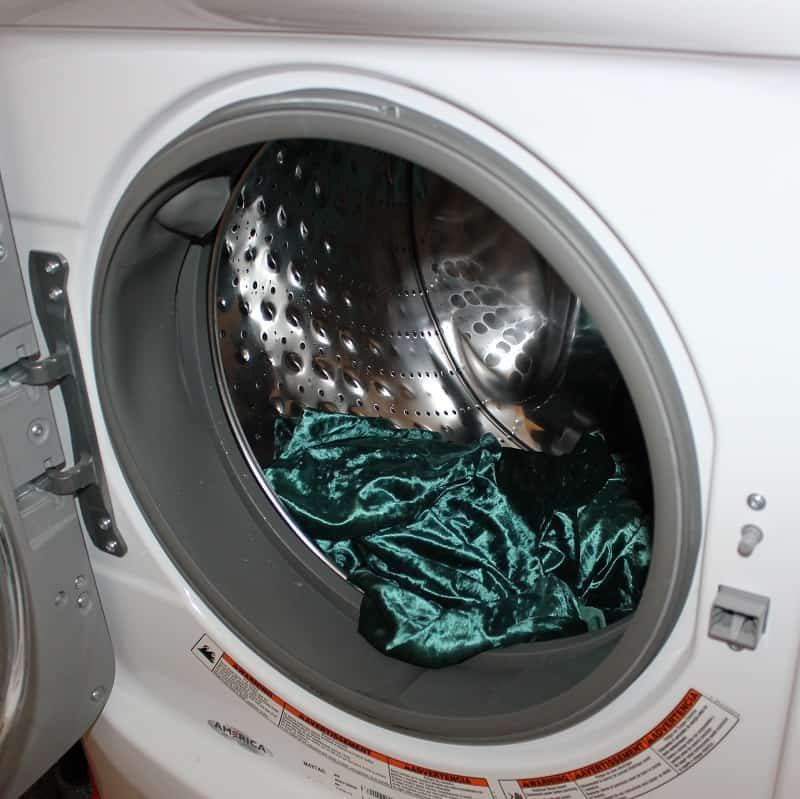
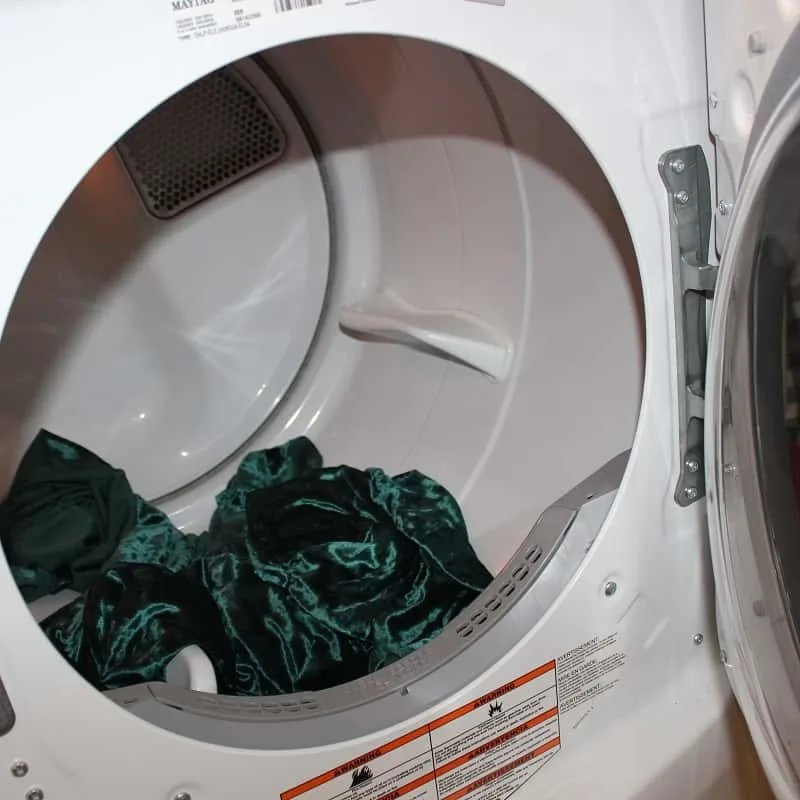
I like to use crushed velvet for making clothes. This is a very tough polyester fabric with an already crushed pile. Did I think: why not prewash it? I cut a square 3 x 3 inches from my crushed velvet and washed it in hot water. The fabric shrank but looked exactly the same as before washing. I then put the whole piece in the washing machine (for 20 minutes delicate cycle, hot) and afterward in the dryer. It worked! The fabric didn’t change in appearance at all and I made a dress which you can see in the image above.


3. How to determine the NAP of velvet?
Pay attention to the nap when arranging the pattern pieces on the fabric or else the pieces will look like they have a different color. The arrangement can be either with or against the nap ( the garment will have a different look ) but it is essential that all are arranged in the same direction. Remember that all the details of the pattern must run in the same direction unless you want to create some design interest and cut yokes for example in different directions to create a different color shade.
4. How to cut velvet?
It is a little tricky to cut velvet fabric. Being a napped fabric, velvet has the tendency to shift a little while cutting. So how to cut velvet? Always cut the pieces in a single layer. Also, you may find it useful to place the velvet right side down on a cutting table – that will prevent shifting while cutting. Never cut on the fold. For pieces that are supposed to be cut on the fold, this means that you will have to create the full pattern before cutting ( to allow cutting in a single layer ).
Since the velvet pile threads on the cuts may fall off, make the seam allowances and the hem a little wider than usual. Also, keep the vacuum handy, there might be fuzz after cutting.
5. Have extra fabric available for your project: From my experience, when cutting in a single layer and since the direction of the cut is important it may be useful to have extra fabric available especially for patterns with larger pieces ( ½ yards perhaps ). If the fabric is expensive you may determine the exact yardage by laying the pattern pieces on the table (or even on the floor) or checking the pattern envelope for cutting “with nap”.
6. Pinning: pin in the seam allowances since pins tend to leave marks in the pile of some types of velvet fabric.
7. Basting: for silk velvet use a very thin thread for basting to avoid leaving marks; silk thread and hand basting work best and avoid crushing the pile and leaving marks on the fabric. After stitching, basting threads should be removed immediately, since the creases formed from the threads will be very difficult to remove over time.
But many other types of velvet take basting very well. Sometimes I even hear advice to sew two rows of basting stitches on either side of the actual seam line which goes in opposite directions because this may help to stitch the seam without the two layers distorting out of place.
8. Stitching: always test the stitch first on a piece of scrap. You will need to adjust the stitch length and lower both the thread and presser foot tension. The thicker the velvet, the longer the stitching step. The presser foot should not leave marks on the fabric when stitching. If that is not possible, try to put a thin piece of paper under the foot while sewing to better distribute the pressure on the material.
Machine needles number 70 or 80 are suitable for garment velvet, and if you sew stretch velvet with elastane, take a needle for elastic materials. Upholstery velvet fabric requires thicker needles number 90 or even 100. Loosen the thread tension slightly and hold the material firmly both in front and behind the presser foot while stitching but do not stretch the material. You can also use a Teflon presser foot or a walking foot. The recommended stitch length is 3-3.5 mm.
I had a very good experience using a Rotary Even presser foot to sew velvet (and any other napped fabric). You can read about it here.

Always sew with the nap starting at the uppermost point of the seam. Sewing against the nap will be more difficult ( if at all possible ). Sewing against the nap usually causes bunching and puckering. Start and stop frequently.
9. How to store velvet: If the fabric needs to be stored for an extended period of time always roll the pieces or hang them, never fold velvet to store it. This will avoid the fold marks which are very easy to see on velvet.
✅ Related tutorial: How To Store Fabric: Fabric Storage Ideas For A Sewing Room
10. Removing crush marks: try brushing the nap after spraying with a little water. If this does not work, or not fully, steam the area lightly and brush again. A soft toothbrush or even another piece of velvet works fine for this purpose. Of course, the best is not to have the marks in the first place!
11. How to sew hems on velvet fabric?
Some types of velvet don’t fray at all so hems could be left unfinished especially with flared skirts because hemming would add bulk and ruin the drape. But if you don’t like unfinished hems then finish it by hand sewing only. Don’t turn up the hem twice, one fold will be enough.
✅ Related tutorial: How to sew hems invisibly
12. How to iron velvet?
Is there a real need for ironing velvet fabric, can you iron velvet? Yes, there is a need but no, do not iron the velvet garment dry or the pile will very likely be crushed, perhaps permanently. Use a steamer instead and hang the garment to dry, velvet is a heavier material and the creases will most likely disappear. Vertical steam, without touching the fabric surface of the iron, will give the best result.
If you want to use an iron while sewing velvet, lay the velvet fabric onto a special velvet board, a terry towel folded several times under it, or a piece of scrap velvet so that the piles can interlock and therefore don’t get crushed. Use moderately heated iron with steam.

I am sure after sewing a number of garments you will get better at this, but there is always more to learn; even after so many years, I am still surprised from time to time by a technique or detail that I have never thought about. If you have additions or comments about this topic please let me know, this way we all learn from each other.

Ready to take the next step in your sewing journey? Check out more step-by-step tutorials from my blog and don’t forget to share!


latest posts
- Adorable DIY Needle Book | Easy Tutorial for Beginners
- Master the Seam Ripper: Your Ultimate Guide to Precision Stitch Removal
- Think You Know Zippers? This Installation Guide Might Surprise You
- Why Does Your Seam Ripper Have a Red Ball? Discover Its Purpose!
- Topstitching Troubles? This Simple Trick Will Turn It Around Instantly!
- How to Sew Shirring: A Step-by-Step Guide to Elastic Thread Gathering
- Are Self-Threading Needles Really Useful?
- Amazon Spring Sale: Best Choices
- Elevate Your Prom Look: A Guide to 10 Neckline Choices (2024)
Gayle
Saturday 4th of February 2023
I made my daughters medieval wedding dress with a velvet cape as well as velvet "ribbon" down the front. I couldn't get the same colour ribbon so had to make strips from the cape fabric. Cutting and over locking or zigzagging didn't work or folding under a hem before stitching. I ended up using a soldering iron from the wrong side working on a piece of wood and using a metal ruler to create a neat wide ribbon that did not fray, so it could be attached on top of the overdress with small zigzag stitching . Very neat finish.
Olga Balasa
Tuesday 7th of February 2023
Gayle, yes, I agree, this is an interesting way to stop fraying. I use a similar process to cut silk organza flowers. But I am not sure I use a soldering iron, my tool is called a "Woodburner", I bought it on Amazon at this link https://amzn.to/3RD9AIJ (affiliate).
Francine Francis
Tuesday 29th of March 2022
Very good article but you did not mention the nightmare of sewing silk velvet to a non velvet lining like satin or regular thin lining- it must be diagonally basted- time consuming but a MUST.
Mollie
Friday 11th of March 2022
I work in a fabric stores. Thank you for the tutorial on use and care of velvet. I have one question. When at the stores cutting table, do I cut or tear velvet for the customer. Does tearing cause the fabric to stretch? Anything else you would like to add please do. I notice you said to lay the fabric face down to keep it from slipping. Do I tear from the top of the nap down. Please email me so I will get your answer. Thank you. Mollie in San Diego, CA
Olga Balasa
Saturday 12th of March 2022
Velvet is most of the time knit, not woven and if it is, it can't be ripped. However I have seen woven velvet and that CAN be ripped. The edge will be a little fuzzy because the material is fuzzy, but I have a piece of woven velvet which shows signs of having been ripped, not cut. I myself have ripped a piece of faux fur (low pile) and it worked nicely. If the material rips properly it is possible that it might stretch, cotton can be easily ironed after. I did not try to do this with velvet, and the fur I ripped myself didn't show signs of significant stretching. But I guess it depends on the material after all, I doubt a universal answer exists and since I do not usually work with velvet, it is difficult to give an all-encompassing answer.
Sue Kaberlein
Wednesday 2nd of March 2022
Your "Nap" picture made me laugh. So cute. Also,I have tried the "hang it in the bathroom when you shower trick." For wrinkly clothes. I've found it takes 2 or 3 showers to really do the trick. PS what's the opposite of irony?........................WRINKLY.
Olga Balasa
Saturday 5th of March 2022
Thank you. Thank you also for the joke!
Toby Ryan
Wednesday 8th of April 2020
Thank you for mentioning how you should keep your designs simple without too many seams when creating velvet clothes. My daughter would like me to make a velvet gown for her that will be comfortable enough for her to sleep in at night, but I am worried that I may tear the velvet fabric I buy due to my inexperience. I'll try a simple design once I find some velvet that will work for my project.