
I’ve covered many aspects of working with silk fabric in previous articles, such as the benefits of silk, common types of silk fabric, and how to cut chiffon. Now it’s time to cover how to sew silk fabric in more depth. This post will explore interfacing, threads, needles, and sewing machine settings for silk fabric – basically, the specifics of the tools and techniques used for sewing silk.

Table Of Contents
- Interfacing – You need to use special interfacing for silk.
- Needles – Needles for silk are thinner and sharper than for regular sewing.
- Thread – Usually silk thread is recommended for silk fabric.
- Sewing Machine Settings – Your machine needs to be set up for silk, especially for very delicate fabric. You may also need a special foot or needle plate to sew very thin material.
Sewing Silk: A Challenging Task
Anything made from silk just looks incredible and feels luxurious against the skin, doesn’t it? However, silk fabrics (especially chiffon, gauze, charmeuse, organza, Georgette, and gazar) have a reputation for being “difficult to work with.”
I’ve used silk in many projects over the years and have formed a different view on sewing silk. In my opinion, it is not the material itself that creates problems.
Instead, I’ve noticed that most of the difficulties stem from either the lack of adequate tools (sewing machine, needles, threads, etc.) or a lack of experience.
How To Sew Silk And Get Professional Results
Through my experience and knowledge, I believe I can help you learn how to sew silk and get incredible final results. It’s amazing what these few simple tricks can do to help give your silk sewing projects a professional-looking finish.
Use Interfacing To Stabilize Silk Fabric
When working with silk fabric, one of your secret weapons will be to stabilize the fabric for cutting and sewing. Interfacing is often necessary to:
- Stabilize seams at necklines, armholes, and waistbands.
- To add firmness to collars, cuffs, pockets, etc.
Choosing the proper type of interfacing for your silk fabric is essential. If you look in your sewing pattern’s instructions, you can usually find information about whether interfacing is required and what type you need.
For most silk fabrics, we use fusible interfacing with an adhesive on one side that permanently bonds to the fabric when applied with an iron. I use very lightweight, thin, fusible knit interfacing, which has a certain amount of stretch. It doesn’t add any weight or bulk to the fine silk fabric.
Note: Some of the links on this page are affiliate links. This means I will receive a commission if you order a product through one of my links. I only recommend products I believe in and use myself.
There is also woven fusible interfacing for silk which is delicate, semi-transparent, and slightly elastic.

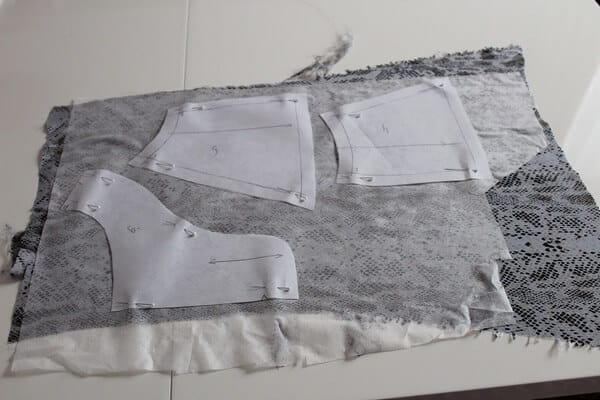
If I need to fuse (stabilize) small pattern pieces (like collars, yokes, belts, and facings), I don’t usually cut them separately from the fabric and the interfacing.
Instead, I just use fusible fabric for silk and cut a bigger piece of silk first and then cut pattern pieces from it. This helps to prevent distortion of the small pattern pieces.

How To Sew Silk: Best Way To Apply Fusible Interfacing
I use an iron without steam to apply fusible interfacing. Recommendations include using the silk setting on the iron, but that setting seems very low. So, I use the wool setting, and I’ve never had any problems.
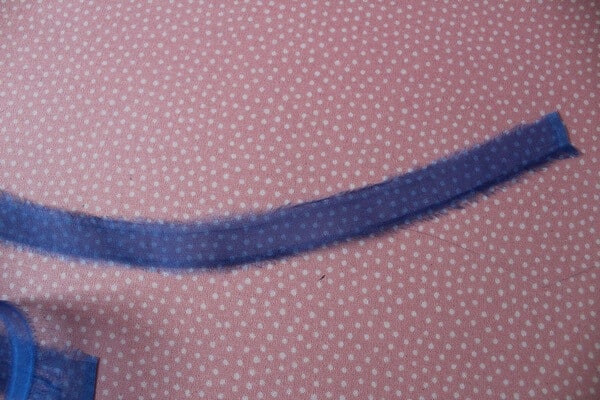
Another technique I’ve used successfully is to put narrow strips of very thin fusible interfacing (about 2cm or 7/8 in) along entire seam lines. Since seams can become stressed (as shown in the image), this reinforces the seams and prevents the garment from tearing apart with wear.

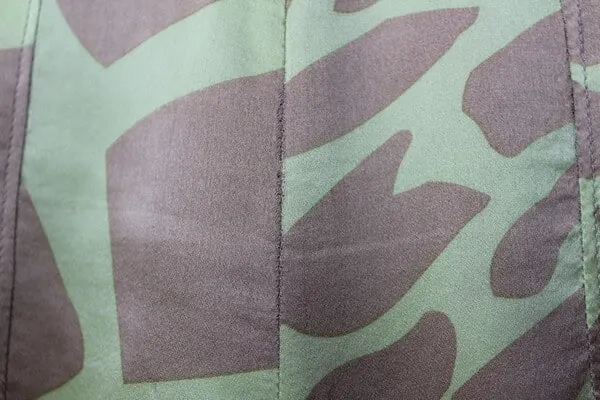
I’ve noticed this happens most commonly with close-fitted garments in some curved areas or where a lot of movement occurs.
Fabrics That Don’t Work With Interfacing
Unfortunately, you can’t use even very thin fusible interfacing for transparent silk fabric like silk mesh, chiffon, or organza, because the glue can appear through on the right side of the fabric. Furthermore, fusible interfacing is only available in white or black and will be visible through the sheer fabric.
Therefore, to stabilize transparent silk, you can use a second layer of the same fabric as a form of sew-in fusible fabric for silk!
Best Fusible Interfacing For Silk Alternatives
There are other alternatives that we can use as fusible fabric for silk.
For example, we can stabilize seams of slippery silk fabric with stay-stitching. NOTE: I see it is always recommended in McCalls, Butterick, Vogue, and Simplicity pattern instructions.
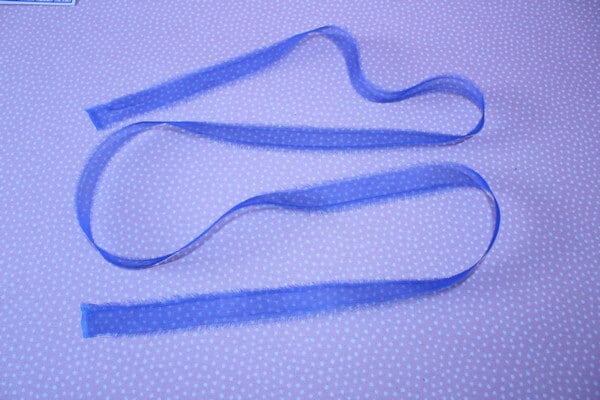
I like to use strips of silk organza instead of stay-stitching. How do I do it? Cut narrow cross-grain strips of silk organza about 2.5 cm (1″) wide and unravel their edges a little. Just the process of tearing strips from the fabric instead of cutting them will accomplish the goal.
This unraveling also has the benefit of making the edges softer, so they won’t be uncomfortable for your skin. You can use these strips to stabilize necklines, armholes, and shoulder seams.
Baste them in place and do the stitching afterward. These strips will stay in the garment permanently and strengthen the seams. If the seams you need to stabilize are curved, you can shape these organza strips with a steam iron.
How To Sew Silk: Best Needle For Silk Fabric
Another thing I’ve learned over the years is that while working with silk fabric, the needle for silk fabric matters. I always baste pattern pieces together by hand because it gives me more control of the slippery material.
That makes machine stitching more manageable and avoids creating stitches you’ll need to pull out because pattern pieces will stay in place. A needle easily damages silk (there are always traces of punctures).

When hand basting, the best needle size for silk fabric is a very thin needle with a tiny eye so that the marks are less visible. For any machine sewing, use a thin universal or sharp sewing machine needle for silk – 70/10, 65/9, and 60/8 size needles are great.

A Great Find For Sewing Silk
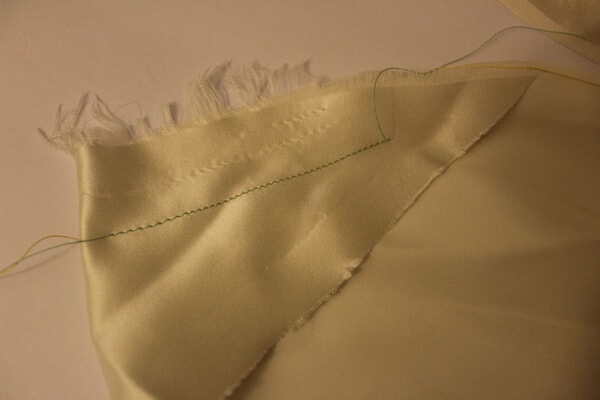
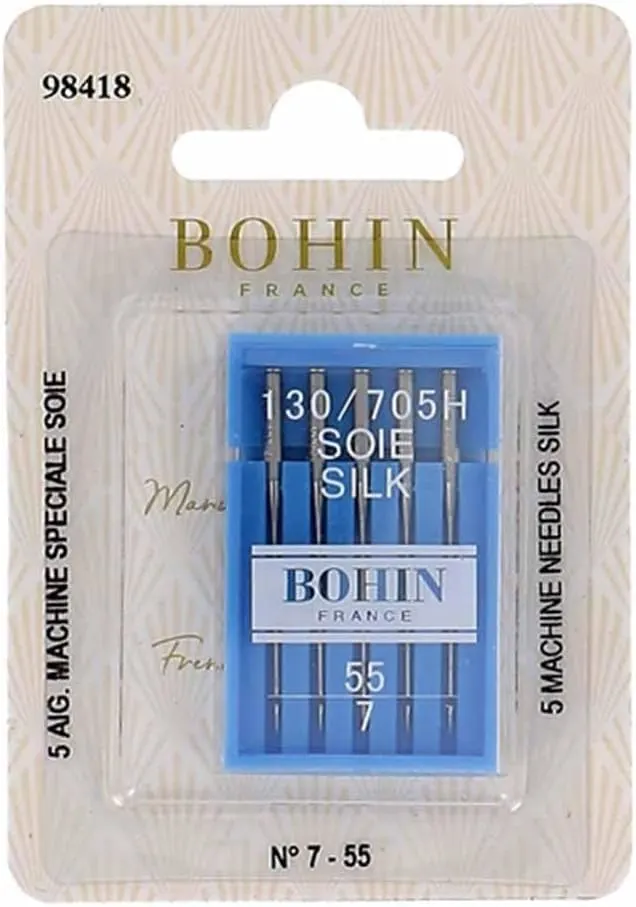
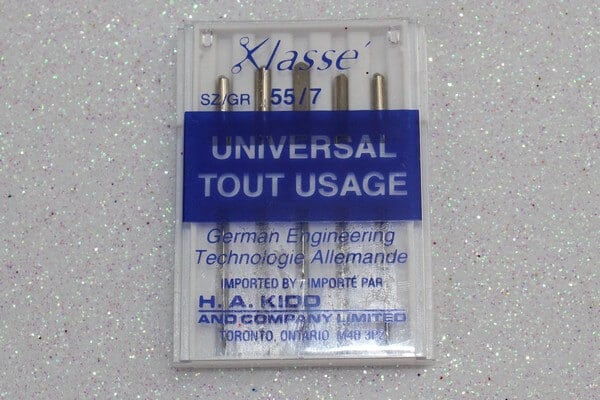
Not long ago, I found size 55/7. I didn’t know that size existed because I had never seen anything about these needles on any sewing site.
So, I had to try it out. I used one of the needles to sew silk chiffon (with silk thread), and it worked so well. I took stitches out (just to try the needle), and there were no holes in the chiffon, as seen in the image.


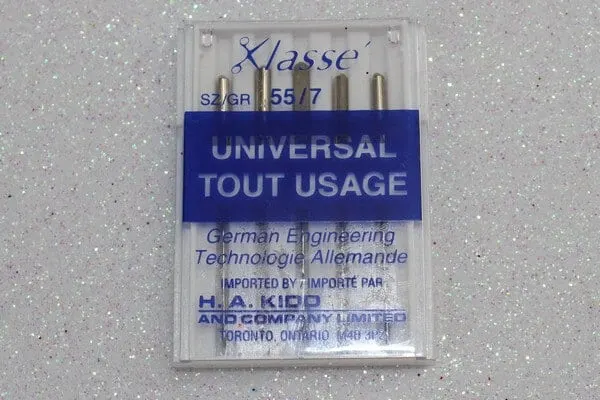
After buying them initially, I had a tough time finding that same 55/7 size again. Walmart was selling that size at a slightly higher price, but I can’t find these needles anywhere right now. The closest alternative is the next size (60/8).
The smaller needles I have are Klasse brand, but I haven’t been able to find them again either. If you find some, let me know, please!
Pro Tip: Make sure the needle is smooth, straight, and doesn’t have any roughness. Sometimes previously used needles might have bent slightly. Even if you can’t see the bend, the needle will be distorted enough to affect the stitching.
It’s better to use a new one for each new project, even if you don’t see anything wrong with the old one.
How To Sew Silk: Best Thread For Sewing Silk Fabric
From my experience, 100-weight, 100% silk spooled threads are the best for several reasons. They:
- are smooth
- are very strong yet still delicate
- have a lustrous sheen
- glide through the silk fabric with amazing ease
Here are some threads from my collection.
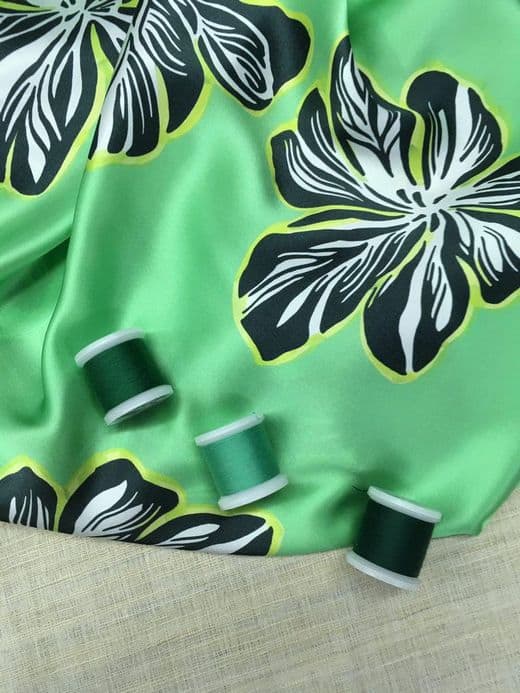

Pro Tip: Remember that your thread shouldn’t be heavier than the fabric. Silk threads are just amazing!
Here are some affiliate links where you can buy 100% silk threads for your projects.


If you can’t find silk thread in an ideal color, then use fine cotton or linen thread. Polyester thread can also be used, but use scraps to check how the stitching line falls. Now and then, when the polyester thread comes out of the machine, it stretches and then “relaxes” on the seams before shrinking back and puckering the fabric.
Cotton threads are preferable for silk garments because the cotton seam will break more easily than expensive silk threads if your garment catches on something. On the other hand, seams sewn with polyester thread are more durable. So if the silk garment gets caught, the stitching with polyester thread will hold, and the fabric itself will tear.
How To Sew Silk: Sewing Machine Settings For Silk
When sewing silk with a sewing machine, always check your machine before sewing. It needs to be clean and free of lint.
Adjust Tension Settings
Next, adjusting the tension on any threads and needles you will use for sewing silk is imperative. Consult your machine manual about the tension setting for sewing silk and practice on scraps. Then practice some more!
Although you won’t usually deal with bobbin tension, there may be instances where you need to. It’s good to know what you can do. If you want to learn more, check out Sewing Machine Tension Adjustment and Bobbin Tension.
Adjust Stitch Length
Stitch length should be short – set it to 1.5 – 2 mm. NOTE: Machines usually just show the number (the “mm” is implied). In other words, if there is no marking, the number means millimeters. Older machines may show the stitch length in inches (but then it would be marked as such).
Tie Loose Ends Instead Of Backstitching
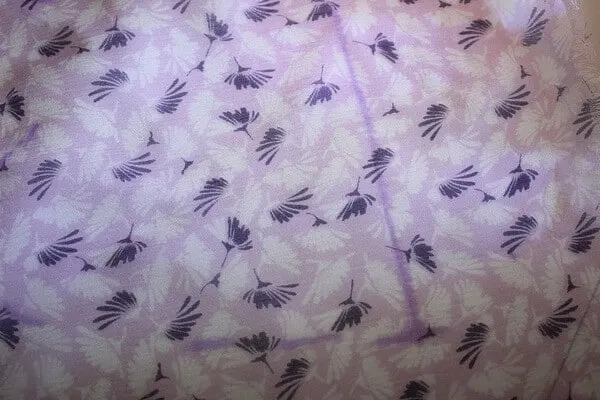
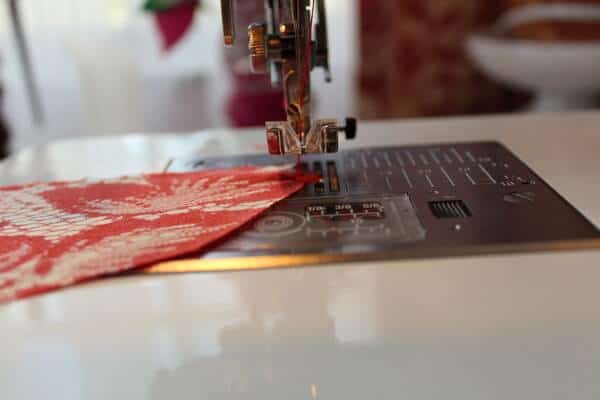
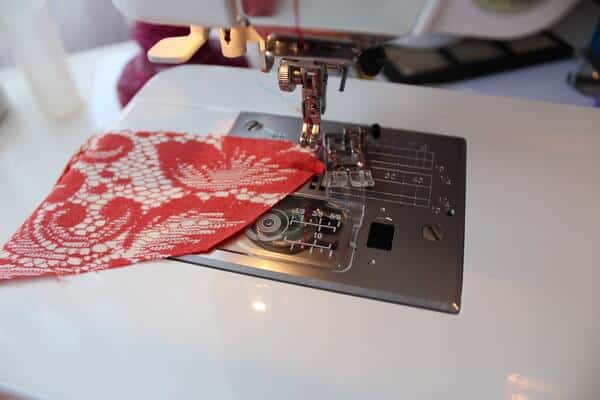
Avoid backstitching on lightweight silk. Instead, manually tie thread ends to secure the stitches. Lightweight silk is prone to get “swallowed” in the needle plate opening when the needle moves up and down.
The images below show the silk being dragged into the hole. The photos are not easy to see, but if you look at the needle, you will see the material dips into the needle hole.
Tips For Sewing Silk
In addition to the general settings and techniques above, here are some helpful tips for sewing silk and getting beautiful results.
Sew Silk With A Straight Stitch Plate
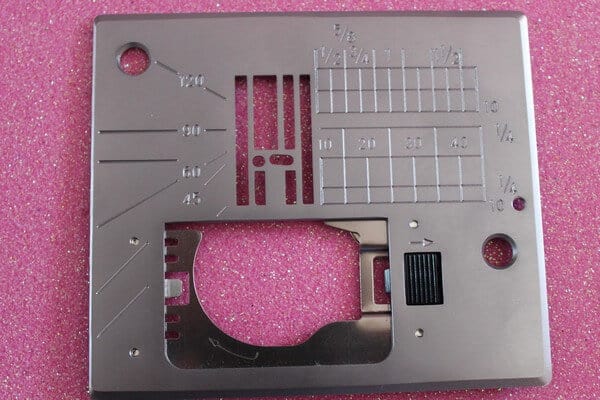
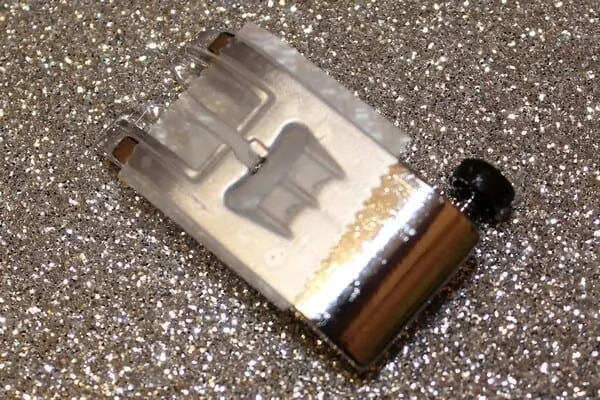
Some seamstresses set a special needle plate with a smaller opening for the needle when sewing silk. It’s called a straight stitch plate and is used for straight stitching in the far left position.
This special plate prevents puckering, bunching up, and skipped stitches. It also prevents the fine fabric from being pulled down to the bobbin area. It is a little bit different for every sewing machine.
I have one for my Janome 6600, but they will look different for Brother, Singer, and other brands.
Here is the image for mine.

And you can buy it on Amazon. Just double-check that it fits your model. You may need to search by the model (search for “straight stitch needle plate” + your model). If you do not find it on Amazon, try Etsy or eBay.


However, if you don’t have this special plate, you can just stick a very small piece of transparent scotch tape on the regular needle plate. Don’t forget to make a small hole under the needle so the fabric won’t fall through. Basically, you want to cover most of the needle holes and allow less space for the material to go under.
I have to confess I am not a big fan of this trick, but lacking all else, it might work. You can also use a special straight stitch foot with a smaller hole.

Or you can stick a piece of clear scotch tape to the regular foot. Again, not a big fan of the tape trick, but in a pinch, it might work.

Or you can try to sew with the needle in the far left position. This will also help you avoid getting the silk fabric pulled down into the feed dogs.
Use Tissue Paper
Another trick to avoid having your silk fabric pulled into the feed dogs is to lay a sheet of paper between the needle plate and the material. Or you could place it between the silk and the needle.
For this technique, I recommend using tracing paper, gift wrapping tissue paper, or a lightweight tear-away stabilizer (which is much more expensive).
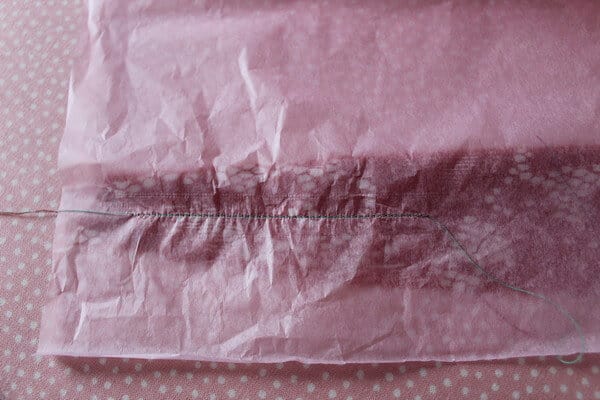
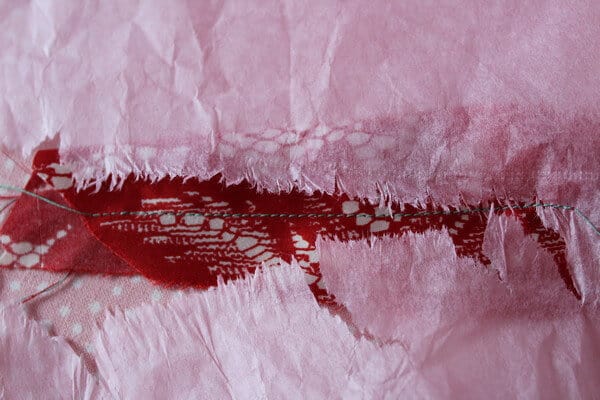
This will also help to prevent distorted seams, stretching the fabric, and will eliminate the fabric’s tendency to slide around. Once you finish stitching, just rip off the paper!
If the tearing gets tedious for you, just dampen the seams and watch it come off quickly & easily.
Before I bought the straight stitch plate and straight stitch foot, I used 5 cm strips on the bottom and narrower strips on the top (I put them even with the edge of the fabric). After a bit of practice, it is straightforward!
Use These Tips As Needed
Using all these tricks is not always necessary. They may be useful only for very thin, fine lightweight silk chiffon, georgette, organza, or habotai. Other types of silk fabric will be just fine with the regular settings. Try your stitching on scraps first to see if your machine produces even, regular stitches.
Use these tricks if your sewing machine will “swallow” the fabric. If not – then forget about them (until next time).
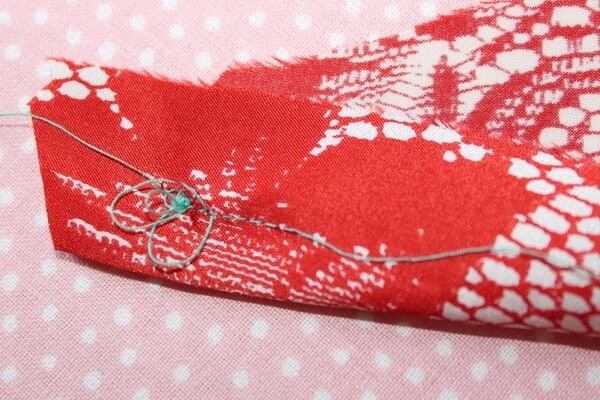
And as always, hold the thread ends behind the needle as you start sewing to prevent the fabric from getting under the needle plate and preventing threads from bunching, as seen in the image below.

Best Sewing Machine For Silk
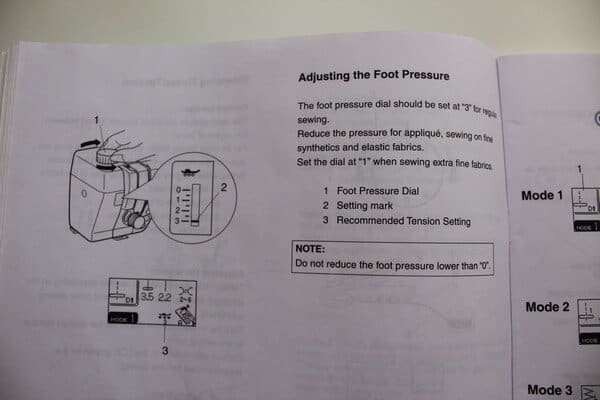
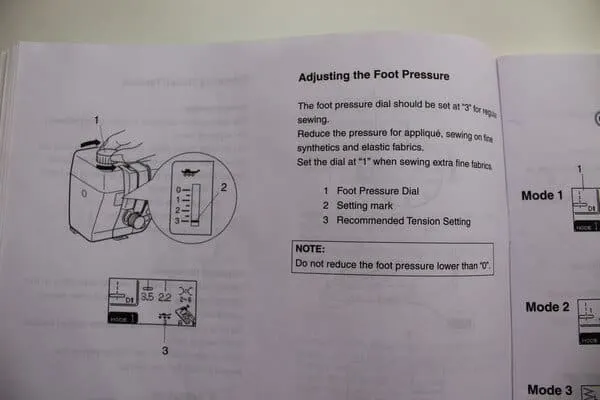
Most sewing machines (but not all) come with foot pressure regulators. This control isn’t obvious, and many sewists just never use it. But, if you are sewing very fine silk fabric, you must adjust the foot pressure. Otherwise, you may get skipped stitches, difficulty in guiding the fabric, and poor feeding of the fabric.
The foot pressure for chiffon, organza, Georgette, and other very lightweight silk fabric has to be different than for thick coat wool and denim.
So, check your sewing machine’s manual for the recommending settings. Then, find the pressure adjustment knob and move it to the setting for very lightweight fabrics. It is usually marked with an image of a presser foot.
This image shows what it looks like in my Janome 6600 sewing machine manual.
Again, practicing (on scraps) will help make a perfect garment!
How To Sew Silk FAQs
As you might guess, sewing silk can be tricky for many people, so I thought it might be helpful to answer a few questions I often see readers ask.
Is silk hard to sew?
Silk (and other slippery fabrics) have a reputation for being hard to sew, but the fabric isn’t the problem. The problem is a lack of knowledge about sewing techniques and machine settings. Learn those, and sewing silk becomes no harder than sewing other fabrics.
How to stabilize silk for sewing?
There are several ways to stabilize silk for sewing, so choose what works best with the fabric you are using. Common options include fusible interfacing for silk, tissue paper, or using a piece of the same fabric or a strip of organza.
How to sew silk without puckering?
Since silk is a fabric that tends to slide around as you work with it, treating it as you would sew other types of fabric will lead to skipped stitches, puckering, uneven hems, and more. To prevent this, adjust your machine settings and stabilize the fabric as you sew.
What To Sew With Silk Fabric
Once you learn all these tools and techniques, it’s time to put them to work! Here are some of the projects I’ve made with silk. It’s really a lovely fabric to work with once you learn how to do it and get great results.
How To Make A Silk Robe Without A Pattern
Sewing Made Simple: DIY Panties Tutorial
DIY Pillowcase From Natural Silk Fabric
How To Sew A Fitted Sheet (From 100% Silk Fabric)
Do you have other useful tips (for sewing silk) to share? If you want to learn more, I share about stitches and seams for silk fabric, basting, seam allowances, hemlines for silk garments, etc., in How To Sew Silk: Types Of Stitches And Seams.
Or you might find “Sewing With Silk: All You Need To Know” a helpful resource because it has all of my articles related to sewing with silk.
Did you find this tutorial helpful? If so, save this pin (see below) on your sewing board so you can come to the article later when you need this information on stay stitching , and follow me on Pinterest for more tips, tutorials, and inspiration!


latest posts
- Ditch My Sewing Machine? Not in This Lifetime!
- Adorable DIY Needle Book | Easy Tutorial for Beginners
- Master the Seam Ripper: Your Ultimate Guide to Precision Stitch Removal
- Think You Know Zippers? This Installation Guide Might Surprise You
- Why Does Your Seam Ripper Have a Red Ball? Discover Its Purpose!
- Topstitching Troubles? This Simple Trick Will Turn It Around Instantly!
- How to Sew Shirring: A Step-by-Step Guide to Elastic Thread Gathering
- Are Self-Threading Needles Really Useful?
- Amazon Spring Sale: Best Choices
