
In this sewing tutorial, you will find a detailed exploration of the basting stitch, an essential technique in the sewing process. We’ll discuss the importance of basting and the situations where it becomes particularly beneficial. I’ll show you the step-by-step methods for both hand and machine basting, advise you on how to choose the right needle and thread to avoid leaving marks on your fabric, and explain the common mistakes to avoid.

Basting in sewing is an age-old technique that can improve the accuracy and overall quality of your sewing projects. Essentially, it involves creating temporary stitches to hold fabric in place before final stitching.
Basting stitches are generally long and loose, making them easy to remove once the permanent stitches are in place. This technique is particularly useful for maintaining the alignment of fabric pieces, especially when dealing with slippery or stretchy materials, complex shapes, or when fitting a garment to a specific shape.
Basting can be done by hand or with a sewing machine, depending on your preference and the task at hand. It is a fundamental skill in sewing that, while simple, plays an important role in the overall success of a sewing project.
Why Baste a Seam?
Basting may seem like an old-fashioned technique, but it has undeniable benefits that can make the difference between a homemade and a professionally finished project. It’s a testament to the saying “slow and steady wins the race,” especially when it comes to sewing.
In my personal sewing experience, I initially basted everything to ensure I had the utmost control over my projects. As I became more comfortable with sewing, I started to rely on pins for quicker assembly. Yet, I still do basting for those “special occasions” where precision is non-negotiable.

Basting is not necessary for every sewing project, as there are many alternatives available that can save time and effort. But there are specific situations where basting is either a must or can be highly beneficial compared to using pins or other methods.
Situations Where Basting Stitch is a Must
- Handling Slippery or Delicate Fabrics
Fabrics like silk, chiffon, or lightweight very stretchy knits can shift easily, making basting stitches essential for accurate sewing.
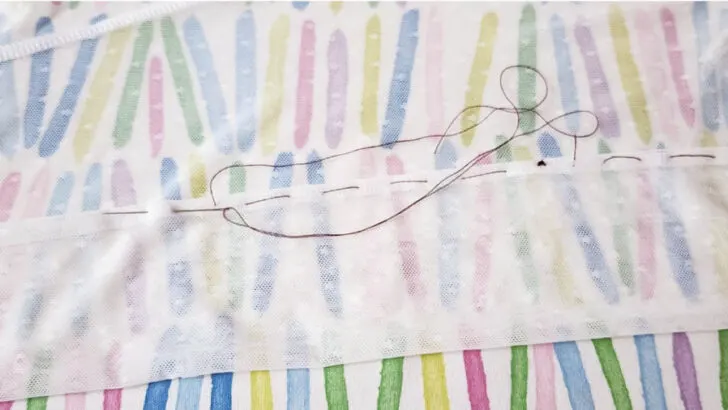
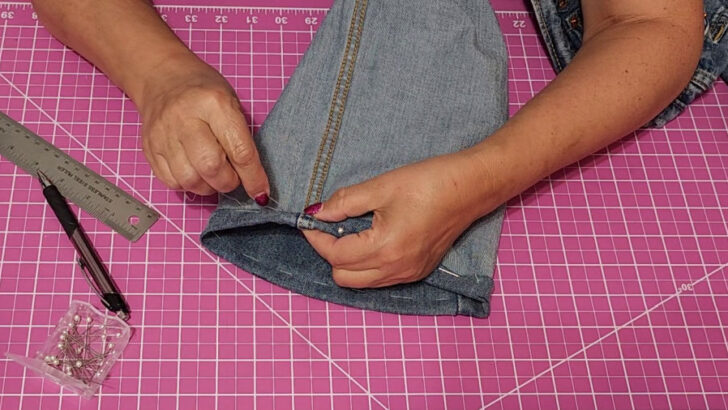
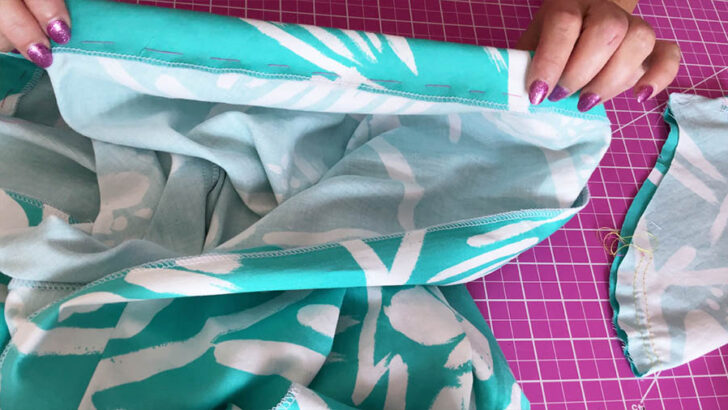
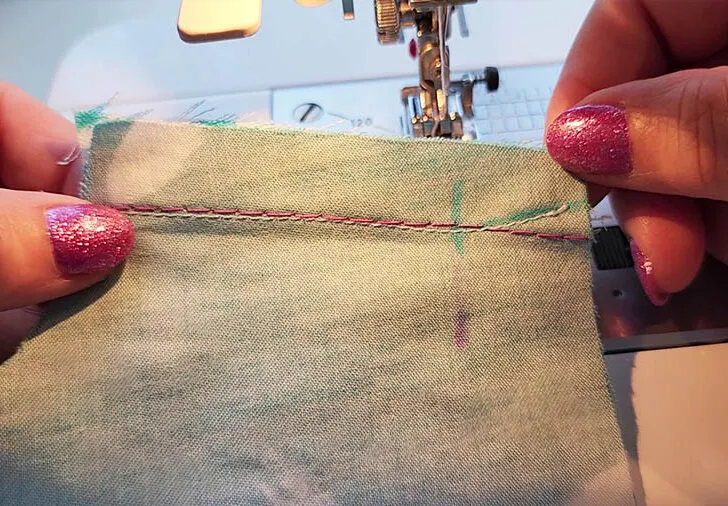
In the image below, you can see how I’ve carefully basted the hem of a t-shirt that was too long for my husband. This preparatory step allowed me to securely hold the fabric in place before taking it to my coverstitch machine. The basting stitches are easily visible, providing a clear guide for where I should be sewing the coverstitch. By basting the hem first, I made sure that the fabric doesn’t shift as it’s fed through the coverstitch machine, resulting in a neat, even hem.
✅ Related tutorial: Coverstitch vs. Serger
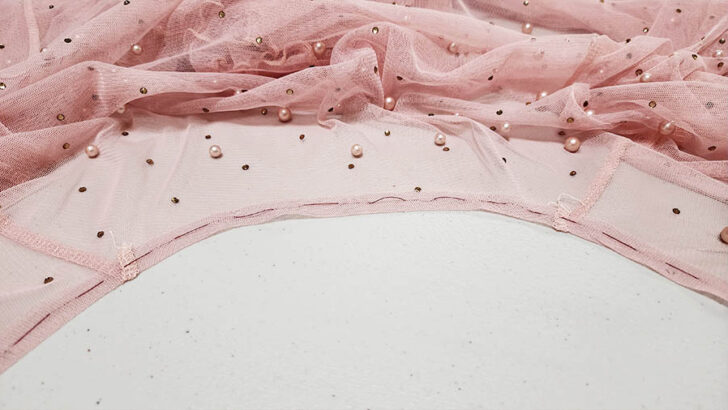
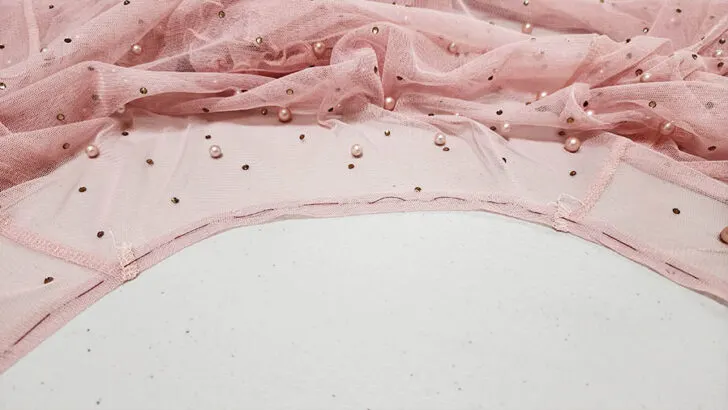
2. Sewing Highly Curved Seams
When sewing curves, such as necklines or armholes, basting helps maintain the shape without puckering.
3. Setting in Sleeves
To prevent tucks and ensure a smooth cap, basting stitches are crucial for attaching sleeves properly.

4. Matching Patterns
For precise alignment of stripes, plaids, or other patterns, basting is necessary to keep the design consistent.

5. Attaching Sew-in Interfacing or Lining
Basting keeps these layers from shifting during construction.
6. Creating Pleats or Tucks
To hold these folds in place before sewing, basting is more reliable than pins.
7. Installing Zippers
Especially for invisible zippers, basting ensures they are correctly aligned and lay flat.
8. Tailoring
Basting is integral to shaping garments for a custom fit.
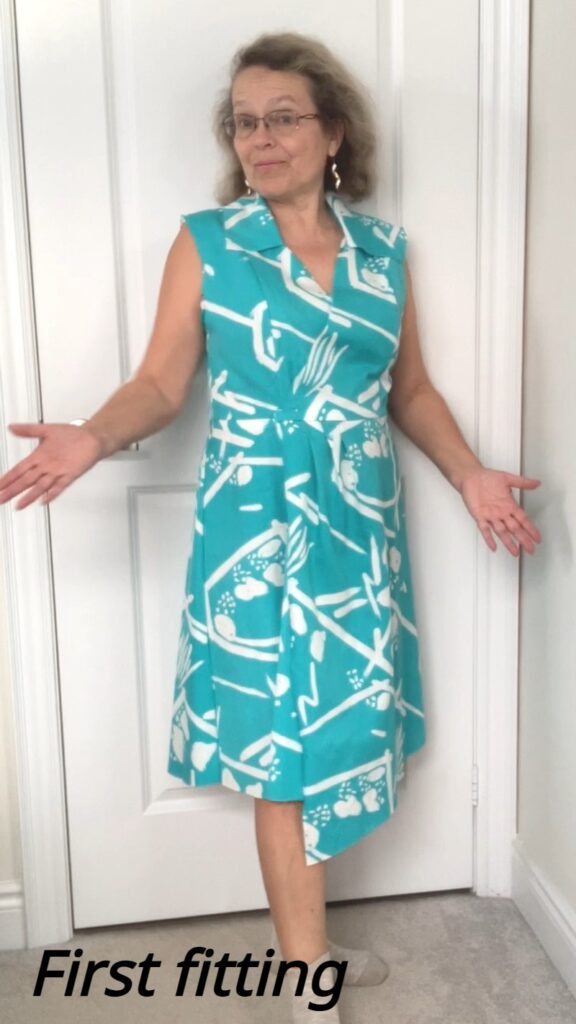
For those interested in seeing basting in action during garment construction, I invite you to visit my tutorial How to Sew a Dress Using a Pattern: A Step-by-Step Guide. I’ve used machine basting to prepare all the seams of the dress for the first fitting.The image below showcases the dress at this stage, with me trying it on to demonstrate the effectiveness of basting in achieving the right silhouette.

Situations Where Basting is Beneficial
1. Quilting
While pins or clips can be used, basting keeps all layers stable, especially for large quilts.
✅ Related tutorial: Quilt basting tutorial – learn different ways to baste a quilt
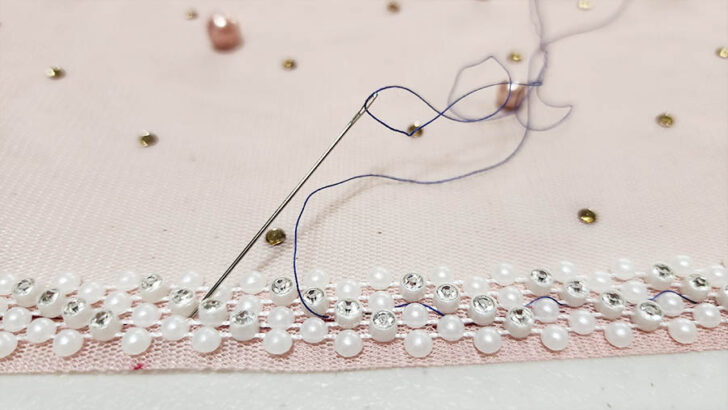
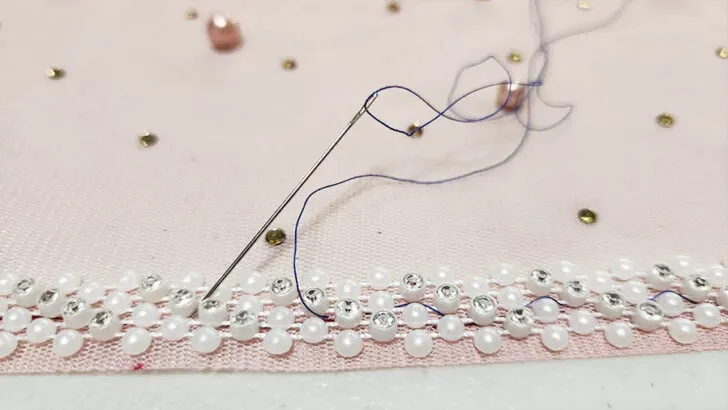
2. Attaching Trims or Ribbons
Basting helps position these embellishments accurately before final sewing.
3. Sewing Bulky Fabrics
To prevent layers from shifting, basting can be more effective than pins.

4. Constructing Pockets
For precise placement and to prevent the pocket from moving, basting is helpful.
5. Sewing on Bias
Basting keeps bias-cut fabric from stretching out of shape.
✅ Related tutorial: How to cut fabric on the bias
6. Working with Multiple Layers
When sewing through several layers, basting can help keep everything aligned.
While pins, clips, and direct sewing are suitable for many tasks, basting has its unique place in sewing where precision and control are necessary. It’s about choosing the right technique for the job, and often, basting is that technique.
Types of Basting
Basting stitch can be done in various ways, each with its specific applications and advantages. The main types of basting are hand basting and machine basting, and within these categories, there are several techniques to choose from based on the needs of your sewing project.
Both hand and machine basting serve the same purpose: to temporarily hold fabric in place. The choice between them depends on the specific requirements of the sewing task at hand, the type of fabric being used, and the sewist’s personal preference.
Hand Basting
Here are some common hand basting techniques.
Even Basting
Even basting is widely used for its simplicity and effectiveness. In even basting, the stitches are intended to be of equal length on both the front and the back of the fabric, which creates a uniform appearance and provides a stable hold for the fabric layers. This method is often employed for general purposes across various sewing projects, from garment construction to quilting.
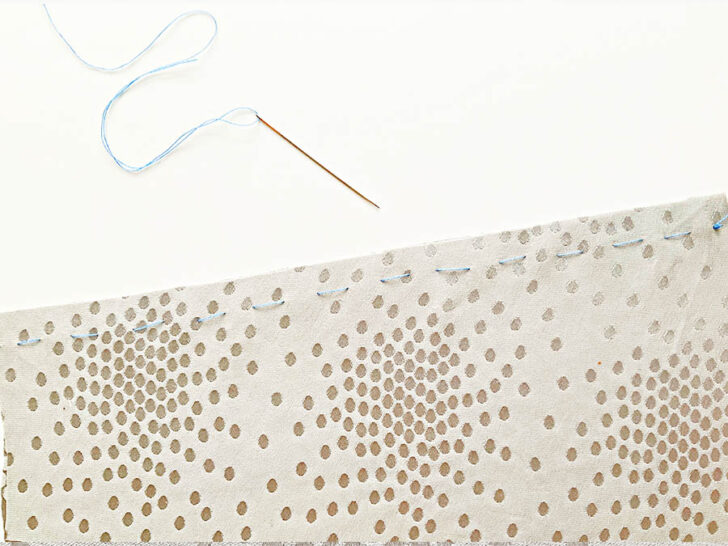
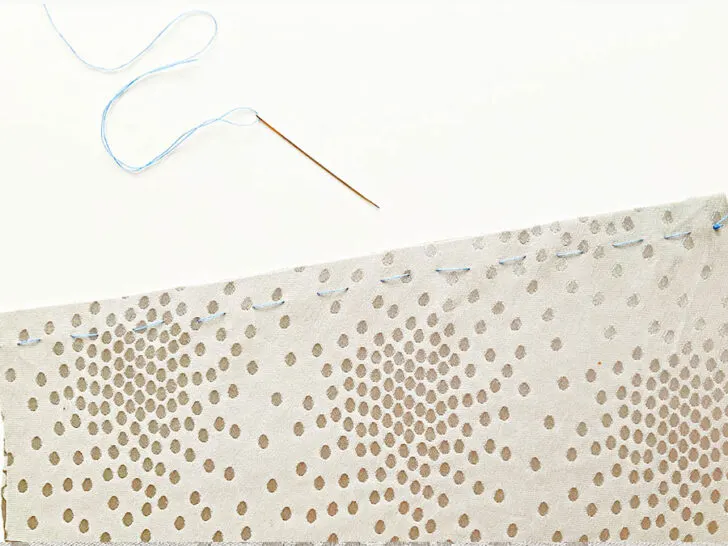
It’s an excellent way to prepare seams before machine sewing, ensuring that the fabric doesn’t shift as it’s fed through the machine.
While the aim is to create stitches of equal length, the “evenness” of the stitches in even basting is not a strict requirement. The priority is to hold the fabric together effectively rather than achieving precise stitch lengths.
In practice, the slight variations in stitch length that naturally occur when basting by hand are perfectly acceptable. The key is that the basting serves its purpose as a temporary guide and stabilizer, not as a showcase of meticulous handiwork. So, while the stitches in even basting are generally uniform, a bit of irregularity doesn’t compromise the technique’s utility in the sewing process.
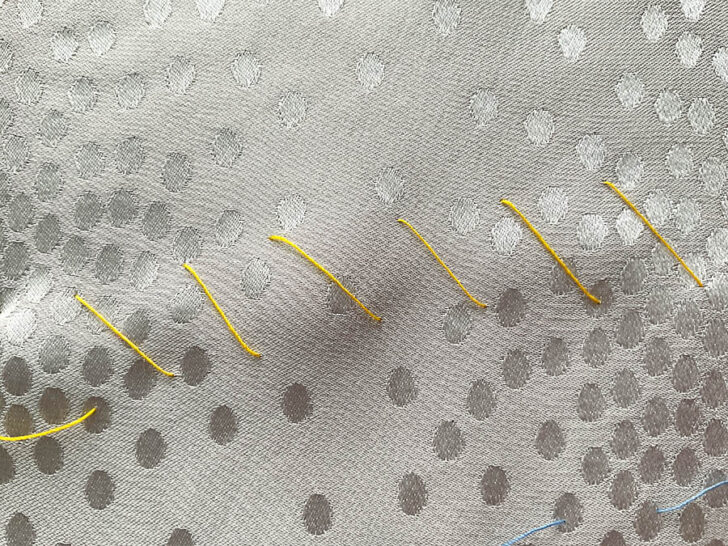
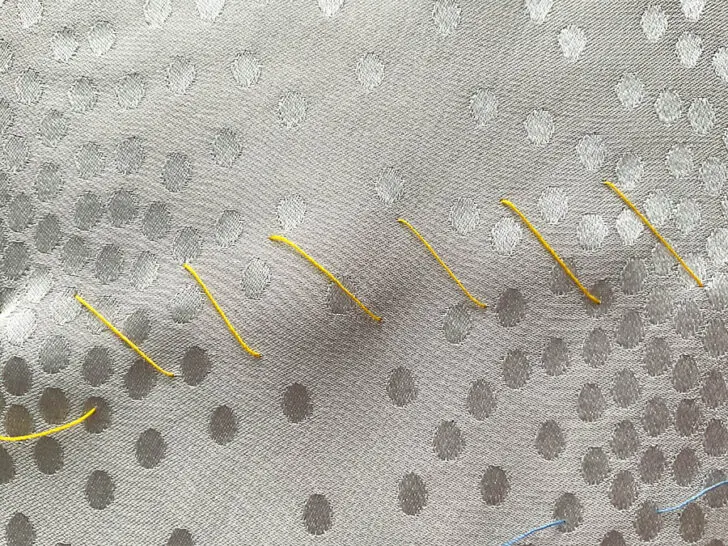
Uneven Basting
Also known as a combination of short and long stitches, uneven basting is used when more holding power is needed on one side of the basted area than the other. The longer stitches are visible on the top side of the fabric, while the shorter stitches appear on the underside, creating an irregular pattern.
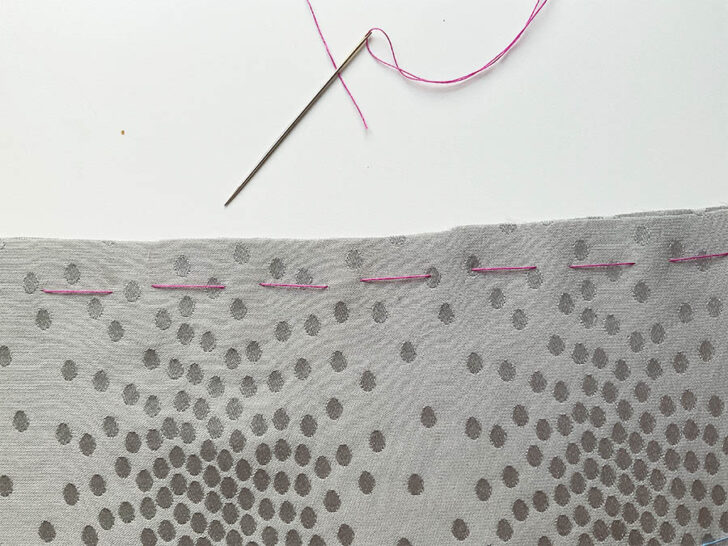
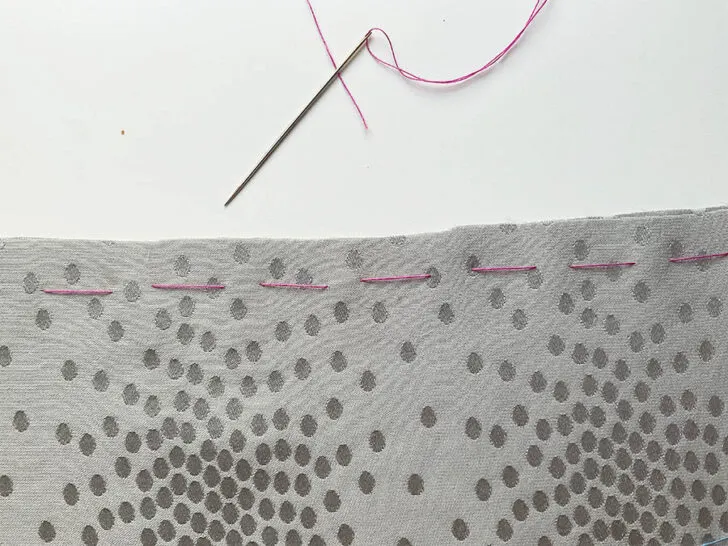
This type of basting is particularly useful when working with fabrics that require different tensions across the seam, such as when easing a sleeve cap into an armhole or setting in gathers. The longer stitches can hold the fabric in place where less tension is needed, while the shorter stitches provide greater control in areas where the fabric needs to be eased in without puckering.
This basting method can be used when working with curved seams, or to temporarily set hems, pleats, or other design elements that may need to be adjusted for fit or alignment before final sewing because uneven basting allows for slight adjustments in the fabric.
Diagonal Basting
Diagonal basting, also known as tailor’s basting, involves making a series of parallel, diagonal stitches. This type of basting is useful for holding multiple layers of fabric together, such as when attaching an interfacing or lining to a garment piece. The diagonal orientation of the stitches provides a strong hold while maintaining the flexibility of the fabric, which is important in tailoring to achieve a proper drape and fit.
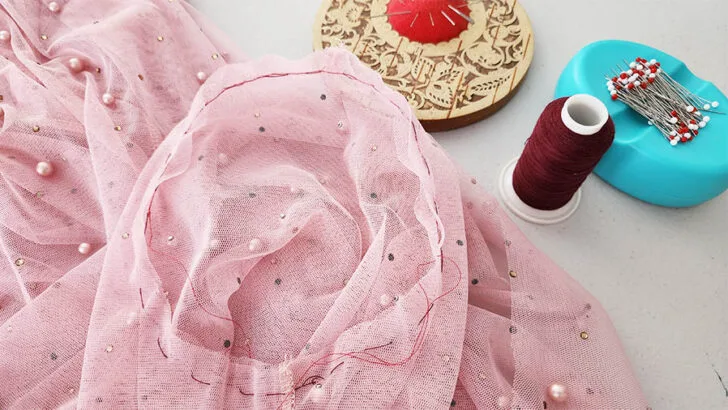
Slip Basting
Slip basting is used for very precise placement of fabric layers, such as when matching plaids or stripes. It involves making a series of small, even stitches along the seam line.
The primary purpose of slip basting is to provide a secure, temporary hold that ensures perfect placement of fabric layers without shifting.
Because slip basting is done so close to the seam line, it offers an excellent guide for final stitching. The accuracy of slip basting makes it an invaluable technique for achieving professional-looking seams in tailored garments and couture sewing.
While it may be more time-consuming than other basting methods, the results justify the effort, particularly in high-quality garment construction.
Machine Basting
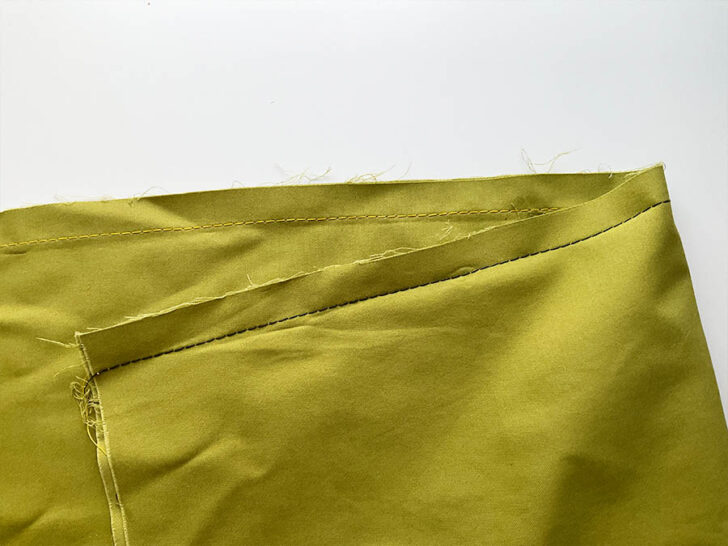
Machine basting is faster than hand basting and more suitable for long seams or when quick assembly is needed.
For machine basting, use a regular straight stitch set to the longest stitch length on the sewing machine. It’s quick to do and easy to remove, and it’s useful for a variety of general sewing tasks.

I have a routine when it comes to sewing garments: I always use machine basting to assemble the entire piece before the first fitting. This approach allows me to create a temporary version of the garment that can be easily adjusted.
It’s an important step in my process because it shows me exactly how the garment fits on the body without committing to permanent stitches. If any adjustments are needed, whether it’s taking in a side seam or letting out a dart, the basting stitches can be quickly removed, and the pattern can be altered accordingly. This method saves me time in the long run and helps to ensure a well-fitted final product.
Materials and Tools Needed for Basting
Note: Some of the links on this page are affiliate links. This means I will receive a commission if you order a product through one of my links. I only recommend products I believe in and use myself.
Thread – choose a thread color that contrasts with your fabric for easy visibility and removal, and use smooth, lightweight thread to prevent any damage to the fabric.
 Each Spool for Quilting, Serger, Sewing and Embroidery - 24 Basic Colors")
Needles – long, sharp needles, such as milliner’s or basting needles, are preferred for hand basting due to their length and ease of use.
✅ Related tutorial: Types of Hand Sewing Needles and Their Uses: A Guide for Modern Sewists
Pins – straight pins can temporarily secure fabric before basting, serving as quick reference points or to hold sections in place.
✅ Related tutorial: Types of sewing pins and their uses: all you need to know about straight pins for sewing
Sewing Clips – useful for holding together multiple layers of fabric or bulky materials before basting.
✅ Related tutorial: Sewing Clips vs. Pins | Which To Choose?
Scissors – keep a sharp pair on hand for cutting thread.
✅ Related tutorial: Cutting Tools For Sewing: The Ultimate Guide
Seam Ripper – an essential tool for quickly and safely removing basting stitches without harming the fabric.
✅ Related tutorial: How to use a seam ripper
Ruler or Measuring Tape – necessary for ensuring that hems, pleats, and other elements are evenly and accurately basted.
✅ Related tutorial: All About Tape Measure for Sewing: Ultimate Guide
Marking Tools – chalk or erasable pens are used to mark where basting stitches will be placed on the fabric.
✅ Related tutorial: Your Guide For Choosing The Best Quilt Marking Pens For Every Project
How to Baste by Hand Step-by-Step
Step #1. Prepare Your Fabric
Remove any wrinkles or folds that could affect the placement of your basting stitches. You don’t need to iron the fabric, just smooth it by hand.
Step #2. Choose Your Thread and Needle
Select a contrasting thread for visibility and easy removal. A thin lightweight thread size 50 is the best. Don’t use a very long thread, cut a length of about 18 inches to prevent tangling.
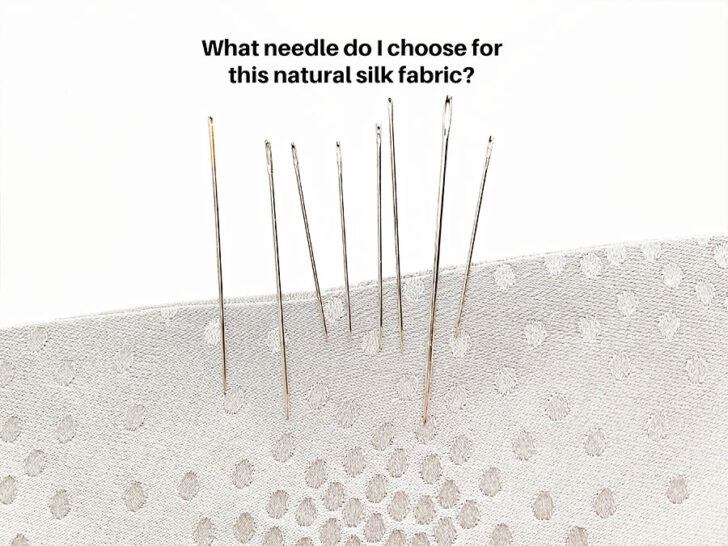
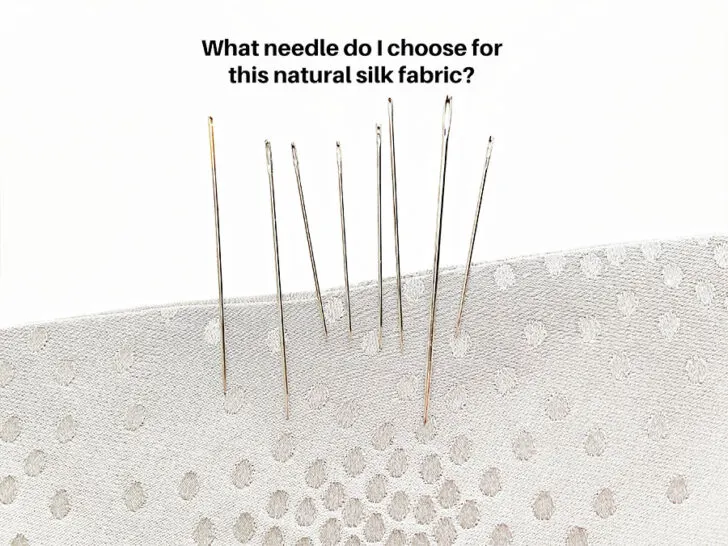
Use a thin and sharp hand sewing needle, such as size 10, because it is fine enough to pass through the fabric without leaving noticeable holes. This is particularly important when working with tightly woven, lightweight, or knit fabrics that could be damaged by a larger needle.

Step #3. Thread the Needle
Use a single strand of thread through the needle and tie a knot at one end.
✅ Related tutorial: How To Thread A Needle For Hand Sewing (9 Easy Tips + Videos)
Step #4. Position Your Fabric
You can use pins or sewing clips to temporarily secure the fabric layers.
Step #5. Create the Basting Stitches
Insert the needle at one end of the seam. Sew a running stitch with stitches and spaces approximately 1/4 to 1/2 inch in length. Adjust stitch size as needed for more detailed work.
Basting stitches are a temporary fix. They hold fabric in place until more permanent stitches are applied, and because of this, the uniformity and exact length of basting stitches aren’t a priority.

The primary goal of basting is functionality over perfection; it’s about securing the fabric, not creating a flawless look. Basting should be done quickly to save time, considering that these stitches will be removed later on.
When you’re basting, the focus should be on the function of the stitches rather than their form. Move swiftly and don’t stress about maintaining a perfect stitch length. Basting is not meant to showcase sewing skills. It’s a practical step designed to ensure the final product turns out better.
Step #6. Secure the End
At the end of the basting line, secure the thread with a few small backstitches or leave a thread tail.
Step #7. Inspect Your Work
Check the basted fabric for any puckers or misalignments and adjust if necessary.
Step #8. Proceed With Sewing
With your fabric now stable and aligned, you can confidently sew your seam.
Step #9. Remove the Basting Stitches
After sewing, carefully remove the basting stitches, using a seam ripper if needed, and being cautious not to damage your final stitches or fabric.
How To Baste By Machine
Machine basting is a quick way to temporarily hold pattern pieces together before sewing them permanently. Here’s how to machine baste step-by-step.
Step #1. Set Up Your Sewing Machine
Install a regular presser foot and a needle that is appropriate for the fabric you’re working with.
Step #2. Select the Straight Stitch
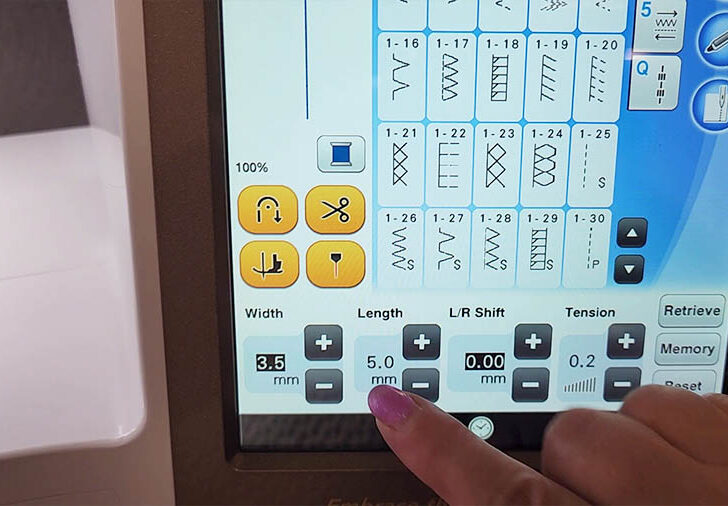
Adjust your sewing machine to the longest straight stitch setting, which is typically between 4.0 and 5.0 mm in length. Set the tension to 0 or almost 0 (like 0.2).This makes the basting easy to remove later.

Step #3. Thread the Machine
Choose a thread color that contrasts with your fabric for easy removal. Thread your machine as you normally would, including both the top thread and bobbin.
Step #4. Prepare the Fabric
Use pins or sewing clips to temporarily hold the layers in place if necessary.
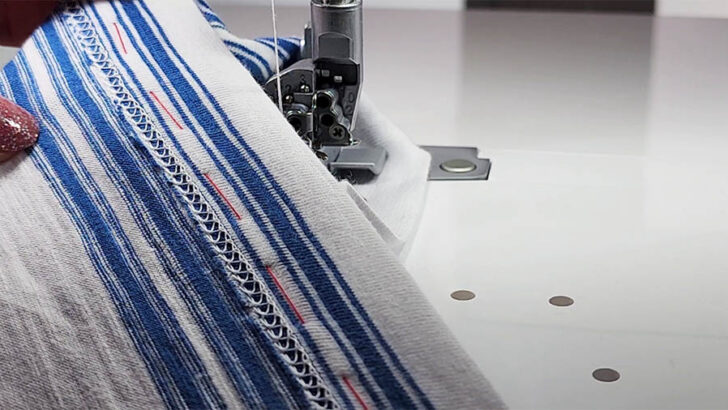
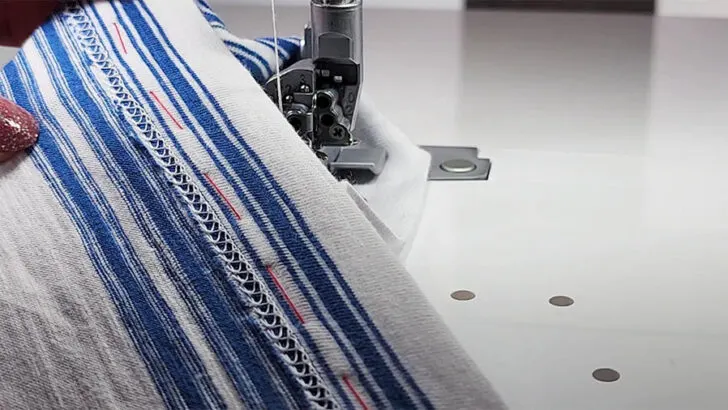
Step #5. Sew the Basting Stitch
Place the fabric under the presser foot, starting at one end of the area to be basted. Lower the presser foot and needle into the starting position. Begin sewing, guiding the fabric through the machine without backstitching at the beginning. Maintain a consistent speed for even stitching. When you reach the end of the area to be basted, do not backstitch. Instead, leave long thread tails before cutting the threads.
Step #6. Inspect the Basting
Check to ensure the basting stitch has properly held the fabric layers together without puckering or shifting.
Step #7. Proceed With Sewing
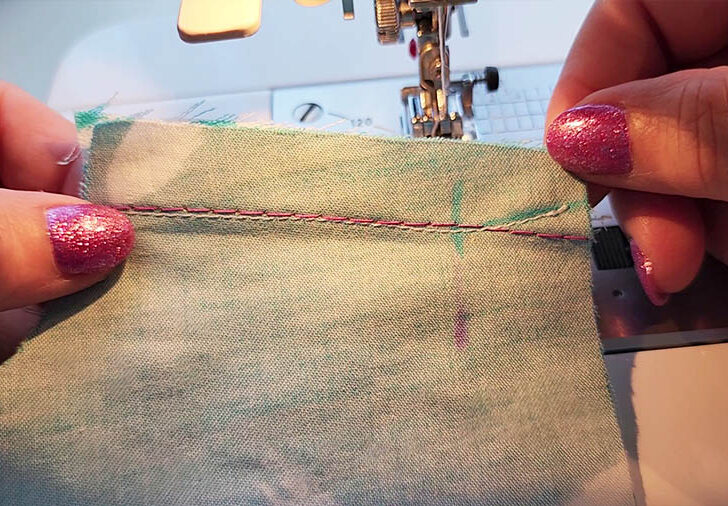
Sew the permanent stitches as required for your project. The basting will keep the fabric stable during this process. Sew the permanent stitches as close to the basting stitches as possible, but try not to sew over basting thread.
Step #8. Remove the Basting
Once the permanent stitching is complete, carefully remove the basting stitches. The long stitch length and contrasting thread color should make this easy to do without damaging the fabric.
Common Mistakes to Avoid in Basting
There are some common mistakes that can impact the effectiveness of your basting stitches. Here are some key points to keep in mind to avoid errors in basting by hand or by machine.
Incorrect Stitch Length
Basting stitches are meant to be temporary and easily removable, which is why they should be longer than regular sewing stitches. Making basting stitches too short can make them difficult to remove and may also cause unnecessary puckering of the fabric.
Typically, a basting stitch length of about 1/4 to 1/2 inch is recommended for hand basting, and the longest straight stitch setting on your sewing machine for machine basting – 5mm for most machines.
Neglecting Thread Contrast
Choosing a basting thread color that stands out against your fabric is a wise decision. A contrasting thread color will not only help you see the basting stitches more clearly during the sewing process but also make it much easier to identify and remove them once they are no longer needed. This simple step can prevent accidentally snipping your permanent stitches or fabric when taking out the basting.
Using a Large Needle
A large needle can be detrimental to your fabric, especially if it’s delicate or prone to showing needle marks. When you baste with a needle that is too big for your fabric, it can leave noticeable holes or even cause snags and runs. This is particularly problematic when the basting stitches are removed, as the fabric may not fully recover, leaving unsightly marks or damage. So select a finer needle that is appropriate for the weight and weave of your fabric to ensure clean, small punctures that close up neatly once the basting thread is taken out.

Skipping Securing Ends
While backstitching is not used in machine basting because it can make the stitches harder to remove, it’s important to leave long enough thread tails at both the start and end of your basting. This prevents the basting stitches from coming undone as you handle the fabric. For machine basting, simply leave long tails of thread. For hand basting, you can either leave a tail or use a couple of smaller stitches at the end to secure the thread.
Tension Issues
The tension of your basting stitches should be relatively light. Pulling the thread too tight can cause the fabric to pucker, which defeats the purpose of basting and can create problems when you sew the permanent seam. The fabric should lay flat and smooth after basting, with the stitches holding the layers together without distorting them.
If you found this tutorial on a basting stitch helpful, please consider pinning the image on Pinterest so you can easily find it again later and share it with others who might find it useful. Simply hover over the image and click the “Pin It” button that appears. Thanks for your support! Follow me on Pinterest for more tips, tutorials, and inspiration!

latest posts
- Ditch My Sewing Machine? Not in This Lifetime!
- Adorable DIY Needle Book | Easy Tutorial for Beginners
- Master the Seam Ripper: Your Ultimate Guide to Precision Stitch Removal
- Think You Know Zippers? This Installation Guide Might Surprise You
- Why Does Your Seam Ripper Have a Red Ball? Discover Its Purpose!
- Topstitching Troubles? This Simple Trick Will Turn It Around Instantly!
- How to Sew Shirring: A Step-by-Step Guide to Elastic Thread Gathering
- Are Self-Threading Needles Really Useful?
- Amazon Spring Sale: Best Choices
