
When I first heard about foundation paper piecing from my friend and saw the quilt she made I thought that paper piecing is complicated and time-consuming. How to sew on paper? What is it?
But I was intrigued for a while and in the end, decided to try this method. And I am glad I did! It’s not complicated at all, it’s actually quite simple and allows to make blocks with the greatest accuracy.
The idea of foundation paper piecing is that you cover a paper shape with fabric, sew the pieces (fabric and paper) together, then remove the paper while the fabric block stays intact.

Paper piecing designs look very beautiful and interesting and it’s also a great way to get rid of scraps of your favorite fabrics. It also significantly speeds up the process of preparing blocks for quilts.
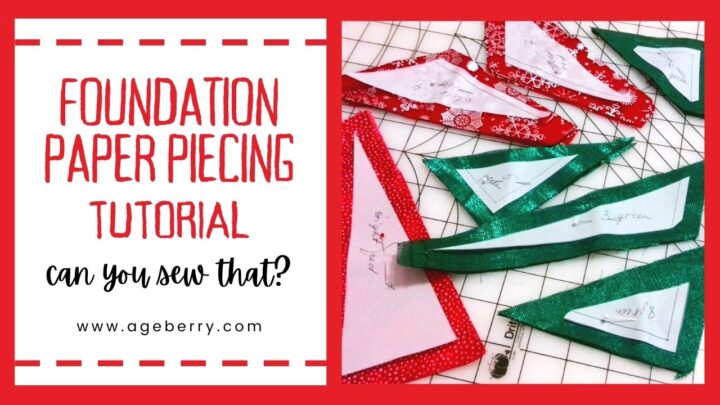
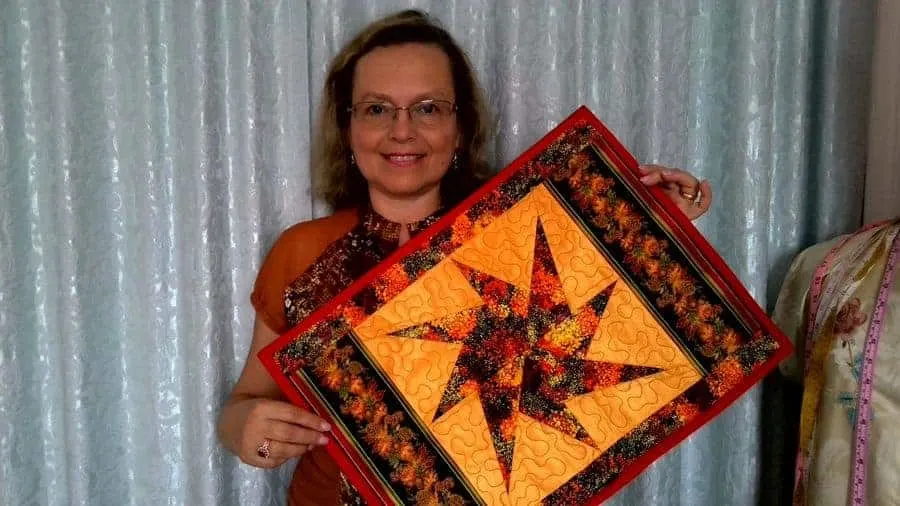
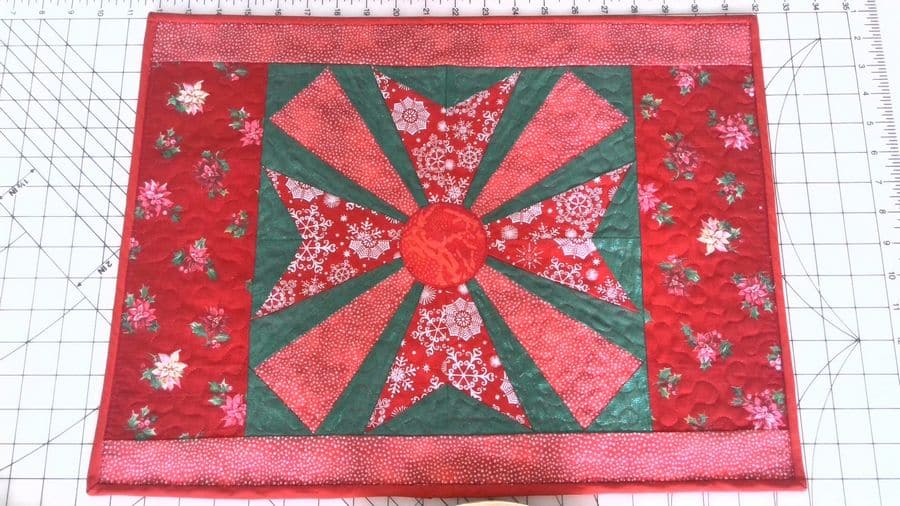
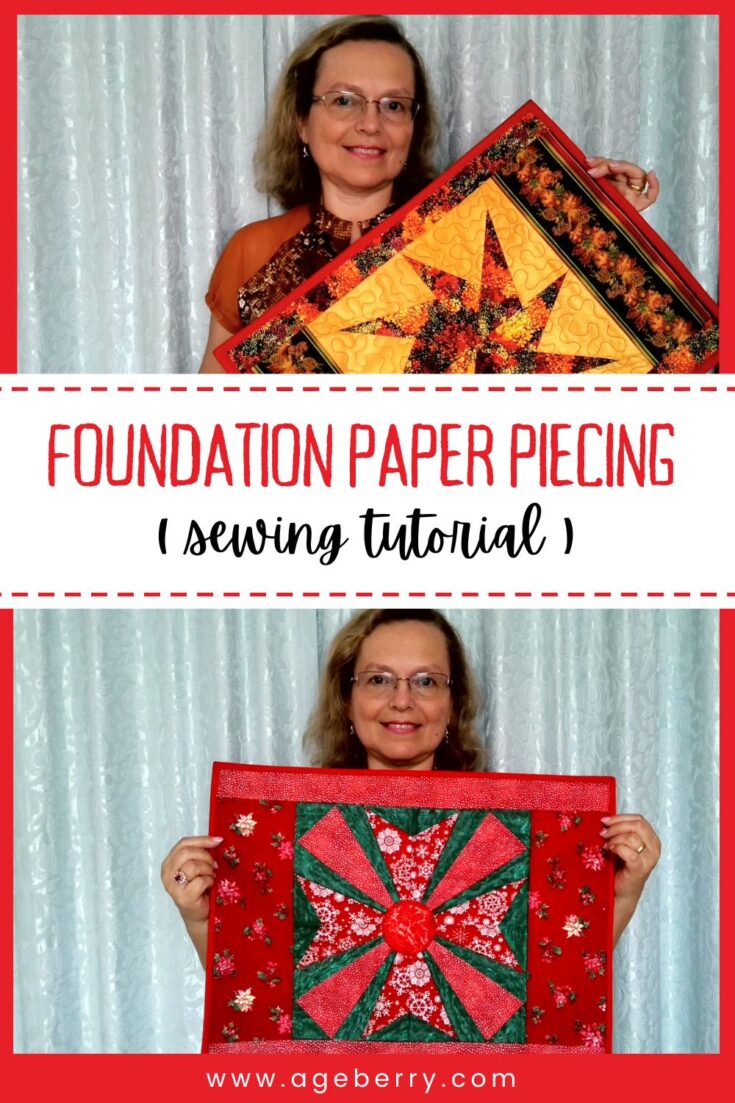
So, I made this reversible placemat (one side is for Thanksgiving, and another side is for Christmas) using foundation paper piecing (for the first time), and here is a tutorial so you can easily make it too.

Note: Some of the links on this page are affiliate links. This means I will receive a commission if you order a product through one of my links. I only recommend products I believe in and use myself.

 Paper piecing supplies – what you’ll need
You don’t need any specific skills. Only a few pieces of fabric, a good pattern, and a desire to create something special. Plus some inexpensive standard quilting tools you probably already have.
Fabric in 9 colors (or actually as many varieties as you wish)
Paper piecing patterns
Vellum paper (or any other paper suitable for paper piecing)
Mini-iron (optional)
New sewing machine needle
Good quality thread (matching colors)
Open toe presser foot (optional)
Sewing machine (of course)
I would like to add here that it’s better to use pieces of fabric in contrasting colors to highlight a design.
Attention! If you like the video format, at the bottom of this post, look for a YouTube video version where there is a step-by-step tutorial on how to do foundation paper piecing. For a more complete picture, I recommend exploring both versions.
STEP 1
Making foundation piecing patterns
I could buy some nice patterns for my paper pieced project (there are also plenty of free paper piecing patterns) but I decided to create 2 simple foundation piecing patterns myself.
Why? Because I wanted it to be simple (remember, it’s my first paper piecing project), I wanted it to be exactly the size I need for my placemat (placemats have standard sizes after all), and it was fun to make!
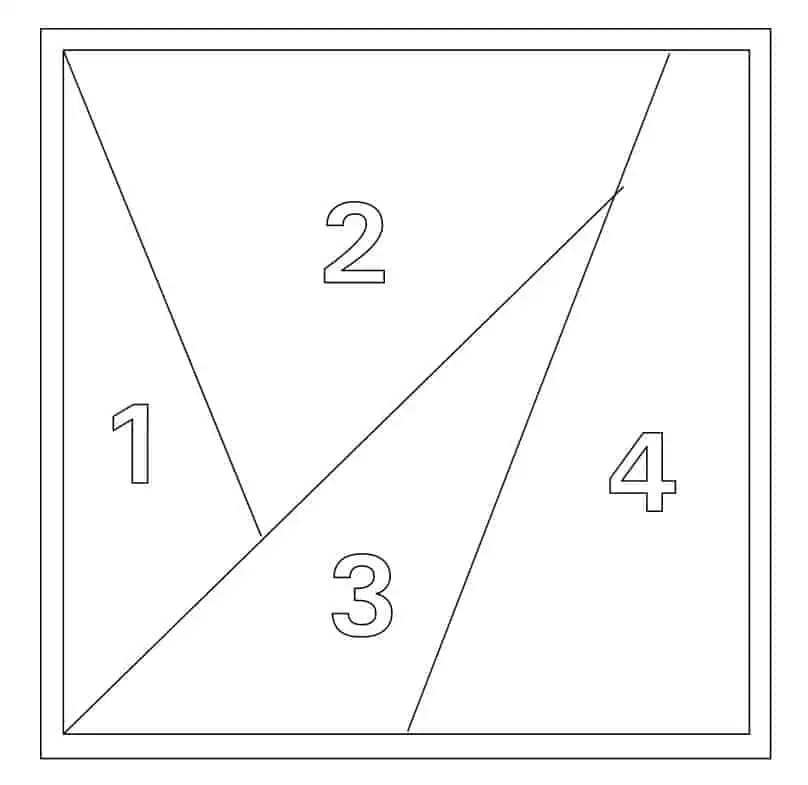
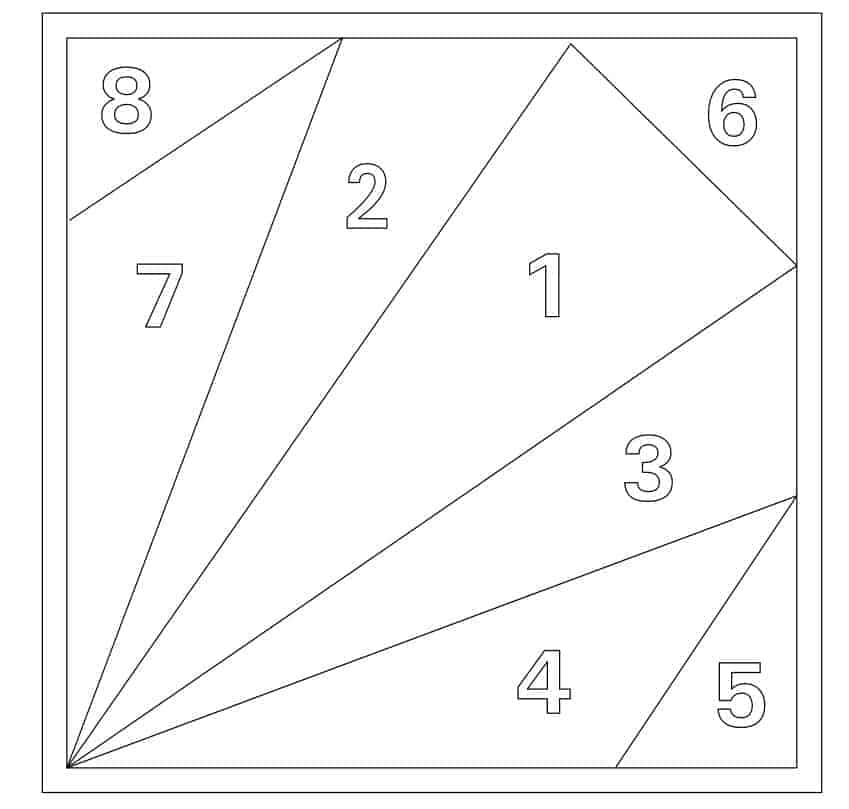
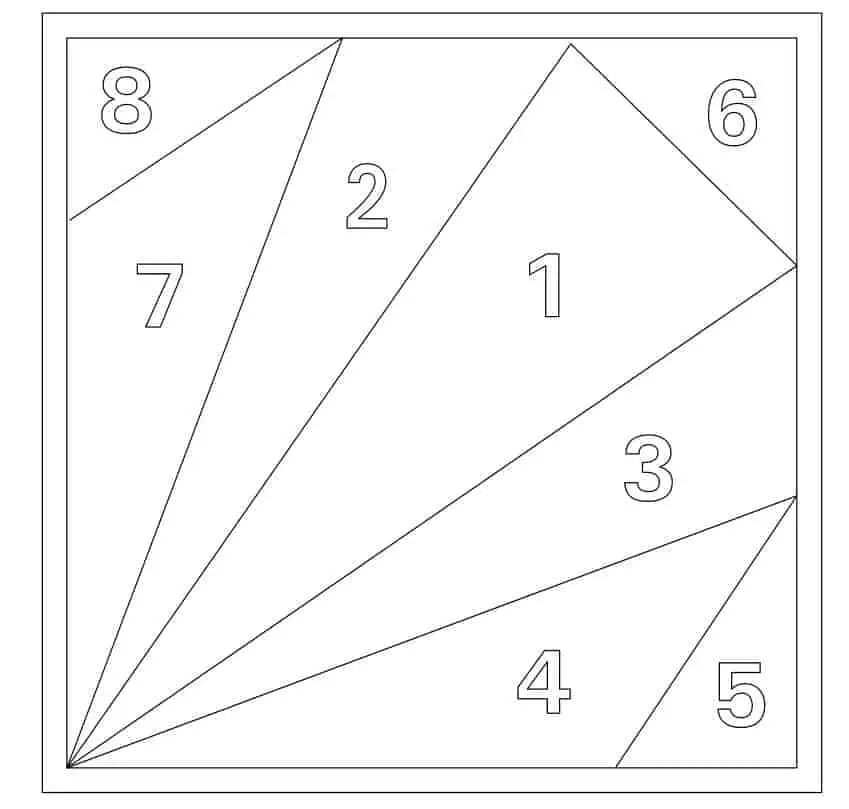
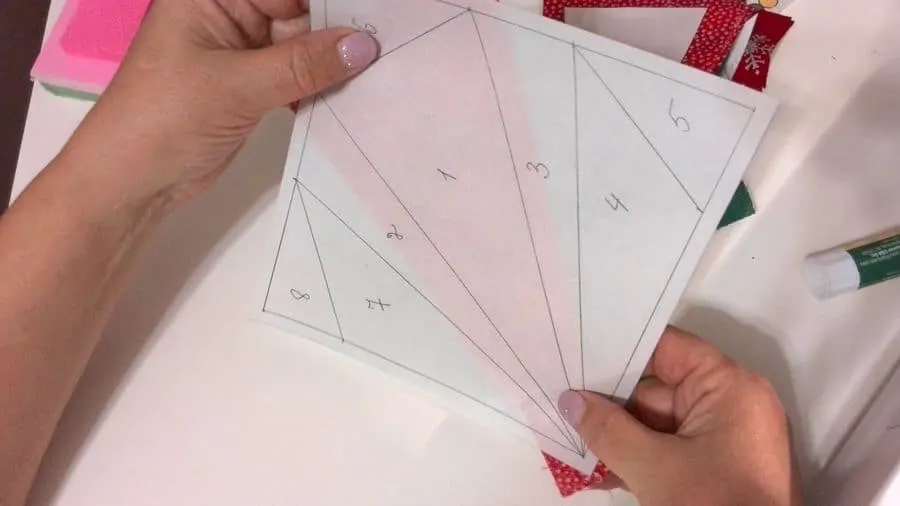
I drew 2 squares 6 x 6 inches and added ¼ inch seam allowances. After that, I just drew some lines to make my designs.
If you are going to draw a design for paper piecing yourself be sure to number every piece, as shown in the images below. We do this in order not to confuse the stitching sequence of the pieces.
Or, if you subscribe to my newsletter, you can download these patterns for free from my “Free resource library of files, printables, and patterns – Ageberry: helping you succeed in sewing” page. If you are not a subscriber you can use the below form to subscribe and you will receive in an email instructions how to access the Resource Library.

STEP 2
Preparing foundation paper for quilting
I was surprised to find out that I can use many types of paper for my paper piecing project. Although now there are new materials that are used instead of paper and they don’t even have to be torn off later (like embroidery stabilizers).
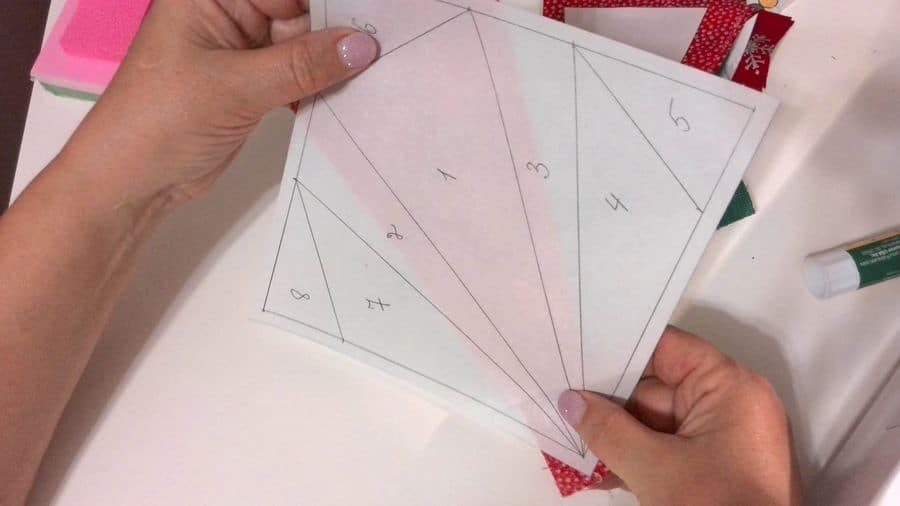
I decided to go with vellum paper and the main reason for this is that I can easily see the pattern on both sides of this paper which is very helpful.
Try to use the thinnest paper, then it’s easier to tear it off from stitched canvas.
To sew a placemat, you need to prepare 4+4 identical blocks, which will then be sewn together.
Print the template (can be downloaded here) in 5 copies for each block: 4 – for direct stitching and one – for cutting fabrics.
I would add here that there is a way to make necessary copies without a printer (it’s especially helpful if you use rolls of paper for piecing and not already cut sheets) and facilitate your work. Simply stitch a few sheets of paper on a sewing machine without threading a needle along the lines of the design and get the required number of copies of the blocks.
For this procedure, take a not very sharp old needle. Then replace it when you sew the fabric because the needle will quickly become dull from sewing on paper and begin to “catch” the fabric.
STEP 3
Cut the fabric
Cut one of the copies for each block along the marked lines.
I read that you can use just odd pieces of fabric for your paper piecing project and freehand cut fabric roughly larger than your paper pieces. But I found out that I save a lot of fabric and make sewing easier if I pre-cut pieces using my templates with added seam allowances.
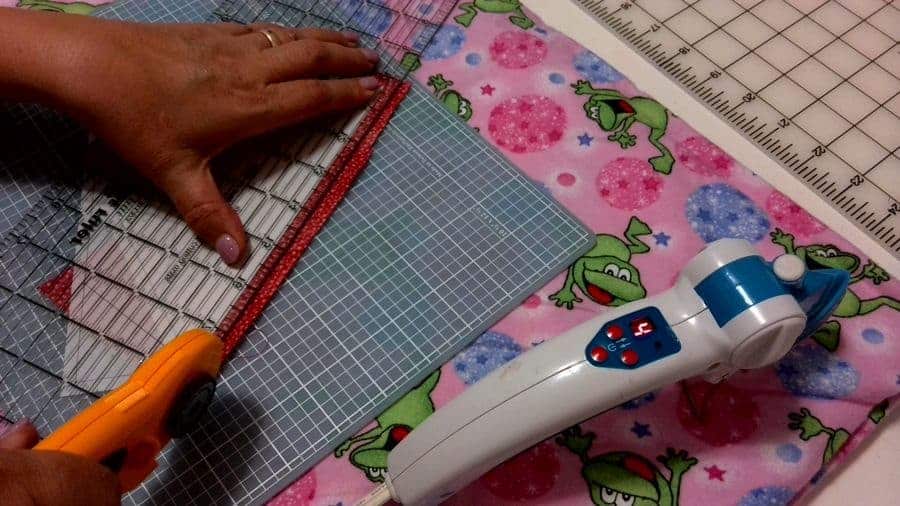
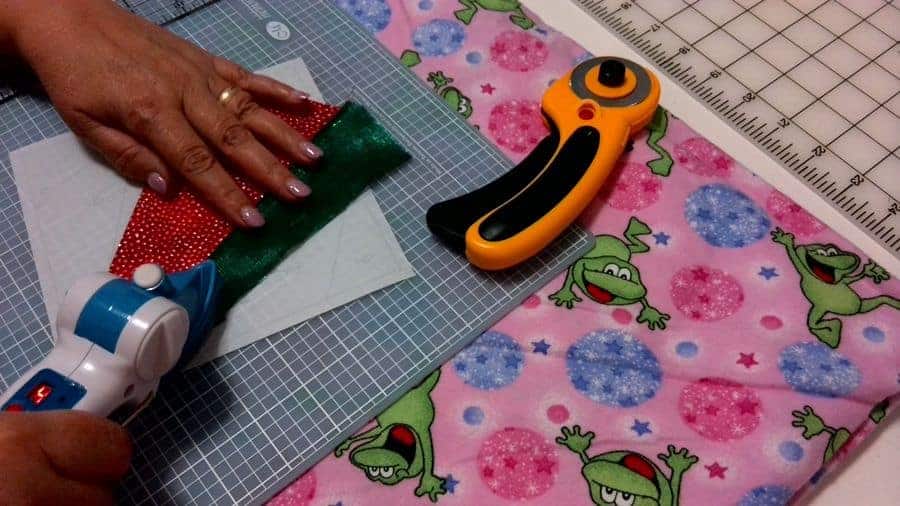
Cut the required number of shapes from fabric (with seam allowances) according to the pattern (use the 5th printed sheet). I just make seam allowances half-inch not ¼ inch. It’s really easy and fast to do with my quilting ruler and a rotary cutter. I just need to be sure that my fabric shapes are big enough to fit around paper pieces.
You can stack up a few pieces of fabric and cut several pieces at once – it’s faster this way.
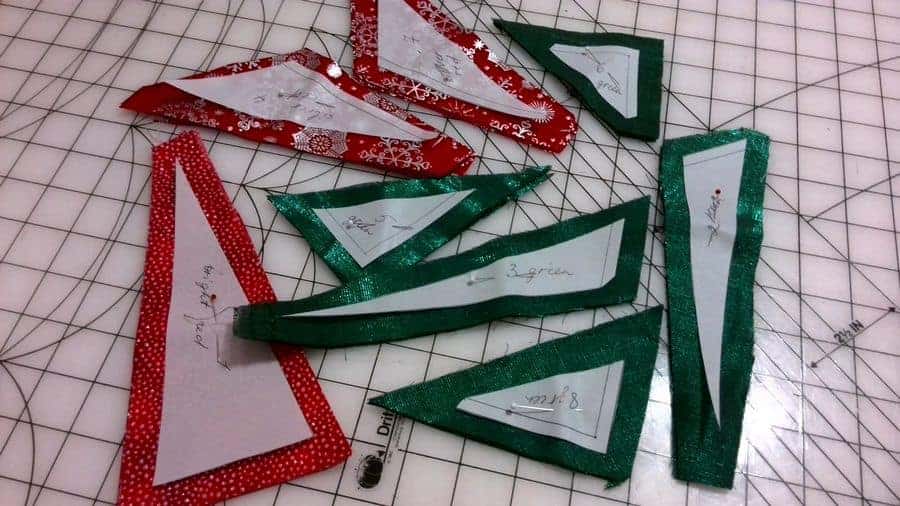

After that, I organize everything for easy sewing placing all the parts into groups corresponding to each number.
✅ Related tutorial: How to bind a quilt
STEP 4
Paper piecing instructions
Now I proceed to the sewing process itself.
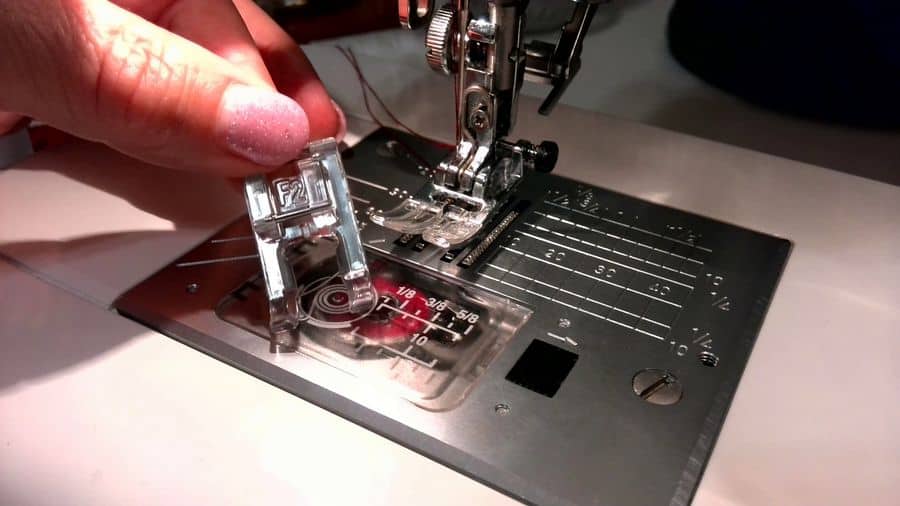
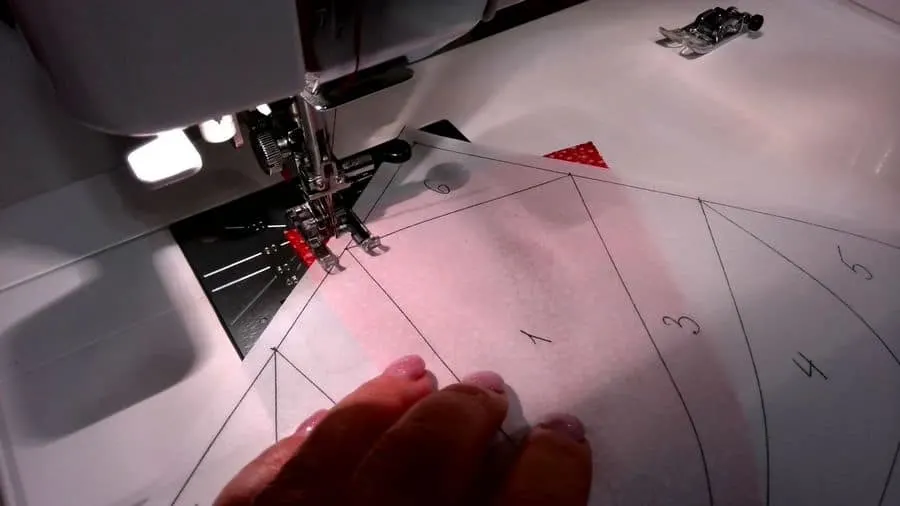
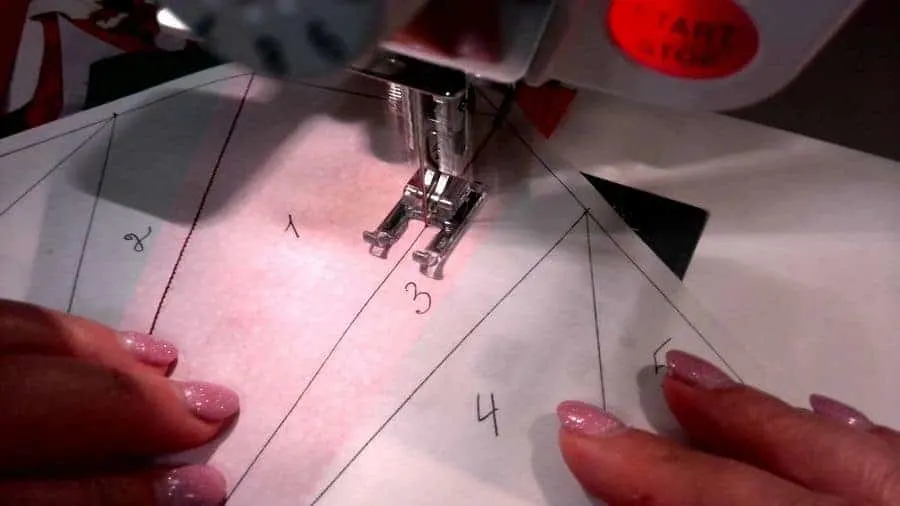
Make the stitch length very small, like 1.5 mm, so you can tear off the paper easier later on.
Change the regular presser foot to the open toe presser foot – it’s much easier to stitch along the lines with this foot.

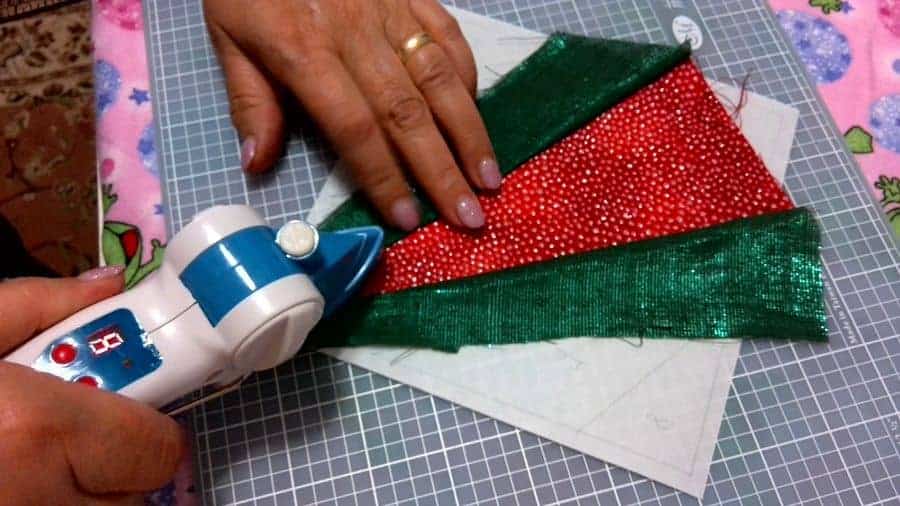
Put fabric piece number 1 on the wrong side of the paper template right side up (I mean the wrong side to the paper). Note that the edges of the piece go beyond the lines on the paper pattern – this will actually be an allowance for the seam.
Well, I did that but the piece didn’t stay, it moved easily, so I decided to use a fabric glue stick – just a little to fix the piece on paper. And it worked MAGIC! The correct placement of the first piece is very important.
Then put the second piece right side together with the first and align it around the edge.
I used vellum paper so I could easily see all the lines and numbers through it and adjust the pieces correctly.


Next – stitch on the line which you see on the right side of the paper block. Don’t sew exactly from point to point – make the stitch a little longer going ¼ “ beyond each point.

Now fold the block along the first stitching line (already perforated by a needle) and cut off the excess seam allowances making them ¼ inch with a quilting ruler.

Flip the piece carefully and press over the stitching line.
I used my mini-iron and it was perfect. I heard that you can do it with big iron, but then the vellum paper may shrink and your pattern will be distorted.

✅ Related tutorial: Mini irons for sewing and quilting
Similar to sewing the first two parts, add the part after part according to the pattern.
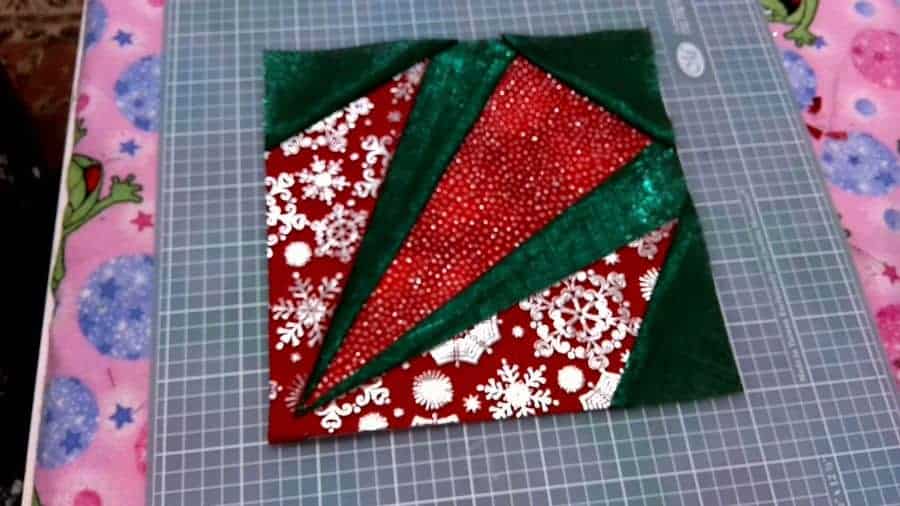
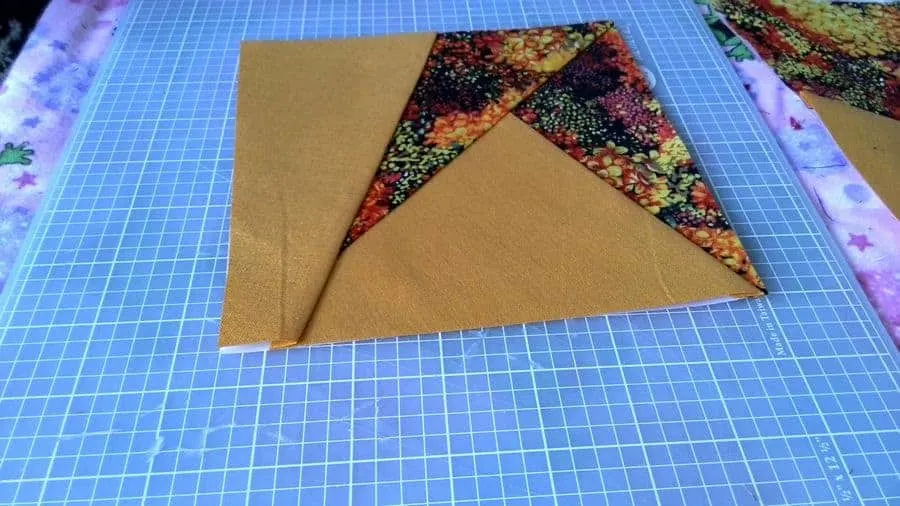
Step by step, the block takes shape. Sew all the other cut-out parts of the block, observe the numbering, keeping everything in order.


Step 5
Finishing paper pieced quilt blocks
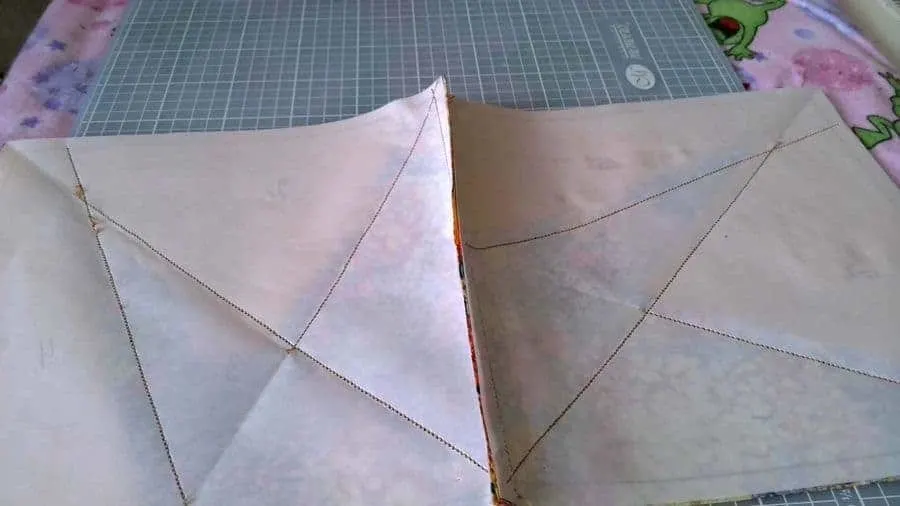
Once all the pieces are in place, adjust the edges of the block. Work around the perimeter to cut off all the excess fabric but leave ¼ “seam allowances all around.
But don’t cut the paper yet – we will need it to sew the blocks together.


Make three additional blocks for each pattern in exactly the same way.
Next, begin to assemble the blocks create a design, and sew all the blocks.
To begin with, pin the two blocks right sides together. The edges of the paper will serve as a good helper, so the seams will be more even and neat.
Sew very close to the paper. Repeat with the other two blocks.

Put the two large pieces together.
and … and what else? Ahhh, now we need to remember to remove the paper from the inside of our blocks. Just gently tear it off at the seams, that’s all.

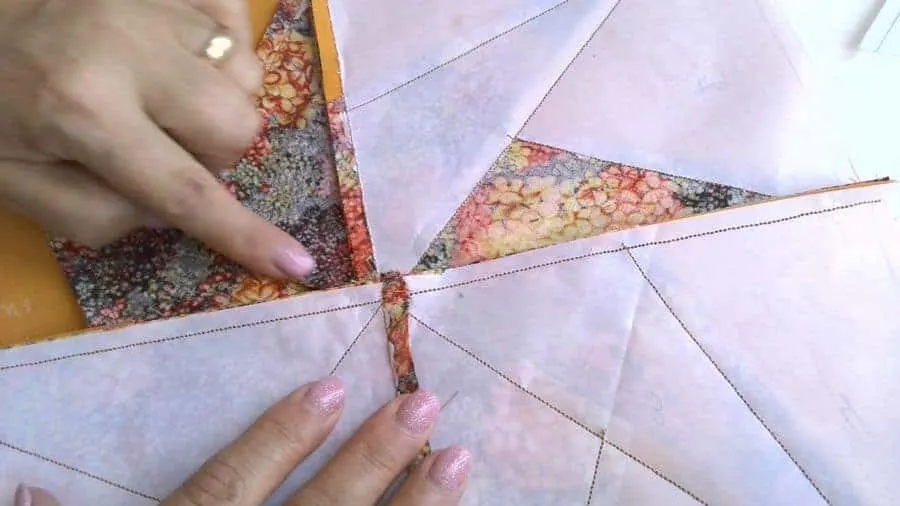
If you want to sew something in the patchwork style, try this way of sewing on paper, you will be pleasantly surprised by the result because it will be excellent! I don’t think I have ever had this accuracy in aligning 7 seams at once exactly in the center.
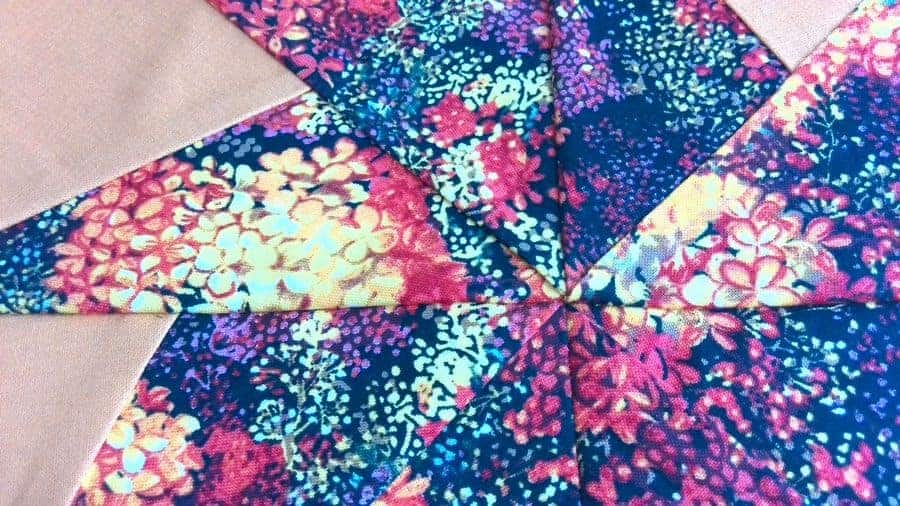
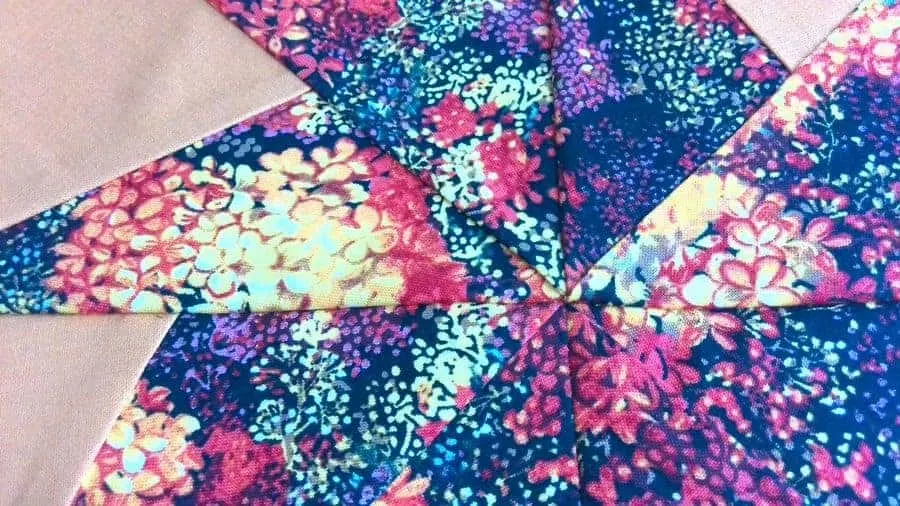
I think I like the clean finish on the front and back.


I made a YouTube video for you if you are the watching type. Check this out if you like to see how to do foundation paper piecing instead of reading…

Did you find this tutorial helpful? If so, save this pin (see below) on your sewing board so you can come to this tutorial later when you are going to try paper piecing and follow me on Pinterest for more tips, tutorials, and inspiration!

latest posts
- Adorable DIY Needle Book | Easy Tutorial for Beginners
- Master the Seam Ripper: Your Ultimate Guide to Precision Stitch Removal
- Think You Know Zippers? This Installation Guide Might Surprise You
- Why Does Your Seam Ripper Have a Red Ball? Discover Its Purpose!
- Topstitching Troubles? This Simple Trick Will Turn It Around Instantly!
- How to Sew Shirring: A Step-by-Step Guide to Elastic Thread Gathering
- Are Self-Threading Needles Really Useful?
- Amazon Spring Sale: Best Choices
- Elevate Your Prom Look: A Guide to 10 Neckline Choices (2024)
